Get the perfect finish to your paint job when you prep, mask and paint the right way.
- Ladder
- Drop cloth
- 100-grit sandpaper and block
- Mutton cloth
- Scraper
- Extra fine sandpaper (220-grit)
- Pink Stuff
- Brush and bucket
- Bloc-it painter’s tape
- Bonding liquid
- Plaster primer and undercoat
- Exterior filling compound
- Paintbrush
- Roller and tray
- Extension handle
- Exterior paint
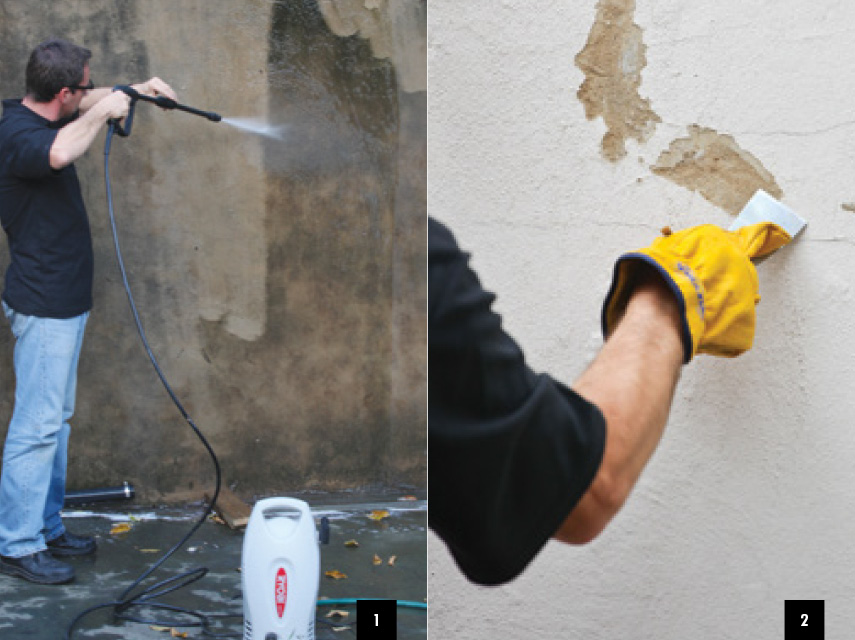
Step 1
Wash walls thoroughly and allow to dry. You can use a high-pressure cleaner with Pink Stuff detergent (which won’t kill your plants if you can’t control the run off).
Step 2
Scrape off any large flakes and bubbles of old paint and clean areas affected by damp.
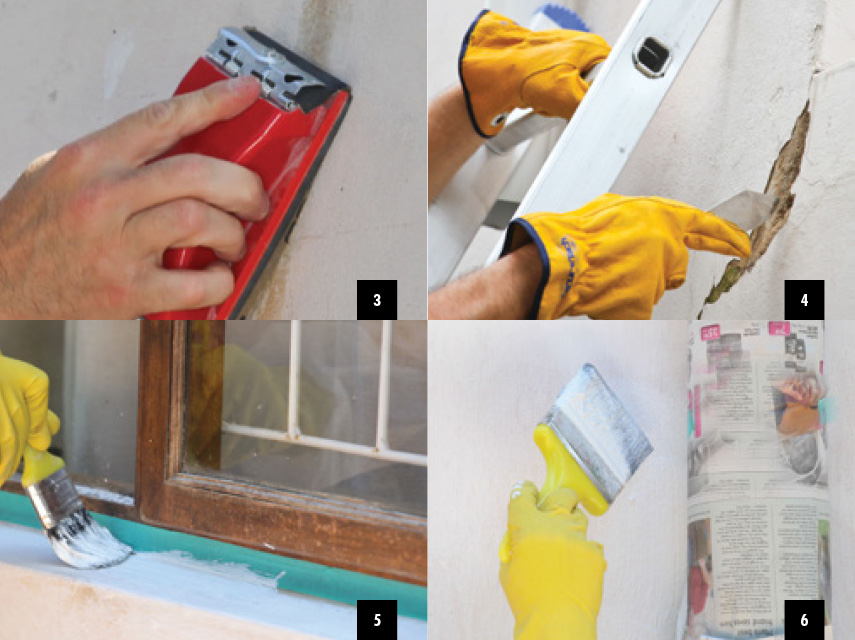
Step 3
Sand the wall using fine-grit paper and a sanding block. This will ensure an even flat surface. Dust the wall off with mutton cloth.
Step 4
Identify any cracks that need filling. Open small cracks with a scraper and clean out any debris. Wash and allow to dry thoroughly.
Step 5
Tape around (or remove) all window fixtures.
Step 6
Wrap downpipes in newspaper so you can cut in behind them without getting paint on them.
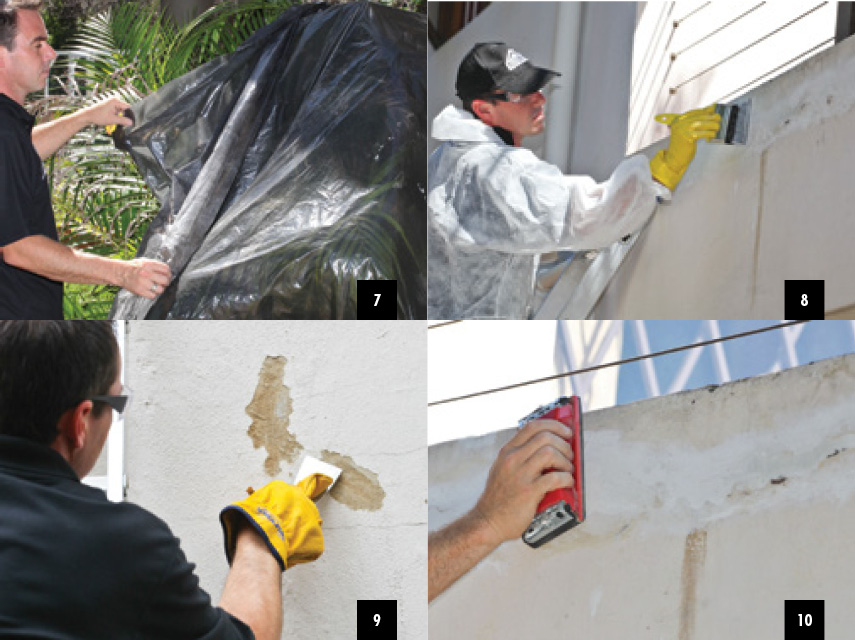
Step 7
Drape drop cloths over your plants and flowerbeds to avoid paint getting on the plants.
Step 8
Cut in and prime the walls with plaster primer. We chose Fired Earth All-in-One so we wouldn’t have to apply an undercoat as well, since this primer is an all-in-one product. Prime inside the cracks as this will prepare them for the filling compound. Allow to dry.
Step 9
Fill the cracks with exterior filling compound, using a putty knife, and allow to dry.
Step 10
Sand the filled cracks so they are flush with the wall.
Step 11
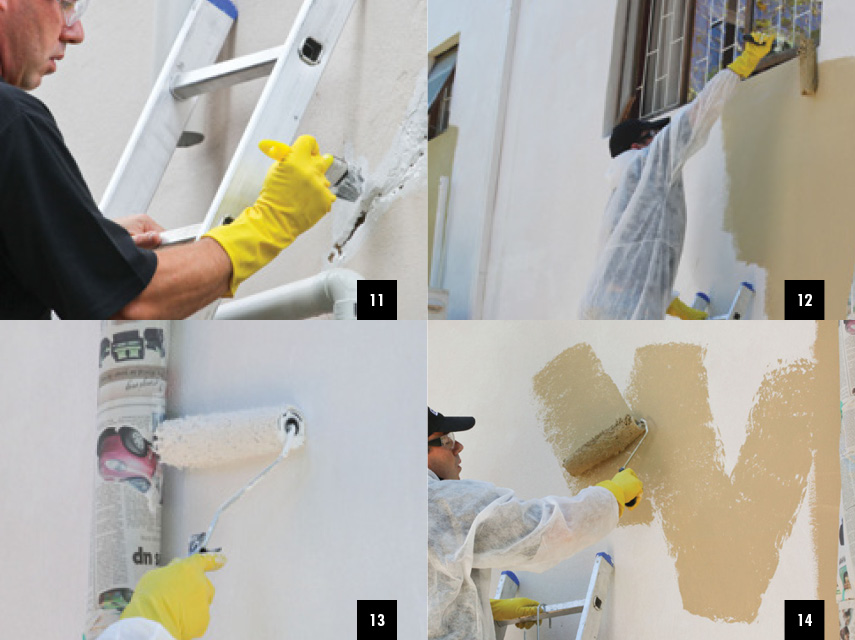
Paint bonding liquid onto the filling compound to get the paint to adhere firmly to it (you could also use plaster primer). Allow to dry.
Step 12
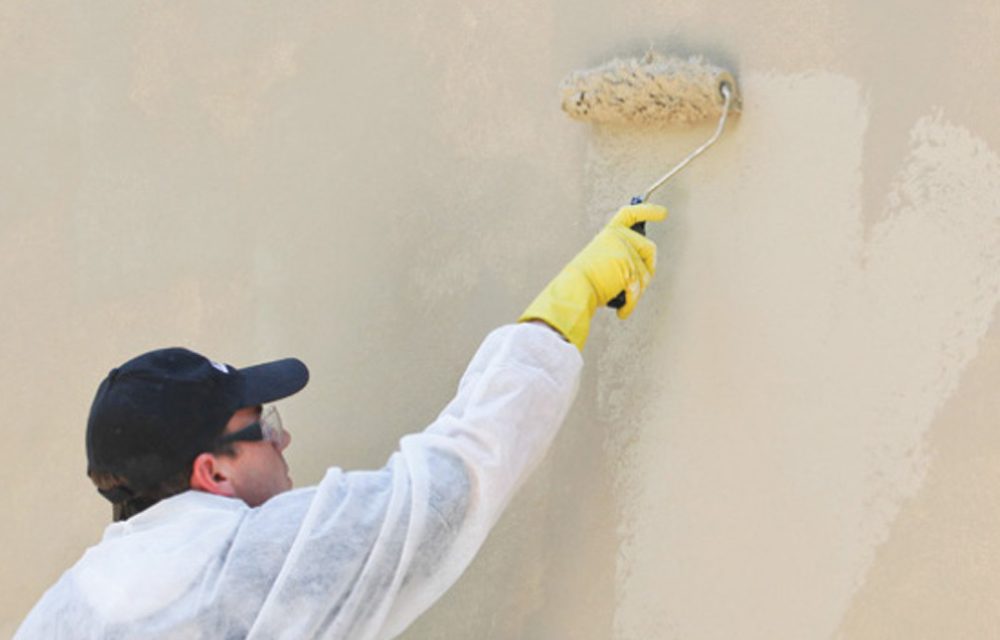
Paint the walls in sections edged by natural features such as corners, windows and downpipes so as to avoid leaving harsh break lines in your colour. Work from right to left (if you are right handed) and from the top down to avoid messing the area you have already painted.
Step 13
Cut in under the eaves and around windows and downpipes as you go. While the paint is still wet, roller the large areas next to them.
Step 14
Roller the paint on in a W pattern, then, without reloading it, run the roller horizontally across the W to spread the paint evenly. Use an extension pole to reach the tops of the walls. Always allow the paint to dry for the time advised on the tin.
Step 15
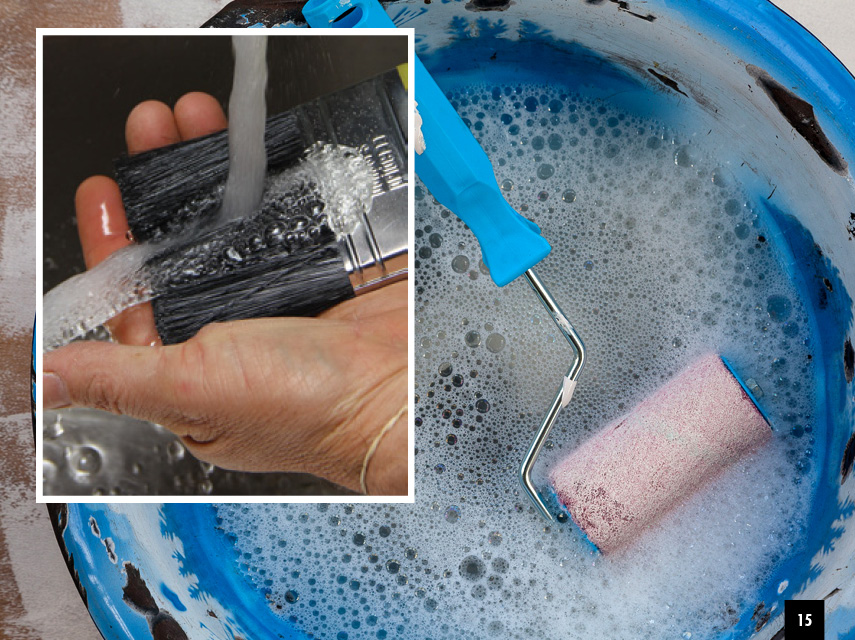
Clean your brushes and rollers and dispose of the dirty water suitably (not down your drain).
Top Tip: When using waterbased paints and primers, wash your brushes and rollers in buckets. Do not let the water run down your drain. When you have finished, let the paint settle in the buckets, then pour off the clean water, scrape the paint onto waste paper and dispose of it in your rubbish bin.
Browse 1000’s of products available to you. Select your country to Shop Online.


