This DIY project is a solution to that mess you find when monkeys, baboons, dogs or other wildlife get into your rubbish bags!

You’ll need:
- 30 mm x 30 mm angle iron
- 30 mm flat bar iron
- Galvanized expanded mesh
Cutting List:
- 4 x 945 mm x 30 mm x 30 mm angle iron, with 45° ends
- 4 x 645 mm x 30 mm x 30 mm angle iron, with 45° ends
- 4 x 500 mm x 30 mm x 30 mm angle iron, with square ends
- 6 x 950 mm x 30mm flat bar
- 2 x 945 mm x 950 mm weld mesh
- 4 x 305 mm x 645 mm weld mesh

Step 1.
When cutting the iron, a chop saw really comes into its own, as it can cut at a variety of commonly used angles, including 45°. Be careful not to force the disc through the steel when cutting, as excessive force can cause the disc to bow, leading to uneven cuts. Apply enough force to cut without bogging down the motor. An angle grinder is the best tool to cut the weld mesh.

Step 2.
Place the angle iron on the bench, positioning one long and one short side together. Use a welding magnet to hold the steel square and in place. Tack weld these together and repeat for the other corners until you have a rectangular frame. You’re only tack welding at this stage, so you can easily adjust if needed.

Step 3.
Place one length of flat bar on the inside corner, clamp it tightly with vice grips and bend the flat bar over to the other side, forming a semi-circular hoop. Clamp it again and check that it’s square before tack welding these together on both sides. Repeat for the opposite end and middle straps.

Step 4.
Once the frame is tacked together and you’re happy with the shape, weld each joint more permanently. For the expanded mesh, start with the larger piece and position it along the outside of the frame. Clamp the mesh to the outer frame and bend it over the straps to ensure a snug fit. Tack weld along the bottom and work your way along the straps until the mesh is secured.

Step 5.
To close the ends, hold and tack the smaller expanded metal rectangle pieces on the ends. Once everything is tacked together and you’re satisfied with the placement, complete your welding at regular intervals along the mesh. Use an angle grinder to cut the mesh to shape.

Step 6.
That’s the first half of the cage complete. Now, repeat the steps to make a second half. One of these will be the top half and the other the bottom, which needs legs. Weld the legs to the four corners. Flip the cage to stand on the feet and position the top half in place. To join the two halves, weld on heavy-duty steel hinges, spaced 100 mm from each edge. Ensure the correct orientation of the hinge before welding.

Step 7.
Before you install your cage on the verge, paint the non-galvanised frame and the welds to prevent rust and prolong the life of your DIY project. We recommend Metal Direct paint (we used Hammered finish in silver), which forms a protective layer.
For best results, the metal needs to be free from oils and contaminants. Wipe all the welds and bare metal with thinners to clean the surfaces before painting. Using a brush helps get the Metal Direct paint into all the joints. Ensure all exposed metal is coated. Wait six hours and then apply a second coat.

Step 8.
Install your new monkey-proof rubbish cage on the verge by hammering the legs into the ground – a four-pound hammer will make this job much easier!
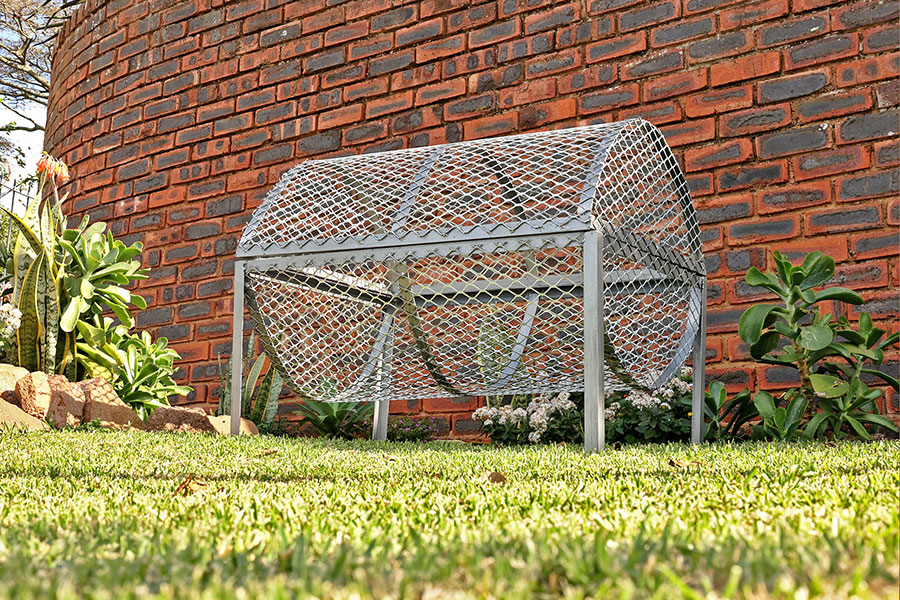
And there you have it: a sturdy, monkey-proof bin bag cage to keep your surroundings clean and tidy – and your neighbours happy! Not only does Builders stock everything you need for this job, including the iron and the tools, but we also have experts who are happy to guide you with your projects. Pick up your supplies in-store or online at builders.co.za.
Browse 1000’s of products available to you. Select your country to Shop Online.


