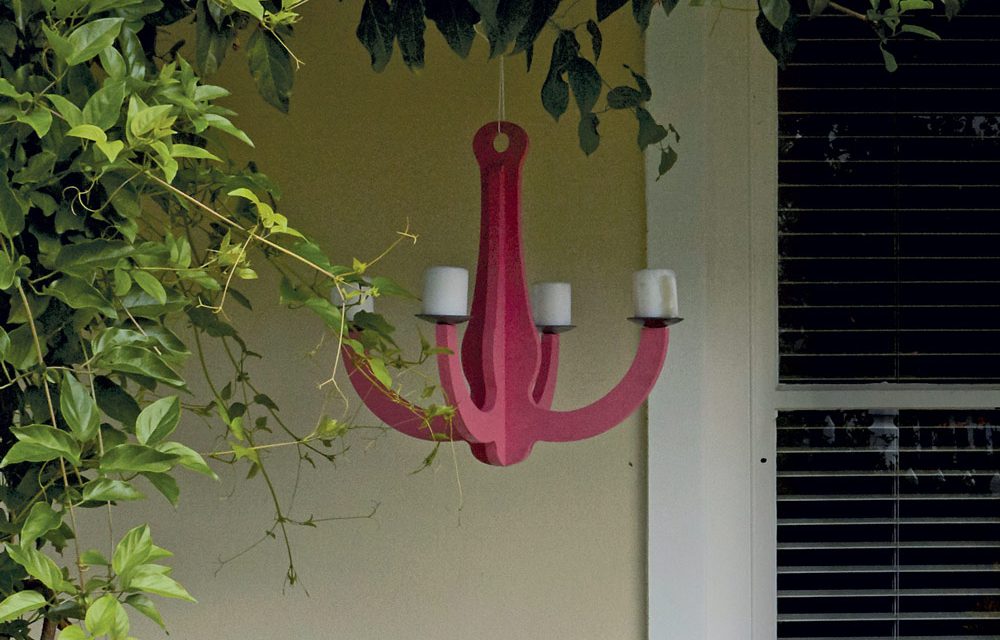
There’s no need to buy an expensive chandelier – simply make your own out of materials around your home!
- 18mm plywood: two 600 x 600mm pieces
- cold glue
- panel pins
- 150-grit sandpaper
- paint or varnish
- four metal candleholders
- four 6mm x 30mm chipboard screws
- small screw-in hooks (optional)
- rope or chain to hang it up
- pencil
- jigsaw
- hammer
- cordless driver and 25mm spade bit
- 4mm steel drill bit
Step 1
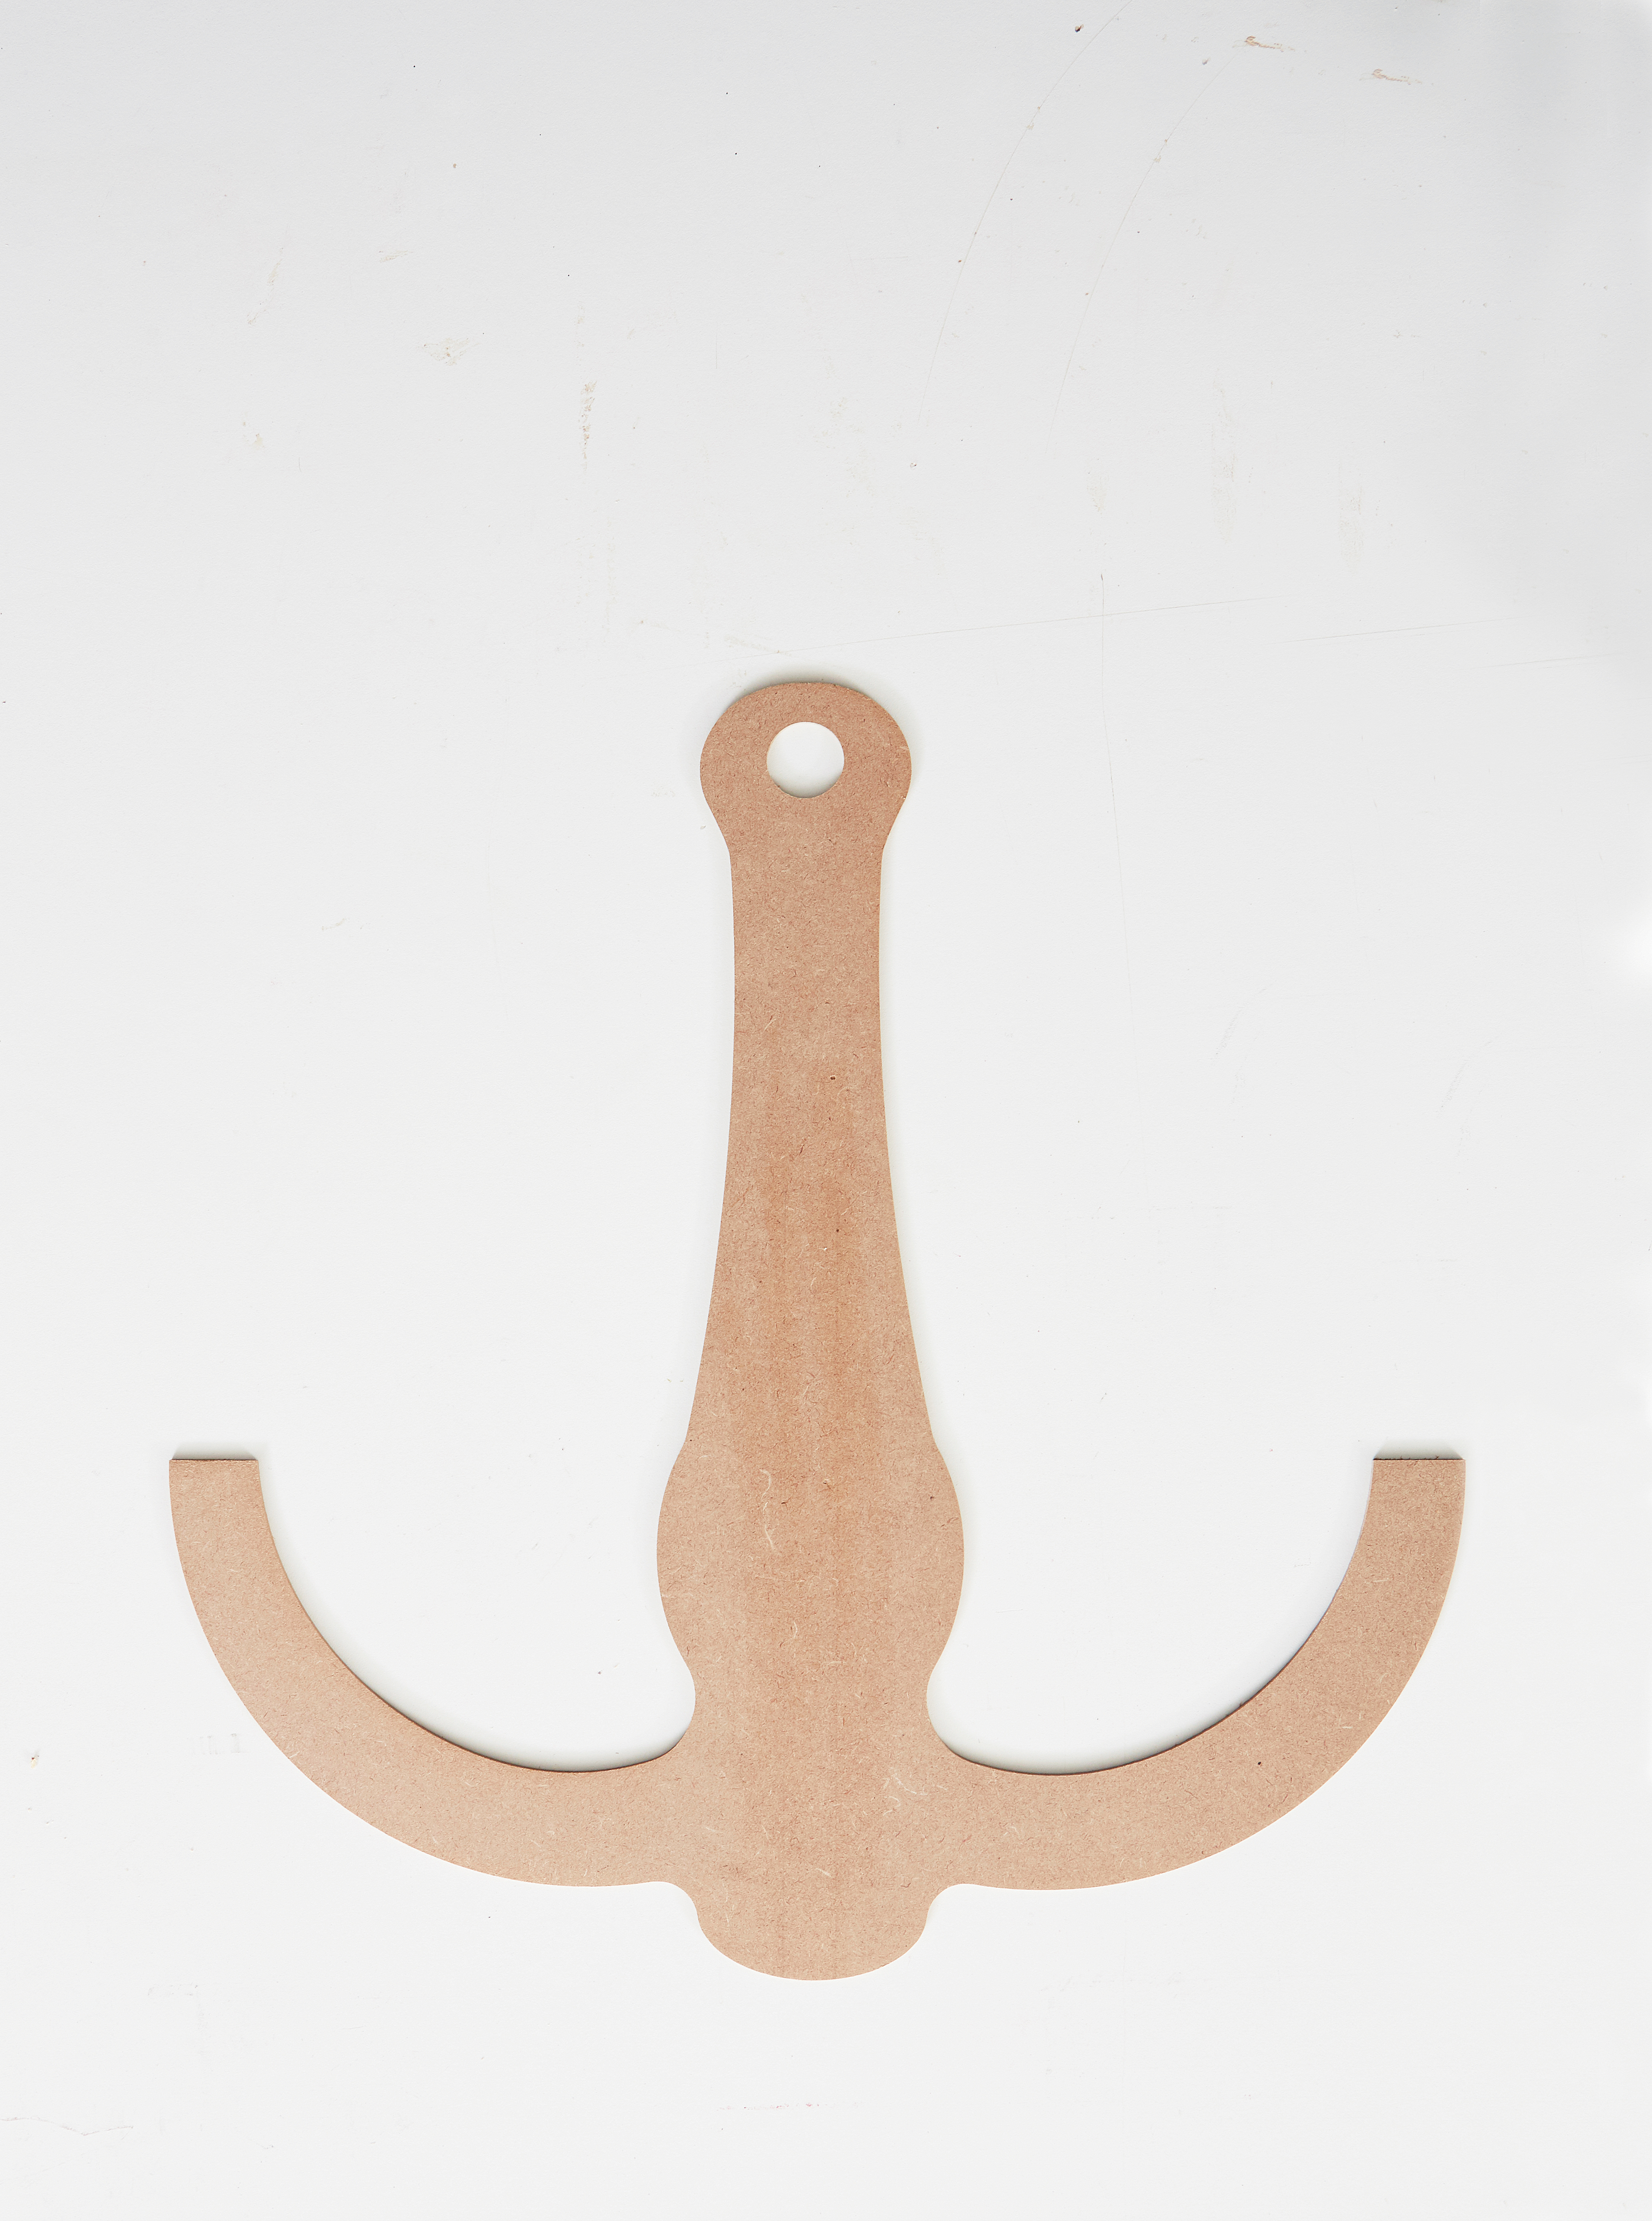
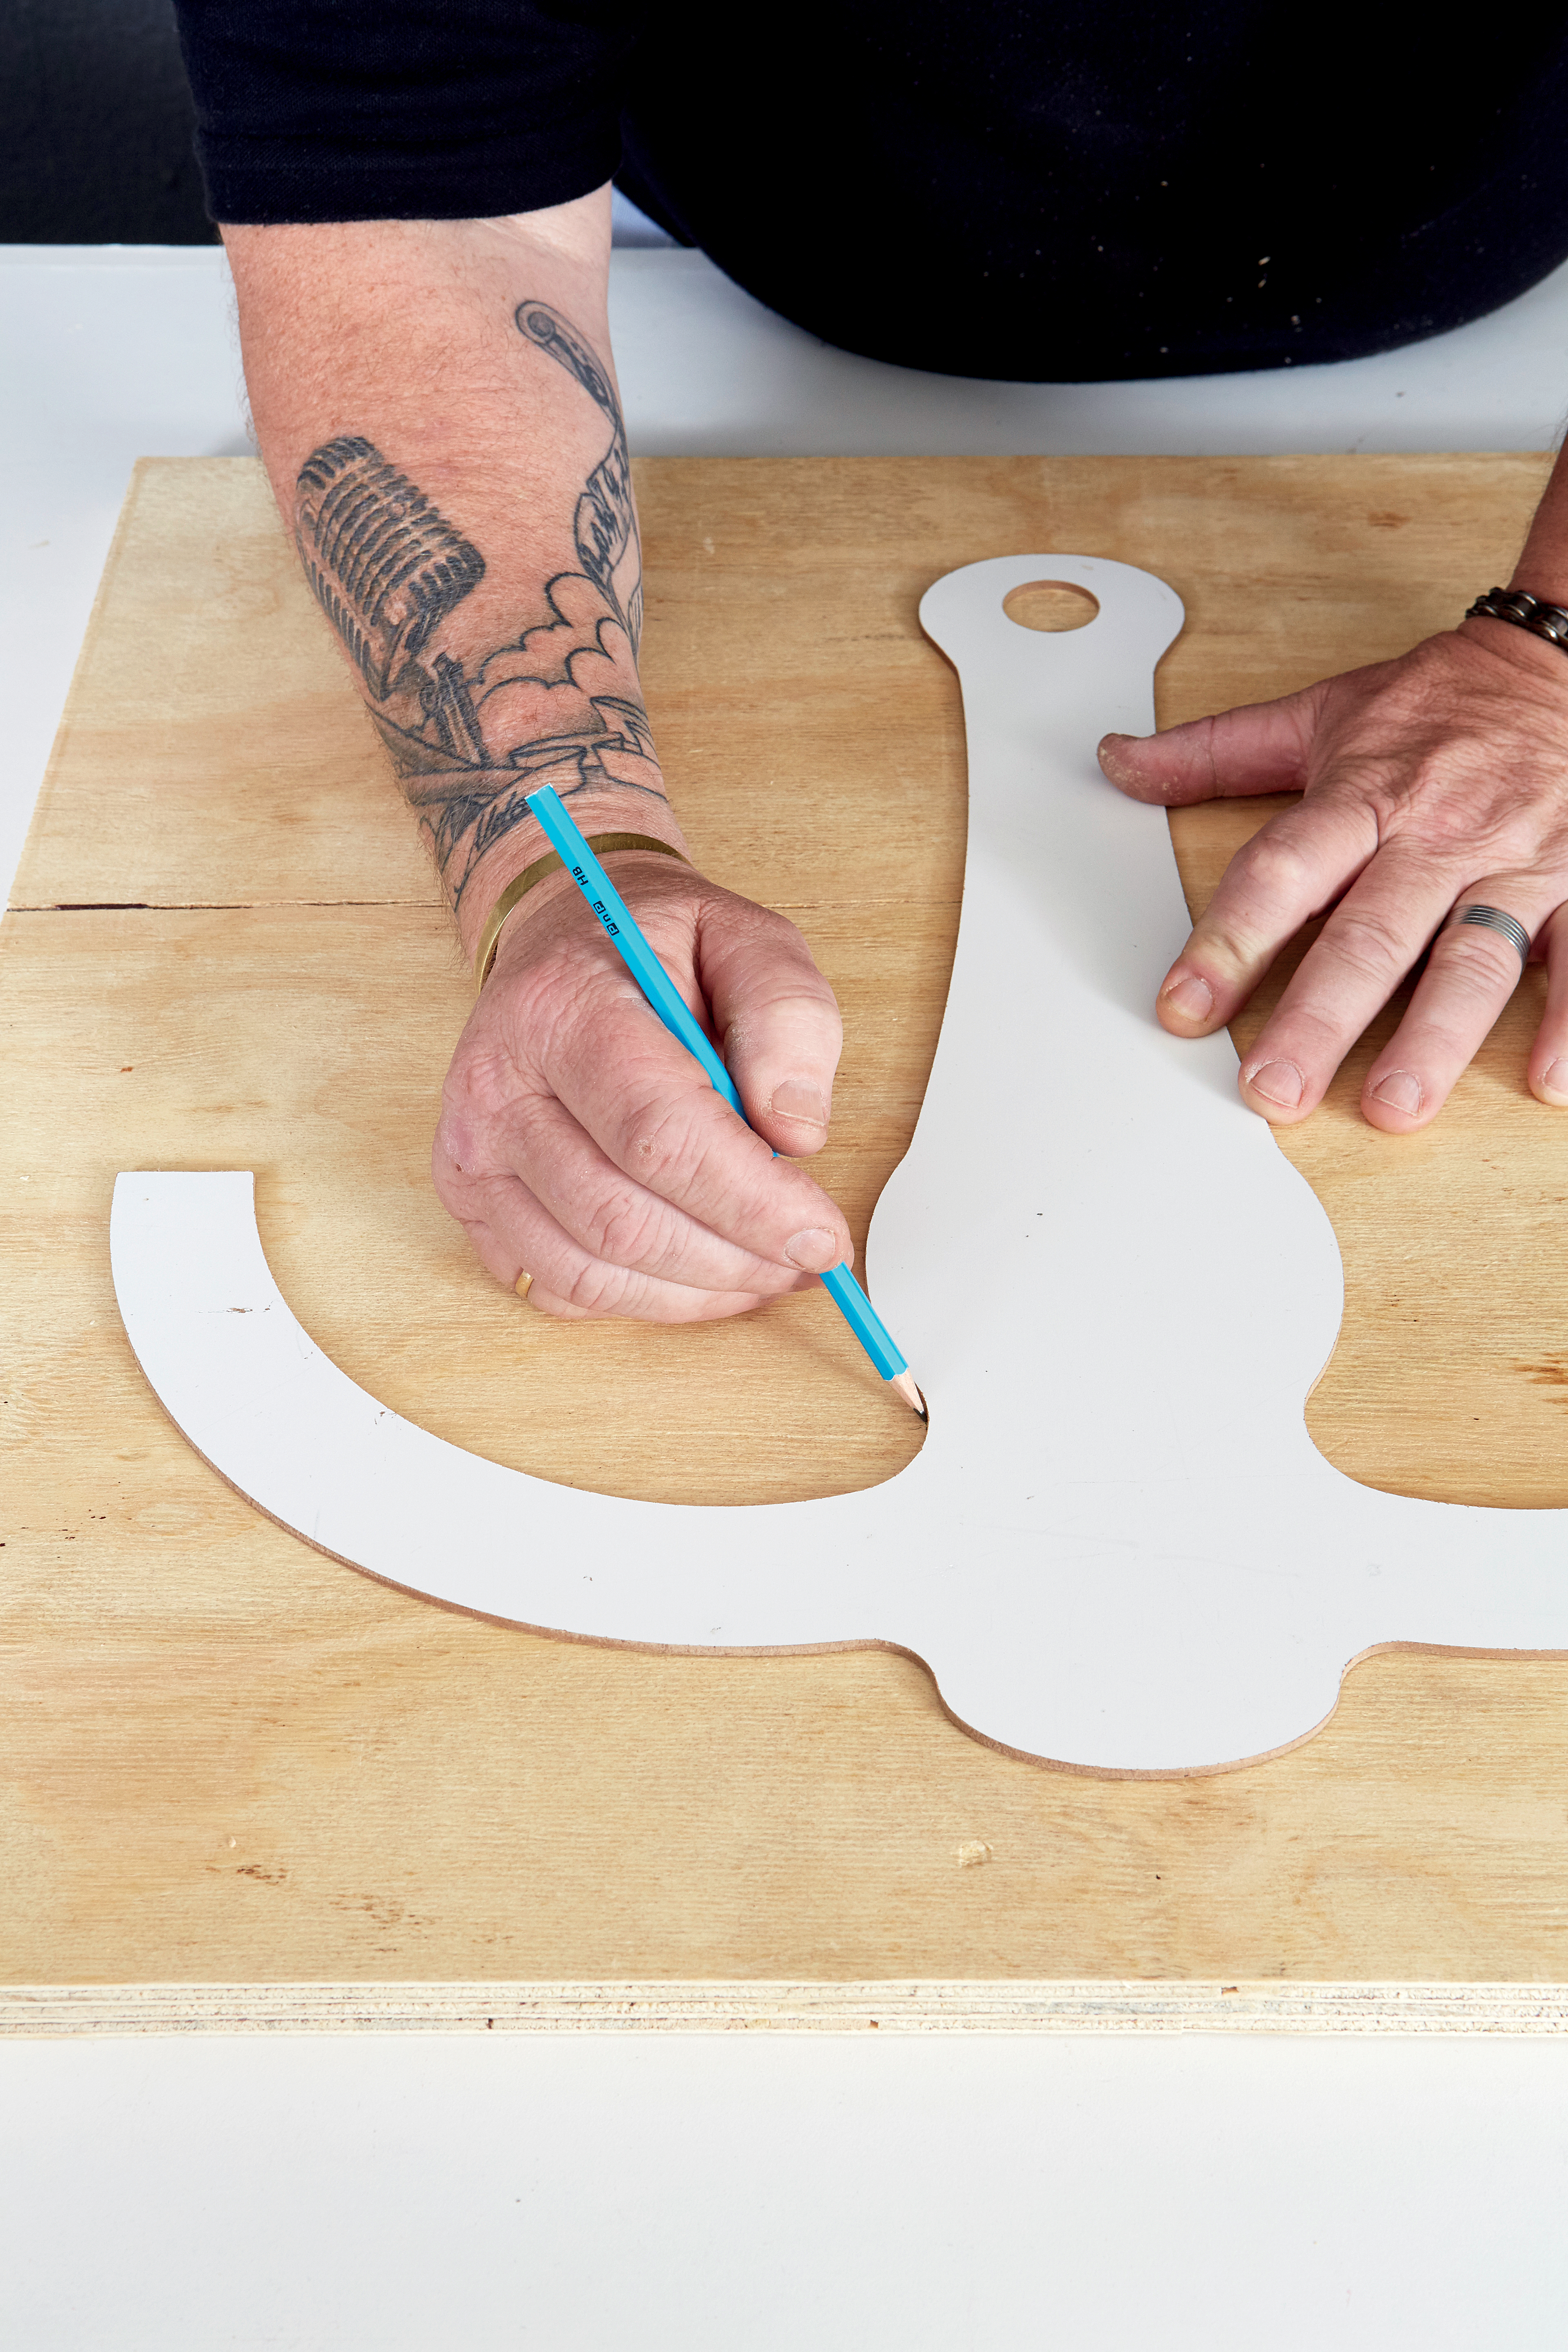
Trace the outline of the chandelier onto stiff cardboard to make a stencil.
Step 2
Using the stencil, draw the outline of the chandelier on both pieces of plywood.
Step 3
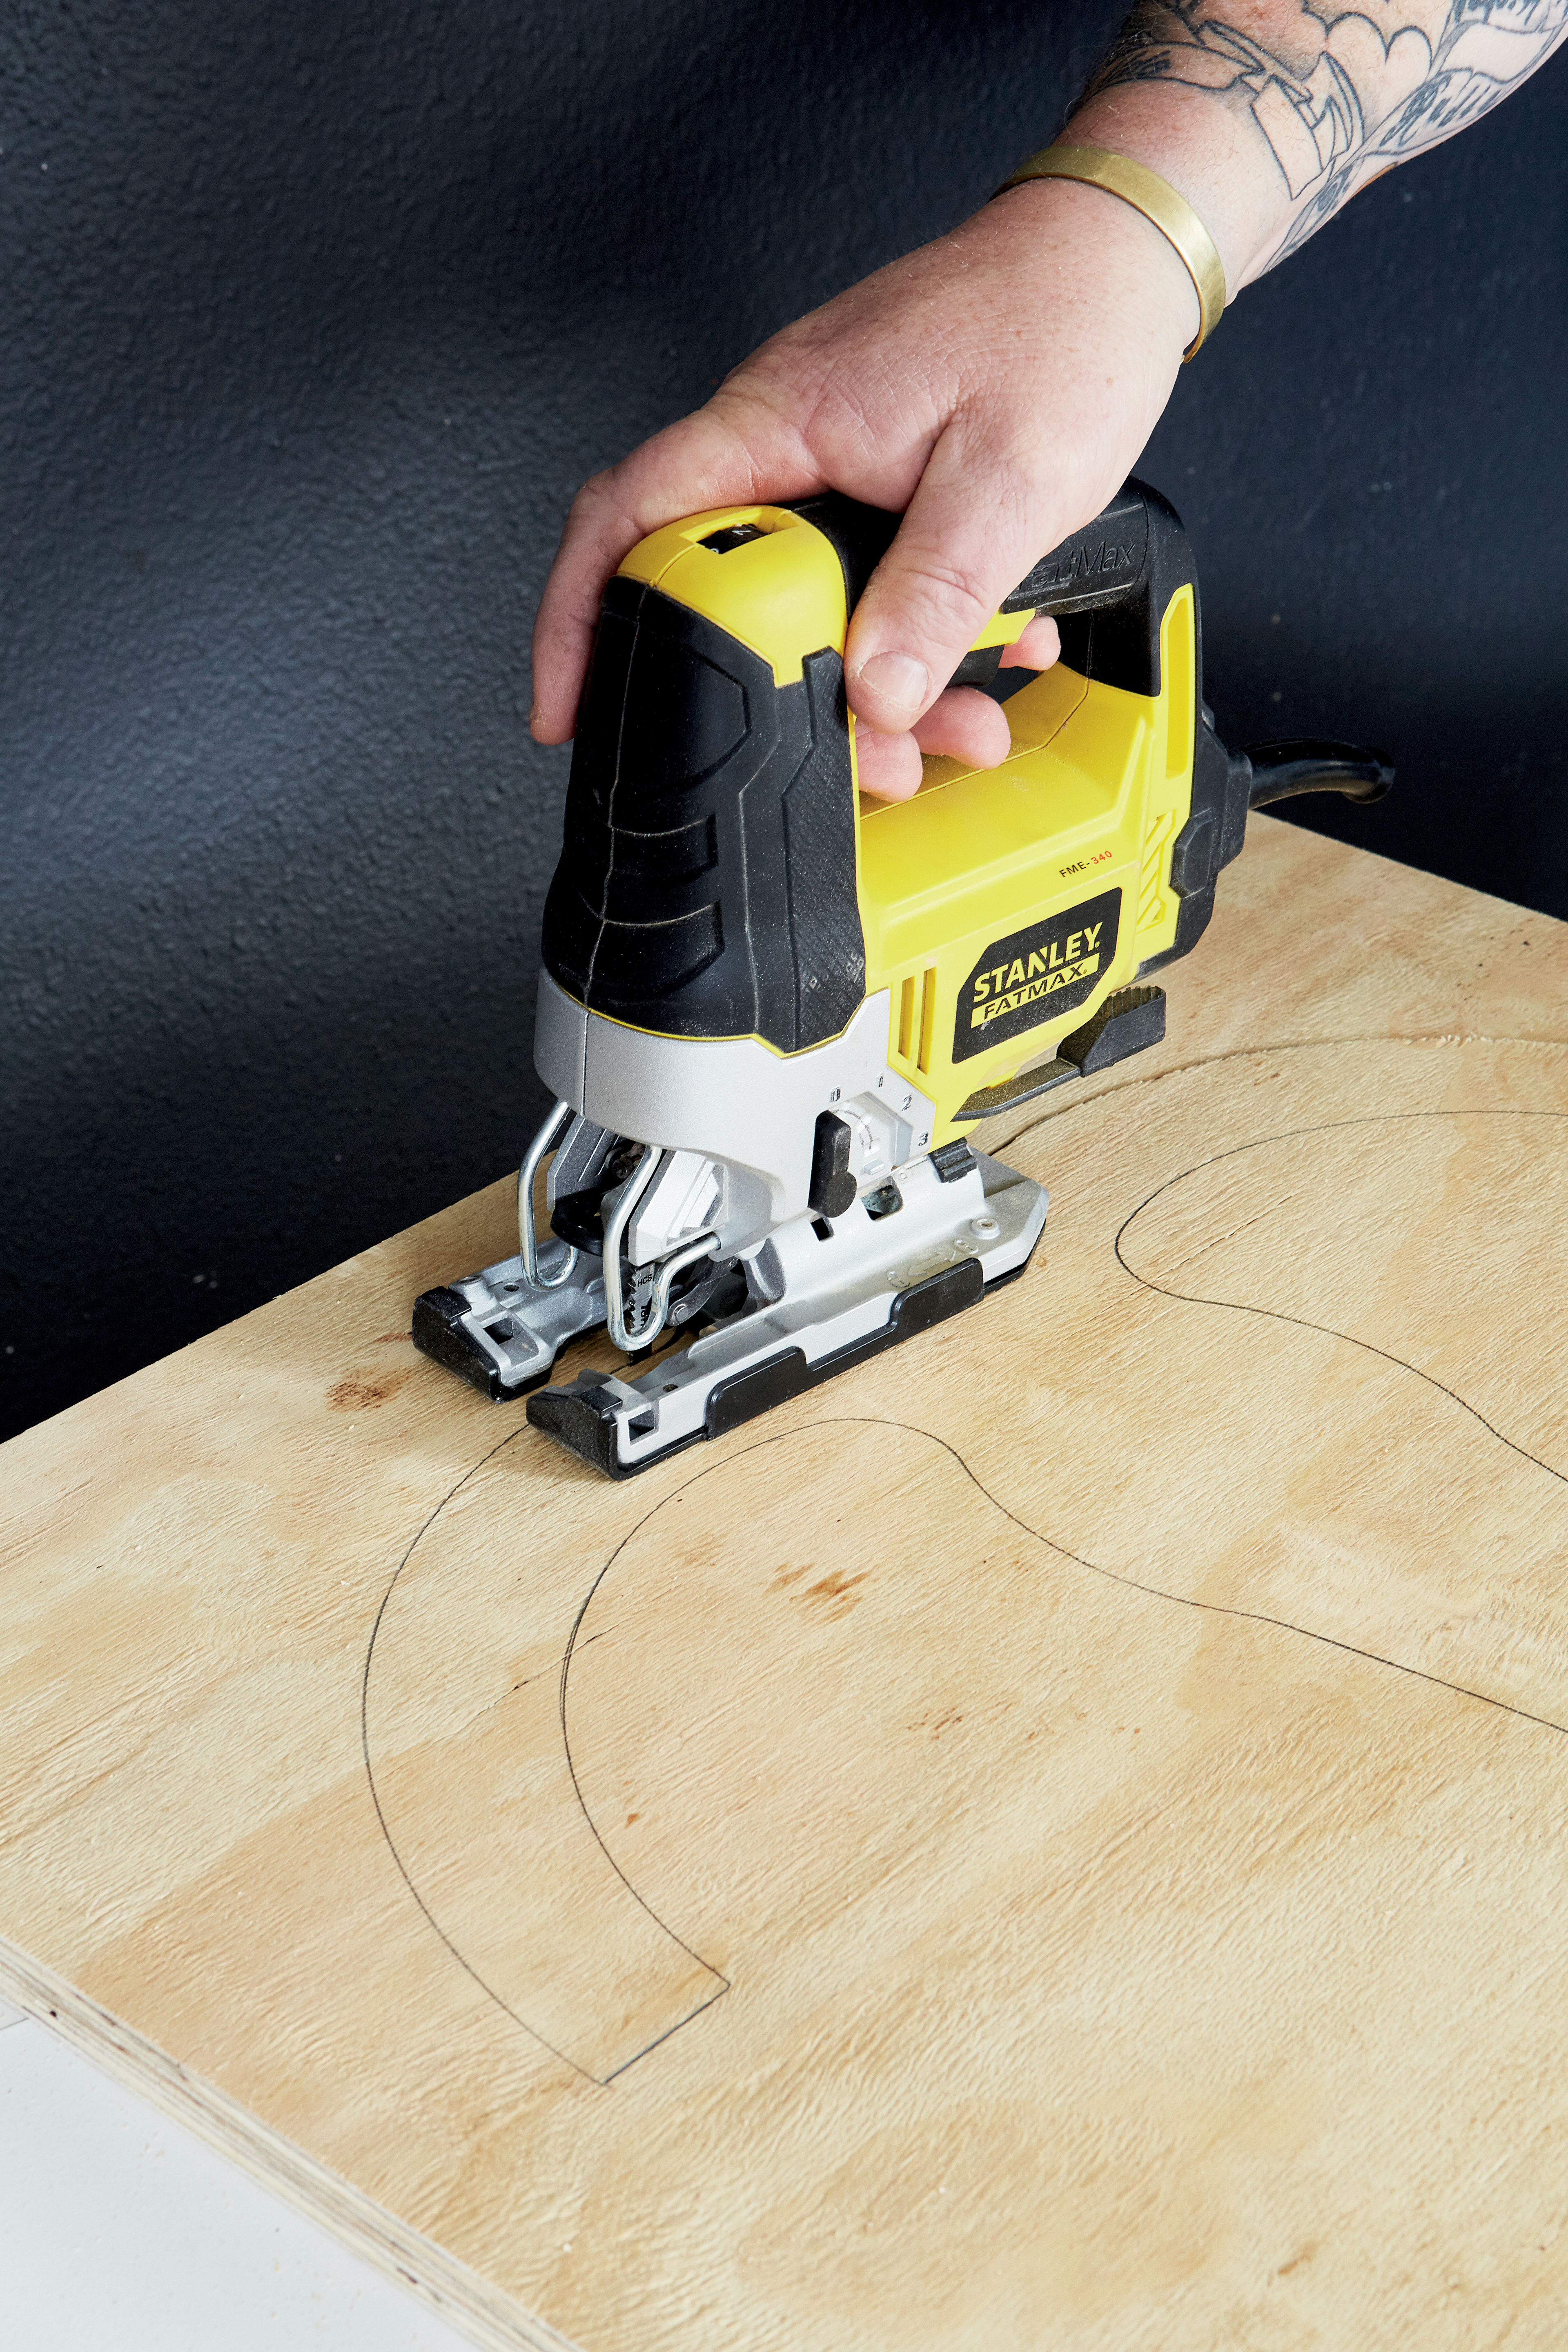
Using the jigsaw, cut along the pencil lines to form the two halves of the chandelier.
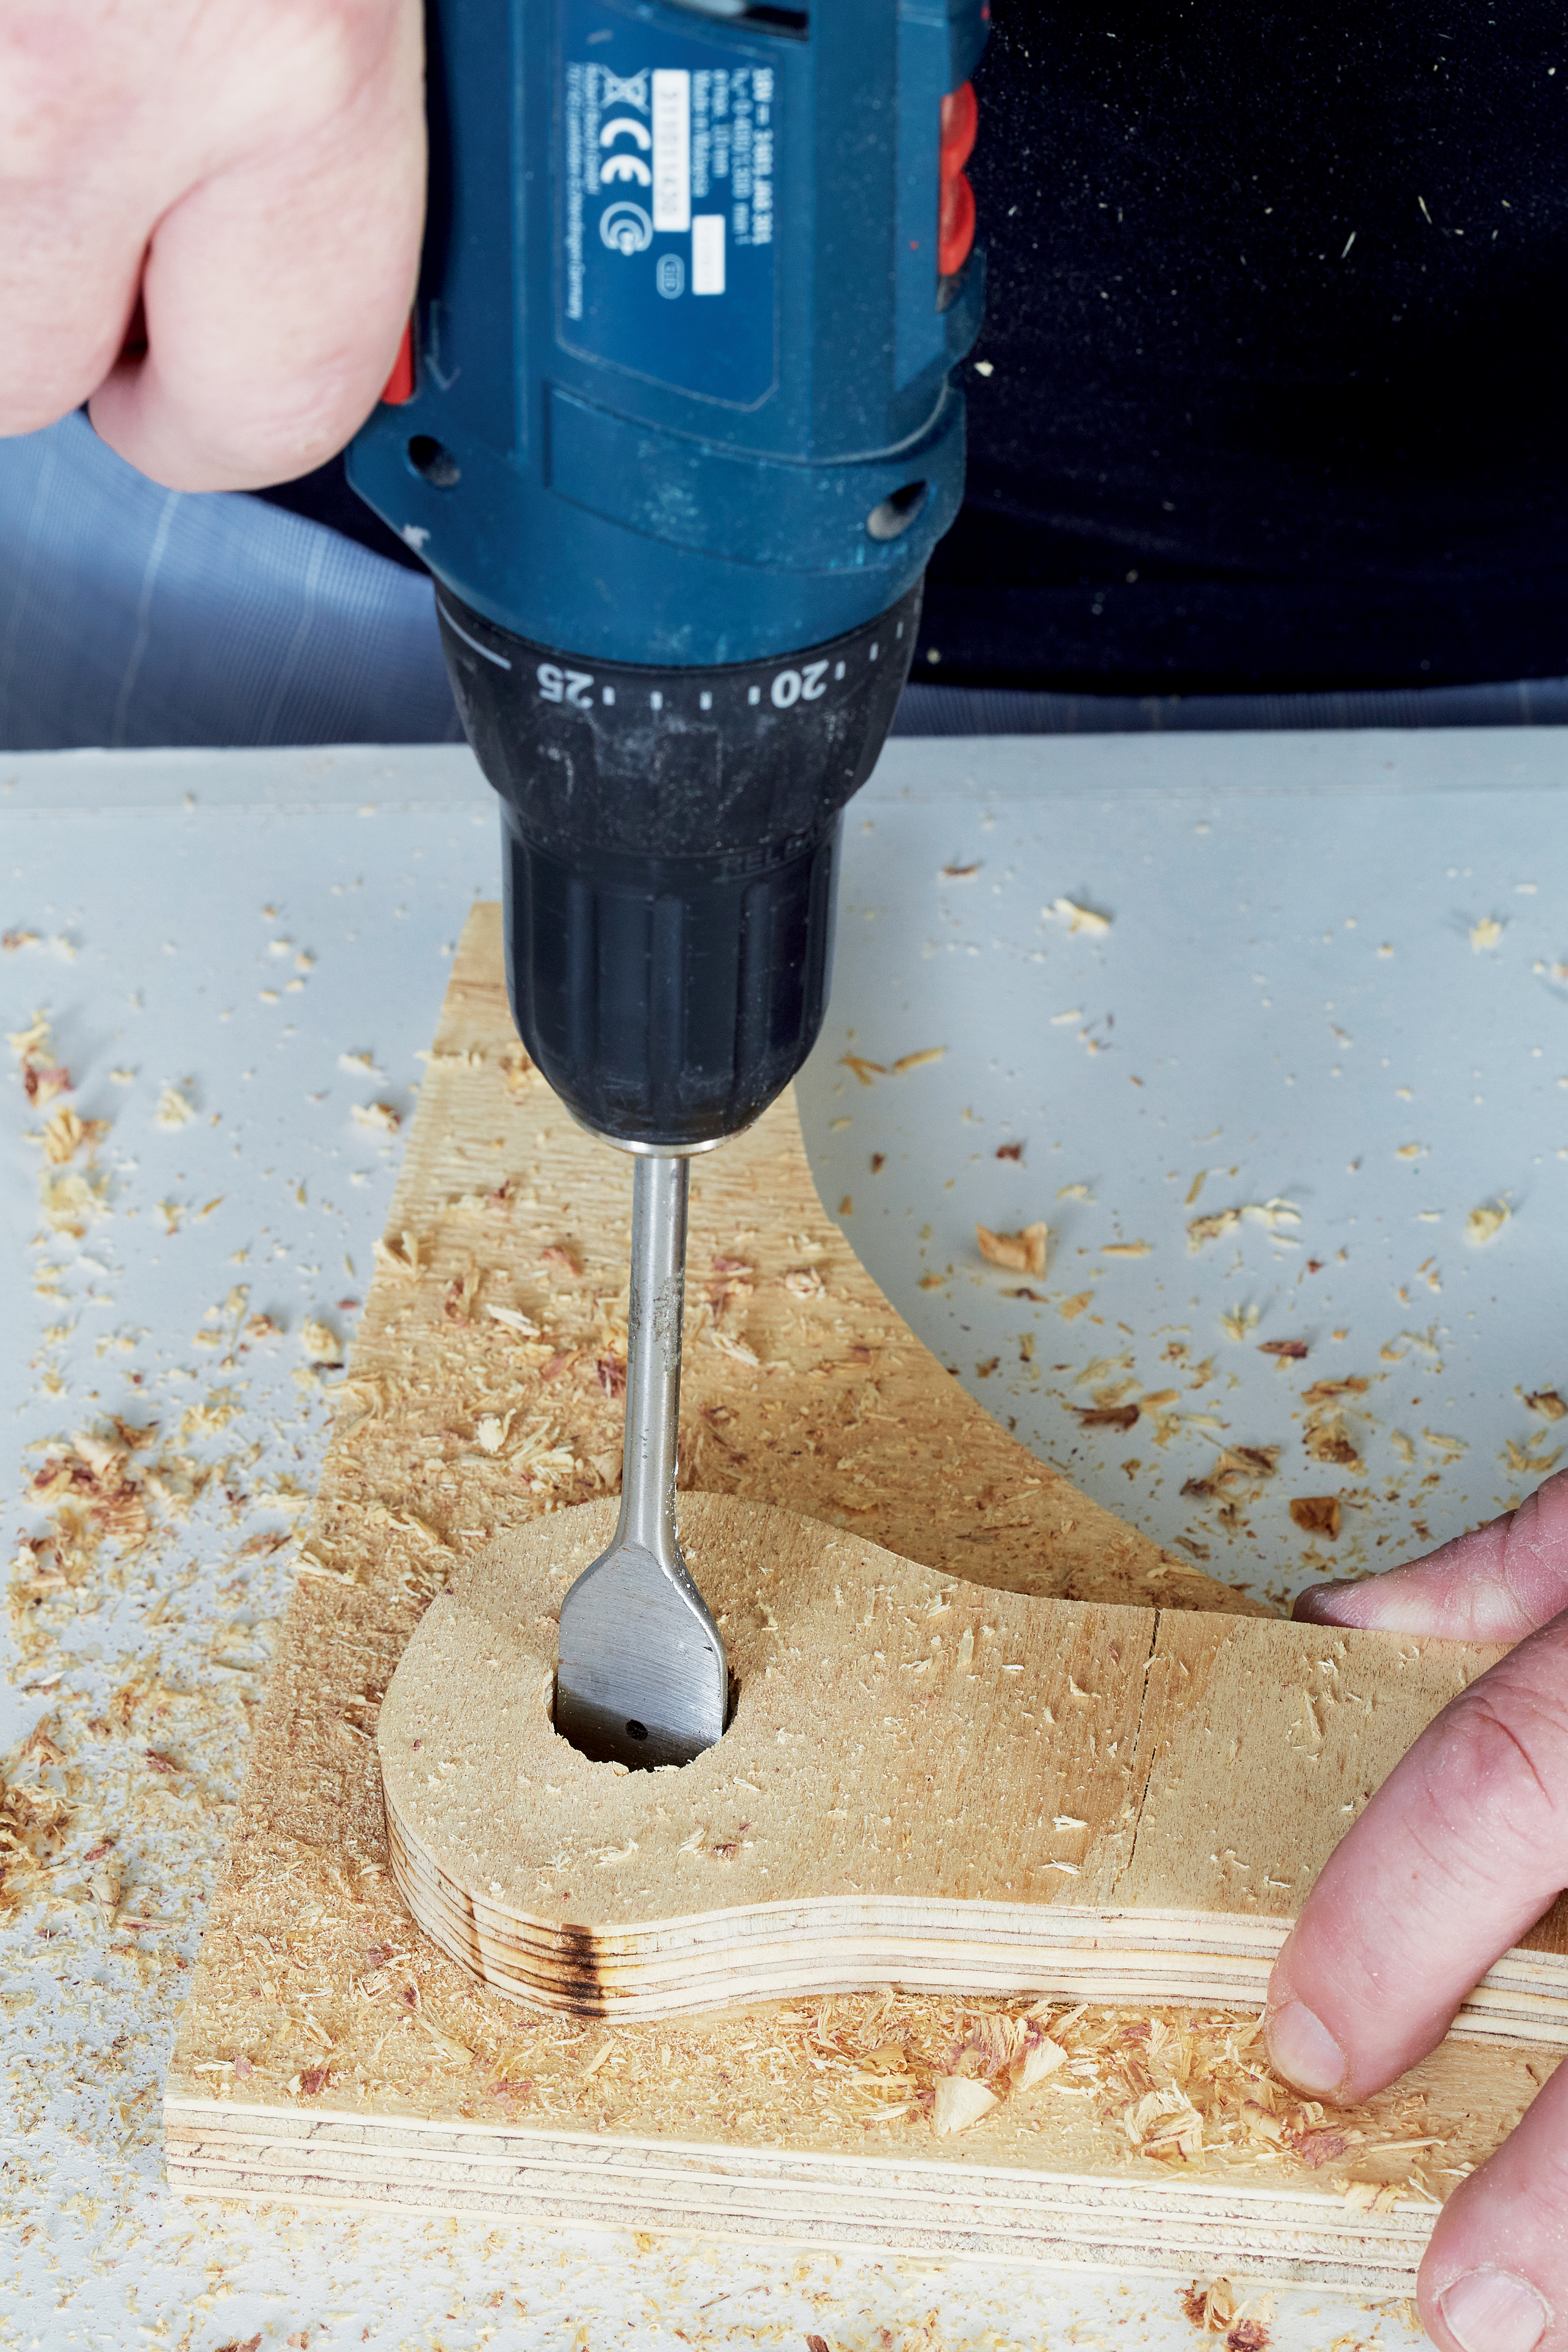
Step 4
Using the 25mm spade bit, drill a hole at the top of one of the two halves.
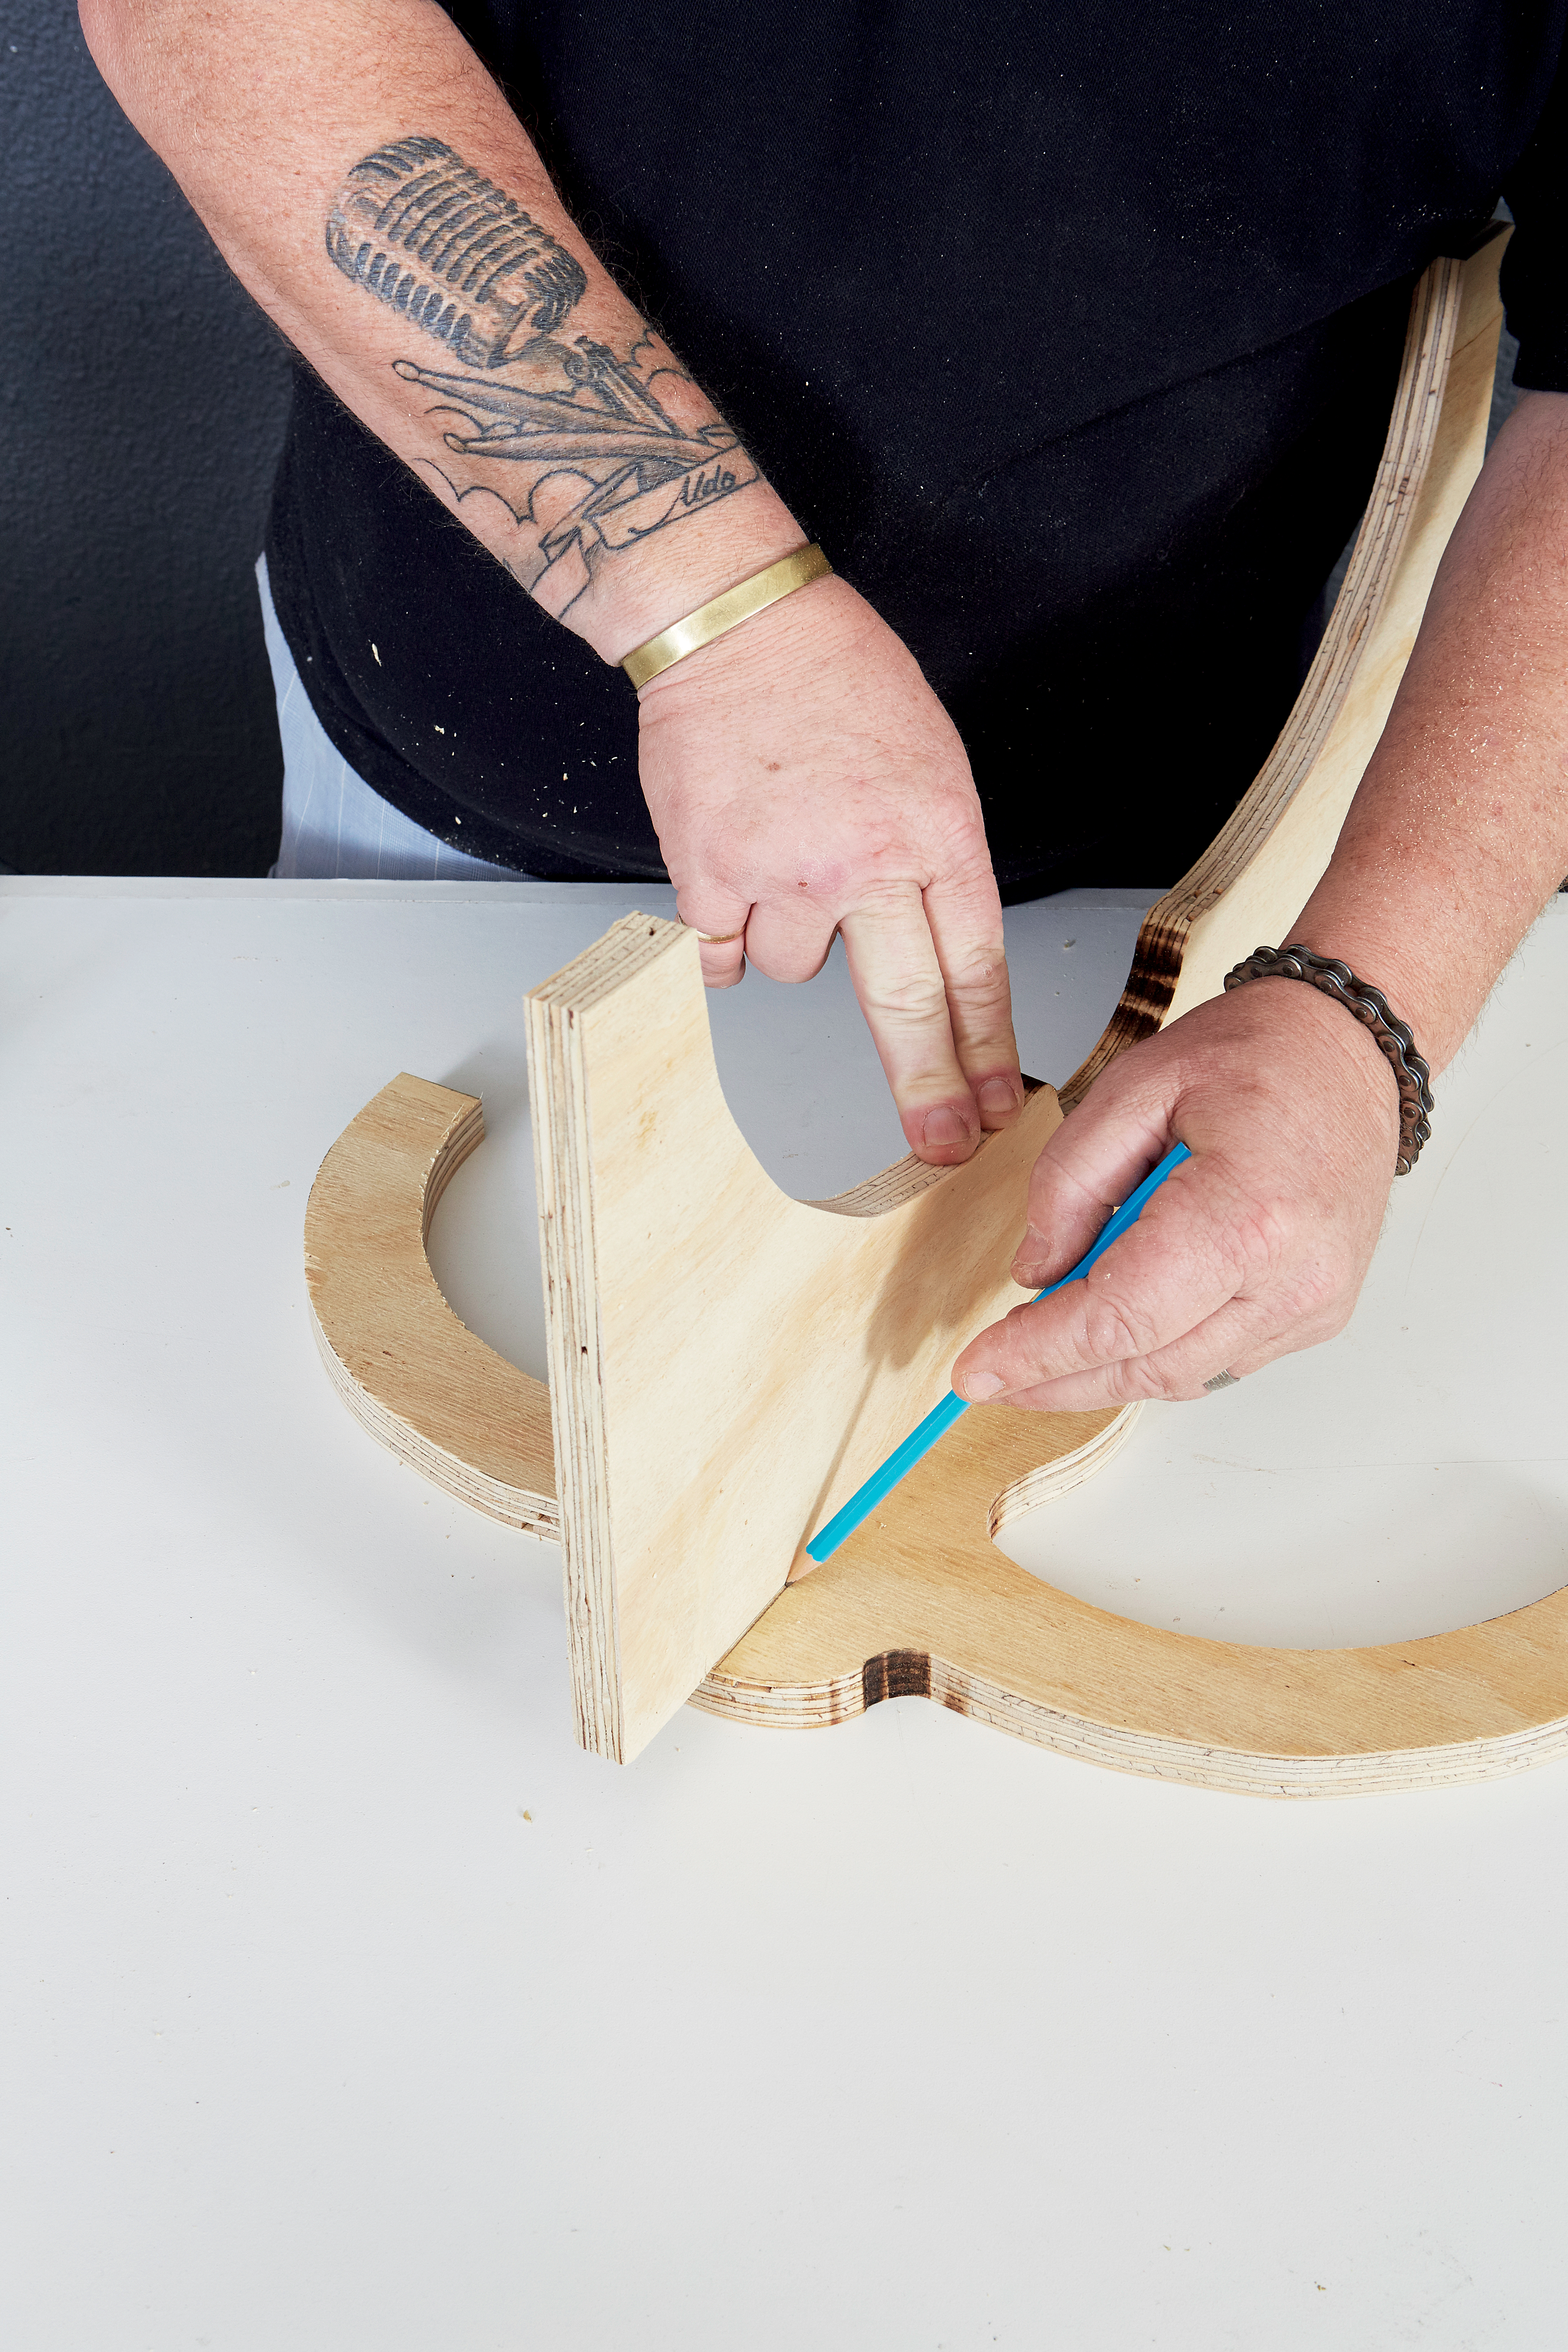
Step 5
Using a piece of offcut wood, mark the middle of both pieces from top to bottom.
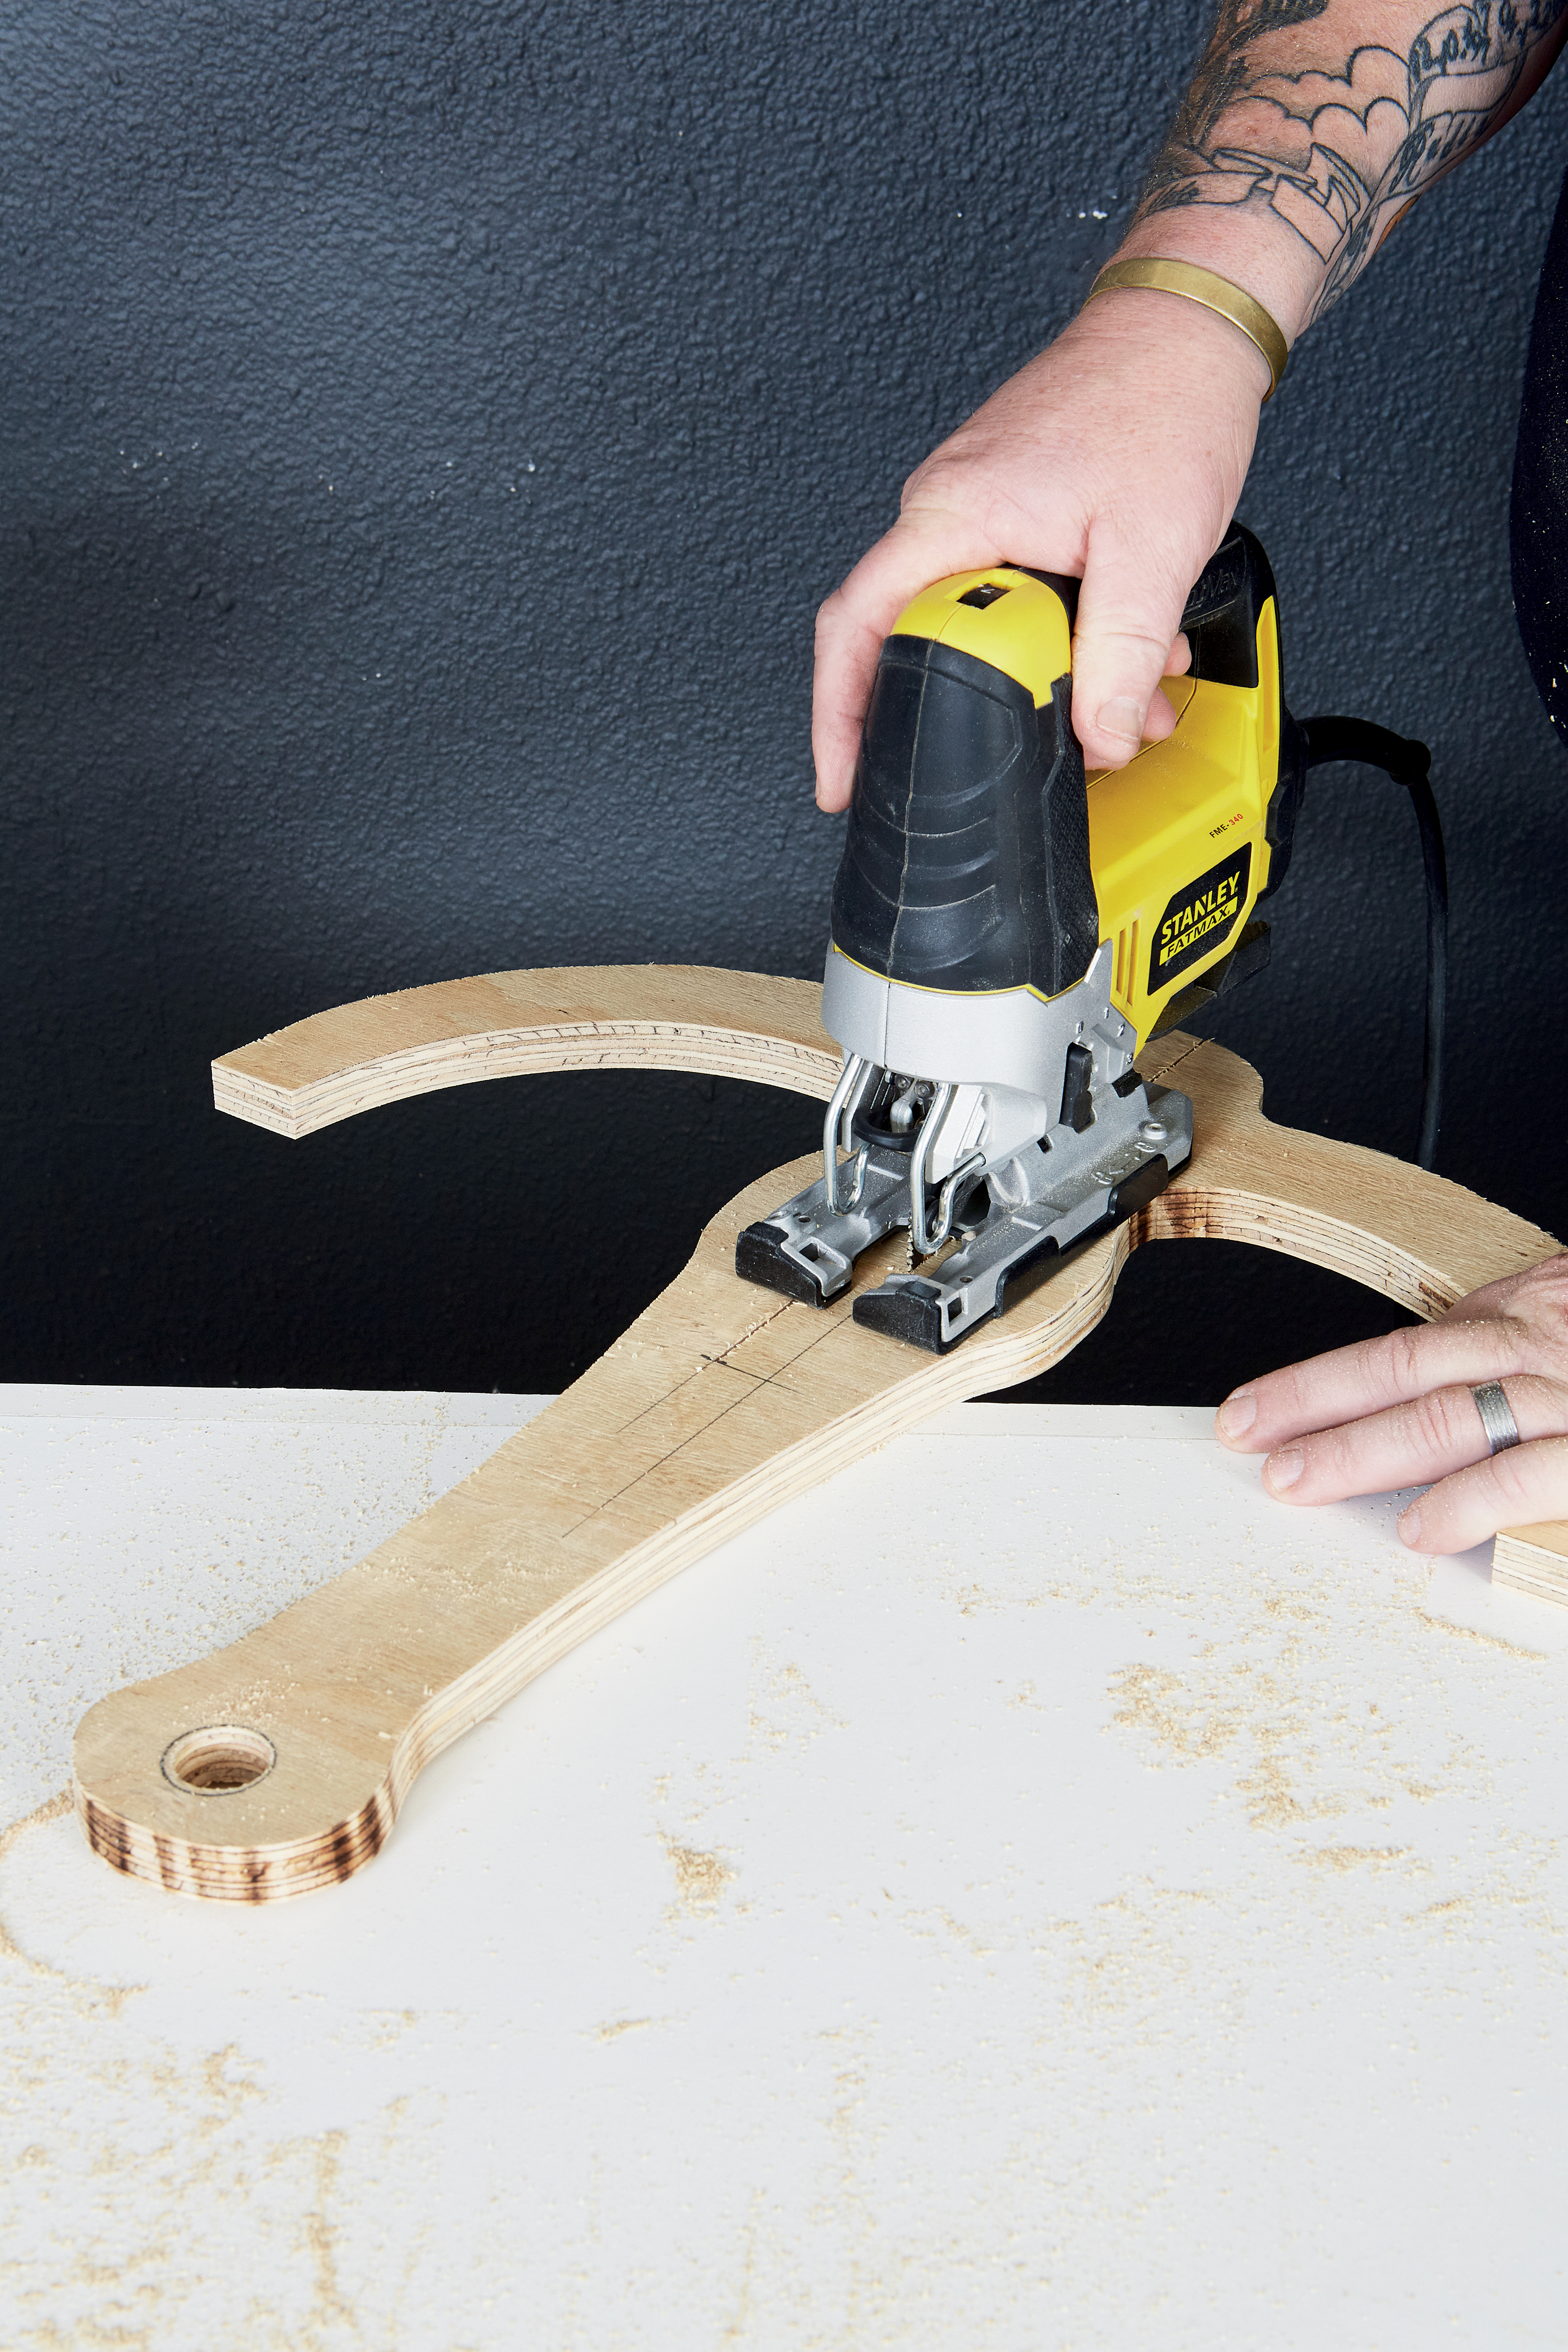
Step 6
On one piece, saw out a slot from the bottom up to the midpoint of one piece and a slot from the top to the midpoint of the other piece. Round off the end of this piece.
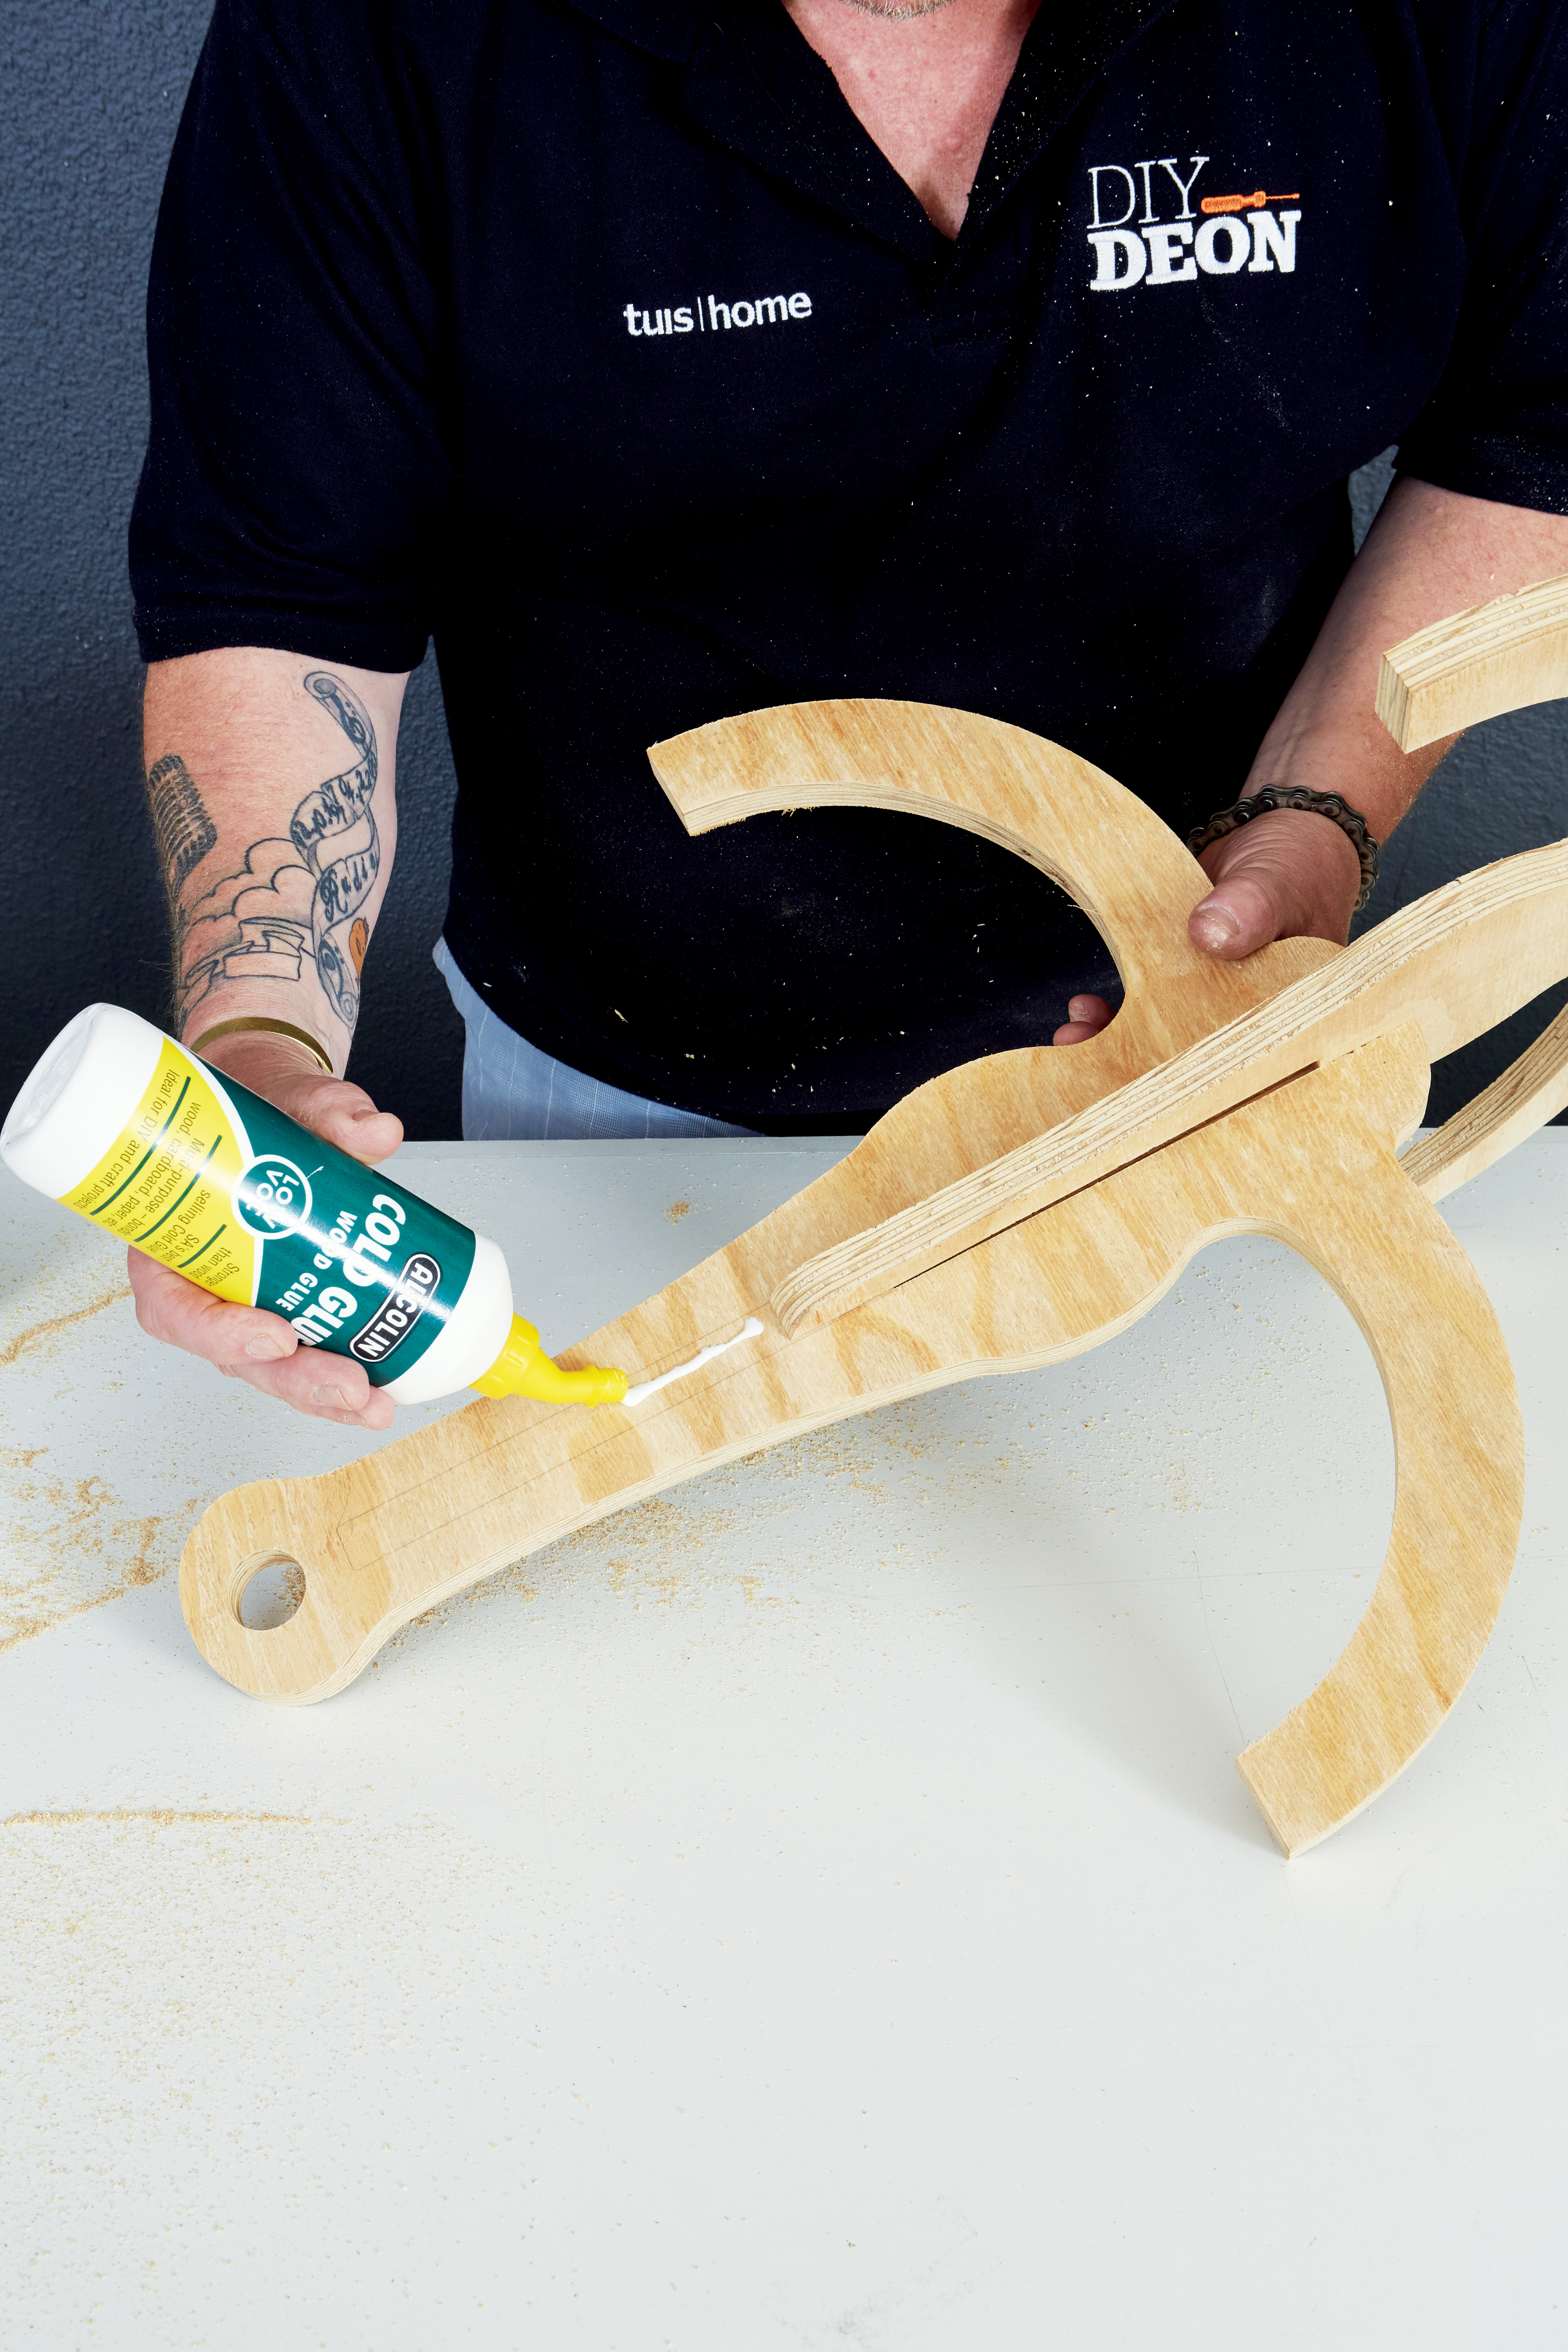
Step 7
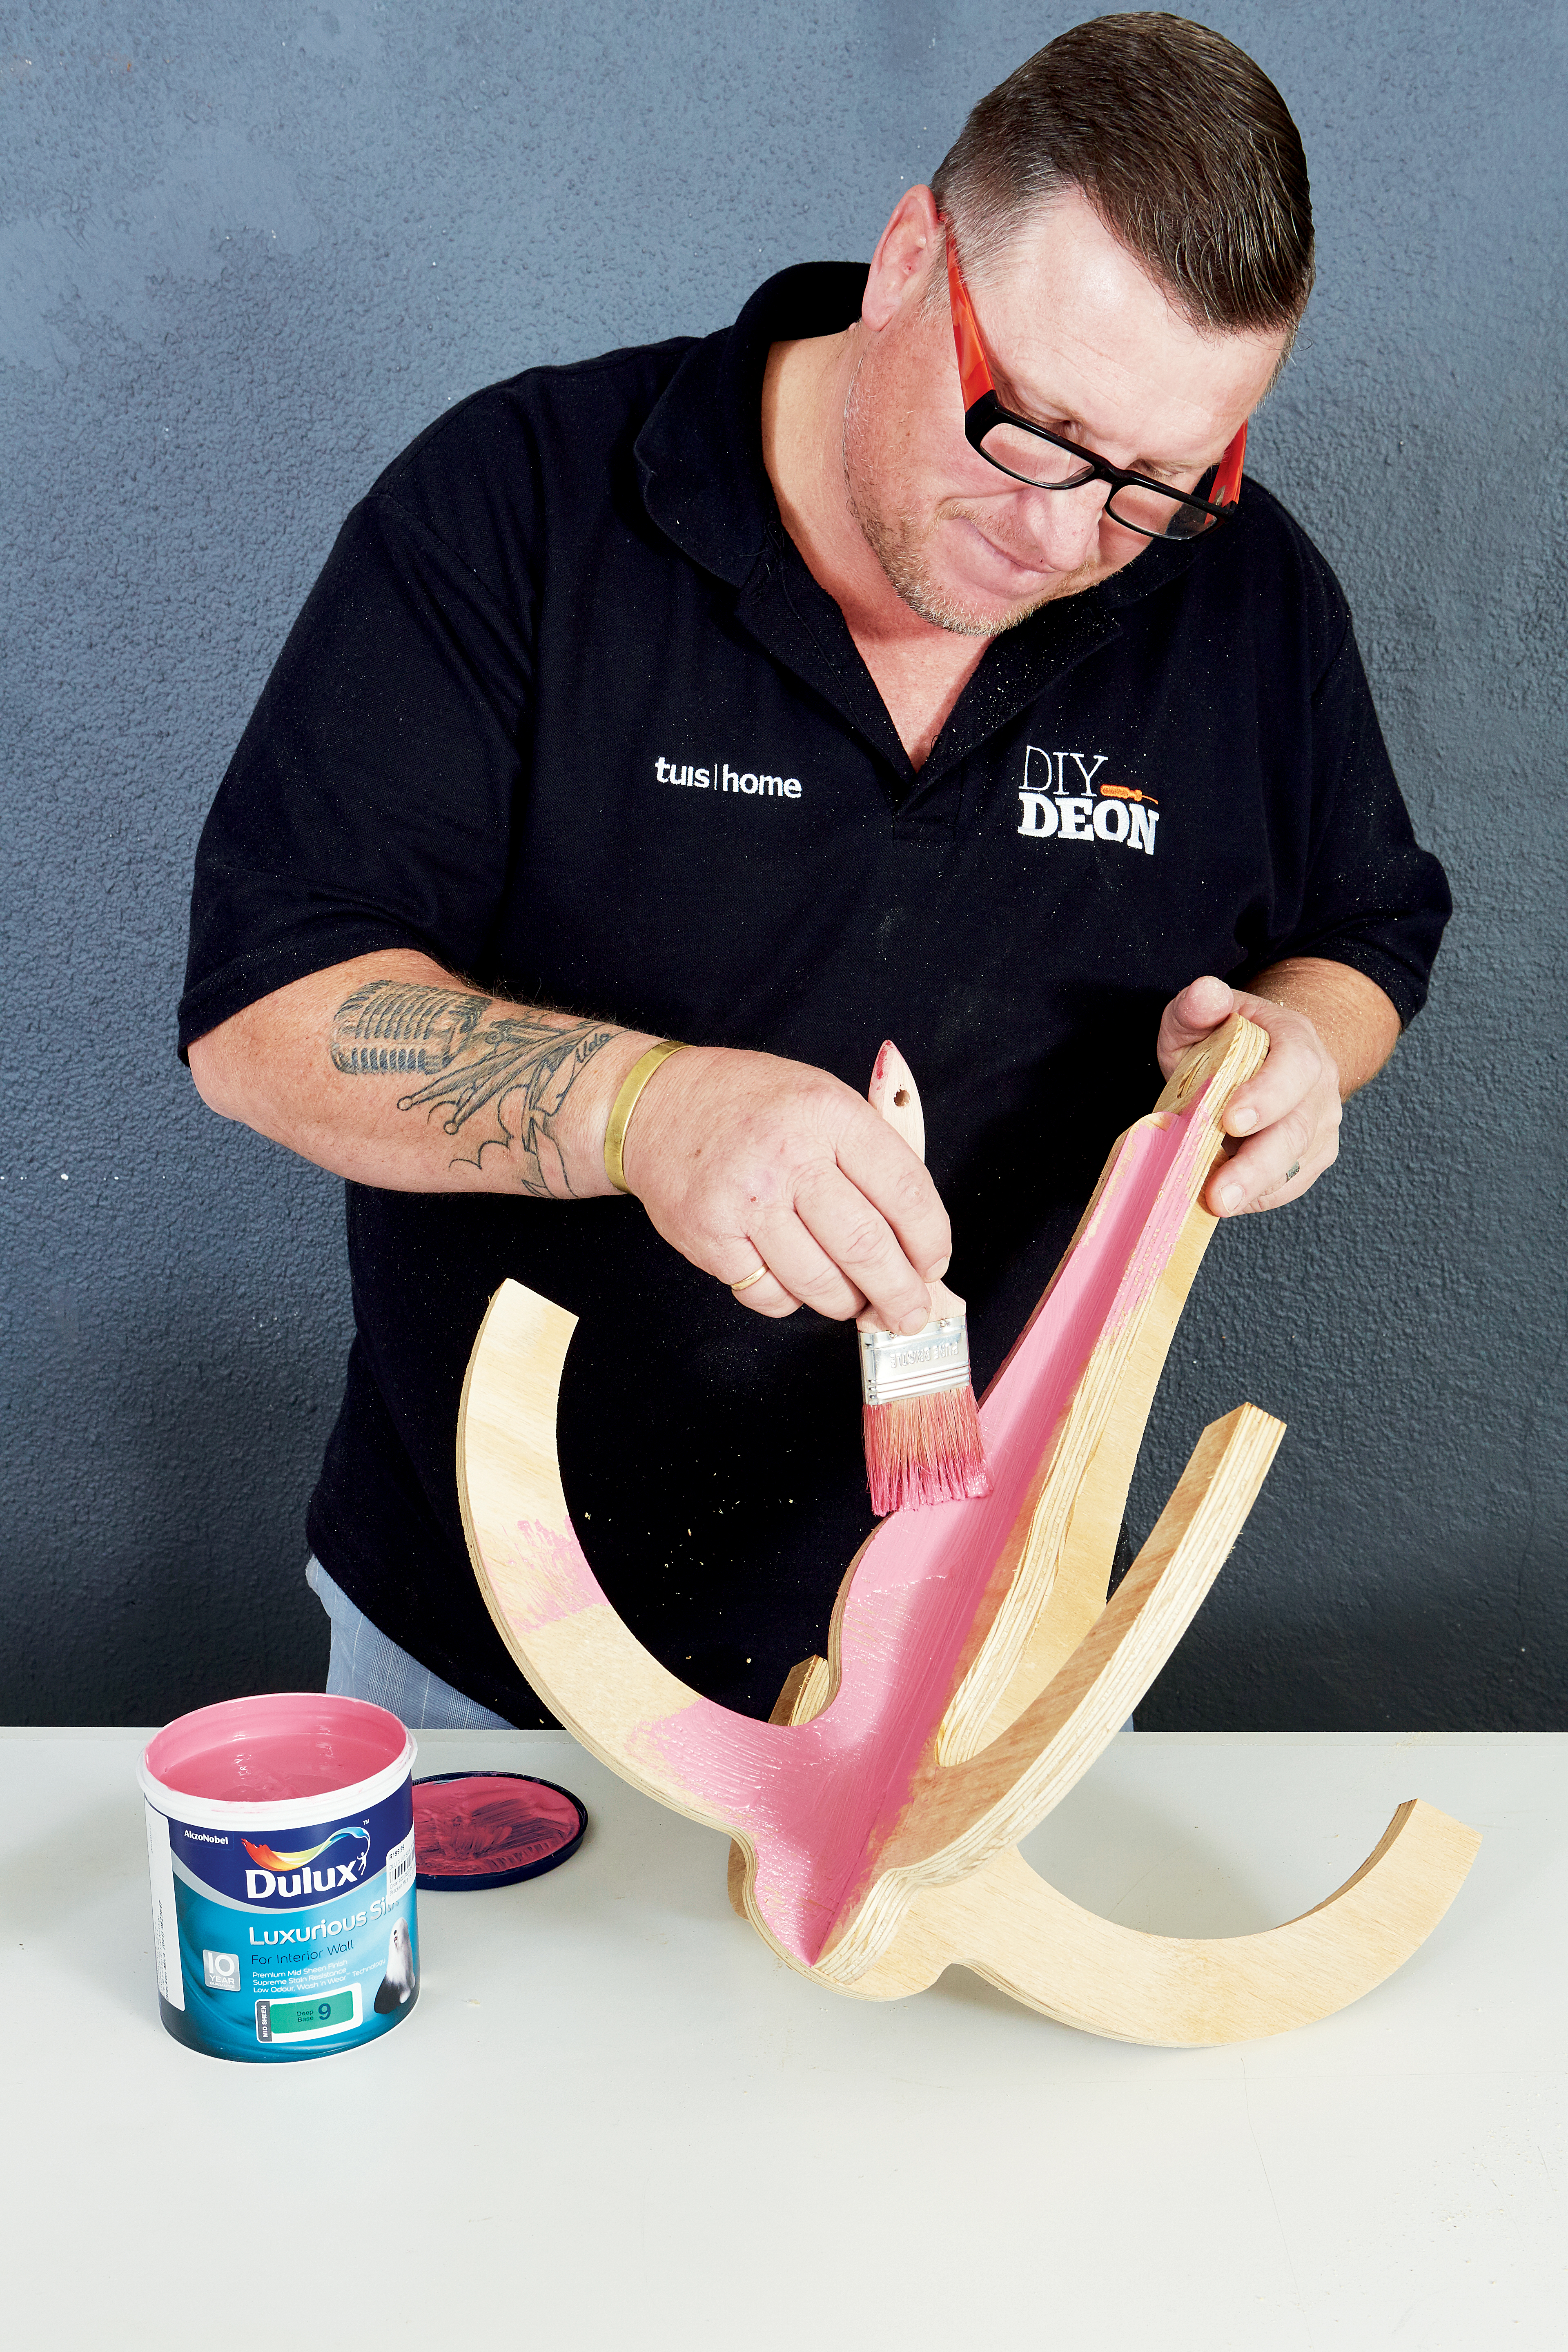
Sand the two halves of the chandelier and slide the one half until it fits perfectly into the other. Glue and nail the two together with panel pins.
Step 8
Paint in the colour of your choice (we used Dulux Fuchsia Falls 2).
Step 9
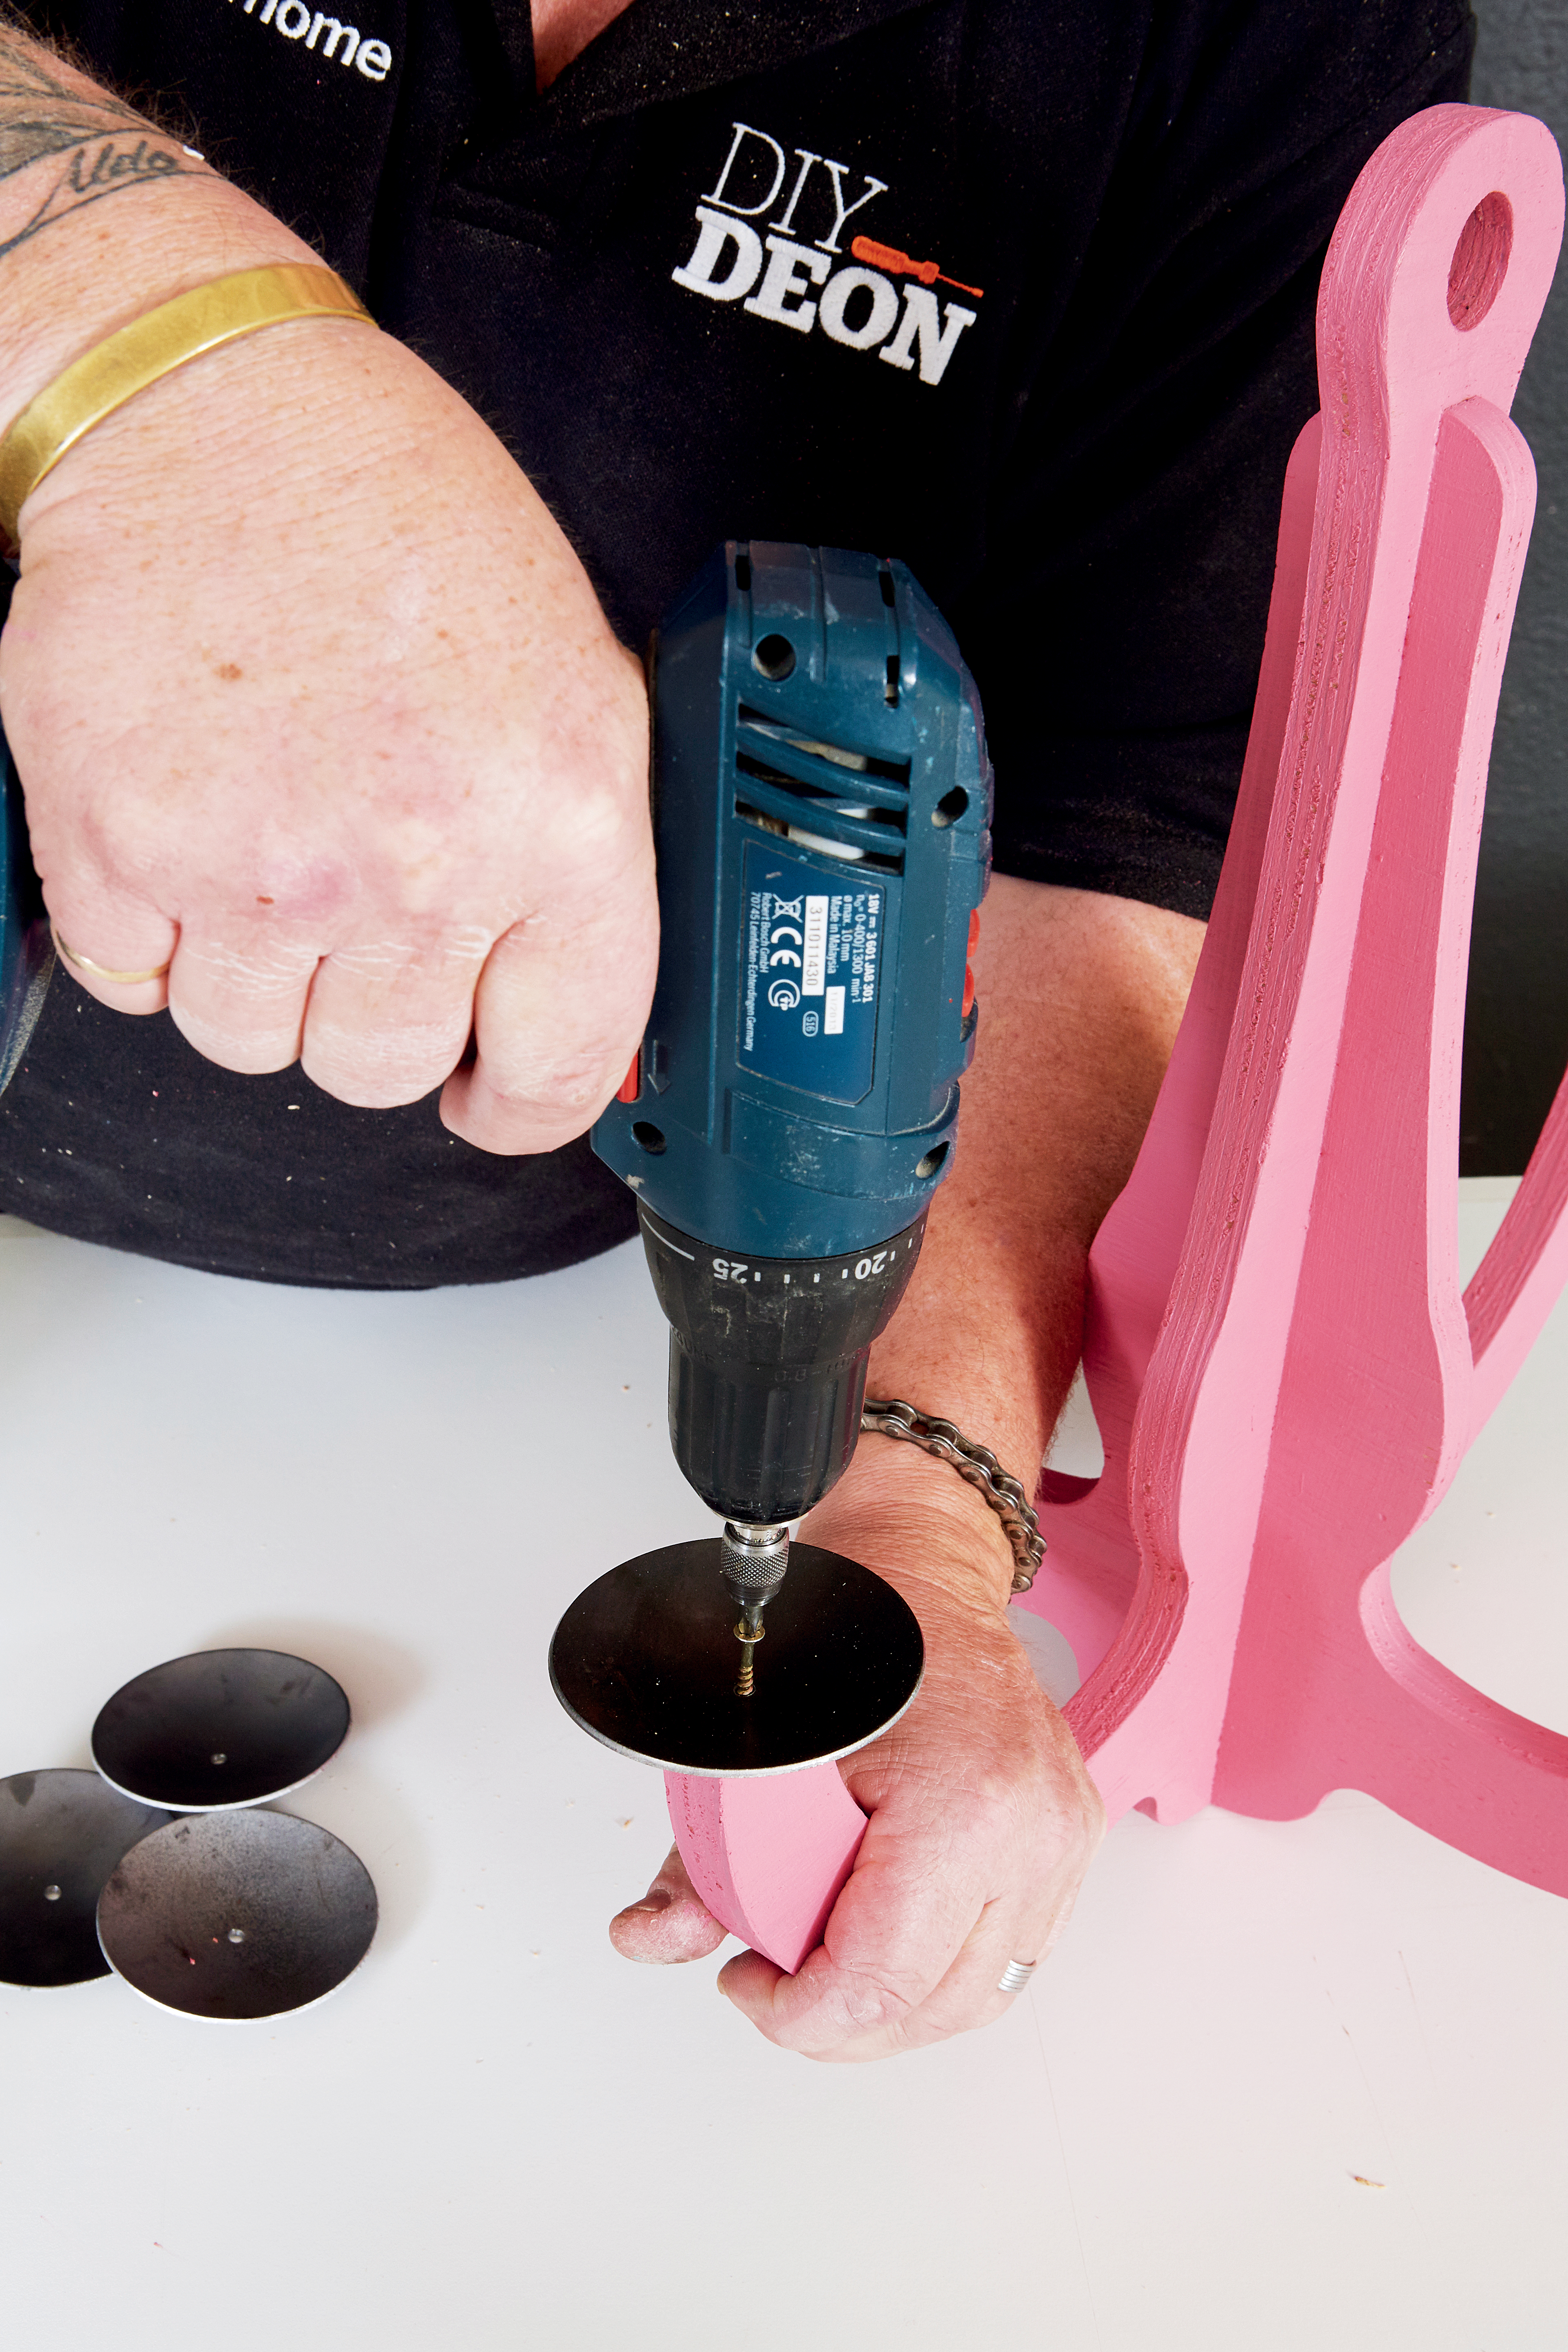
Using the cordless driver, drill a 4mm hole in each candleholder and screw one onto each of the four arms of the chandelier.
Step 10
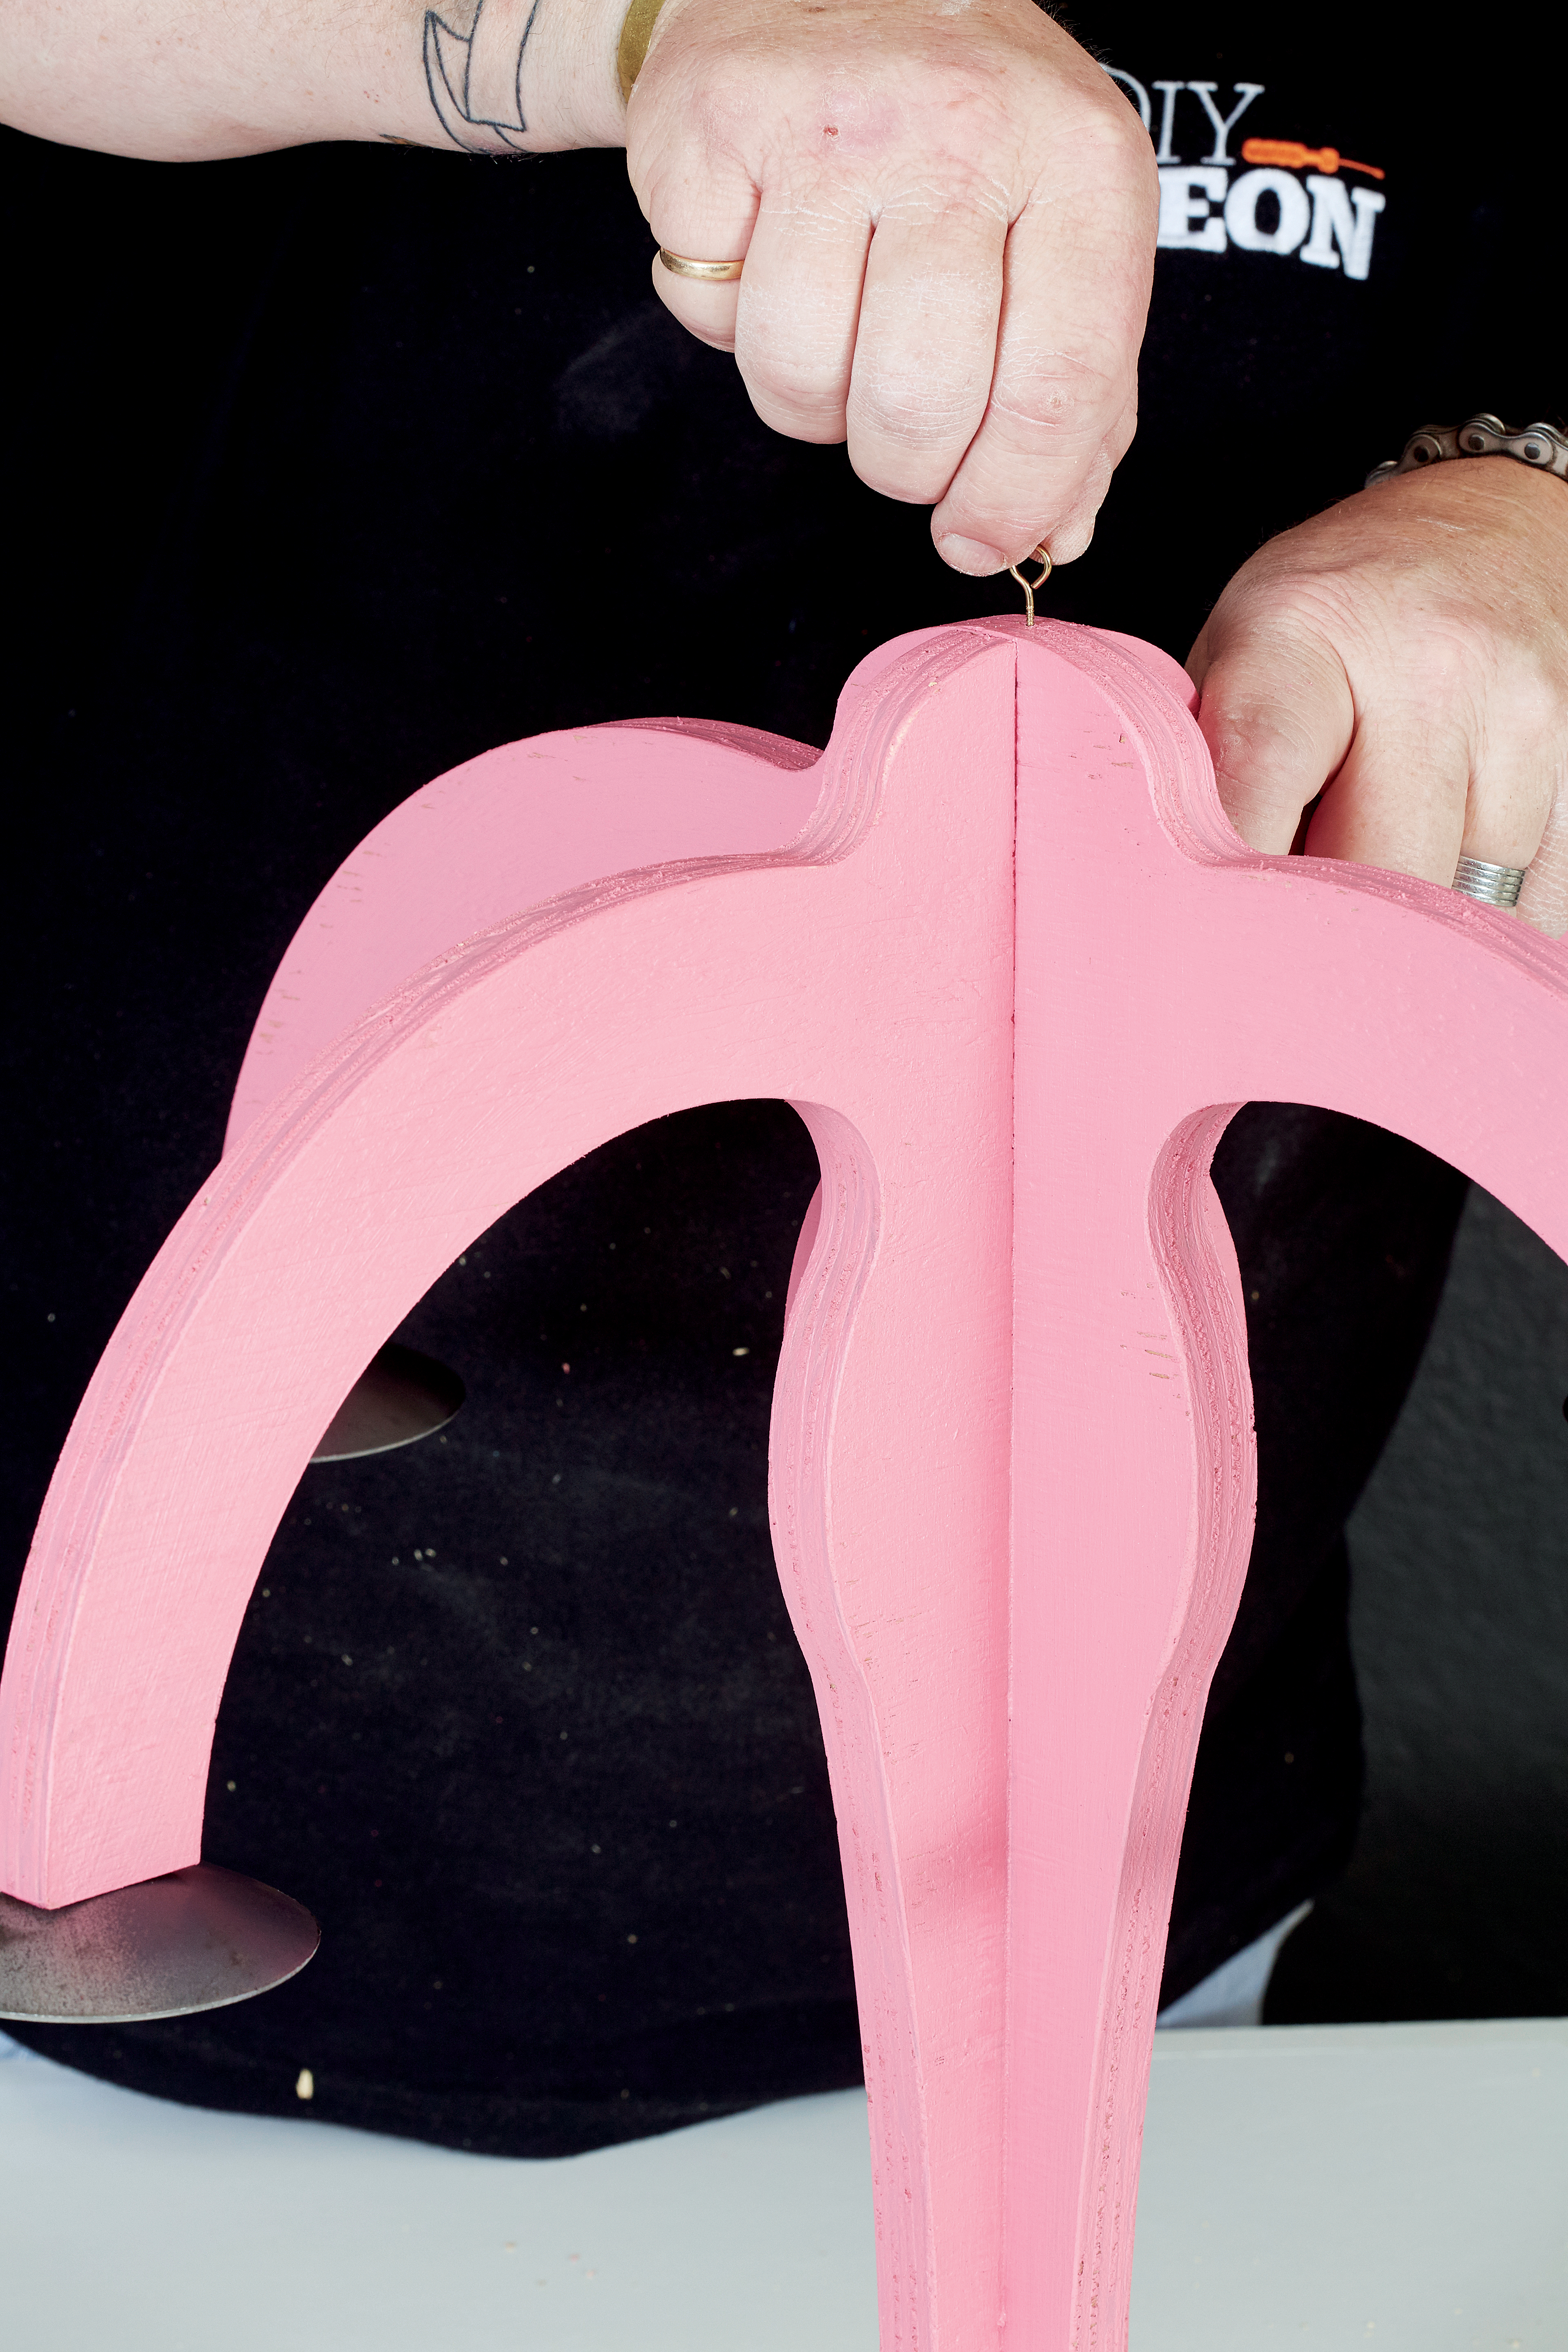
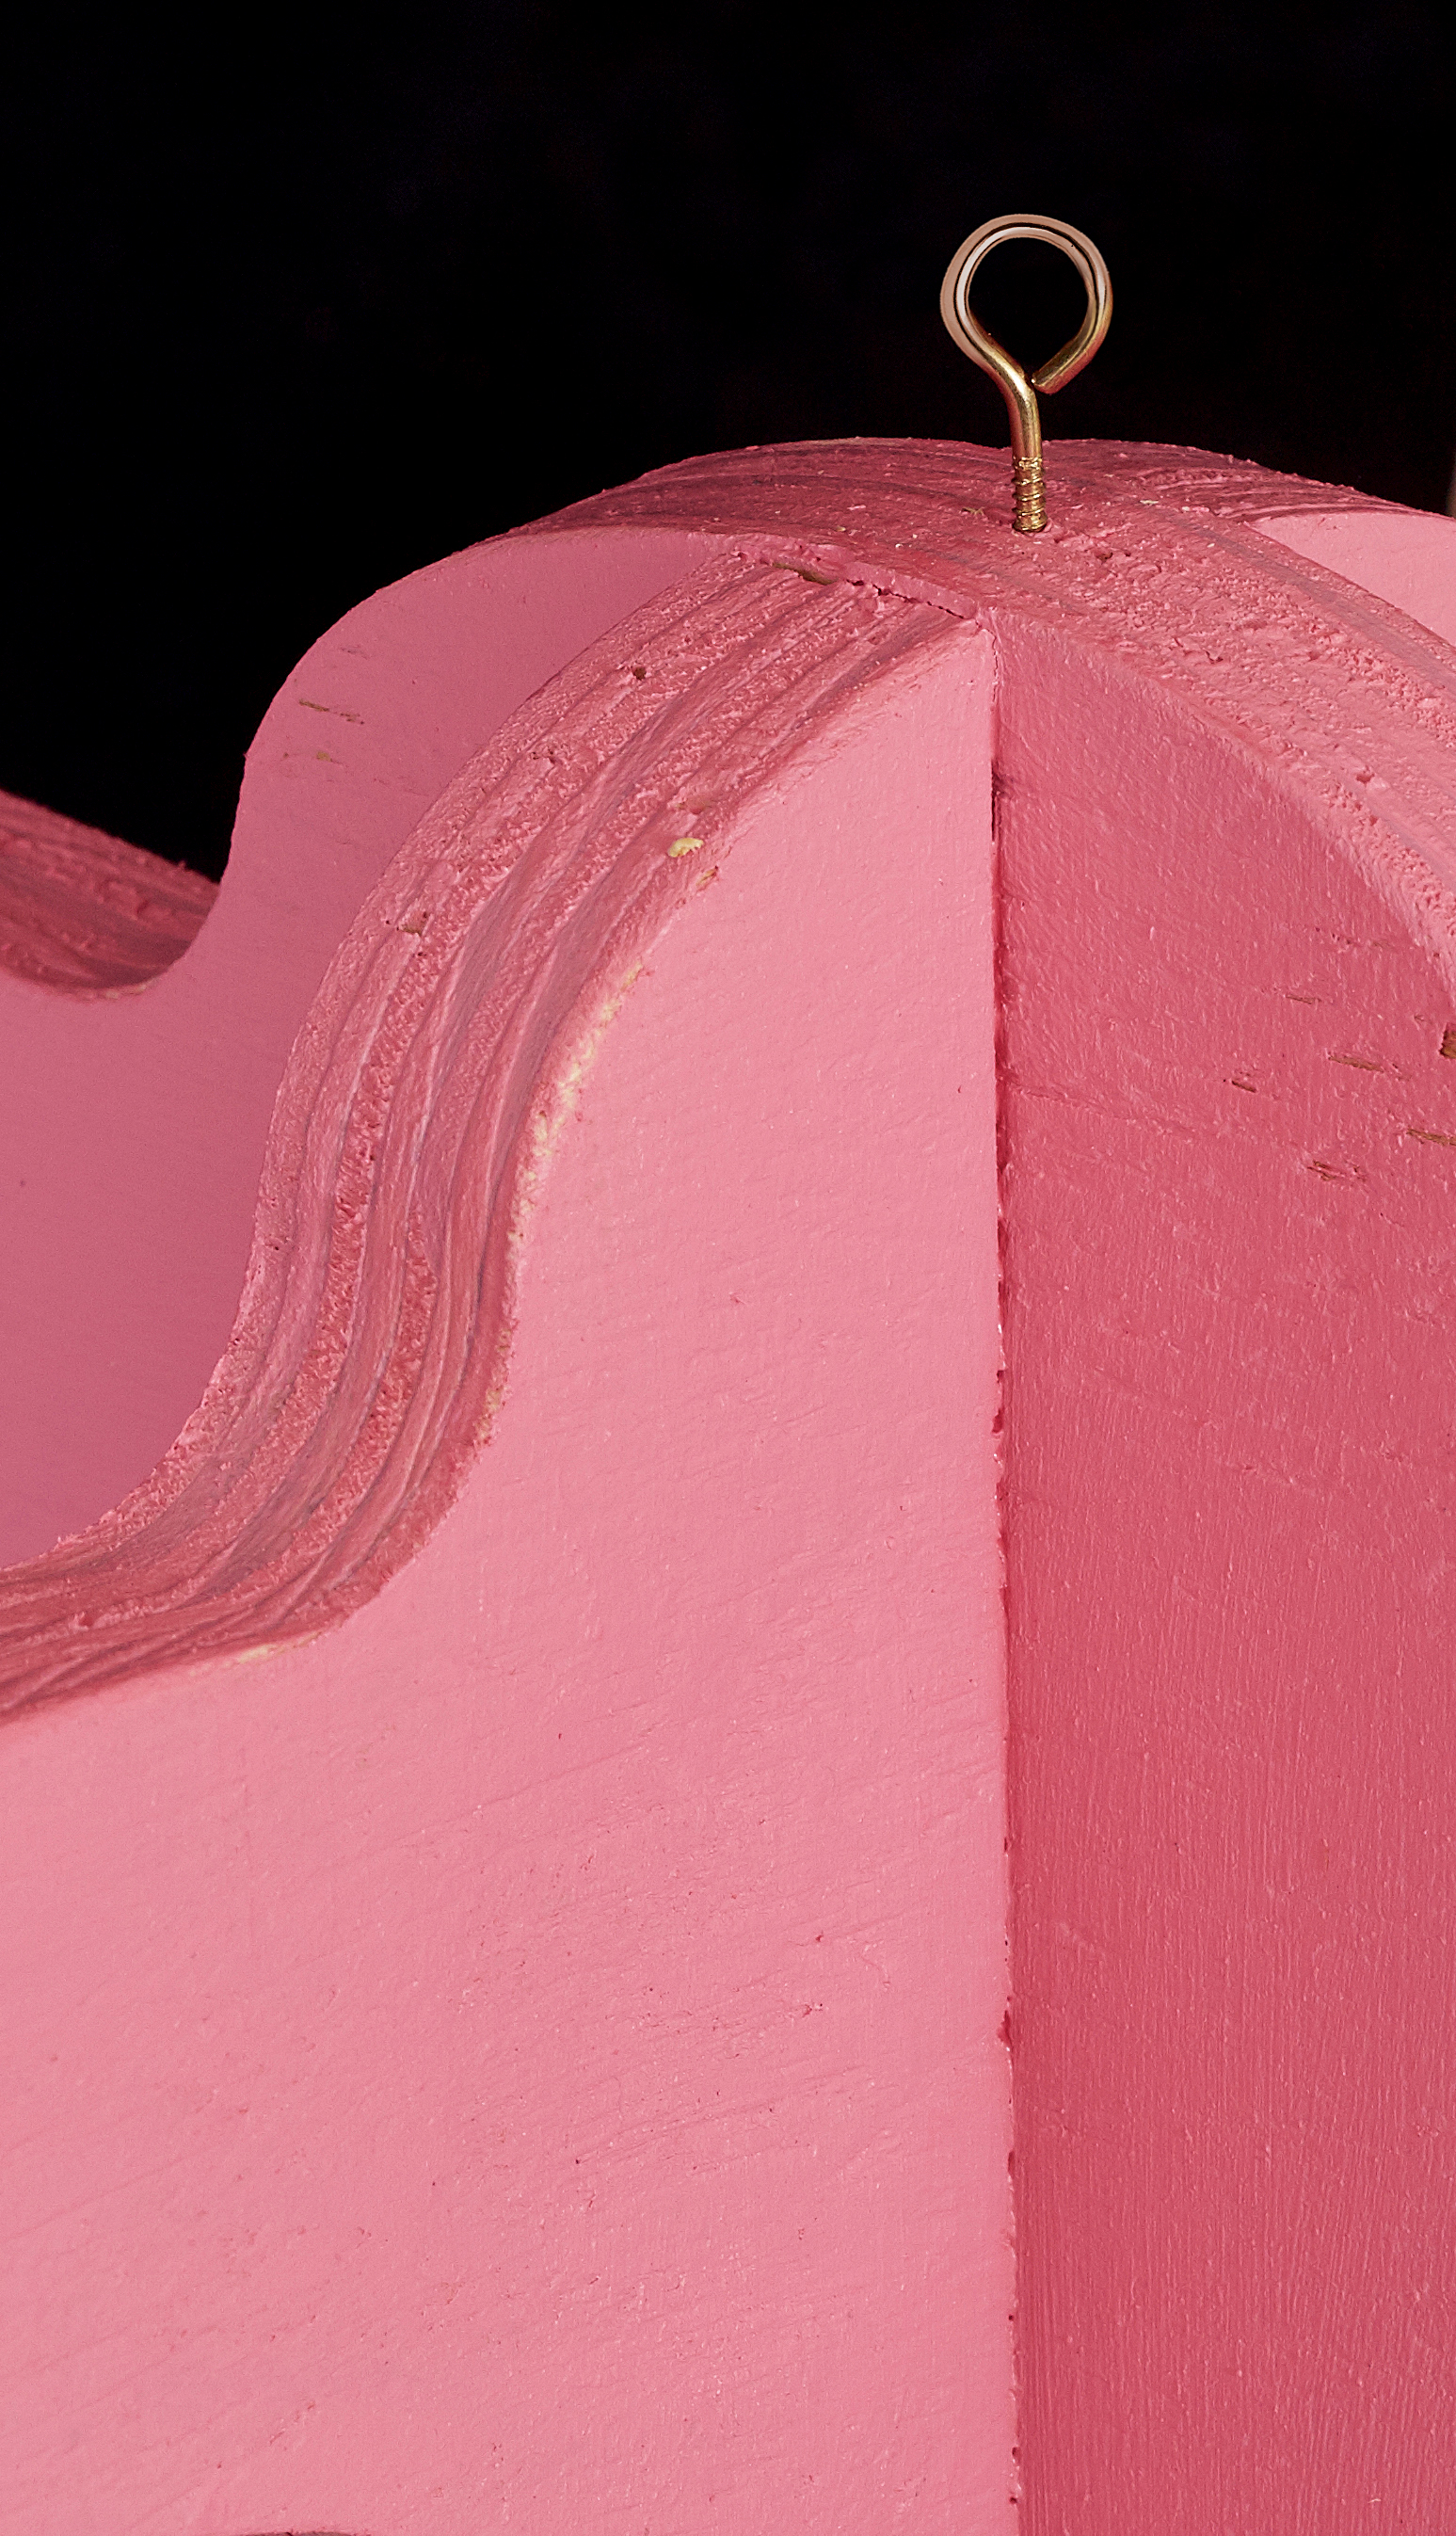
Turn in small screw hooks at the bottom of the chandelier in case you’d like to attach crystals later.
Step 11
Use a rope or chain to hang your chandelier in place.
Credits
Referenced from Gallo images / Home Magazine
Browse 1000’s of products available to you. Select your country to Shop Online.


