A simple DIY star to make with your family this festive season.
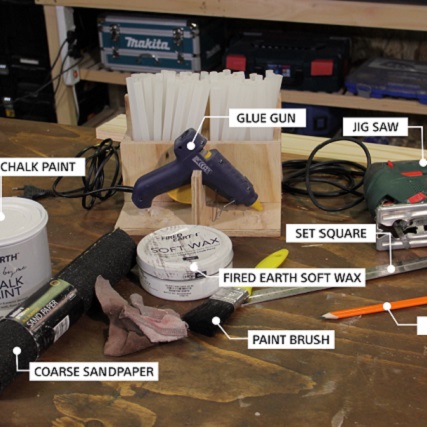
Materials you will need:
- Scrap timber (pine 20mm thick x 94mm wide)
- Fired Earth chalk paint
- Fired Earth soft wax
- Coarse sandpaper
- Glue gun sticks
- Jigsaw or handsaw
- Glue gun
- Set square
- Pencil
- Paintbrush
How to make the segments of the star
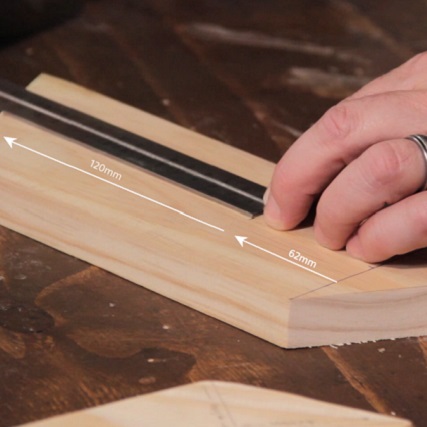
Step 1
Draw a bottom line across the width of your scrap timber, then another (middle) line 62mm from the bottom line and then another at 120mm from the middle line.

Step 2
From the edge, mark out 45mm and 90mm along each of these three lines. Draw diagonal lines from the 45mm mark on the bottom line to the 0mm and 90mm mark on the middle line.
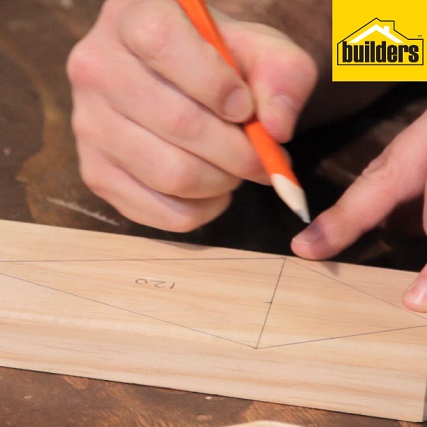
Step 3
Next draw two more diagonal lines from the 0mm and 90mm marks on the middle line to the 45mm mark on the top line. This will create your segment shape.

Step 4
Clamp your timber into place and cut out the segment using a handsaw or jigsaw. Repeat the process for all five segments.
How to complete the star structure
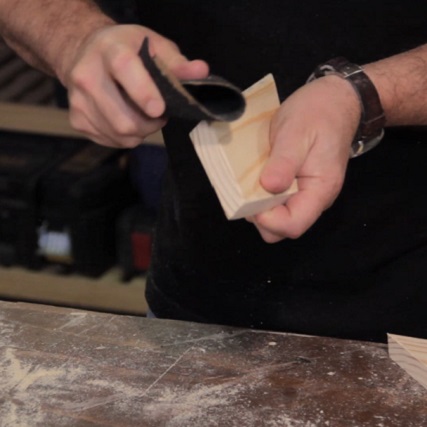
Step 1
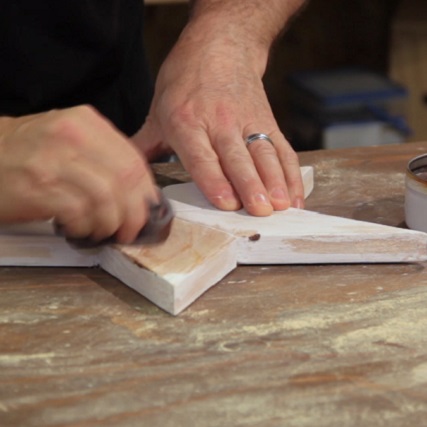
Sand down each of the segments to smooth out any rough edges.
Step 2
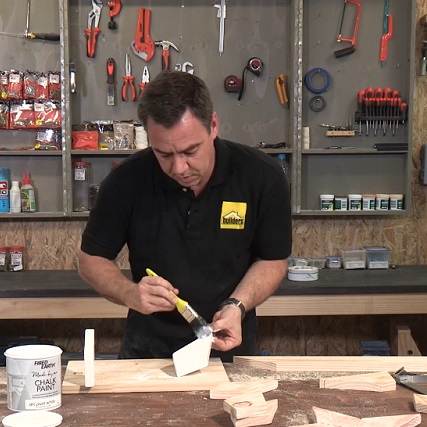
Paint/stain the timber to your desired colour and leave to dry (for this DIY we used Fired Earth chalk paint). Once the paint is completely dry you can use some sandpaper to give the star a distressed look, or simply leave it as is.
Step 3
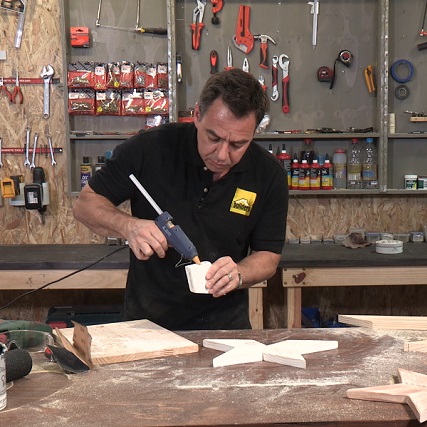
Lay all your segments out and begin assembling the star using a thin line of glue from the glue gun in the centre of the mating surfaces. Repeat this process for all sides.
Step 4
Once the glue has dried, seal the timber to protect the wood from damage or simply leave as is (for this DIY we used Fired Earth soft wax as a sealer).
Browse 1000’s of products available to you.
Select your country to Shop Online.


