We show you how to make a DIY Christmas tree that will last for years!
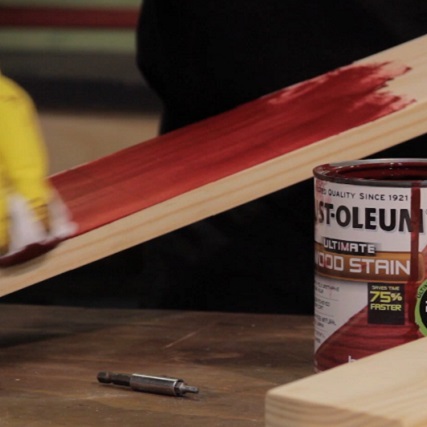
- Rustoleum wood stain
- Wood glue
- 35mm screws
- Cordless drill
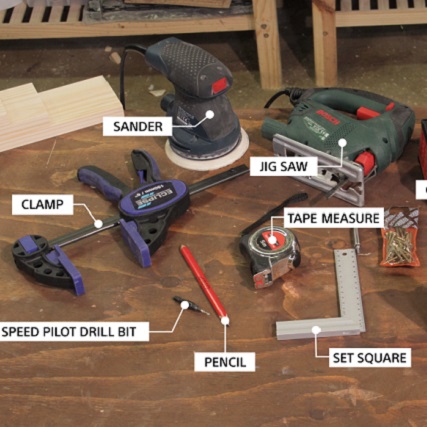
- Jigsaw
- Sander
- Clamp
- Speed pilot drill bit
- Pencil
- Tape measure
- Set square
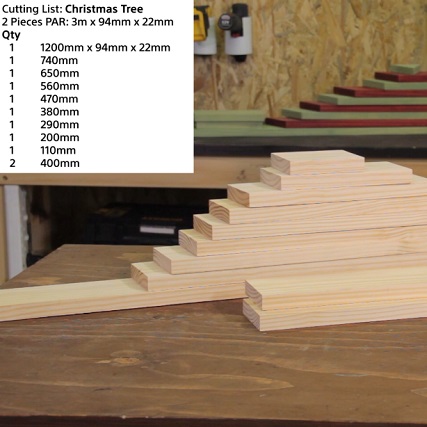
- 2 pieces of 3m x 94mm x 22mm PAR pine. The quantity for each of the following is one unless stated otherwise.
- 1200mm x 94mm x 22mm
- 740mm x 94mm x 22mm
- 650mm x 94mm x 22mm
- 560mm x 94mm x 22mm
- 470mm x 94mm x 22mm
- 380mm x 94mm x 22mm
- 290mm x 94mm x 22mm
- 200mm x 94mm x 22mm
- 110mm x 94mm x 22mm
- 400mm x 94mm x 22mm – x2
How to make the tree branches
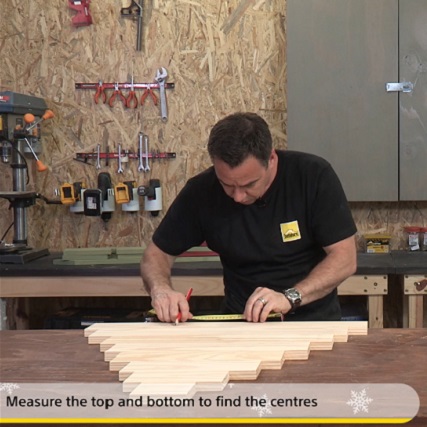
Step 1
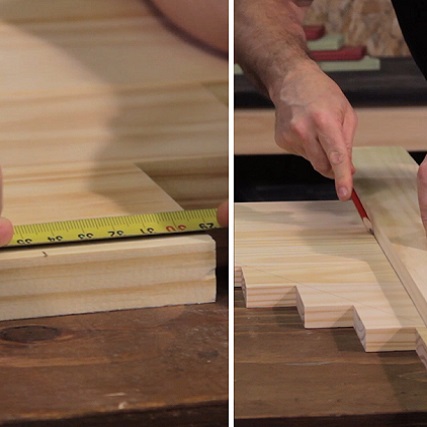
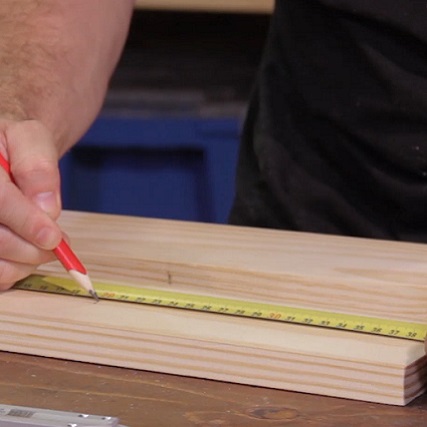
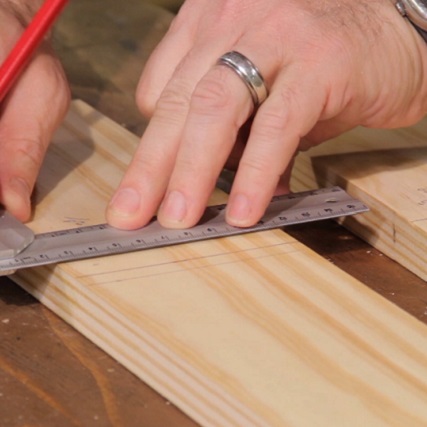
Begin by laying out the branches in ascending order of size and draw a line through the centre of each plank. These lines will be used to ensure that the branches are all centred.
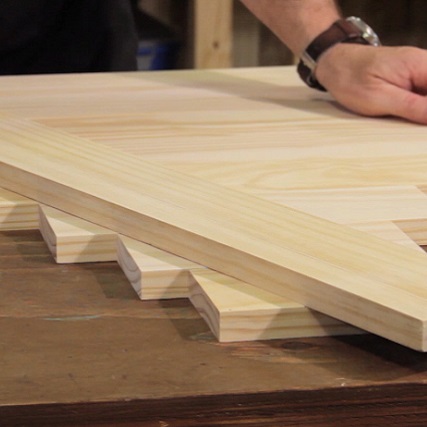
Step 2
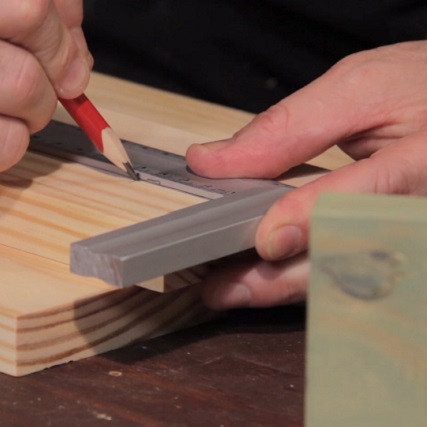
Now use the trunk of the tree (1200mm x 94mm x 22mm) as a ruler. Lay the plank diagonally across the ends of the ‘branches’ – line the plank up so that it meets the centre point of the top branch, then make sure the end point of each of the branches lines up with the diagonal plank and draw a line down the edges to show where to cut. Repeat the process for the other side of the tree.
Step 3
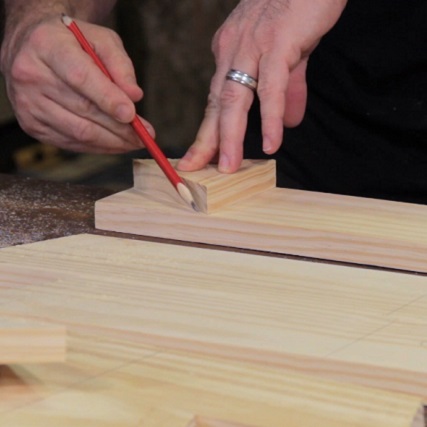
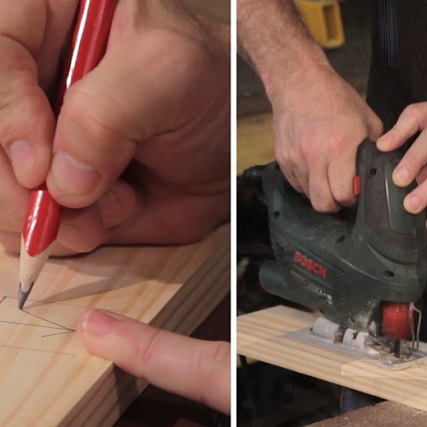
Mark on each branch where the trunk will sit (draw two lines, both 47mm from the centre lines). Tip: At this point also mark which pieces of the timber will be stained which colour to avoid confusion later.
Step 4
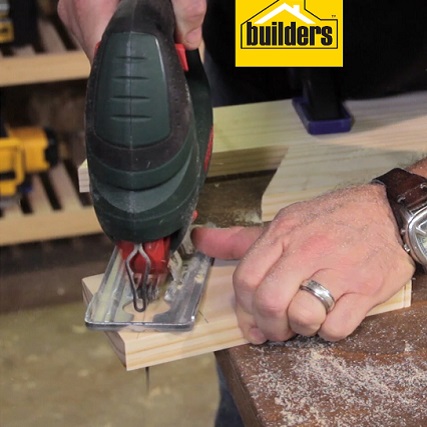
Use a jigsaw to cut off the corners of the planks as marked in step 2. Keep the offcuts to use later as spacers.
Step 5
Once all the branches are cut, mark the position of the top branch on the top of the trunk plank, marking where to cut in order to hide the back plank from view.
How to make the tree stand
Step 1
Draw a line through both stand pieces (400mm), marking the centre.
Step 2
Measure and mark 10mm on either side of the centre line on the first piece. On the second piece measure 20mm on either side of the centre line and draw lines.
Step 3
Measure halfway down the width of both pieces (about 47mm from each side) and rule a line to create the area you need to cut out for the slots. Cut out all marked areas using a jigsaw.
Step 4
Cut out a slot on the bottom of the trunk plank. This slot should measure 10mm on either side of the centre line of the width and 47mm in from the base of the plank. Use a jigsaw to make this cut.
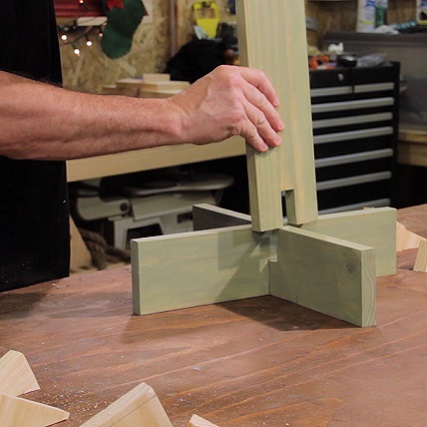
How to complete the structure
Step 1
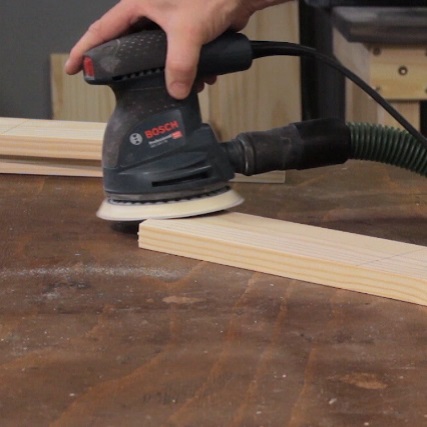
Sand down all pieces.
Step 2
Stain the wood to your desired colours. Seal the timber to protect it from damage.
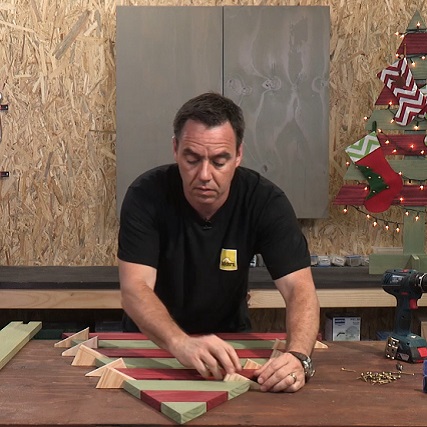
Step 3
Once the timber is dry, lay the pieces out and begin assembling the tree. Tip: Use the cutoffs from earlier to evenly space the branches out.
Step 4
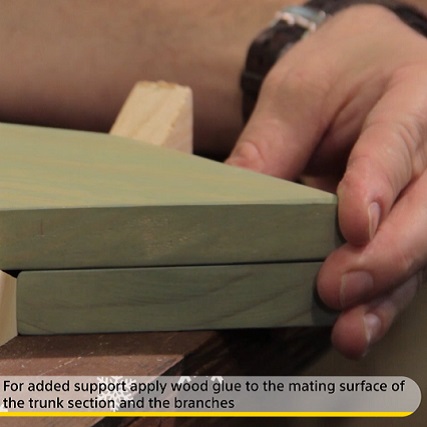
Use wood glue between the mating surfaces and lay the trunk in place.
Step 5
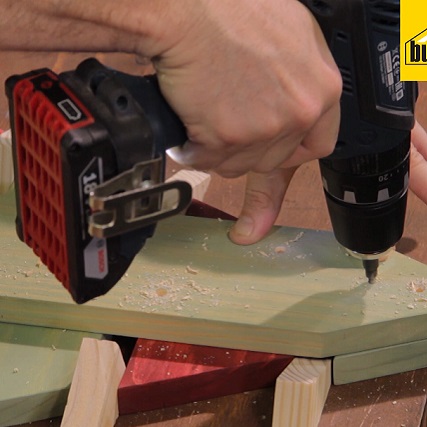
Use a drill and speed pilot to drill the holes for the screws (two on each branch).
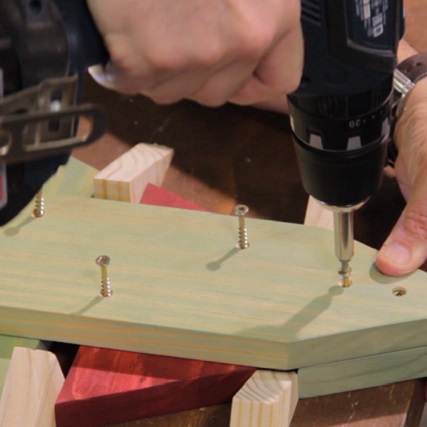
Step 6
Use 35mm screws to secure the trunk to the branches.
Step 7
The Christmas tree structure is now complete. Slip the tree into place on the stand and start placing your gifts beneath it.
Browse 1000’s of products available to you. Select your country to Shop Online.


