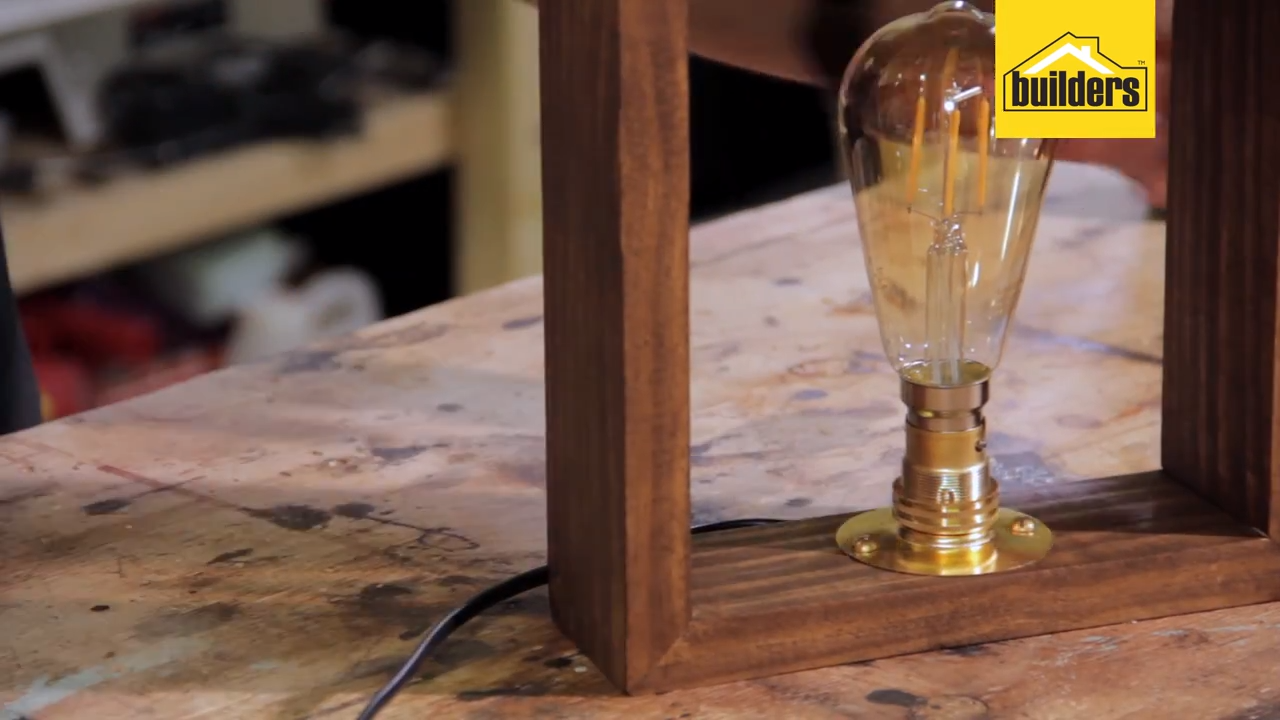
If you’re looking for a unique, retro lamp then this is the DIY for you. This cool and funky Edison light bulb feature for your home also uses very little electricity, as it uses a 4 Watt LED bulb.
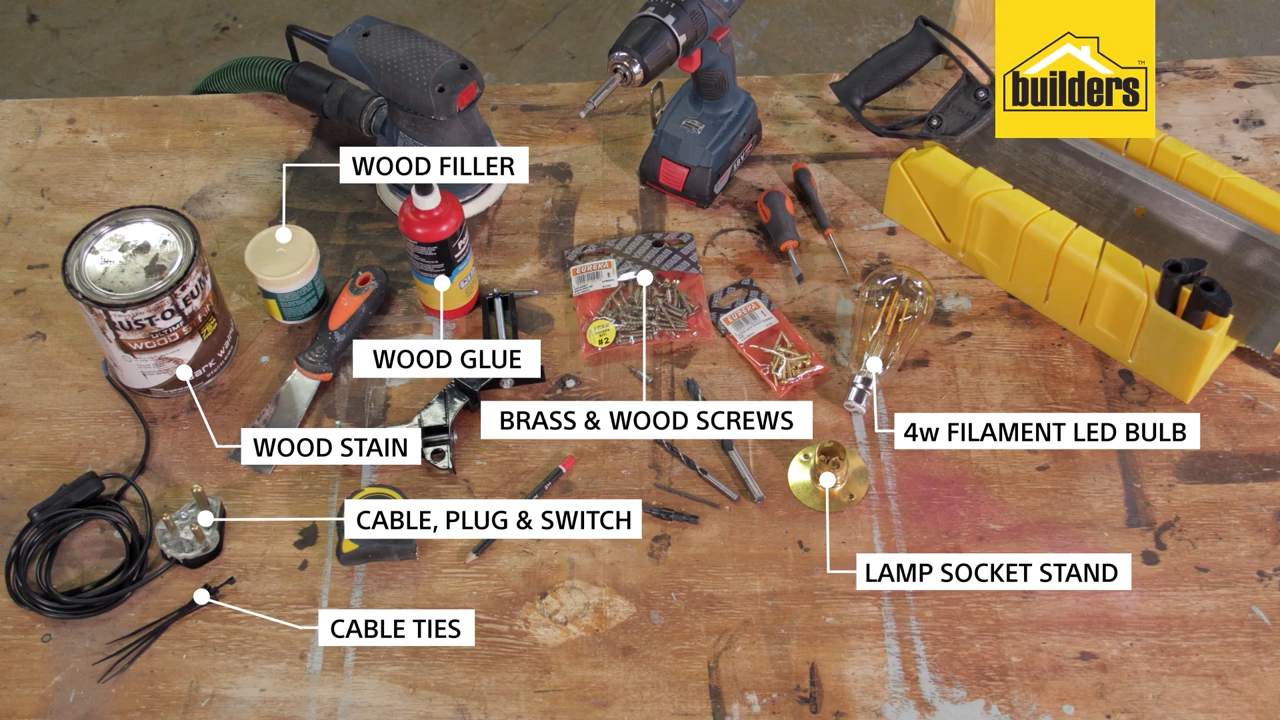
- 1 x 1000mm x 69mm x 22mm PAR timber (pine)
- Lamp socket
- 4W LED filament bulb
- 8 x 4.5mm x 45mm cut screws
- 2 x brass screws to fit the lamp socket
- Cable tie
- 2m two-core flex
- Electric plug
- Electric lamp switch
- Wood glue
- Wood filler
- Wood stain
- Wood sealant
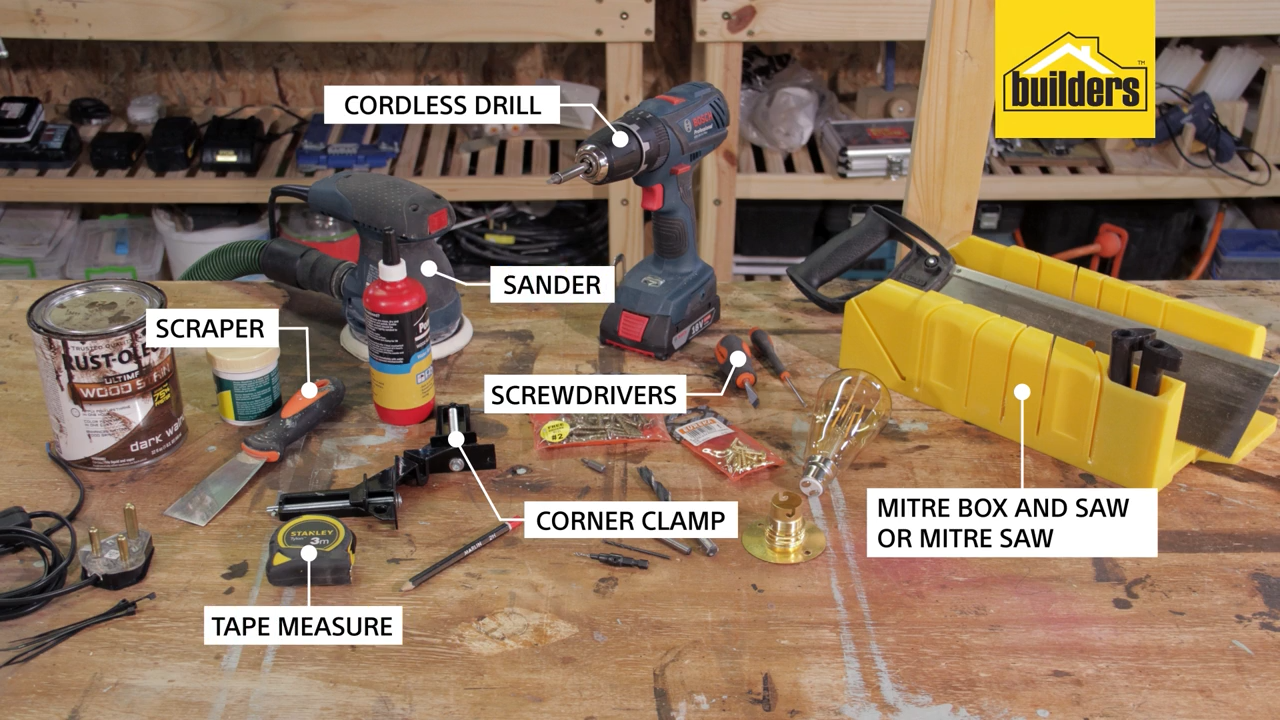
- Cordless drill with 6mm and 10mm wood bits
- speed pilot drill bit
- mitre saw (or mitre box and hand saw)
- screwdrivers
- scraper
- tape measure
- corner clamp
- sander
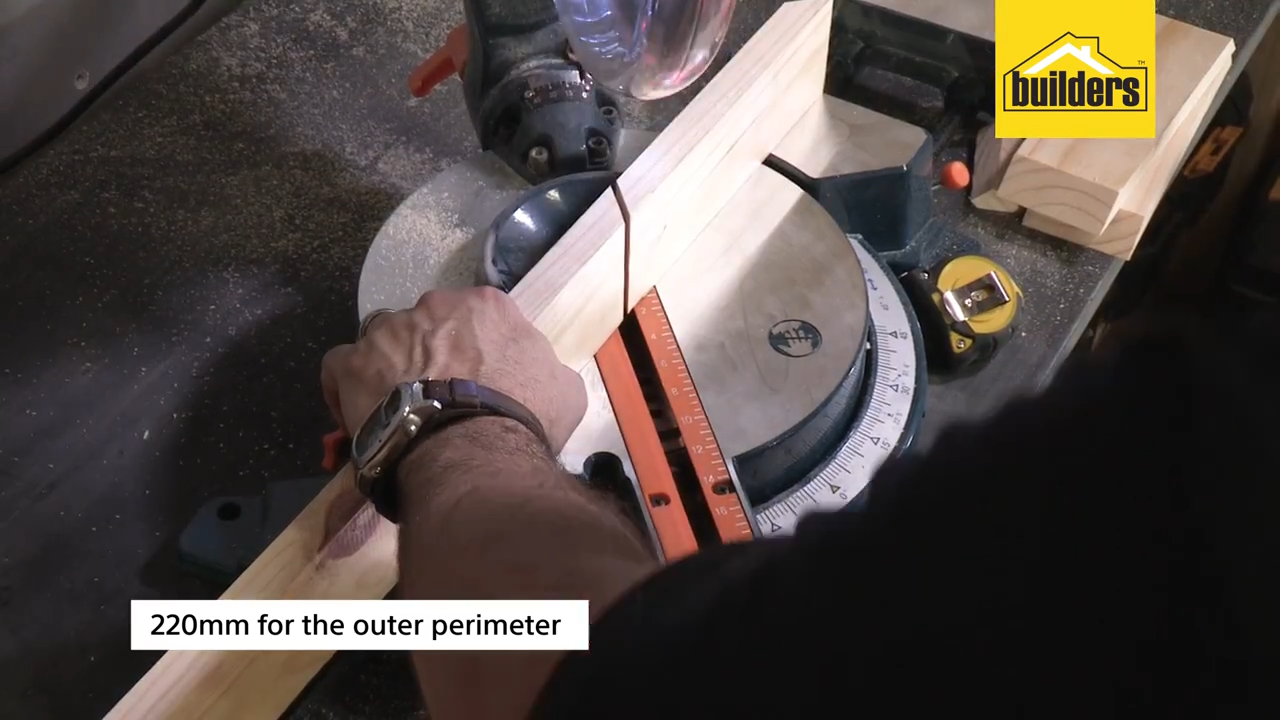
Step 1
Measure the wood and use the mitre saw to cut four 220mm lengths, with 45° ends pointing inwards.
Step 2
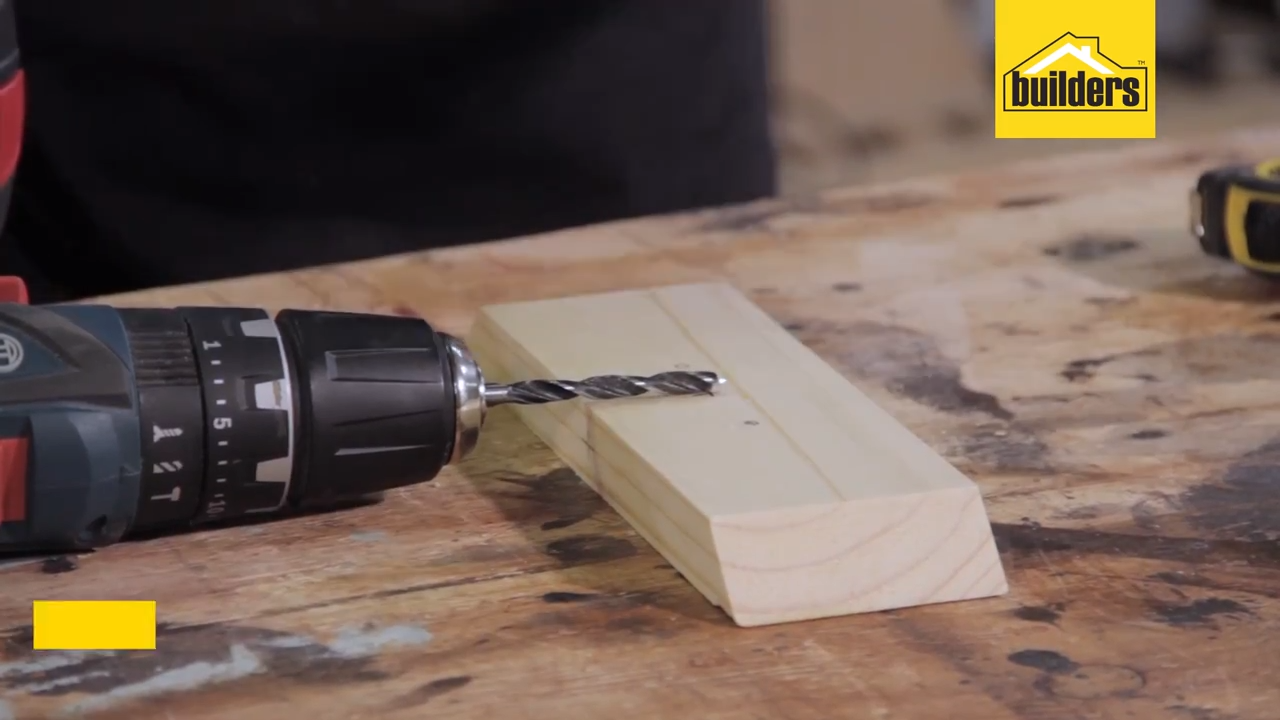
Once the four pieces are cut, select a plank as your base. On this plank measure to find the middle of the 220mm x 22mm edge. Mark it and drill a 6mm hole about 35mm deep.
Step 3
Find the middle of the 69mm wide face, mark it and drill a 10mm hole until you reach the hole drilled in the previous step.
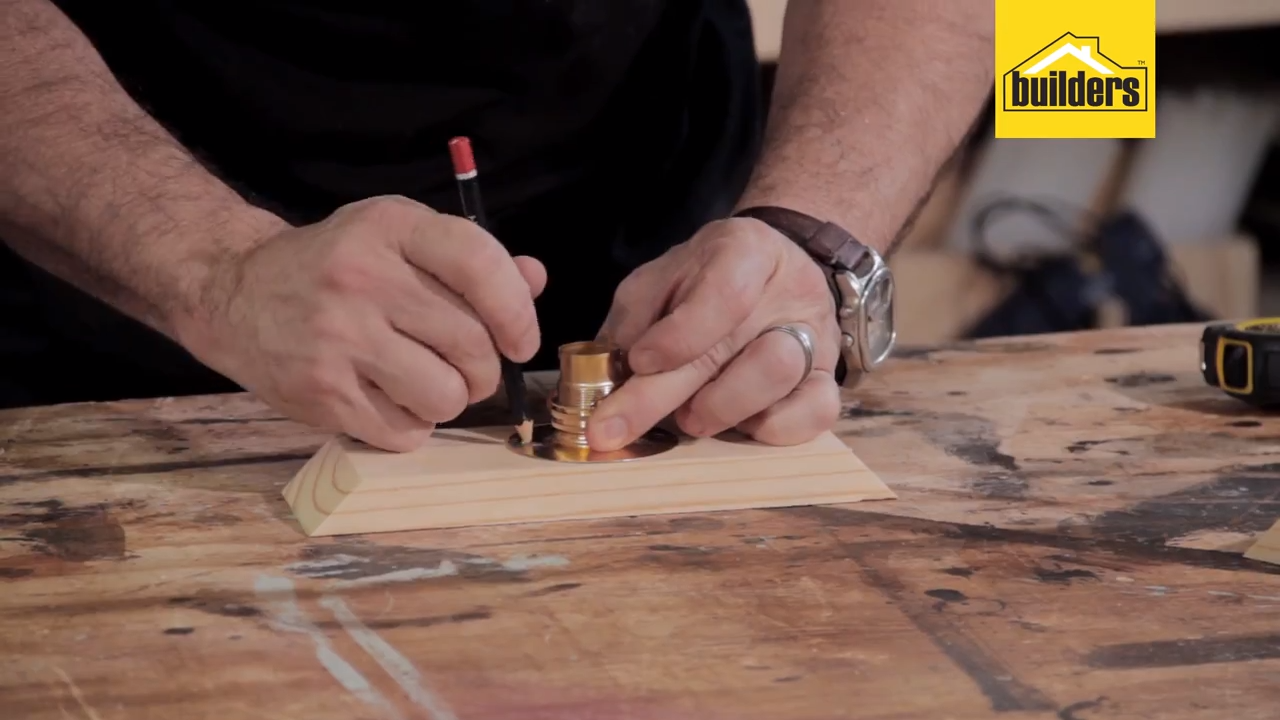
Step 4
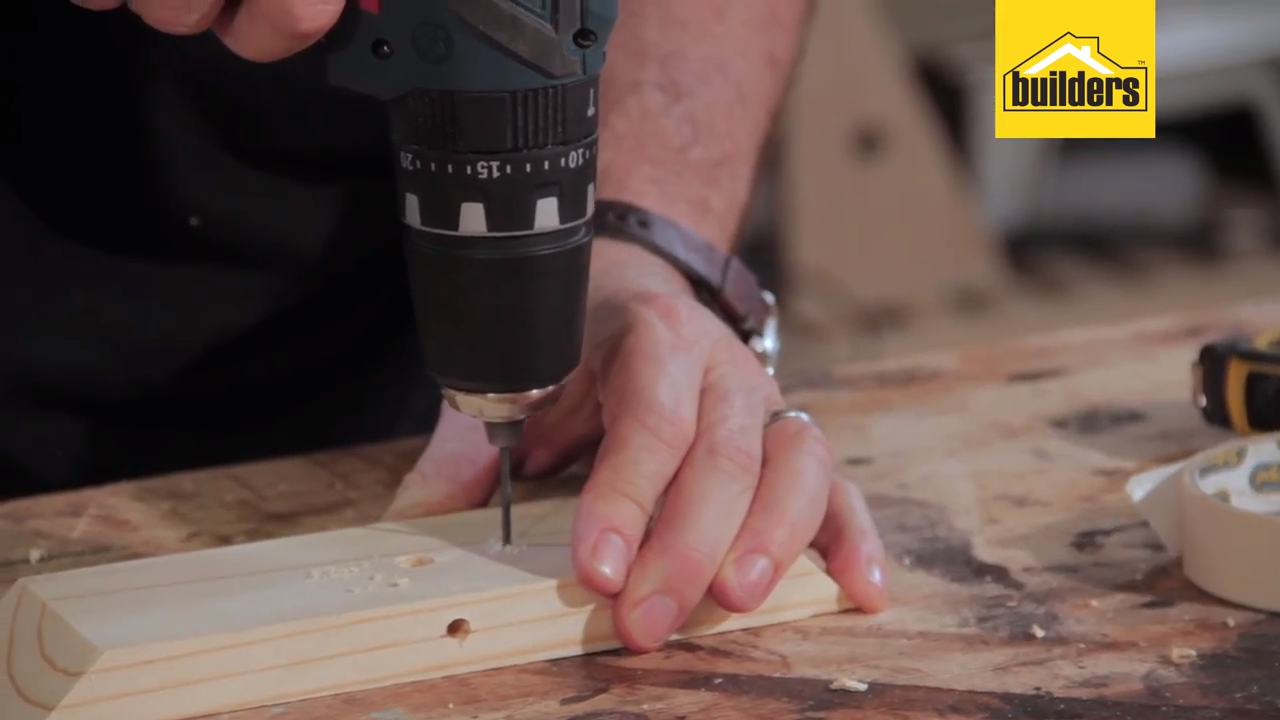
Place the lamp socket in the middle of the plank, above the 10mm hole. Mark where the screw holes in the lamp socket are and drill shallow pilot holes.
Step 5
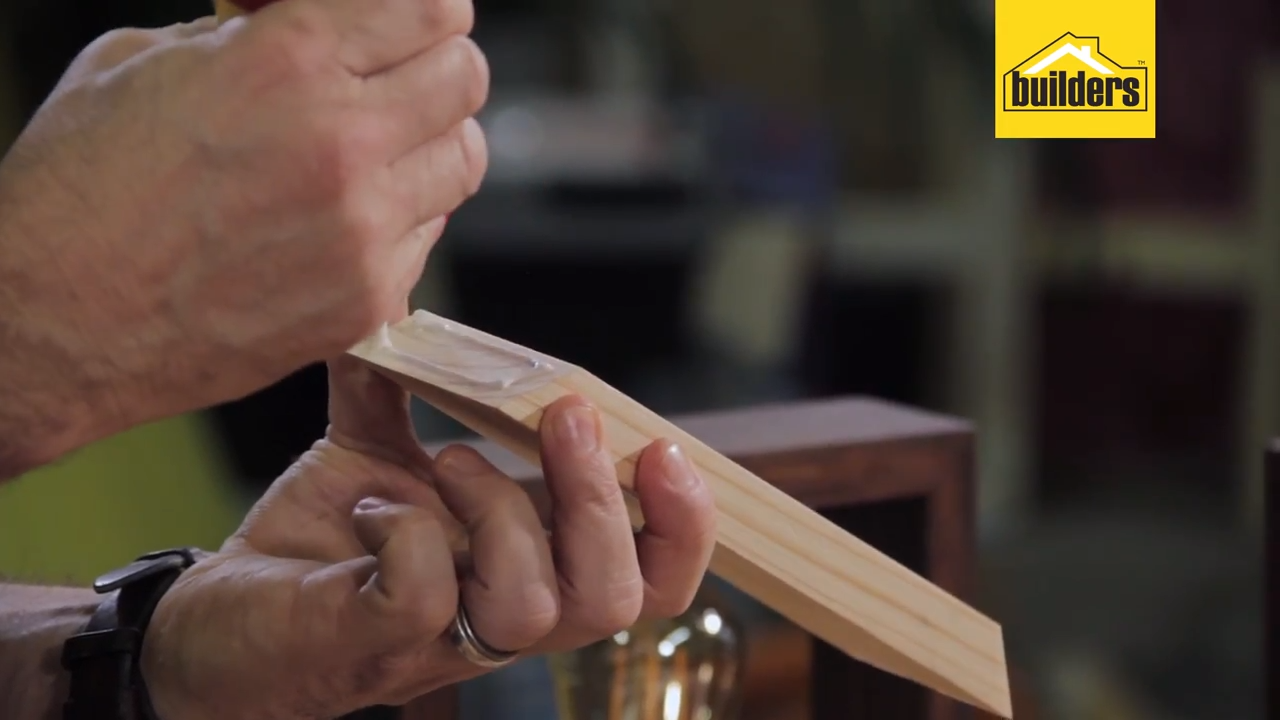
Once the base is complete attach the sides. To do this, place some wood glue on the 45° edges and clamp them together with the corner clamps.

Step 6
Use a speed pilot drill bit (which drills a pilot hole and a countersink simultaneously) and two cut screws to reinforce the joint. Repeat this process for all corners.
Step 7
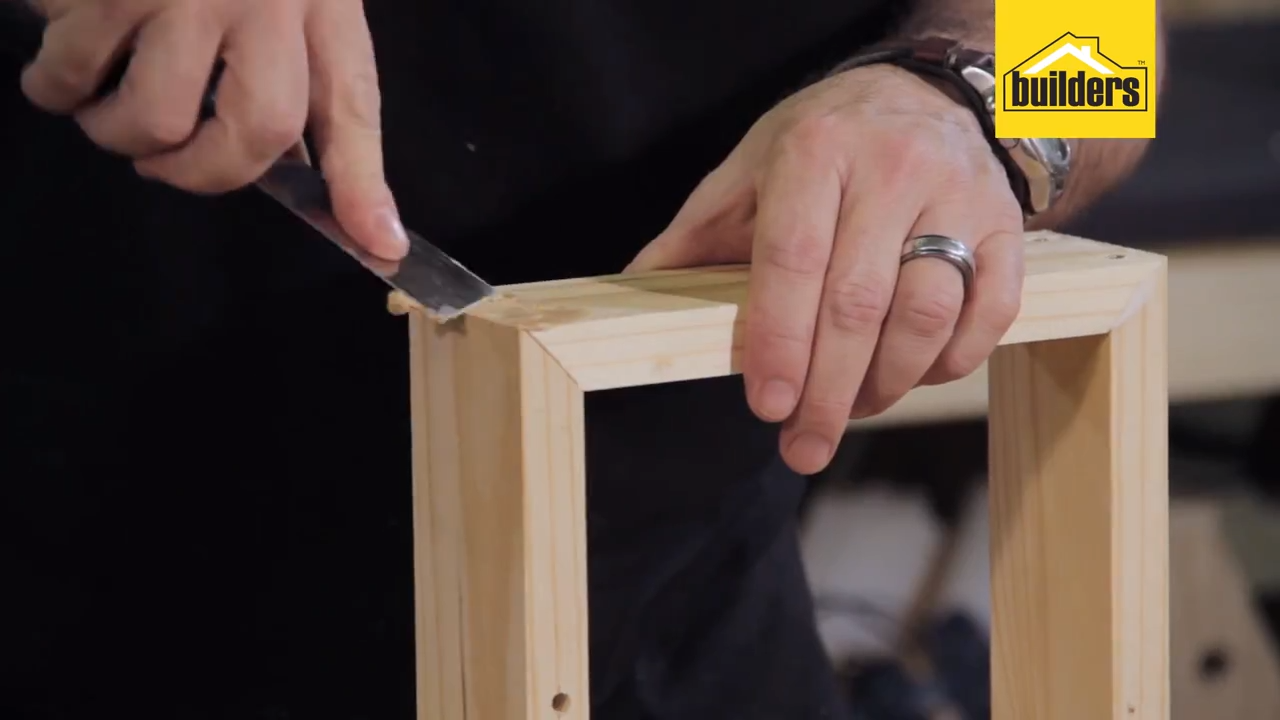
Once the box is complete use wood filler to fill up any holes in the wood.
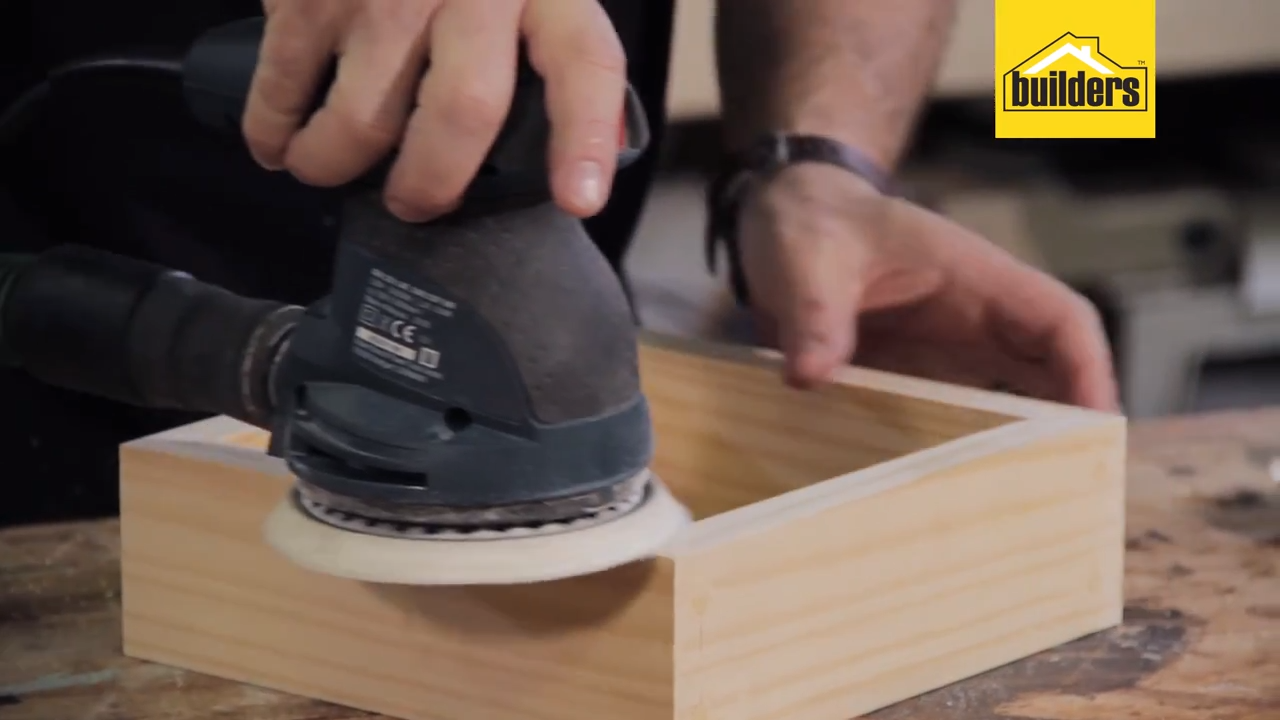
Step 8
When the wood filler has dried sand the timber smooth.
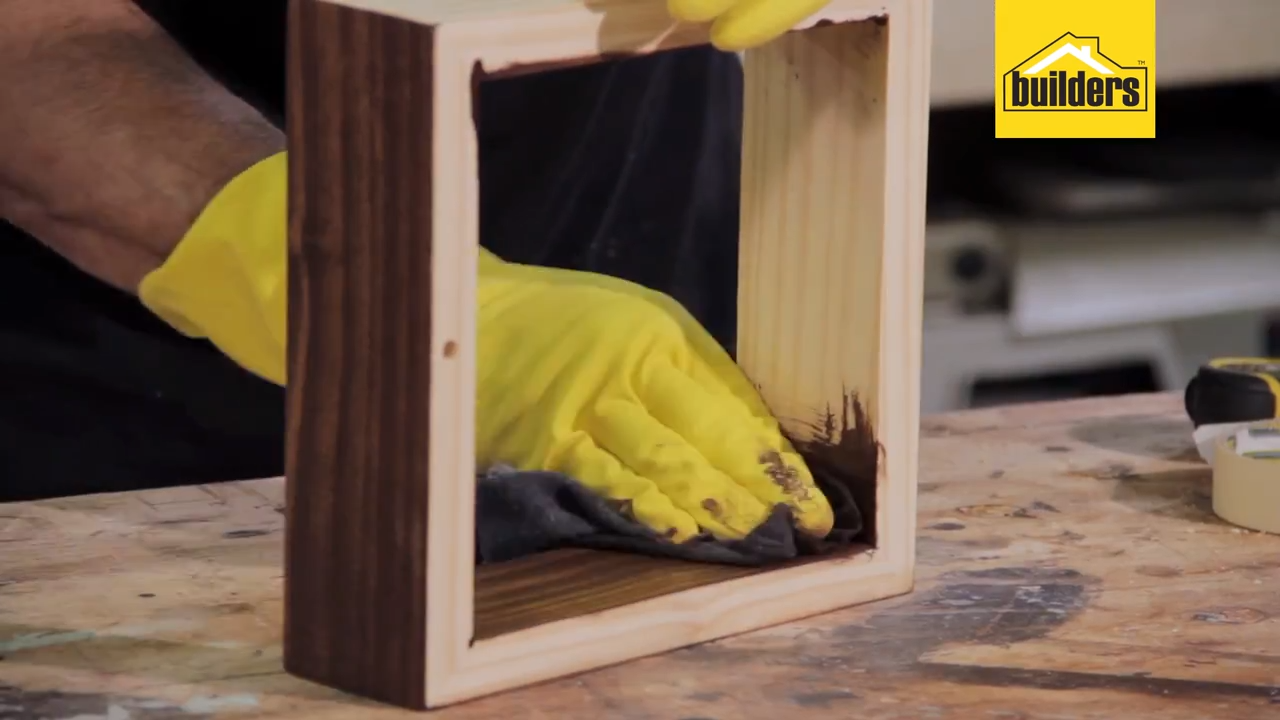
Step 9
Once sanded, stain the wood and seal it to avoid any damage.

Step 10
Once the sealer is dry, feed the flex cable through the holes.
Top Tip: Use a cable tie to prevent the flex from pulling back out of the holes.
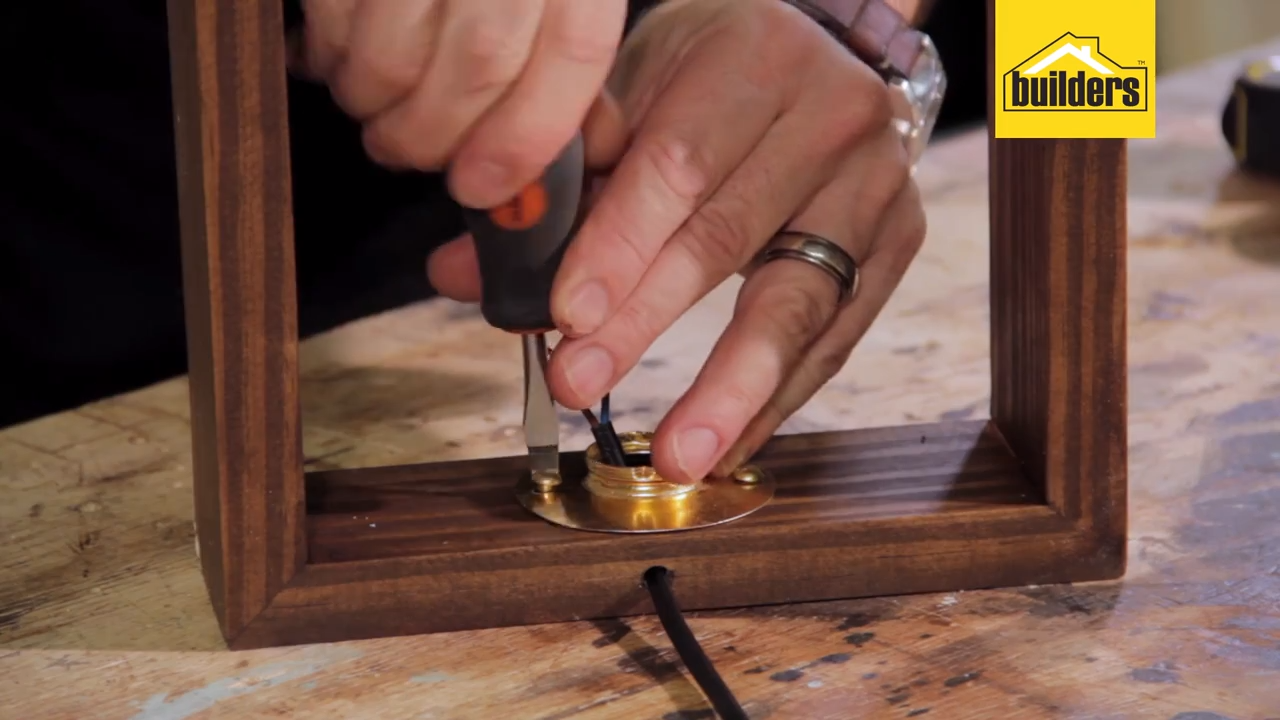
Step 11
Place the lamp socket in position and screw it down using brass screws.
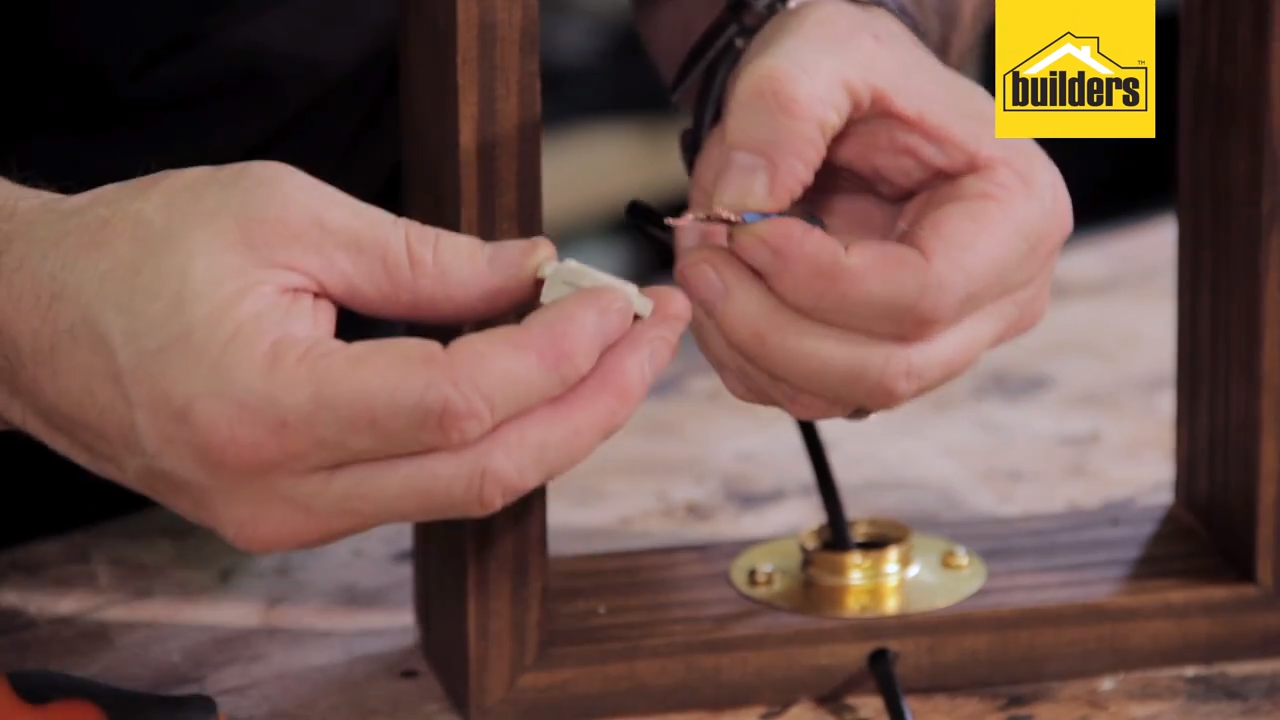
Step 12
Attach the flex to the terminal connectors, and the other end to a plug.
Step 13
Choose an interesting Edison-type light bulb, fit it to the socket and your lamp is ready.
Browse 1000’s of products available to you. Select your country to Shop Online.


