In this DIY we show you how to make your own benches to compliment a dining table.
- Wood glue
- 38mm Kreg screws
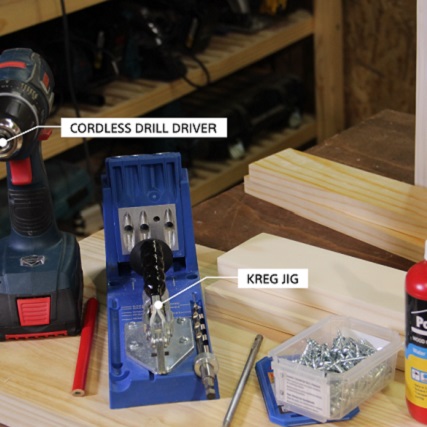
- Kreg jig
- Cordless drill
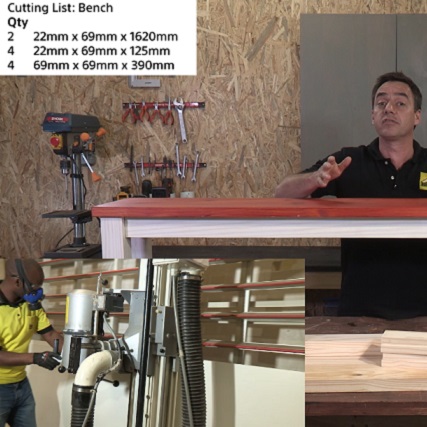
- PAR Pine Timber in the following measurements:
- 1 X 1.8m x 69mm x 69mm
- 2 x 2.4m x 69mm x 22mm
- 1 x 1.8m x 32mm x 305mm (Pine Shelf)
- 2 x 1620mm x 69mm x 22mm – Apron
- 1 x 1.8m x 305mm x 32mm (Pine Shelf) – Bench top
- 4 x 125mm x 69mm 22mm – Cross Braces
- 4 x 390mm x 69mm x 69mm – Legs
*For your convenience get Builders to cut your timber to size.
Step 1
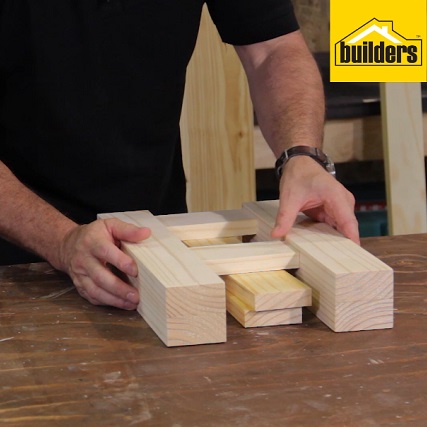
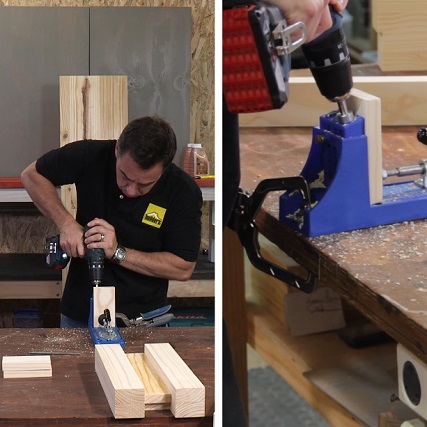
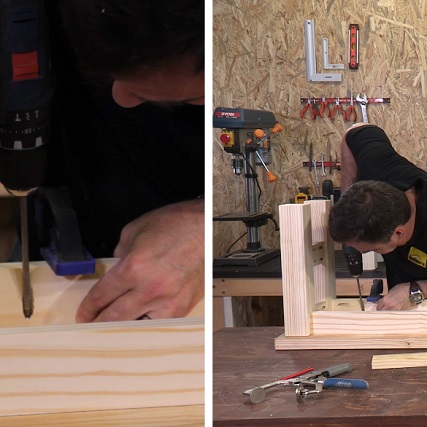
Use two cross braces to join a pair of legs. Lay two legs side by side on a flat surface and position two cross braces between the two legs. Use two 22mm offcuts to elevate the cross braces to ensure a slight recess on either side of the braces. Mark out where to drill your Kreg holes (two on each side of the cross brace). Repeat the process on all the legs and cross braces.
Step 2
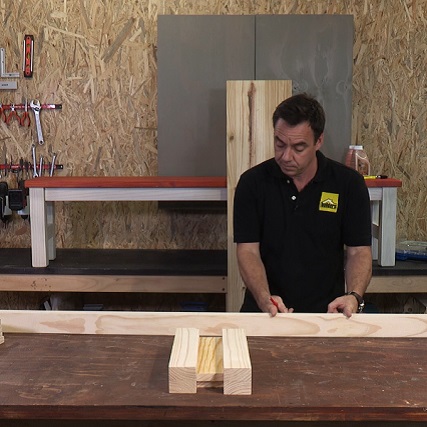
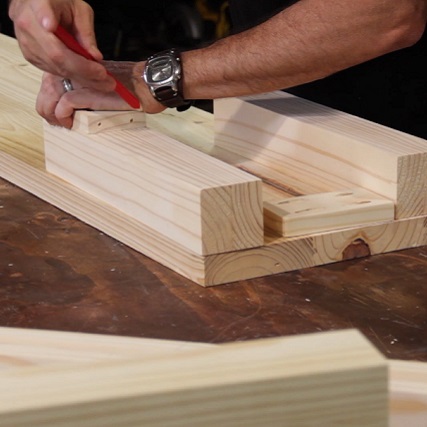
Mark out where to drill the Kreg holes on either end of the aprons where the timber will join to the legs. Once the edges are marked, mark out where to drill Kreg holes along the length of the apron. These holes will join the bench top to the apron.
Step 3
Drill all pocket holes using the Kreg jig as per your markings.
Step 4
Position the legs at an offset of 22mm from the edge of the bench top. Position the cross braces 125mm from the bottom of the legs, remembering to elevate the braces using offcuts of timber to ensure a recess on either side of the legs.
Step 5
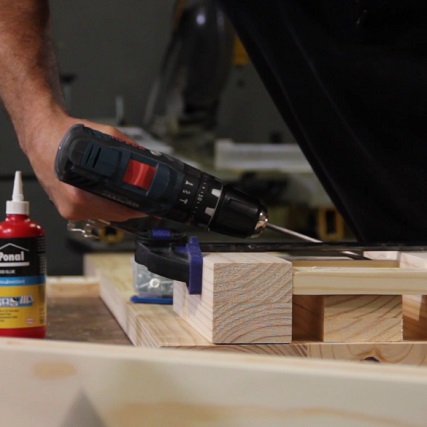
Use wood glue between the mating surfaces, clamp the timber together and screw them together using 38mm screws. Repeat the process for the second leg.
Step 6
Recess the apron timber 22mm from the edge of the legs. Use wood glue between the mating surfaces before clamping the timber into place. Attach the apron to the legs using 38mm screws. Repeat the process for both sides of the apron on both legs.
Step 7
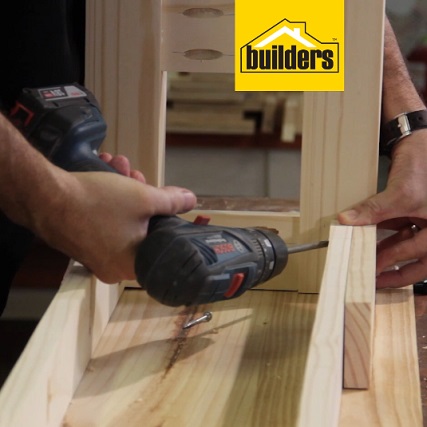
Once the bench legs and frame are in place, place wood glue along the top of the frame and legs. Position the bench top in the middle of the frame, then clamp it into place before screwing it together using the pocket holes along the length of the apron.
Step 8
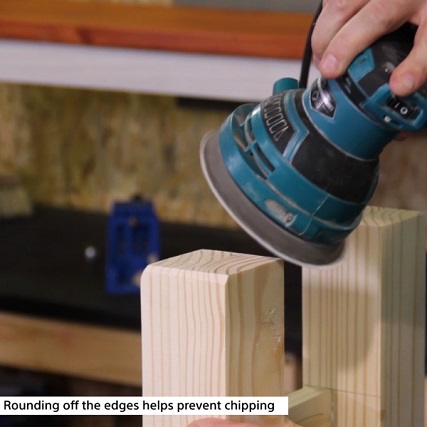
Fill in the screw holes using wood filler or Kreg pocket plugs. Next sand down the bench to smooth out any rough edges. Remember to round off the edges of any corners on the bench.
Step 9
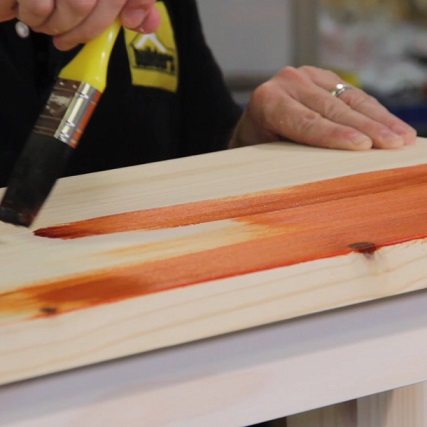
Stain and seal your bench to your desired colour, doing do 2 to 3 coats. Remember to seal the bottom of the bench legs to protect them from wear and tear, and to stain with the grain of the wood.
Browse 1000’s of products available to you. Select your country to Shop Online.


