In this DIY, we show you how to make your own balcony planter using wood, window boxes and materials at home!
- 5mm dowel stick
- 35mm wood screws
- 20mm wood screws
- Wood glue
- Wood filler
- 2 x 60cm window boxes
- Wood sealer/ stain
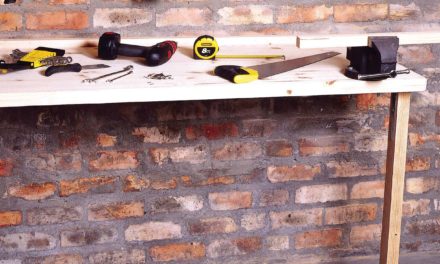
- Cordless drill
- Sandpaper/sander
- Paintbrush
- Speed pilot
- Scraper
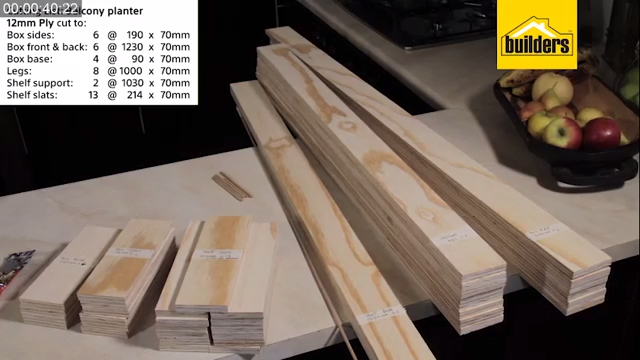
- 12mm plywood cut to:
- 6 @ 1230mm x 70mm (box front and back)
- 4 @ 190mm x 70mm (box base)
- 8 @ 1000mm x 70mm (legs)
- 2 @ 1030mm x 70mm (shelf support)
- 13 @ 214mm x 70mm (shelf slats)
- 6 @ 190mm x 70mm (box sides)
How to make the top box section
Step 1
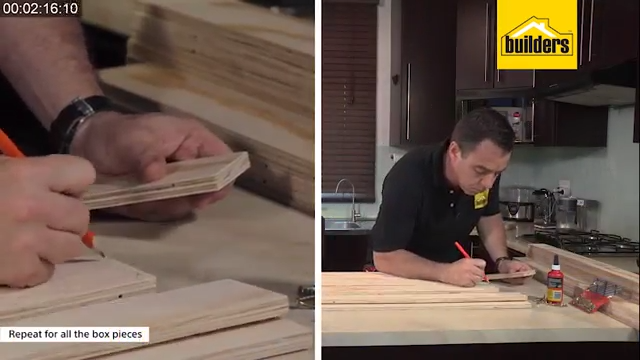
Begin by marking where to drill. Measure and offset 6mm from each end of all the front and back box slats and draw a line.
Step 2
Use the drill and speed pilot to drill two holes along each end in the centre of the marked 6 mm offset.
Step 3
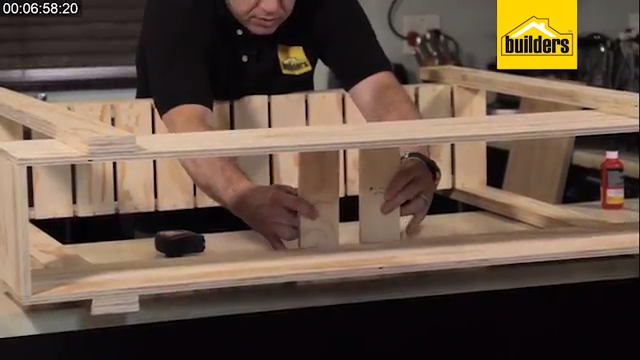
Once the holes are drilled and countersunk, apply wood glue before lining up the edges of the side slats with the front and back slats; and secure them together using 20mm screws. Repeat the process until you have three completed box sections. Use wood filler to cover any visible holes.
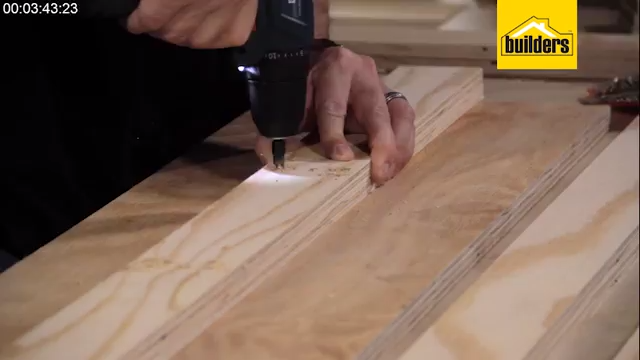
How to make the legs
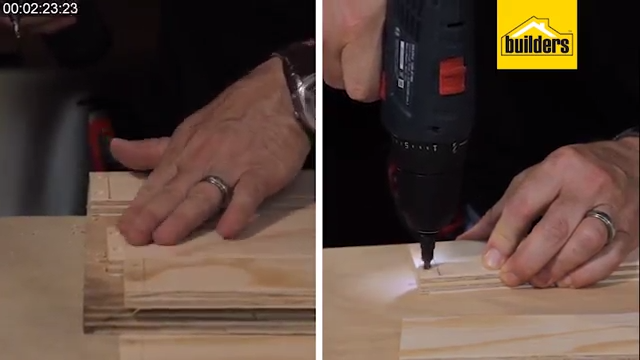
Step 1
Double up the legs by securing two leg pieces together for a solid, stable base. Use wood glue between the mating surfaces and then screw the pieces together using 20mm wood screws.
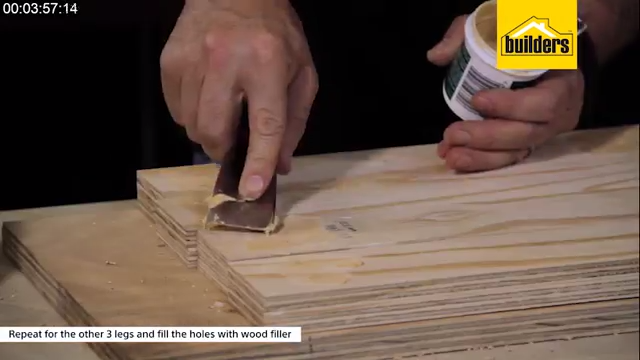
Step 2
Repeat the process for all four legs and use wood filler to cover any visible holes.
how to make the bottom shelf section
Step 1
Begin by marking where to drill. Measure an offset of 6mm from each end of all the shelf slats and draw a line. Use the drill and speed pilot to drill two holes along each edge in the centre of the marked 6 mm offset on two of the shelf slats. For the remaining eleven shelf slats, drill one hole along each edge in the centre of the marked 6 mm offset.Secure the two shelf slats drilled with four holes on either edge of the shelf support with 20mm wood screws. Don’t forget to apply wood glue between the mating surfaces.
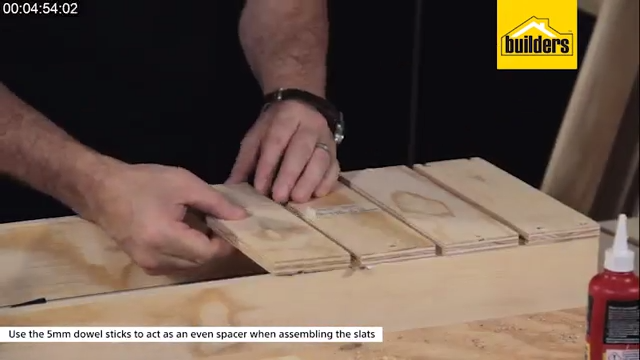
Step 2
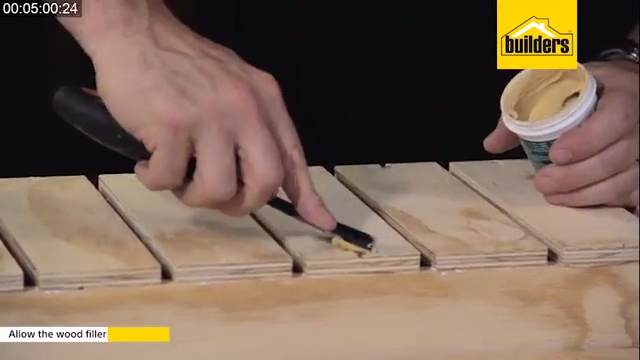
Then use two 5mm dowel sticks as a 10mm spacer between the eleven remaining shelf slats. Use wood glue between the mating surfaces and screw all the shelf slats into place along the shelf supports. Use wood filler to cover any visible holes and sand the timber for a smooth finish.
Assembling the structure
Step 1
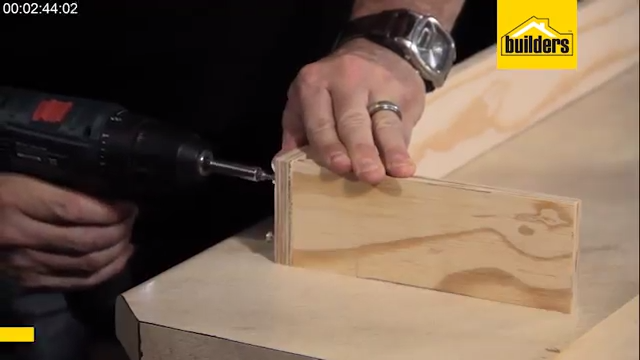
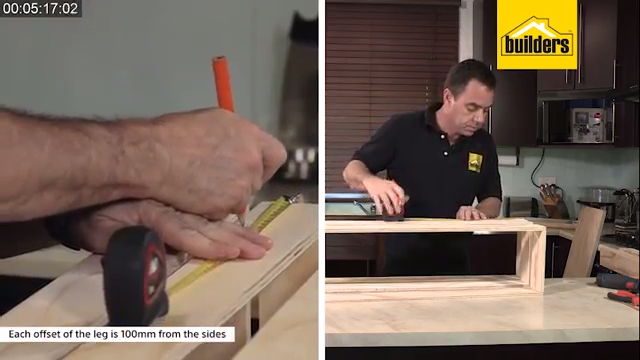
Measure an offset of 100mm from both ends of the three boxes.
Step 2
Use the 5mm dowel stick to evenly stack all three boxes. Align a leg to the marked 100mm offset line. Use a speed pilot to drill and countersink the leg, allowing one hole for each box section.
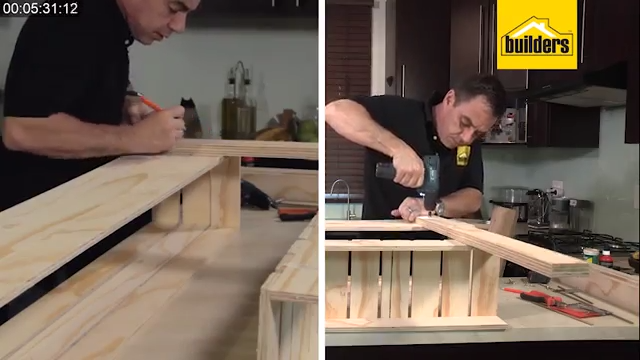
Step 3
Secure the legs to the box section using wood glue between the mating surfaces and the 35mm screws. Repeat this process for each leg.

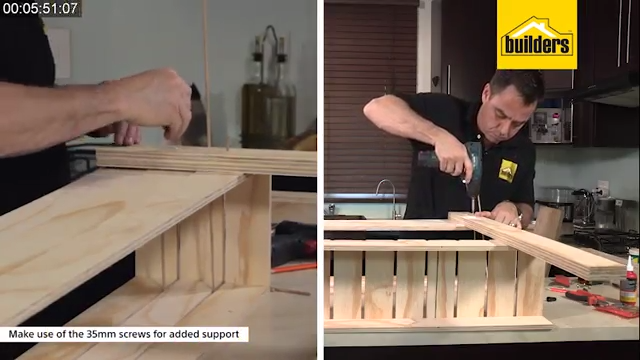
Step 4
To mount the shelf section, mark a 100mm offset from the bottom of each leg. Align the shelf section to the 100mm offset.
Step 5
Use a speed pilot to drill the holes and countersink two holes per leg before securing the shelf to the legs using wood glue between the mating surfaces and the 35mm screws.
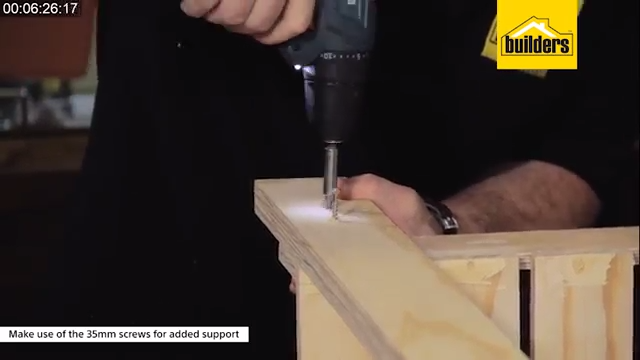
Step 6
Once basic structure is complete, attach the last four pieces to the underside of the box section to brace and hold the window planter pots in place. Use the same method of countersinking the holes with a speed pilot before attaching the braces using wood glue and screwing the brace into place. Secure two braces in the centre of the box section and one on either end of the box section.
Step 7
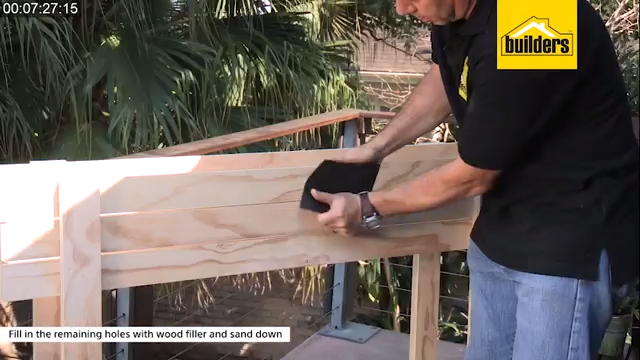
When all braces are in place, use wood filler to cover any visible holes and sand for a smooth finish.
Step 8
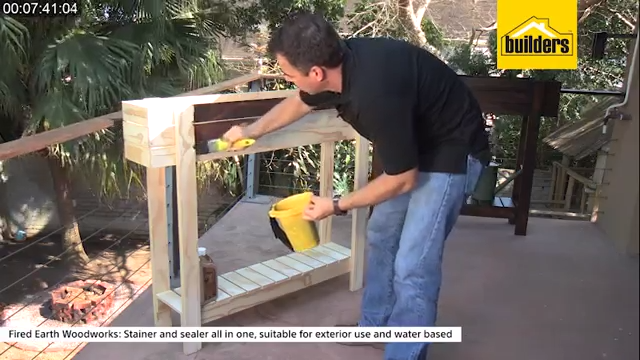
Once the timber is sanded, stain your planter to your desired colour and seal the timber with two coats of wood sealer to protect it from damage. Your balcony planter is ready to use!
Browse 1000’s of products available to you. Select your country to Shop Online.


