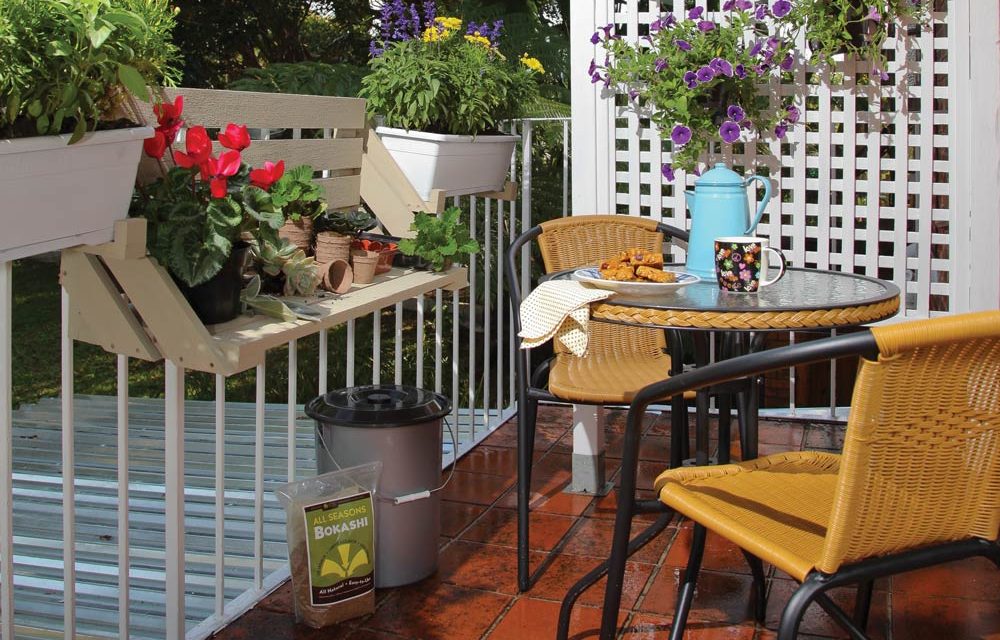
Gardening and revamping a balcony to make it an attractive feature of your home can be a challenge, but we have the solutions in this easy-to-do, small area makeover. Cleaning and painting alone can do wonders for an area like this. But why not go further? here are some neat tricks and mini projects to inspire you into action!
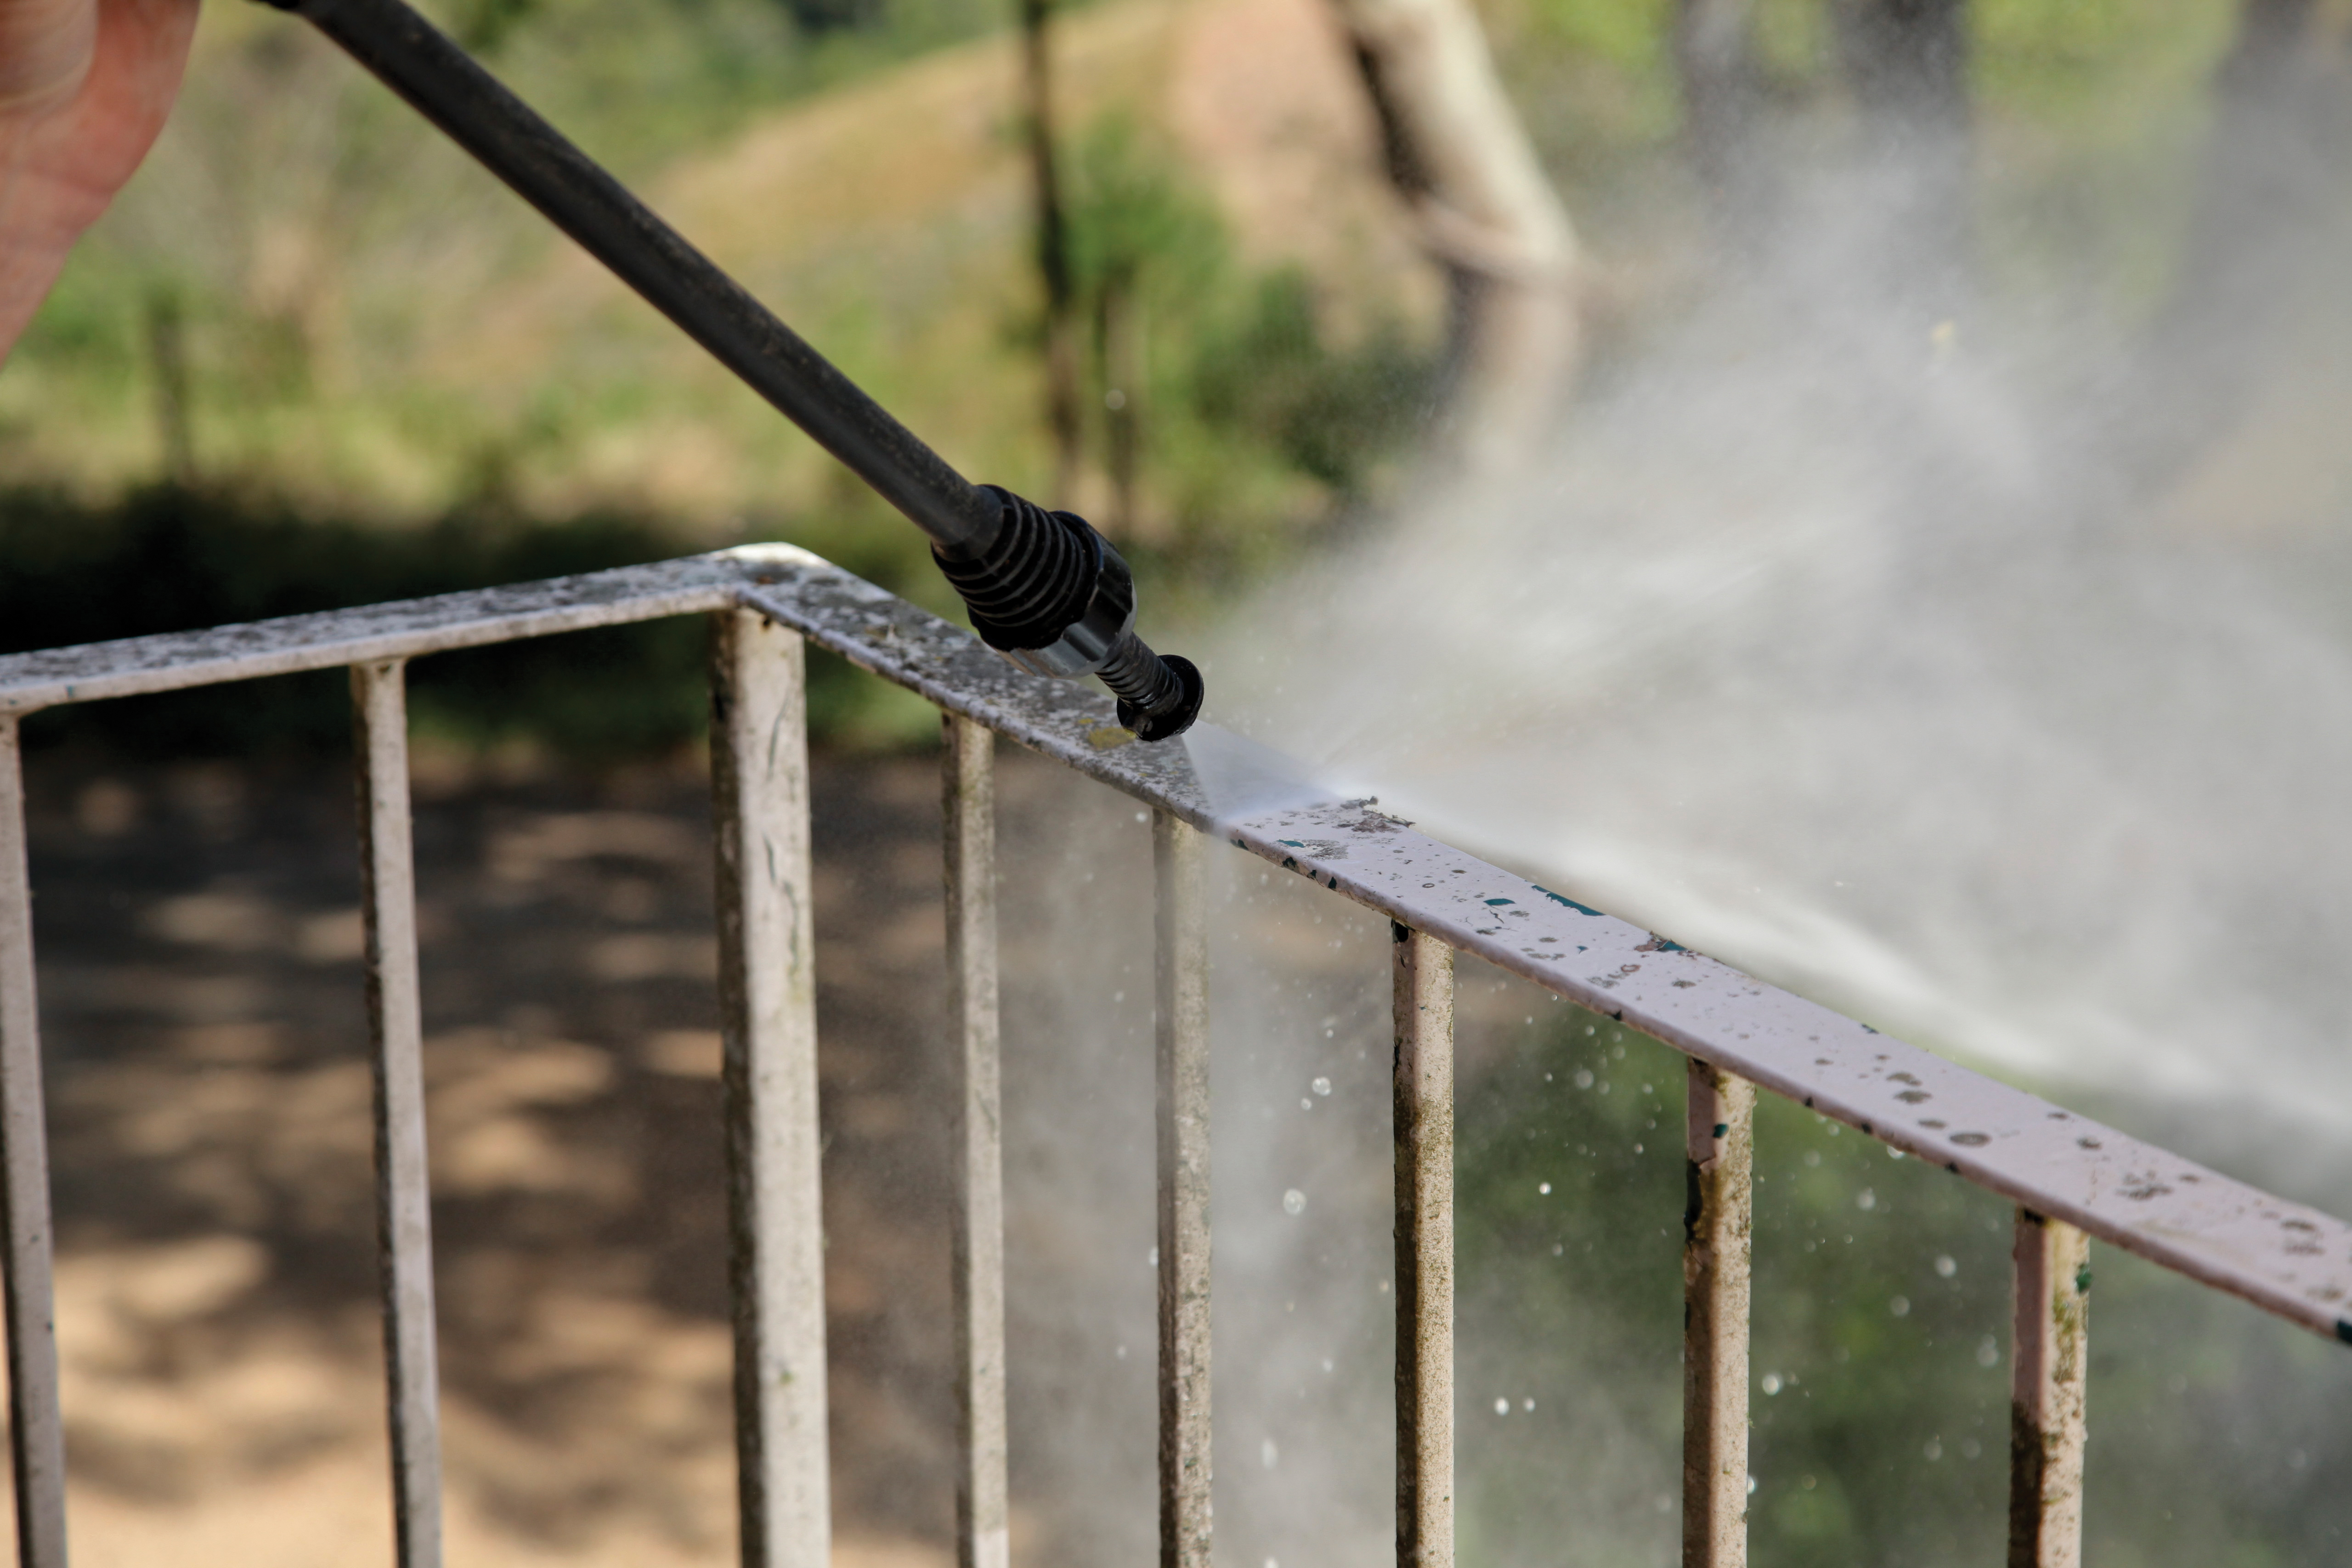
Restoring the railing
Materials you will need:
- Bosch High pressure Washer or Karcher pressure Washer
- Scraper
- 80 Grit sandpaper
- 1 litre Hammerite Direct to Rust-smooth (white)
- 20mm paintbrush
- 1 litre thinners

Step 1
Prepare the surface of the railings by first pressure cleaning and letting it dry, and then scraping any loose paint off and finally giving it a light sanding.
Step 2
Apply the Hammerite Direct to Rust-Smooth. It is specially formulated to be applied directly to metal without a primer, and forms a tough barrier that resists knocks and scrapes to keep it looking its best for longer. Allow to dry and apply another coat.
Step 3
Clean paintbrushes with thinners.
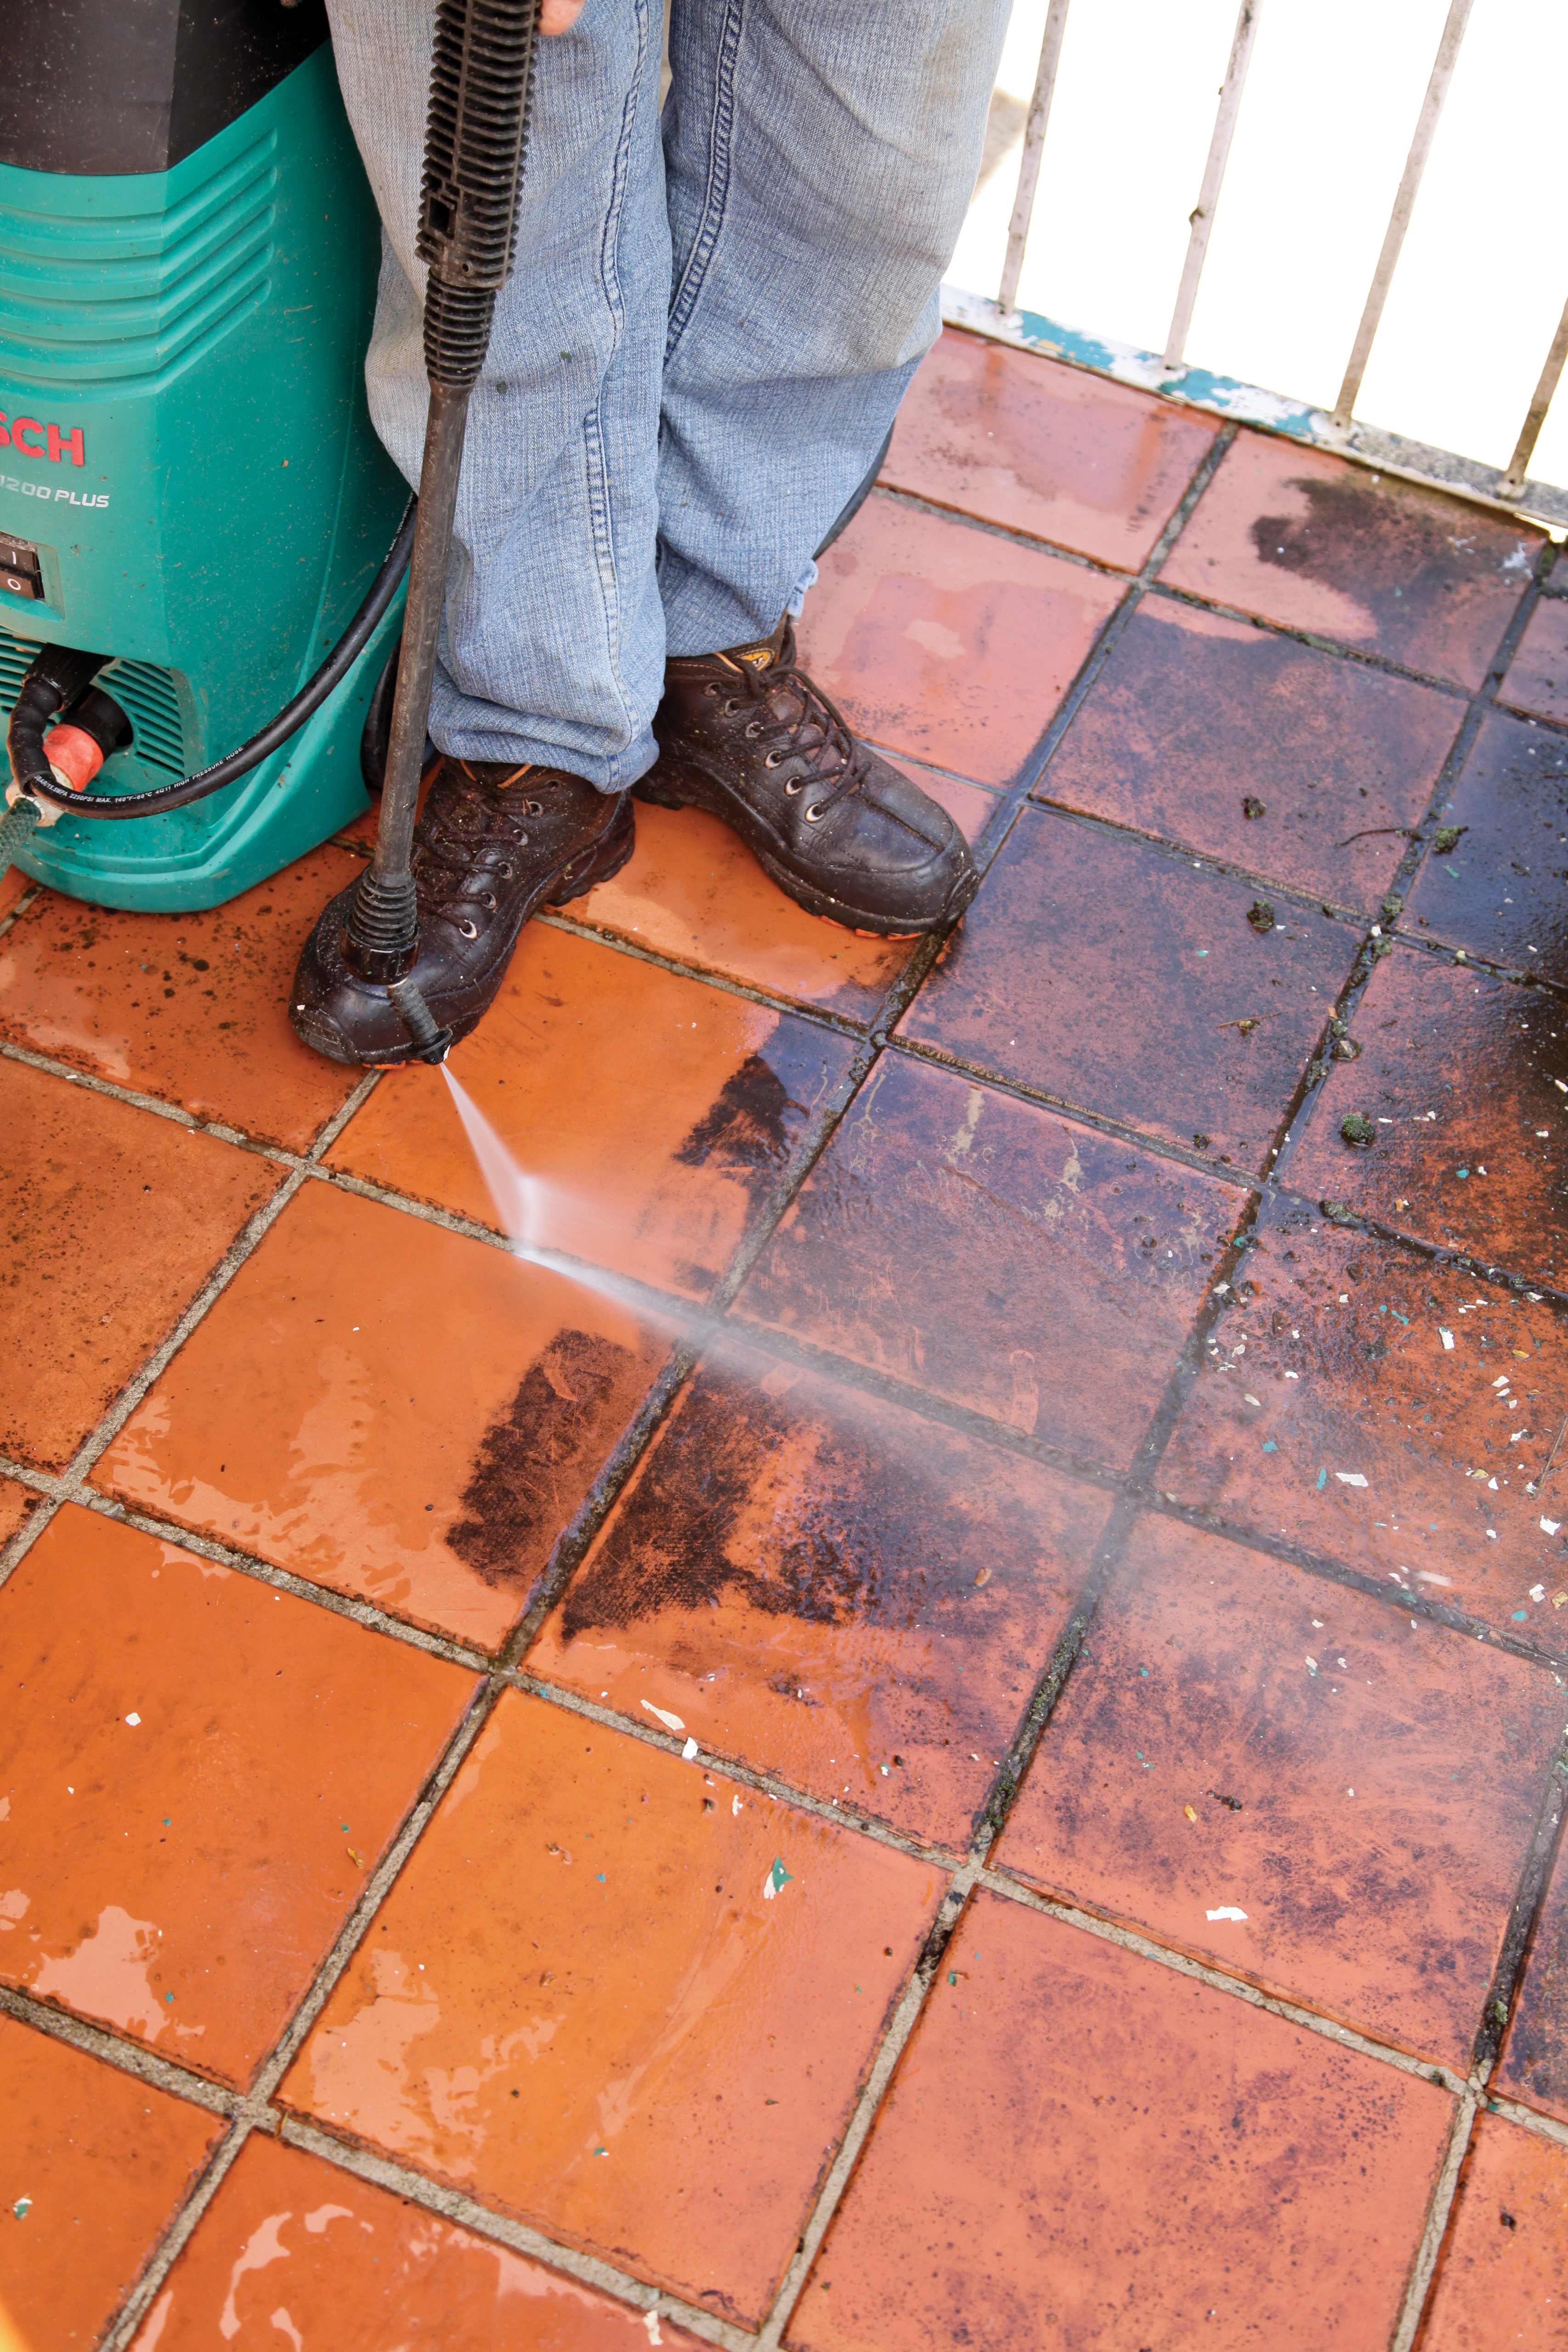
Cleaning the floor
We used the Bosch Aquatak 1200 PLUS high-pressure washer to clean away years of dirt build-up on the tiles. Bosch has a range of washers that can tackle any job from small to big. They are handy machines to have for cleaning pavers, tiles, bricks and railings, as shown here.
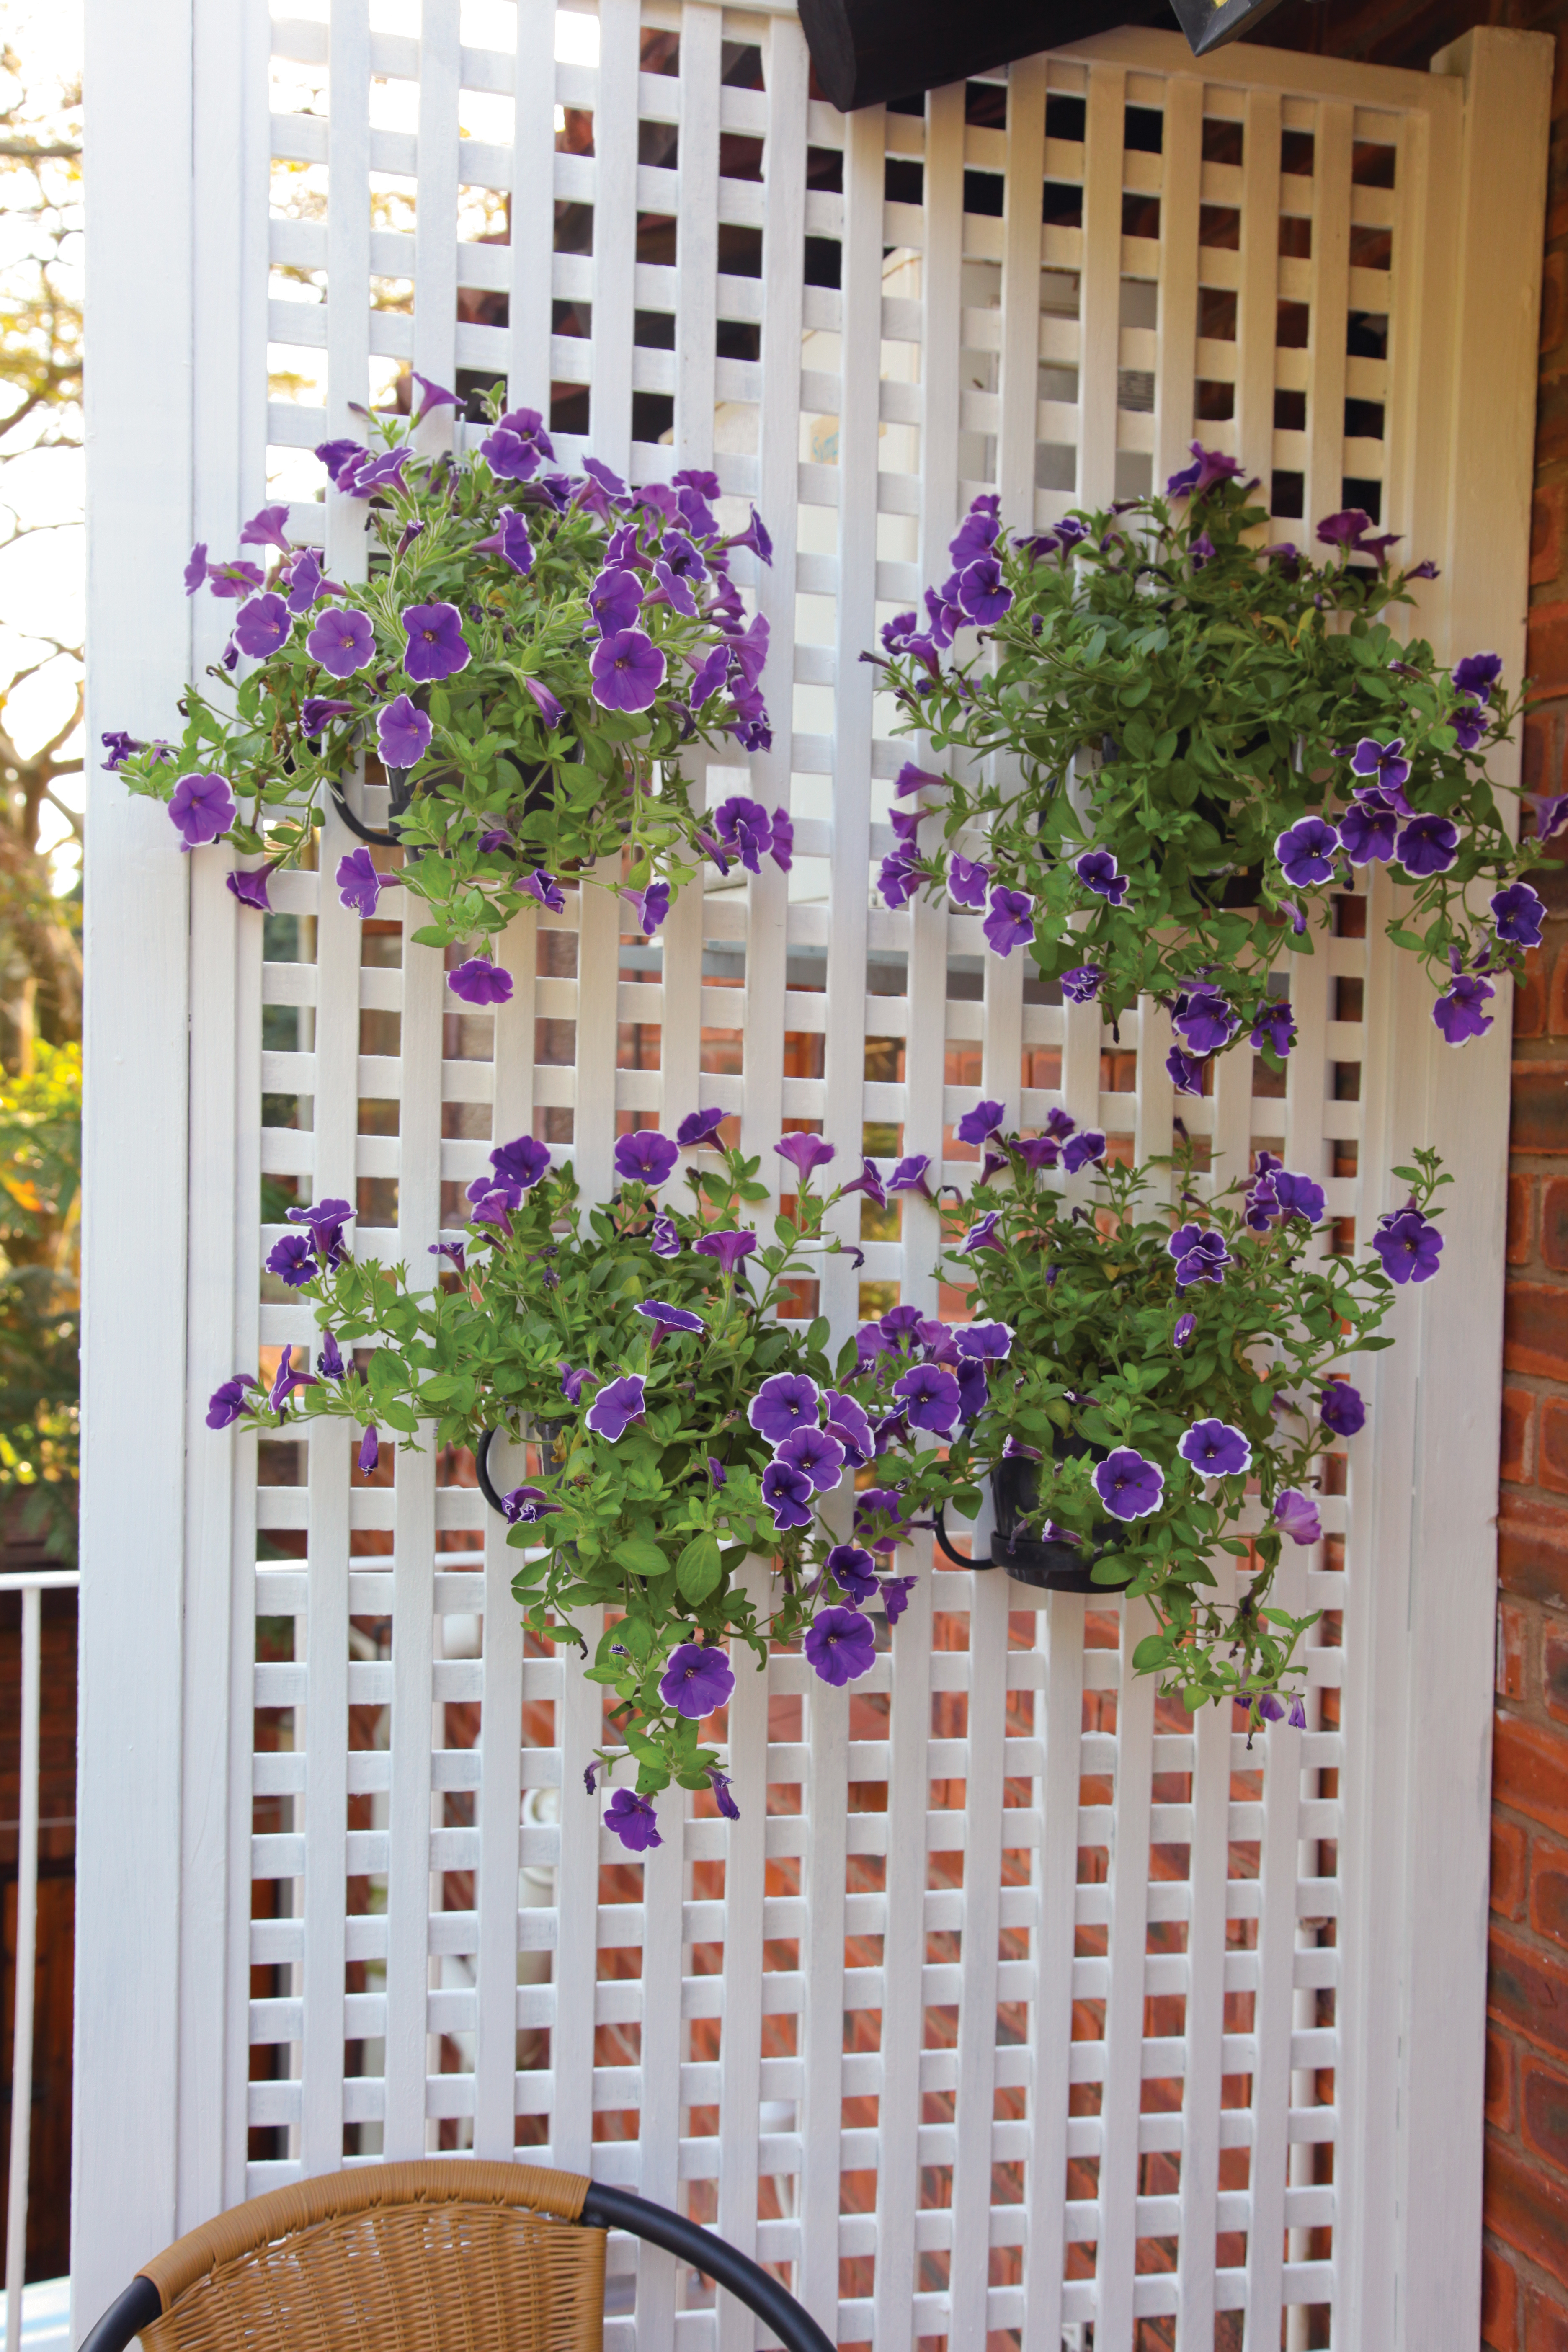
Installing Trellis
Materials you will need:
- 1 panel of white trellis (900 x 1800 mm)
- 2 white posts
- 1 base plate
- 4 Hilti screws (8 x 135 mm)
- 1 rawl bolt (10 x 70 mm)
Step 1
Mount the post onto the wall by drilling through the groove in the post, and then into the wall at four evenly-spaced intervals, and secure using the four long Hilti screws.
Step 2
Slide the trellis panel into the post and place the other post with the base plate into position, and mark the position of the base plate on the floor. Set aside the panel and the post so you can drill into the floor using the hole in the base plate as a guide, and secure with the awl bolt. Reposition the trellis and the post into the base plate.
Step 3
Decorate with pots of plants, hooked onto the trellis with metal heart pot holders.
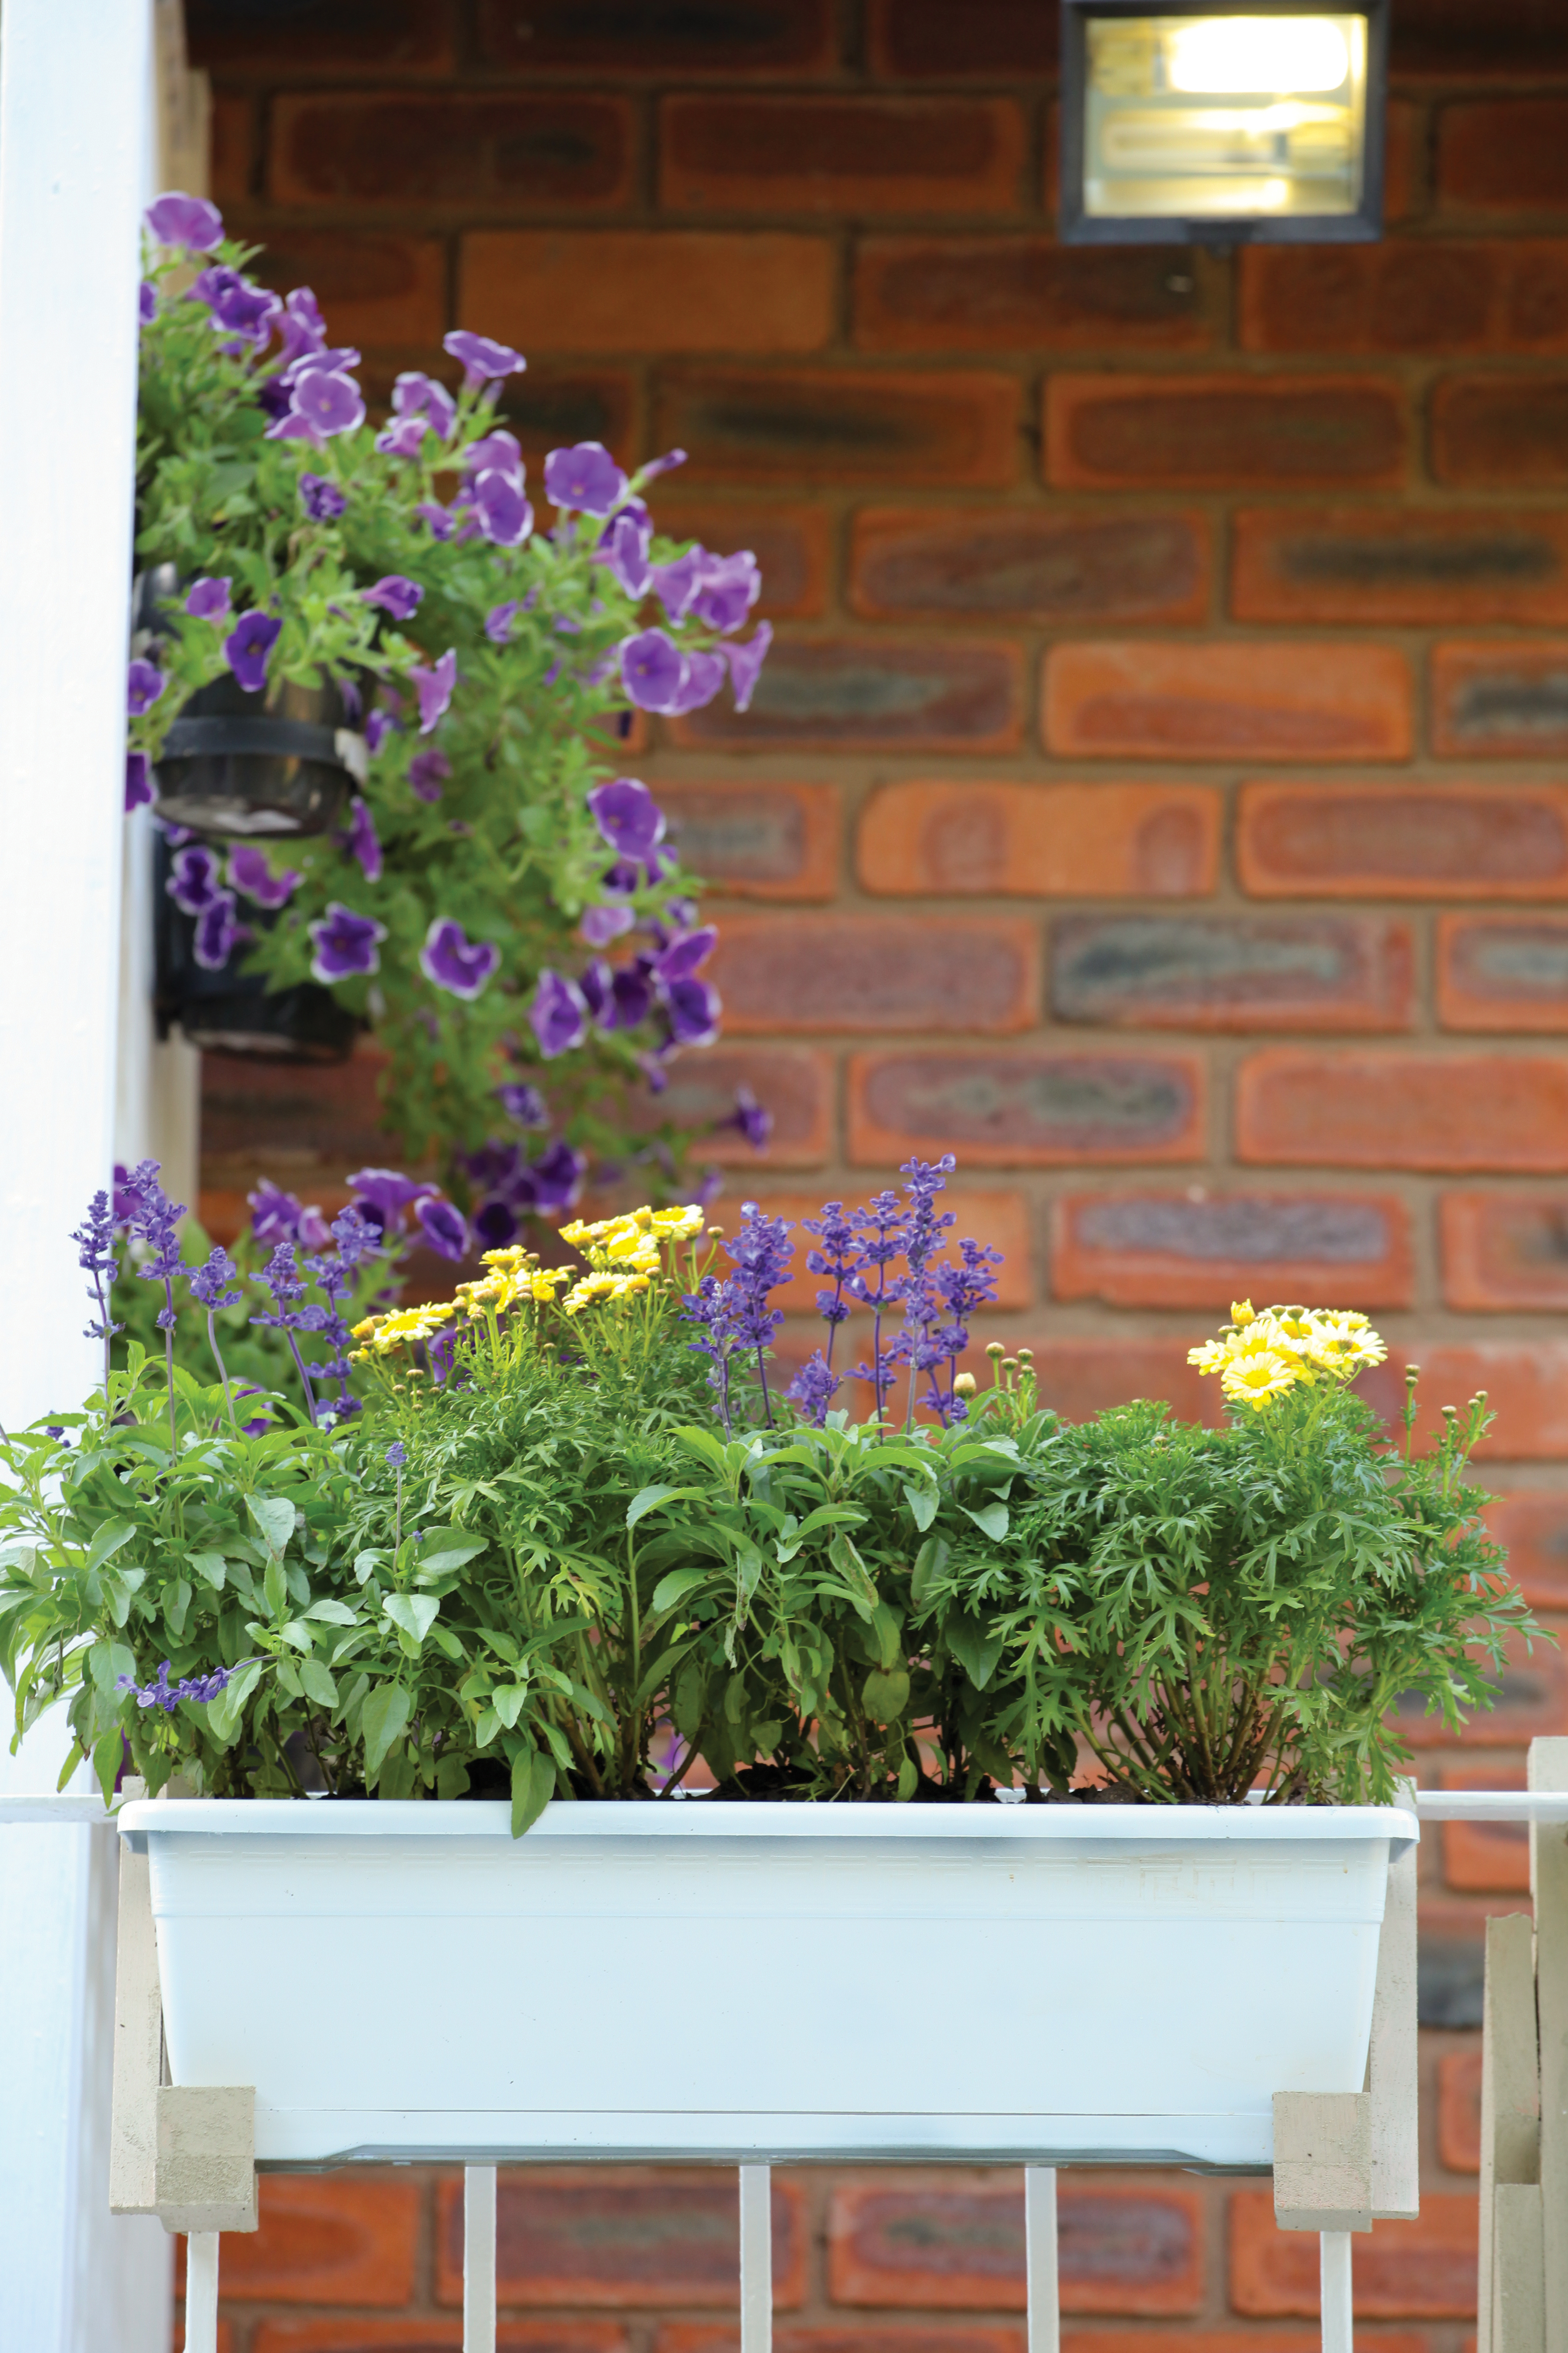
Window Boxes
Materials you will need:
- 12 meranti slats (250 x 44 x 22 mm)
- 4 meranti stopper blocks ( 44 x 44 x 22 mm)
- 28 full-thread cut screws (4 x 30 mm)
- 8 full-thread cut screws (4 x 15 mm)
- 4 metal hooks
- wood glue
- 2 flower troughs (white or spray-painted with Rustoleum Plastic Spray in white)
- 2 bags potting medium
- selection of plants
Step 1
Use eight slats to make four 90° brackets and secure with wood glue and 30 mm screws. Take the four extra slats and cut them at both ends at 45° angles inwards. Secure to the 90° angle brackets to brace, as shown. Secure the stopper blocks in the front of the brackets to prevent the flower troughs from slipping.
Step 2
Screw the metal hooks to the brackets using the 15 mm screws. Position the hooks on the railing, and place the window boxes after potting them up.
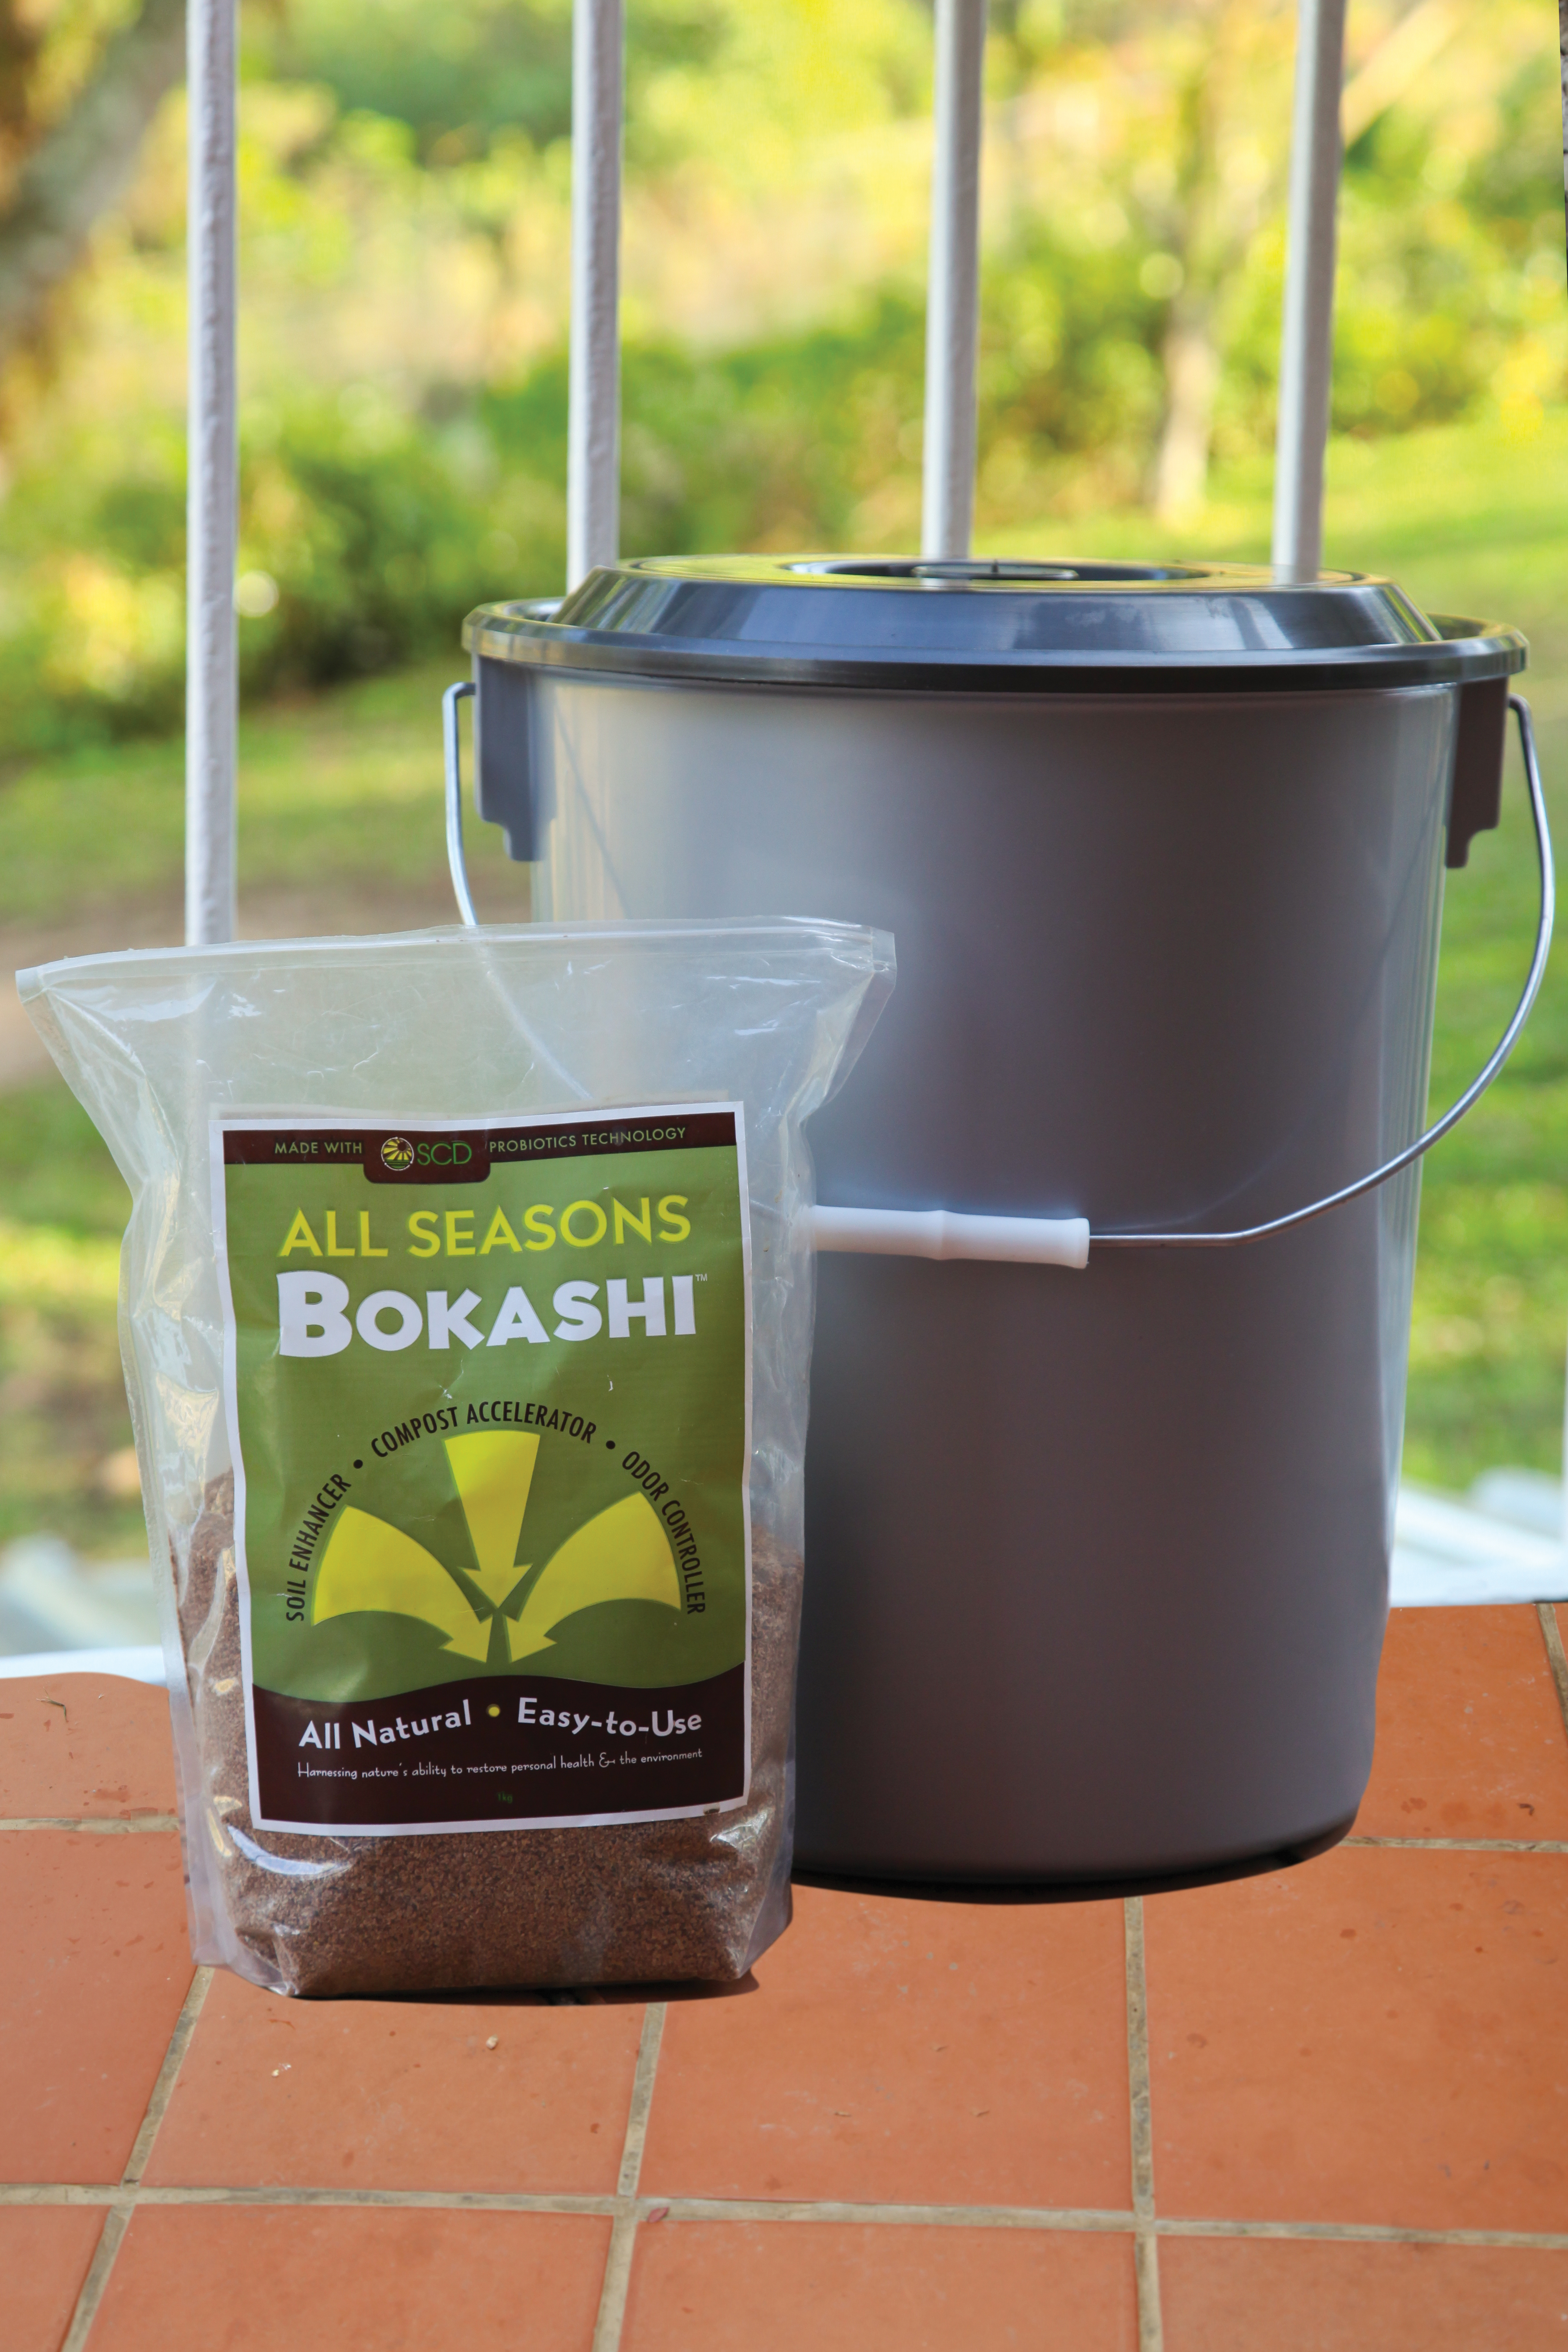
Recycling
Small spaces require big solutions to recycling. With just a bucket and All Seasons Bokashi bran, you can recycle most kitchen waste easily with no odours, and get the benefit of nutrient-rich compost to feed your plants.

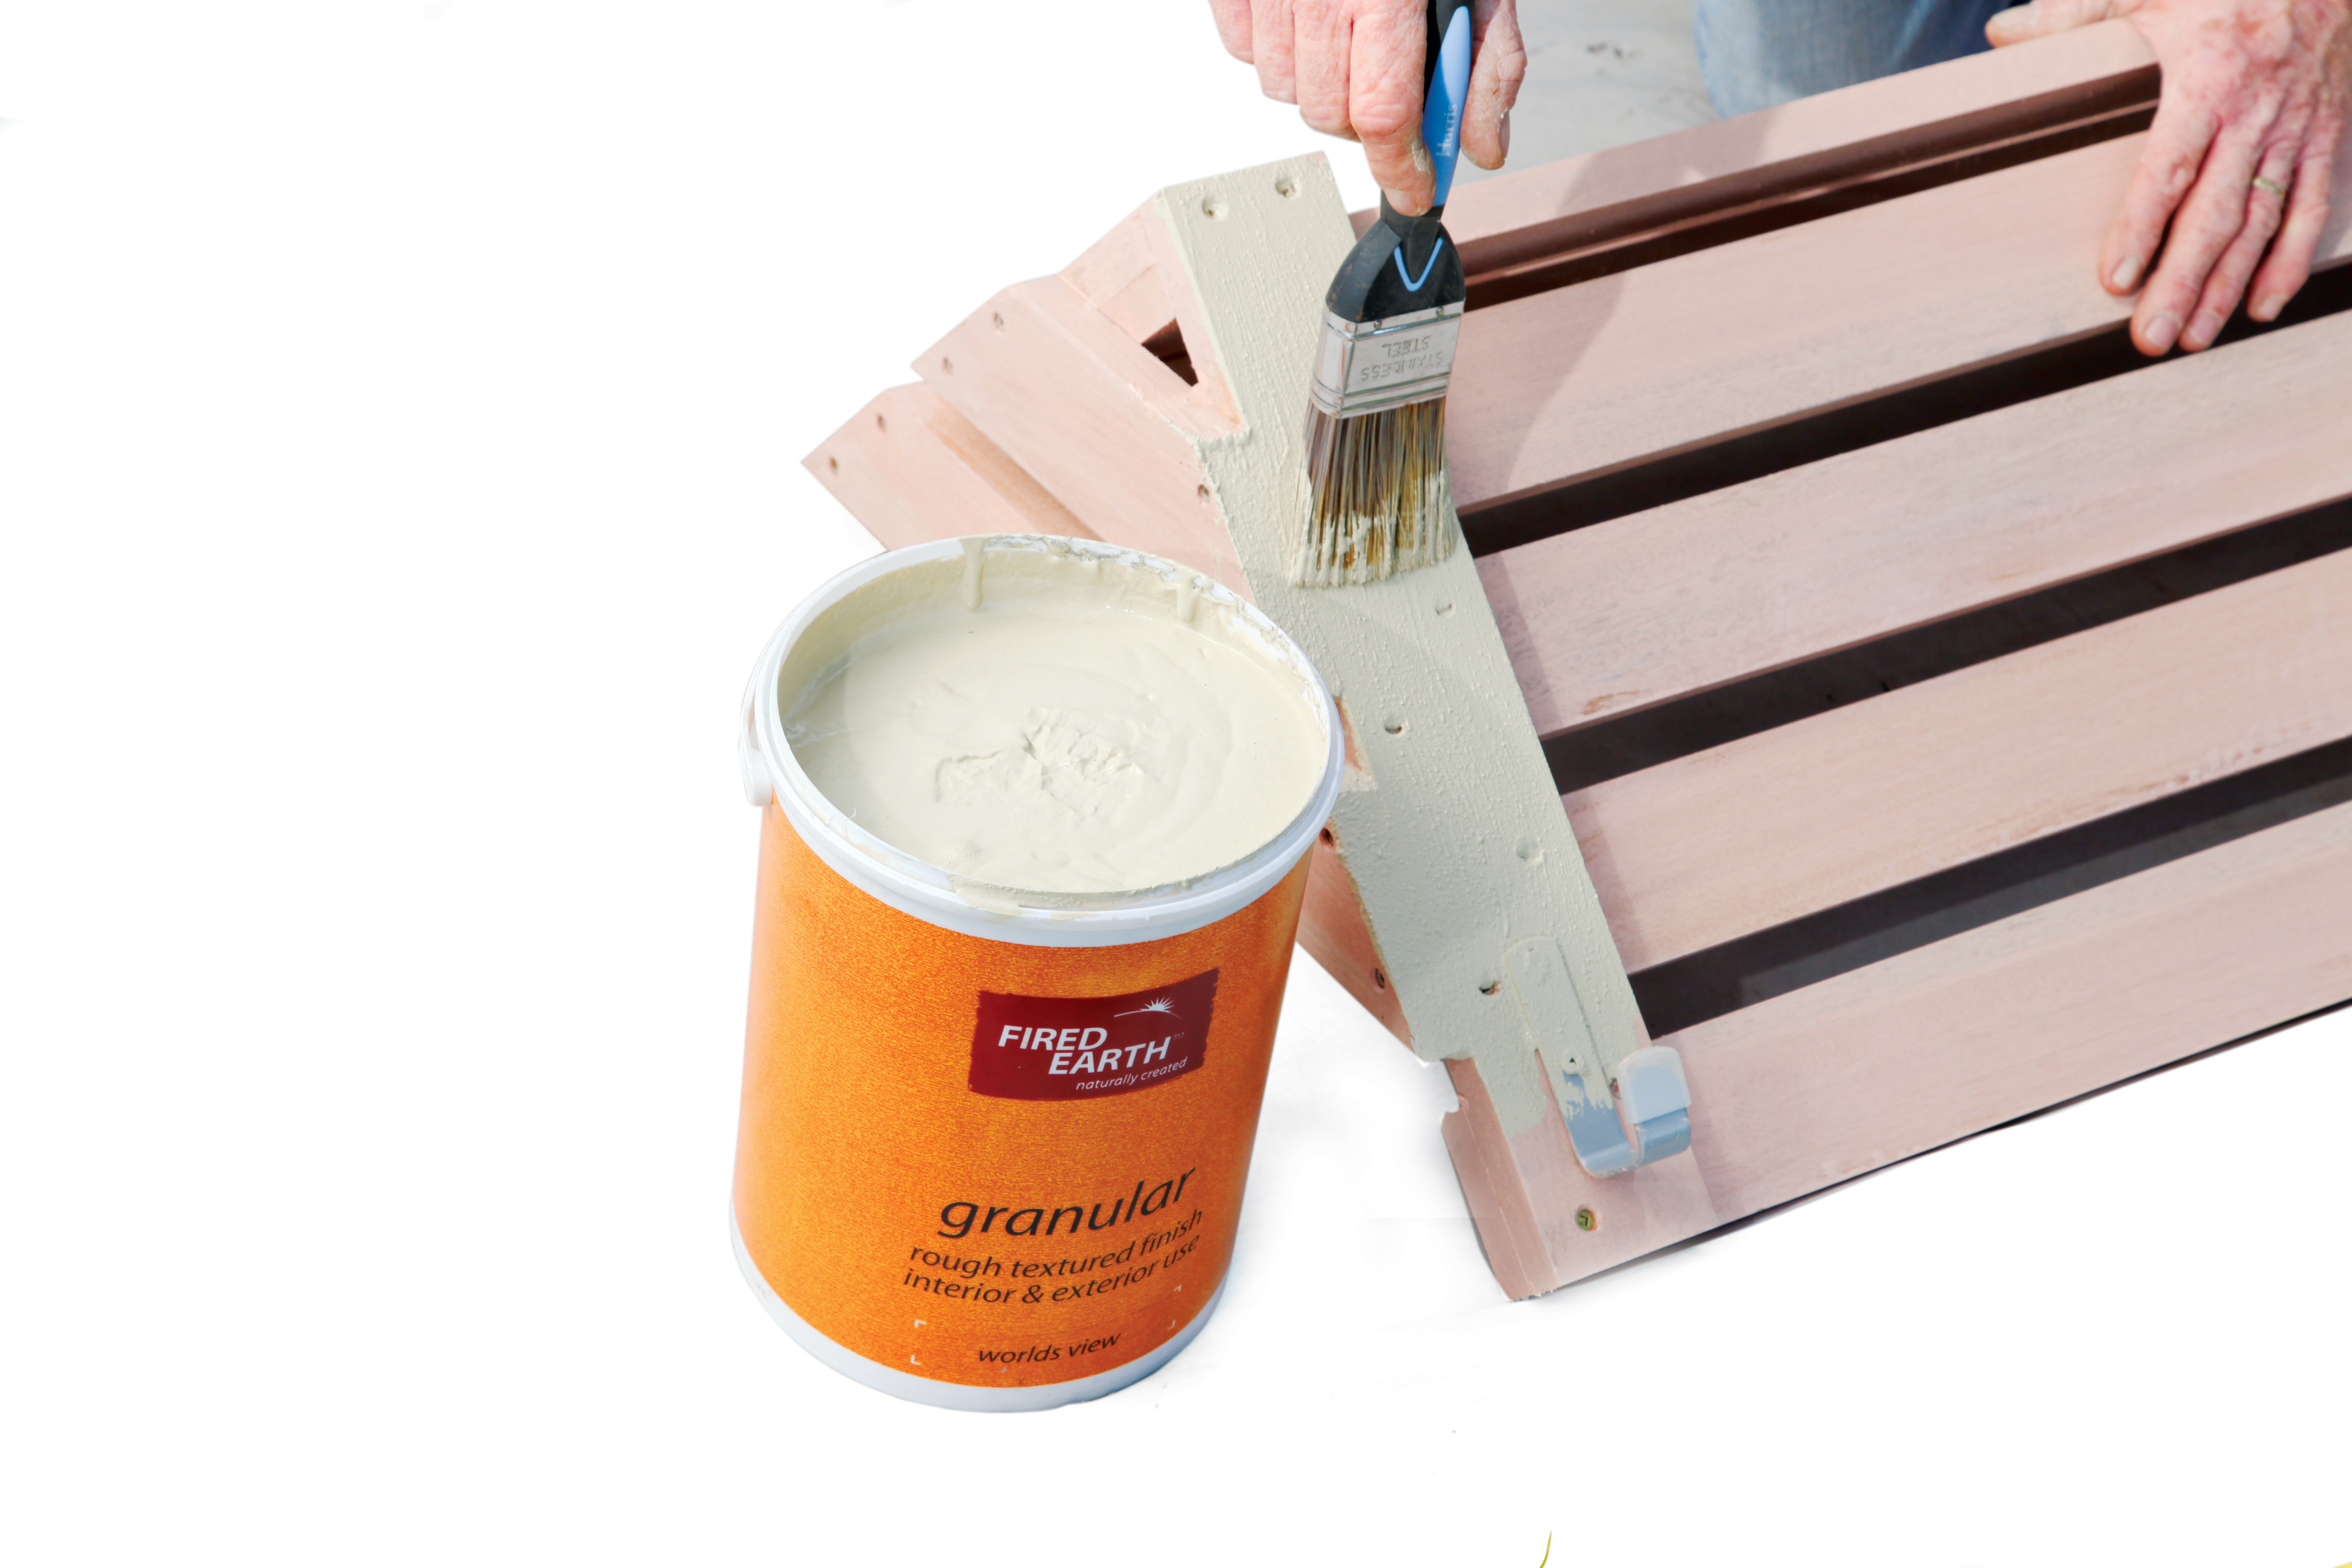
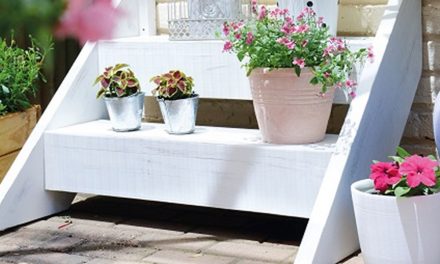
Potting Shelf
With space in short supply, try this potting bench that hooks onto the railing. It can also be used to display potted plants, to serve tea on, or it can be used as a workstation, as it has space for a laptop. The Fired Earth Granular paint gives the shelf a great texture.
- 8 meranti slats, for the base and upright (880 x 68 x 22 mm)
- 2 meranti slats , for cleats for the base (300 x 68 x 22 mm)
- 2 meranti slats, for cleats for the upright (400 x 68 x 22 mm)
- 2 meranti slats, for the side bracing (450 x 68 x 22 mm)
- 2 meranti slats, for the side bracing (265 x68 x 22 mm)
- 60 full-thread cut screws ( 4 x 30 mm)
- 2 metal hooks (75 x 40 mm)
- wood glue
- 80 grit sand paper
- 1 litre Universal wood primer
- 1 litre Fired Earth Granular (World’s View)
- Impact drill
- cordless screwdriver
- tape measure
- pencil
- spirit level
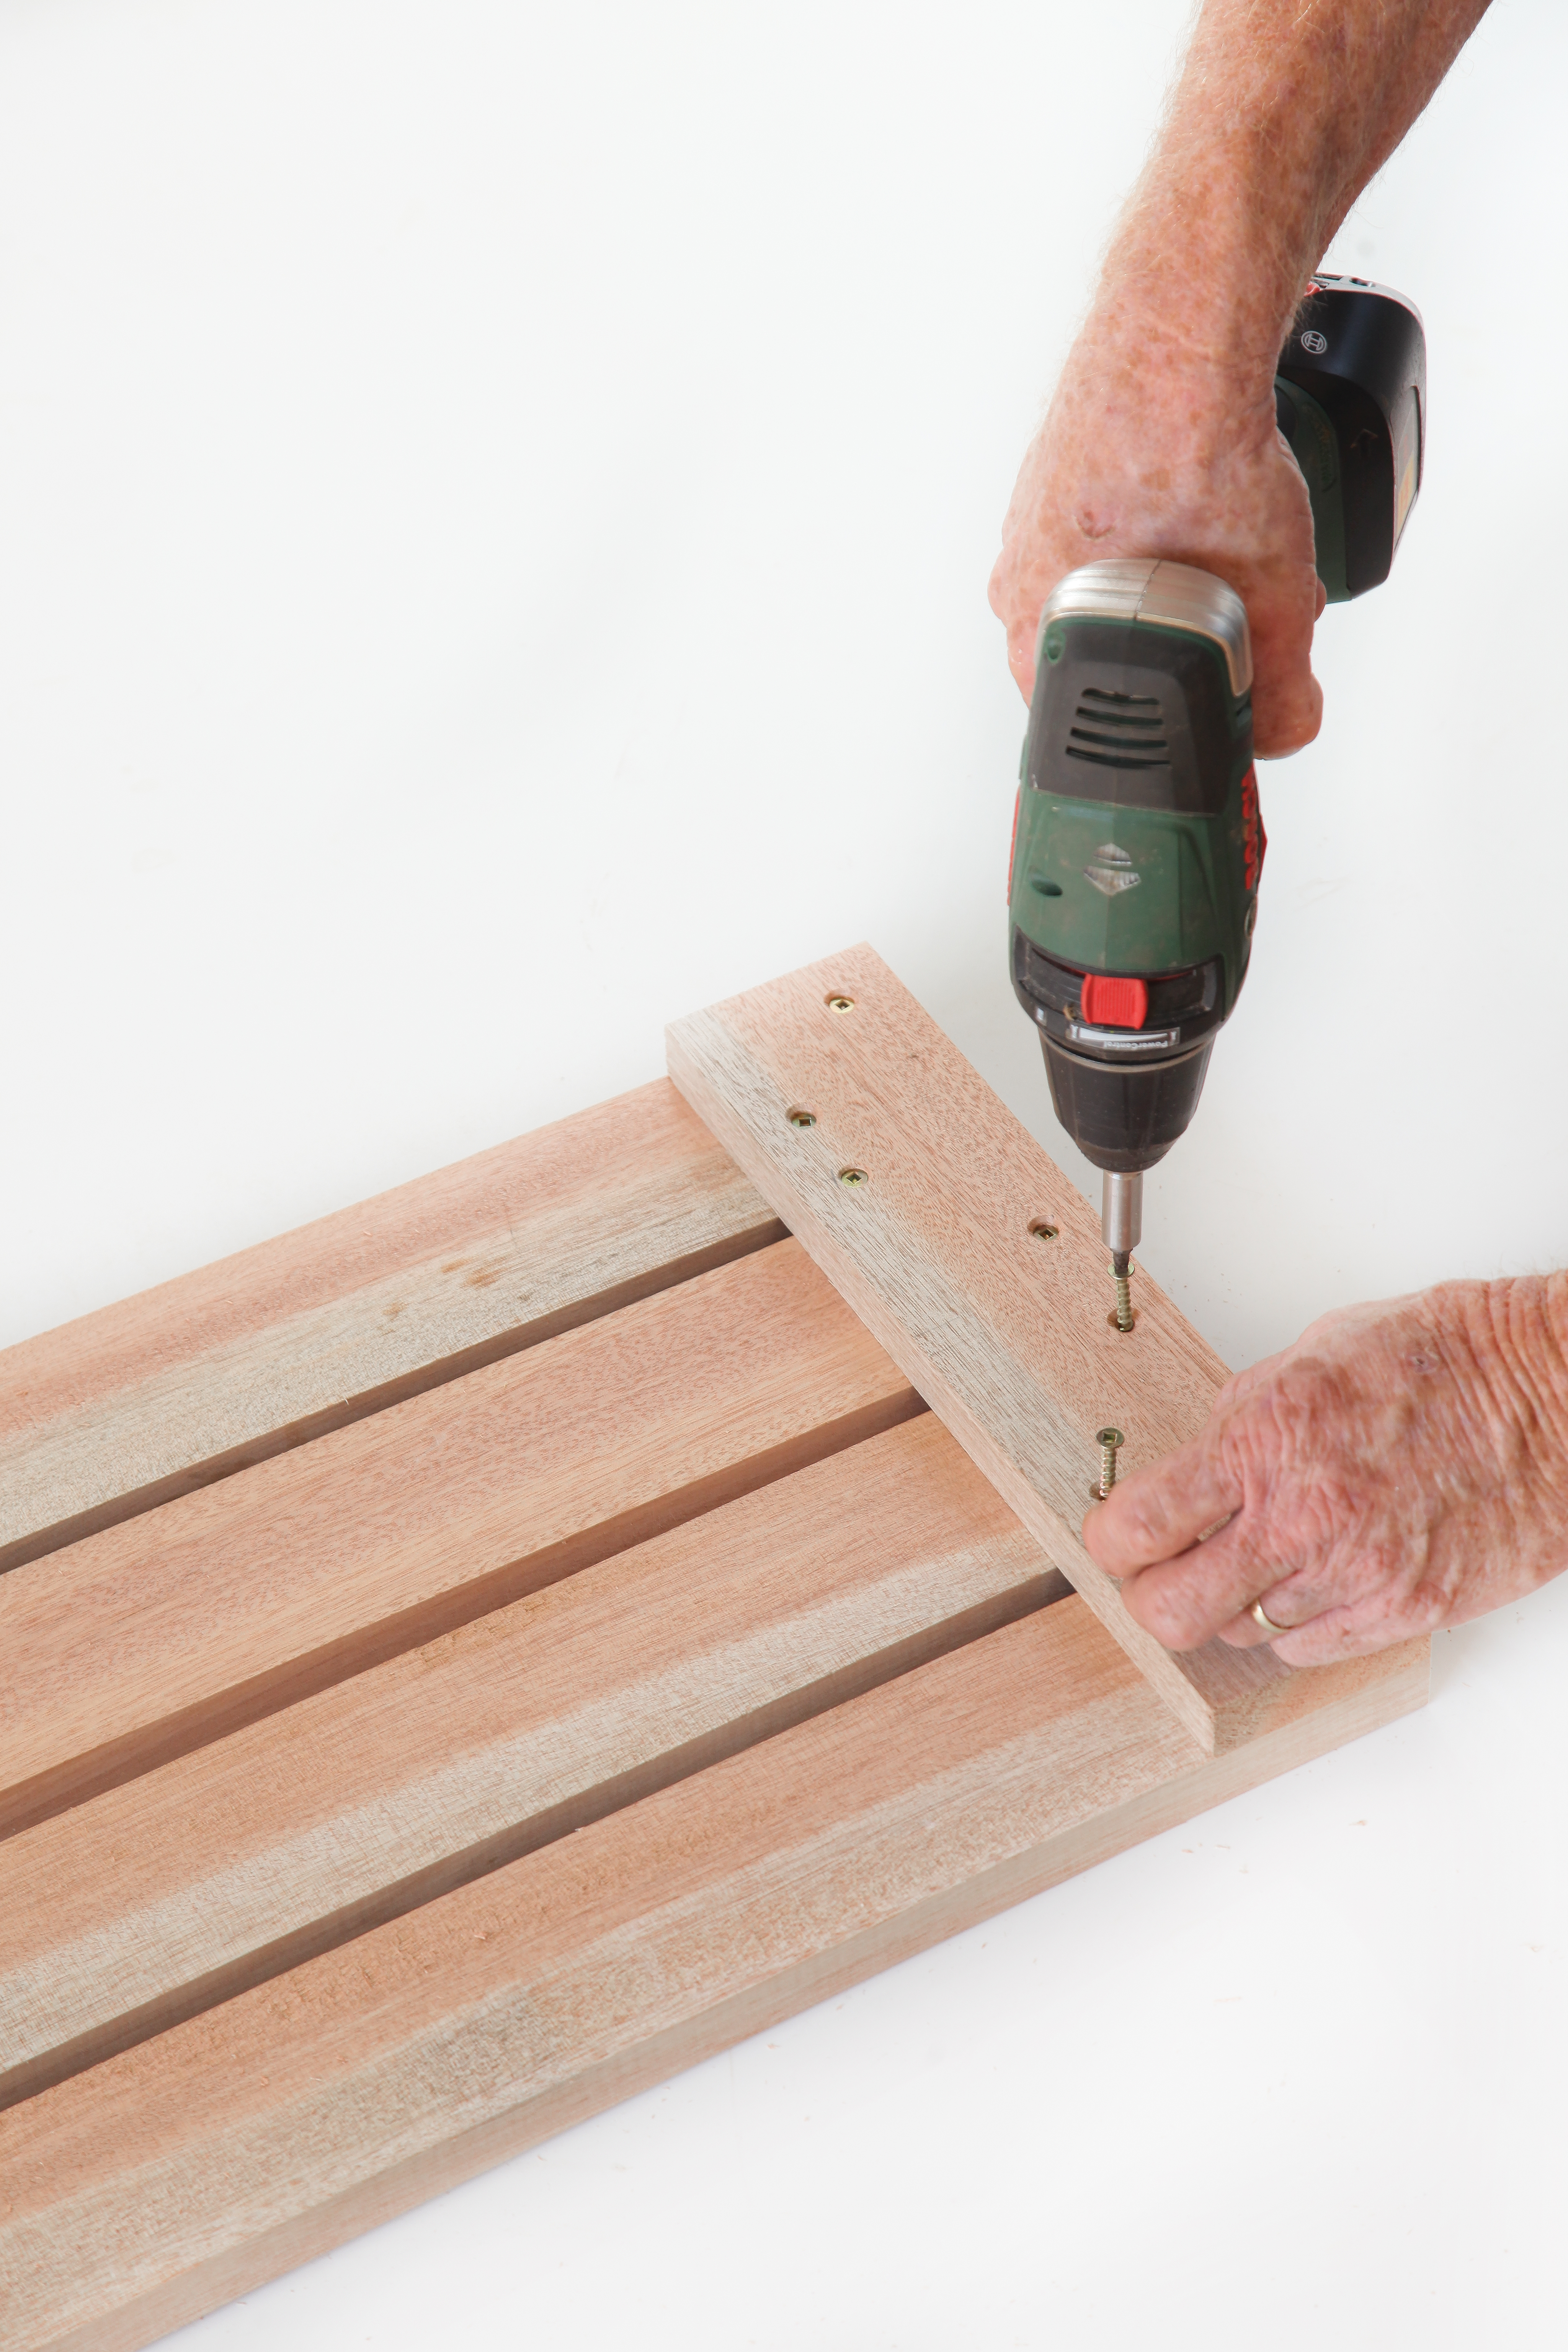
Step 1
For the base, take four of the 880 mm slats and place together leaving a 10 mm gap between each of them. Secure a 300 mm piece on both ends, using wood glue and 30 mm screws.
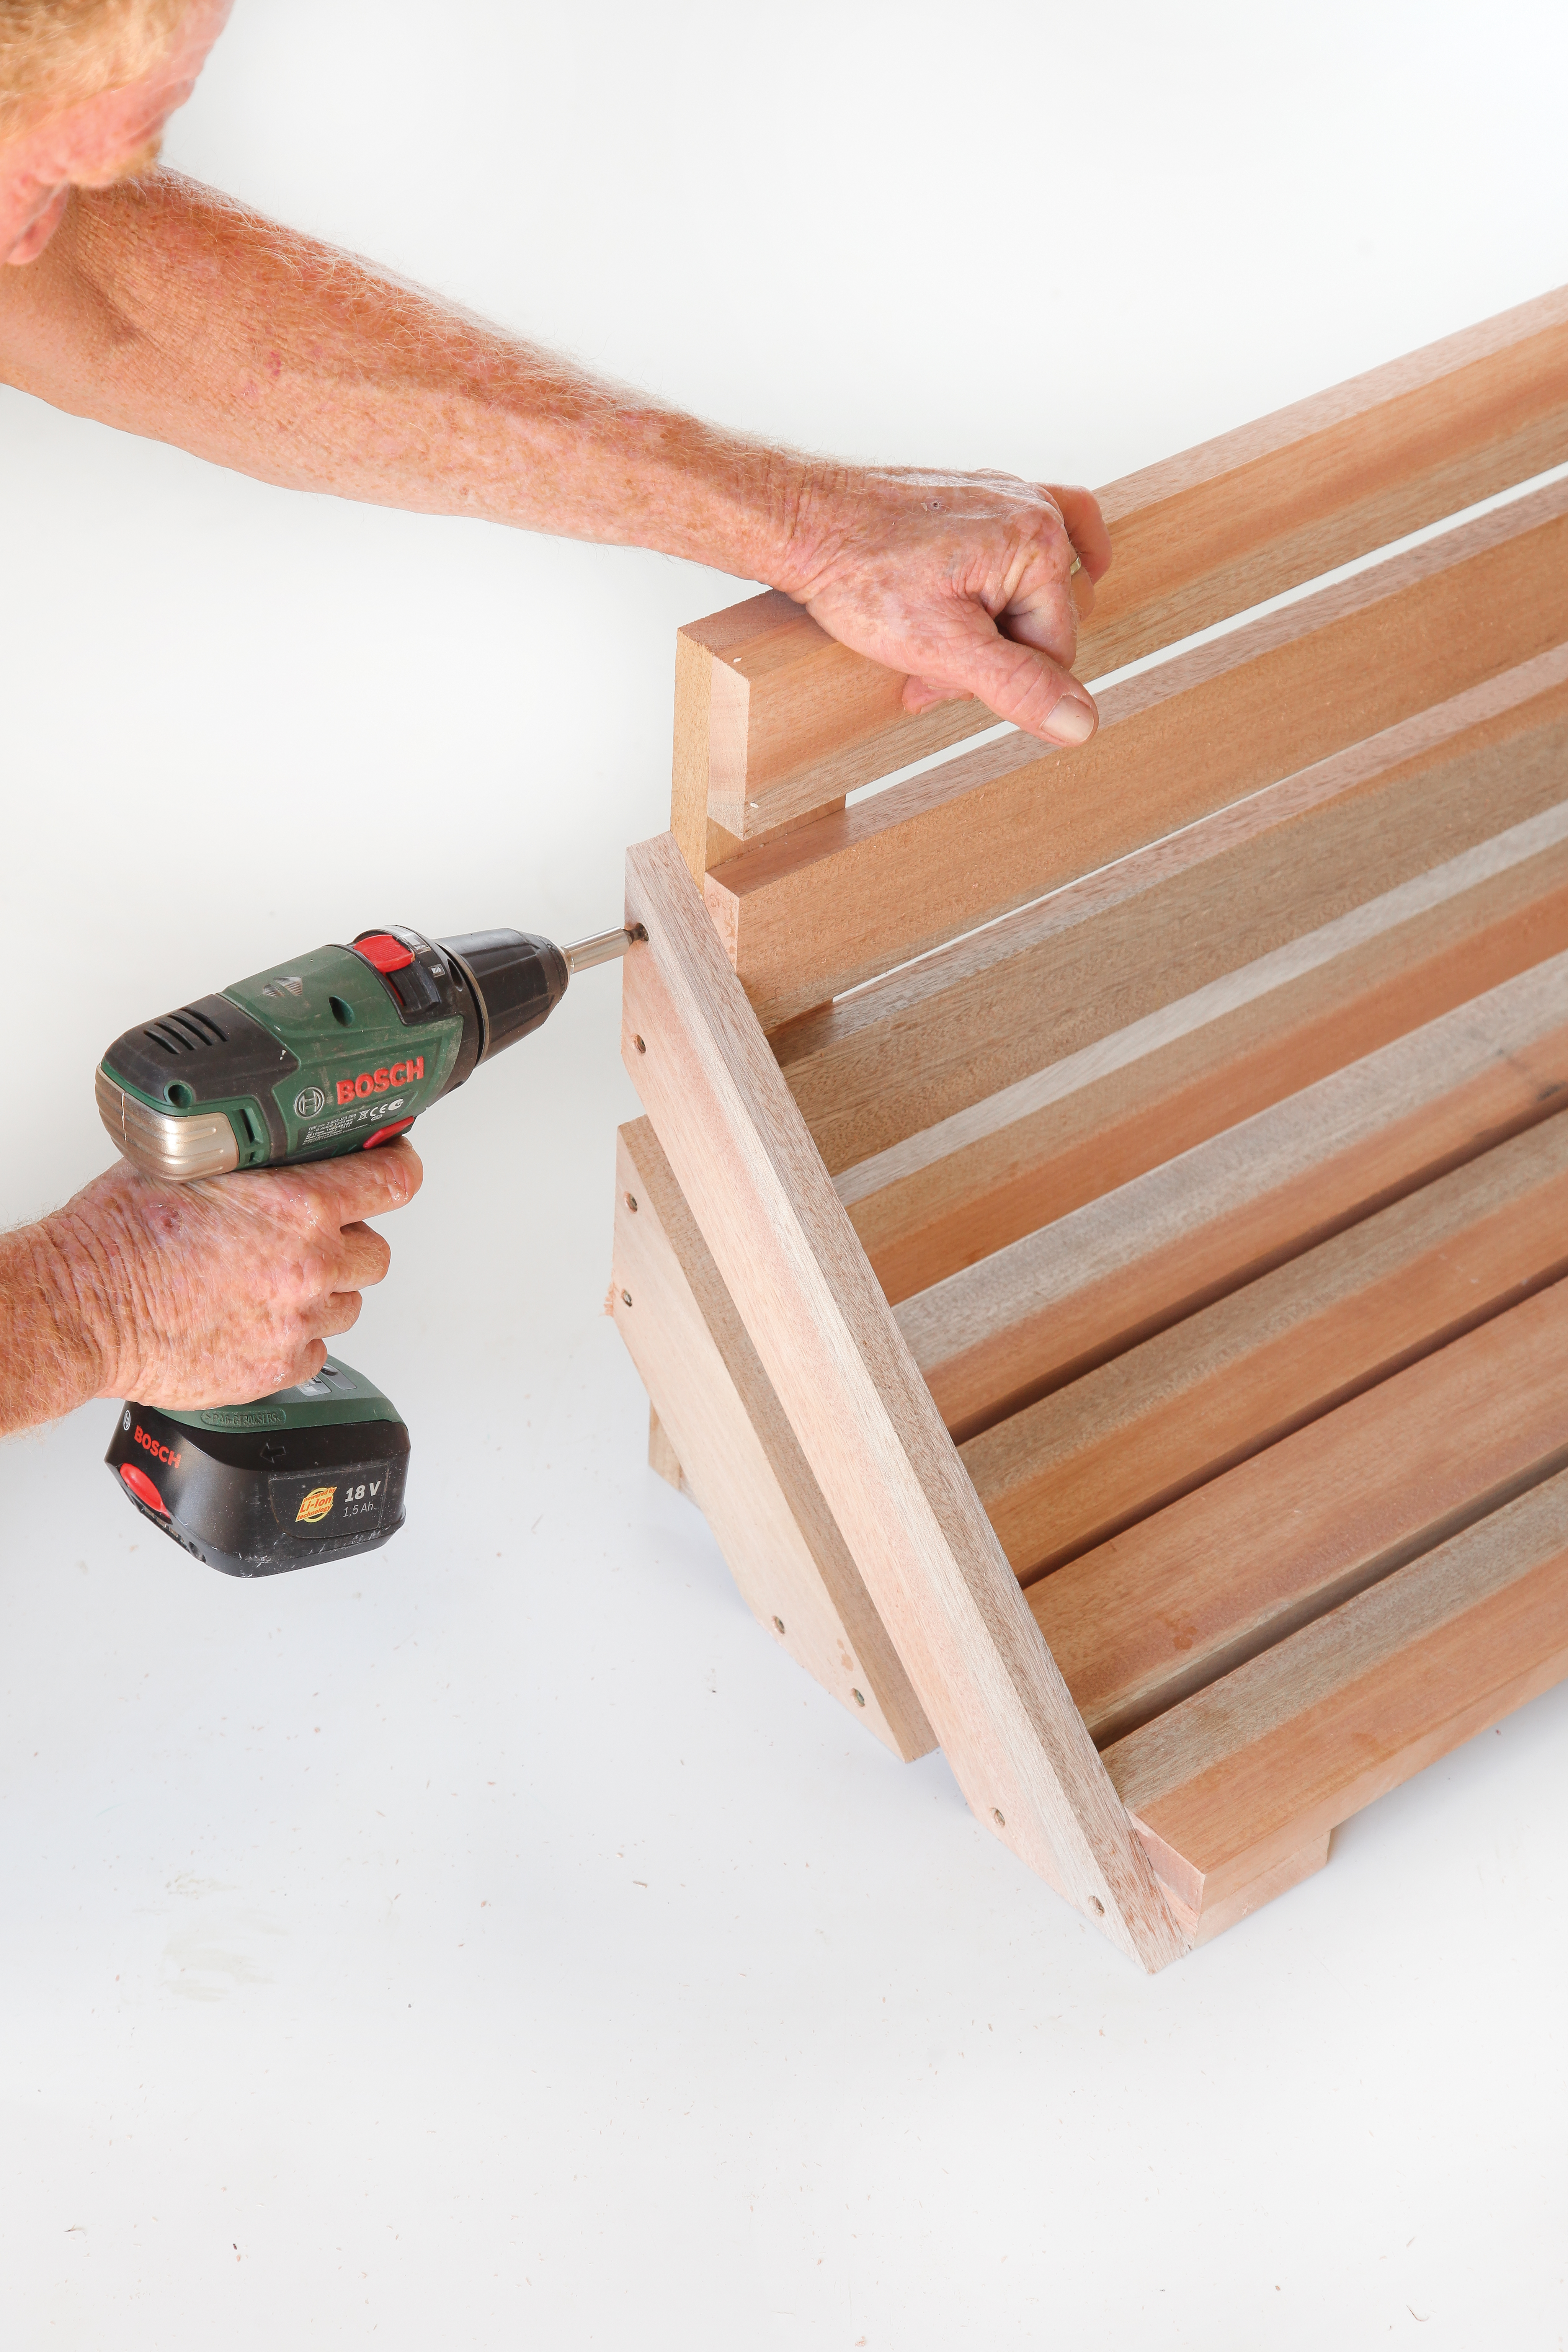
Step 2
For the upright, take the four remaining 880 mm slats and place together, leaving 10 mm gaps between them. Then secure a 400 mm piece on both ends, leaving the extra length on the one side to secure the pieces together.
Step 3
Secure the base to the upright to form a 90° angle.
Step 4
Cut 45° angles on both the 450 mm and 265 mm pieces inwards and secure these to the sides of the shelf.
Step 5
Sand off all the sharp edges on the shelf.
Step 6
Paint with one coat of primer and allow to dry.
Step 7
Apply two coats of Fired Earth Granular, allowing for drying time between coats.
Step 8
Attach the metal hooks using screws.
Credits
Referenced from Gallo images / www.thegardener.co.za
Browse 1000’s of products available to you. Select your country to Shop Online.


