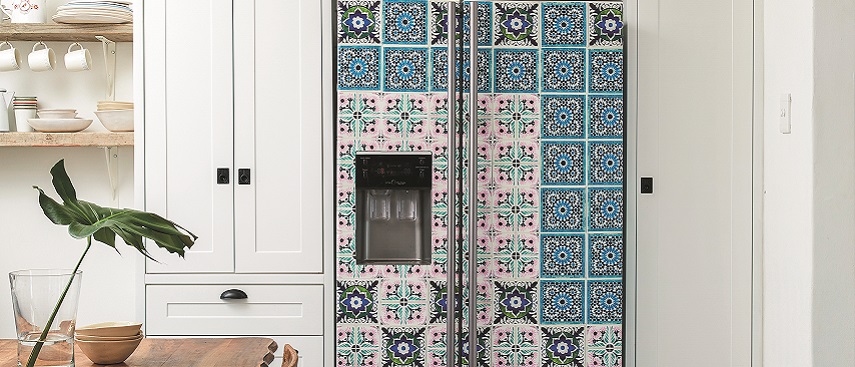
We show you how you can add this cool new look to your fridge.
- vinyl tiles (the number of tiles depends on the size of your fridge; we used 77)
- craft knife
- steel ruler
- cutting mat
- vernier caliper
- scissors
- compass
- pencil
- measuring tape
Step 1
Use the venier caliper to measure the handle where it meets the door.
Step 2
Use the measuring tape to measure from the handle around the side of the door, as well as from the handle to the top of the door.
Step 3
Draw lines on the back of one of the vinyl tiles with the measurements you took in step 2. Then use a compass to draw a circle according to the measurement you made in step 1.
Step 4
Draw a line from the centre of the circle to the edge that will go around the side of the door. Cut along this line and around the circle.
Step 5
Position the tile you cut in step 3 around the handle and stick it down. You will have to repeat step 2 and 3 every time you get to where the handle meets the door.
Step 6
Continue sticking the individual tiles on the rest of the door. When you get to an area where the tile extends beyond the door, cut off the excess with a craft knife.
Step 7
If your fridge has an ice dispenser, stick the tiles over it and use the steel ruler and craft knife to carefully cut away the areas that are covered.
Now your DIY is complete, here are some fun facts around this project.
Did you know?
- The 15 x 15cm tiles are self-adhesive; simply peel off the back and stick them on.
- The tiles are easily removed; simply peel them off.
- You can create this tiled effect on JoJo tanks, wheelie bins and splashbacks as well as in bathrooms and bedrooms.
Credits
Referenced from Gallo Images / Home Magazine
Browse 1000’s of products available to you. Select your country to Shop Online.


