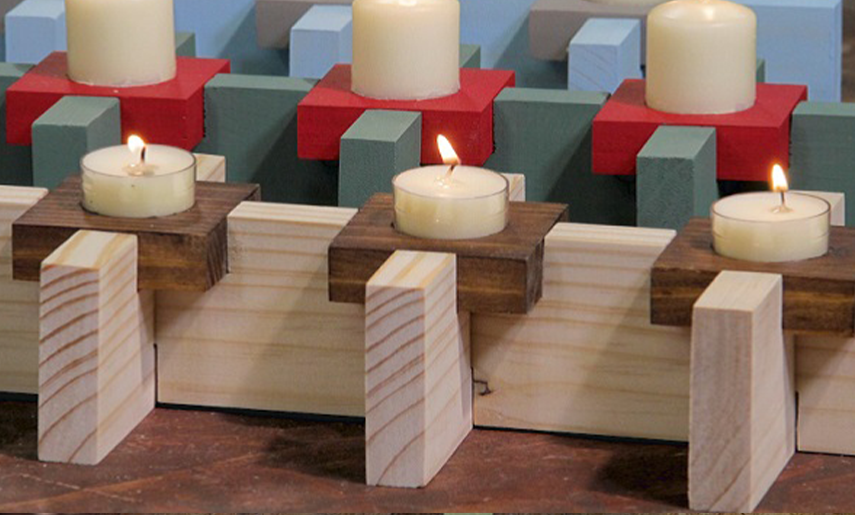
What’s better than having your DIY displayed beautifully in your home? We show you how to make candle holders out of wood.
- Timber cut as per the cutting list
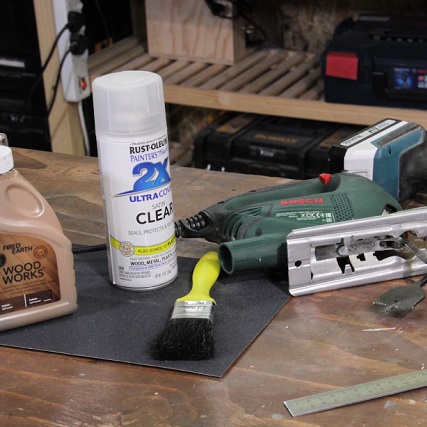
- Wood stain and sealer
- Sandpaper
- 3 tealight candles
- Cordless drill
- 38mm spade bit
- Jigsaw
- Safety glasses
- Pencil
- Measuring device
- Sander
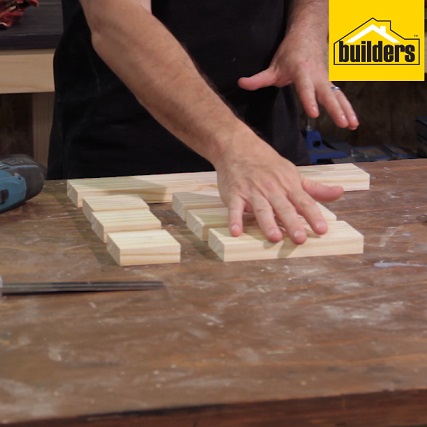
- 1 x Pine PAR 1800mm x 69mm x 22mm:
- Long cross piece 380mm (L), 69mm (W) – x 1
- Short cross piece 160mm (L), 69mm (W) – x 3
- Candle supports 69mm (L), 69mm (W) – x 3
* The diagrams can be found at the end of the content
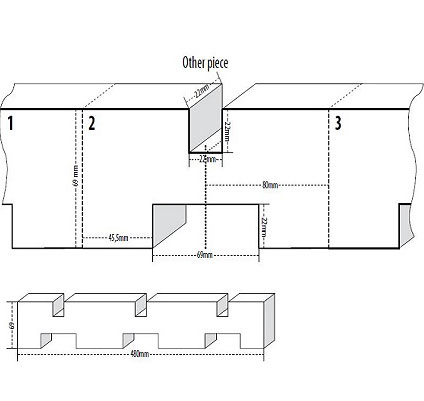
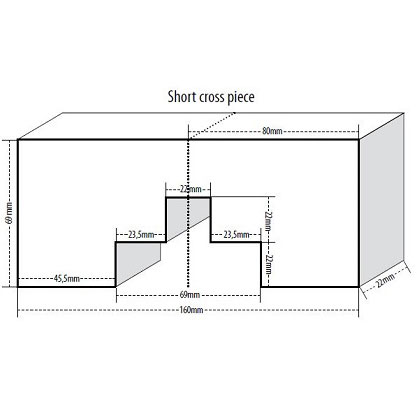
The short cross pieces
Step 1
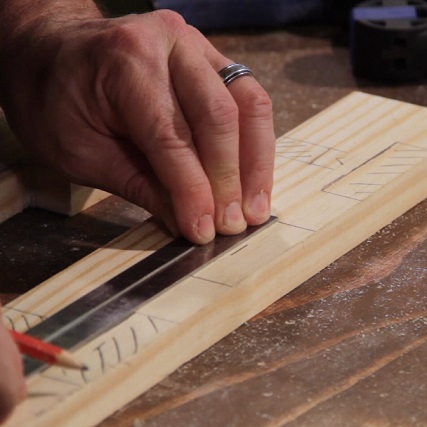
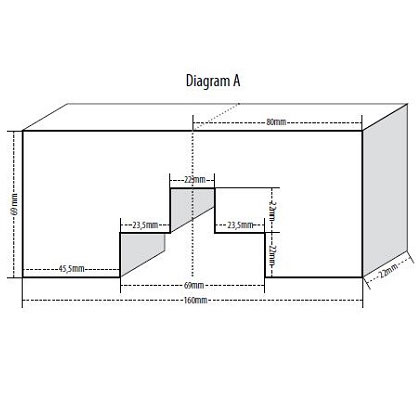
Mark your cutting lines as per diagram A. Alternatively you can use a candle support piece as a template to measure the spacing.
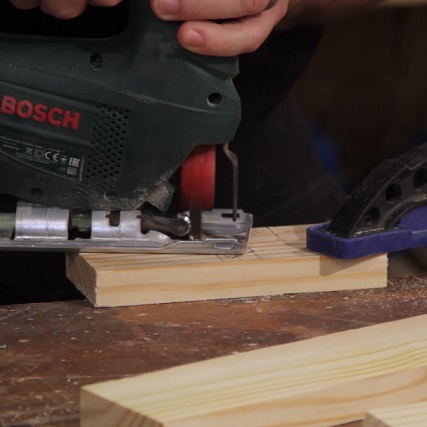
Step 2
Once all the lines are drawn, cut your timber to size using a jigsaw. Repeat the process for all three cross pieces.
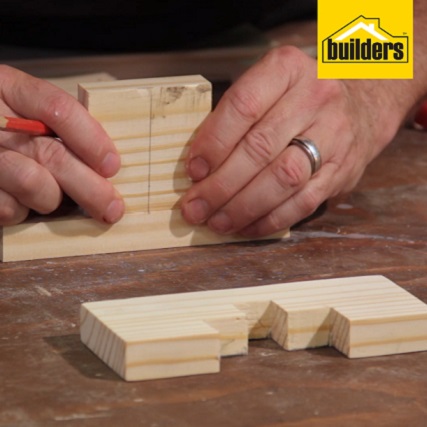
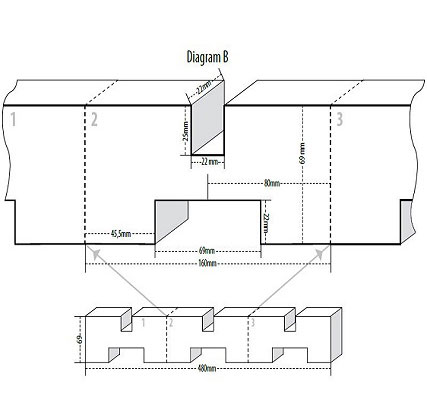
The long cross piece
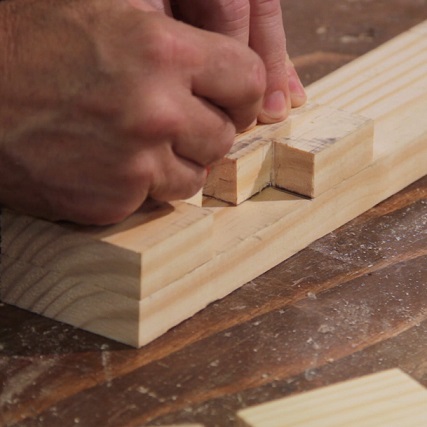
Step 3
Mark out cutting lines along the long cross piece as per diagram B. You can also use the short cross piece as a template to mark where to cut.
Step 4
Cut the timber to size using a jigsaw and repeat the process three times along the long cross piece – these three grooves will accommodate the three short cross pieces.
Step 5
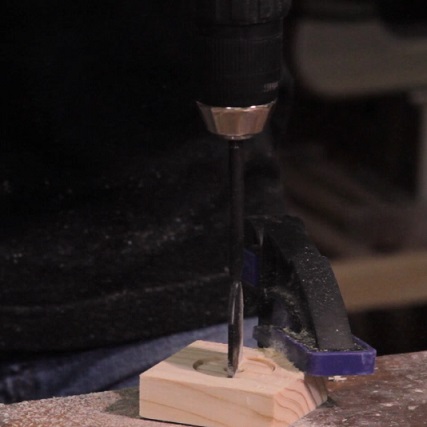
Drill the holes for your candles to sit in. Draw lines down the centre of both the width and length of the candle support piece. Place the tip of the 38mm spade bit on the point where the two points intersect and drill down about 2 – 3mm. Repeat the process for all candle supports.
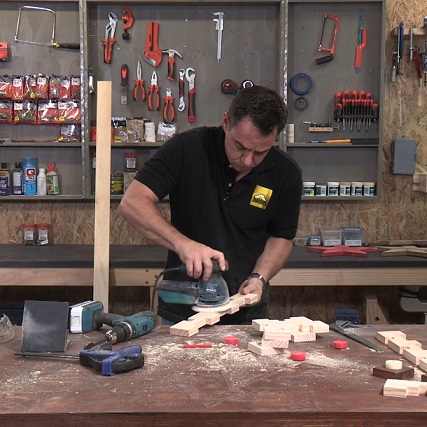
Step 6
Sand down all of the timber for a smooth finish.
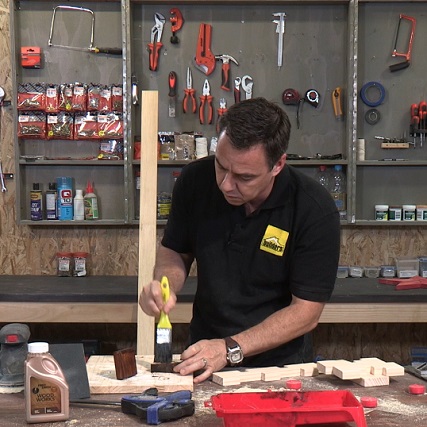
Step 7
Stain your timber to your desired colour/s and leave to dry.
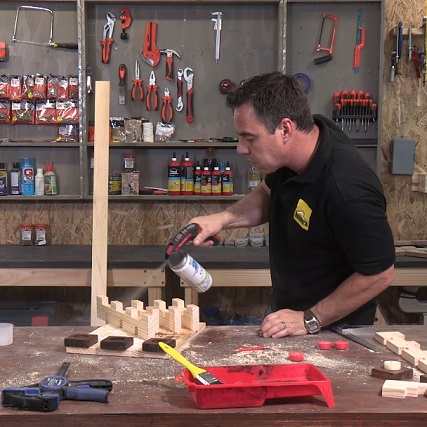
Step 8
Seal your timber in order to protect the wood from damage and assemble the candle holder.
Browse 1000’s of products available to you. Select your country to Shop Online.


