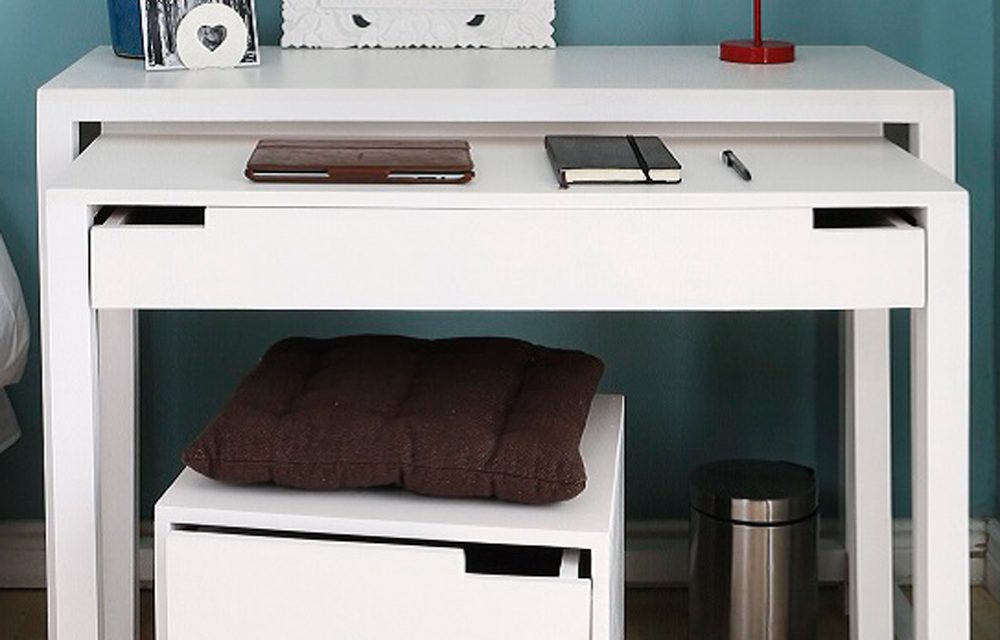
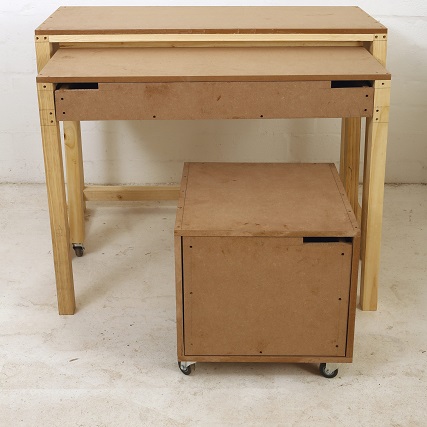
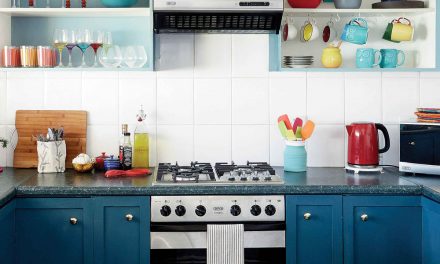
Use this desk unit as a side table or place it behind a sofa or in a dining area to double as a server – or position it under a staircase for the ultimate use of space.

- Drill
- 5mm drill bit, combination countersink drill bit
- Tri-square
- Jigsaw
- 10mm spanner
- Mitre clamp
- G-clamp
- Pencil
- Measuring tape
- Spatula
- Wood glue
- 50mm chipboard screws (to fix pine joins)
- 35mm drywall screws (to fix MDF joins)
- 15mm chipboard screws (to fix plate fitting castors, drawer runners)
- 50mm coach screws (to fix single bolt fitting castors)
- Two 75mm swivel castors with single bolt fitting
- Four 75mm swivel castors with plate fitting
- 350mm heavy duty drawer runners
- 300mm heavy duty drawer runners
- 120 grit sandpaper
- Wood filler
- Primer and paint
- Paintbrush or foam roller
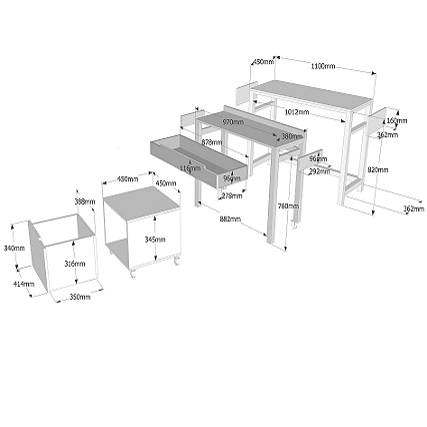
- 44 x 44mm pine cut to:
- four 820mm (server legs)
- two 760mm (desk front legs)
- two 685mm (desk back legs)
- one 1012mm (server back brace)
- two 362mm (server side braces)
- 44 x 22mm pine cut to:
- four 362mm (server side supports)
- four 292mm (desk side supports)
- two 1012mm (front and back supports under server)
- one 970mm (back edge of desk ‘stopper’)
- one 882mm (back support under desk)
- 16mm supawood cut to:
- one 1100 x 450mm (server tabletop)
- one 970 x 380mm (desk tabletop)
- two 362 x 160mm (server side panels)
- two 292 x 96mm (desk side panels)
- one 116 x 878mm (desk drawer front panel)
- one 878 x 96mm (desk drawer back panel)
- two 278 x 96mm (desk drawer side panels)
- one 846 x 278mm (desk drawer bottom panel)
- two 450 x 450mm (cube seat, top and bottom)
- two 450 x 345mm (cube seat sides)
- one 414 x 340mm (cube drawer front panel)
- two 350 x 316mm (cube drawer sides)
- one 388 x 316mm (cube drawer back panel)
- one 356 x 350mm (cube drawer bottom panel)
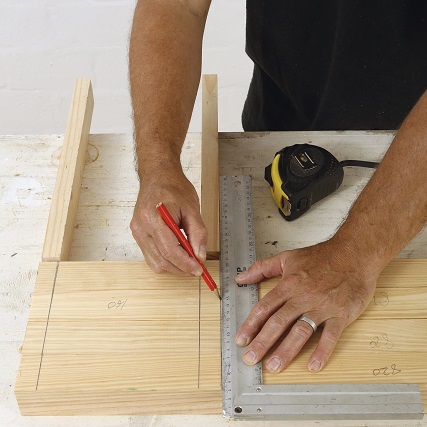
Step 1
Lay the 820 x 44mm lengths side by side and mark a line 22mm from the ends, then draw 22mm-wide bands 160mm apart. Mark a 44mm-wide band 75mm from the opposite ends.
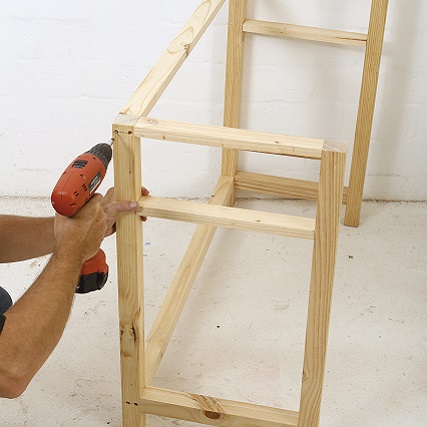
Step 2
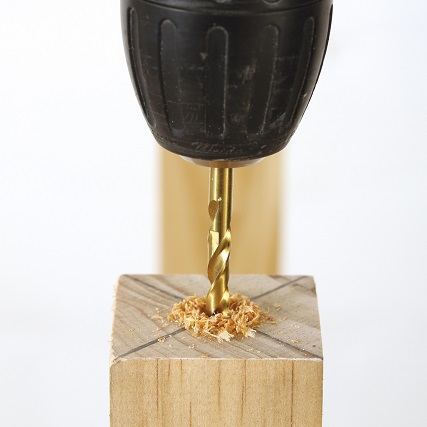
Make the framework by fixing the respective 44mm and 22mm lengths, as shown. Drill pilot holes then glue and screw them using the 50mm screws.
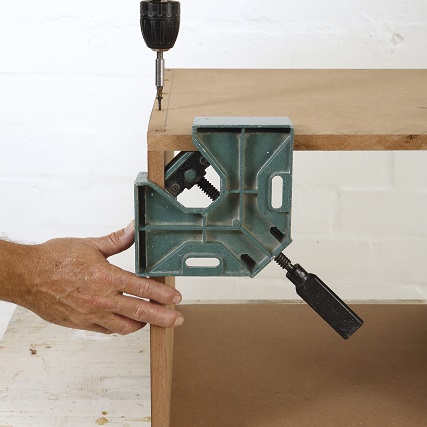
TopTip: Use mitre clamps or a tri-square to ensure right angles.
Step 3
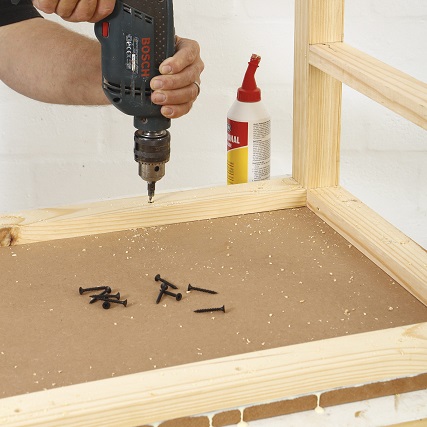
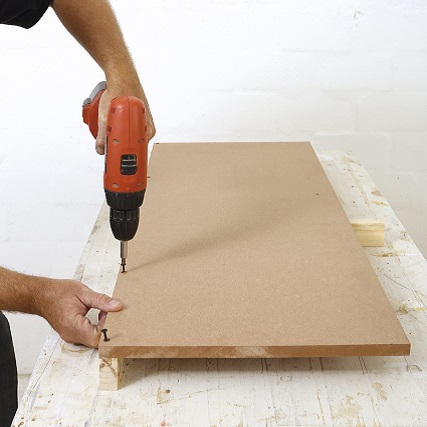
Place the 1100 x 450mm MDF top onto your work surface then turn the framework upside down before placing it on top. Glue and screw in position (using the 35mm drywall screws) after first drilling pilot holes.
Step 4
Repeat the same process to construct the desk framework; refer to the diagram for details. Fix the 970mm rail/‘stopper’ to the back edge of the desk top, as shown, before fixing it to the framework (see step 3).
Step 5
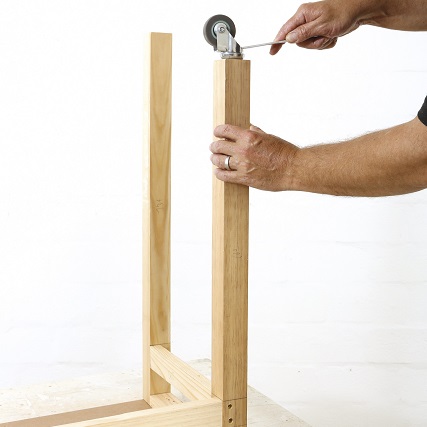
Use the 5mm drill bit to drill a pilot hole before fixing the single bolt swivel castors to the shorter back legs of the desk.
Step 6
Use the 10mm spanner to tighten the coach screws
Step 7
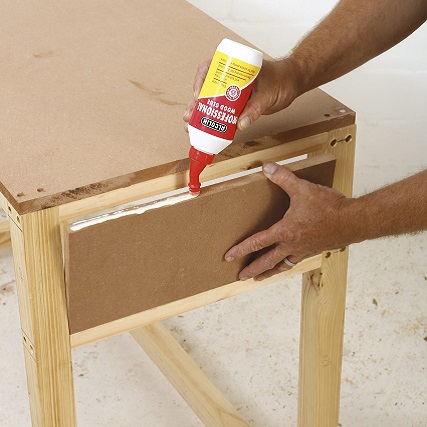
Fix the side panels (see diagram and cutting list) to both the server and the desk, using glue and screws where needed.
Step 8
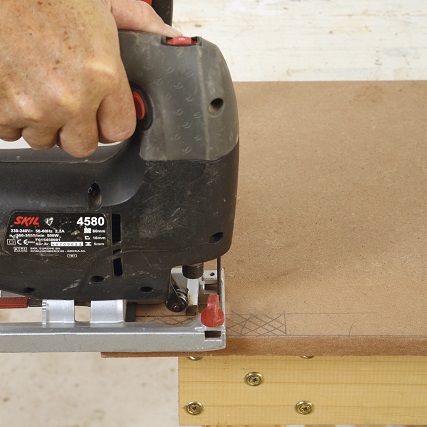
Mark a 120 x 22mm section at both ‘top’ corners of the desk drawer front panel (116 x 878mm) and in one corner of the cube drawer front panel (414 x 340mm). Then use the jigsaw to cut away these corners, as shown. Now continue to construct both drawers as per the diagram, using the same techniques outlined in previous steps.
Step 9
Mark lines 16mm from the edges of the 450 x 450mm pieces. Then drill pilot holes before fixing these together using the 35mm drywall screws. Use the mitre clamp to ensure it is constructed at right angles.
Step 10
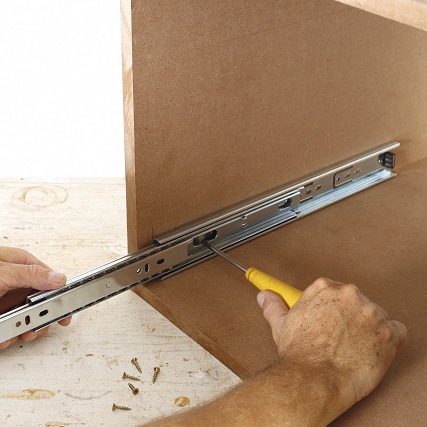
Separate the runners and release the clip to remove the last section. Position the inner runners, with the front edge recessed 16mm from the front edge of the opening. You will have to slide the runners apart to fix these in position.
Step 11
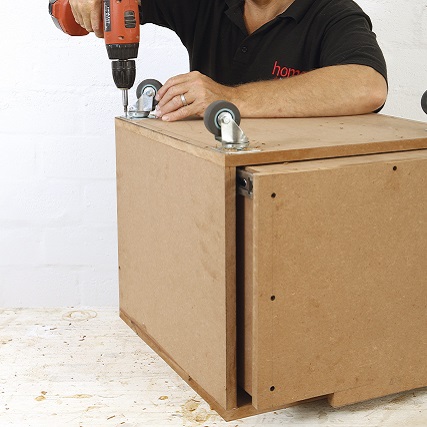
Fix the swivel castors with plate fitting to the bottom of the cube, using the 15mm chipboard screws.
Step 12
Then fill all the holes and crevices with wood filler and once dry, lightly sand these and the edges. Apply a primer to all the surfaces. Once dry, apply one or two topcoats in the colour(s) of your choice.
Credits
Referenced from Gallo Images / Home Magazine
Browse 1000’s of products available to you. Select your country to Shop Online.


