In this DIY we show you how to make your own chopping boards.
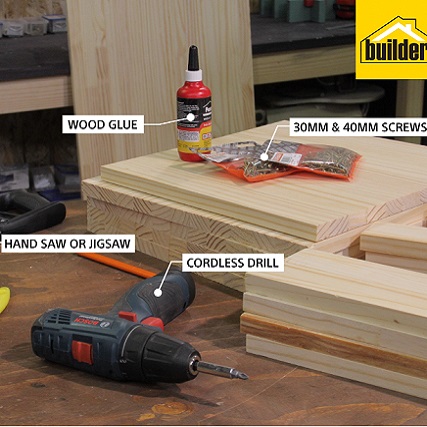
- 30mm cut screws
- 40mm cut screws
- Wood glue
- Wood stain/sealer
- 2400mm x 530mm x 20mm laminated pine shelf to be cut as per the cutting list
- Cordless drill
- Handsaw or jigsaw
- Paintbrush
- Pencil
- Hammer
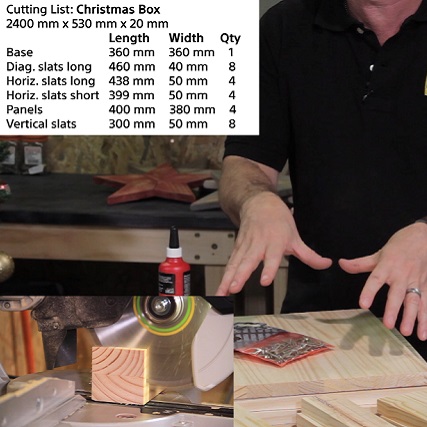
- Base – 360mm (L), 360mm (W), 1 (Quantity)
- Diagonal Long Slats – 460mm (L), 40mm (W), 8 (Quantity)
- Horizontal Long Slats – 438mm (L), 50mm (W), 4 (Quantity)
- Horizontal Short Slats – 399mm (L), 50mm (W), 4 (Quantity)
- Panels – 400mm (L), 380mm (W), 4 (Quantity)
- Vertical Slats – 300mm (L), 50mm (W), 8 (Quantity)
For your convenience get Builders to cut your timber to size. You can adjust the sizing of your box to fit your Christmas tree.
Box structure
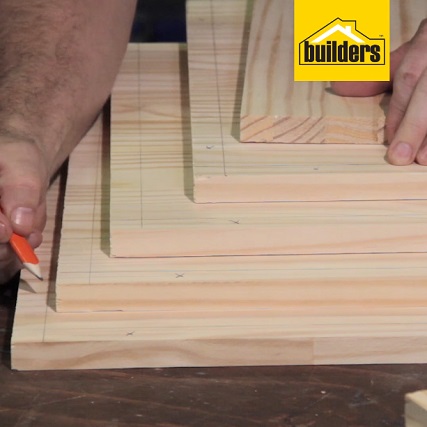
Step 1
Mark out a line 20mm from the edge of two adjacent sides of each of the panels. Mark the point where you will drill the holes within this line. Note – You are only screwing on two sides of each panel.
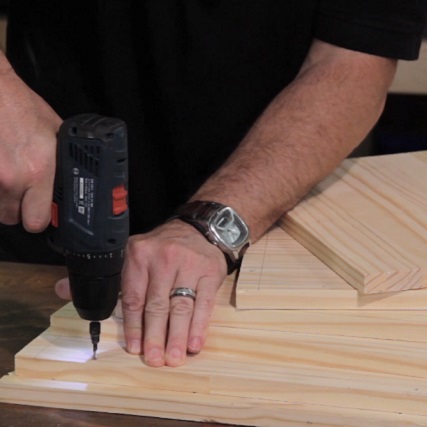
Step 2
Use a speed pilot to drill the holes for the screws. Then use wood glue along the vertical edge of a panel that doesn’t have any screw holes, then prop a piece of timber with screw holes against it. The initial contact of the glue will help hold the side in place when you screw it together.
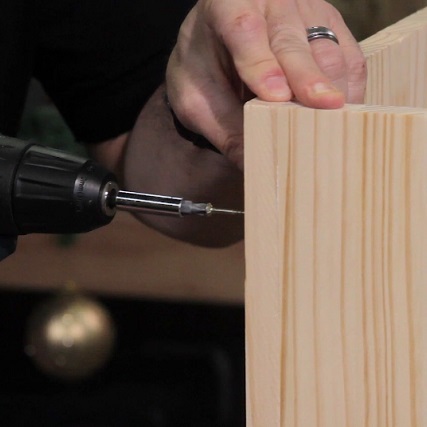
Step 3
Screw the panels into place using the 40mm screws. Tip: Keep your base piece in place to keep the box square.
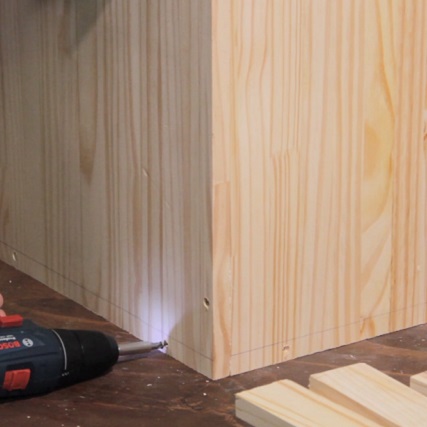
Step 4
Repeat this process until all four sides are in place. Once the sides are in position, screw the base into place using the same method.
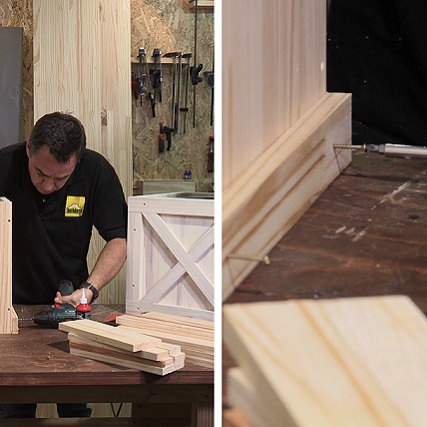
Box Cladding
Step 1
Begin by securing the base cladding. Use a horizontal short slat (399mm x 50mm) on the bottom of two opposing sides of the box. Screw them into place using wood glue between the mating surfaces and the 30mm screws.

Step 2
Once base cladding is in place, place the vertical slats on either side of the panels – securing them using the same method of wood glue and screws. Complete the cladding on both sides of the by placing another short horizontal slat across the top of the panel, glue and screw into place.
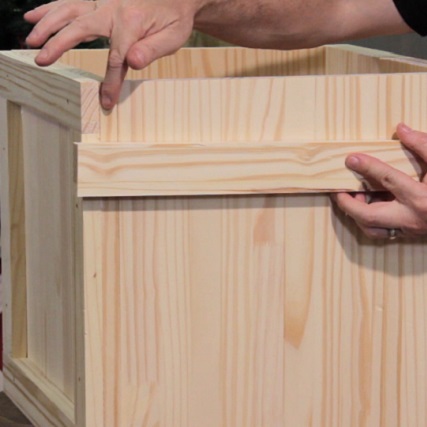
Step 3
Repeat the process for the remaining two panels, substituting the bottom and top cladding for the long horizontal slats (438mm x 50mm) – this will cover up any overlap and hide any join lines.
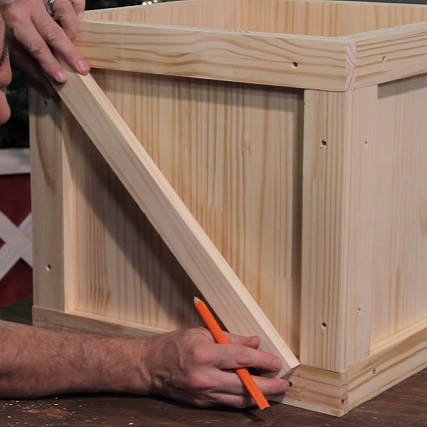
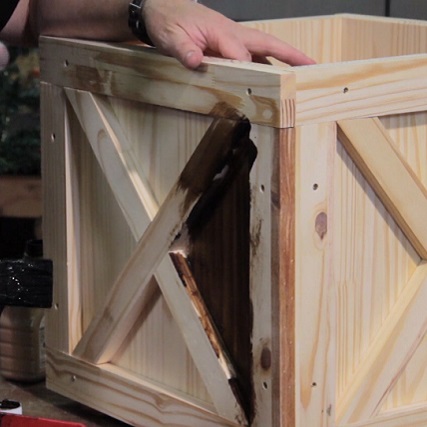
Diagonal cladding
Step 1
Lay your diagonal slat in position across a panel of your box and mark out where to cut the timber. Use a handsaw or jigsaw to make the angled cut.
Step 2
These diagonal slats are purely cosmetic, so simply use wood glue to secure them in place.
Step 3
Repeat the process for the opposing diagonal slat, but remember that the second diagonal slat will have a cut out in the centre to accommodate the original cross piece. Repeat the process for all four sides.
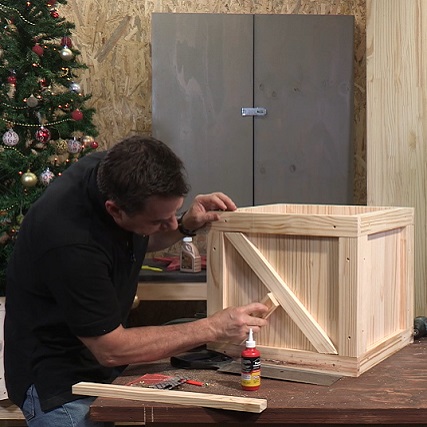
Step 4
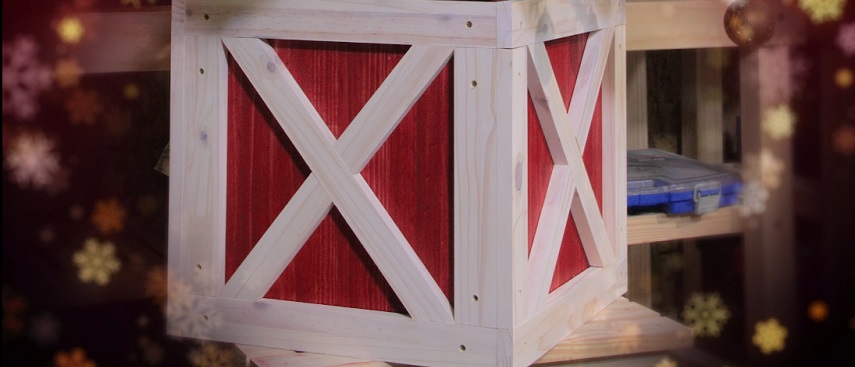
Once the box structure is complete, stain the timber to the desired colour and seal the wood to protect it from damage.
Browse 1000’s of products available to you. Select your country to Shop Online.


