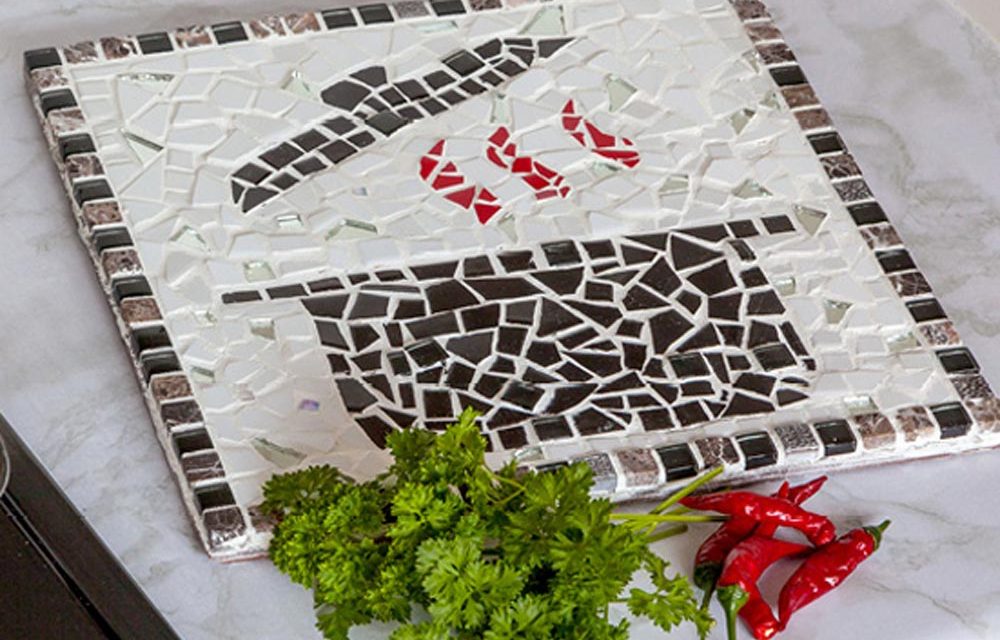
This easy fun project just needs an old tile and a few mosaics.
Laying the mosaics
Materials you will need:
- A ceramic tile as your base
- An assortment of old tiles and mosaics
- Tiling cement
- Tile nippers
- Tile cutters
- A palette knife
- A scale to measure
- Mutton cloth
- An old plastic container for mixing cement
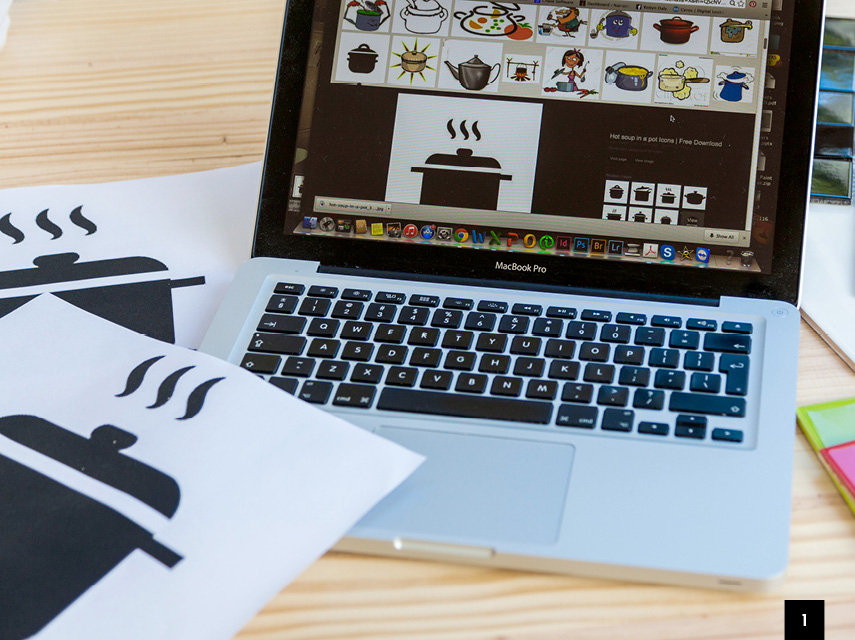
Step 1
Choosing the right motif is fun. There are lots of free clip art images to be found on Google.
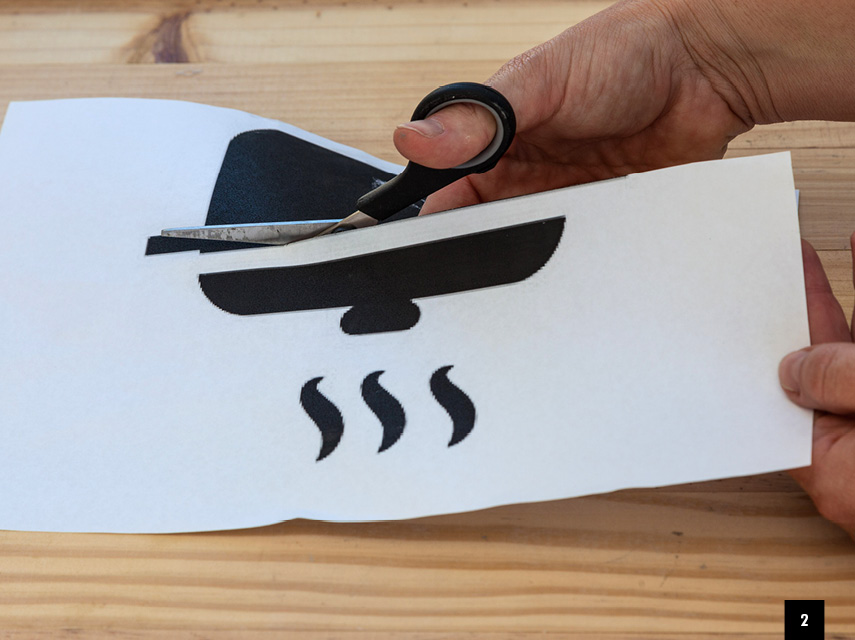
Step 2
Print out the image and resize using a photocopying machine. Then cut out the image to create your template.
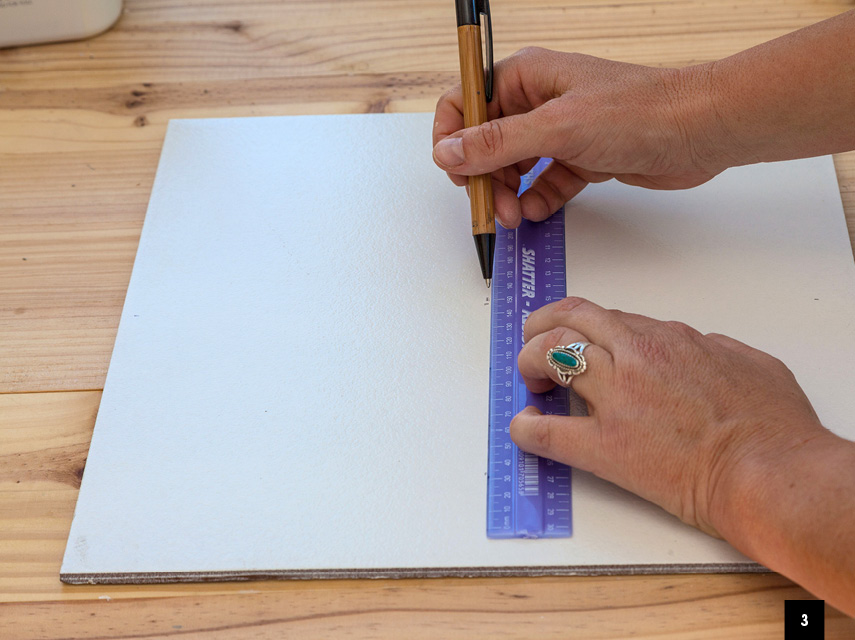
Step 3
Measure your base tile to mark the centre and place your template in the centre, allowing for a border plus a little breathing space where you’ll fill in with the background colour.
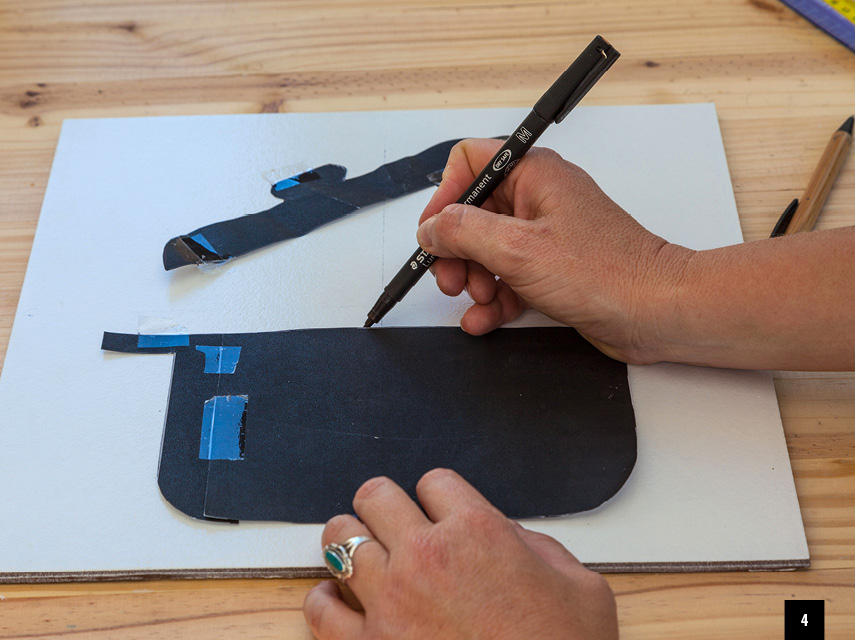
Step 4
Tape the template to the tile and trace around it. Remove the template. Now you’re ready.
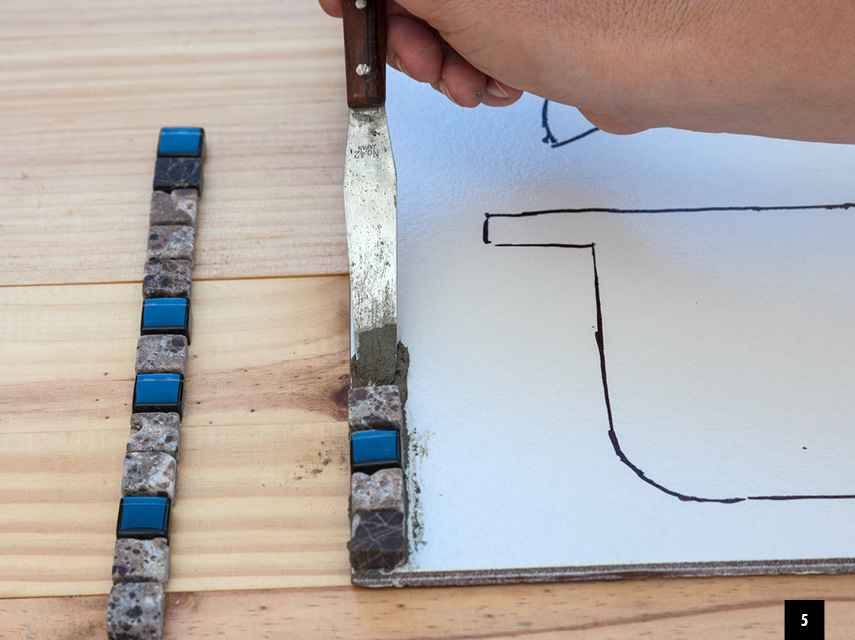
Step 5
Mix your tiling cement according to the guidelines on the package. A thick paste is the consistency you’re looking for. Too wet or too dry and it won’t hold. Start with the border, smearing a layer of cement onto the tile, then pressing the mosaics down onto it.
Top Tip: Mix small quantities of tiling cement at a time. Use a 20mm syringe to measure the exact amount of water.
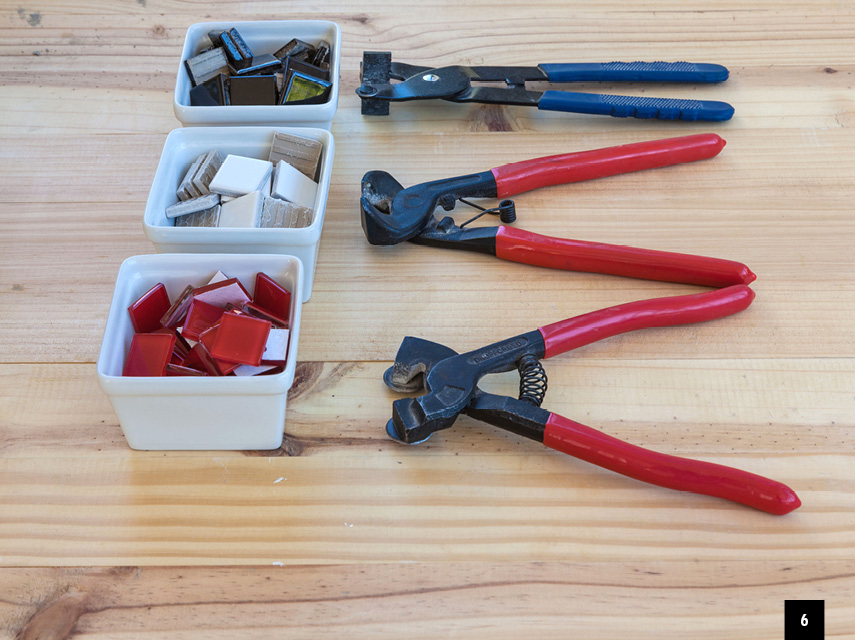
Step 6
Once the border is completed, you’re ready to fill in the details. Use your tile cutters to cut to size and the nippers to shape the mosaics. Leave enough space between each mosaic piece to allow for grouting.
Top Tip: To prevent shards from flying, cover the tile cutters with a cloth when you’re cutting tiles and mosaics.
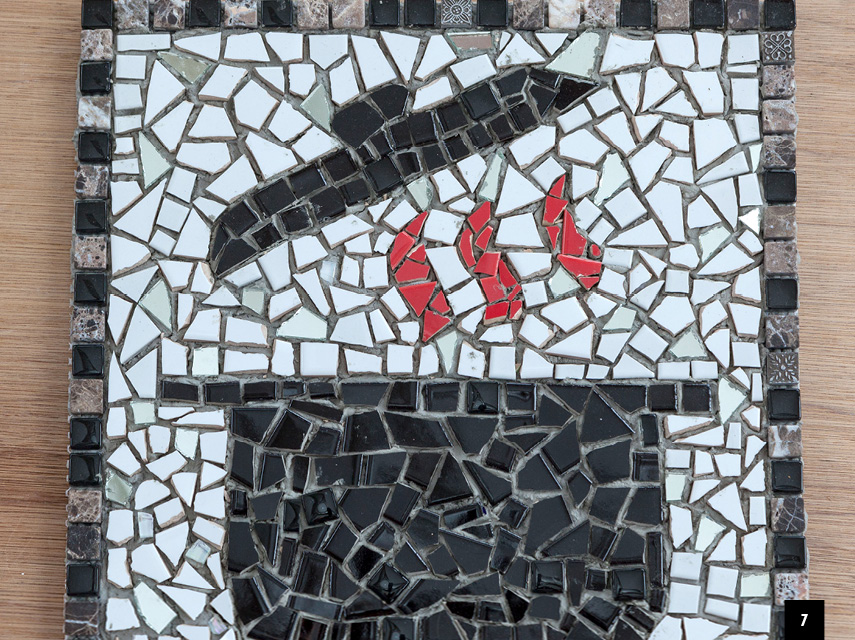
Step 7
Once you’ve laid the mosaics and tile pieces, wait until the cement is fully dry and hardened before grouting.
Grouting
Materials you will need:
• Grouting cement (available in a variety of colours)
• Squeegee
• Small sponge
• Damp mutton cloth
• Self-adhesive felt
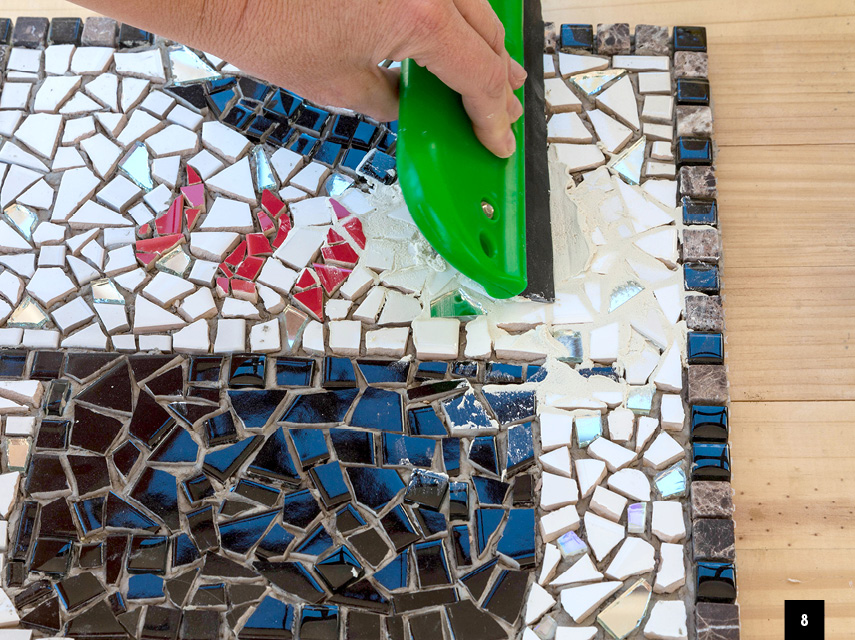
Step 8
Mix the grouting cement according to the manufacturer’s instructions. Again, you’re looking for a thick paste. Smear it onto your artwork using the squeegee. Work the cement into all the gaps.
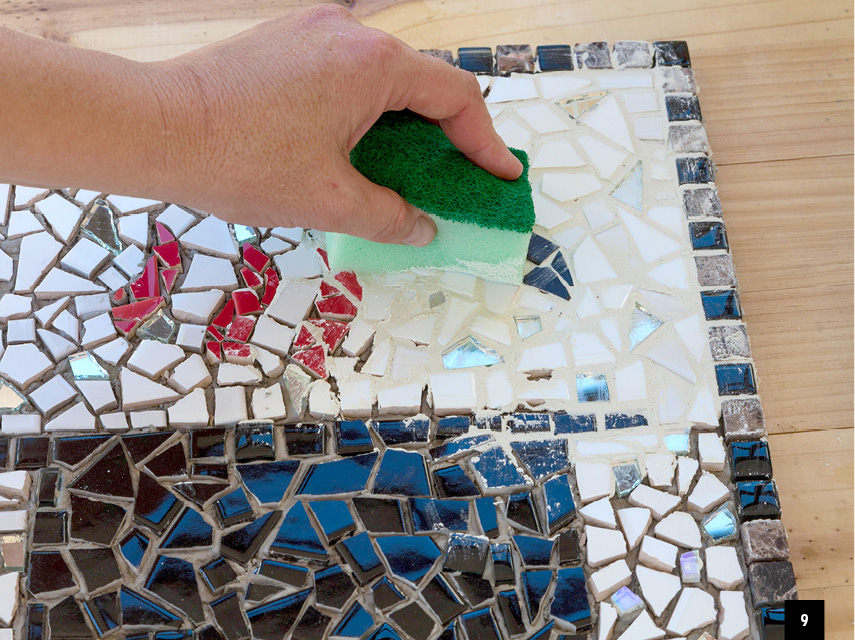
Step 9
When the grouting is partially dry, clean off the excess cement using a sponge or a damp cloth.

Step 10
Finish the pot stand off with a patch of self-adhesive felt underneath each corner so the base doesn’t scratch your counter surfaces.
Browse 1000’s of products available to you. Select your country to Shop Online.


