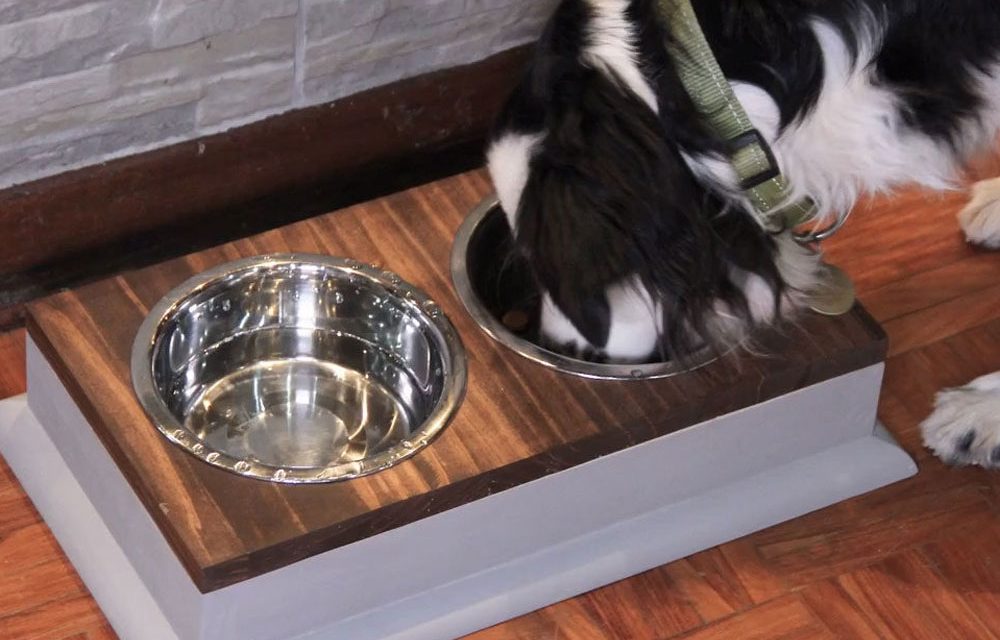
This elegant dog feeding station is actually very easy to make – just follow the steps to make a fancy feeding station.


- Wood glue
- Wood stain
- 14 x 32mm coarse-thread Kreg screws
- Panel pins
- Wood filler
- 2 dog bowls
- Hammer
- Cordless drill
- Jigsaw
- Sander
- Kreg pocket hole jig
- Handsaw
- Mitre box
- 8mm drill bit for wood
- Clamps
- Drawing compass
- Scraper
Cutting list:
- 1.8m x 380mm x 19mm PAR pine shelving cut to:
- 1 x 380mm x 200mm x 19mm (top)
- 2 x 342mm x 70mm x 19mm (sides)
- 2 x 200mm x 70mm x 19mm (ends)
Note:
There will be timber left over, which you can use for another DIY project.
• 1.5m x 19mm skirting quadrant

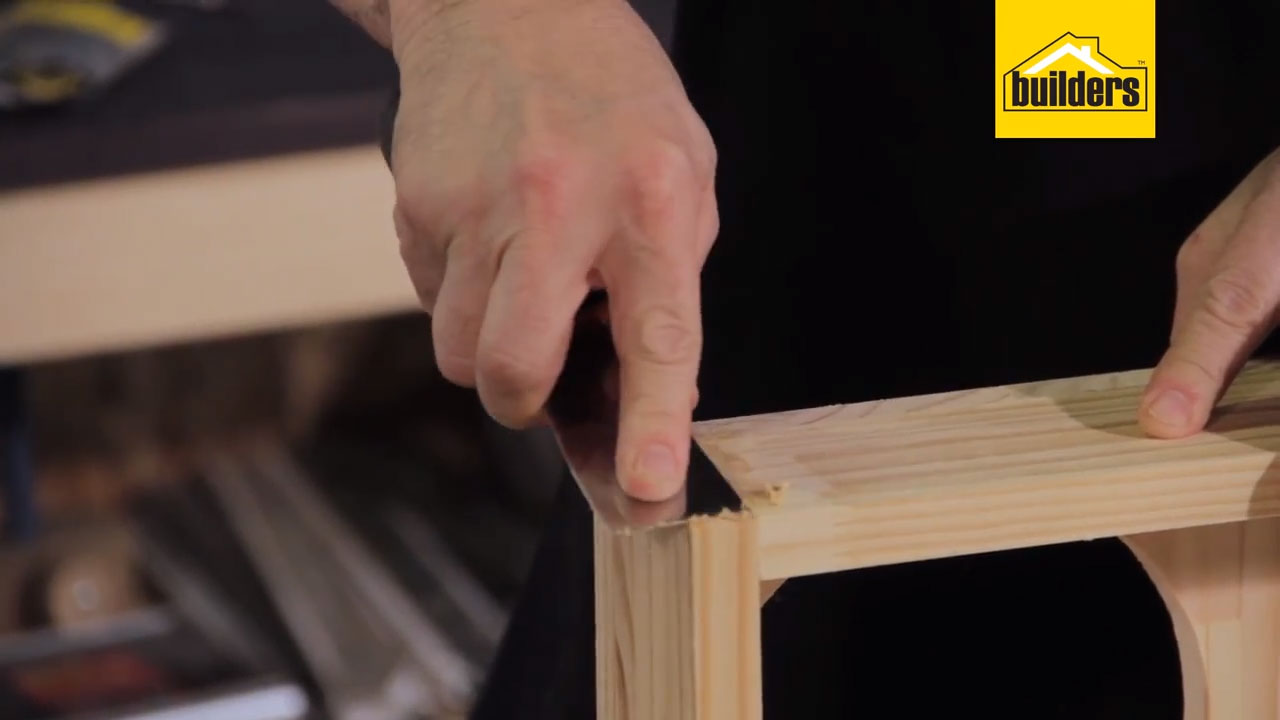
Step 1
Begin by assembling the box section of the stand. Place the top on your work surface. Place the sides and ends in position around it.
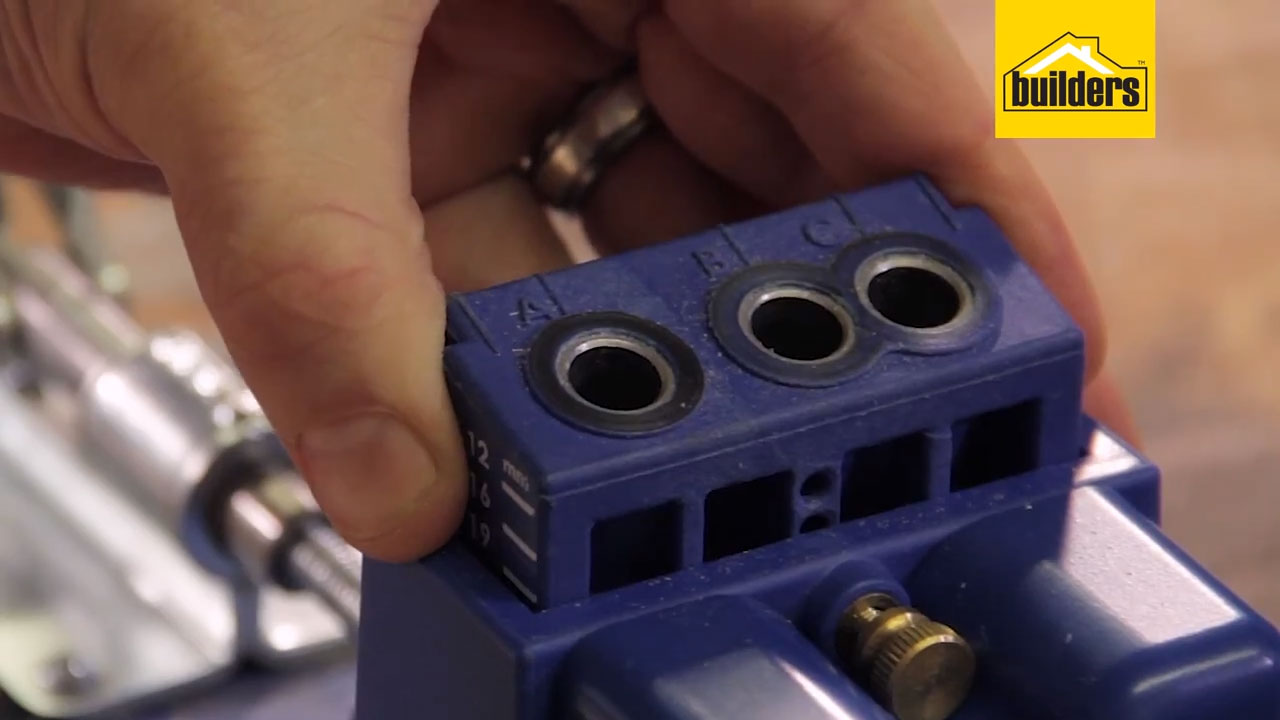
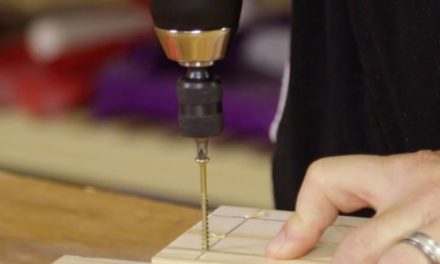
Step 2
Mark out the pocket holes, which will all be on the two side pieces (342mm x 70mm). On the long edges butting up against the top, mark three pocket holes. On the short edges butting up against the ends, mark two pocket holes.
Step 3
Use the Kreg jig and cordless drill to drill the pocket holes on the marks. Make sure the jig is set up for 19mm timber.
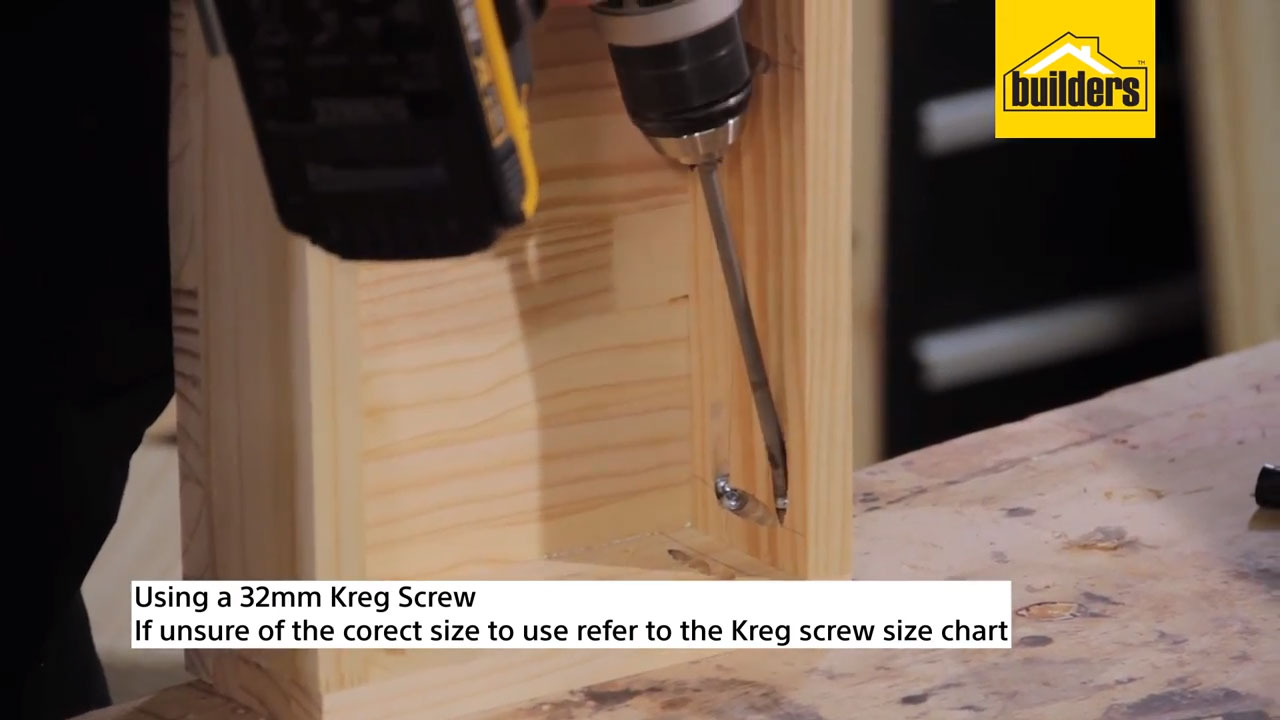
Step 4
Once the holes are drilled, use wood glue between the mating surfaces and clamps to hold the components in position, and screw your box together using Kreg screws.
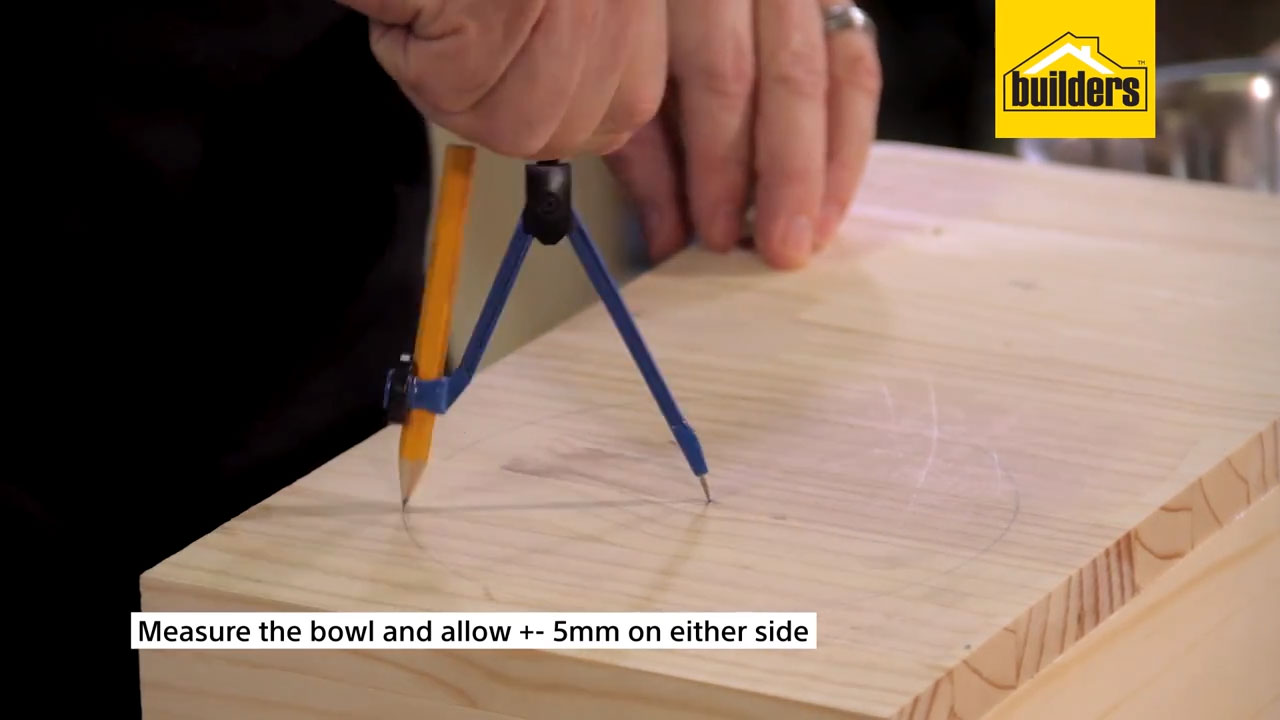
Step 5
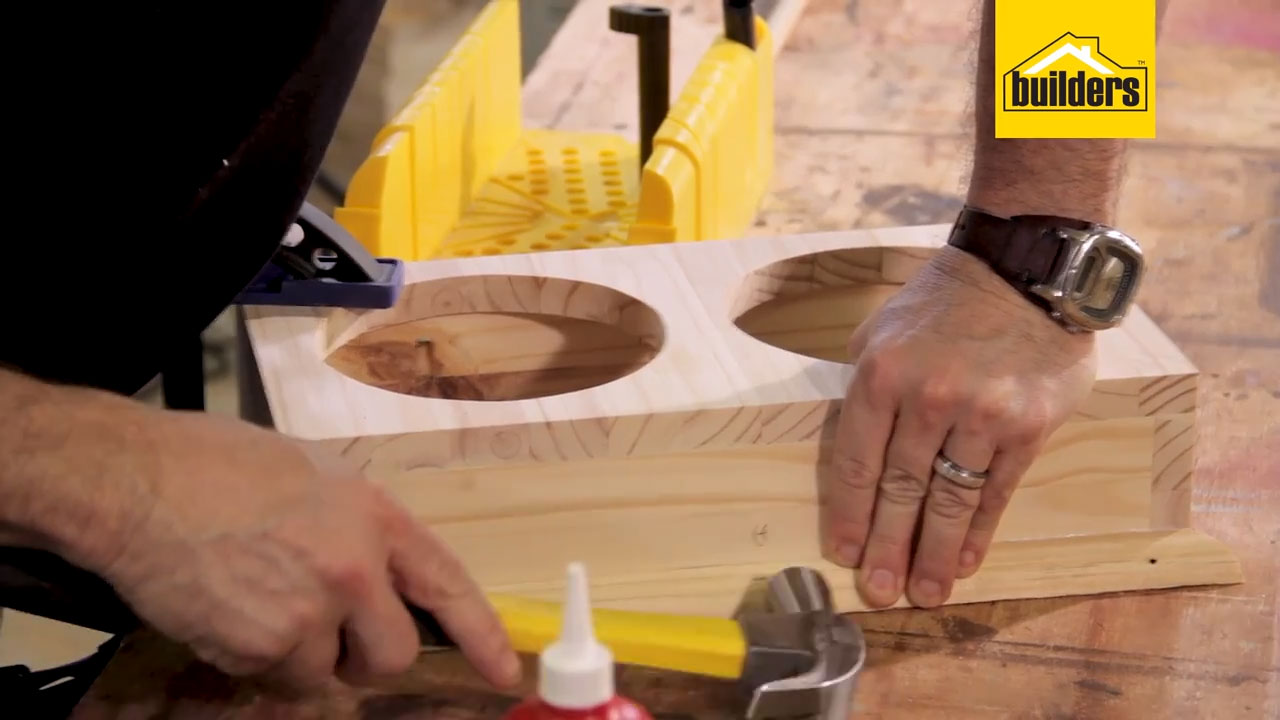
Flip the box over. On the top, mark out the centre points of the two holes for the dog bowls. Using a compass draw a circle that is smaller than the outside rim of the bowl, and a bit bigger than the inside radius of the bowl.
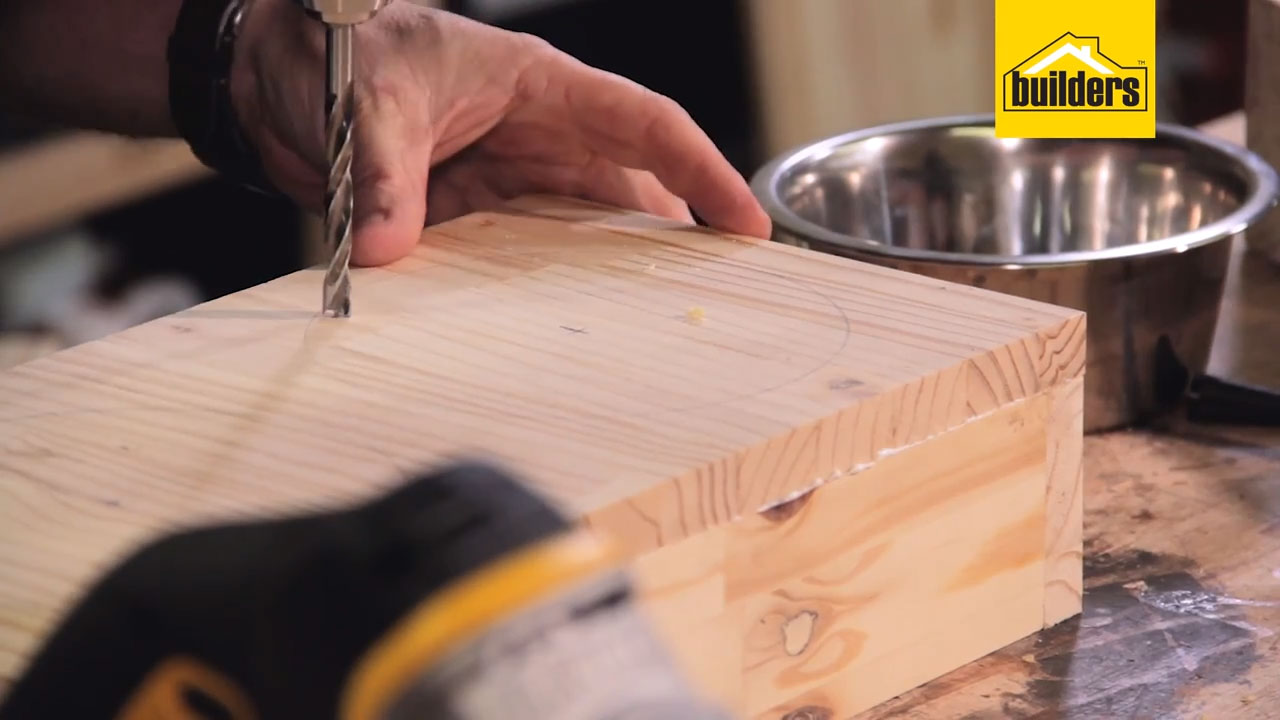
Step 6
Use the jig saw to cut out the circles, creating the holes for the food bowls. Begin by drilling a 8mm hole in the surface of the box, inside the drawn circle, creating a hole to insert the jig saw into.
Step 7
Follow the contour of the circle all the way around, then repeat for the second hole.
Step 8
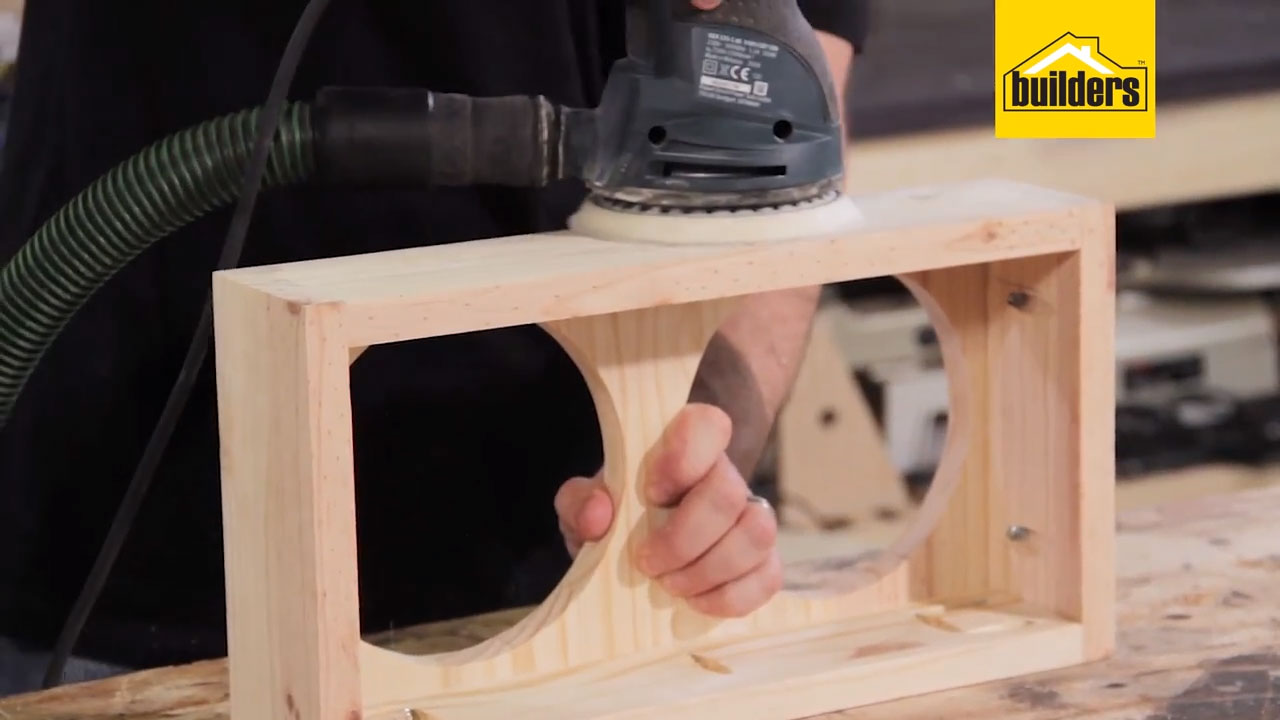
Once the box frame is complete, use wood filler to fill any holes or imperfections and then sand it for a smooth finish.
Step 9
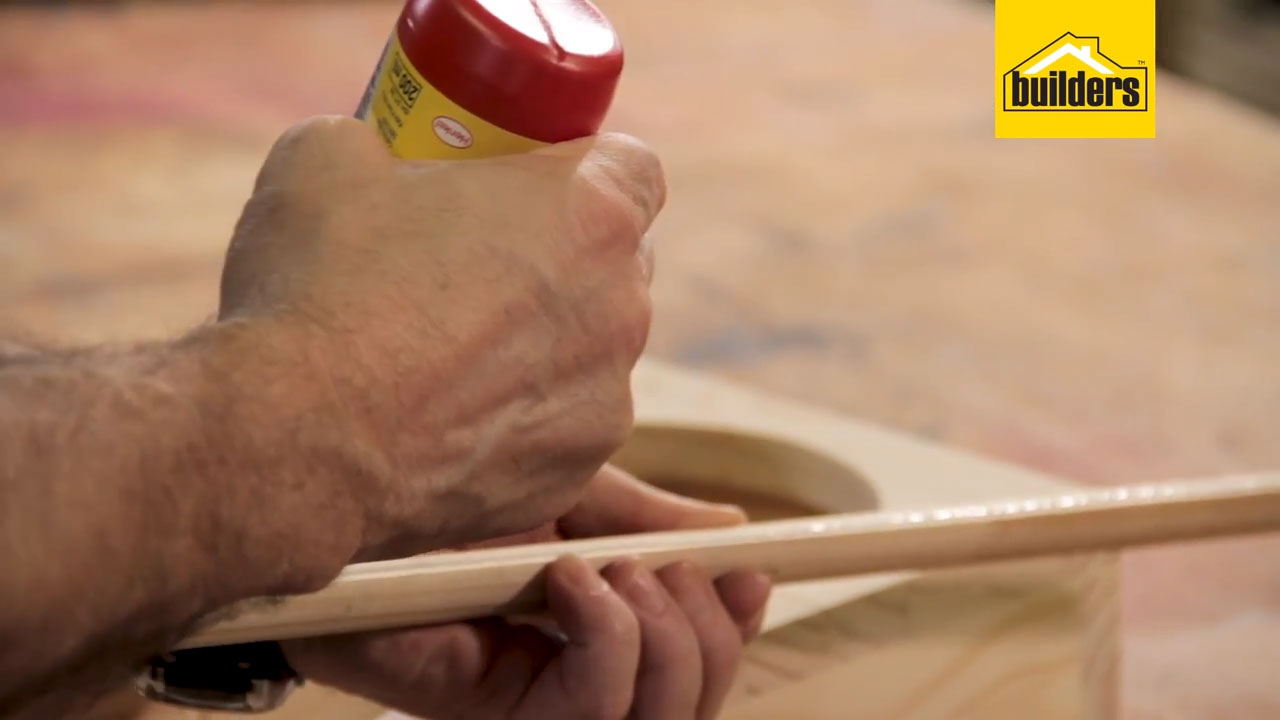
After the structure is sanded, add the quadrant to the edging. Line a piece of quadrant up against the base of the box and mark it, allowing a little excess on the side to cut the quadrant at a 45° angle. Cut one end of the quadrant at a 45° angle using a handsaw and mitre box. Hold the 45° in place and mark the other end and cut it to fit. Use wood glue between the mating surfaces and then use panel pins to attach the piece of quadrant in place. Repeat the process for all sides. Use wood filler to fill in the tips of the nail heads and sand until smooth.
Step 10
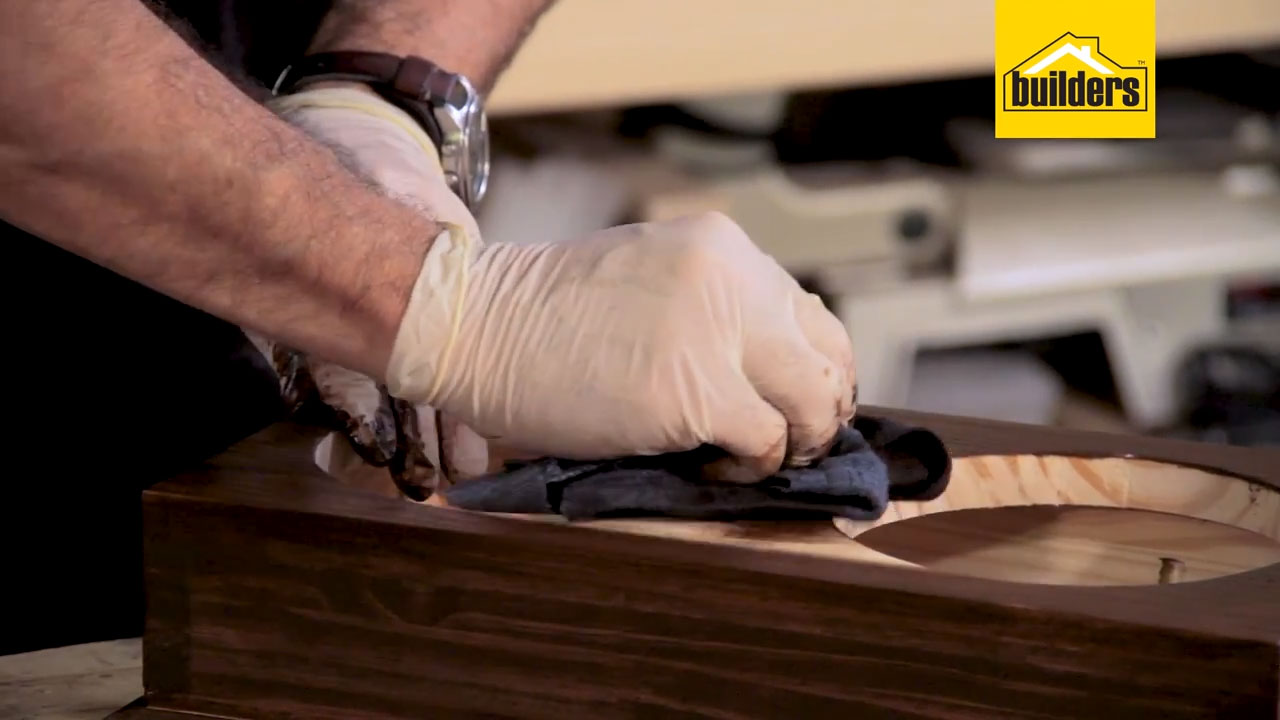
Stain the completed structure.
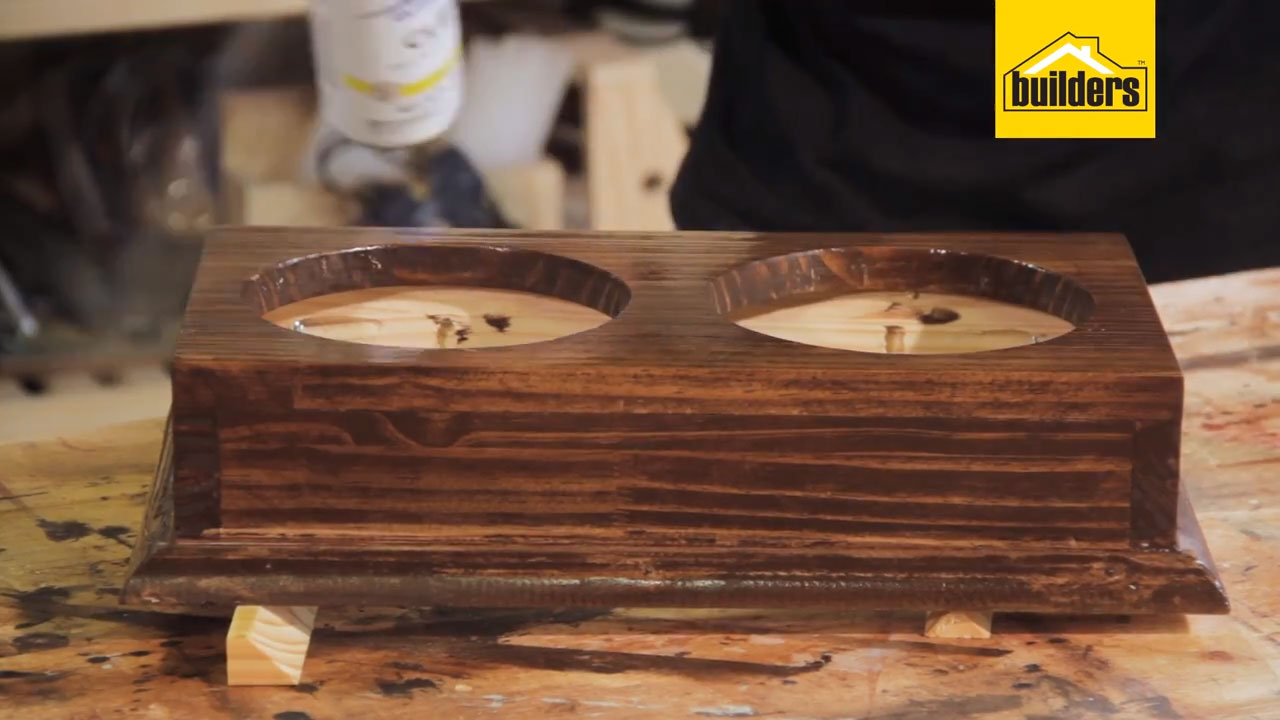
Step 11
Seal the structure using a wood sealer or a spray paint sealer to protect the timber from spillage.
Browse 1000’s of products available to you. Select your country to Shop Online.


