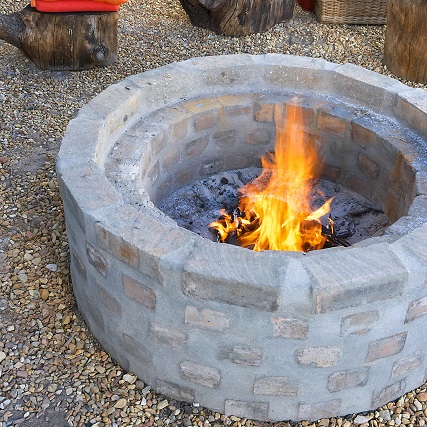
Want to make a fire pit for the garden this summer? This fire pit is easy to build and will create an attractive focal point in your yard.
- ± 120 Fire-hardened building bricks
- Building sand
- Cement
- Stone
- Measuring tape
- Spirit Level
- Spades
- Trowel
- Wooden stakes
- String
- Bonding liquid
- 3mm Steel plate cut to 950mm in diameter

Step 1
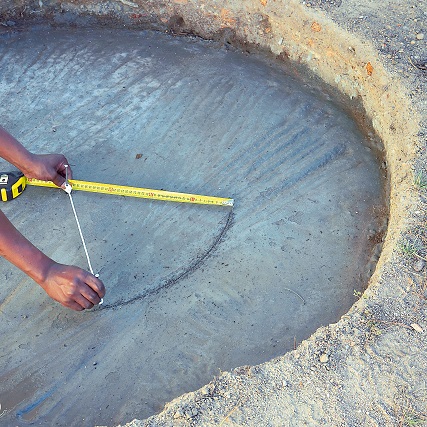
Decide where you wish to place your firepit. Avoid areas that are too close to buildings or have overhanging branches. Knock a wooden stake into the ground to mark the centre point. Use the tape measure and cut a piece of string roughly a meter in length. Tie a loop at each end to give a final length of about 80cm. Fit one loop over the stake and place a stake into the loop at the other end. Now scribe a circle roughly 160cm in diameter. Remove the soil from the area to a depth of at least 15cm.
Step 2
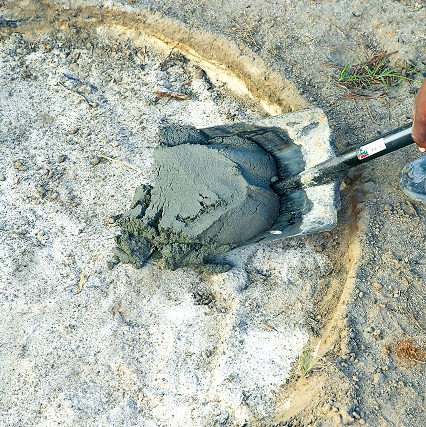
Mix the sand, stone and cement together to form the mortar for the foundation. Fill the hole until you have a foundation about 10cm thick. .

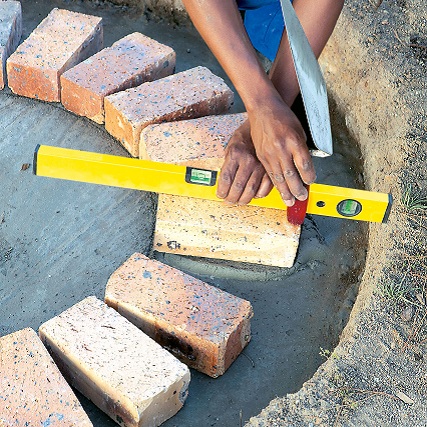
Step 3
Use a spirit level to ‘chop’ (the motion is a bit like chopping parsley) the still wet cement (from one end to the other) to ensure it is level. Leave the foundation to set overnight.
Step 4
Using the same method as described in step one, create another length of string and two loops about 45cm in length. While the cement is still slightly wet, hammer a nail into the centre point. Using the string system described in step one, now scribe a circle about 90cm in diameter.
Step 5
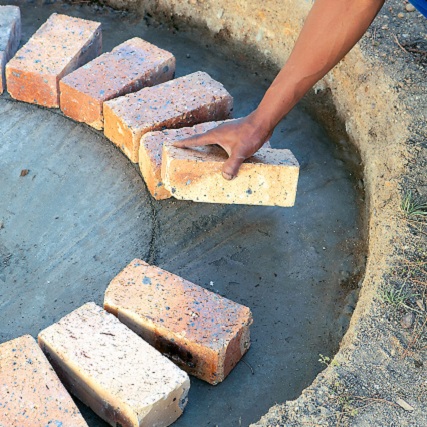
Place a circle of bricks to the outside of the circle, as shown. Space the bricks evenly so that the spaces around the outside are even.
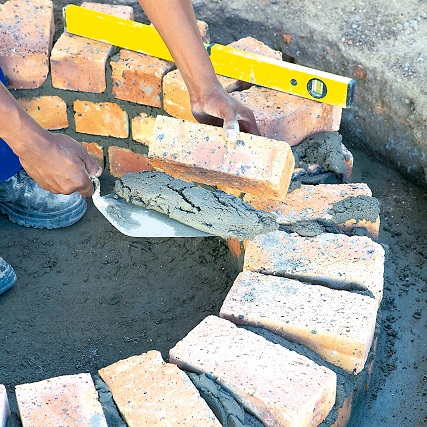
Step 6
Now mix your mortar (adding bonding liquid to your mix will make it stronger and help it bond better) and start laying your first brick. Use the spirit level to ensure that the bricks are level. Use the handle or edge of the trowel to tap the brick down into the mortar until you are happy that it is sitting firmly (and level) in the mortar.
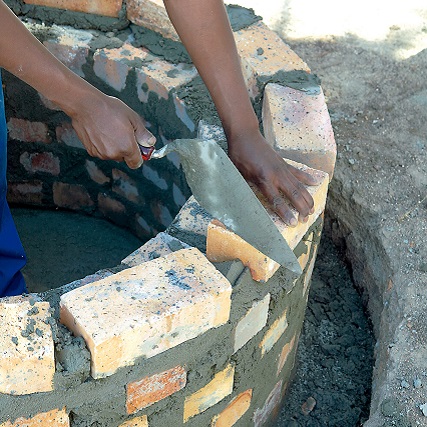
Step 7
Repeat the process for the subsequent tiers, alternating the positions of the bricks so that they overlap the bricks in the rows below. Fill the wider gaps along the outside as you work.
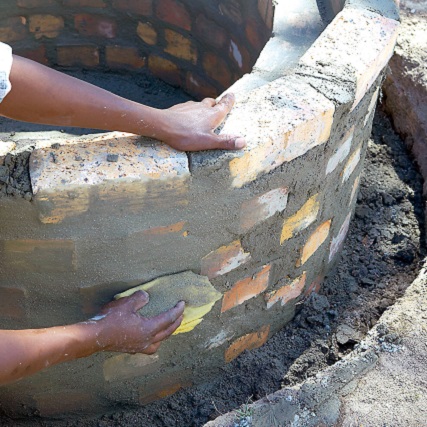
Step 8
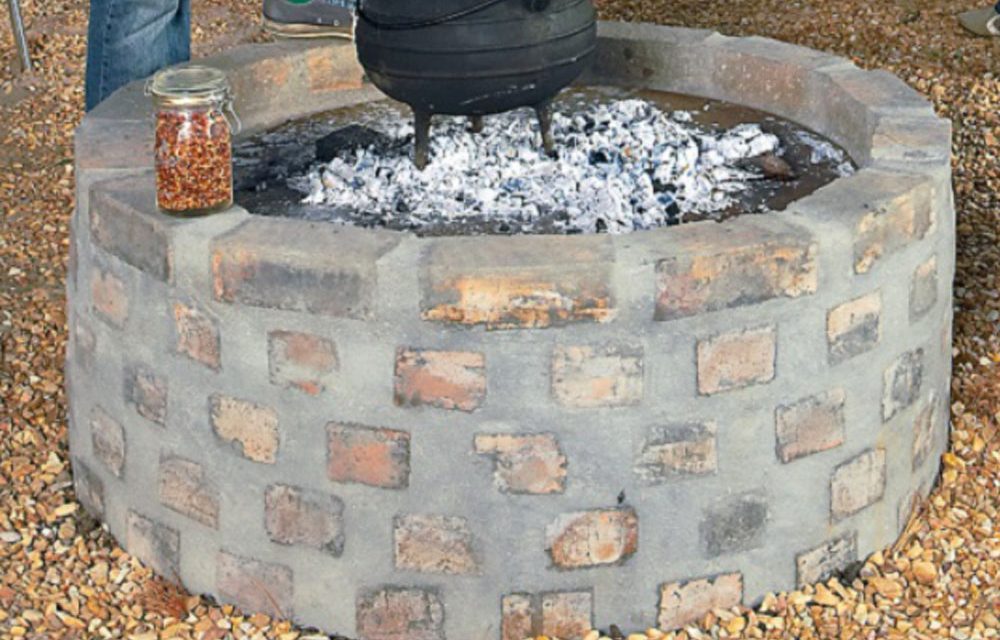
The final row of bricks should be placed end to end around the outside, as shown. Our braai included five courses of bricks radiating outward and a sixth row placed end to end around the top.
Step 9
Once all the gaps between the bricks have been filled and allowed to set slightly, use a wet sponge and the remaining mortar to ‘bag’ the structure. This entails painting the diluted mortar onto the brickwork in a rubbing motion. Leave the structure to dry for a few days, wetting it morning and evening over the next couple of days; this will help the cement to cure. The longer you leave the structure to cure, the more durable it will be – two weeks or more would be best.
Now your DIY is complete
Experience the freedom of the bushveld in your own backyard with this firepit, easy to construct and versatile enough to use as an open campfire, an oven or a fireplace to cook food.
Credits
Referenced from Gallo images / Home Magazine
Browse 1000’s of products available to you. Select your country to Shop Online.


