
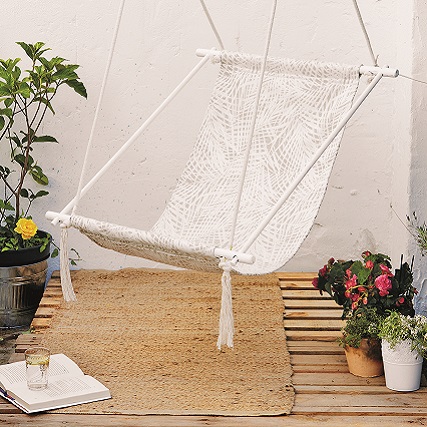
We show you how to make a pallet deck, stacked bench, rice bag vertical garden and a hanging chair.
- 1,3m upholstery fabric
- 10-15m twine, 10mm thick
- 2 x 16mm dowels, each 800mm long
- 3 x 26mm sticks, each 760mm long (we used meranti rake handles from a hardware store)
- 4 x 4mm wood screws
- sandpaper
- wood stain
- drill with 17mm, 11mm and 2,2mm drill bits
- other basic tools (saw, screwdriver, etc)
Step 1
Cut two pieces of upholstery fabric 130 x 60cm each (if your fabric is very strong and heavy, one piece will do).
Step 2
Place the two pieces of fabric together with wrong sidesfacing. Fold under 13mm along the long sides and press. Fold and press again and stitch down. Iron flat. Fold in the fabric along the top and bottom edges by a few millimetres and then 80mm to the back. Pin and stitch close to the folded raw edges through all the layers to form casings for the 26mm sticks. Work a second row of stitching close to the first to strengthen the casings. Now leave the fabric piece until later.
Step 3
If the 26mm sticks are longer than 760mm, cut them off on this measurement and sand the ends until smooth, using sandpaper. Mark a centre line with a pen so your work will always be straight. Mark 50mm and then 90mm from the endsof two of the sticks along the centre line. Drill 16mm holes atthe 50mm markings and 11mm holes at the 90mm markings.
Step 4
For the third stick, measure only 90mm from the ends and drill 11mm holes.
Step 5
Using sandpaper, sand the wood until smooth at all the drilled holes, if necessary.
Step 6
Treat all the sticks with wood stain. Apply approximately three coats, waiting a few minutes between each coat. Place on one side to dry completely.
Step 7
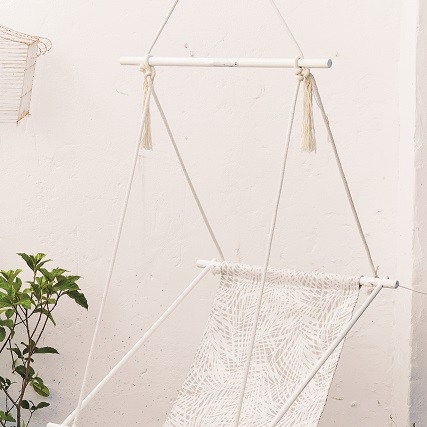
Insert the two sticks with four holes into the casings at the top and bottom edges of the fabric. Also insert the thinner dowels into the 16mm holes. Sand the dowels slightly thinner using sandpaper so they can go through the holes, but not so much that they can fall out of the holes. You must now ensure that the frame is perfectly straight and a perfect rectangle. Using the 2,2mm drill bit, drill a hole at each point where the large sticks and thinner dowels meet. Screw in the wood screws tightly.
Step 8
Insert the end of the twine from the top into the left-hand side (your left-hand side with the chair in front of you) of the upper stick that has only two holes and tie a knot underneath the stick so there is a 220mm length below the knot that will eventually form one of the tassels. Now insert the other end of the twine from the top of the upper stick downwards through the hole on the right-hand side of this stick, so that the length of the twine above the upper stick is 1 180mm (the length of the twine to the stick is 590mm on each side when the chair is hanging up) and tie a knot underneath the stick. Now insert the end of the twine through the right-hand hole of the next stick(the stick for the headrest) and tie a knot. Cut the end off below the knot.
Step 9
Take the remaining twine and tie a knot at one end. Insert the other end of the twine from the bottom upwards through theleft-hand side of the stick for the headrest and take it over the upper stick. Tie a double knot underneath the upper stick and bring it down to the left-hand side of the bottom stick. Insert the twine through the hole and tie a knot. Again leave 220mm twine below the knot for a tassel and cut off the twine.
Step 10
For the last length of twine, tie a knot 220mm from the end. Insert the other end through the right-hand side of the bottom stick and take it up to the upper stick, again tie a double knot and cut off the twine 220mm below the knot.
Step 11
Tie twine around a beam on your veranda or use a strong hook hanging from the roof to hang your chair. Check that all the ropes are the same length and that the chair hangs straight. Now make tassels of the four twine ends that were left hanging, by unravelling the twine. Again measure 220mm and trim all the tassels neatly to an even length.
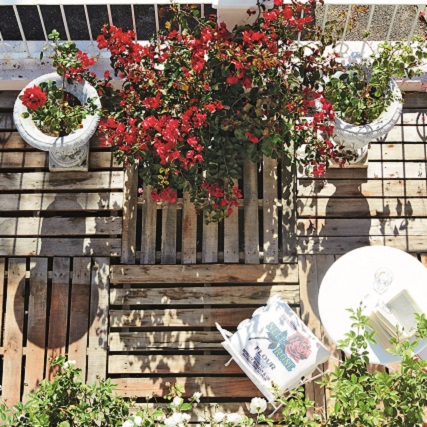
Make a pallet deck
A clever and inexpensive way to make your own wooden deck in the garden is to lay a few pallets next to each other. Look for pallets with wooden slats that are fairly close together. Cut them to size if necessary, so they fit snugly into the space. Secure the pallets with brackets if you’re worried they might move around.
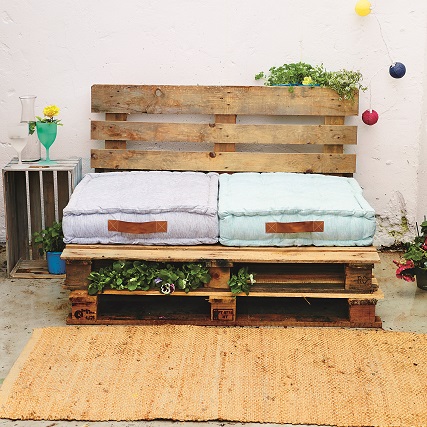
Make stacked benches
Stack a few pallets on top of each other for a quick-fix outdoor seating solution, and position another one for a backrest. For something less temporary and more stable, screw the pallets together to prevent them moving. Complete the picture with comfortable cushions and fun summery lights, and plant a few flowering annuals in the base of your bench.
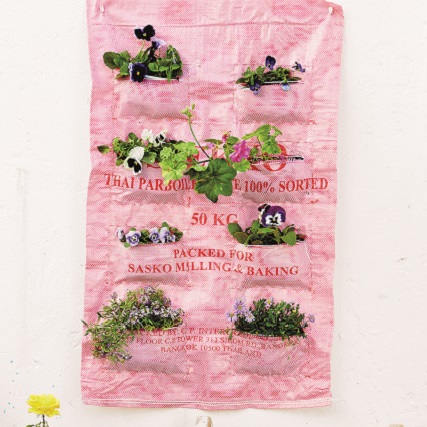
Make a rice bag vertical garden
Transform a colourful woven-plastic sack (the type used for bulk grains or builder’s rubble) into a vertical garden. All you need is the sack, thin cord, an embroidery needle, soil and colourful annuals. Measure the sack and divide it into equal squares. Mark the outlines of the squares and work running stitch along the lines, through both layers of the sack, with the cord and embroidery needle. Cut slits into the top of the pockets you’ve sewn and plant your flowers. Cut holes at the top corners of the sack and hang the garden from hooks on your wall.
Credits
Referenced from Gallo Images / IDEAS Magazine
Browse 1000’s of products available to you. Select your country to Shop Online.


