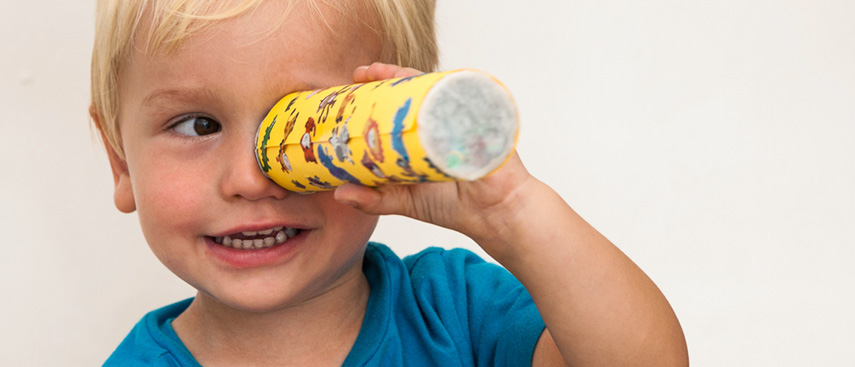
Custom-make this fun kiddies toy as a craft project.
- A clear A4 PVC plastic sheet – a binding cover sheet works best as it is the right thickness. Cut to 20,3cm x 10,16cm
- Wax paper cut to 10cm x 10cm
- Cling wrap cut to 10cm x 10cm
- Carton tube from kitchen paper towel or similar, cut this to 21cm
- A sheet of black project paper
- A sheet of A4 coloured project paper
- Clear glue
- Clear tape
- Permanent marker
- A pair of sharp scissors
- Assortment of coloured glass beads and a few sequins
- Two small rubber bands
- Stickers or other decorations for your finished kaleidoscope
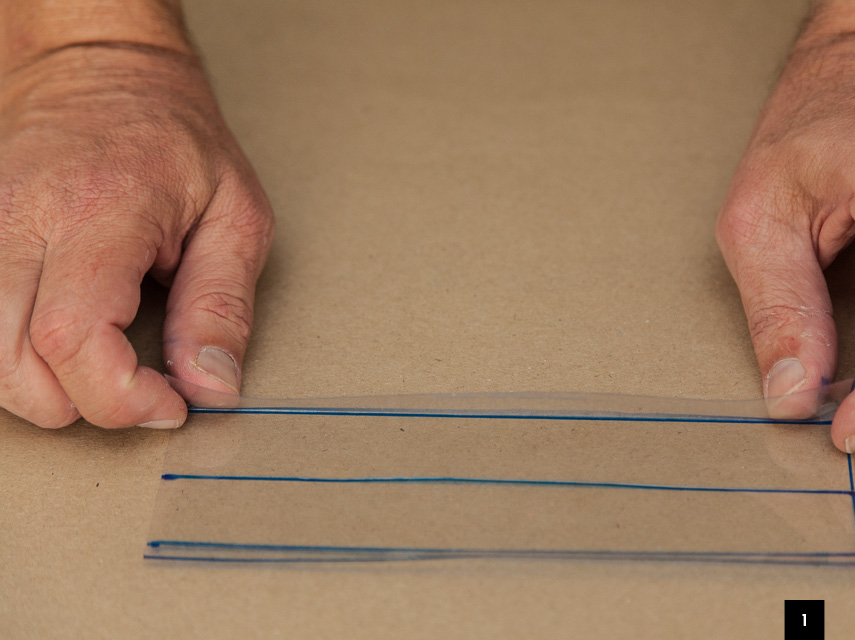
Step 1
Mark up the square of binder sheet, drawing three lines at exactly 3,2cm apart. Then draw a fourth line 0,6cm to the end. This will ensure you have an equilateral triangle to work with. Now fold the plastic crisply along the four lines, to shape it into a perfect triangle. The fourth (0,6cm) line or lip should sit on the outside.
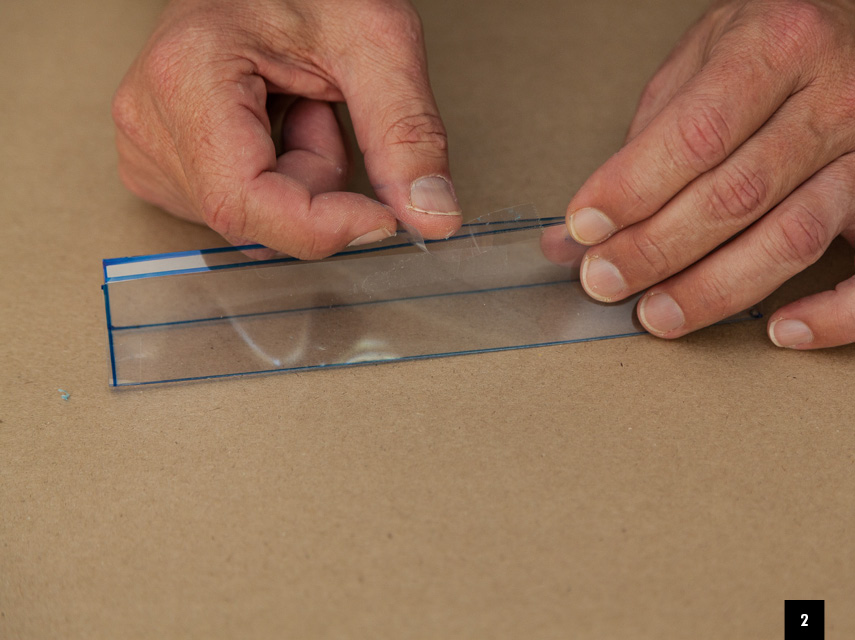
Step 2
Use your clear tape to stick it firmly in place.
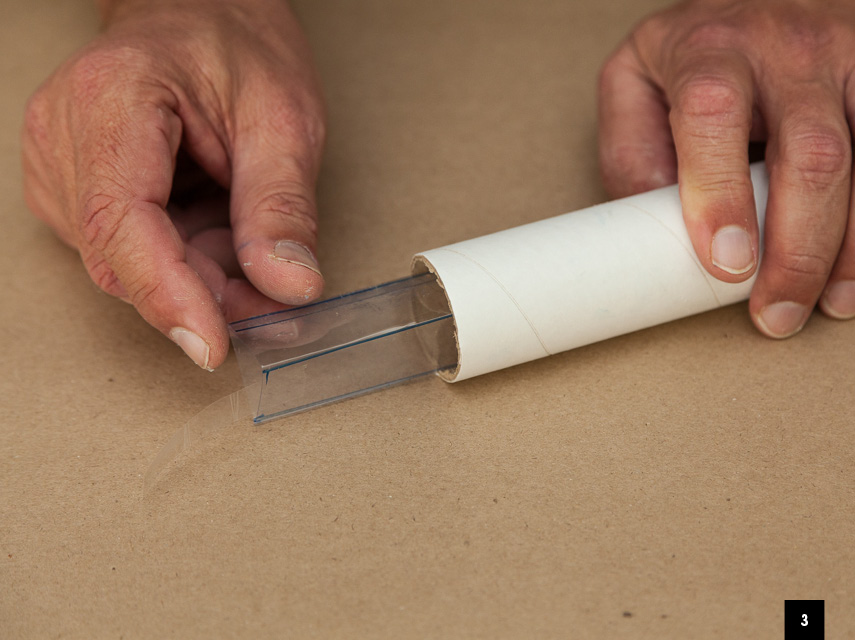
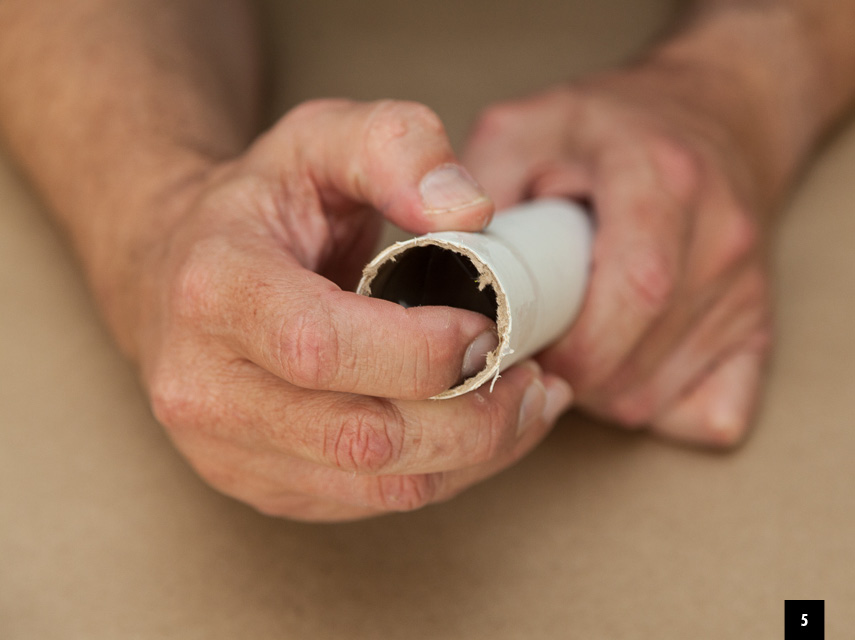
Step 3
Stick a piece of tape on the inside of your plastic triangle and slowly push into the opening of the paper tube. There should be a gap of about one centimetre from the end of the tube to the top of the plastic triangle.
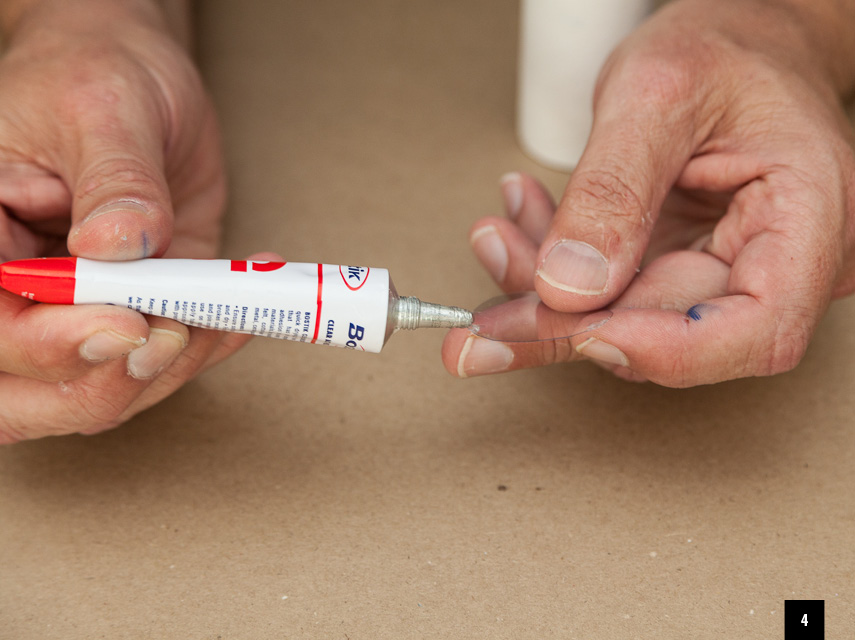
Step 4
Place your paper tube on the remainder of your sheet of plastic. Trace the tube shape onto the plastic using your permanent marker. Cut out along the inside of the line. Take your plastic disc and dot clear glue along the rim.
Step 5
Push gently into the open end of the tube until it sits flush against the top of the plastic triangle.
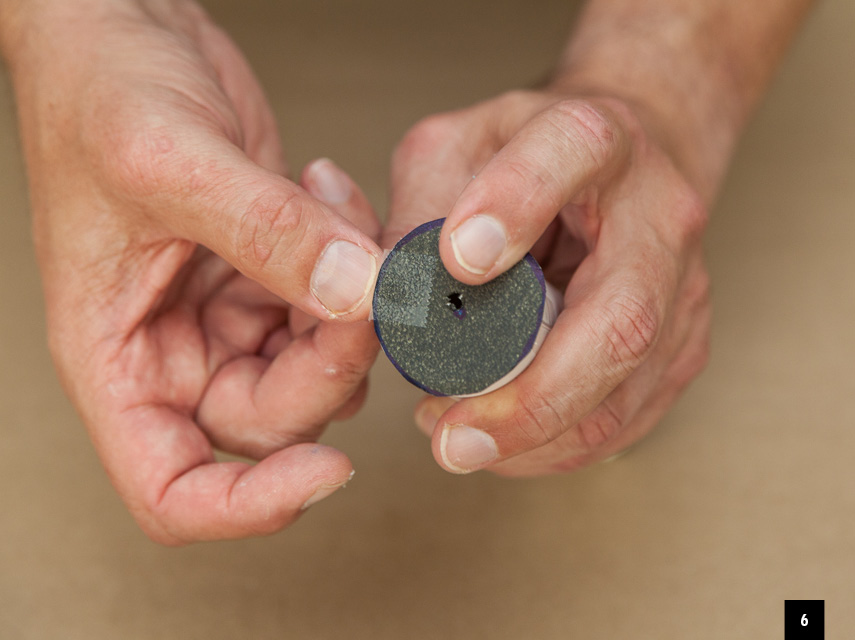
Step 6
Place your paper tube on the black project paper. Trace the tube shape onto the paper using your permanent marker. Cut out along the outside of the line. Using a pencil, make a small hole in the middle of the disc. Then tape the black disc to one end of the roll.
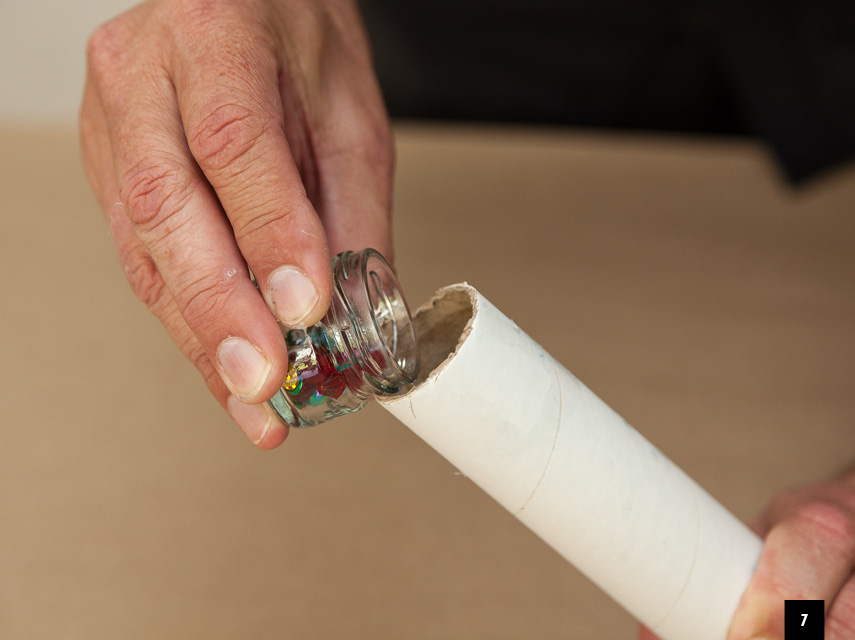
Step 7
Holding your tube upright, shake your beads and sequins into the open end. Don’t overfill – you want the beads and sequins to move around freely.
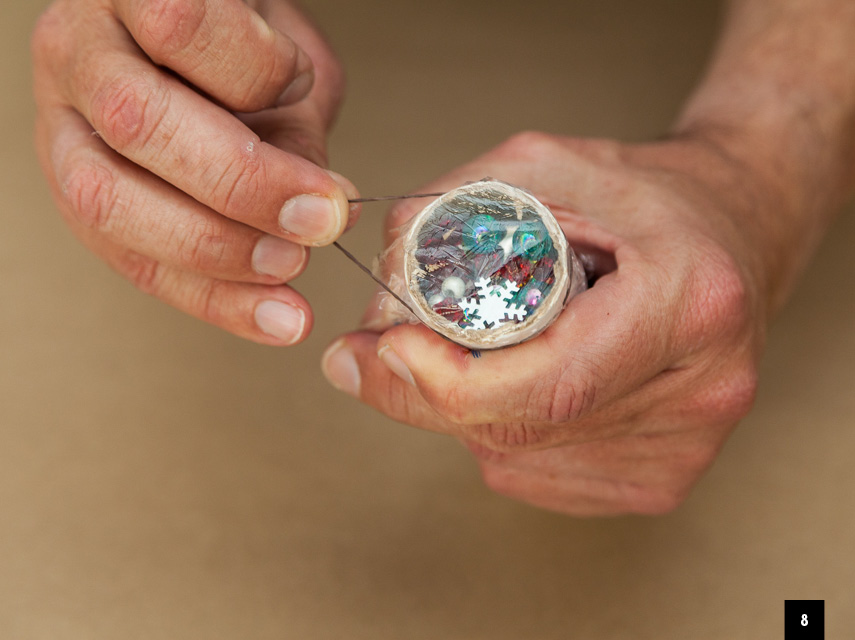
Step 8
Fold your cling wrap over the opening and attach with elastic. Cut away excess material.
Step 9
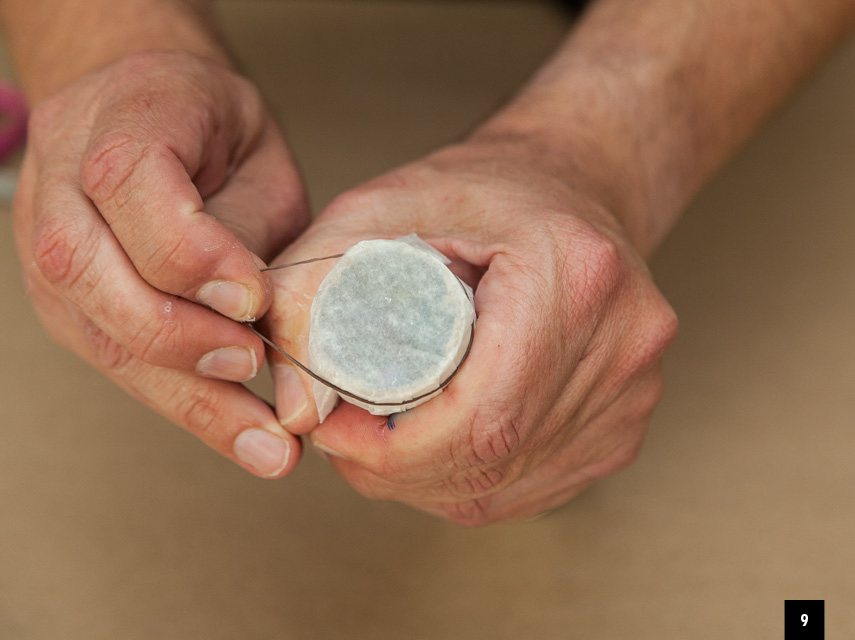
Fold your wax paper over the cling wrap and attach with elastic.
Step 10
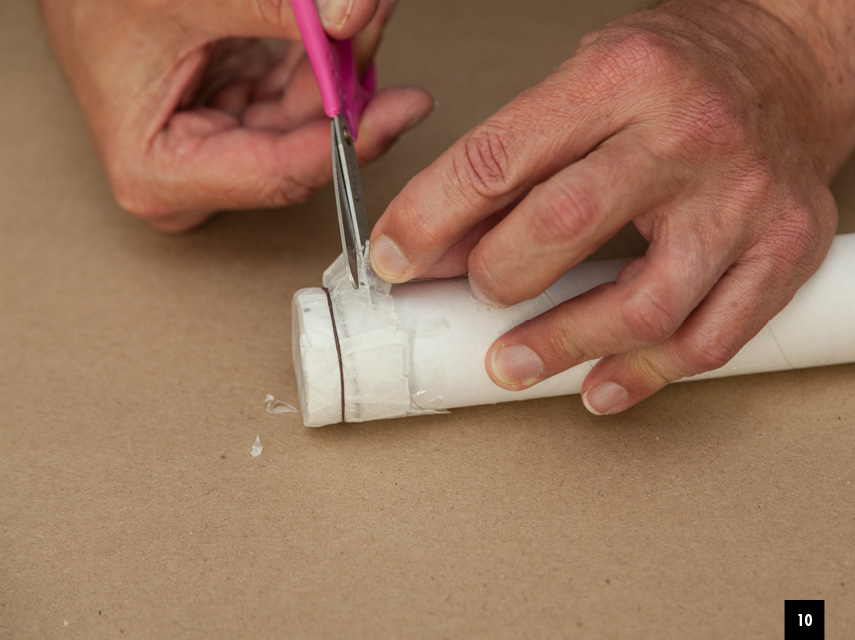
Cut away excess paper.
Step 11
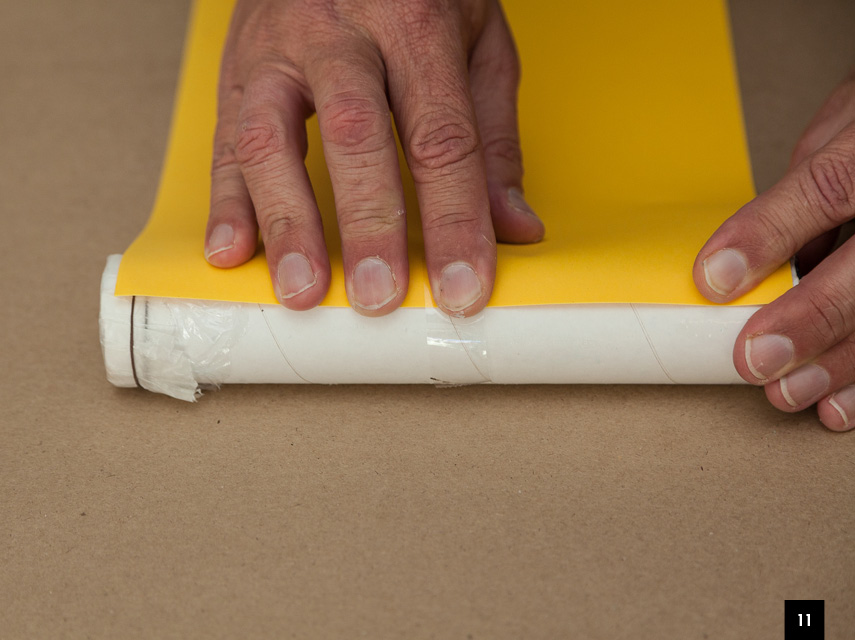
Take your coloured A4 paper and attach it to the tube with clear tape.
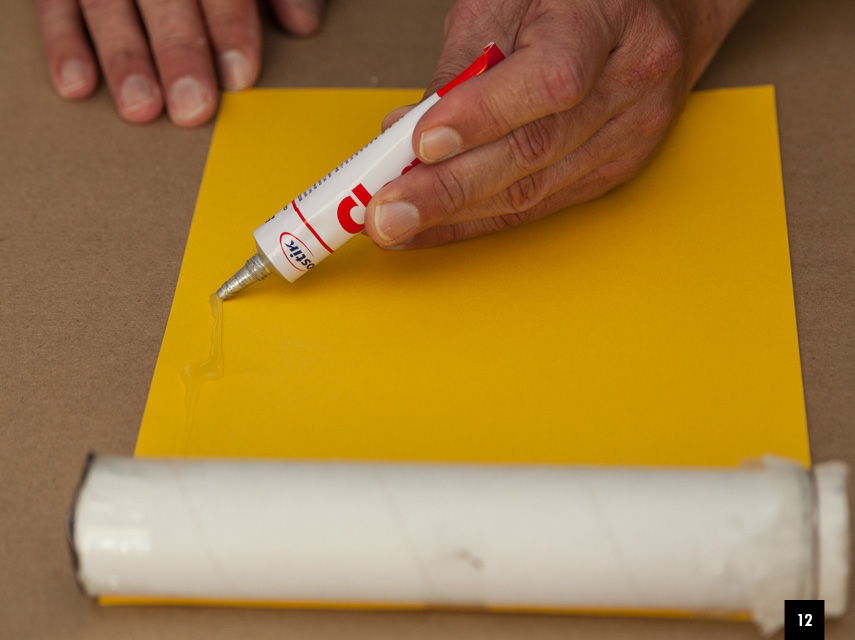
Step 12
Put clear glue onto the paper and attach tightly to the tube. Make sure the paper end is glued tightly in place. If necessary use clear tape to reinforce. Now the kaleidoscope is ready for decorating.
To enjoy your kaleidoscope, point it to a light source and look into the small hole. Turn the tube to change the patterns inside.
Browse 1000’s of products available to you. Select your country to Shop Online.


