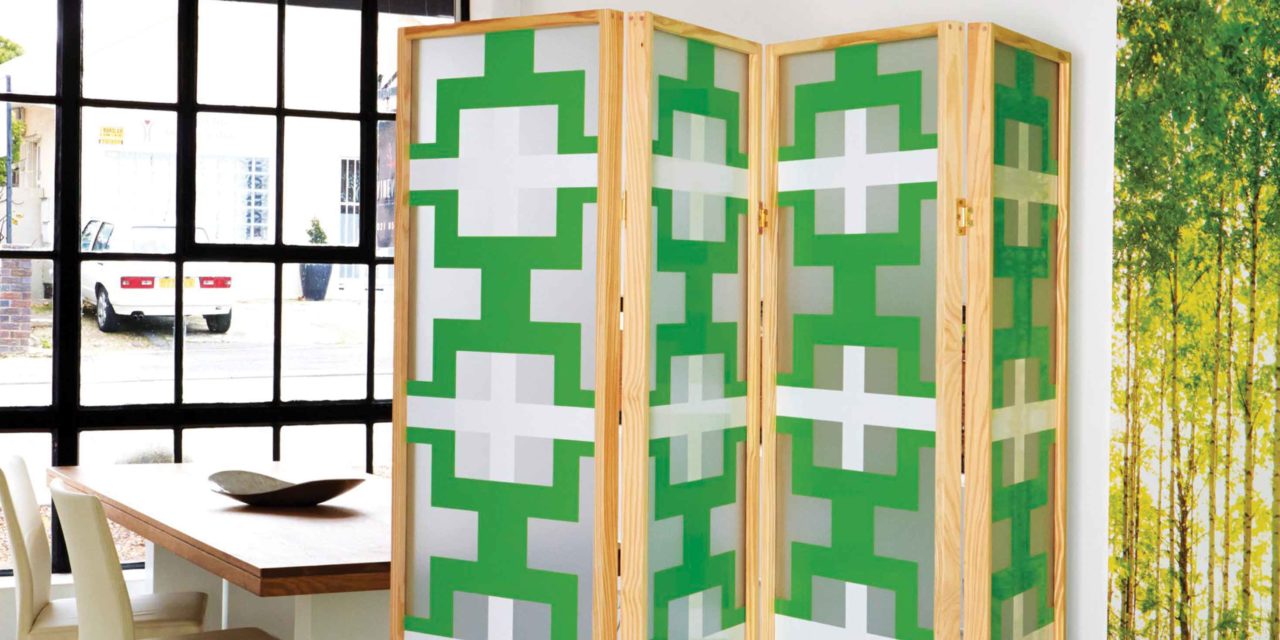
Screens are a great way to separate open-plan areas into space specific zones; for inspiration, see this one up close in the ScreenArt exhibit at Cape Town’s Homemakers Expo.
- cordless or corded drill; 3mm, 8mm drill bits
- tri-square
- mitre box and handsaw
- table saw and mitre saw (optional)
- mitre clamp(s)
- hammer
- pencil
- measuring tape
- sander
- wood glue
- 40mm cut screws
- 16mm chipboard screws
- panel pins (if using beading)
- 120, 220 grit sandpaper
- wood sealer (or varnish)
- paintbrush
- ten 1 800 x 44 x 22mm pine cut to:
- eight 1 790mm (uprights)
- four 450mm (bottom lengths)
- two 1 800 x 22 x 22mm pine cut to:
- eight 450 x 20 x 20mm (top lengths)
- beading (optional): not shown or costed
- twenty 1 800 x 12 x 12mm pine cut to:
- sixteen 1 750mm (vertical beading for glass)
- sixteen 428mm (horizontal beading for glass)
- 8mm timber dowel
- 4mm glass cut to:
- four 1 755 x 460mm panels
- 6 hinges
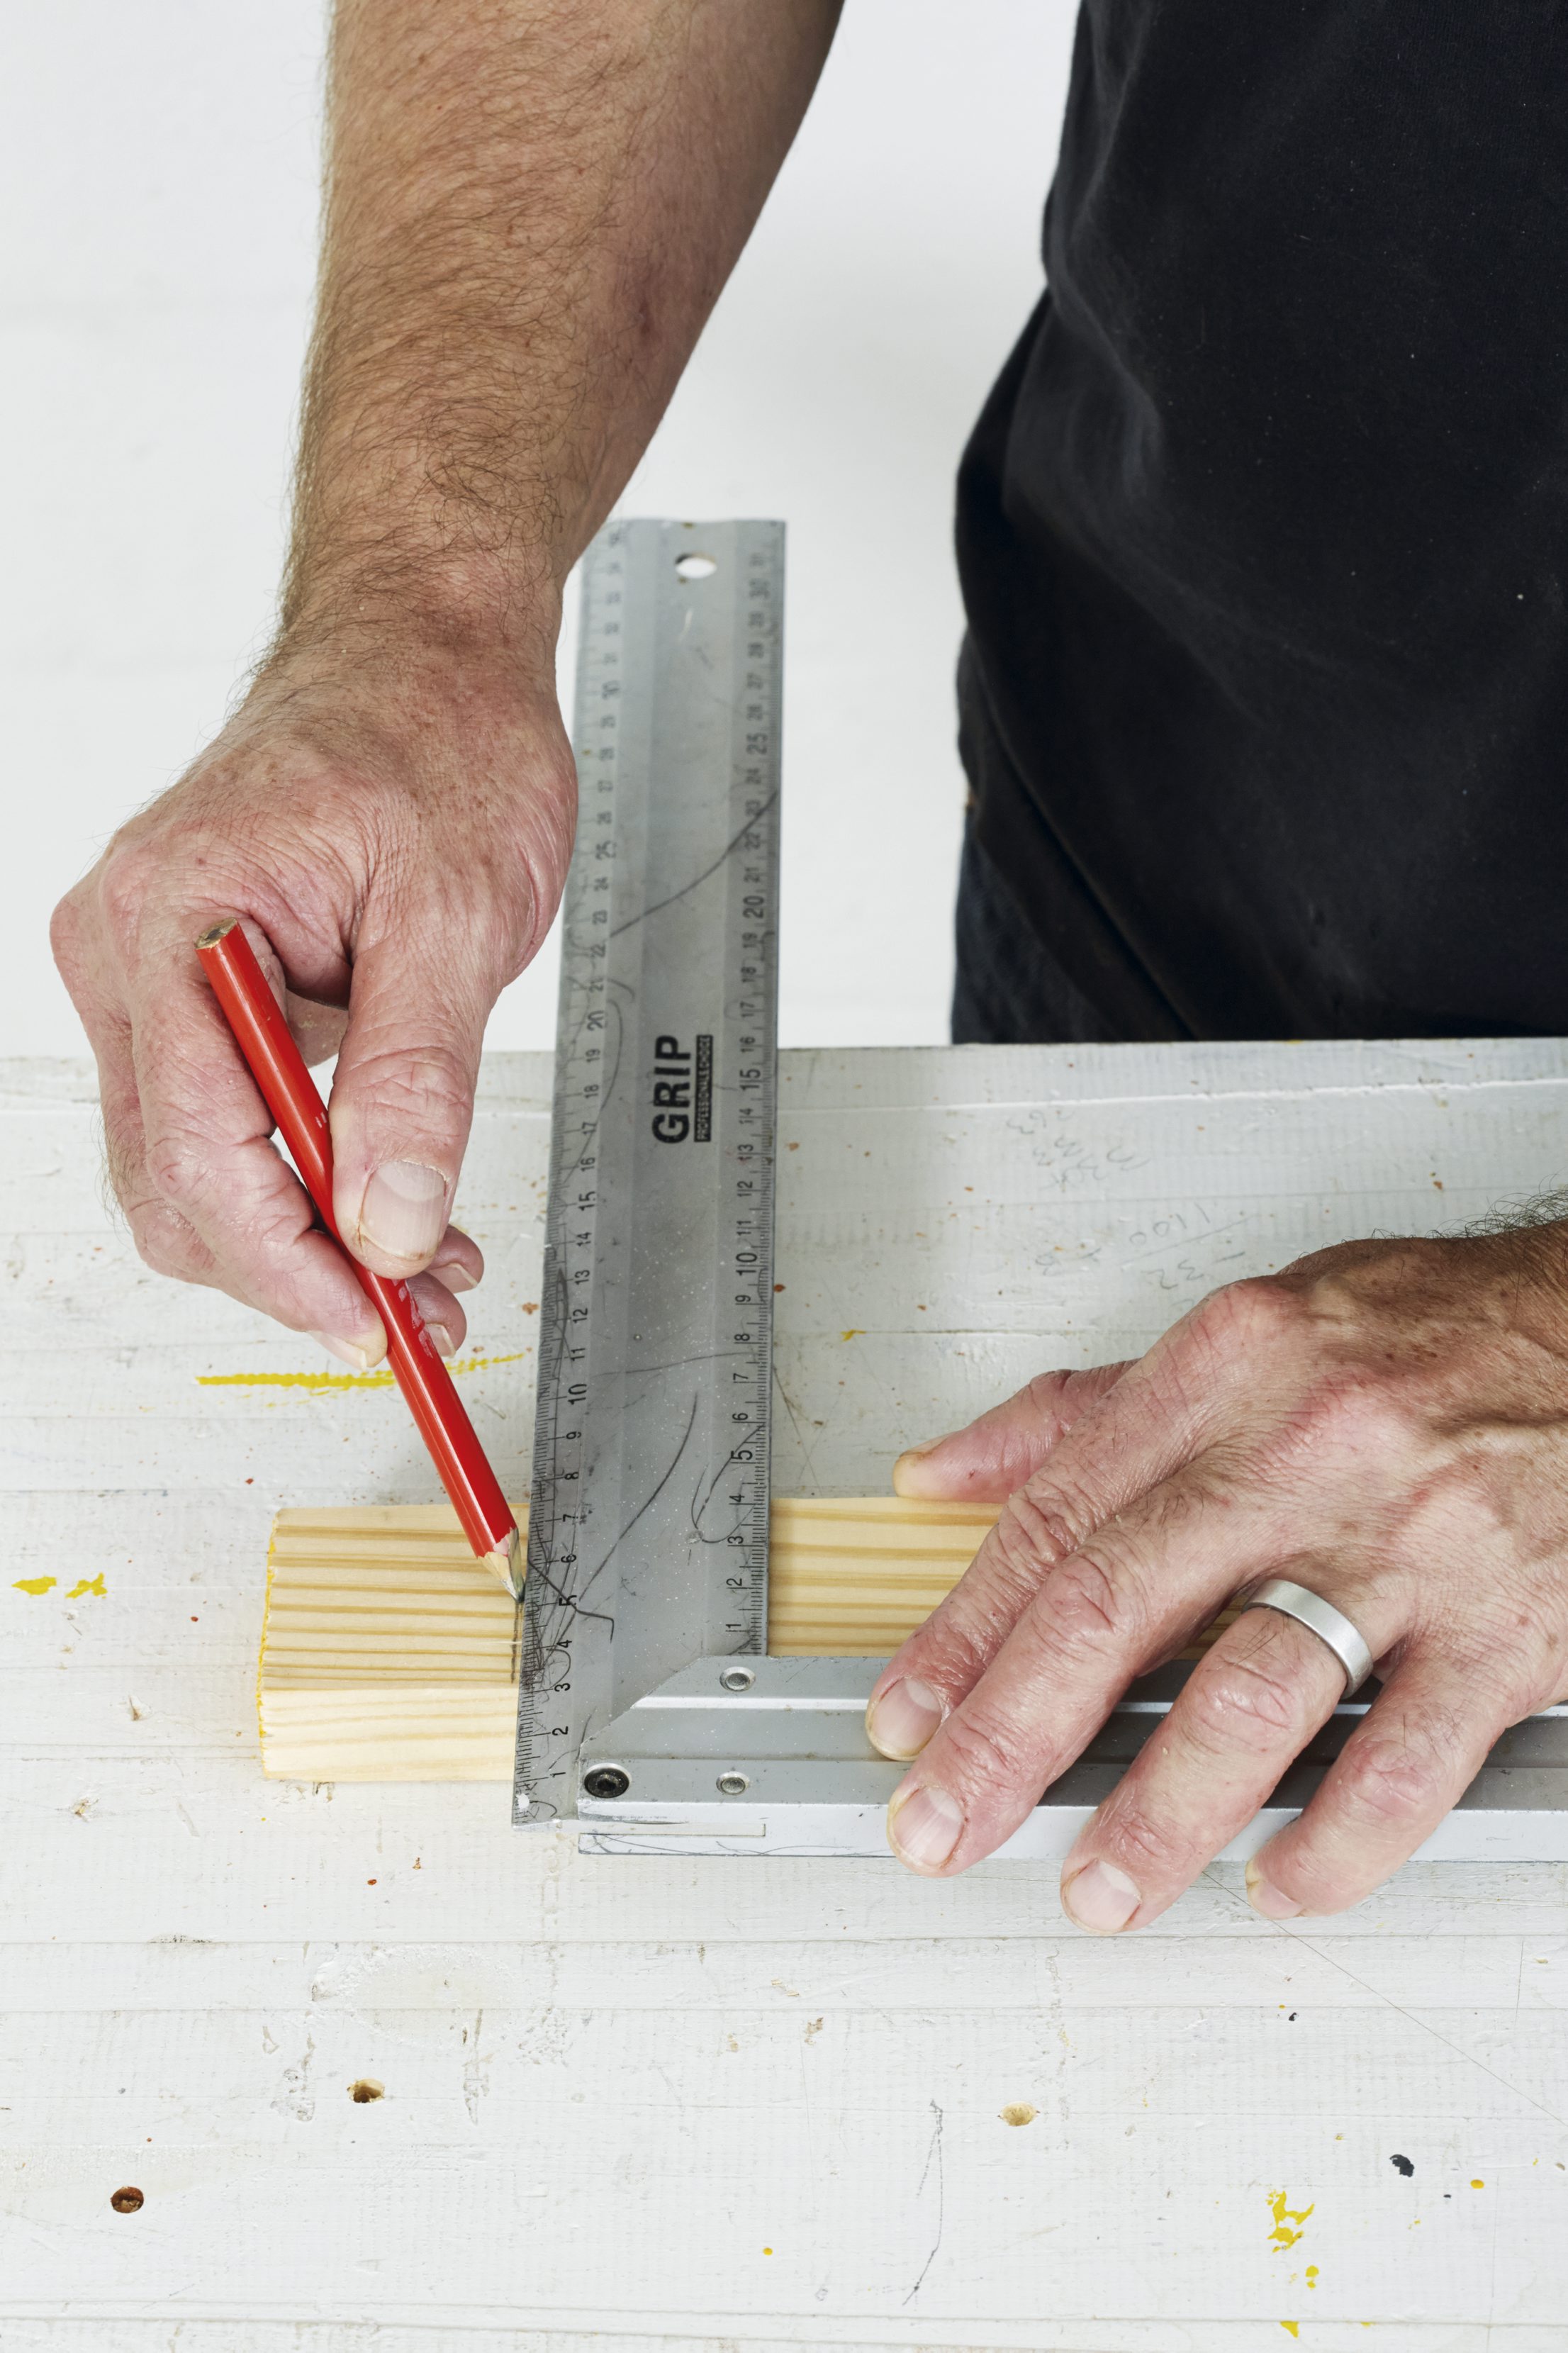
Step 1
Although 1 800mm is a standard, some lengths may vary by a couple of millimetres either way. Trim and neaten the ends of the 1 800mm lengths to give a final size of 1 790mm. Mark out the 450mm lengths too. Use the tri-square to draw lines and ensure that you cut them at 90°.
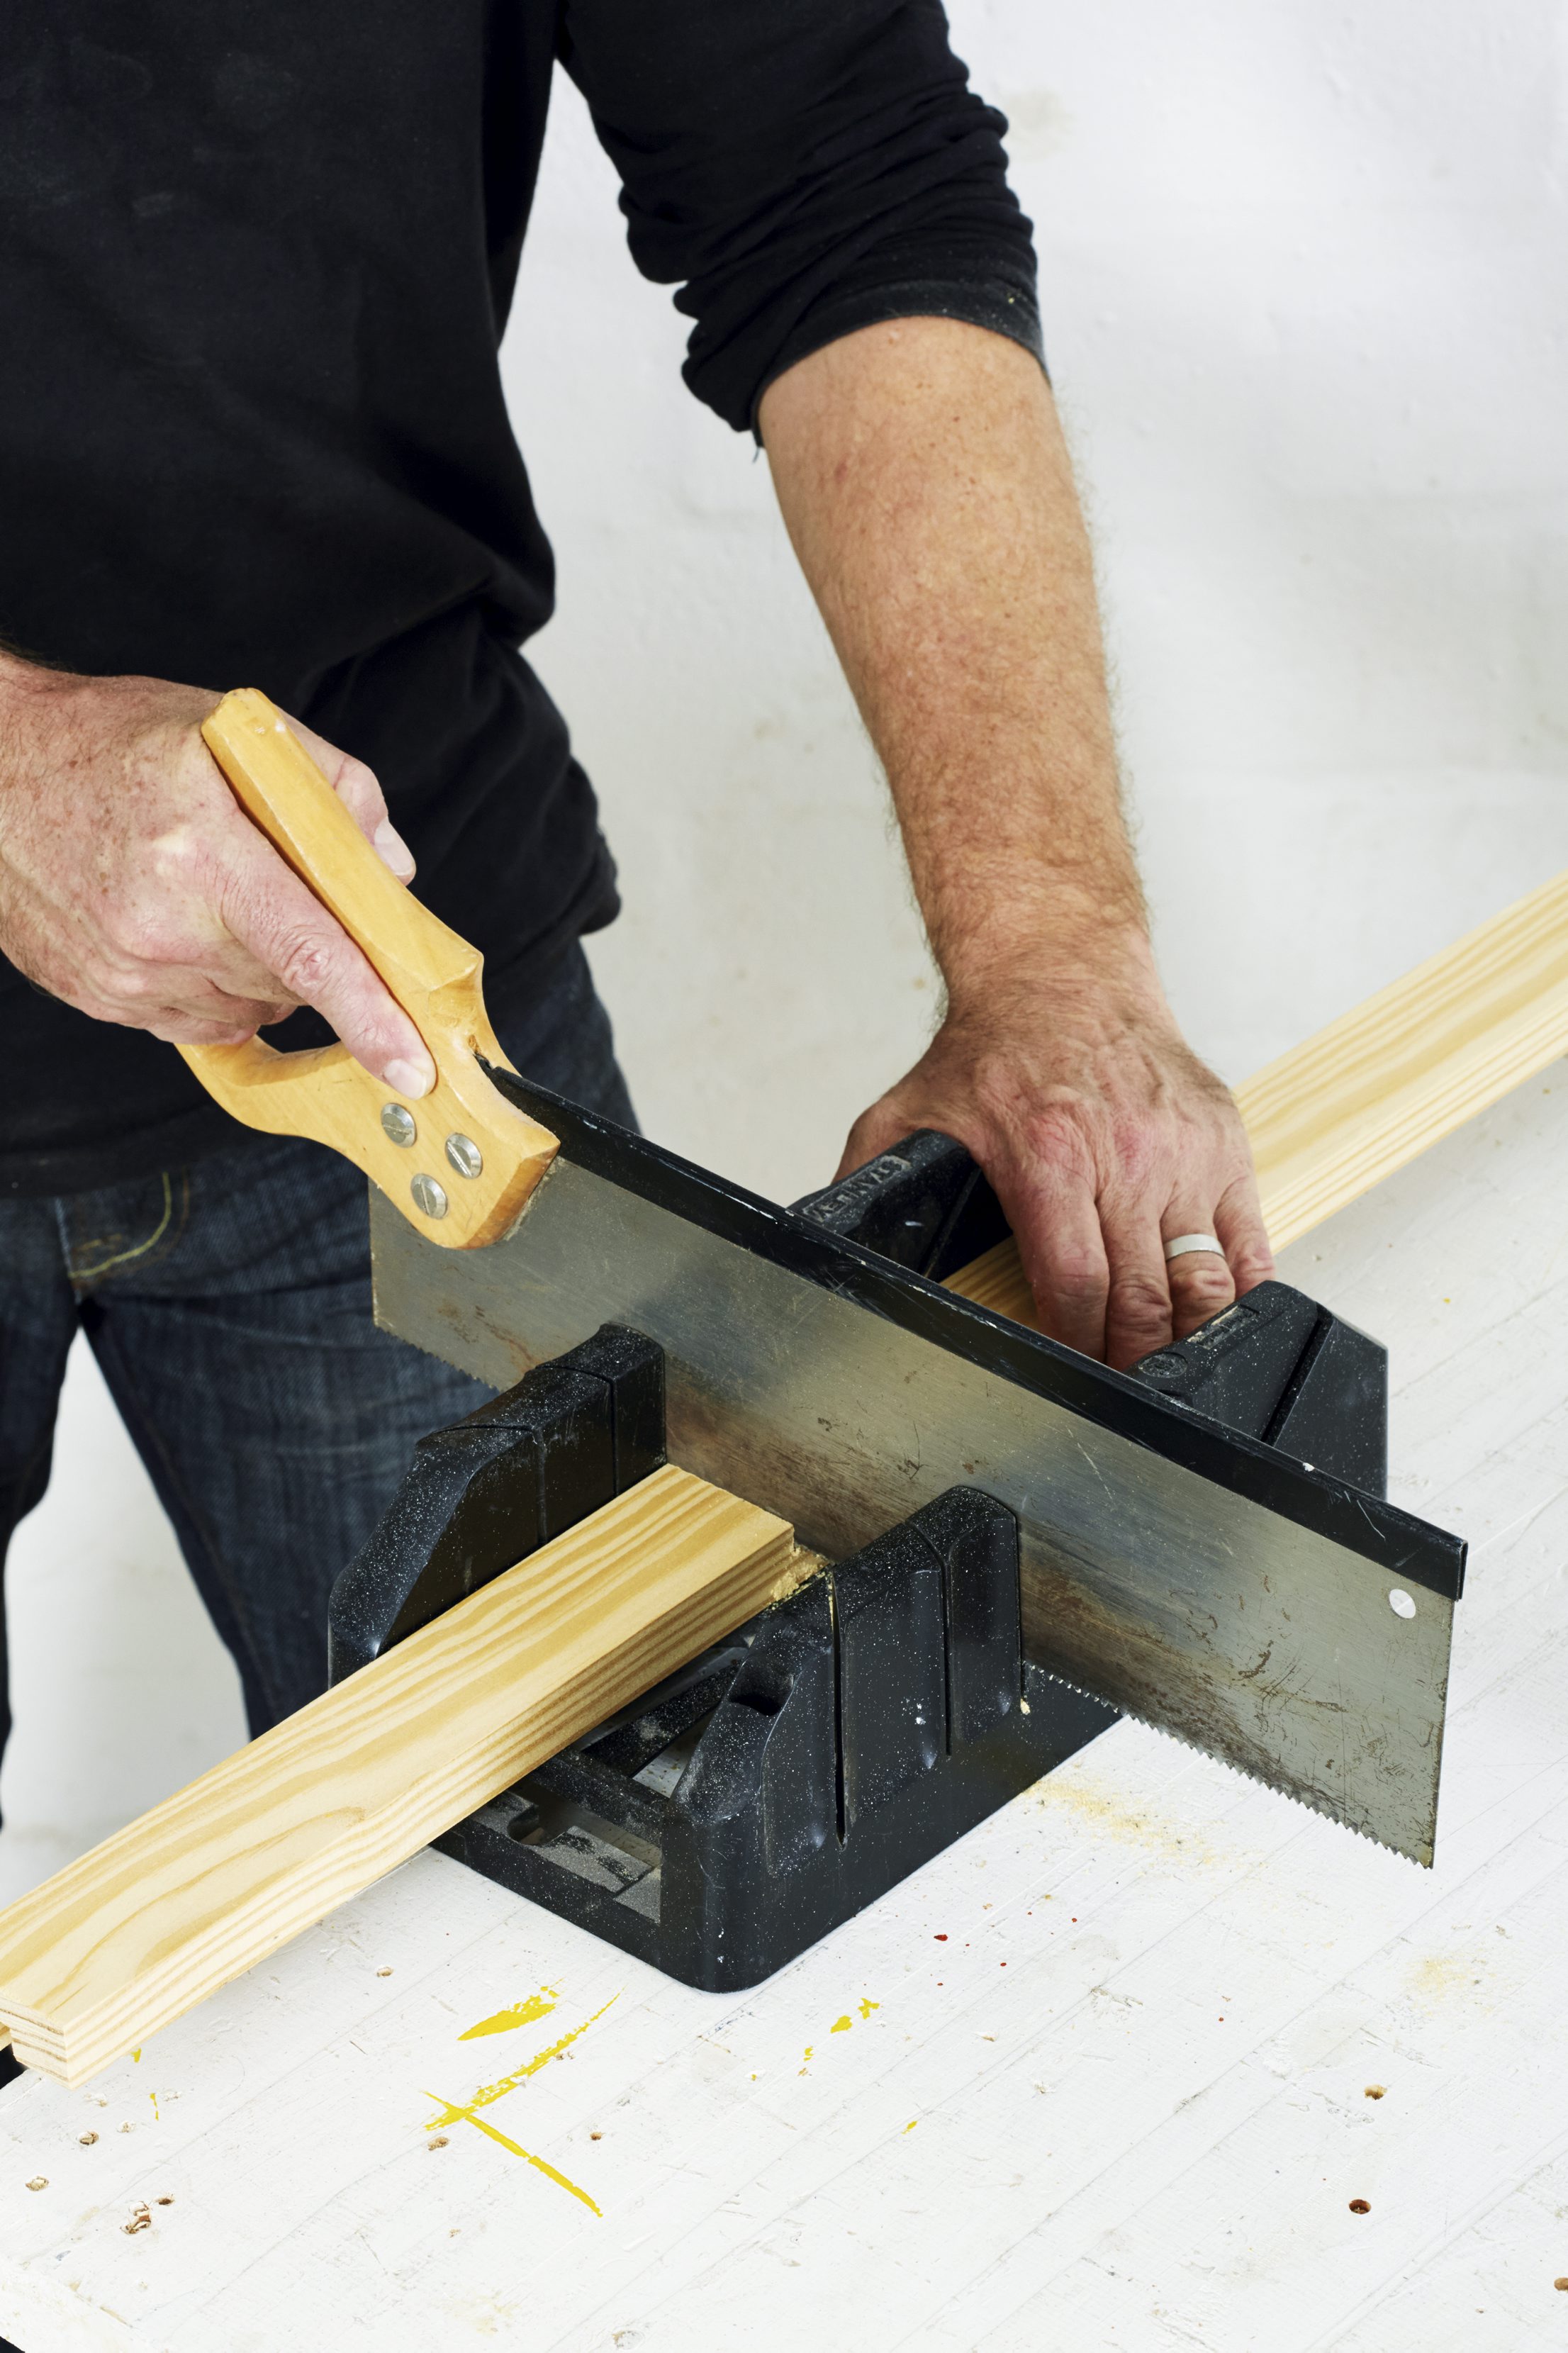
Step 2
Now use the mitre box and handsaw to cut all the required lengths (see cutting list).
Alternative step: Using a mitre saw to cut the various lengths will ensure neater cuts.

Step 3
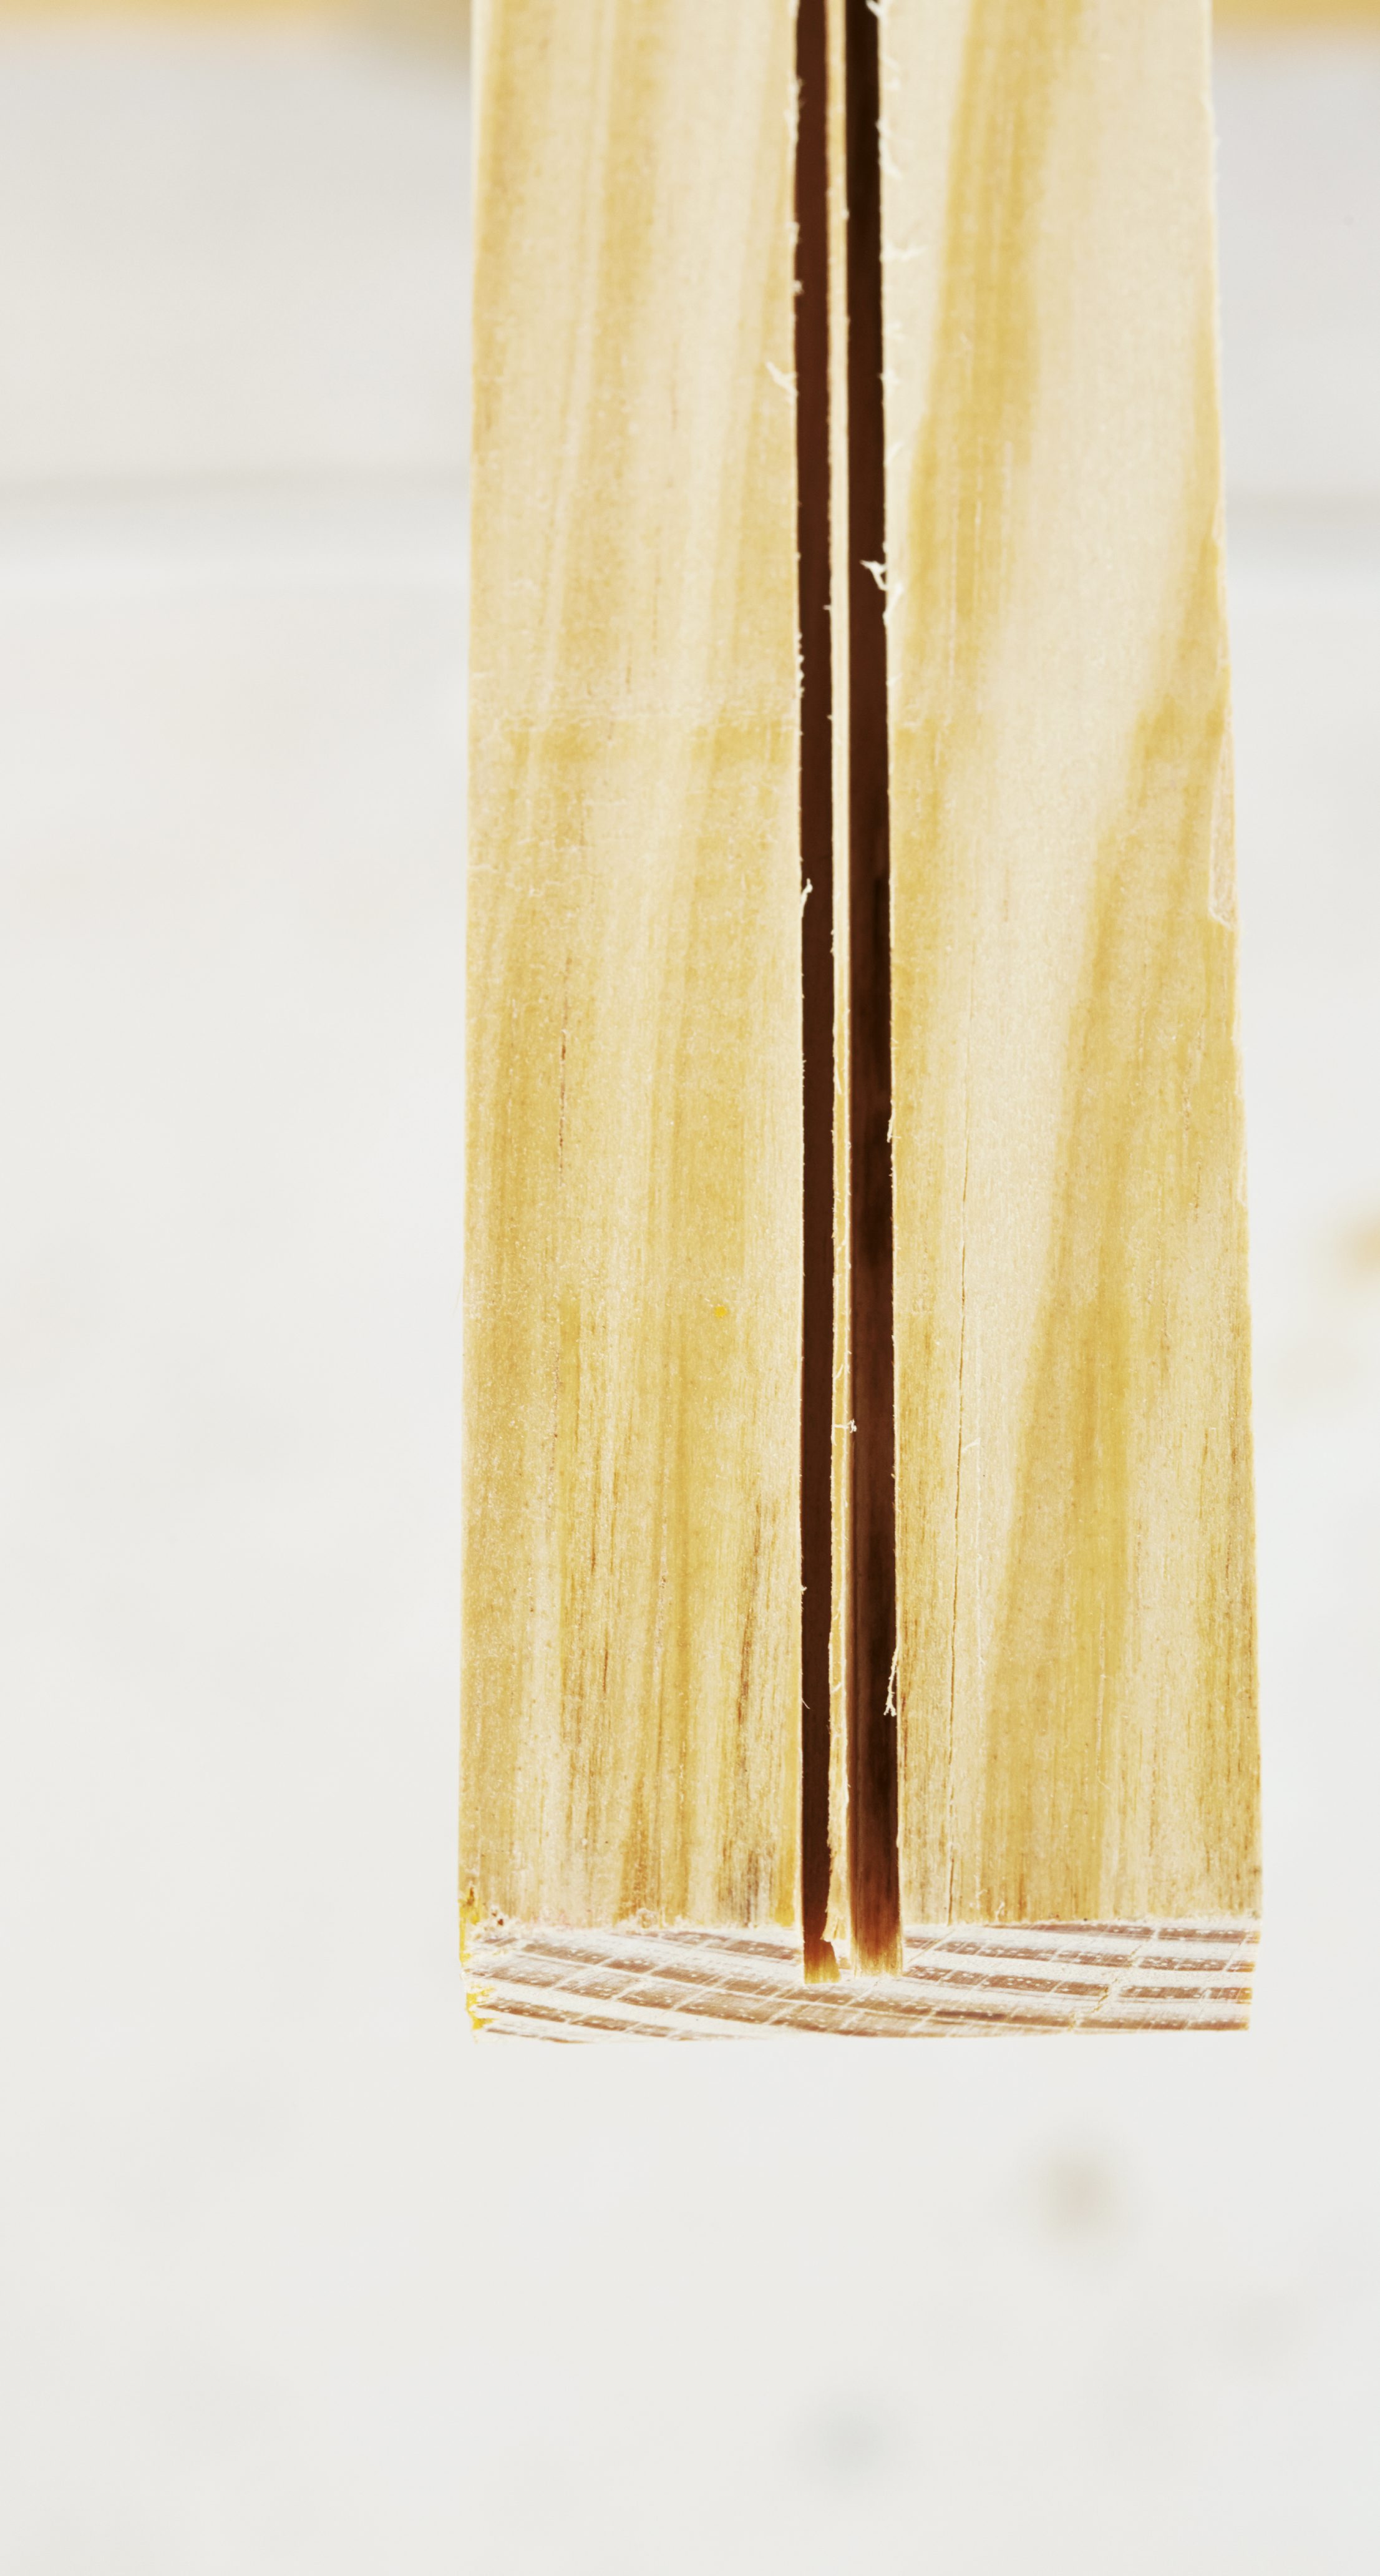
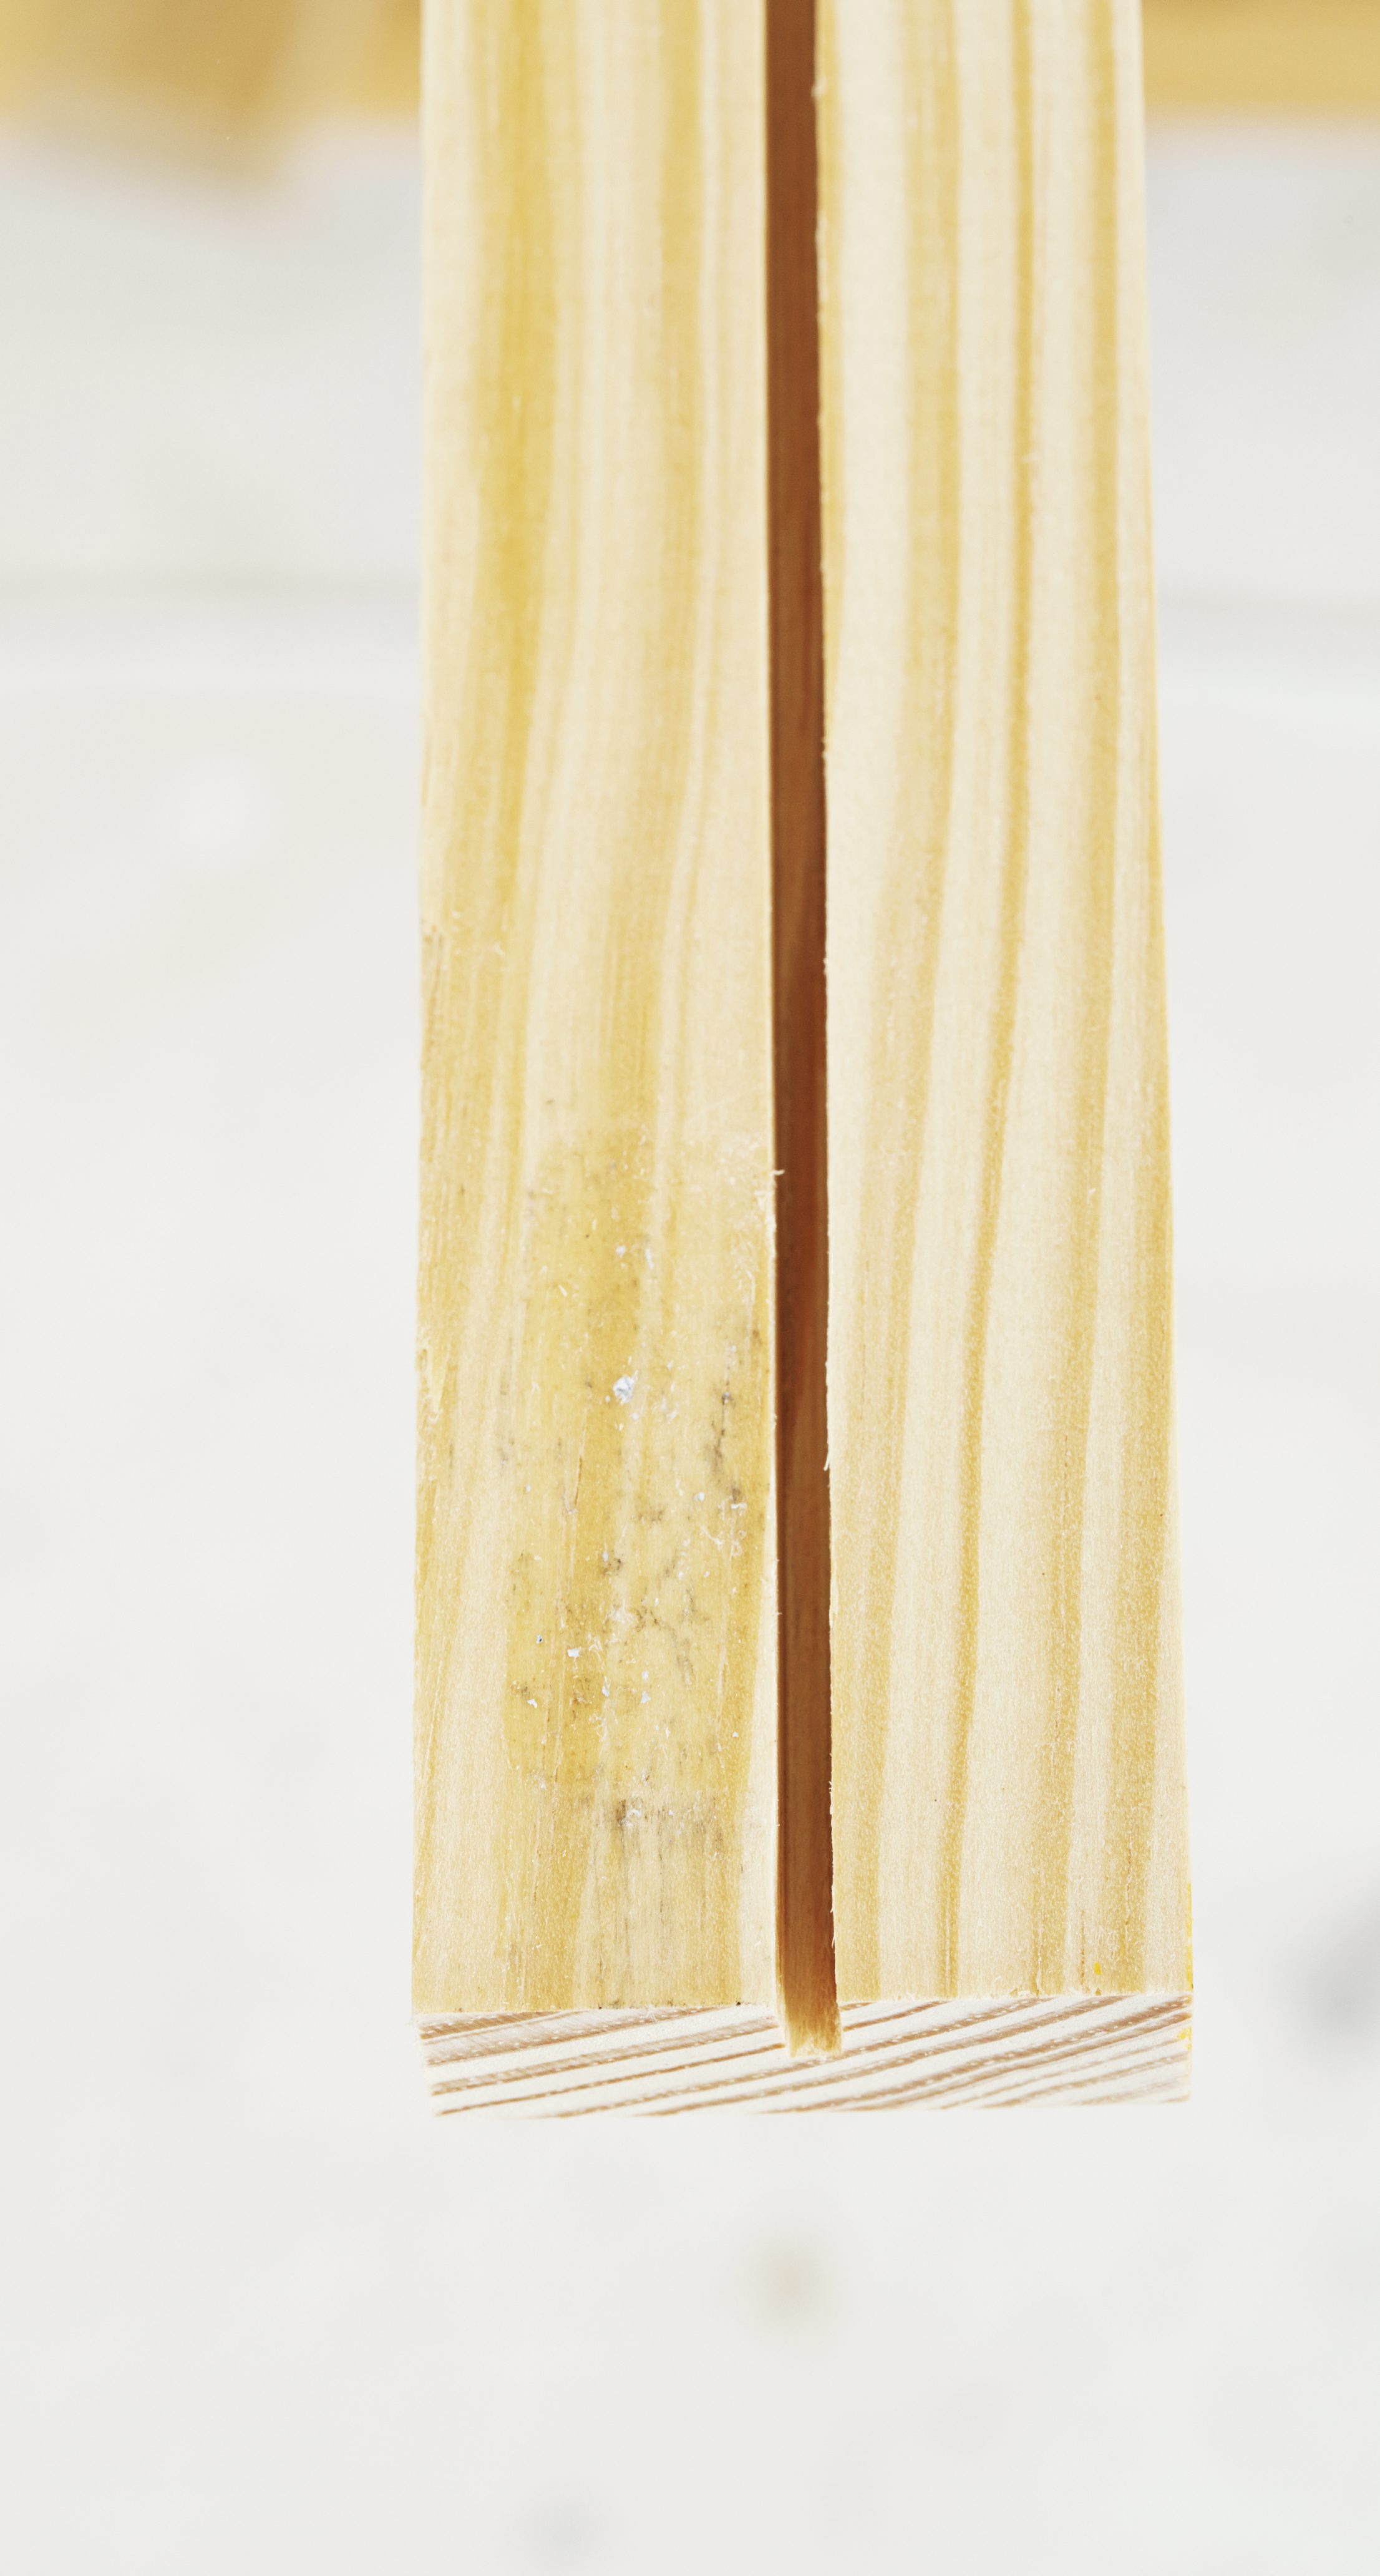
Set the guide on your table saw so that the (3mm) blade is positioned to cut just off-centre (2-2.5mm) of the 44mm-wide plank. That way you can run the lengths first one way and then the other to cut a channel 4mm wide along the length.
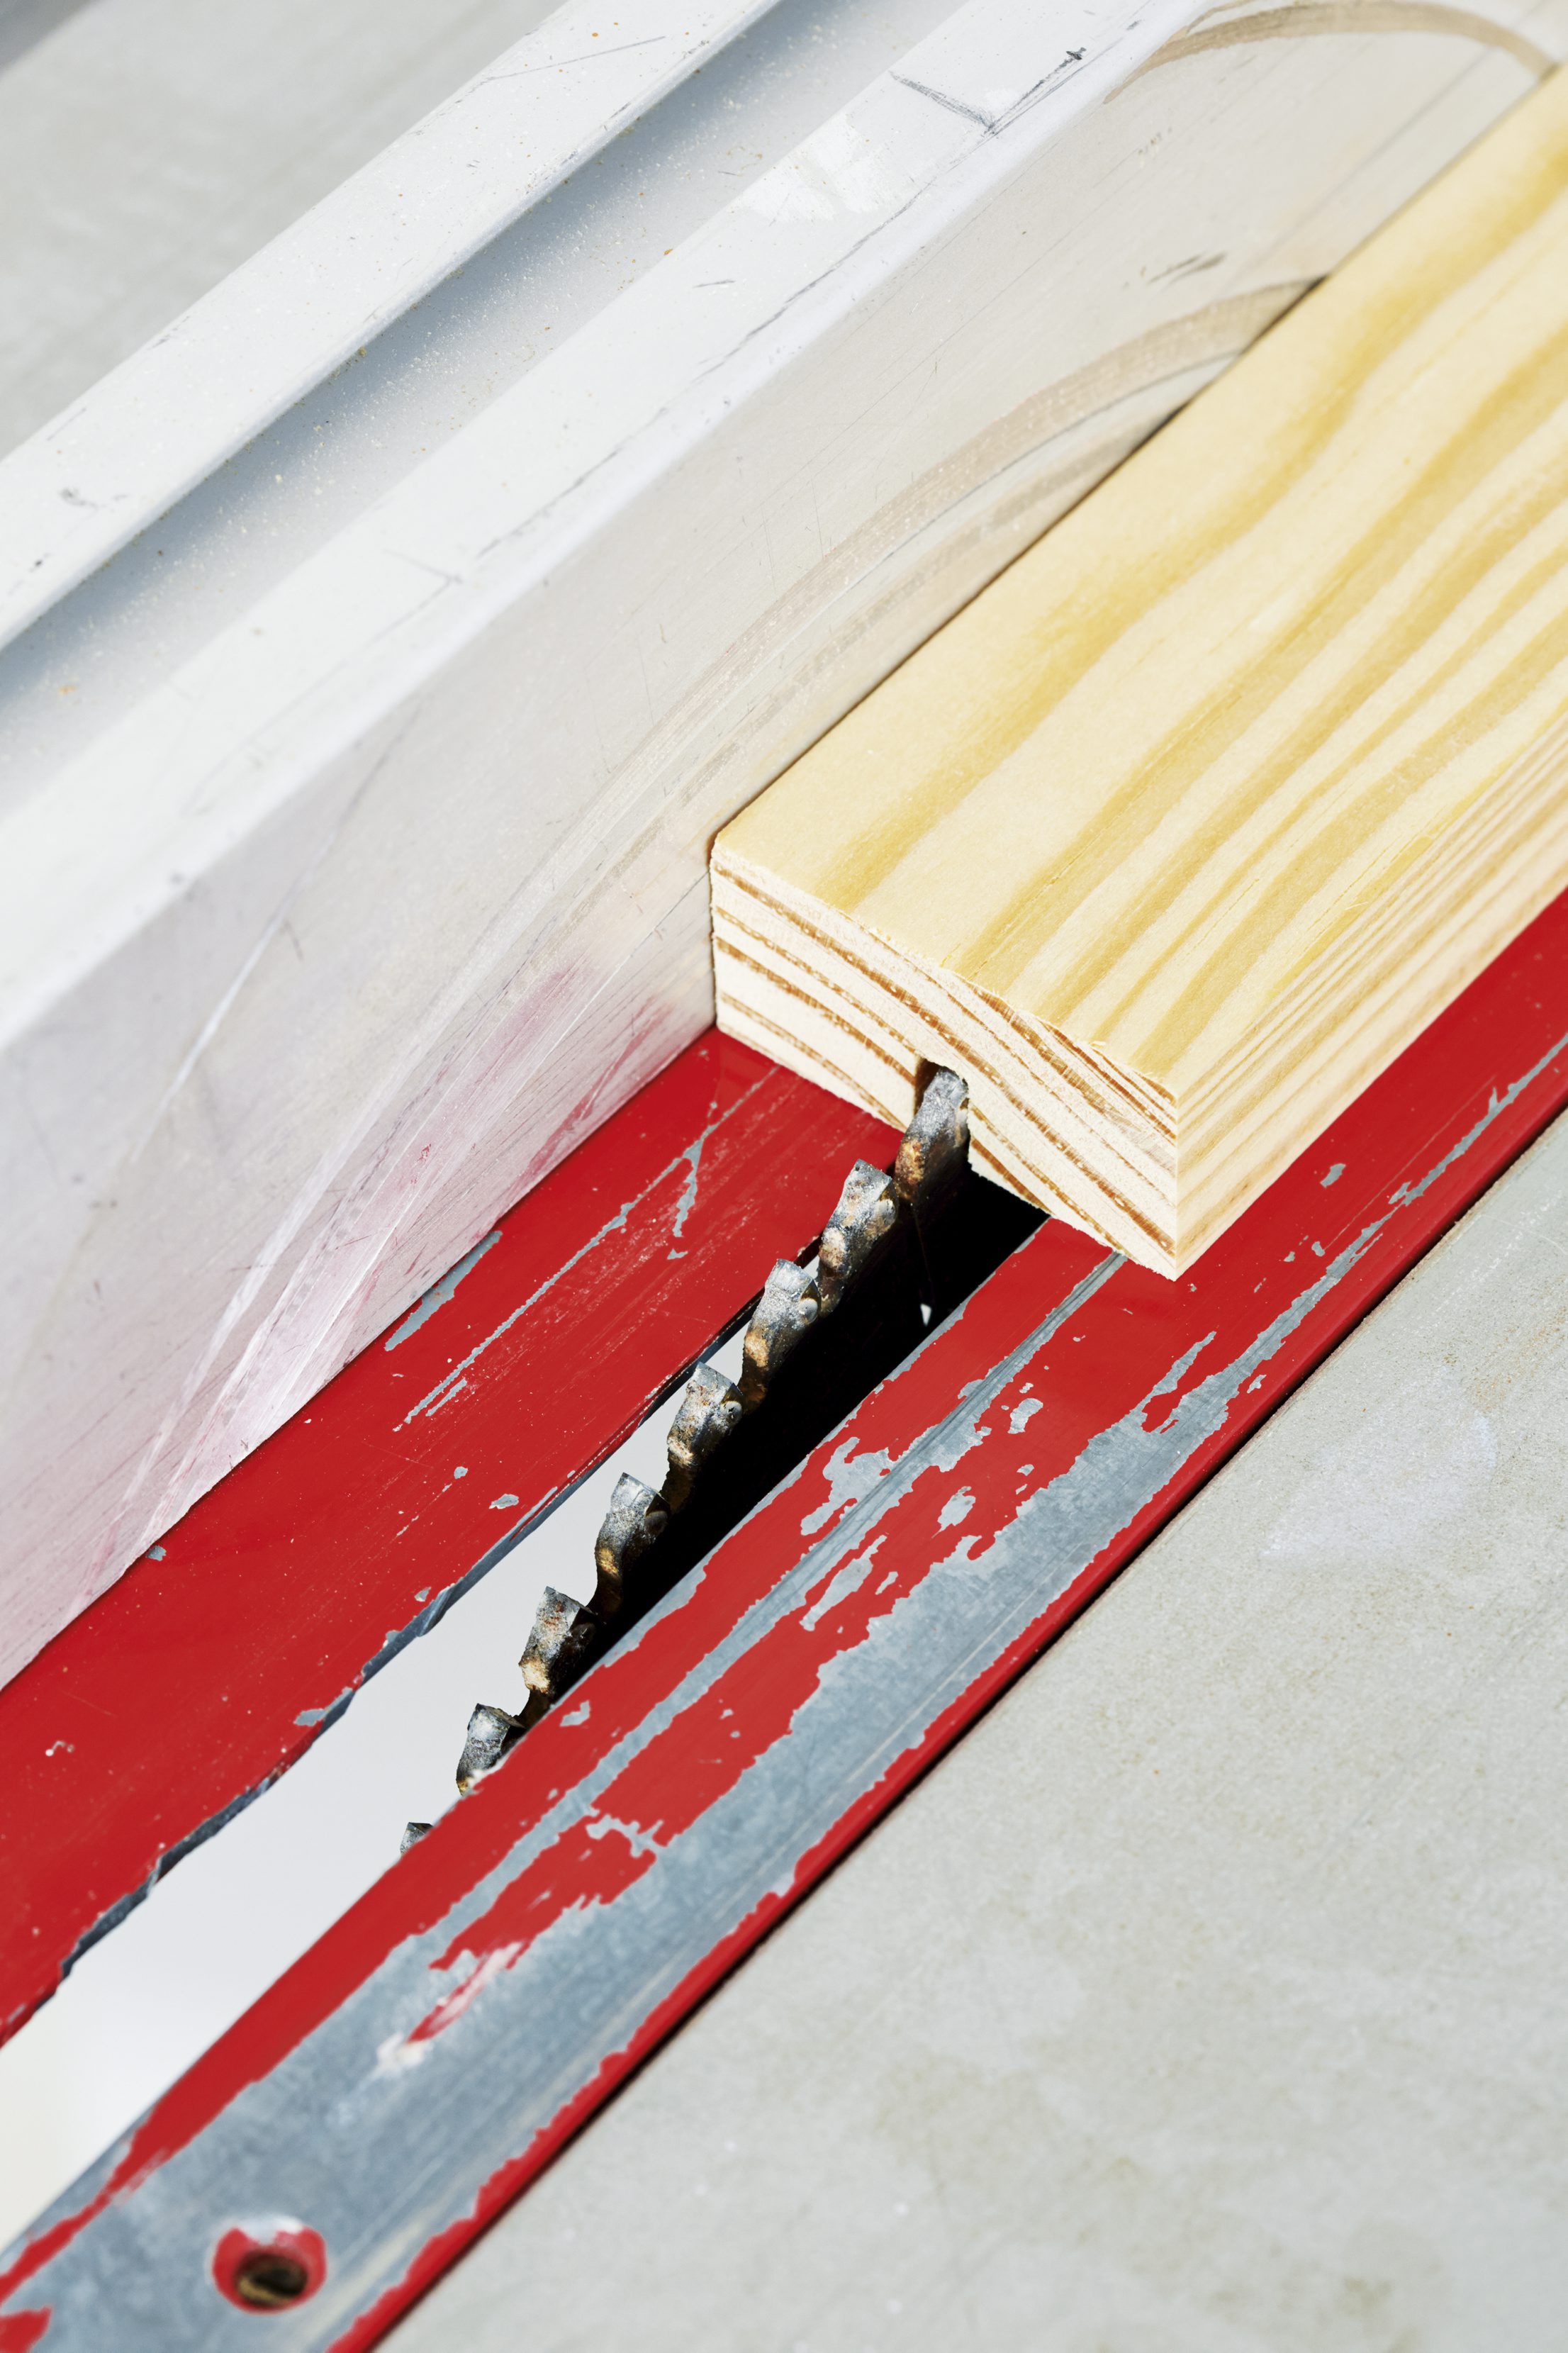
Step 4
Set the blade depth to 6mm.
Step 5
Try the setting on an offcut piece first; this one has the guide set too close, making the cuts too wide apart.
Step 6
Perfectly set guide: the 3mm blade is just offset and cuts a perfect 4-4.5mm-wide channel when the planks are run through along each edge.
Step 7
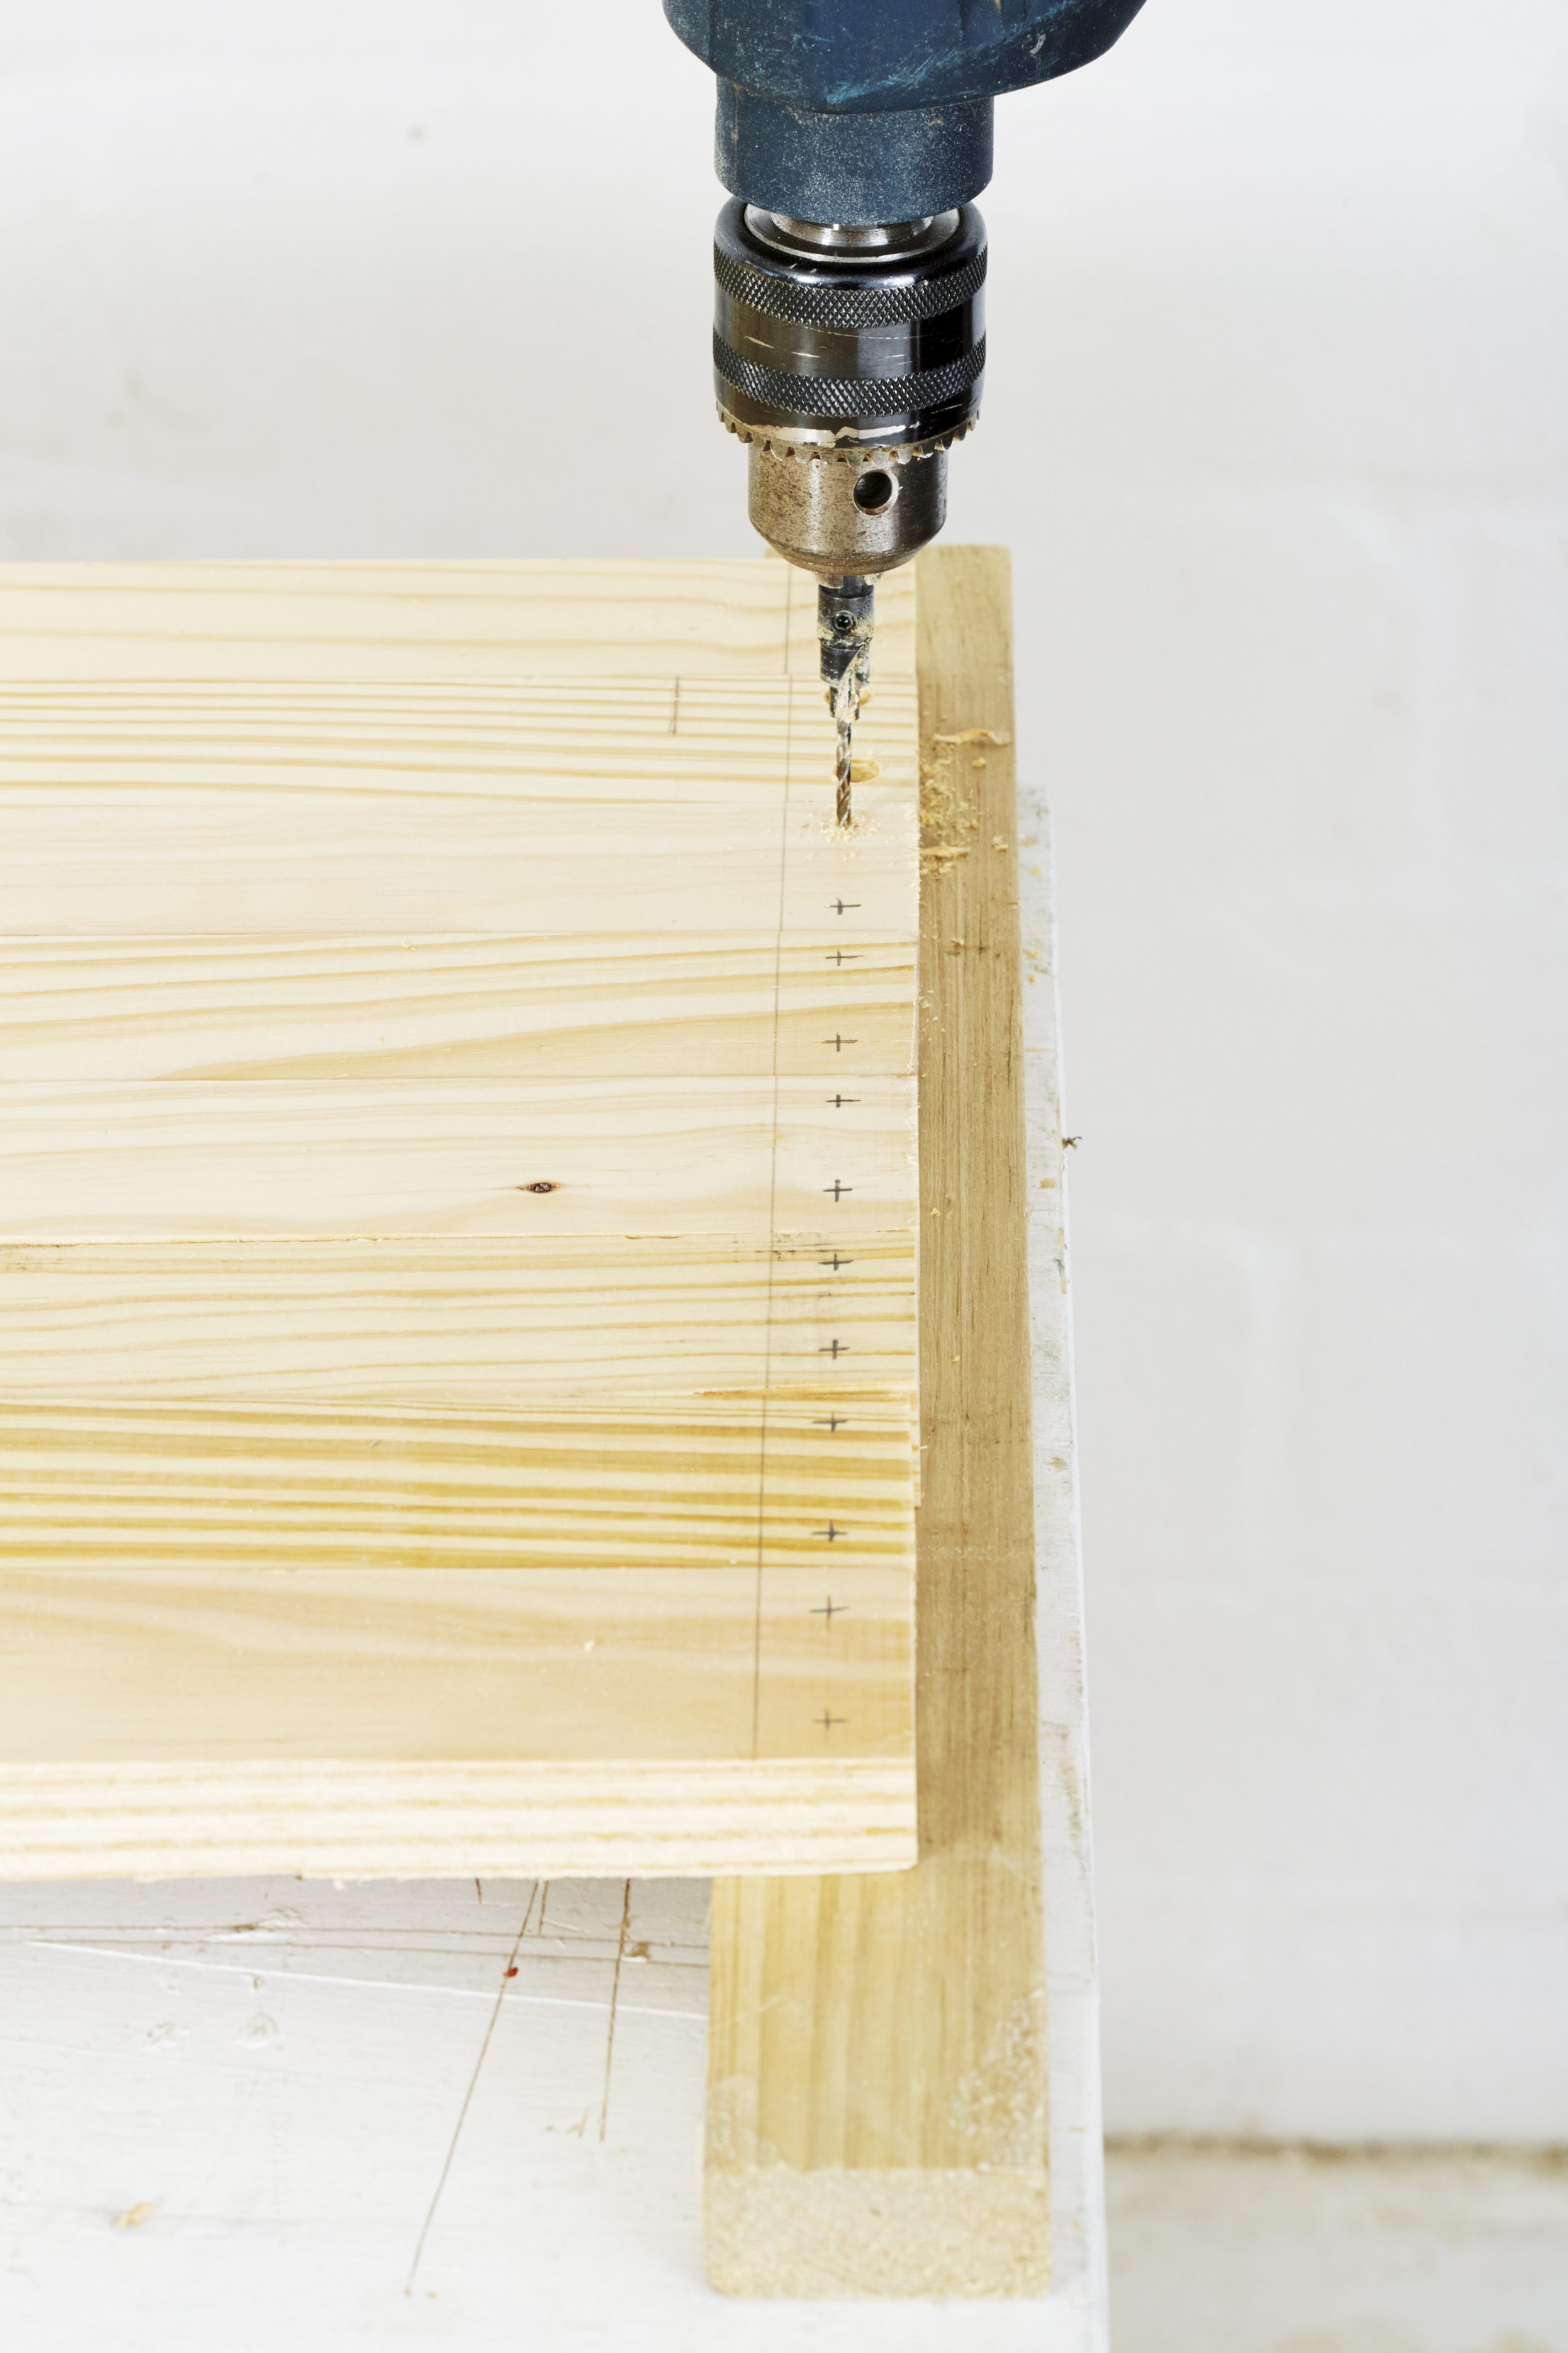
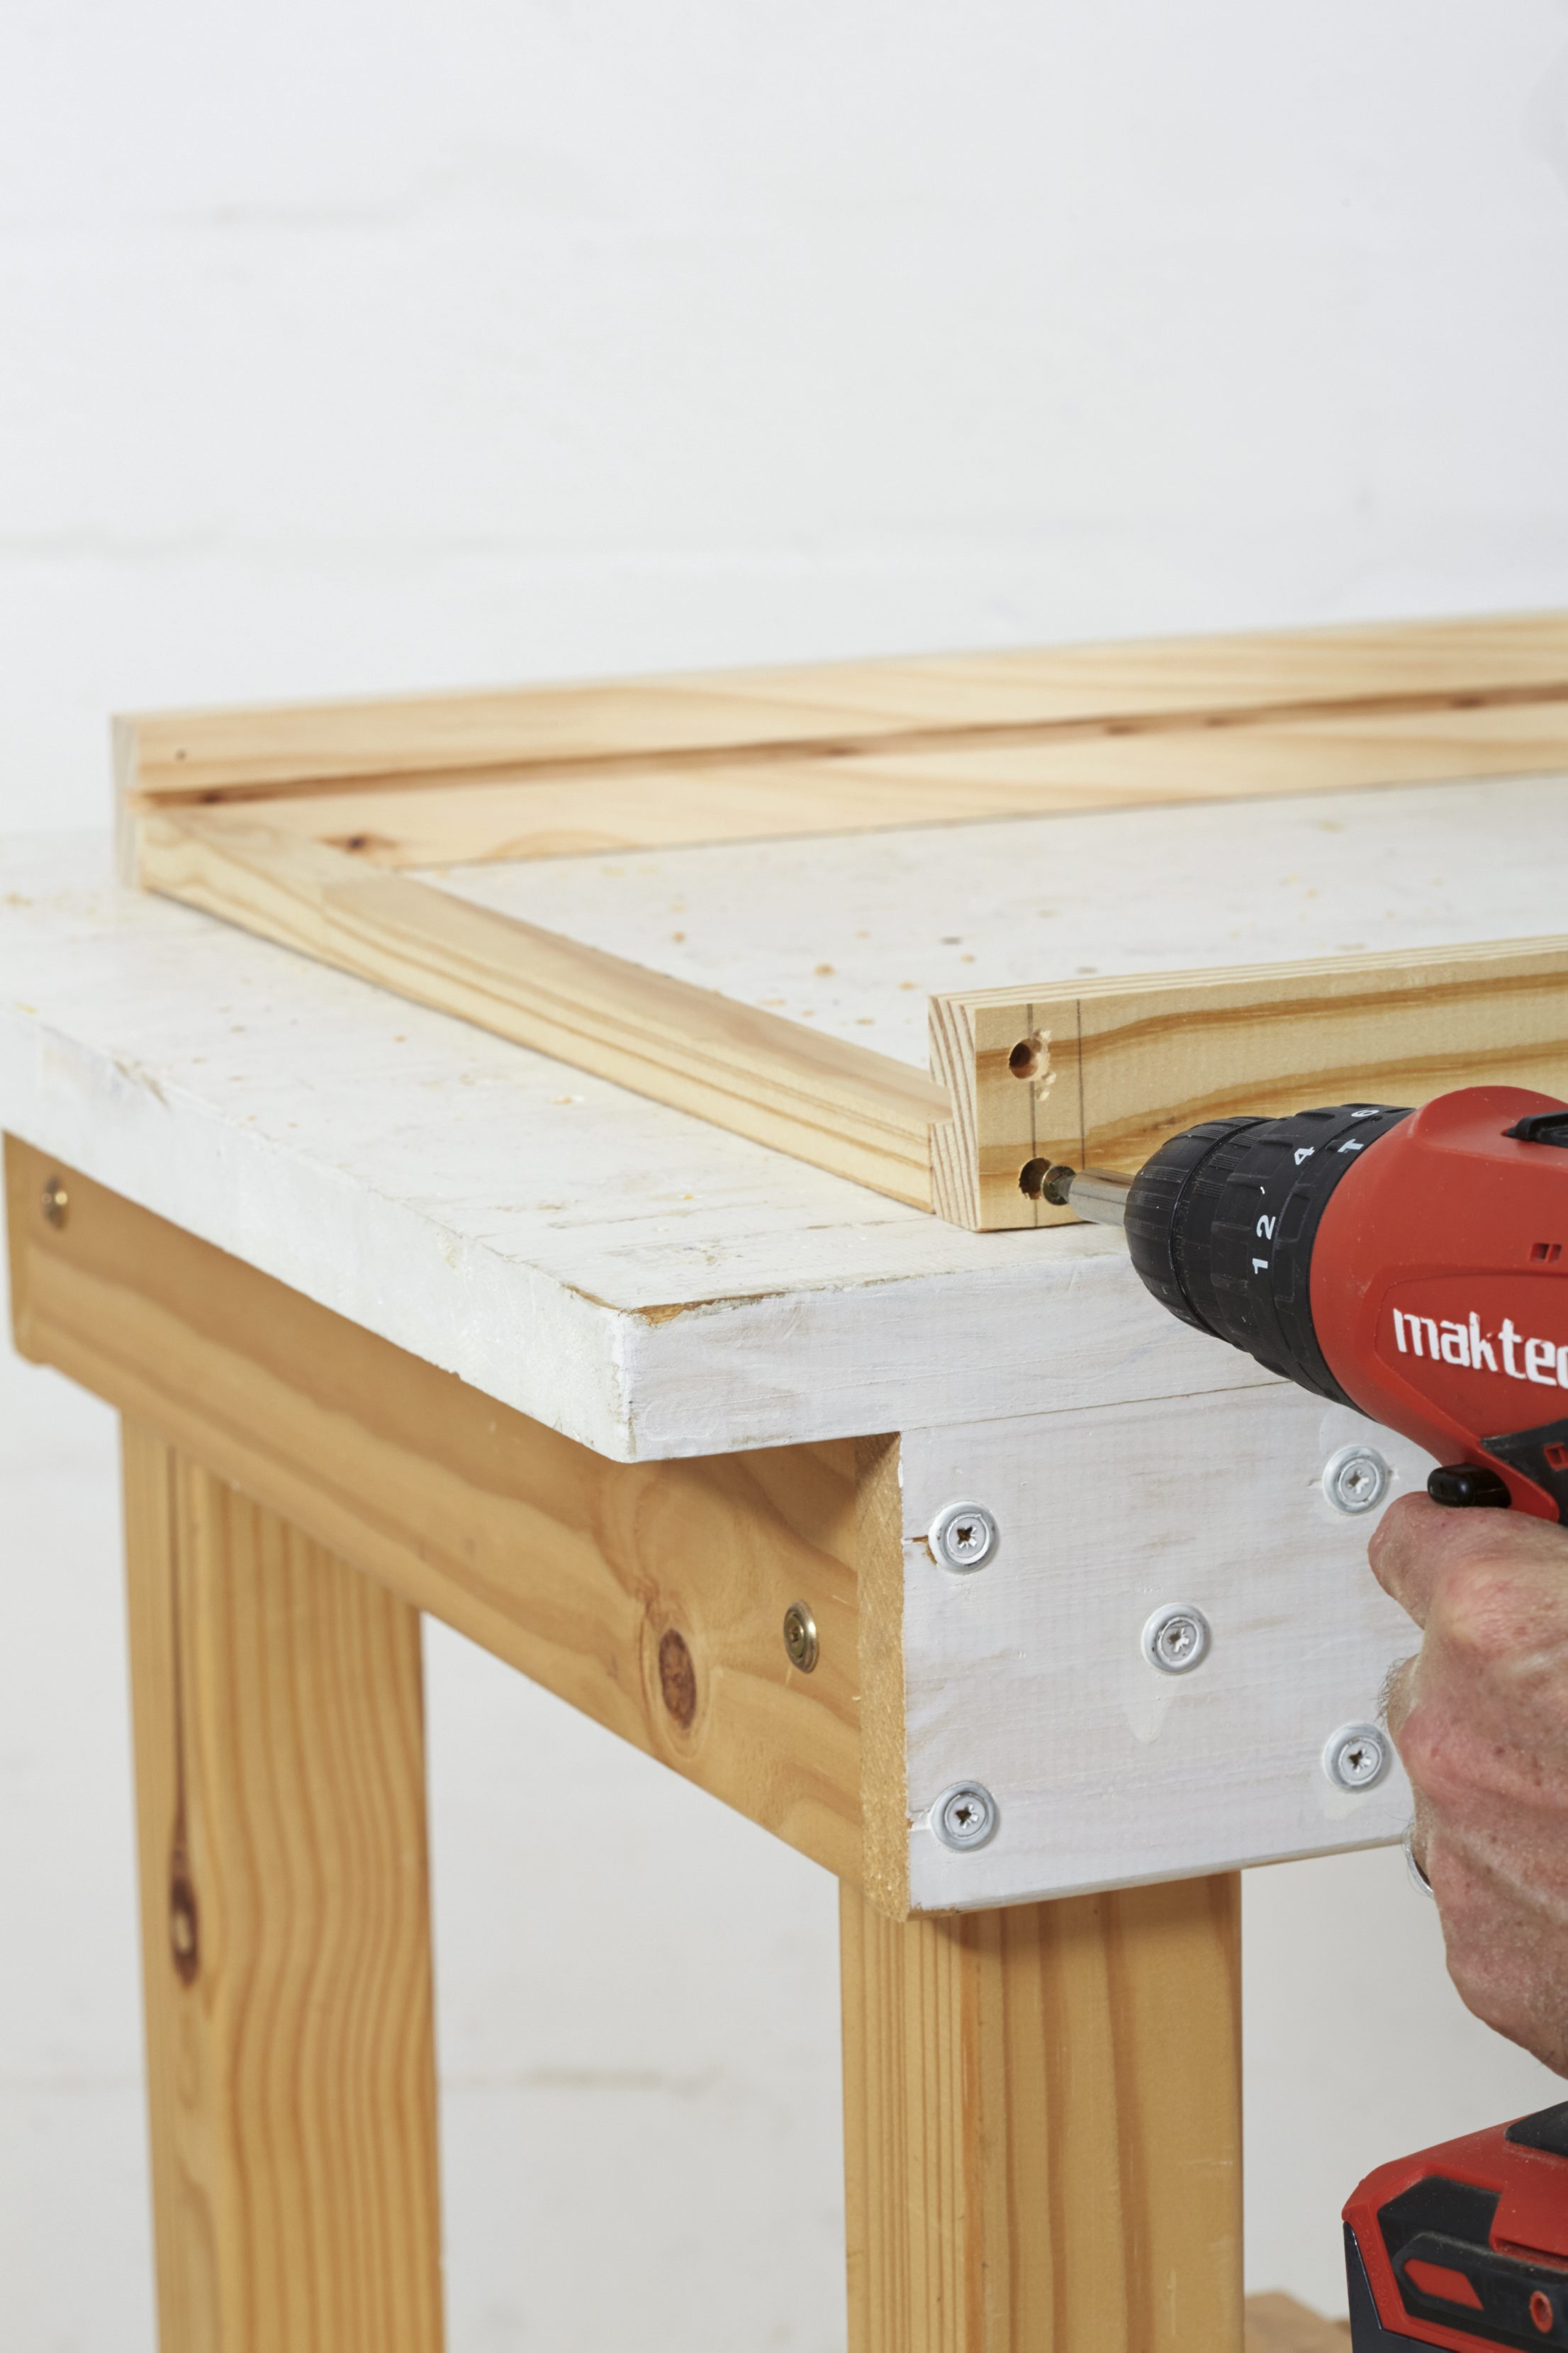
Place the 1 790mm lengths side by side (on the 44mm side) with ends flush; mark a line 22mm from the ends across all the lengths. Do the same at the other ends. Using a 3mm drill bit, drilll two evenly spaced pilot holes at each end of each plank. Follow by countersinking the holes to a depth of about 5mm, using the 8mm bit. Drill your holes about 10mm from the edges, so that the screws will not impact the slots.
Step 8
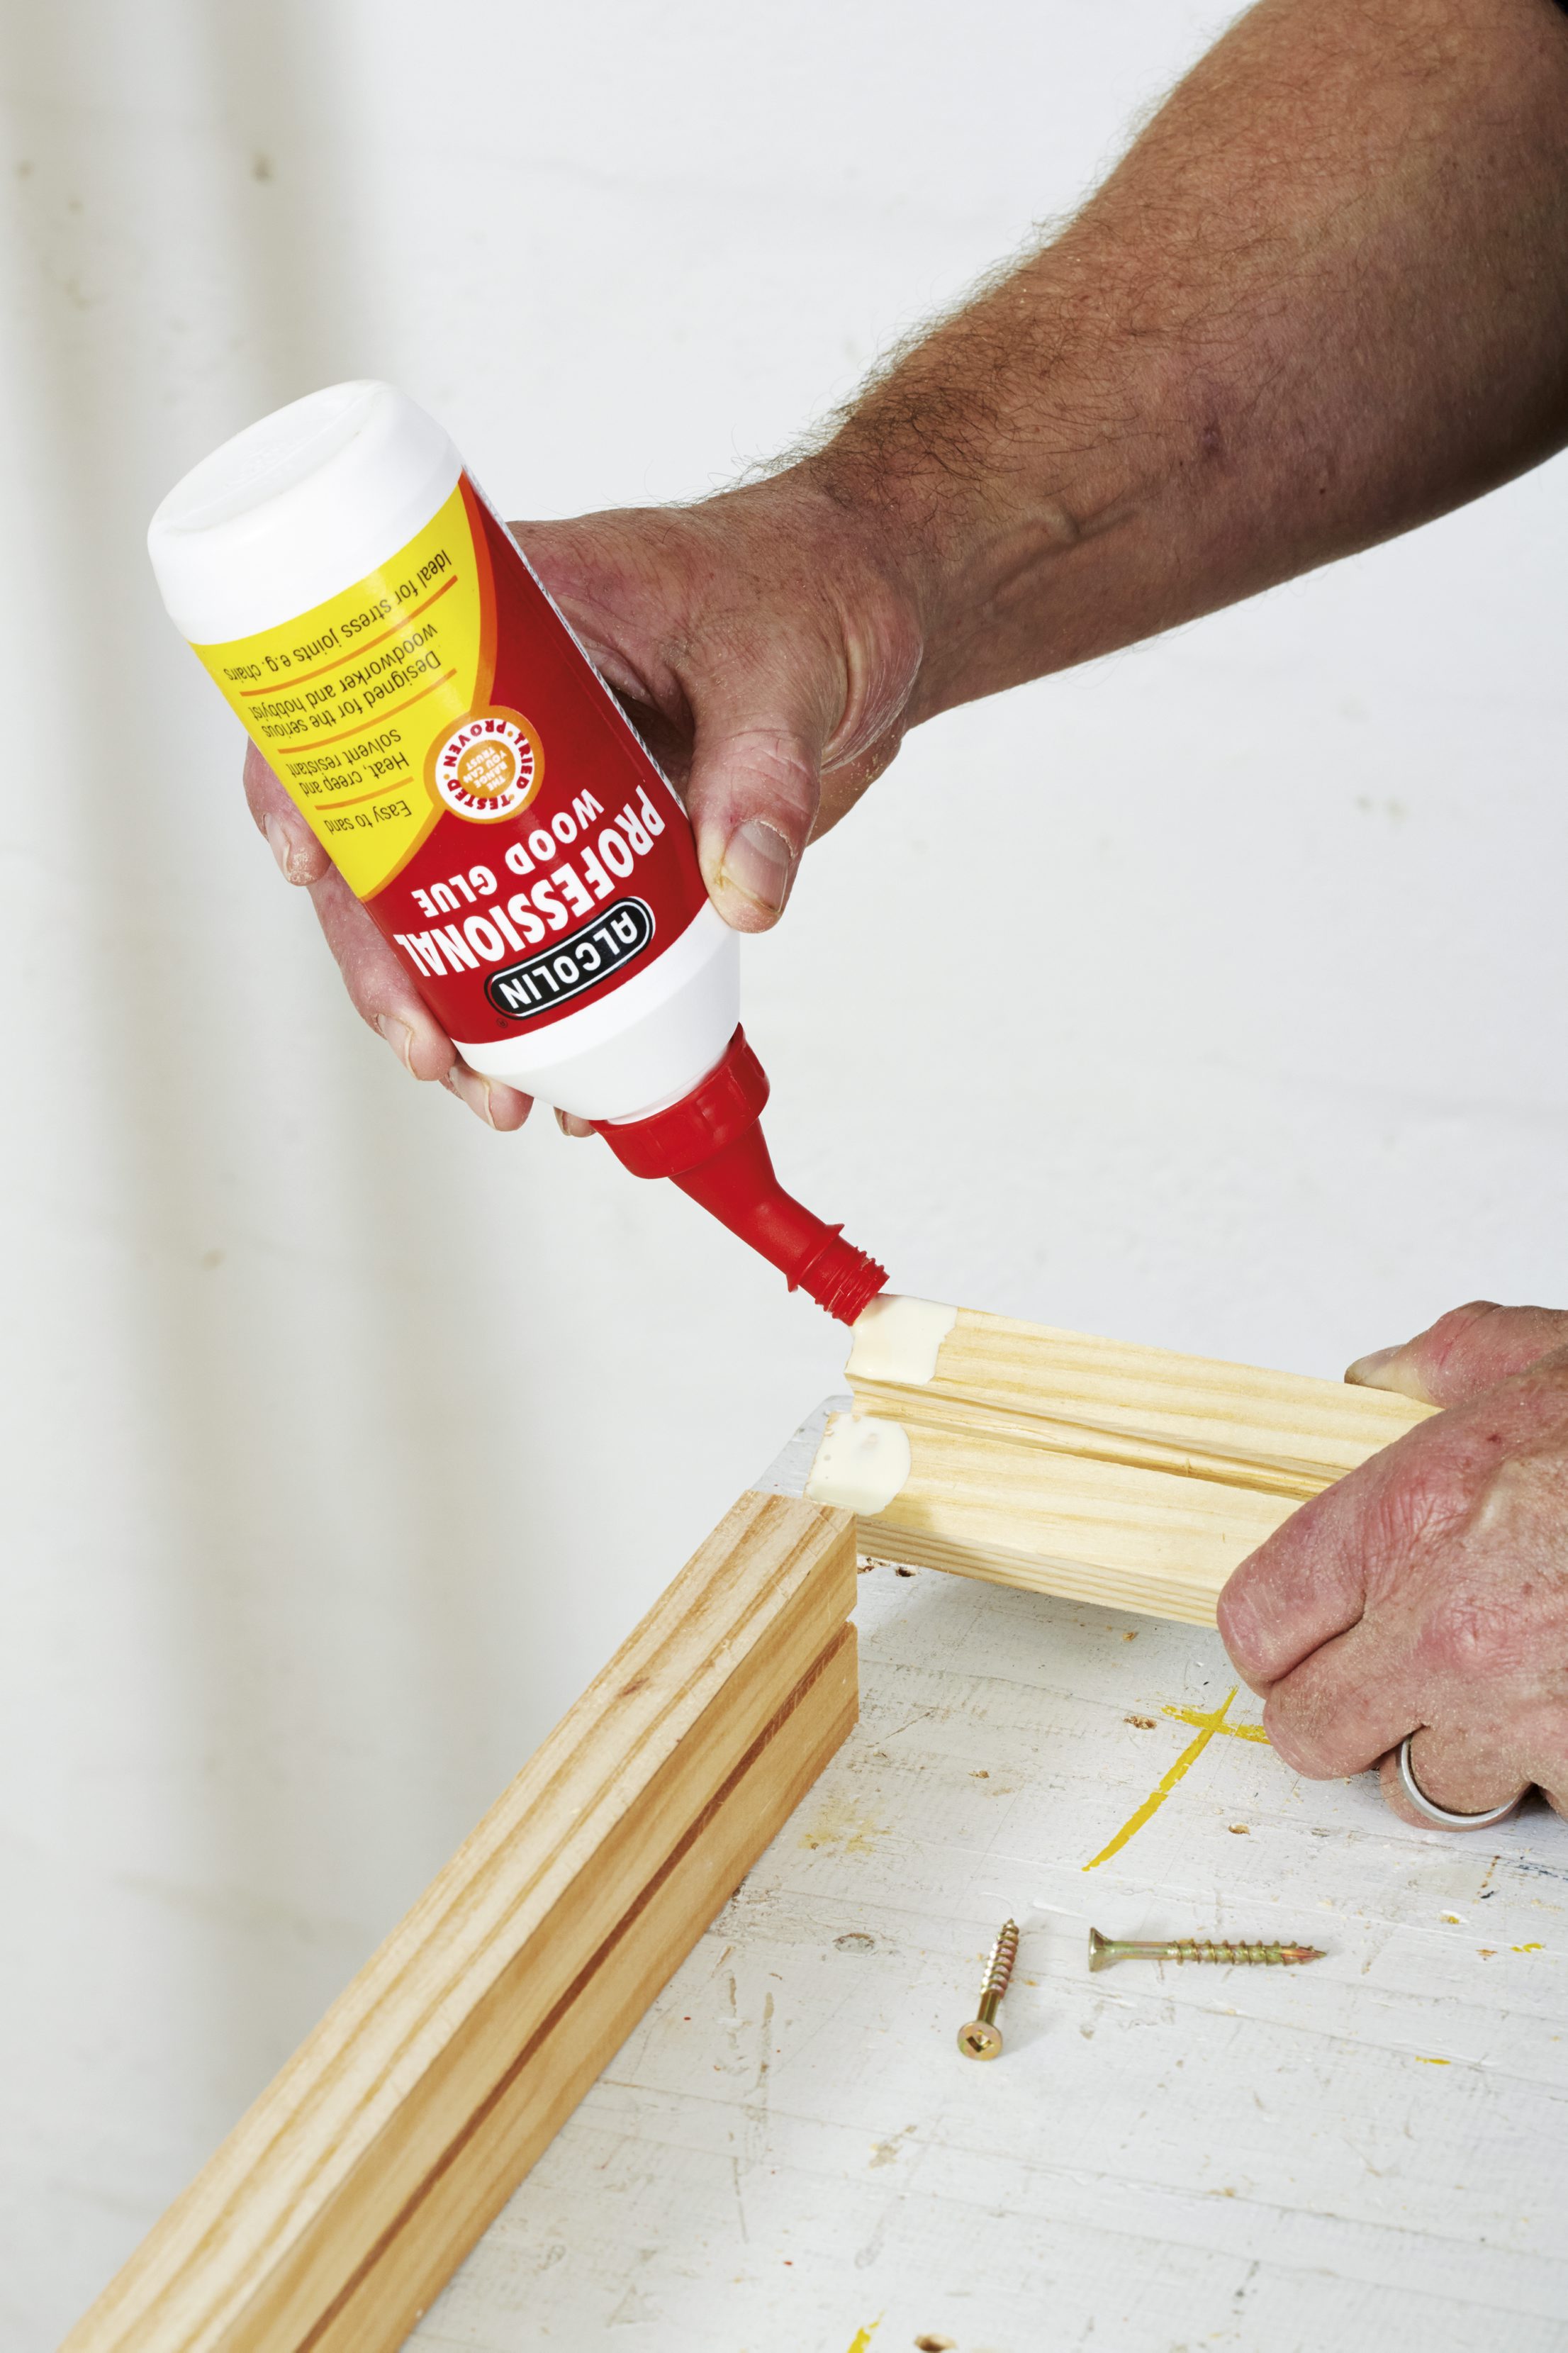
Fix the frames. Add a dab of glue and then use the 40mm cut screws to join the shorter 450mm lengths inside the ends of the 1 790mm lengths, as shown.
Top Tip: Use a mitre clamp to ensure that all your joins are fixed at 90°.
Step 9
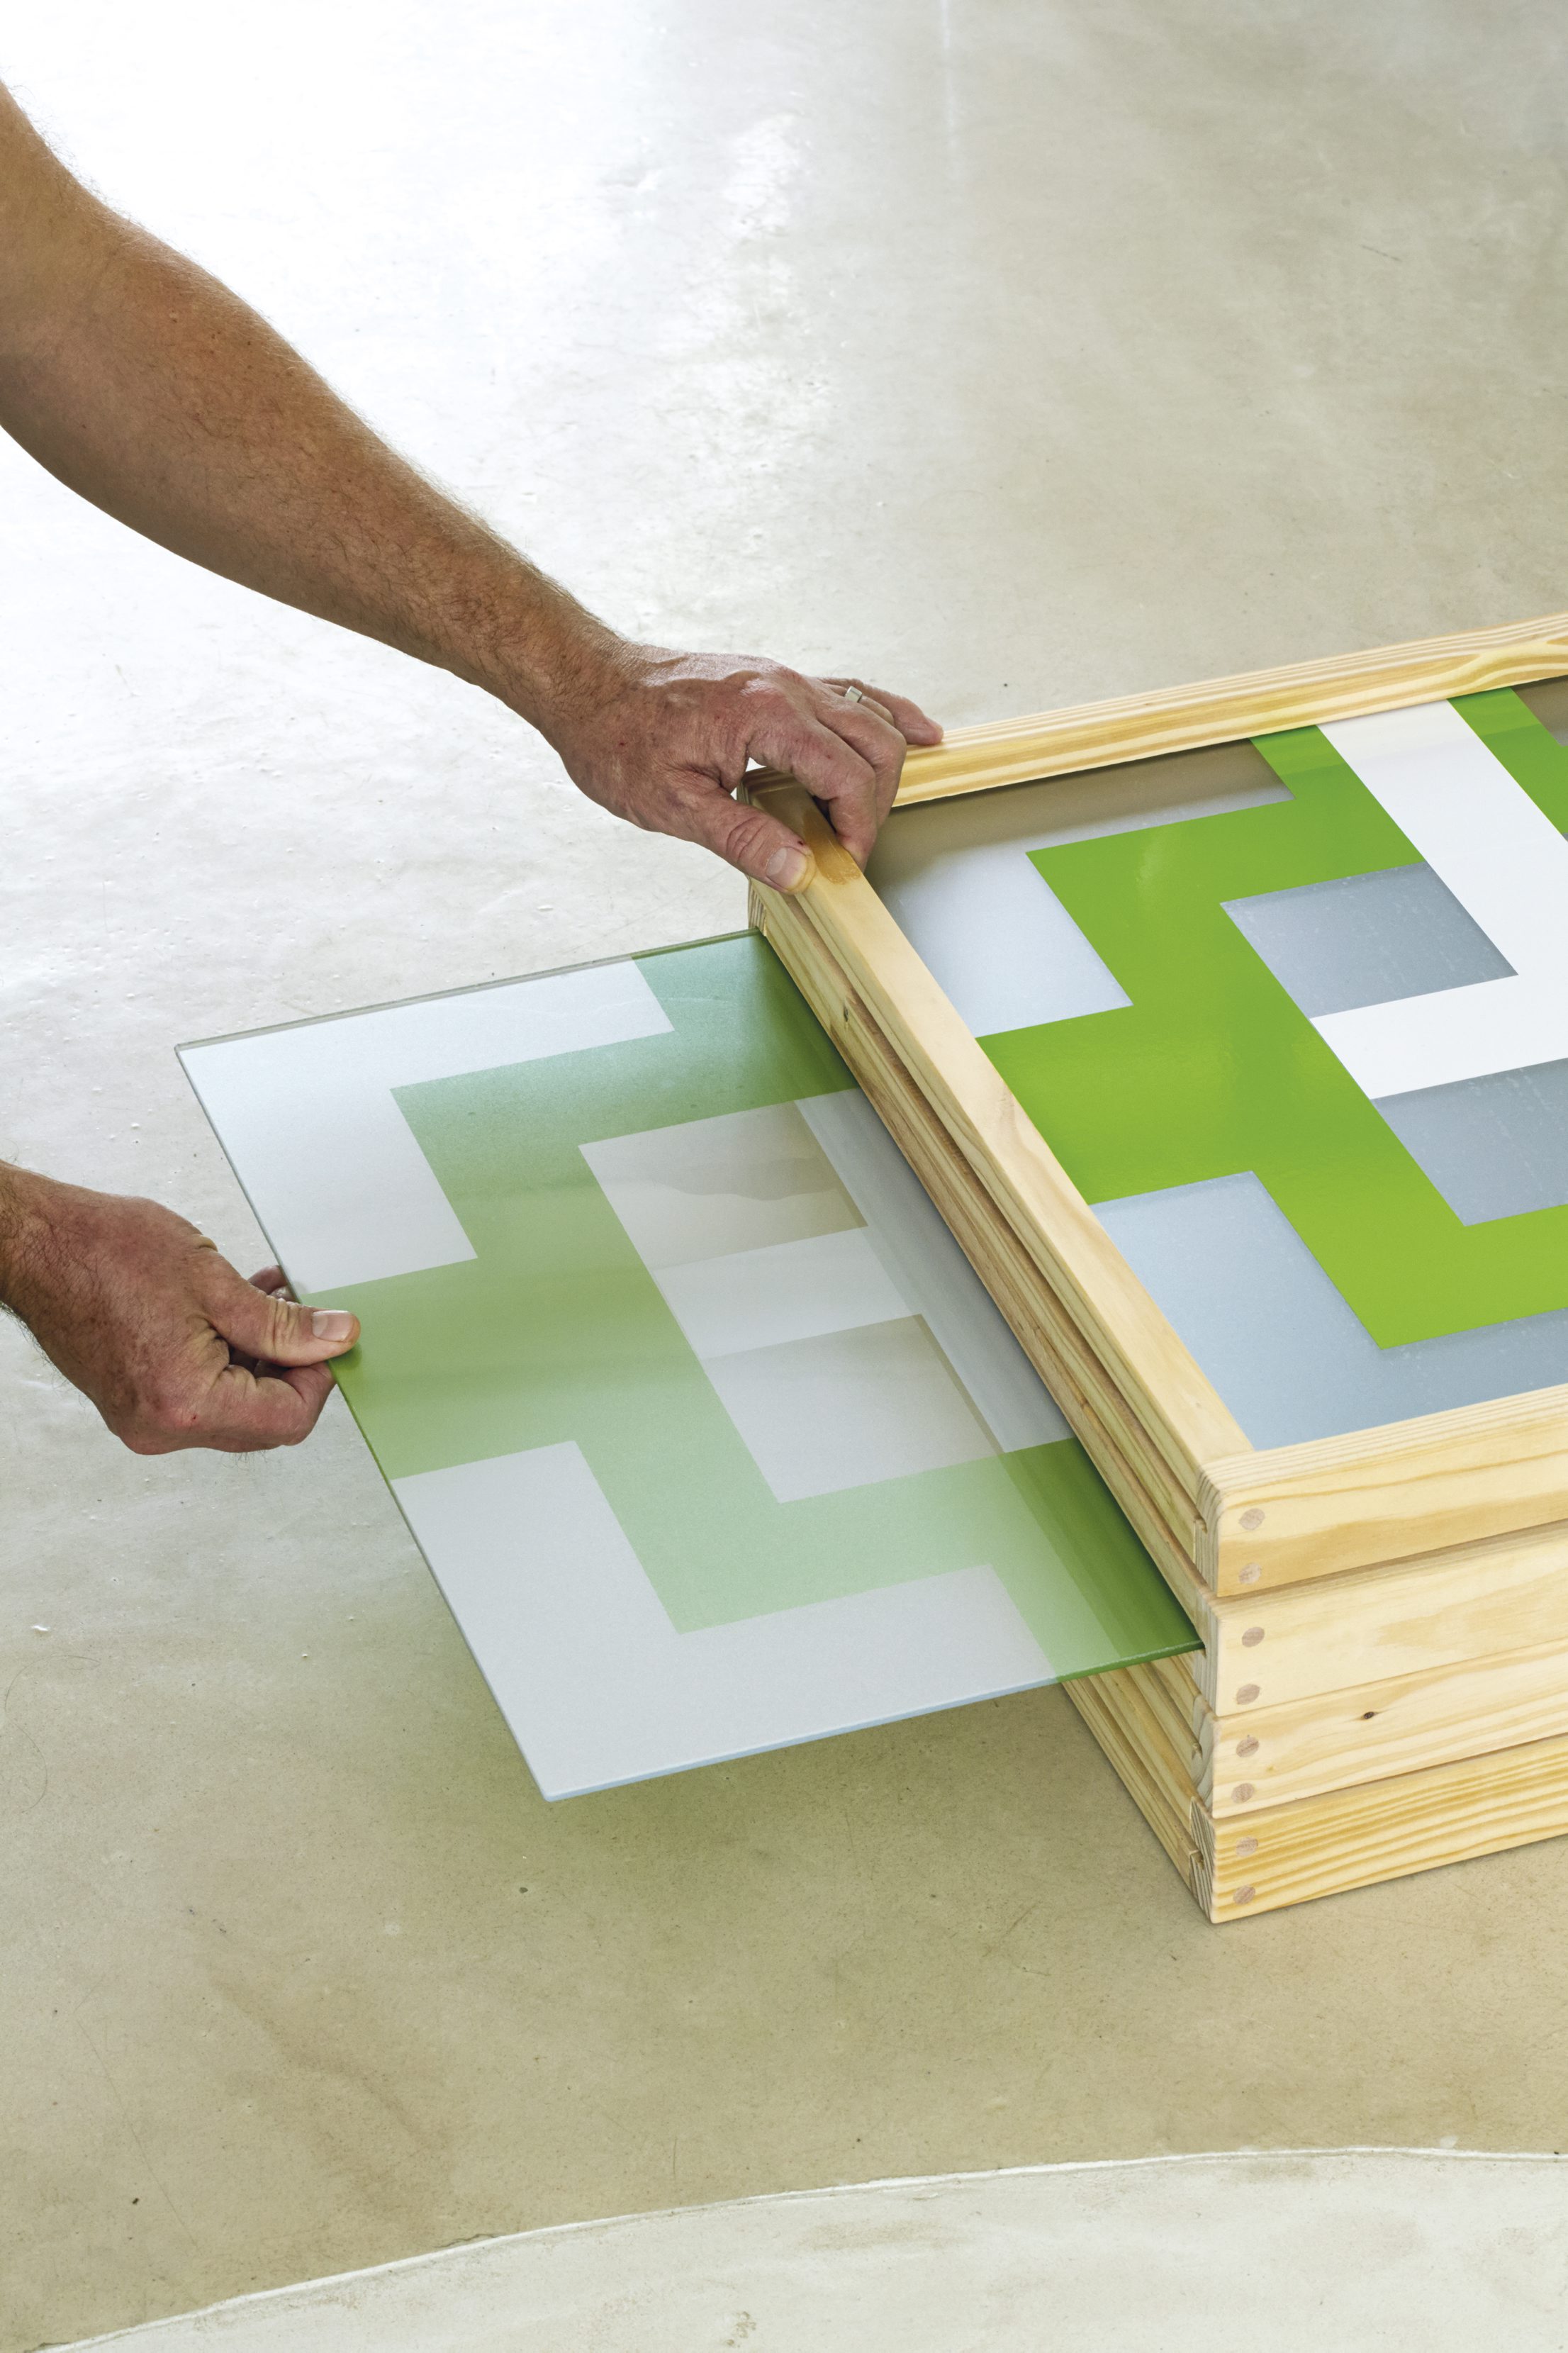
Fix the 450 x 20 x 20mm lengths inside the ends at the top of the frame. Fix these flush with the outside of the 44mm planks so that a 4mm-wide gap (matching the ones in the lengths) is left at the top. This will allow the glass panels to be inserted afterwards.
Step 10
Using the 16mm chipboard screws, fit the hinges to the edges. Make sure to alternate the hinges so that these are fixed to the opposite edges – allowing the screen to concertina.
To Finish: Once the construction is complete, tap the dowel into the holes and use the hacksaw blade to cut flush with the surface. Sand all sharp edges, corners and over the dowels, then apply a primer, sealer or varnish to all the surfaces. Once dry, apply one or two topcoats in the colour(s) of your choice. Place the frames on the ground and slide the glass panels with artwork in place into the slot at the top of the frames. Remember to alternate the facing panels so that these will face the front when the screen is opened into position.
Credits
Referenced from Gallo images / Home Magazine
Browse 1000’s of products available to you. Select your country to Shop Online.


