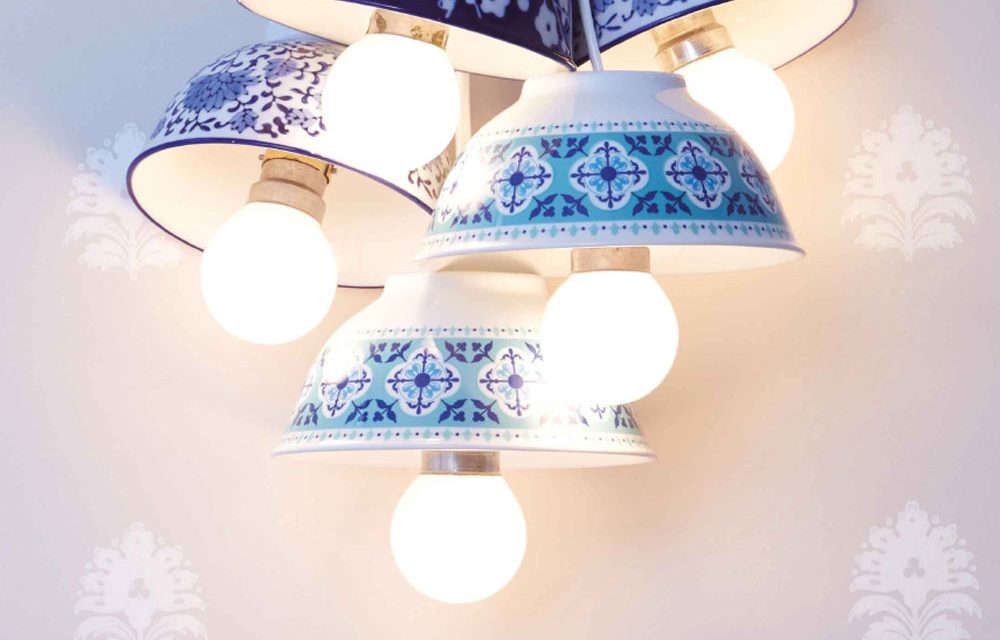
If you know how to drill a hole in a ceramic or porcelain item, you can make the prettiest lights from bowls and cups. We show you how easy it is.
- bowl or cup
- drill with a drill bit suitable for ceramics (see step 1)
- electrical cord with switch
- light fitting
- light bulb
- epoxy glue
- sosatie stick
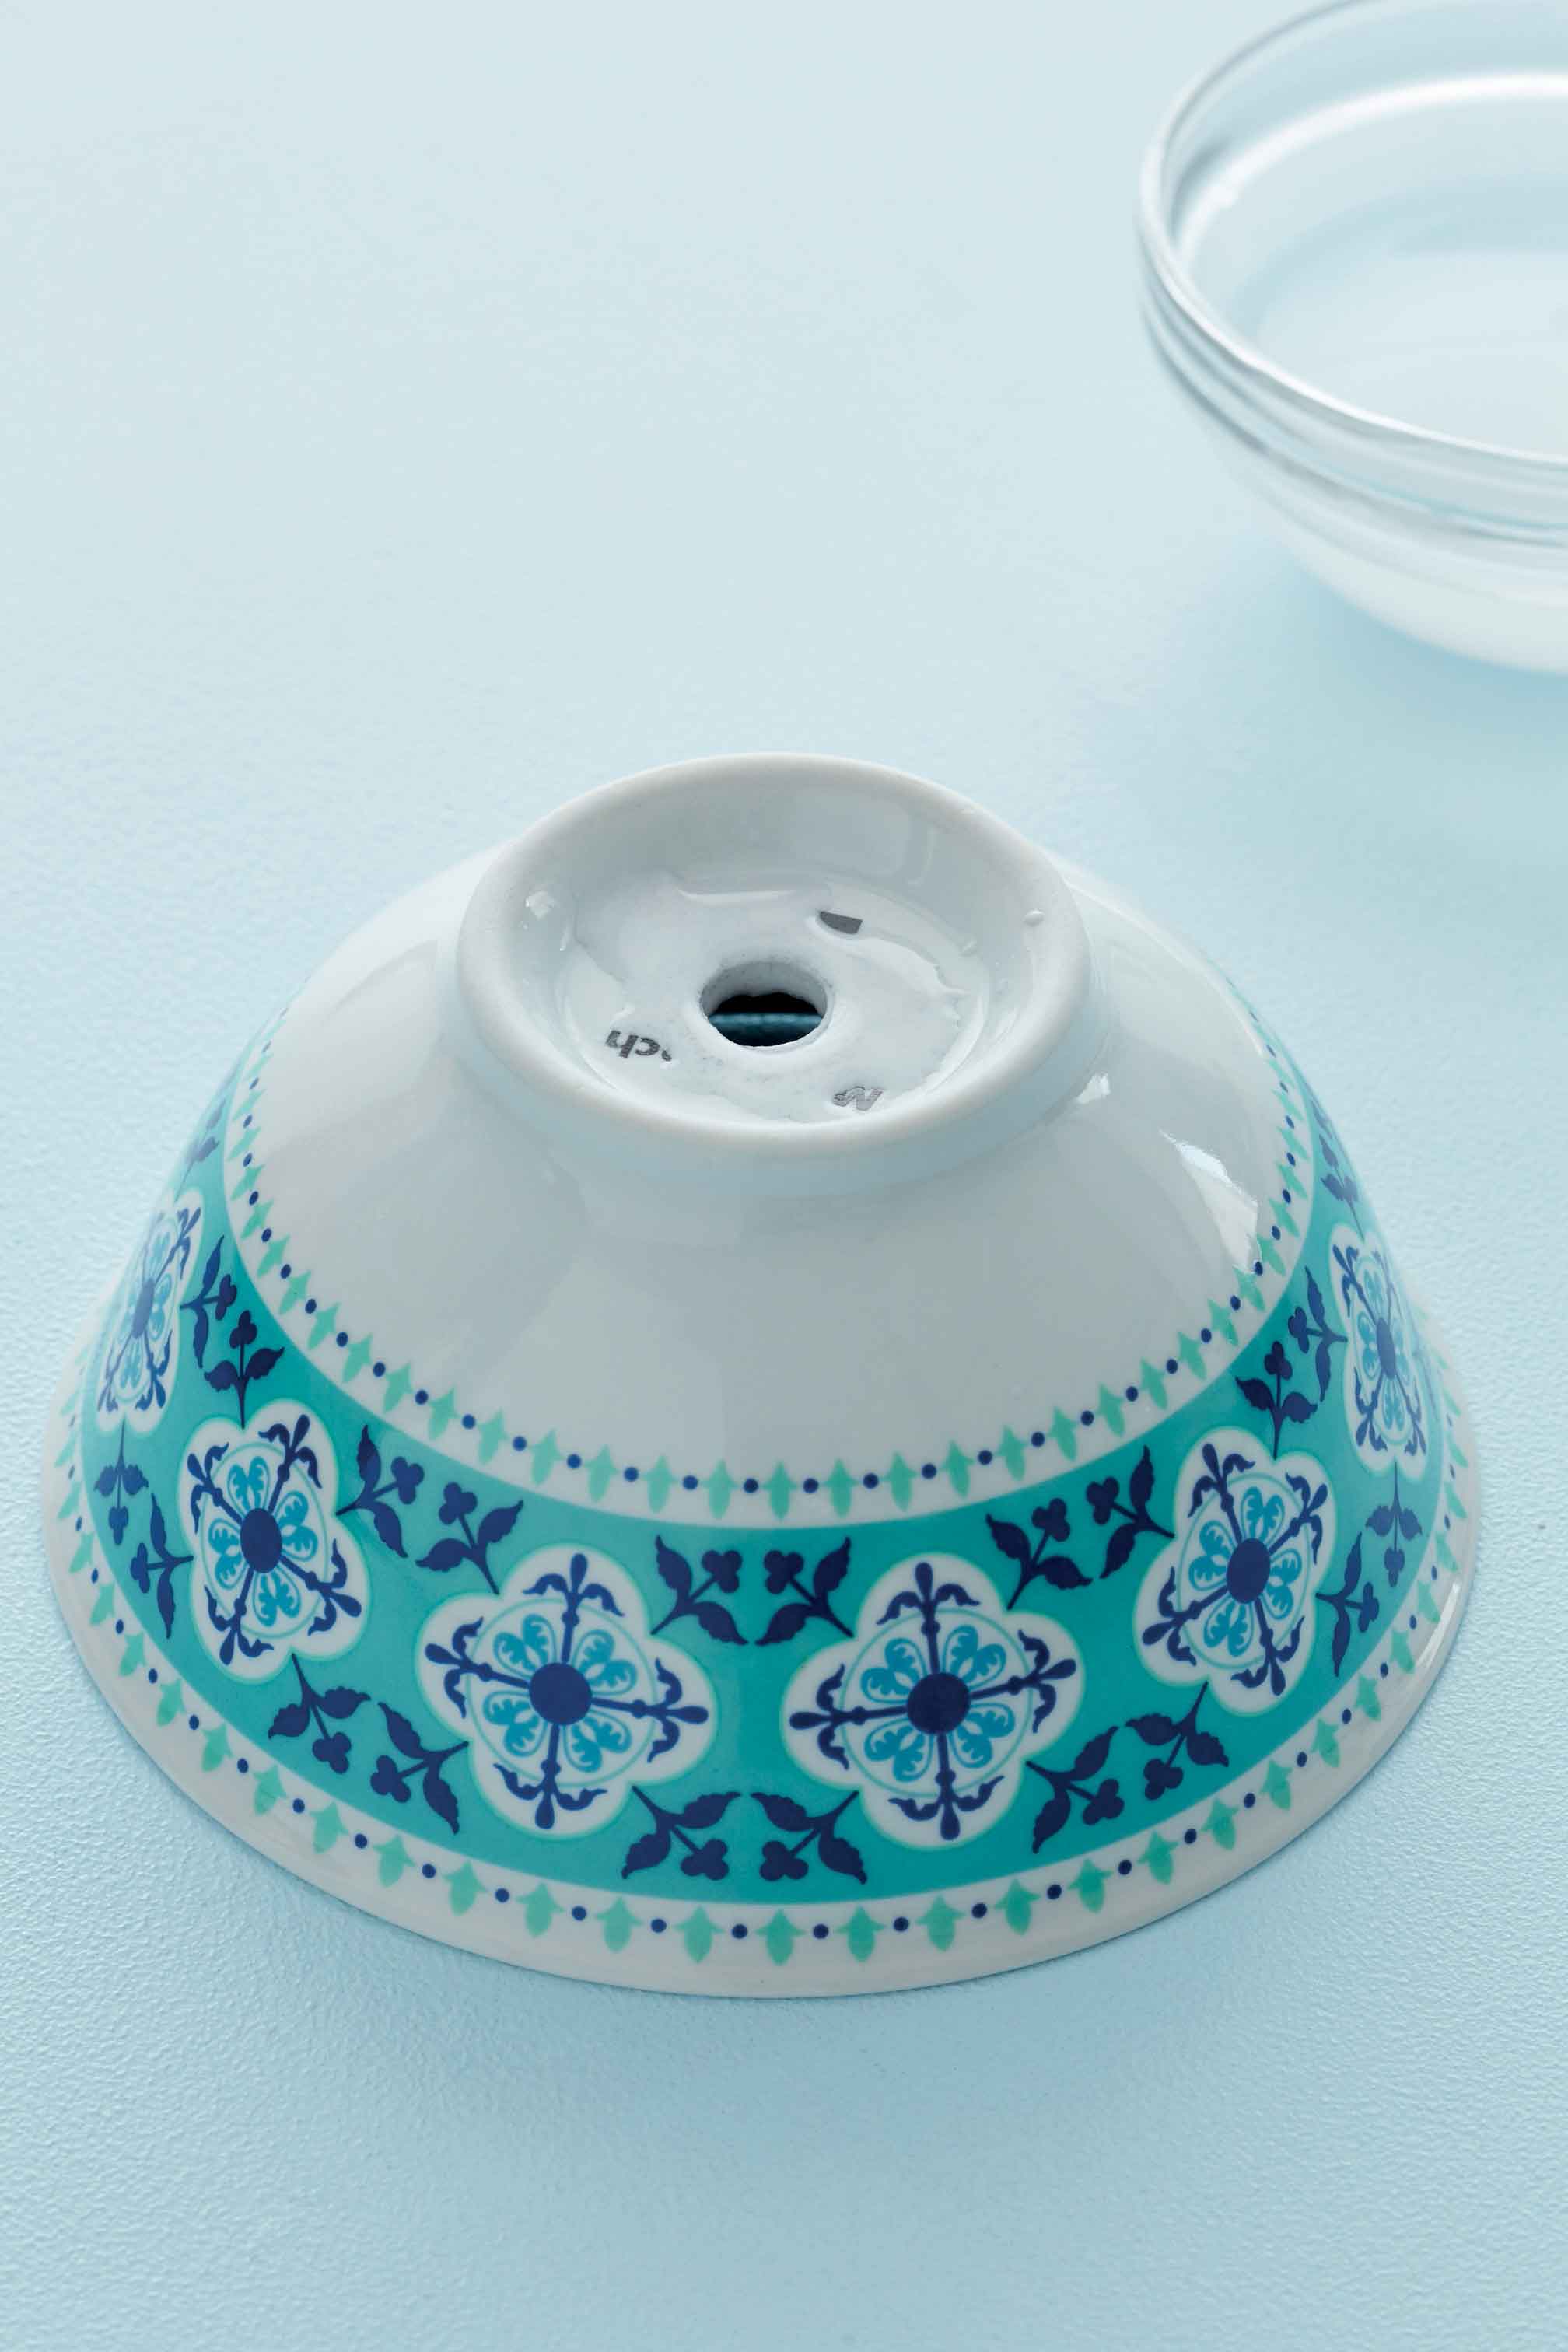
Step 1
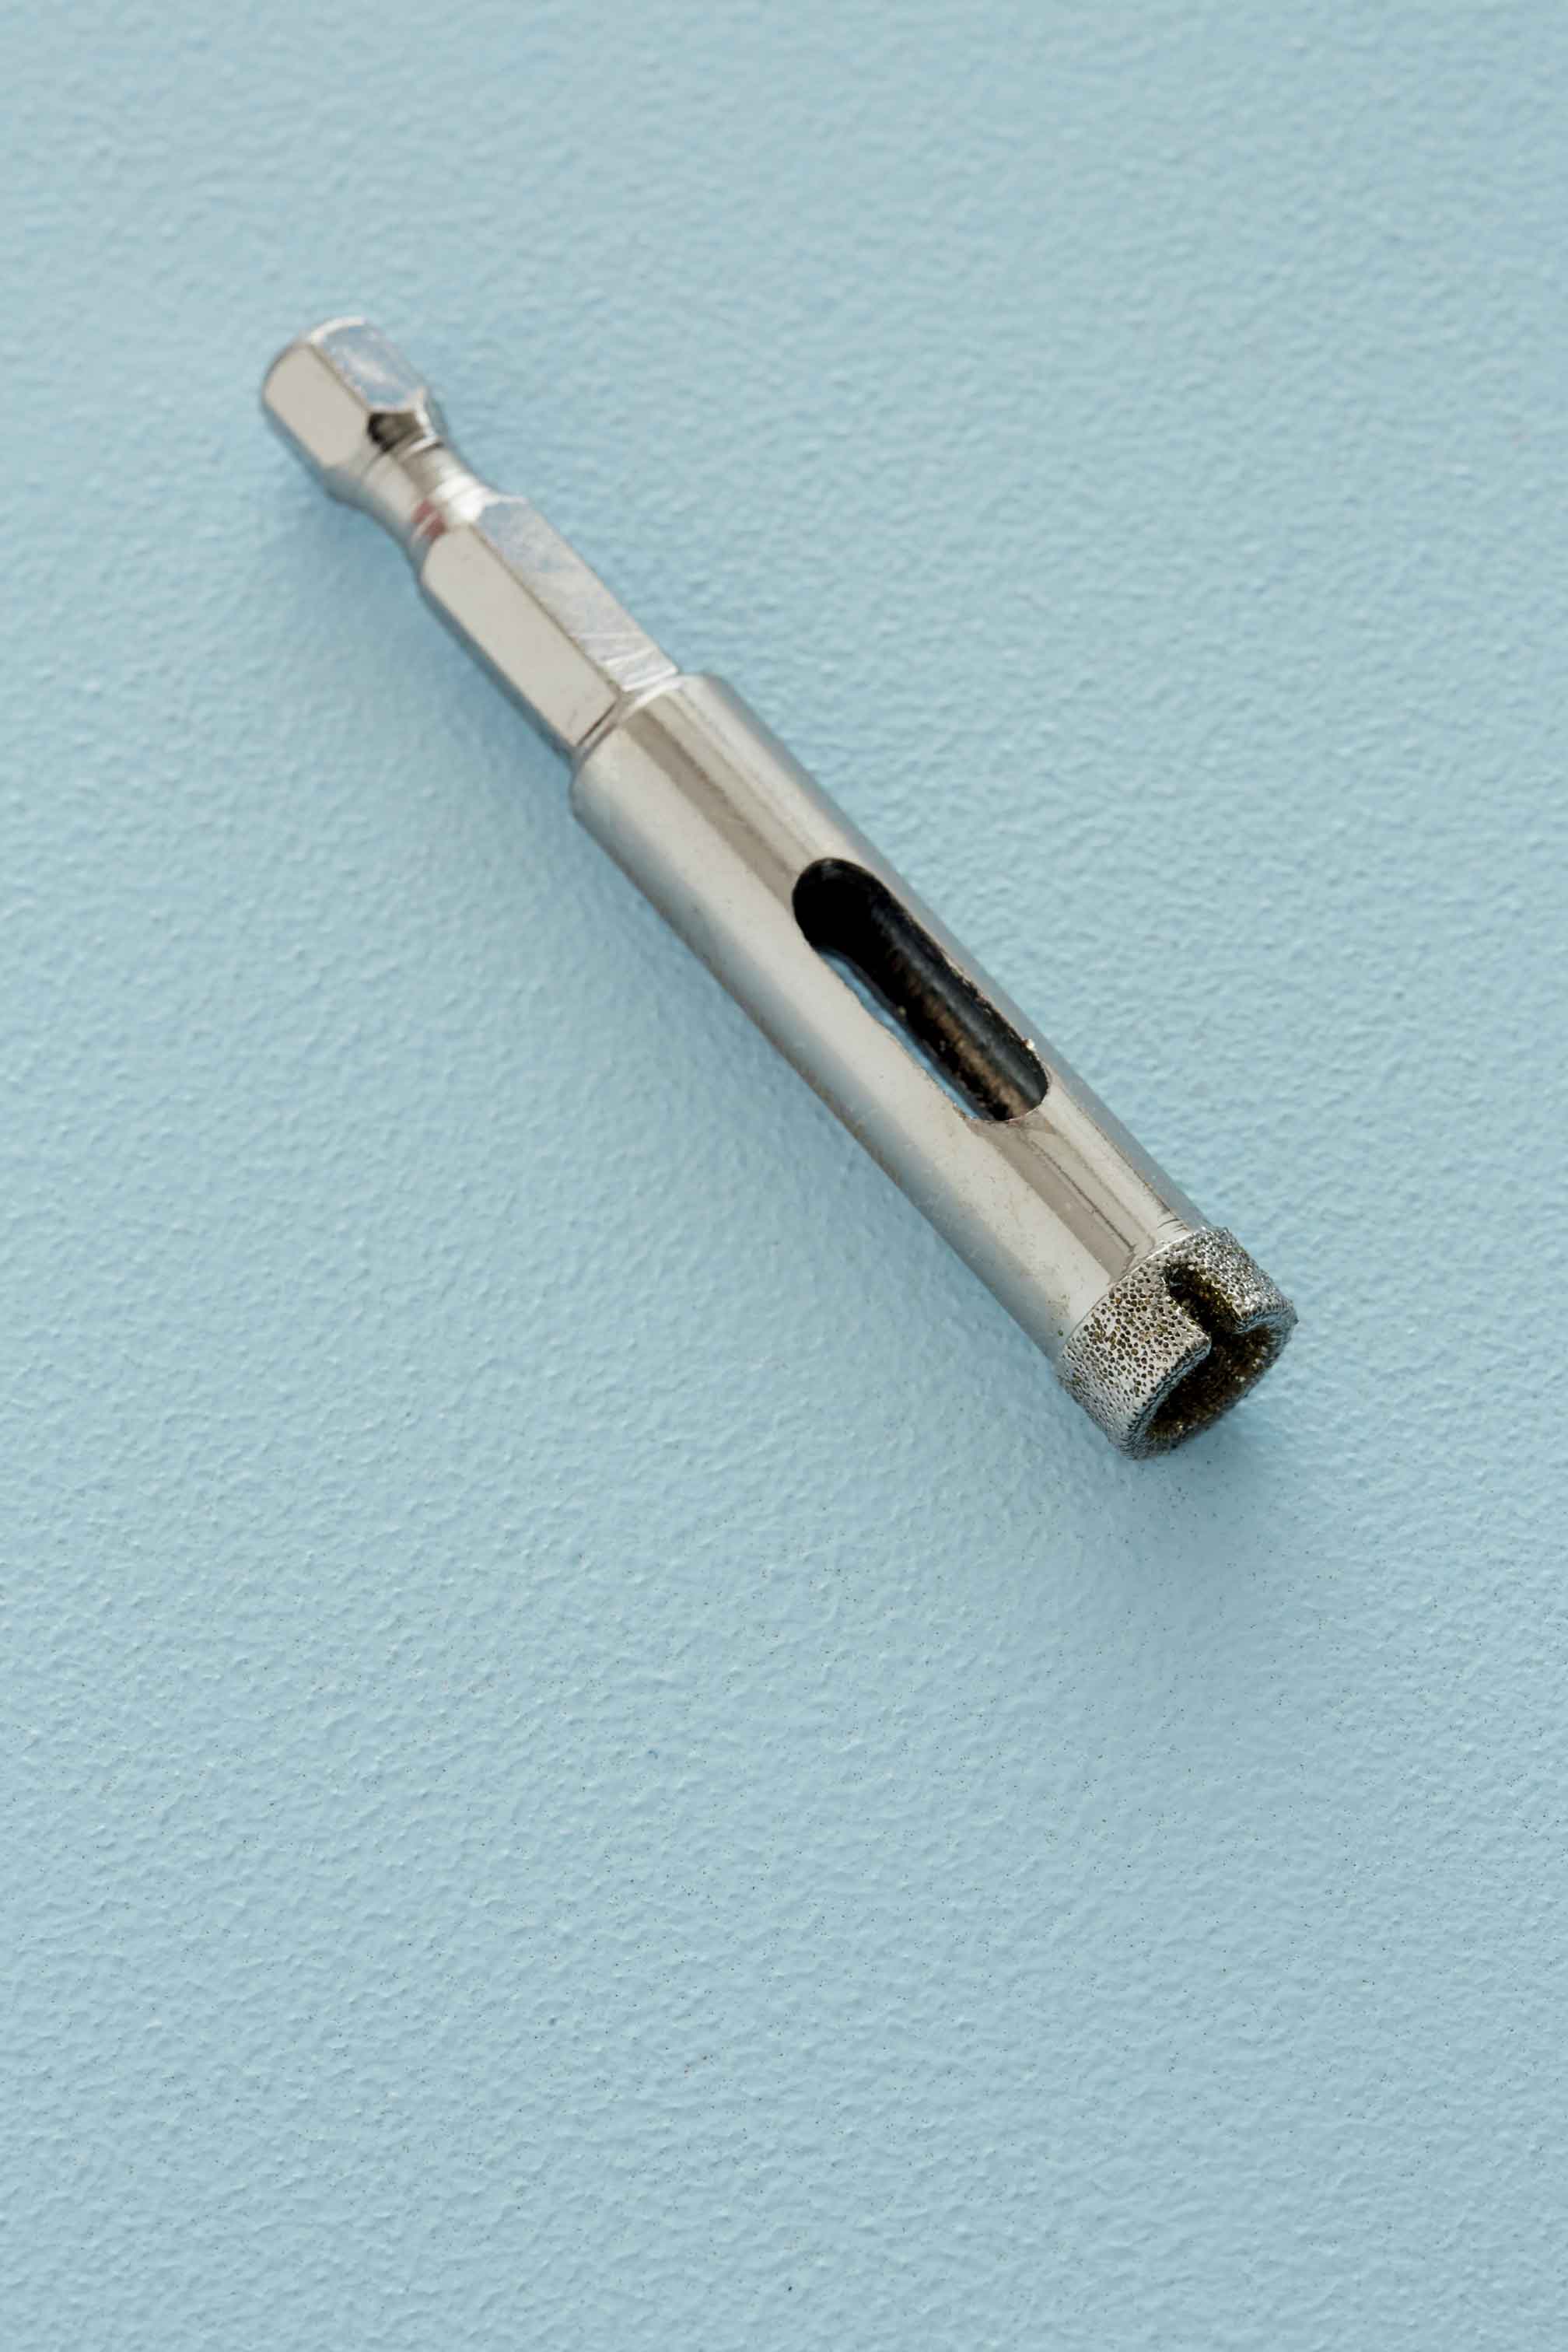
The success of this project lies in using a diamond-tipped drill bit to drill a hole just big enough for the light fitting. Ours measures 12mm.
Top Tip: You can screw the top section of the light fitting onto the bottom of the bowl, but then your hole will need to be bigger and you will need to spray paint the light fitting.

Step 2
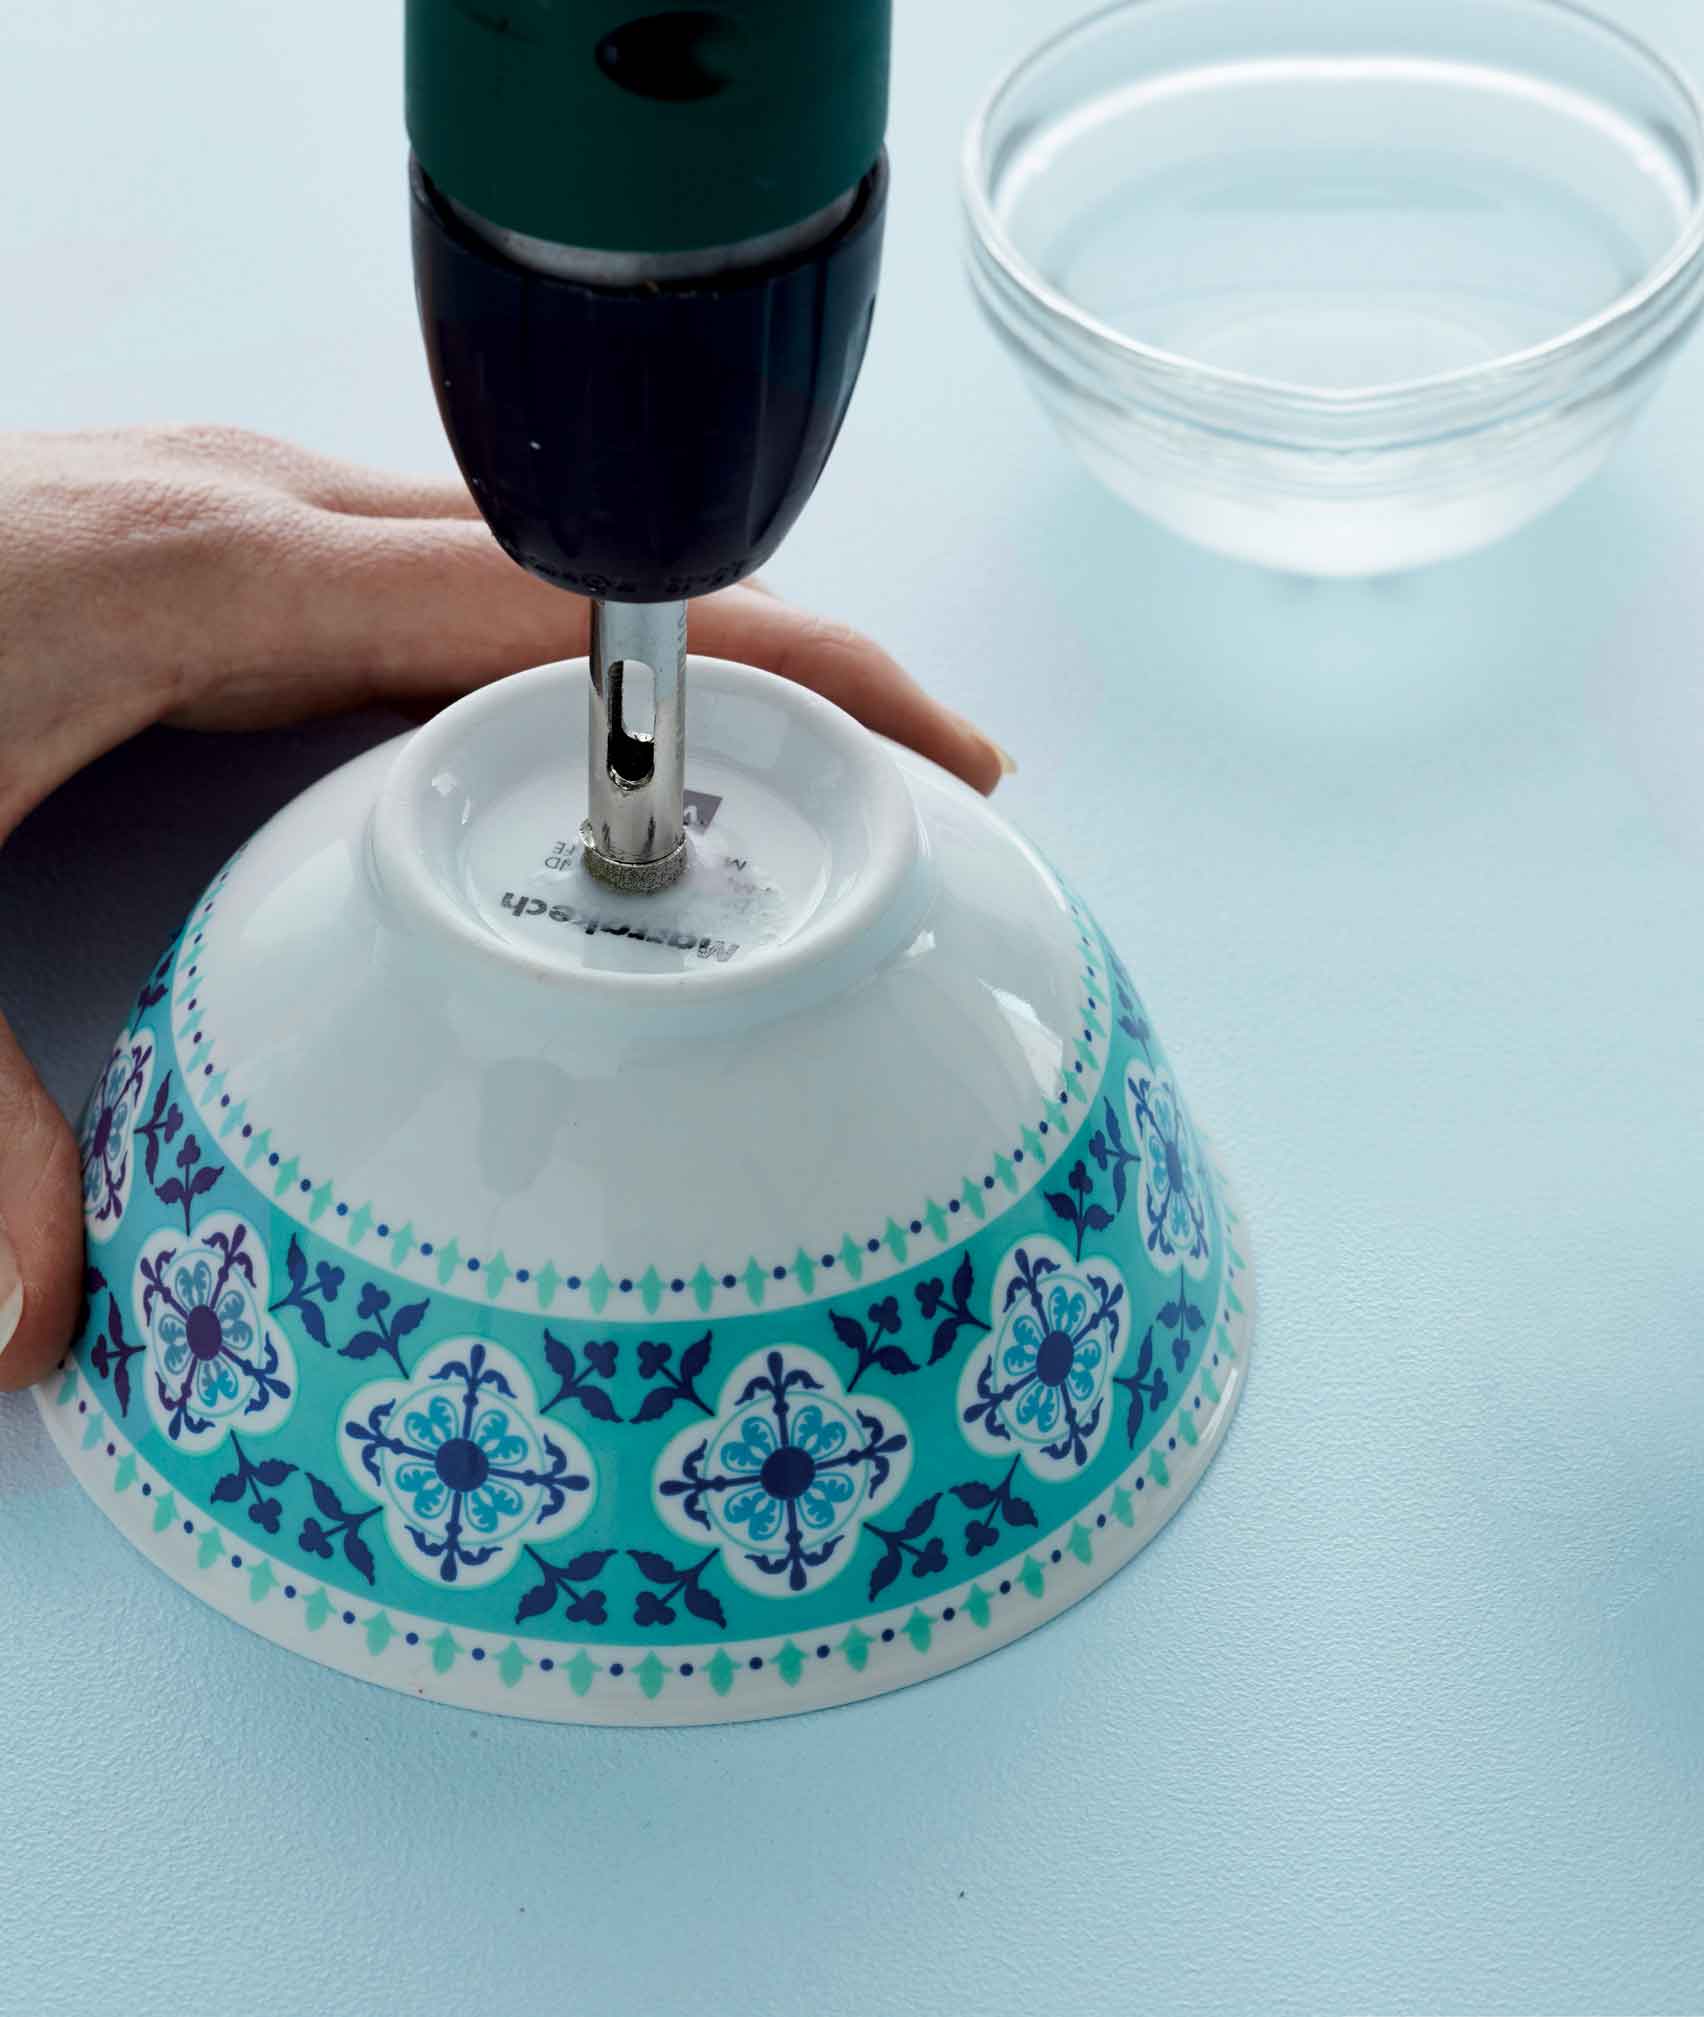
Turn the bowl upside down. Holding the drill at an angle, first make a notch in the bottom of the bowl. This is to prevent the drill bit from sliding over the slippery surface.
Top Tip: Work on an old towel – this will help to prevent the bowl from moving around.
Step 3
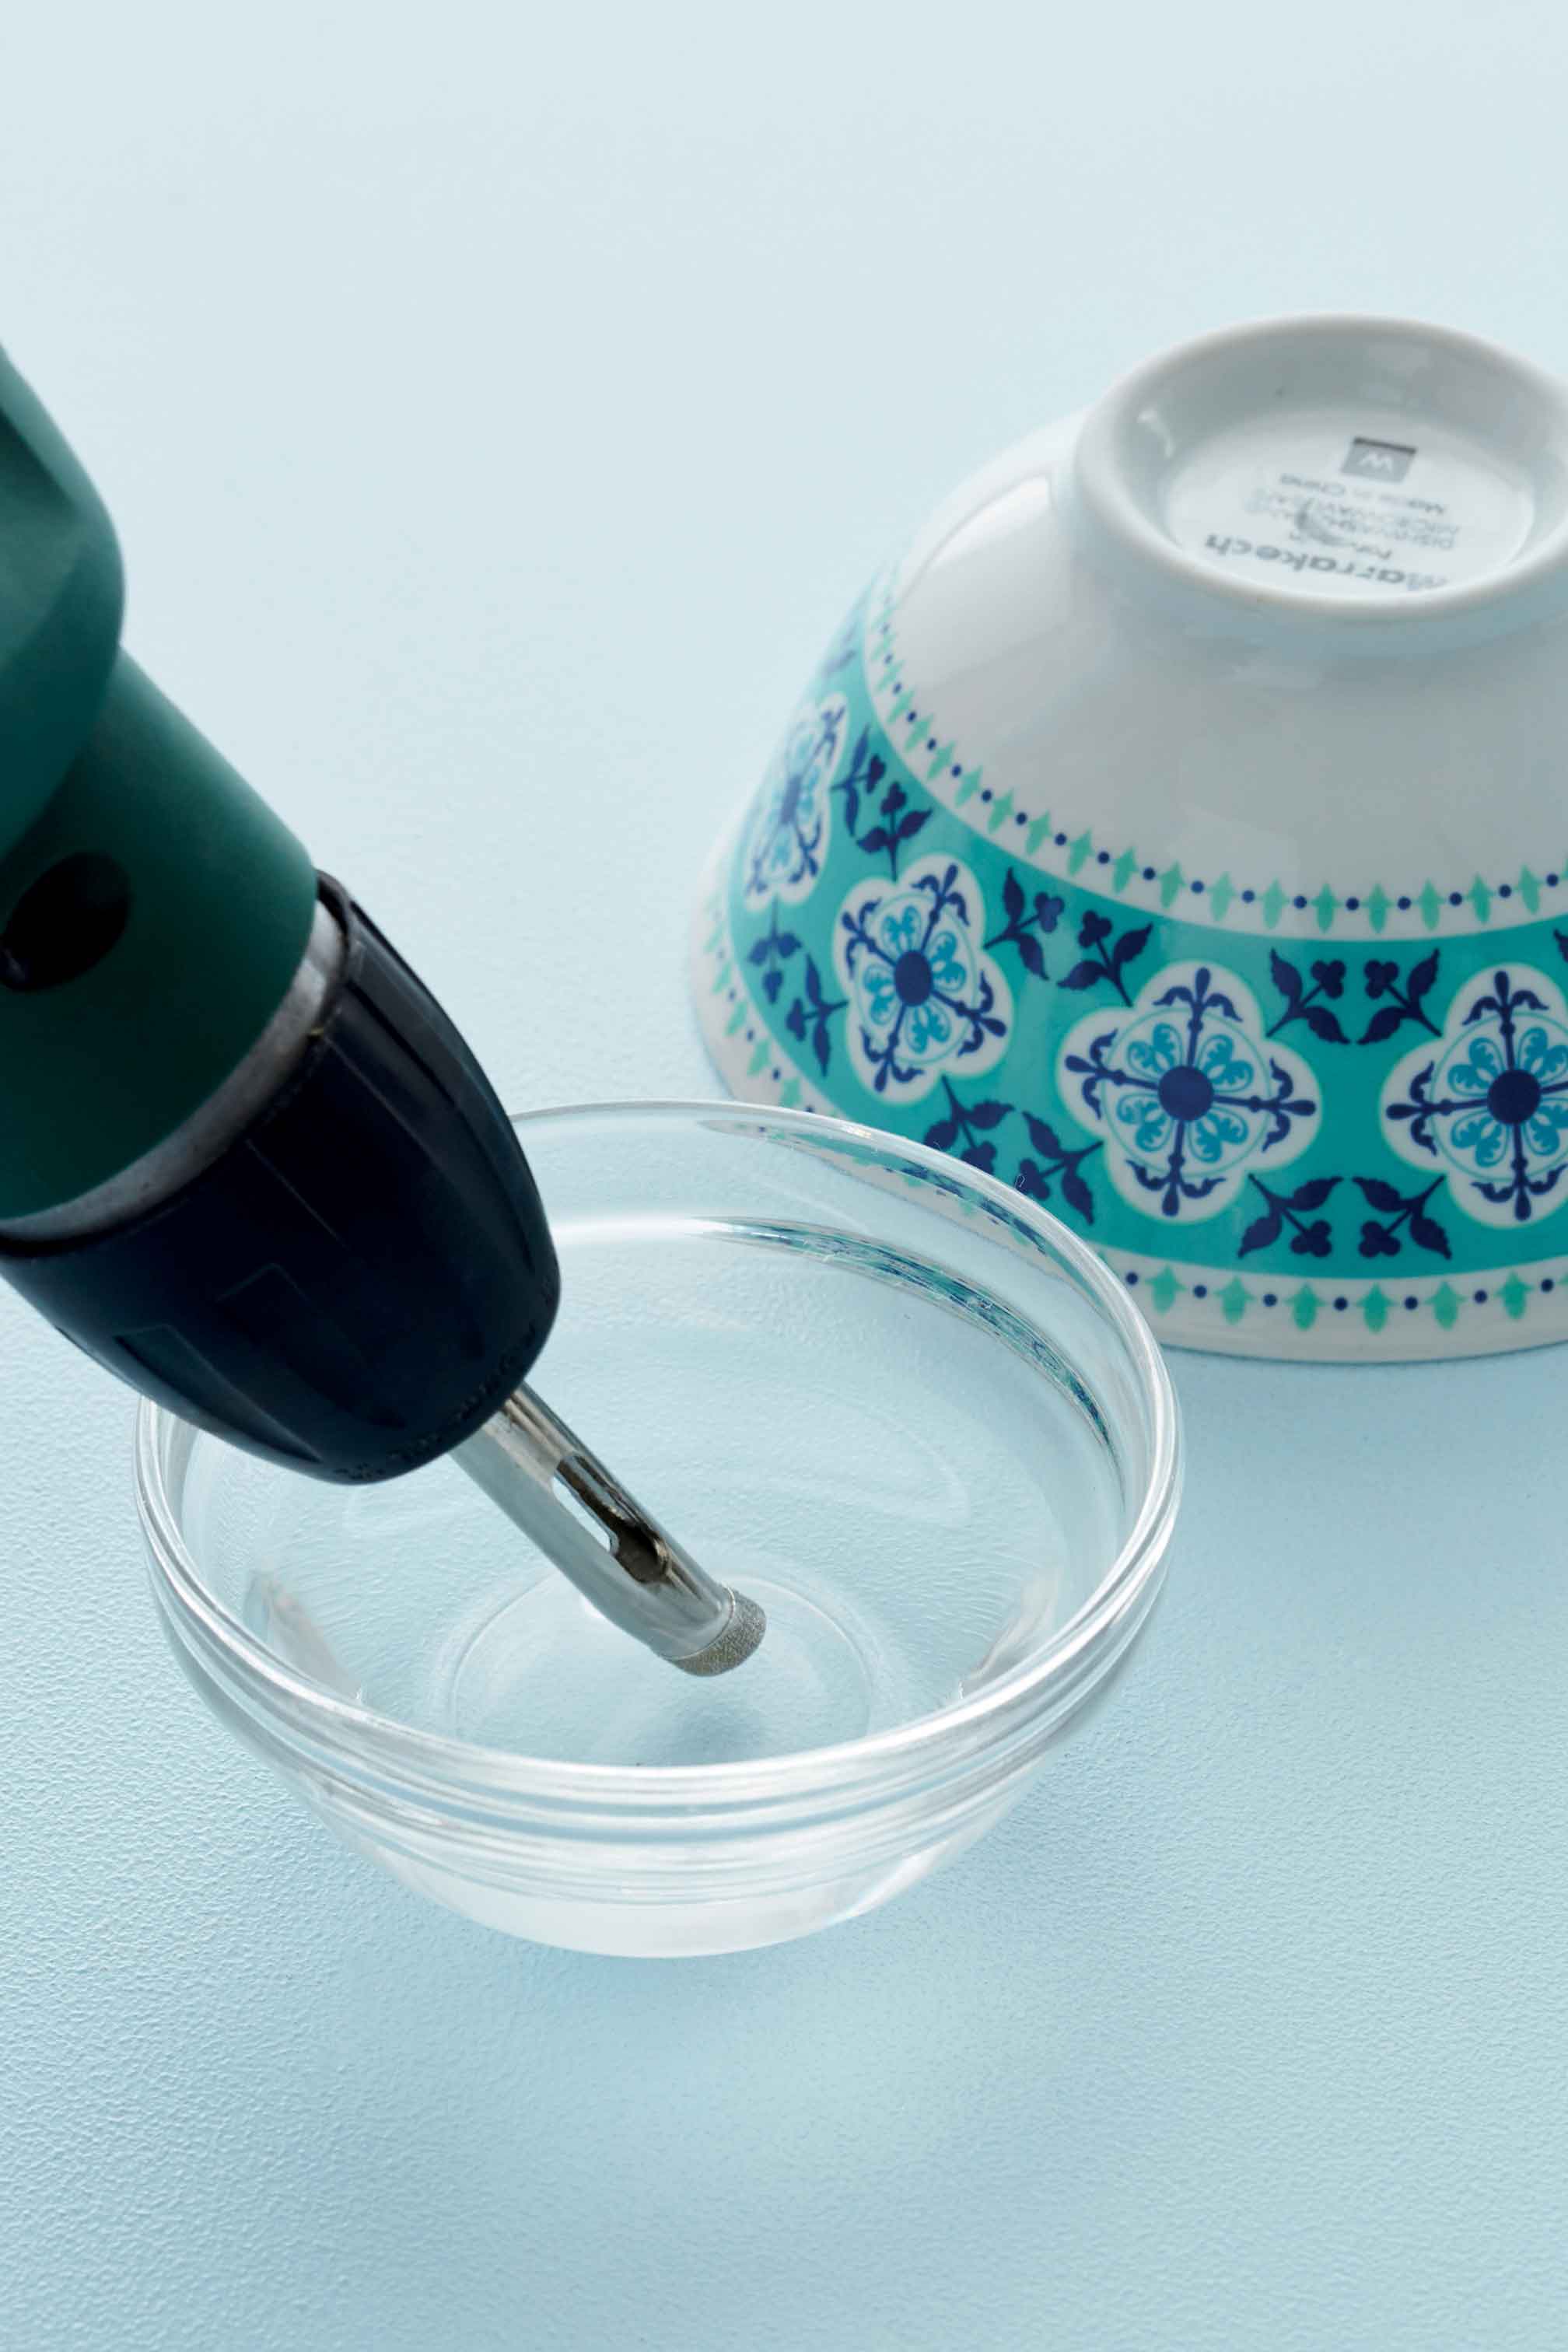
Keep a container filled with water at hand. Dip your drill bit in the water regularly to reduce the friction when you drill – doing this will also keep the drill bit sharp for longer. Alternatively, you can spray the drill bit with water from a spray bottle as you work.
Step 4
When you have made the notch, you can start to drill directly from above. Drill at a low speed and increase the speed gradually. Don’t press too hard otherwise the drill bit could slip. Remember to keep the drill bit wet.
Step 5
When you are almost through the bowl, drill even more carefully. The drill can go through the ceramic very suddenly. Rinse and dry the bowl when you are done.

Step 6
Thread the cord from the bottom of the bowl through the hole you have just drilled.
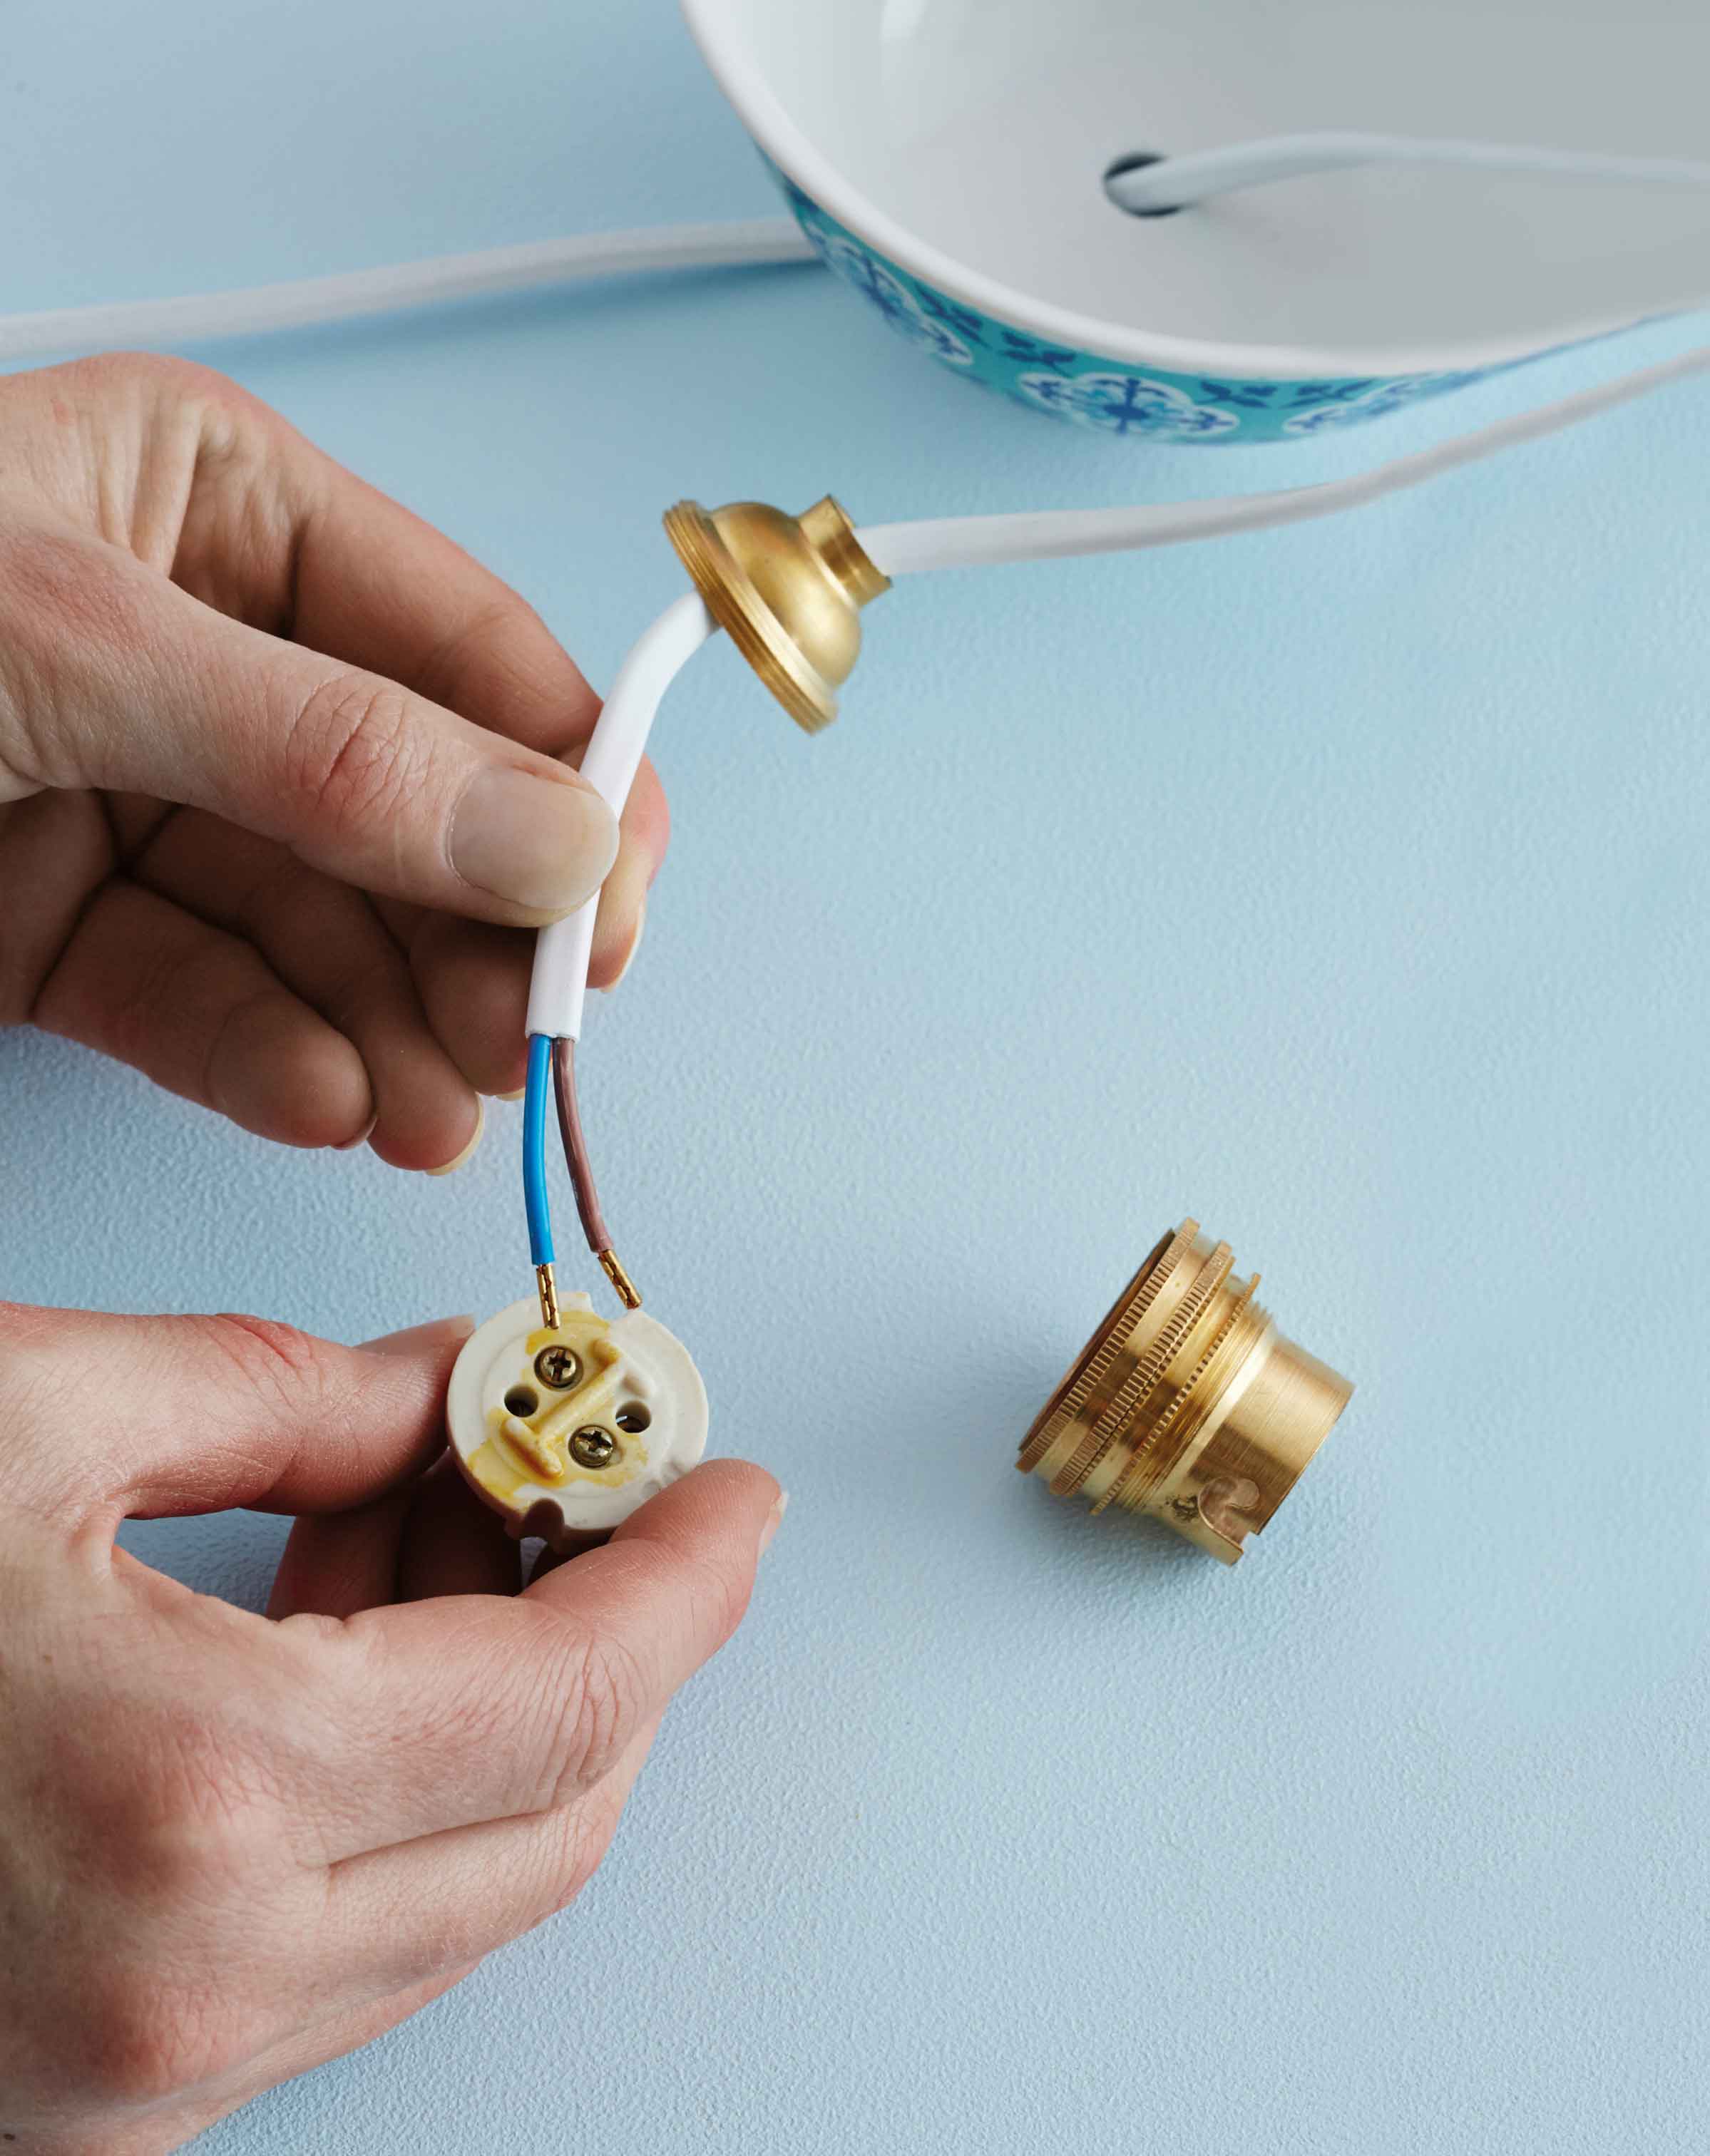
Step 7
Thread the top of the light fitting onto the cord and pull the wires into the holes in the light fitting. Screw them in place and screw on the rest of the light fitting.

Step 8
Pull the cord taut so the top of the light fitting protrudes through the hole. Use a sosatie stick to apply a little epoxy glue between the cord and the hole, to keep it in position.

Step 9
Insert the light bulb and hang up the light.
Credits
Referenced from Gallo images / IDEAS Magazine
Browse 1000’s of products available to you. Select your country to Shop Online.


