Make your own Adirondack garden chairs for the special touch to your patio.
- SA pine boards
- 2 ℓ wood primer
- Masonite or plywood for templates
- Wood glue
- 40 mm full thread, cut screws
- Wood filler
- Jigsaw
- Electric planer
- 2 ℓ paint (exterior acrylic or enamel)
- Belt sander
- Orbital sander
- Cordless drill and bits
- Paintbrush
- Carpenter’s square
Cutting list
- SA pine for two chairs
- 4 x seat sides: (850 x 130 x 22 mm)
- 18 x seat slats: (585 x 55 x 22 mm)
- 4 x front legs: (565 x 144 x 22 mm)
- 4 x armrests: (710 x 144 x 22 mm)
- 4 x armrest support brackets: (130 x 90 x 22 mm)
- 2 x backrest centre slats: (780 x 144 x 22 mm)
- 8 x backrest side slats: (780 x 85 x 22 mm)
- 2 x top backrest support cleats: (725 x 55 x 22 mm)
- 2 x bottom backrest support cleats: (585 x 55 x 22 mm)
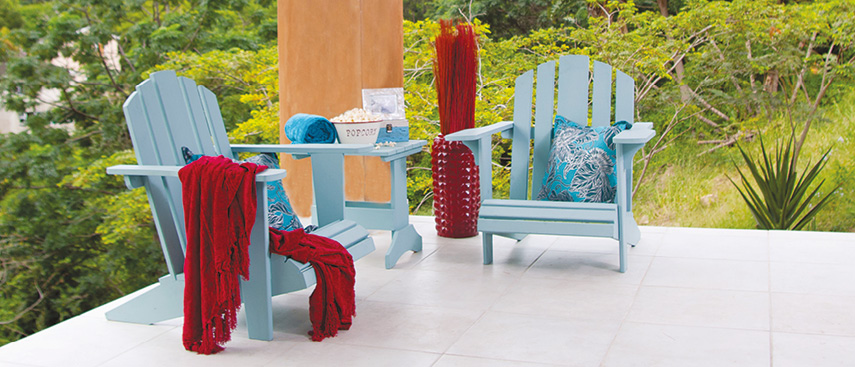
Step 1
Using a piece of masonite (850 x 130 mm), cut out a template for the sides of the seat as per diagram. Use the template to trace the shape onto the 850 x 130 x 22 mm planks and cut them out, using a jigsaw.
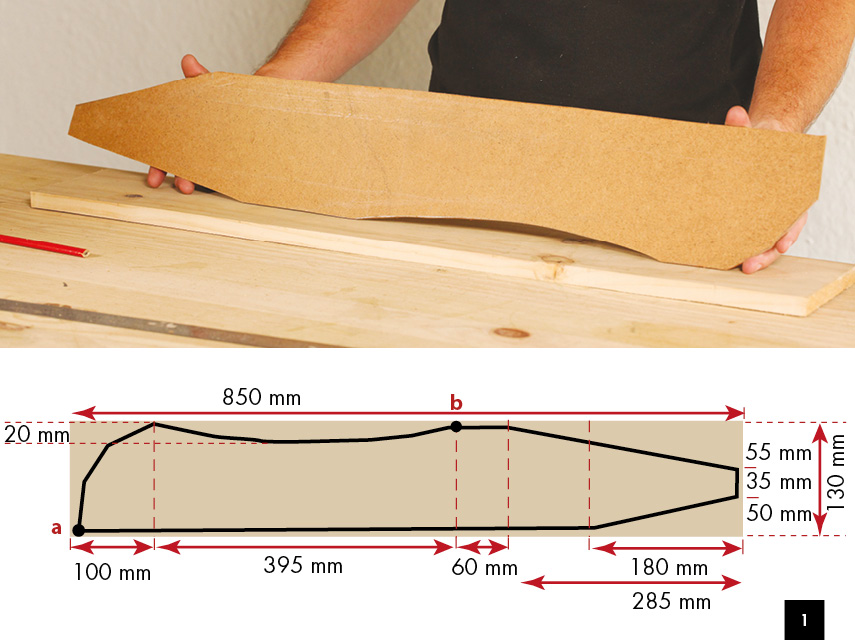
Step 2
Bevel the top edges of nine seat slats (585 x 55 x 22 mm) and attach them to the sides between points A and B on the template diagram, spacing them evenly and making sure the sides stay parallel.
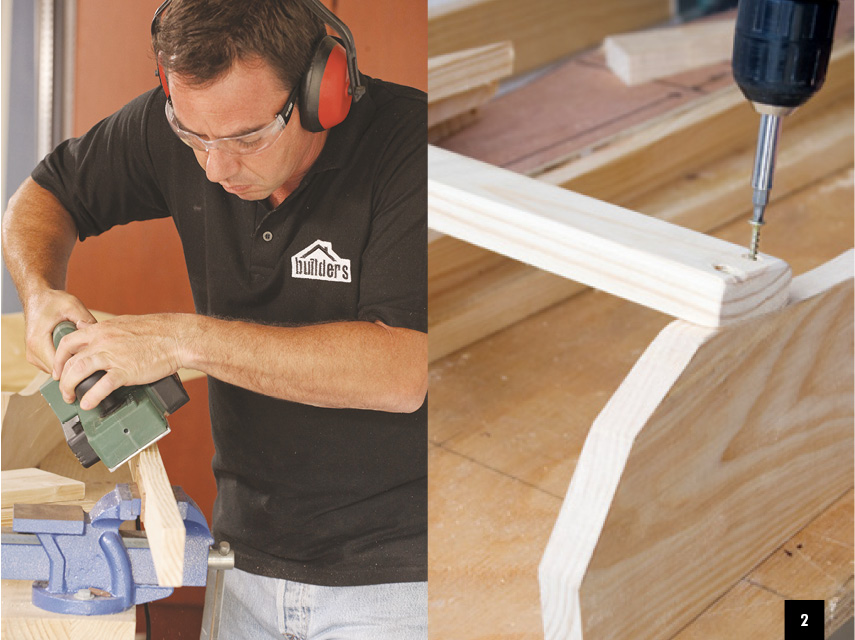
Step 3
The two front legs (565 x 144 x 22 mm) require tapering so that the bottoms are 20 mm narrower than the tops. Measure 20 mm in from one bottom corner and draw a line from there to the corresponding top corner. Saw along the line to create the taper. On a completely flat surface, support the front of the seat so that the two back ‘feet’ are flush with the ground, then attach the front legs on either side at the point shown, with the tapered edges facing backwards.

Step 4
Lay one 780 x 144 x 22 mm centre slat down with two 780 x 0.85 x 22 mm slats on either side of it (five slats in all). From the centre point, use a piece of string and a pencil to mark a curve across the top of the slats, then cut them to shape. Lay the slats down again making sure they are evenly spaced. Fasten them together along the bottom by screwing them to the narrow edge of a bottom cleat (585 x 55 x 22 mm), making sure they remain parallel. Then screw a top cleat (725 x 55 x 22 mm) to the slats, 330 mm up from the bottom cleat. Note that at the bottom you screw the slats to the cleat but at the top you screw the cleat to the slats.
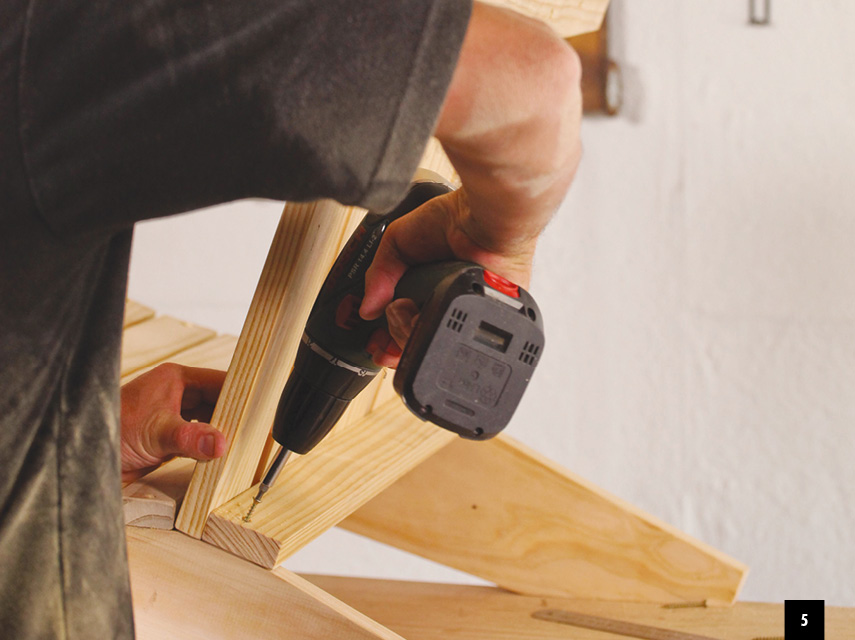
Step 5
Screw the backrest to the seat, just behind the last slat.
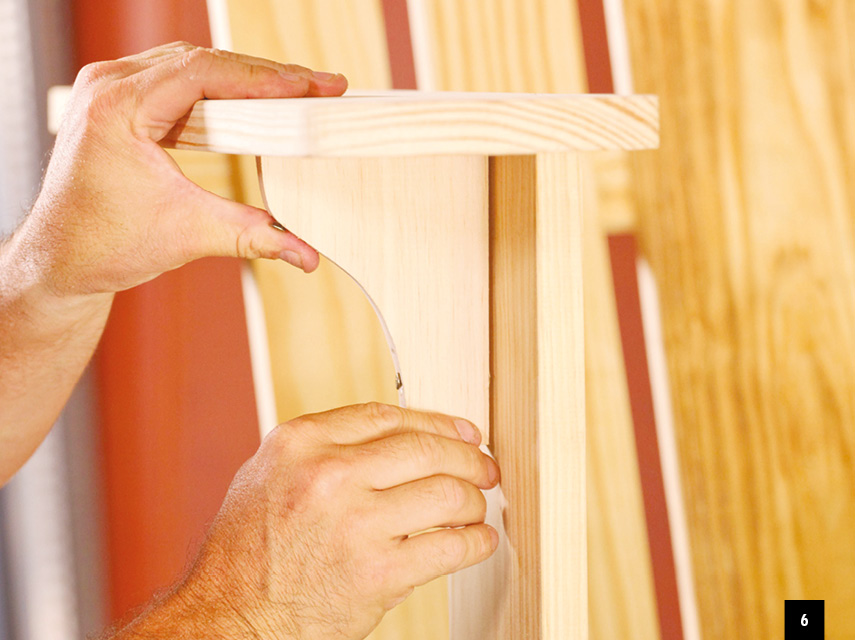
Step 6
Each armrest requires an armrest support bracket (130 x 90 x 22 mm). Cut a curved shape into the corner of the bracket and secure the bracket to the underside of the armrest and the side of the leg (one for either side.)
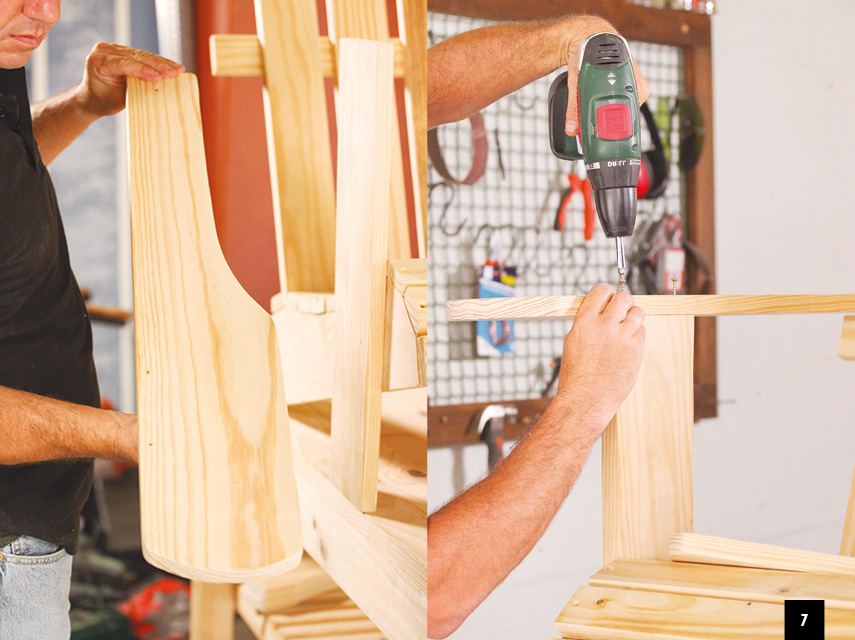
Step 7
Using masonite, draw and cut out a template for the armrests (as per diagram opposite). Draw the outline of the template on the 710 x 144 x 22 mm planks for the armrests and cut them to shape. Bevel and sand all the edges, then attach the armrests to the tops of the front legs first, and then to the ends of the top cleat protruding from the backrest. (Be sure to fasten the armrest to thelegs first as the cleat will be at an angle.)
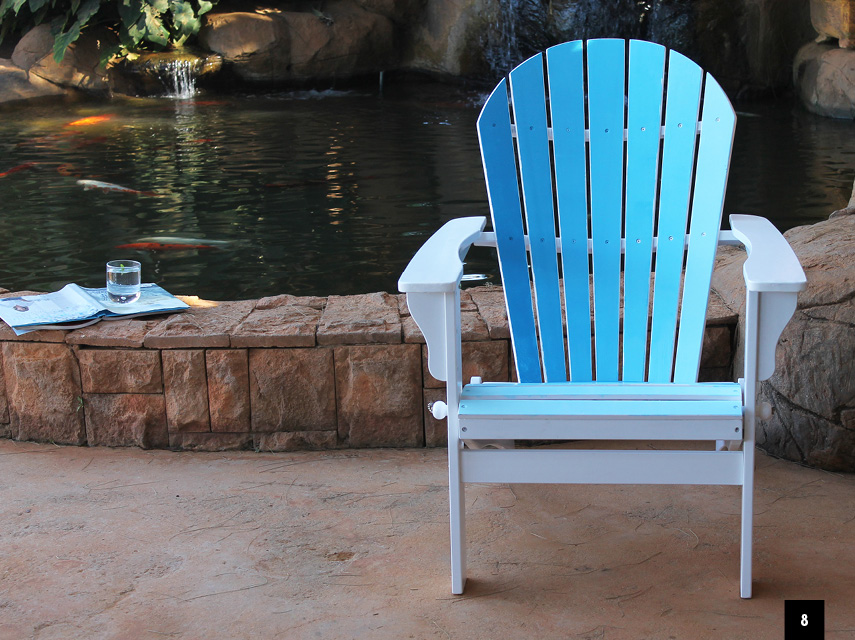
Step 8
Finish with an undercoat of wood primer and then two coats of paint in the colour of your choice.
Browse 1000’s of products available to you. Select your country to Shop Online.


