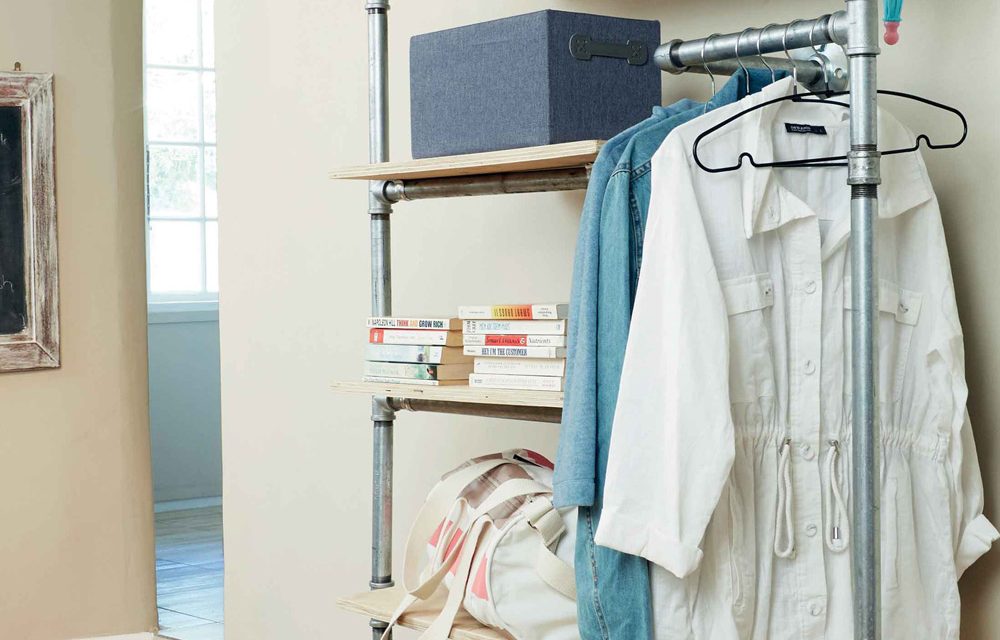
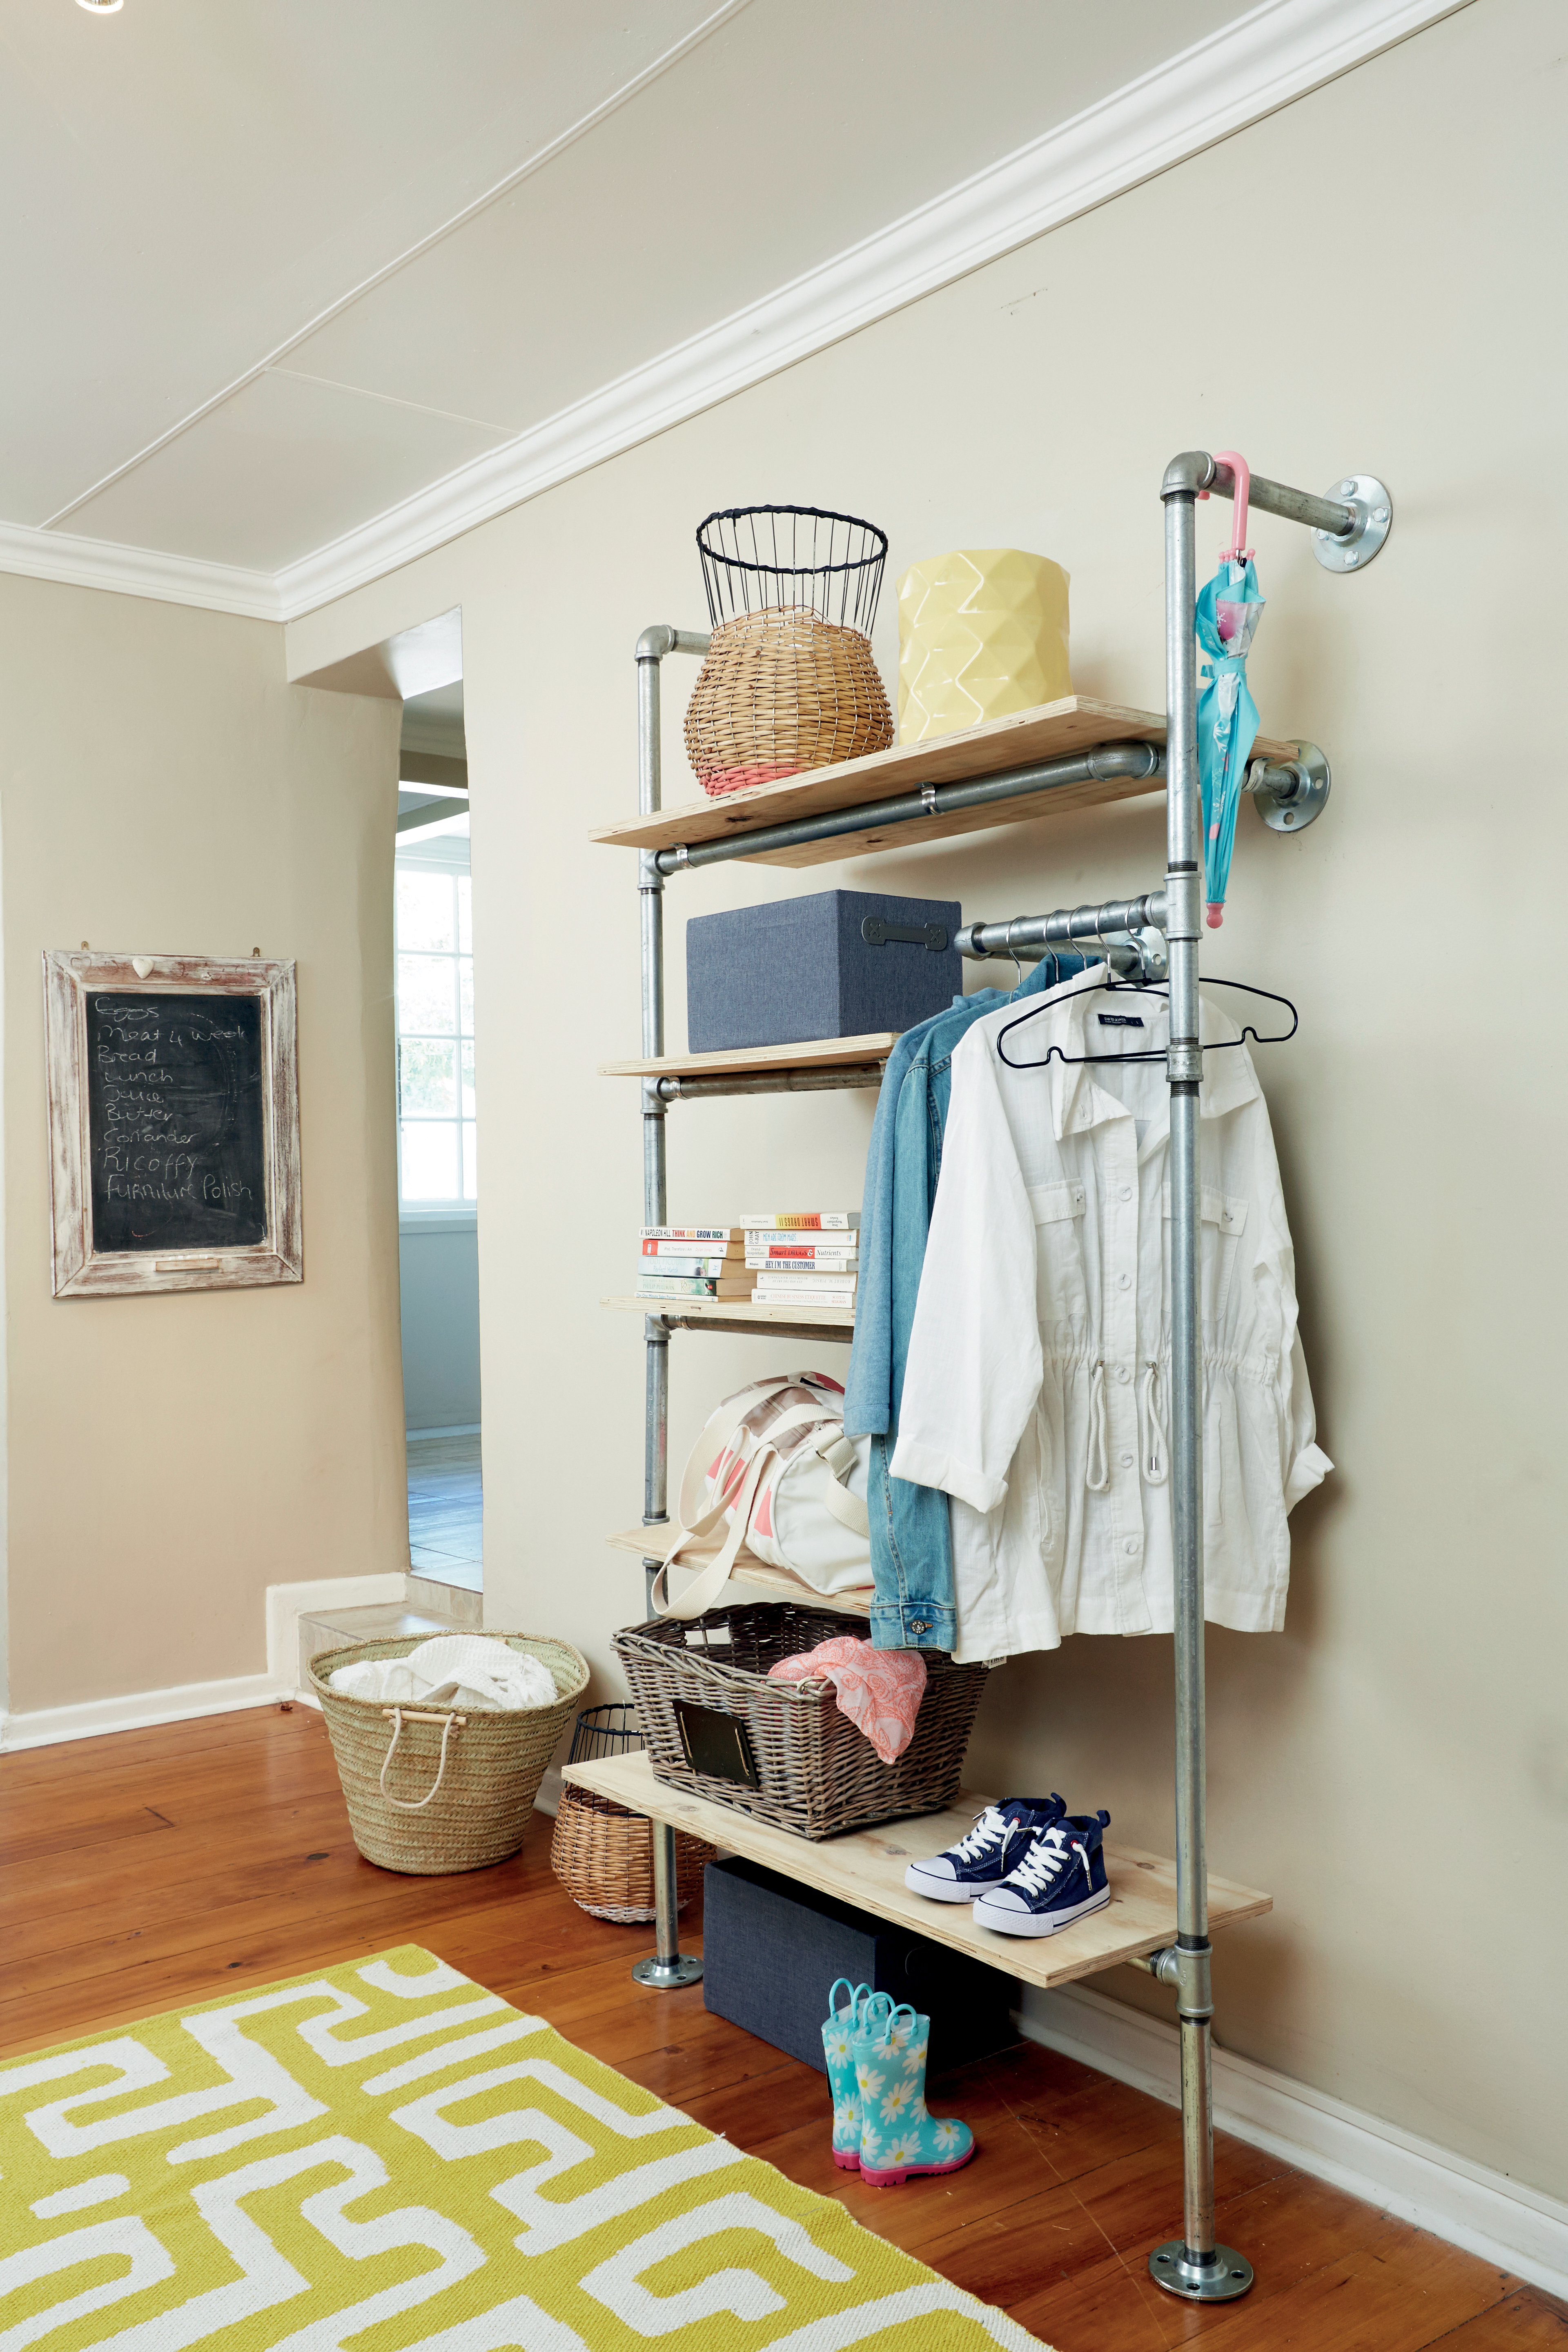
Need more storage space – create a useful shelf unit for the bedroom, bathroom, study or playroom.
- 80-grit sandpaper
- One sheet of 18mm plywood, cut to:
- three 650 x 400mm shelves
- two 960 x 400mm shelves
- one packet of 8mm x 16mm chipboard screws
- nine 10mm x 50mm coach screws
- nine 12mm nylon wall plugs
- fifteen 32mm galvanised saddles
- The following 25mm galvanised irrigation pipes (use standard, pre-threaded lengths):
- fifteen 300mm lengths
- one 900mm length
- two 1 000mm lengths
- three 600mm lengths
- one 450mm length
- one 150mm length
- nine flanges
- cordless drill
- pencil
- hammer drill and 12mm drill bit
- water pump pliers
- ratchet and 17mm socket
- seven elbows
- seven T-pieces
- one socket
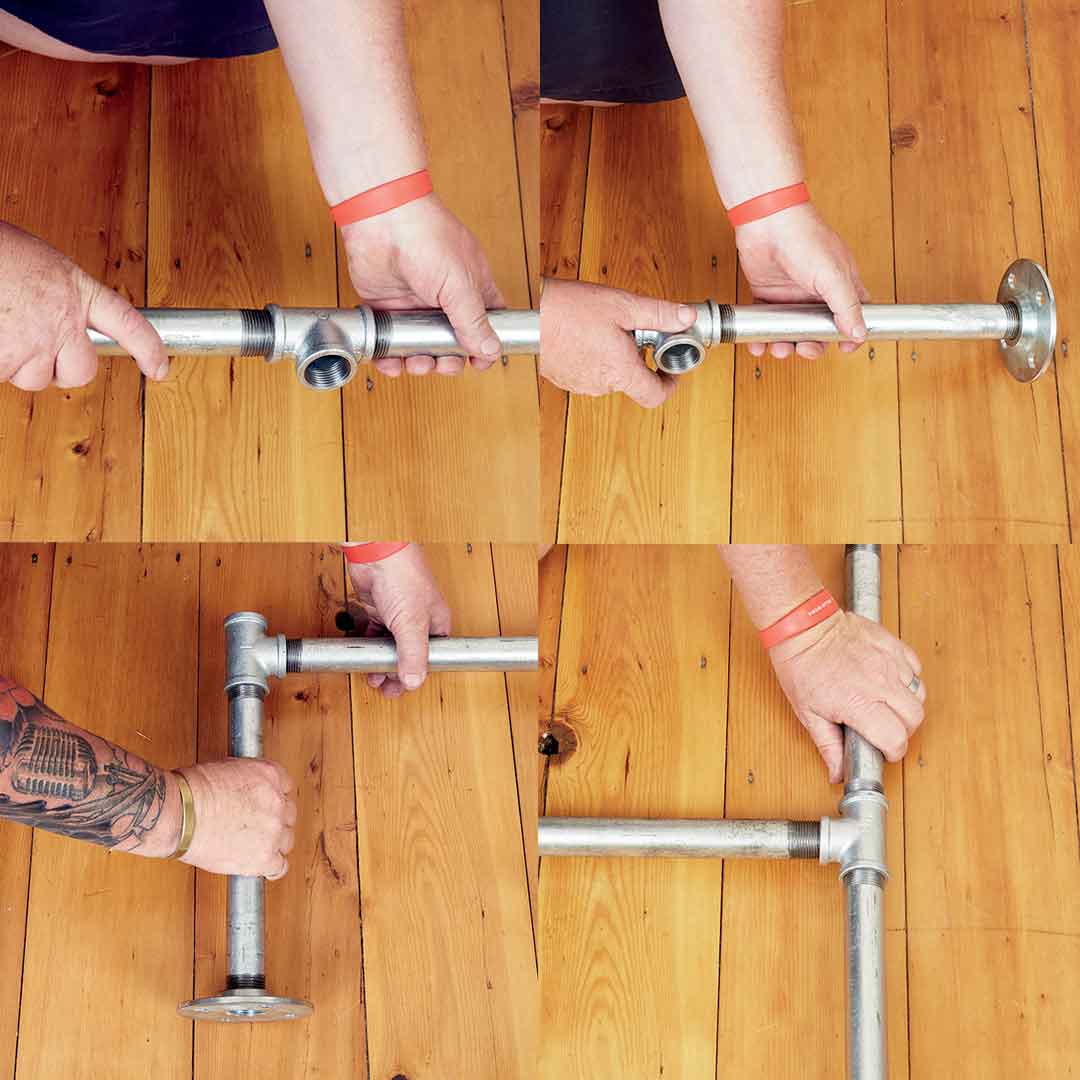
Step 1
Make the left-hand side of your shelf by connecting six 300mm pipes with T-pieces; connect a flange to the bottom to form the foot. Now connect a 1 000mm pipe at a right angle to the bottom of the first T-piece. Make the lower part of the right-hand side by connecting a 300mm pipe with a T-piece to the latter 1 000mm horizontal pipe; attach a flange to the bottom.
Step 2
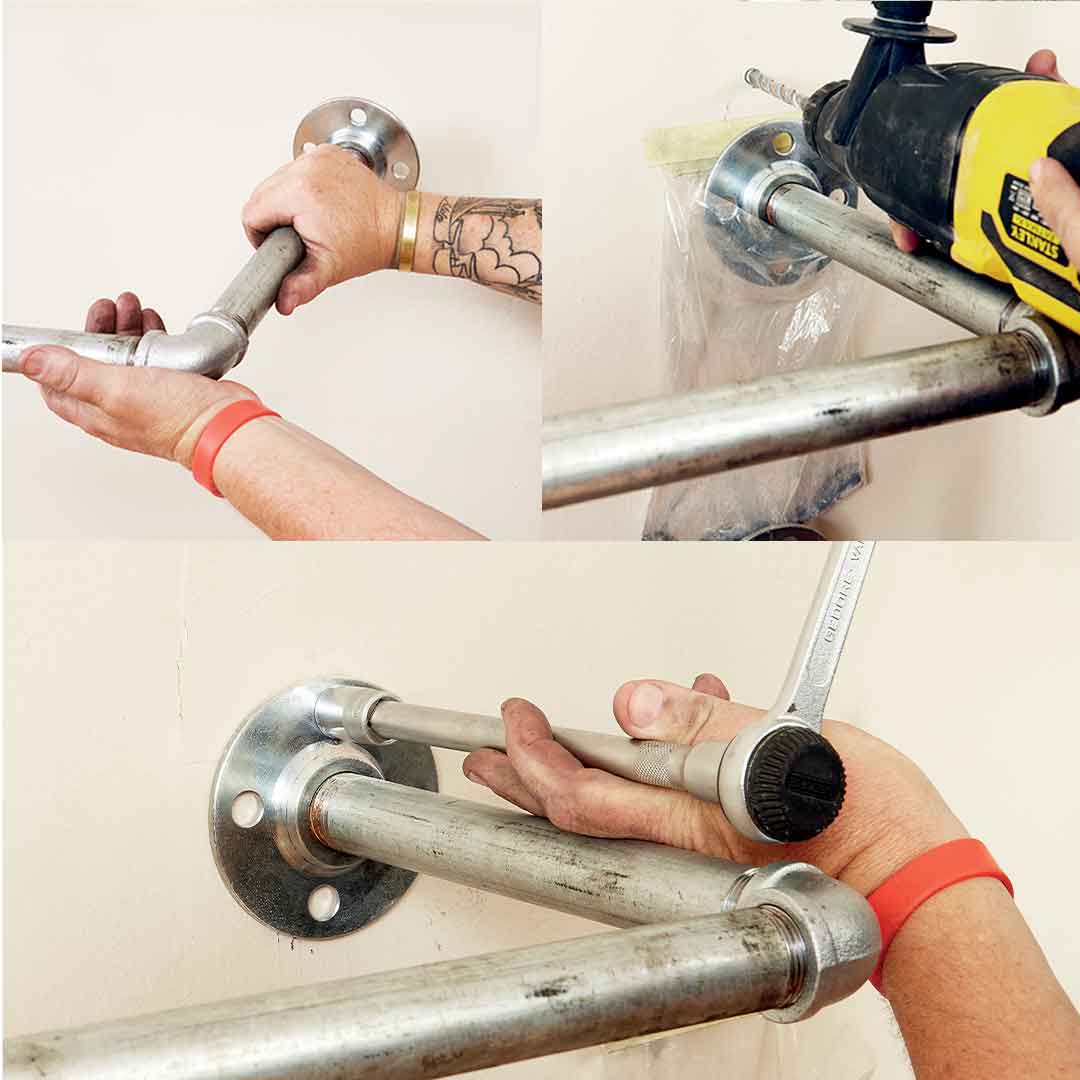
Finish the right-hand side by joining a 1 000mm and a 150mm pipe with a 25mm socket and connecting this to the foot T-piece. Connect the 450mm pipe to the top of the T-piece and attach a 300mm pipe and an elbow to the top of the left-hand and right-hand side horizontally; finish off with a flange. Make sure your shelf is square before marking and drilling the necessary holes for the wall plugs where the flanges will be screwed into the wall. Attach to the wall with coach screws.
Now connect the 600mm pipes to the middle three left-hand side T-pieces horizontally; connect an elbow and a 300mm pipe with a flange to the other end of these pipes. This forms the middle shelf supports. Connect a 900mm pipe to the final T-piece on the left-hand side, finishing again with an elbow, 300mm pipe and flange to make the top shelf support. For the clothes rail, connect the final 300mm pipe at right angles to the right-hand side T-piece, ending with an elbow, 300mm pipe and flange. Mark and drill where each of the flanges will be attached to the wall; use the wall plugs and coach screws to attach the rail.
Step 3
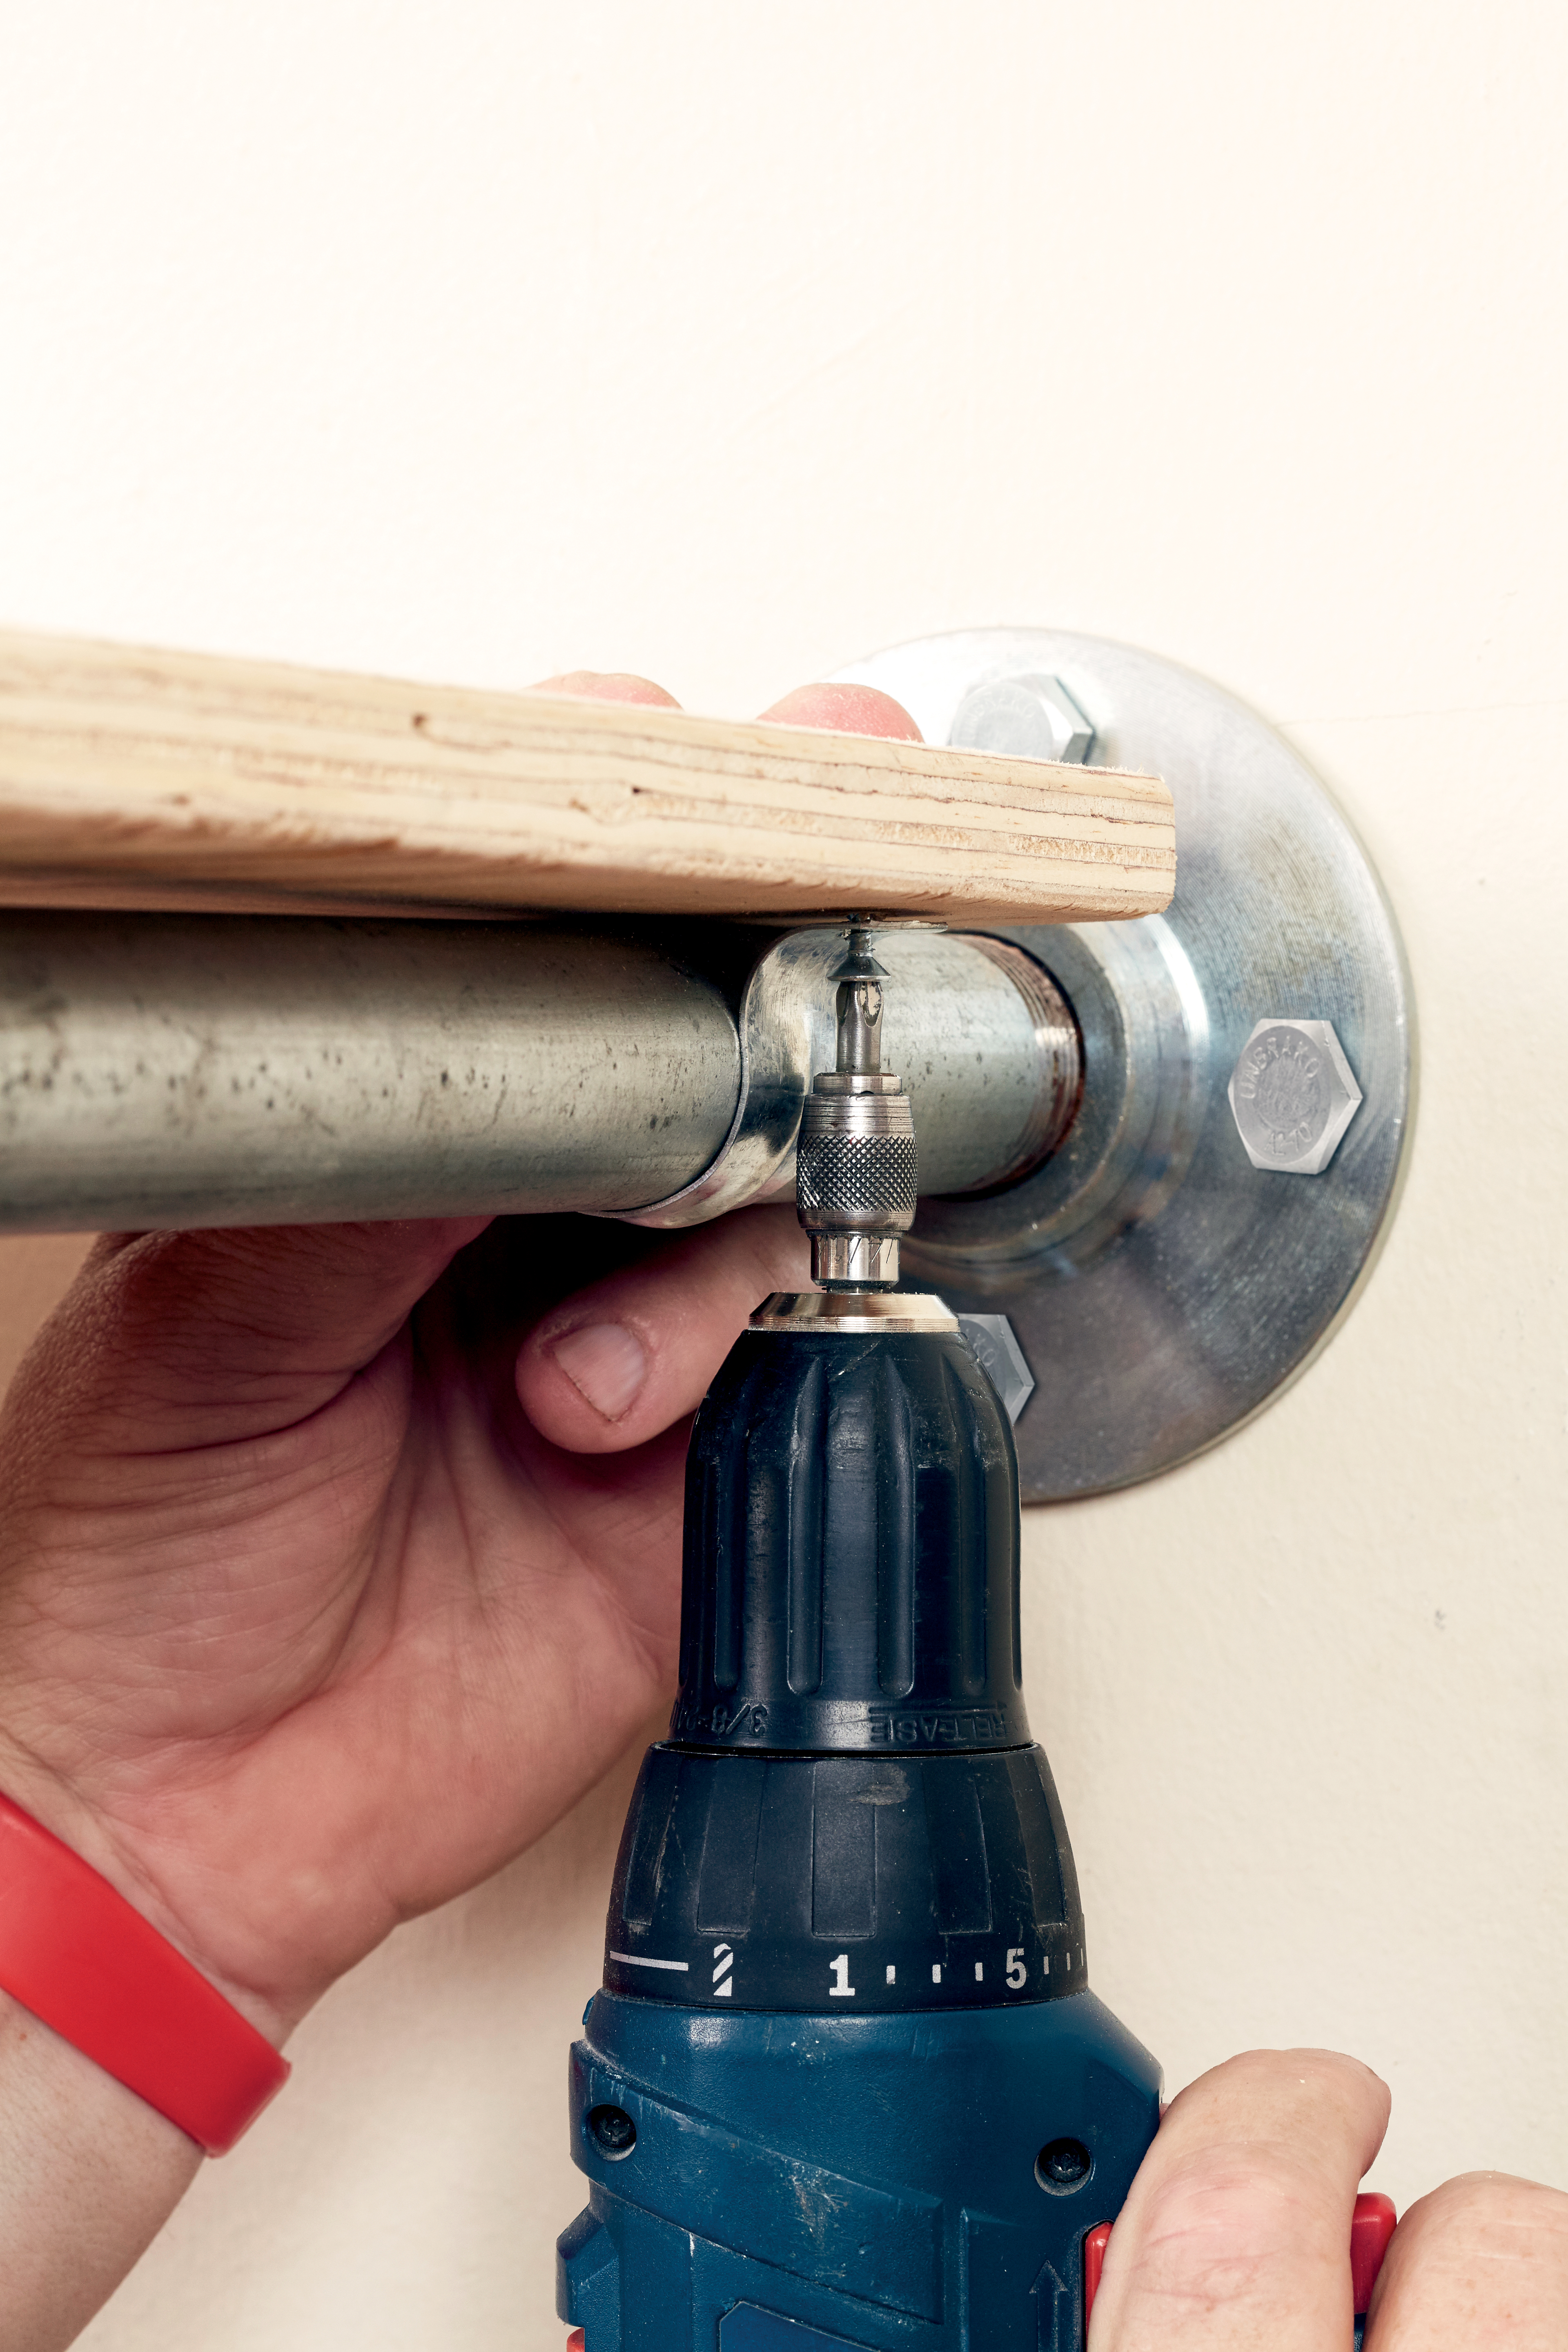
Complete your shelf by attaching the two 960 x 400mm shelves with the saddles and chipboard screws to the pipe at the lower and upper horizontal pipes. Repeat with the three 650 x 400mm wooden shelves at the middle pieces. Sand the wood lightly and paint or varnish in the finish of your choice. We chose to keep the wood natural.
Credits
Referenced from Gallo images / Home Magazine
Browse 1000’s of products available to you. Select your country to Shop Online.


