Nowadays there’s so much variety in the stencils to choose from. Follow these easy steps to get it right.
There’s a wise old adage: “Clean to paint, don’t paint to clean.” All paints (and wallpapers for that matter) are allergic to bad surfaces, be they grimy, dusty, dirty, glossy or inundated with layer upon layer of ageing, brittle and peeling paint. Furthermore, simply painting over a bad surface will end up costing you more in the longer term because the paint won’t stick.
Materials you will need:
- Stencil
- Bloc-it painter’s tape
- Sponge or roller towel
- Paint
- Stencil brush
Preparation:
- Ensure the wall is clean and free of dust.
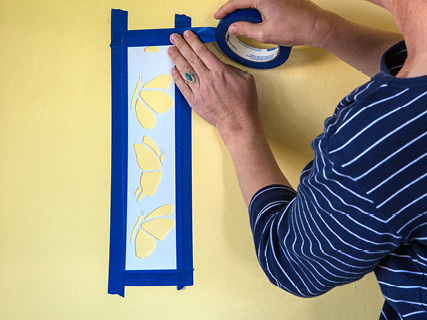
Step 1
Attach the stencil to the wall using painter’s tape
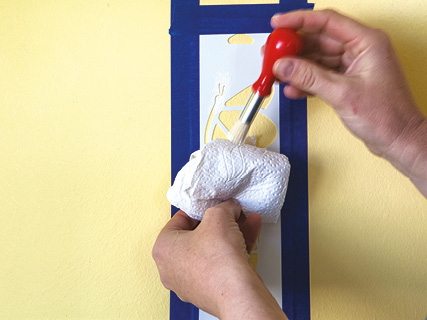
Step 2
Dip the tip of your stencil brush into the paint, then daub it on a sponge or piece of roller towel to remove the excess paint.

Step 3
Lightly daub the paint onto the stencil area. The trick is to do the stenciling in two or three layers with thin coats of paint. That way you won’t get runs and your edges will remain crisp
Step 4
Once your final layer of paint is dry, peel off the stencil and admire your artwork.
Top Tip: Clean stencils before storing them and wipe off any smudges or pencil marks.
Browse 1000’s of products available to you. Select your country to Shop Online.


