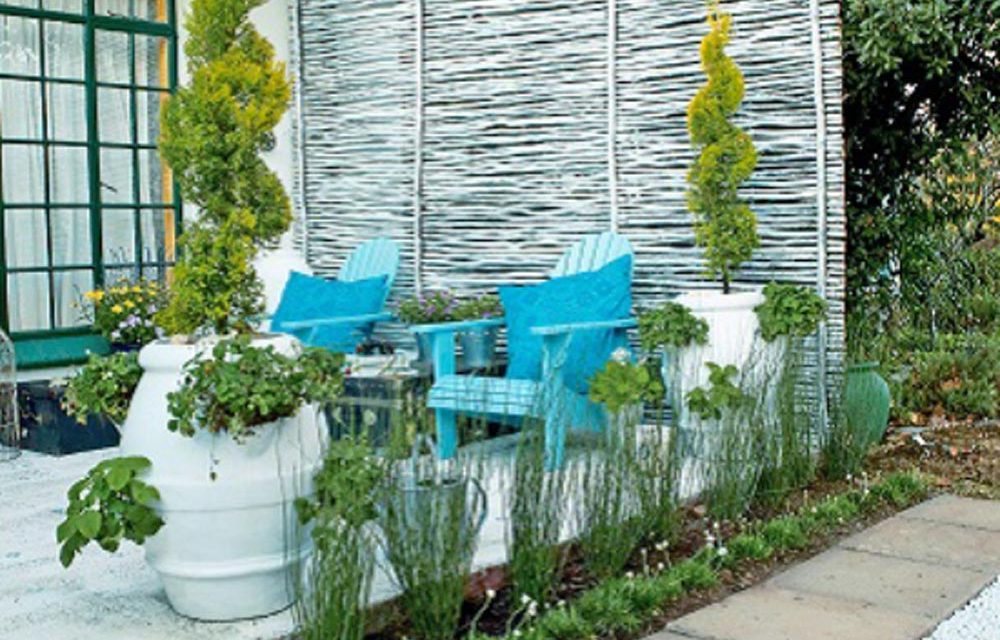
Need a new project for the backyard? We show you how to make magic with your patio in this easy weekend DIY project.

- White ceiling paint
- White acrylic paint
- Grey-blue acrylic paint
- Stencil
- Floor sealant
- 2 garden screens – we bought screens of 3 x 2,3m made of alien black wattle
- Steel supports (to keep the garden screens upright and secure)
- Sisal rope (to tie the garden screens to the supports)
- Potting soil
- 1 bag of river sand
- Compost
- Small, white pebbles
- Light-blue, drip-free enamel paint
- Weed matting or thick plastic to place under the pebbles
- 2 deck chairs of raw wood
- wide short-haired brush (to paint the concrete floor)
- wide sponge brush
- medium-sized sponge brush to paint on the stencil
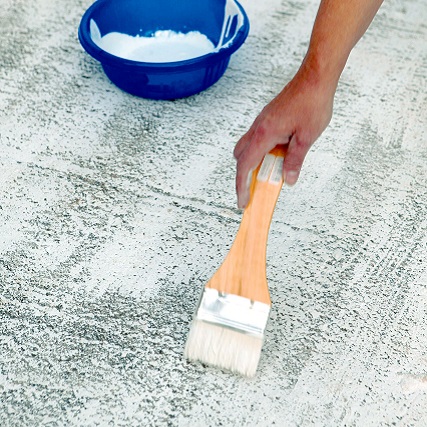
Step 1
Sweep the concrete floor, then hose it down with water and leave to dry. Dilute the white ceiling paint (two parts paint, one part water) and mix it thoroughly. Use very little of the paint at one time and apply it to the floor with quick, light strokes. Do not try to apply the paint solidly – it should look worn and unpainted parts may show here and there.
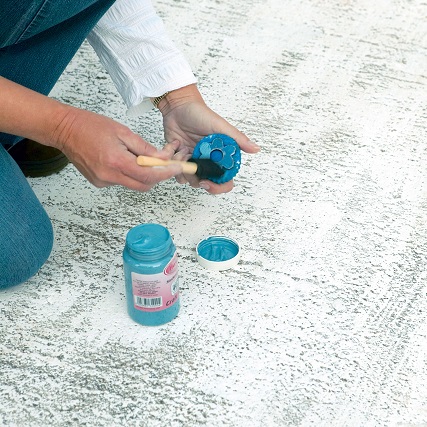
Step 2
Use the medium-sized sponge brush and apply a thin coat of the (undiluted) grey-blue acrylic paint to the stencil.
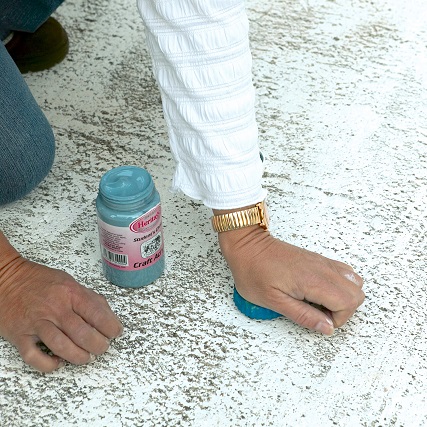
Step 3
Transfer the design to the floor – remember to firmly press down the sides of the flowers, especially where the surface is uneven and the concrete rough. However, do not try to get the stencil to look too perfect – the end result should still look worn. Once the paint has dried you can seal the floor with a floor sealant.
Step 4
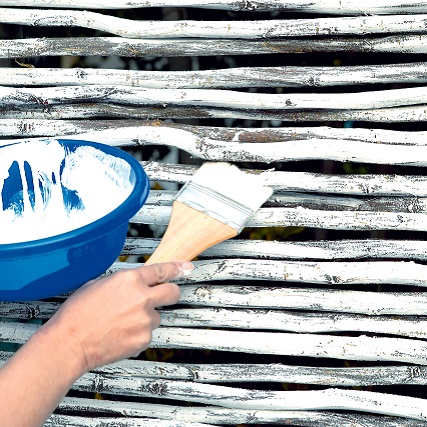
Define the patio with wattle screens on both sides – these will also keep the wind and sun out and provide more privacy. Knock in steel supports and use the sisal rope to fasten the screens. Paint the screens with diluted ceiling paint – use the same method as used for the floor. Do not try to cover the entire screen surface with paint – it should also look worn.
Step 5
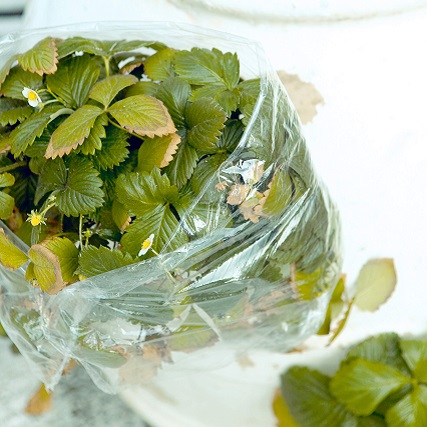
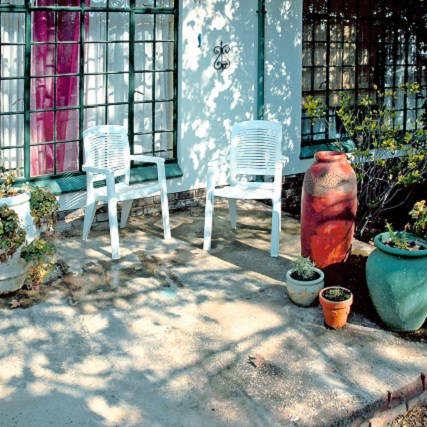
The pots contained wild strawberries and half-dead roses. We removed all the dead leaves on the wild strawberries and replaced the roses with the new cypresses. This was also a good time to replace the soil in the pots. Afterwards the pots were given a coat of white acrylic paint. (If the plants get in the way of the paintbrush try covering them with plastic, as seen in the photograph.)
Step 6
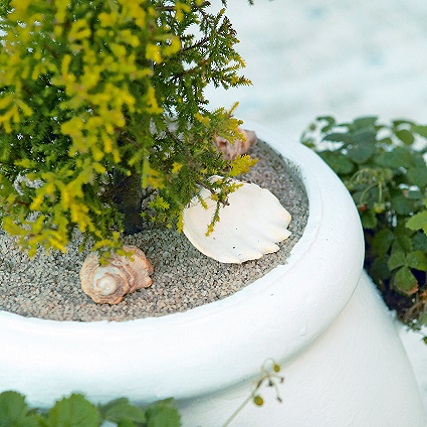
Use the river sand around the feet of the spiral trees and finish off with a few shells or sea stars to create the feeling of a holiday home.
Step 7
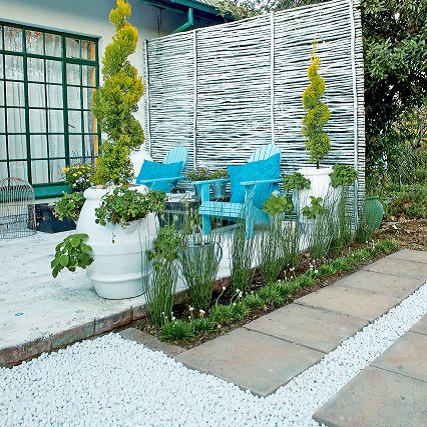
Create a soft green ‘wall’ or ‘border’ by planting the same type of plants in a row but remember to leave an entrance on one side. Prepare the bed with compost, plant a hedge of thatching reed (Chondropetalum tectorum) and round it off with a row of Armeria maritima ‘Alba’.
Step 8
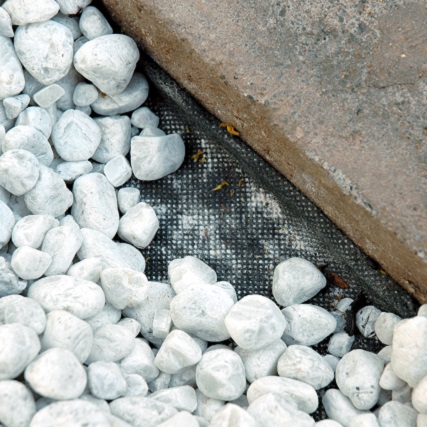
Place weed matting or thick plastic underneath the areas where you want to place pebbles. This will prevent the pebbles from gradually disappearing into the soil as people walk over them.
Now your DIY is complete
No one enjoyed spending time on this patio, which has a raw concrete floor. What’s more, the pots filled with wild strawberries did not match, the paint on some of them was flaking off and the plants needed attention. Another disadvantage was that the patio was exposed, offering no shade or protection against the wind.
Credits
Referenced from Gallo images / Home Magazine
Browse 1000’s of products available to you. Select your country to Shop Online.


