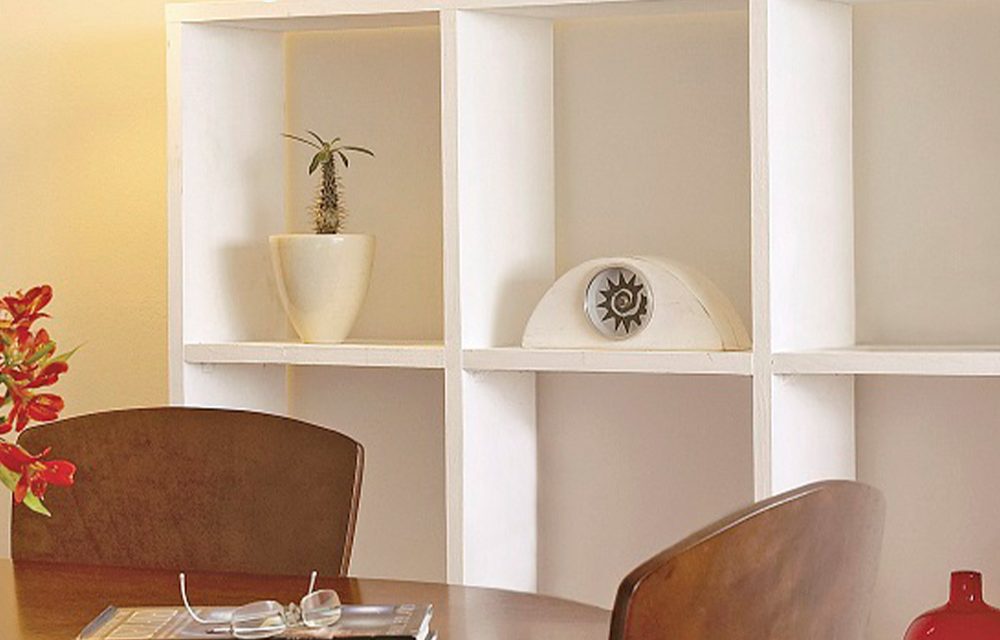
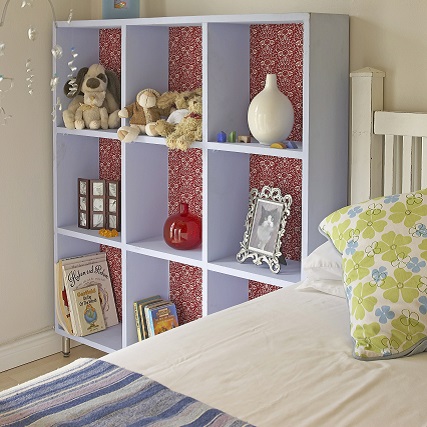
Construct a simple shelf unit that can double as a room divider, and choose from three completely different looks.
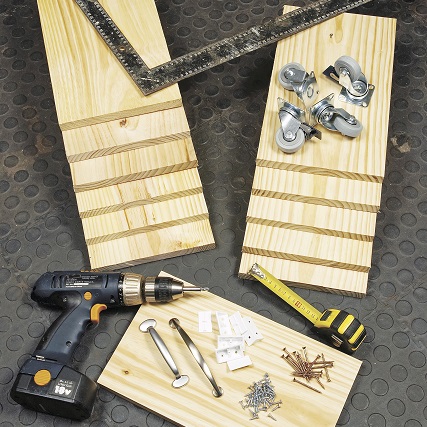
- corner blocks (small)
- 50mm chipboard screws
- 16mm chipboard screws
- 4 x 100mm brushed aluminium legs or 50mm castors (optional)
- handles (optional)
- wood filler
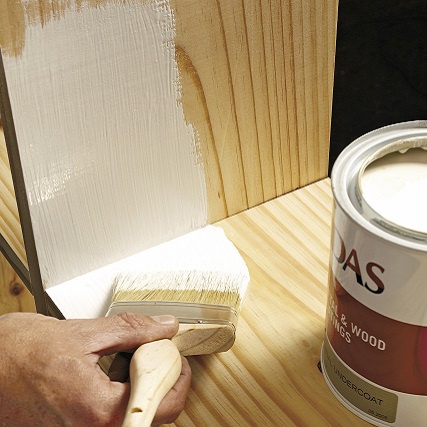
- universal undercoat (if you are intending to paint the unit)
- paint colour of your choice (we used a white acrylic PVA for the one ‘look’ and Plascon Lullaby A32-4 for the other)
- clear varnish/wood oil
- tape measure
- pencil
- ruler
- cordless drill
- 3mm drill bit
- 8mm drill bit
- screwdriver
- orbital sander and sanding discs
- paintbrush and cloth
Cutting list
- A: three 2 400 x 220 x 22mm pine or meranti planks cut into six 1 200 x 220 x 22mm strips
- B: one 2 400 x 220 x 22mm pine or meranti plank cut into six 372 x 220 x 22mm blocks
- one 1 200 x 1 200 x 3mm backing board (optional)
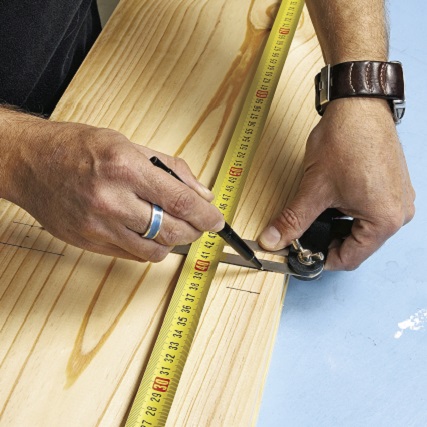
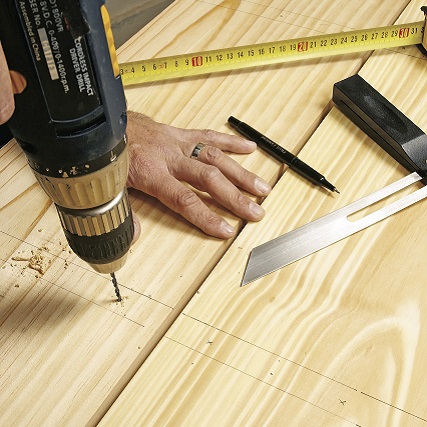
Step 1
On four of the 1 200 x 220 x 22mm sections (A), mark positions 40mm in from each edge at 400mm and 800mm intervals. Mark 11mm on either side of these lines – the 22mm shelf will be positioned between these lines and will be spaced correctly. Flip two of the 1 200 x 220 x 22mm sections over and do the same. These will form the two middle partitions and the other two will form the sides.
Step 2
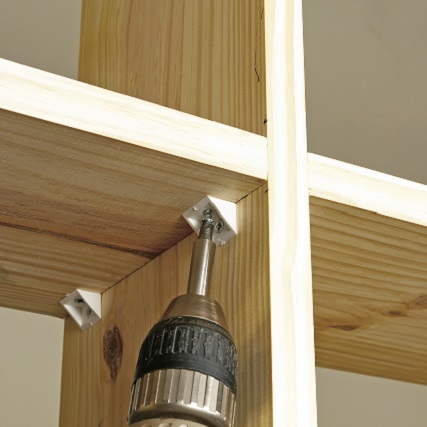
Using the cordless drill, fix the small corner blocks in position below these marks using the 16mm chipboard screws.
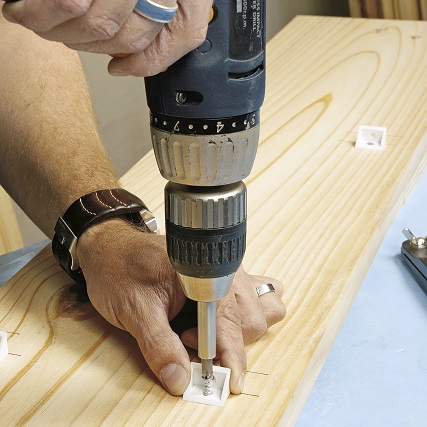
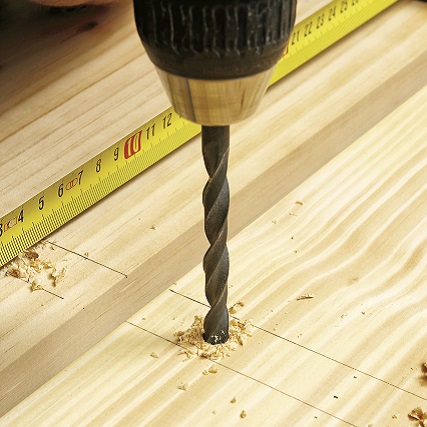
Step 3
On the two remaining 1 200 x 220 x 22mm sections (A; top and bottom shelves), mark 22mm from each end, then mark the positions where the upright partitions will be by using one of the pre-cut 372 x 220 x 22mm (B) shelves as a spacer. Work from each end, turning it on its side to mark the 22mm widths. Using a 3mm drill bit, drill three pilot holes in-between each of these positions, as shown.
Step 4
Use an 8mm drill bit to ‘countersink’ these holes for the screws, as they will be filled with wood filler at a later stage. In order to countersink a hole in the conventional sense (a hole with 45-degree edges that allow for the flush positioning of screw heads), a countersink bit should be used.
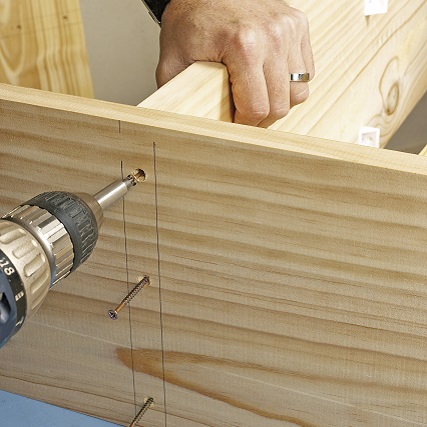
Step 5
Using the markings as a guide, position and fix in place the two middle partitions using the 50mm chipboard screws, as shown.
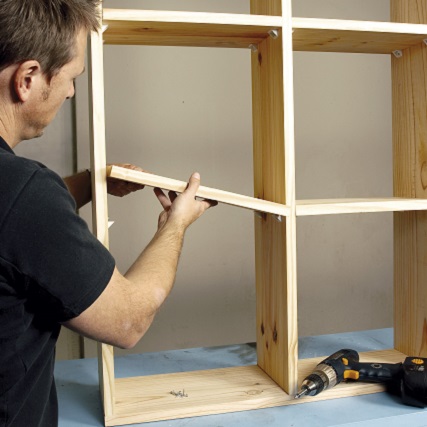
Step 6
Place the 372 x 220 x 22mm shelves in position onto the corner blocks. Depending on variances in wood thickness, we have added 2mm onto the length of our measurements. If the shelves fit too snugly or are too long, trim a little from each of the two middle shelves.
Step 7
Fix the shelves in position from underneath using the 16mm chipboard screws.
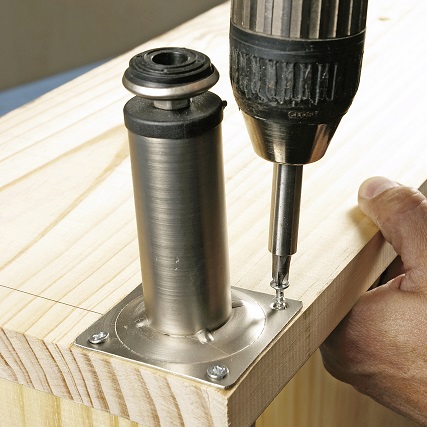
Step 8
Use 16mm chipboard screws to fix the castors or legs to the base of the shelf unit.
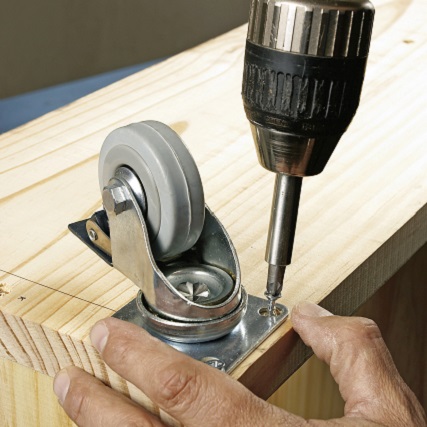
Step 9
Use 16mm chipboard screws to fix the castors or legs to the base of the shelf unit.

Step 10
Drill 5mm holes – positioned according to the handles of your choice – on either sides (or just one side) of the unit, about two thirds up. Fasten the handle in position with a screwdriver.
Step 11
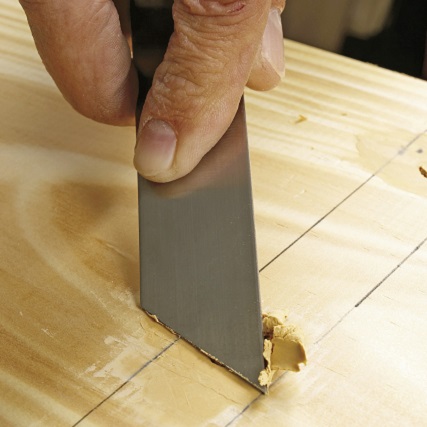
Fill all the holes and blemishes with wood filler (stopping) and sand to a smooth finish, rounding sharp corners as you sand.
Step 12
If you intend to finish the unit, seal the raw/untreated wood with a universal undercoat (and allow it to dry) before applying the colour of your choice.
Now you are done
Now your DIY shelf and room divider is complete and can be styled to your heart’s desire to suit the room you fit it into.
Credits
Referenced from Gallo images / Home Magazine
Browse 1000’s of products available to you. Select your country to Shop Online.


