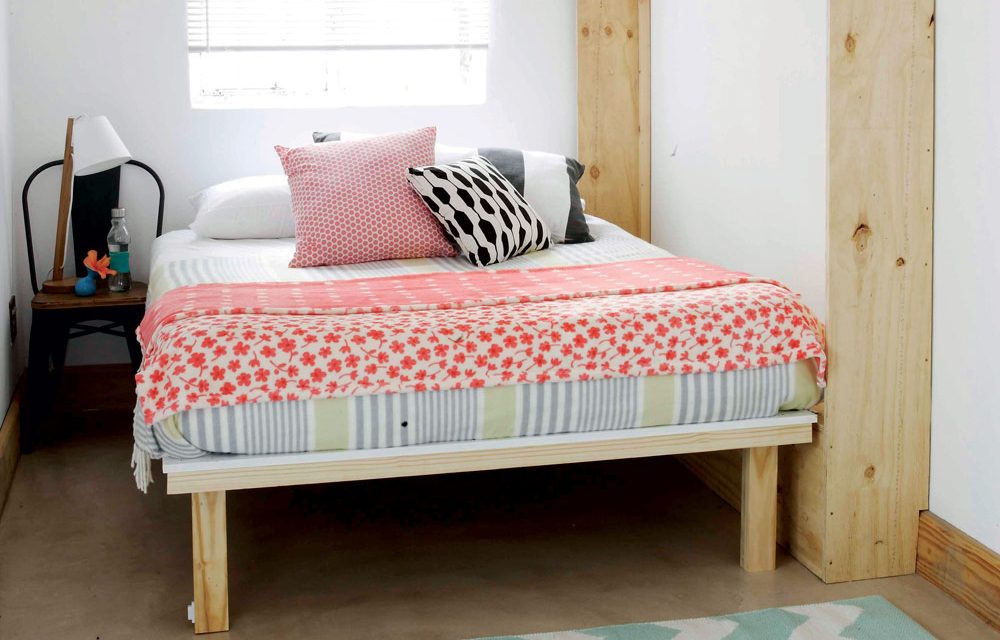
When your guests have gone this comfy bed folds away neatly against the wall to save space.
- Measuring tape
- Pencil
- Jigsaw
- Ladder
- Screwdriver
- Spirit level
- Drill with countersink bit
- 4 mm and 10 mm wood drill bits
- 8 mm masonry drill bit and 4 mm metal drill bit
- Hammer
- Paintbrush
- Wood glue
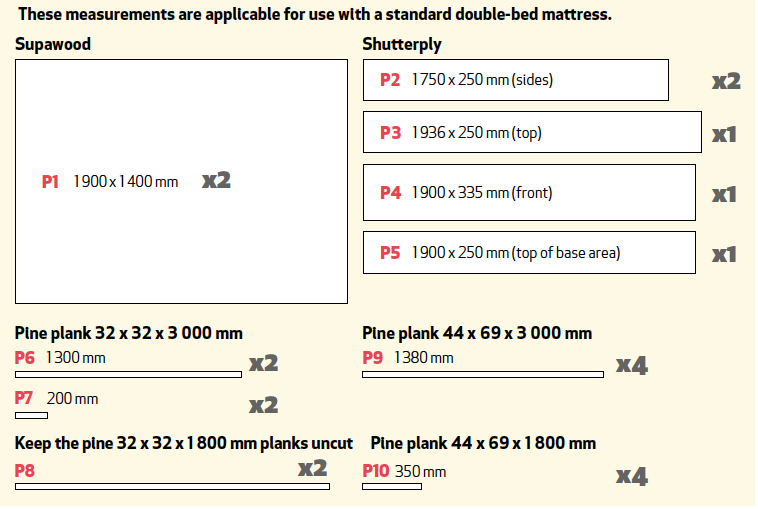
- 1 sheet Supawood 16 x 2 750 x 1 830 mm
- 1,5 sheets Shutterply pine 2 440 x 1 220 x 18 mm
- 2 pine planks 32 x 32 x 1 800 mm
- 1 pine plank 32 x 32 x 3 000 mm
- 1 pine plank 44 x 69 x 1 800 mm
- 2 pine planks 44 x 69 x 3 000 mm
- 4 sinkless hinges 100 x 76 x 2 mm
- 4 barrel bolt necks 50 mm
- 4 magnetic catches
- 4 flash hinges 50 mm
- 1 sash fastener
- Nail-in screws and plugs 8 x 80 mm (pack of 50)
- Harlequin dead flat interior varnish
- 3,5 x 40 mm cut screws (pack of 75)
- 4 x 12 mm screws (pack of 25)
- Metal whiteboard sheet 1 800 x 900 mm
Step 1
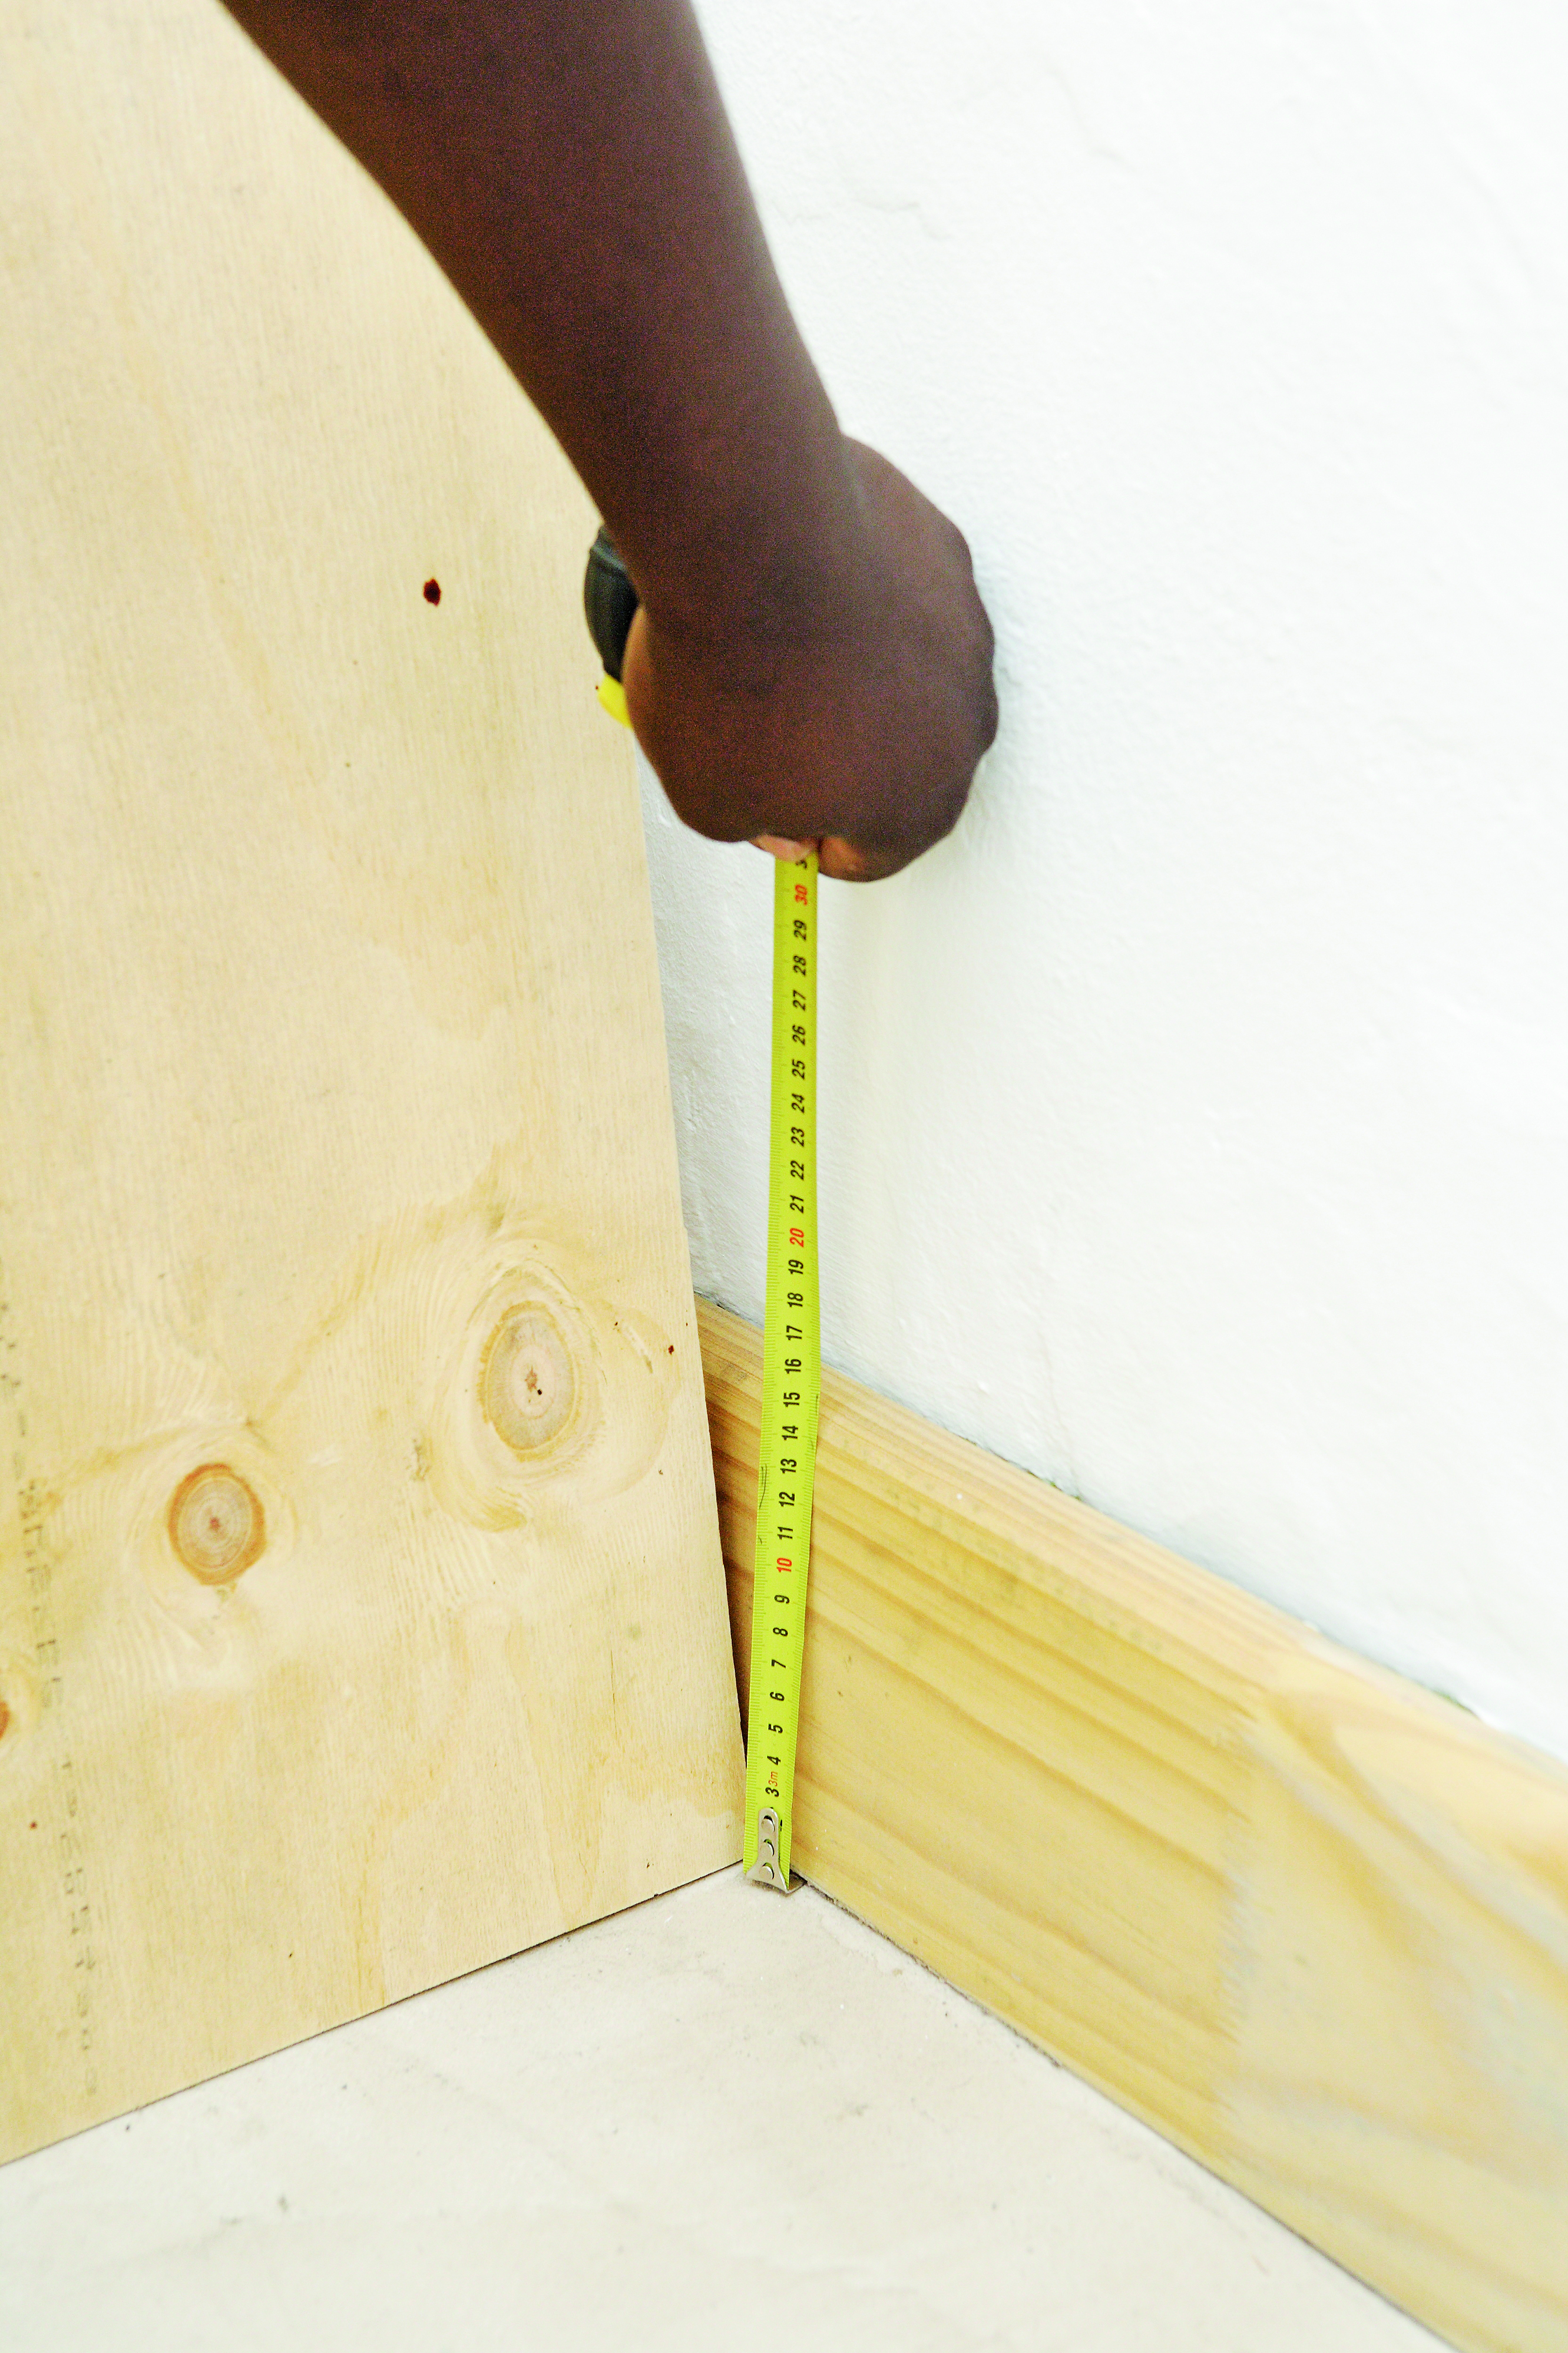
Measure, mark and cut out the profile of the room’s skirting board on the P2s.
Step 2
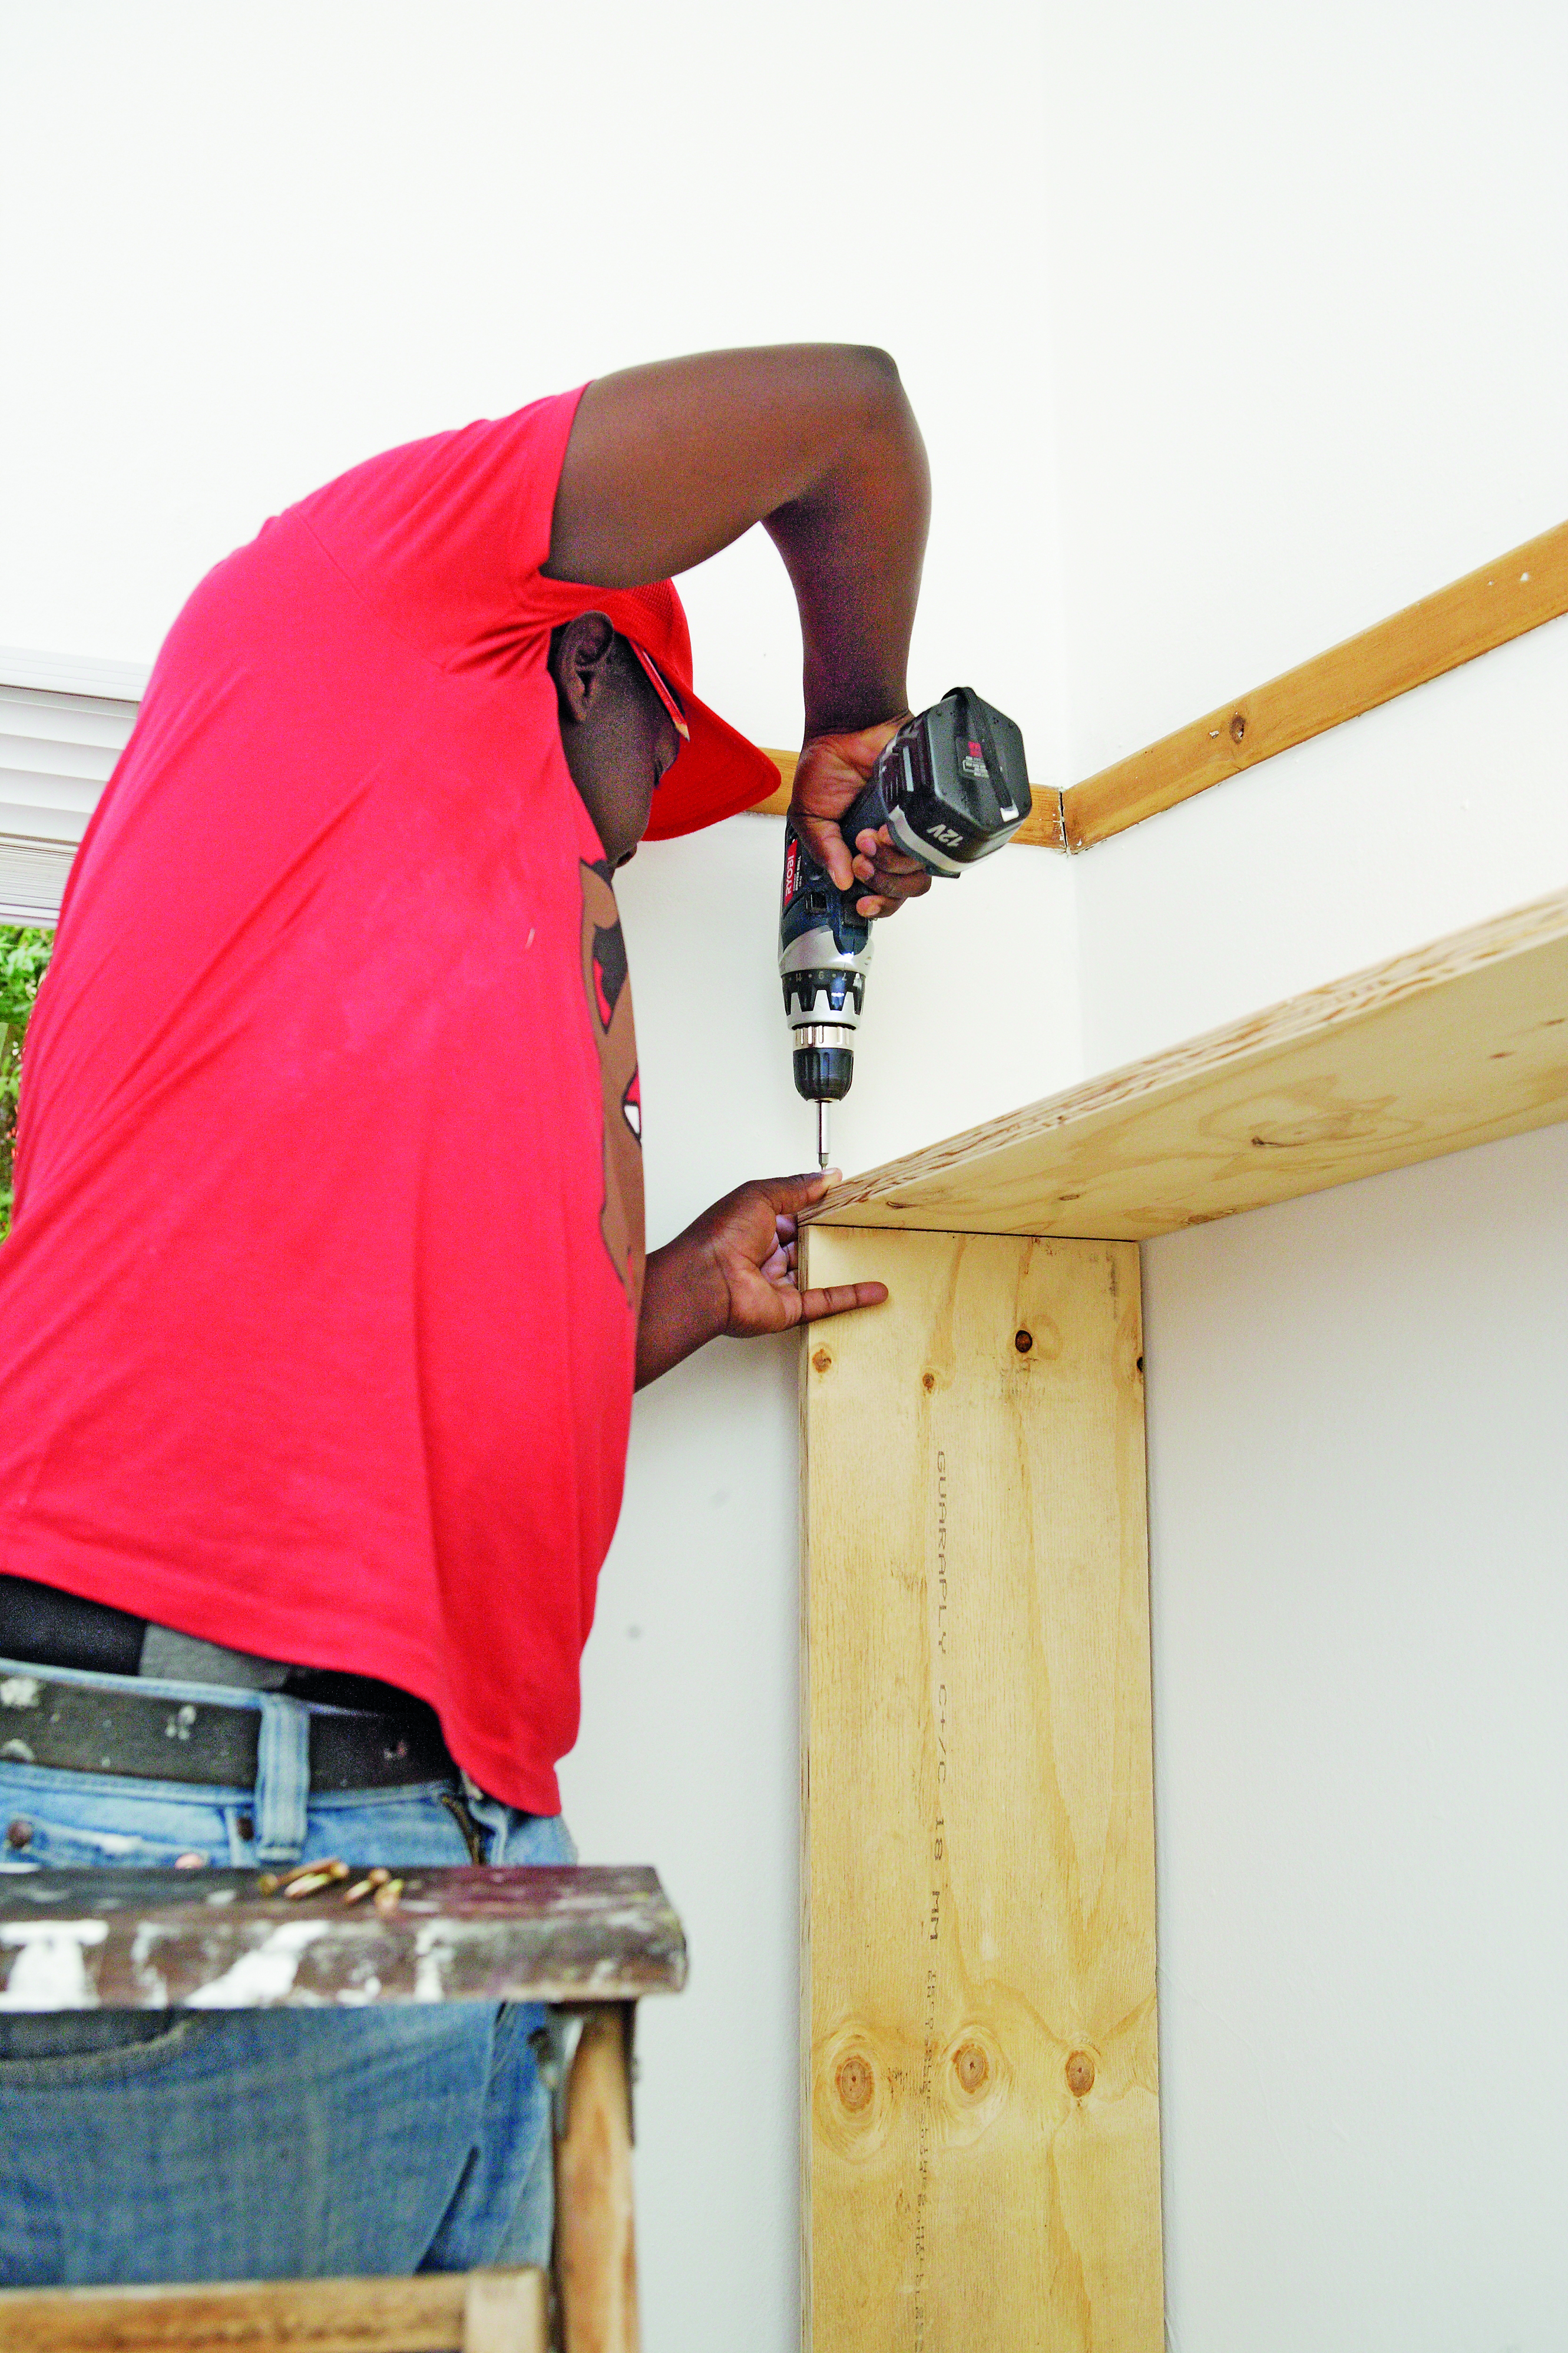
Attach the P3 on top of the P2s.
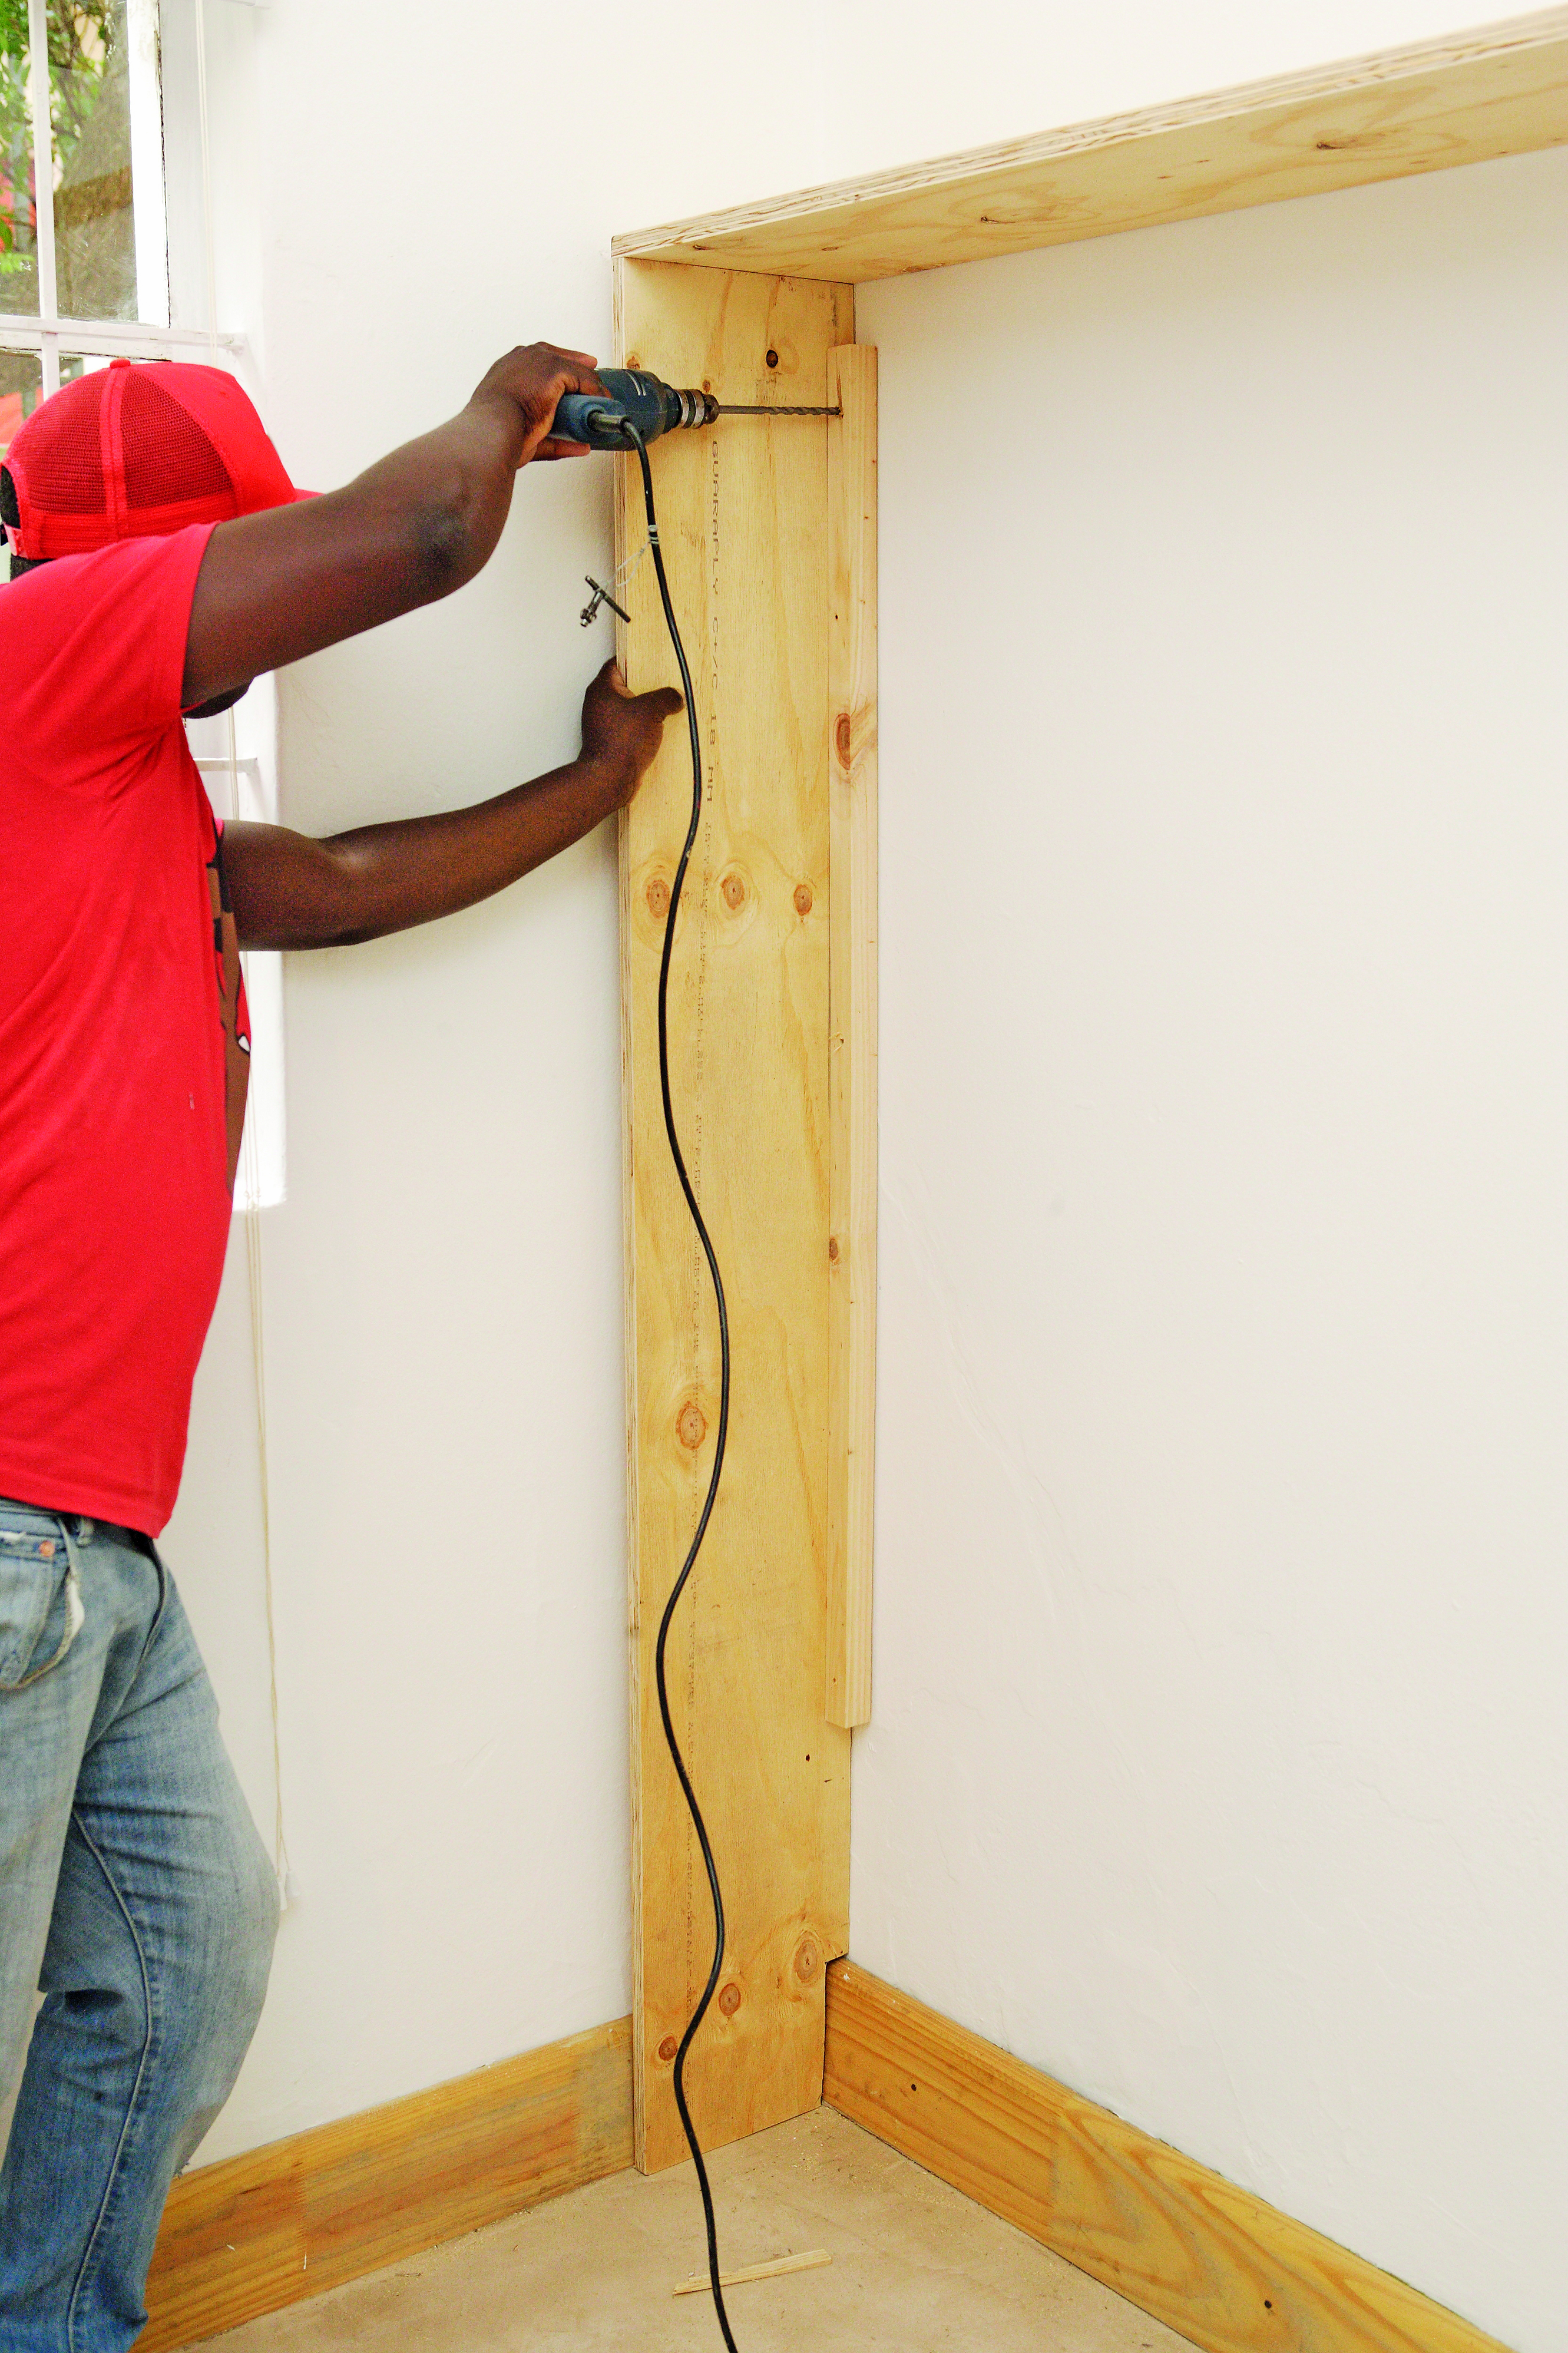
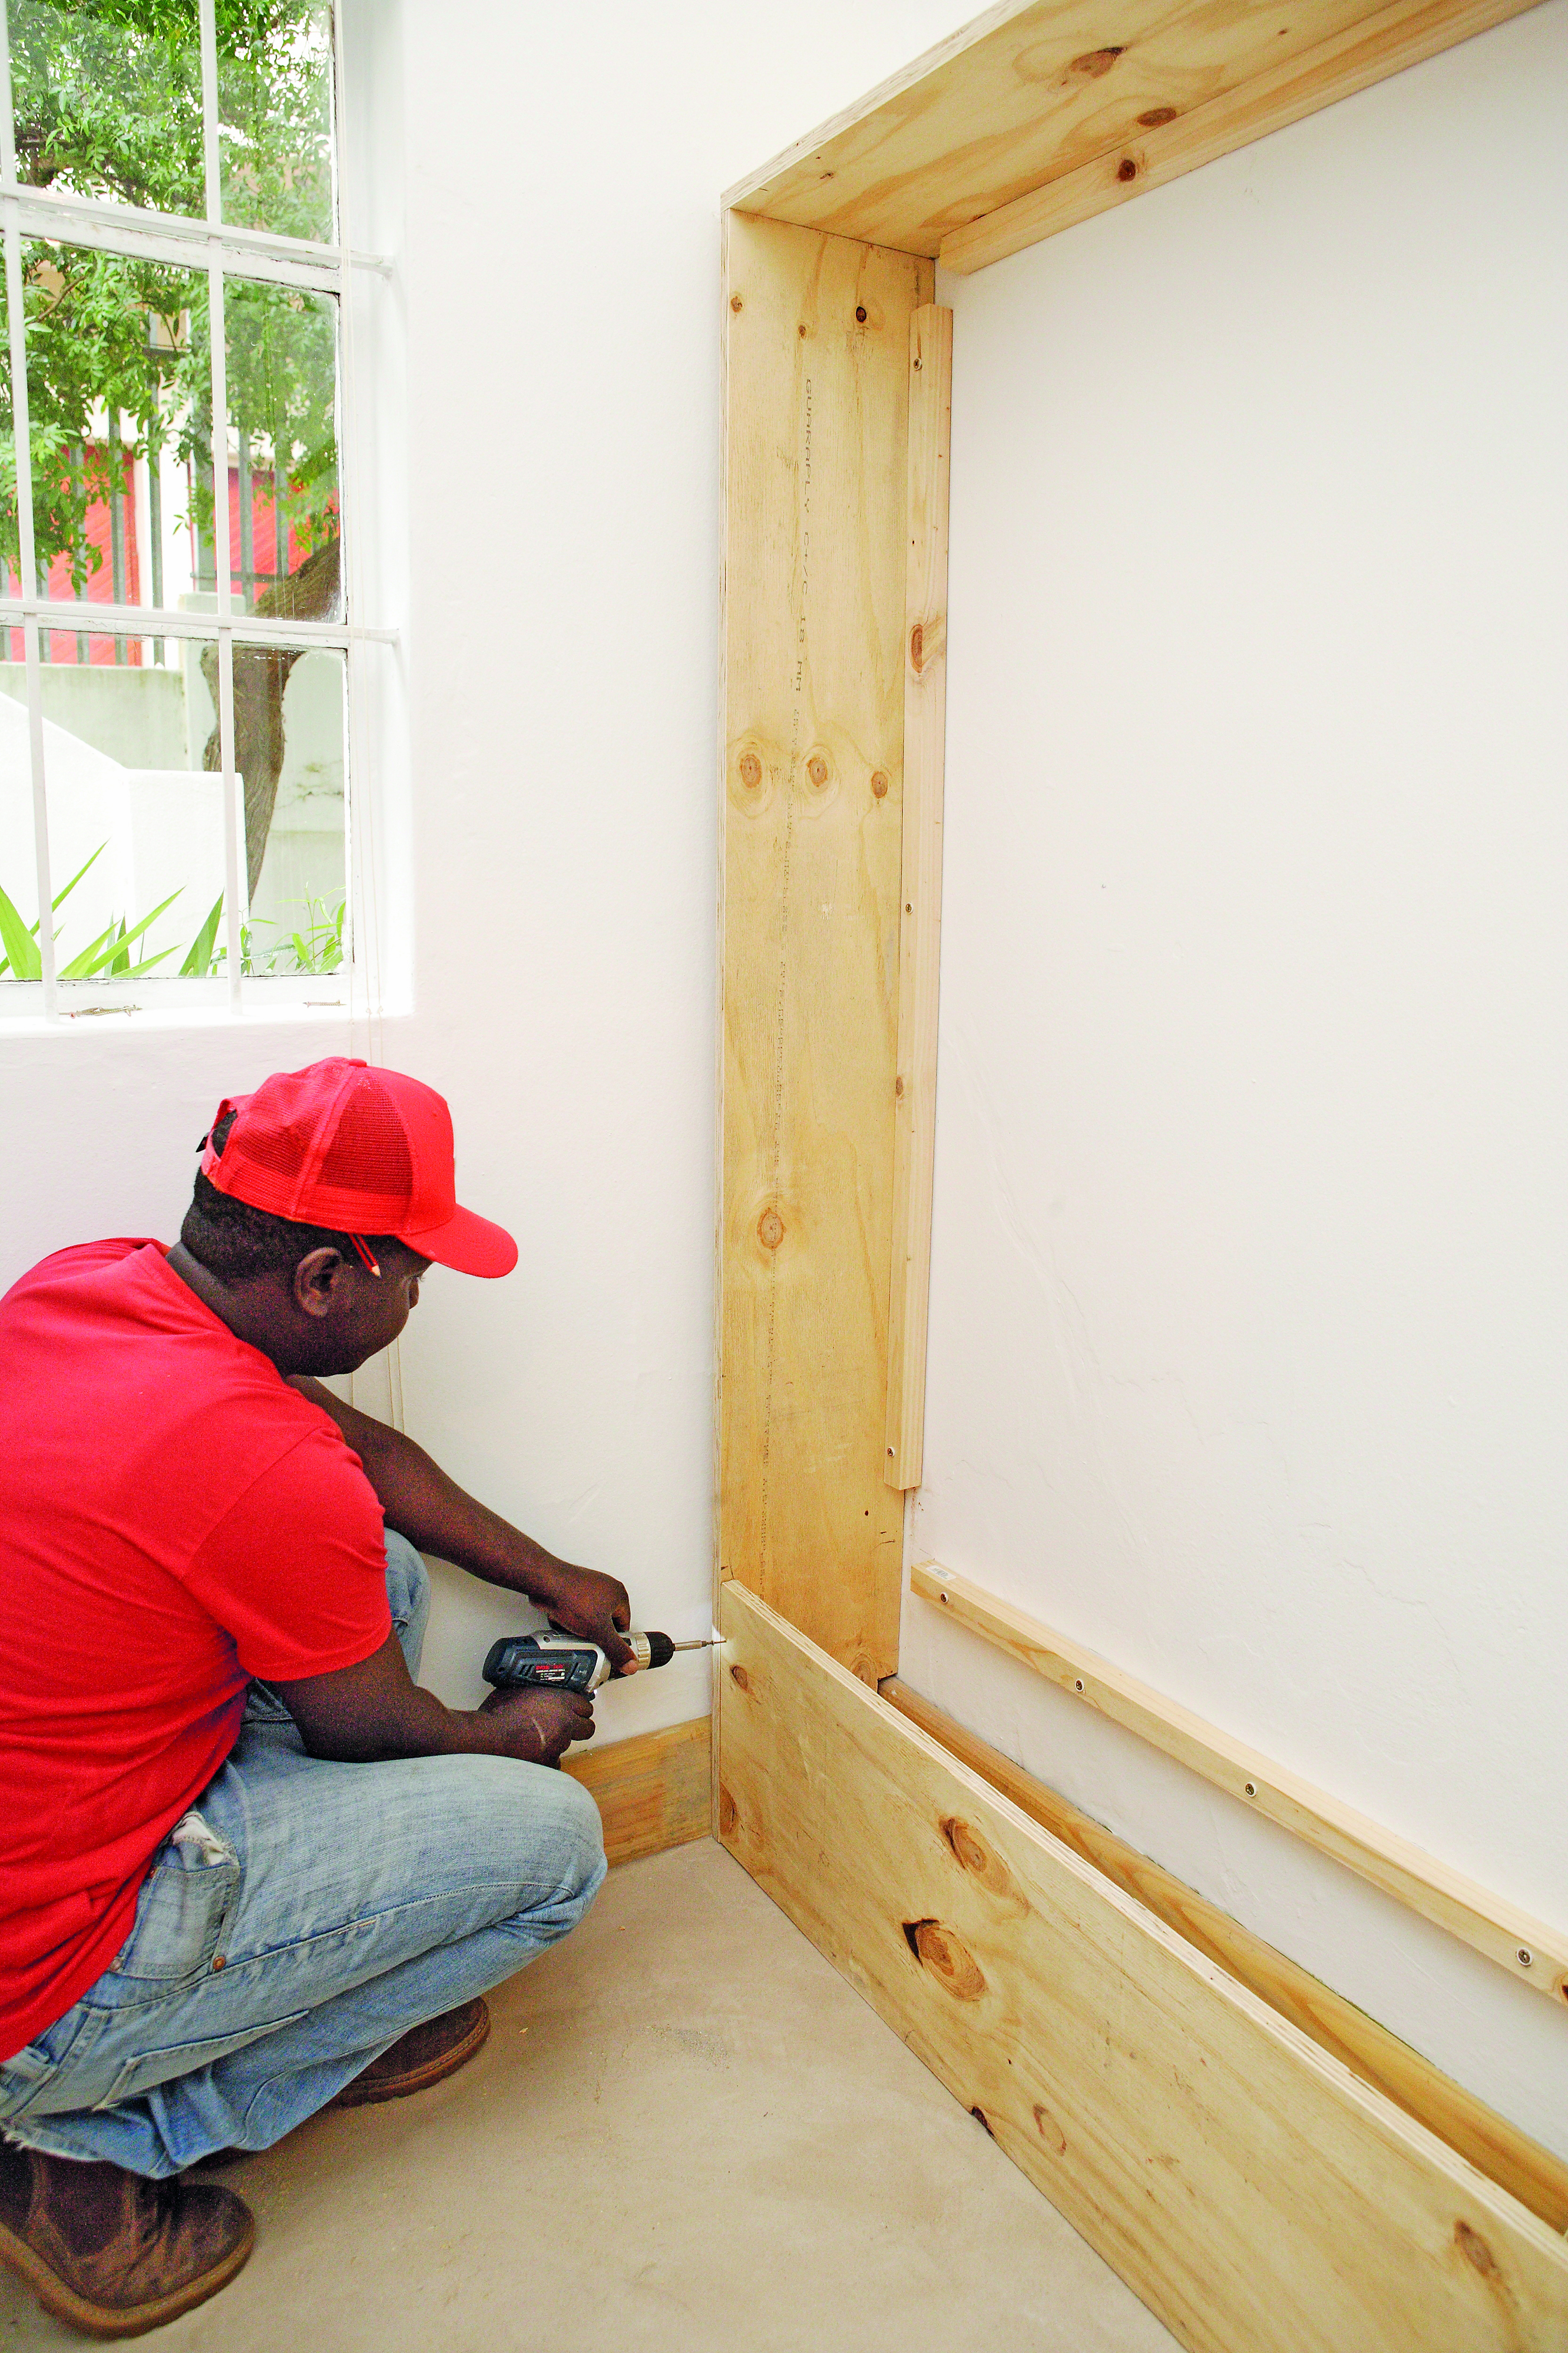
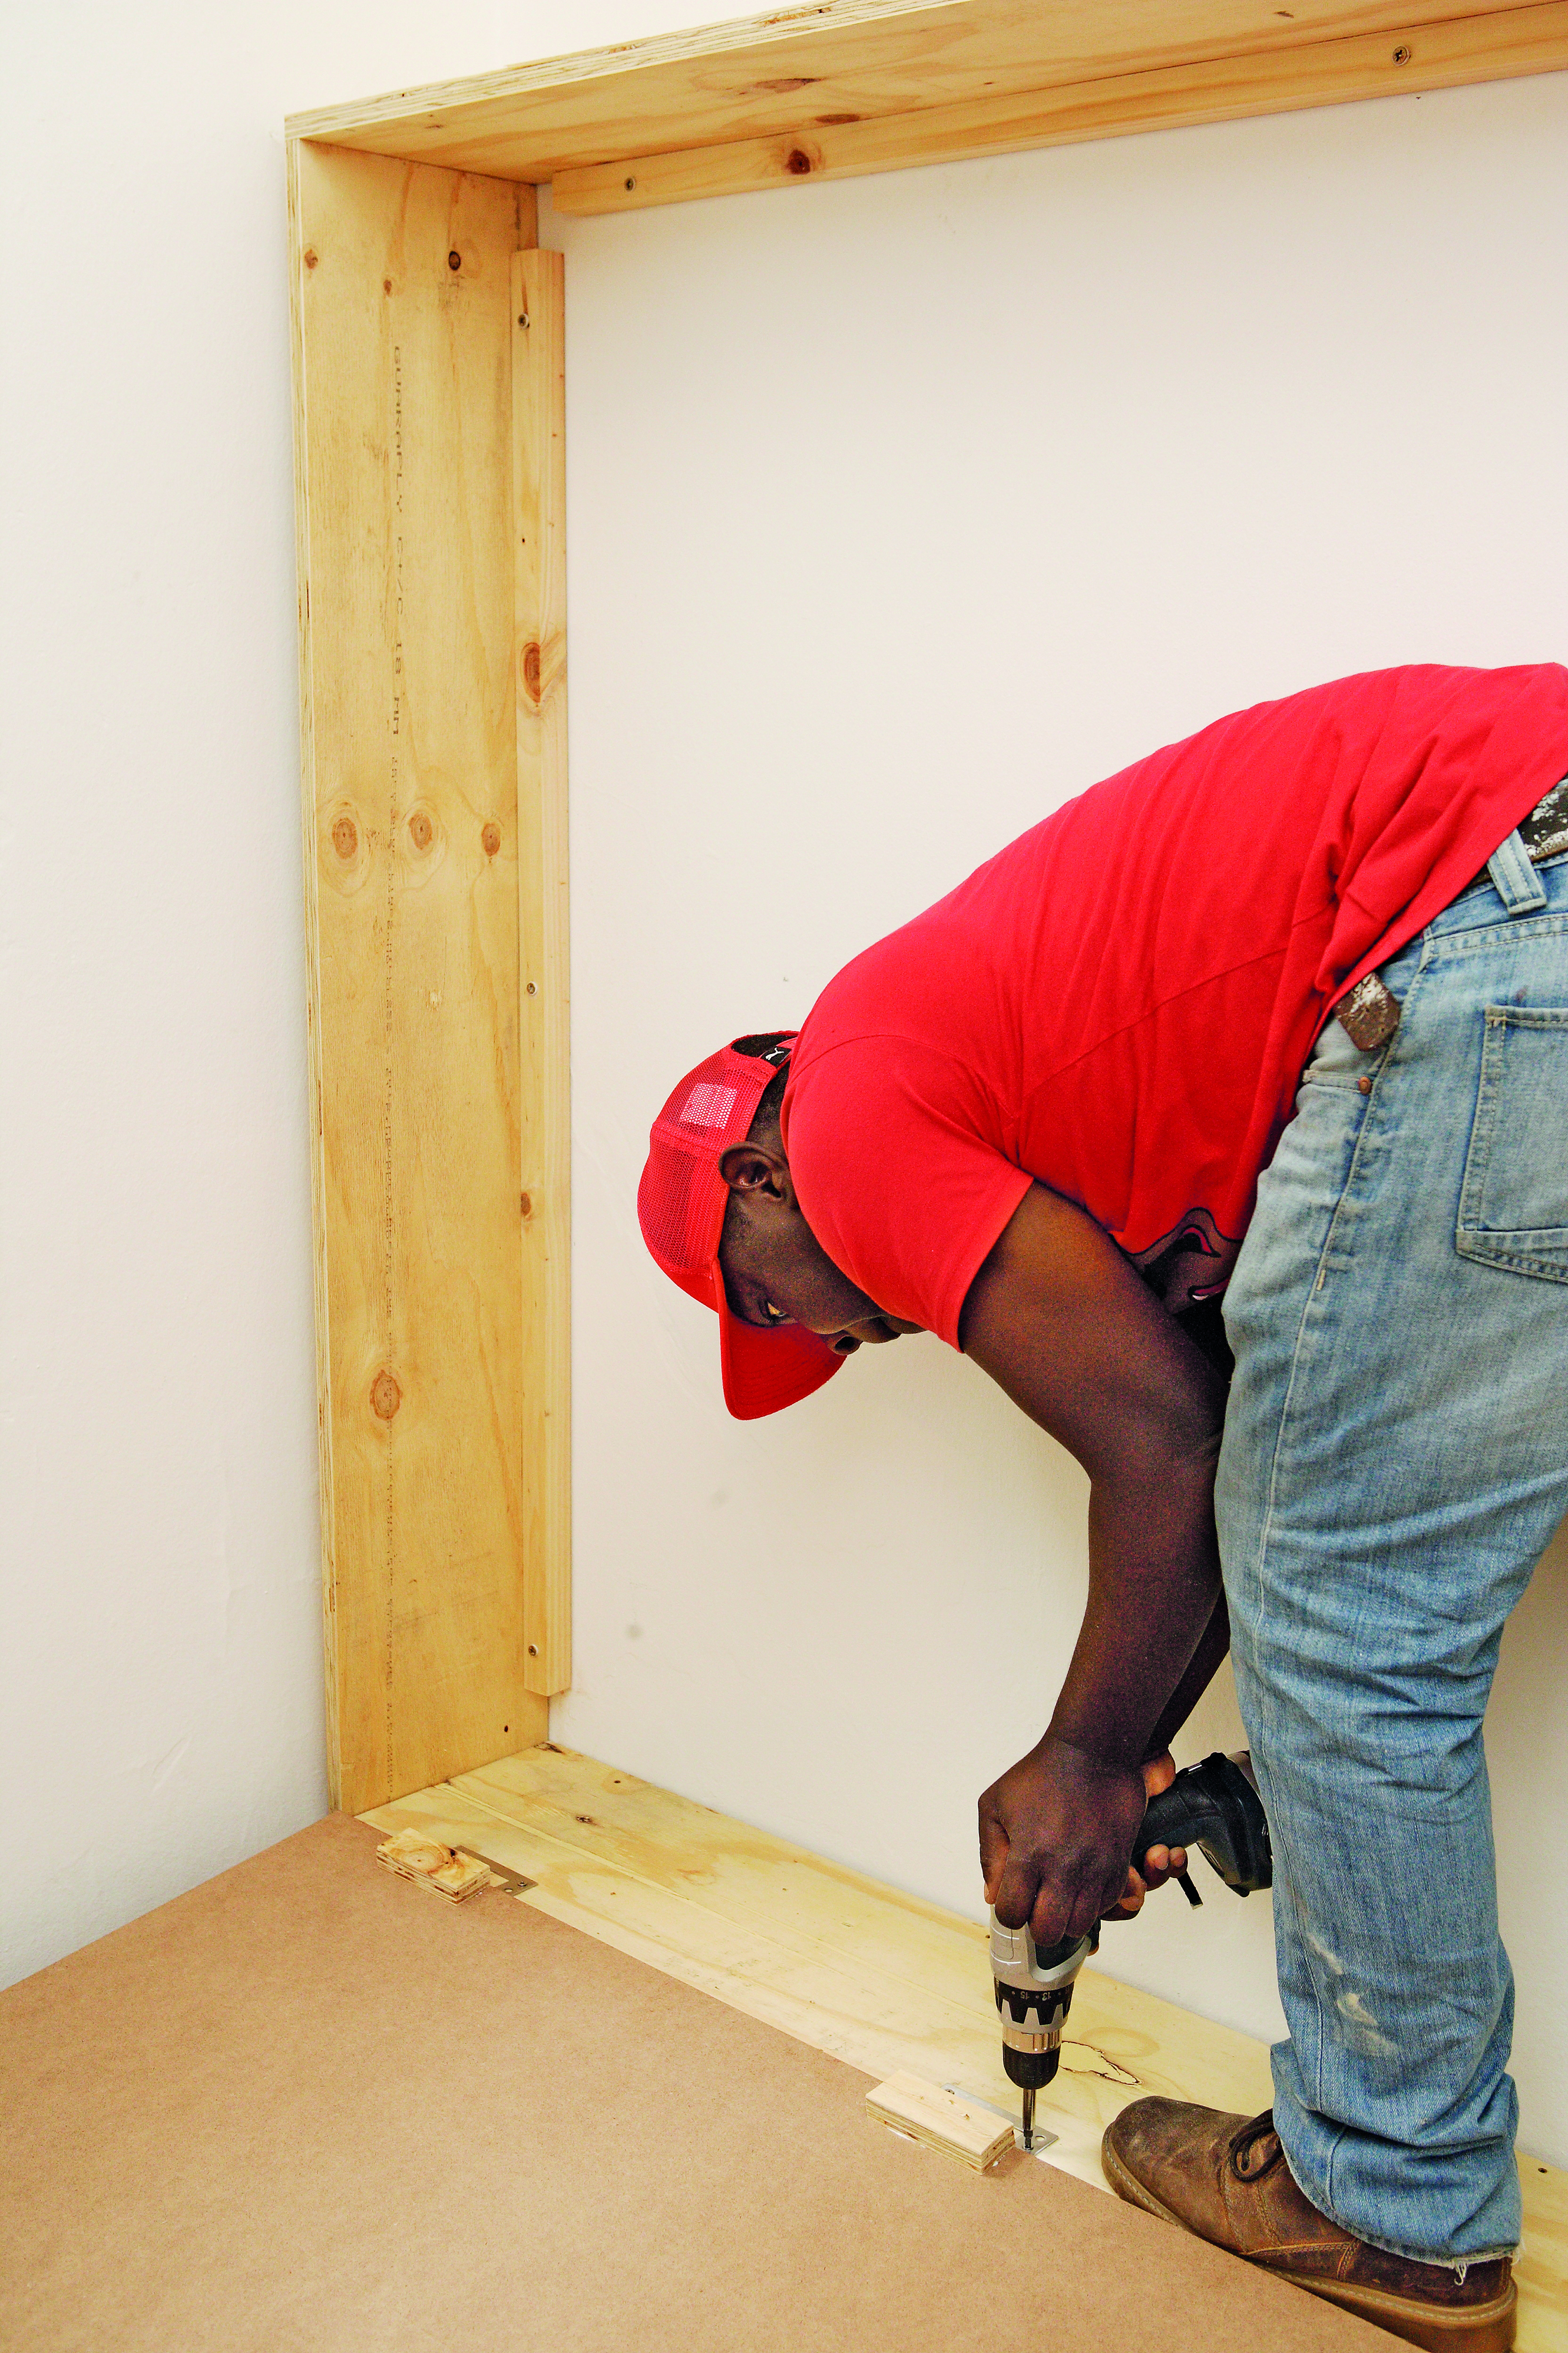
Step 3
Attach the P6s to the sides of the P2s that will go against the wall. Then screw them to the wall. Use the spirit level to make sure they’re straight.
Step 4
Attach a P8 to the base of P3, then attach it to the wall.
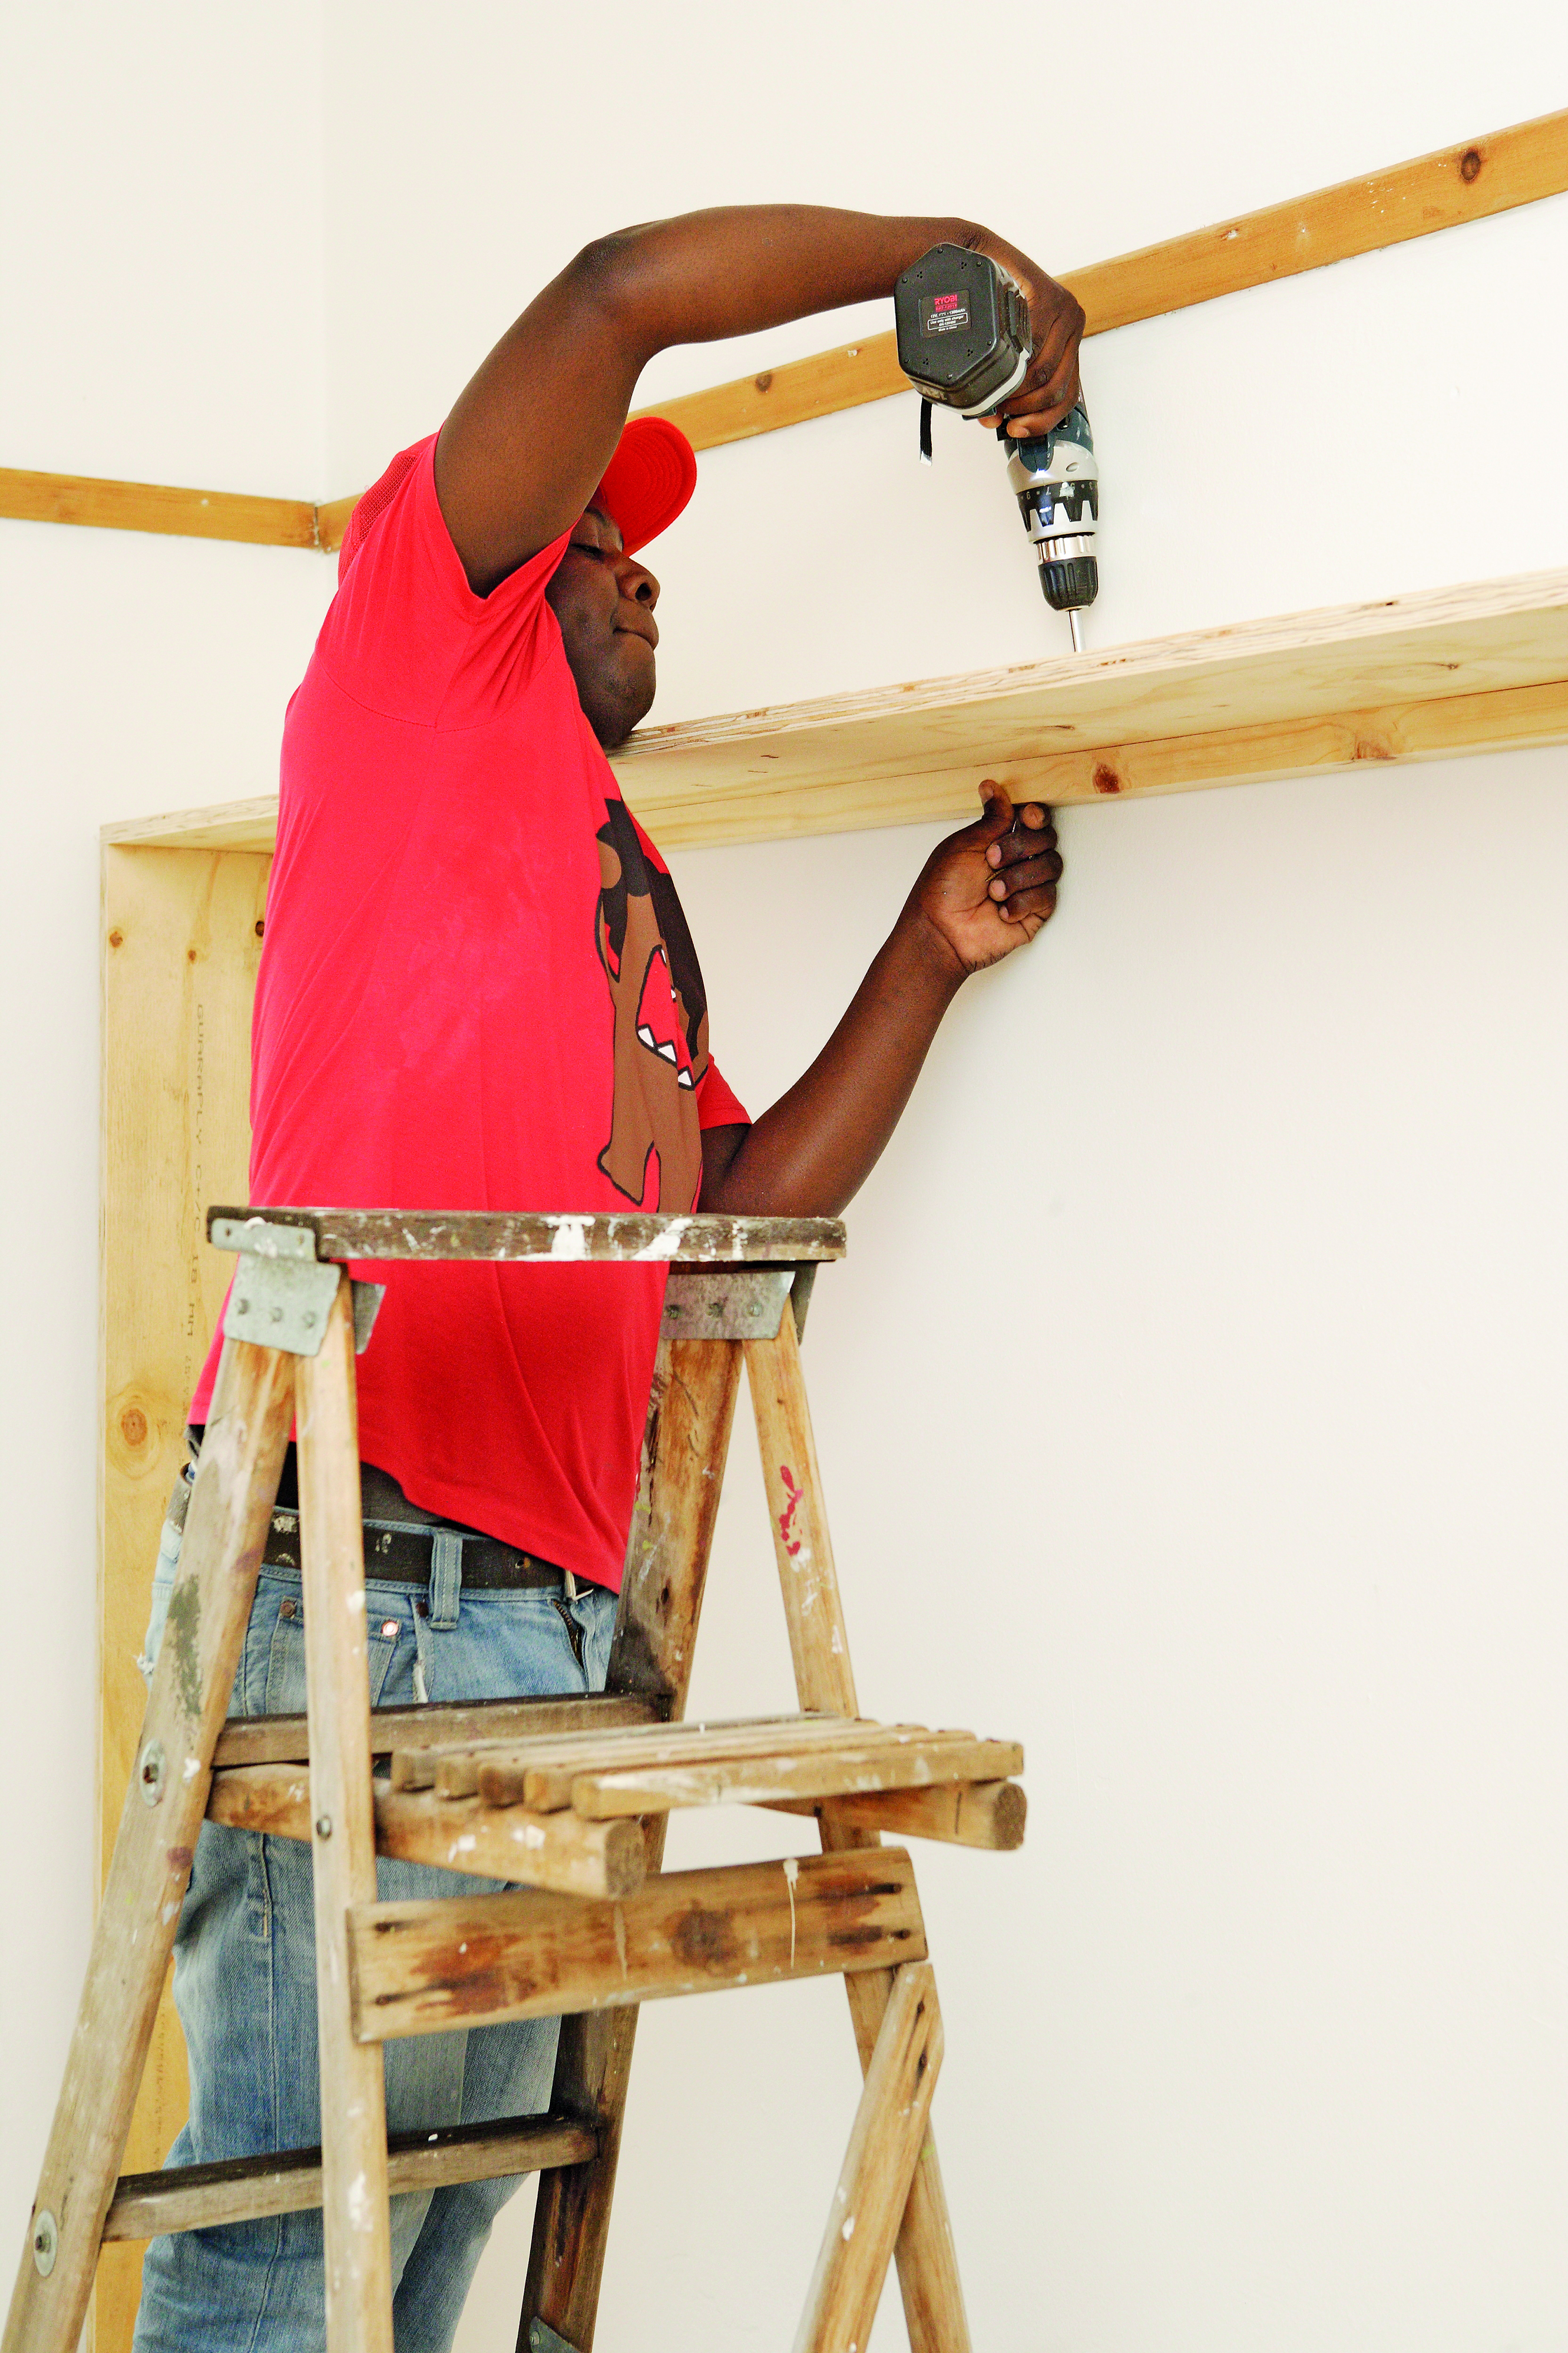
Step 5
Mark 335 mm from the floor on the wall and attach a P8 below this mark.
Step 6
Attach the P7s 18 mm in from the front edge at the bottom of the P2s.
Step 7
Attach P4 to the P7s.
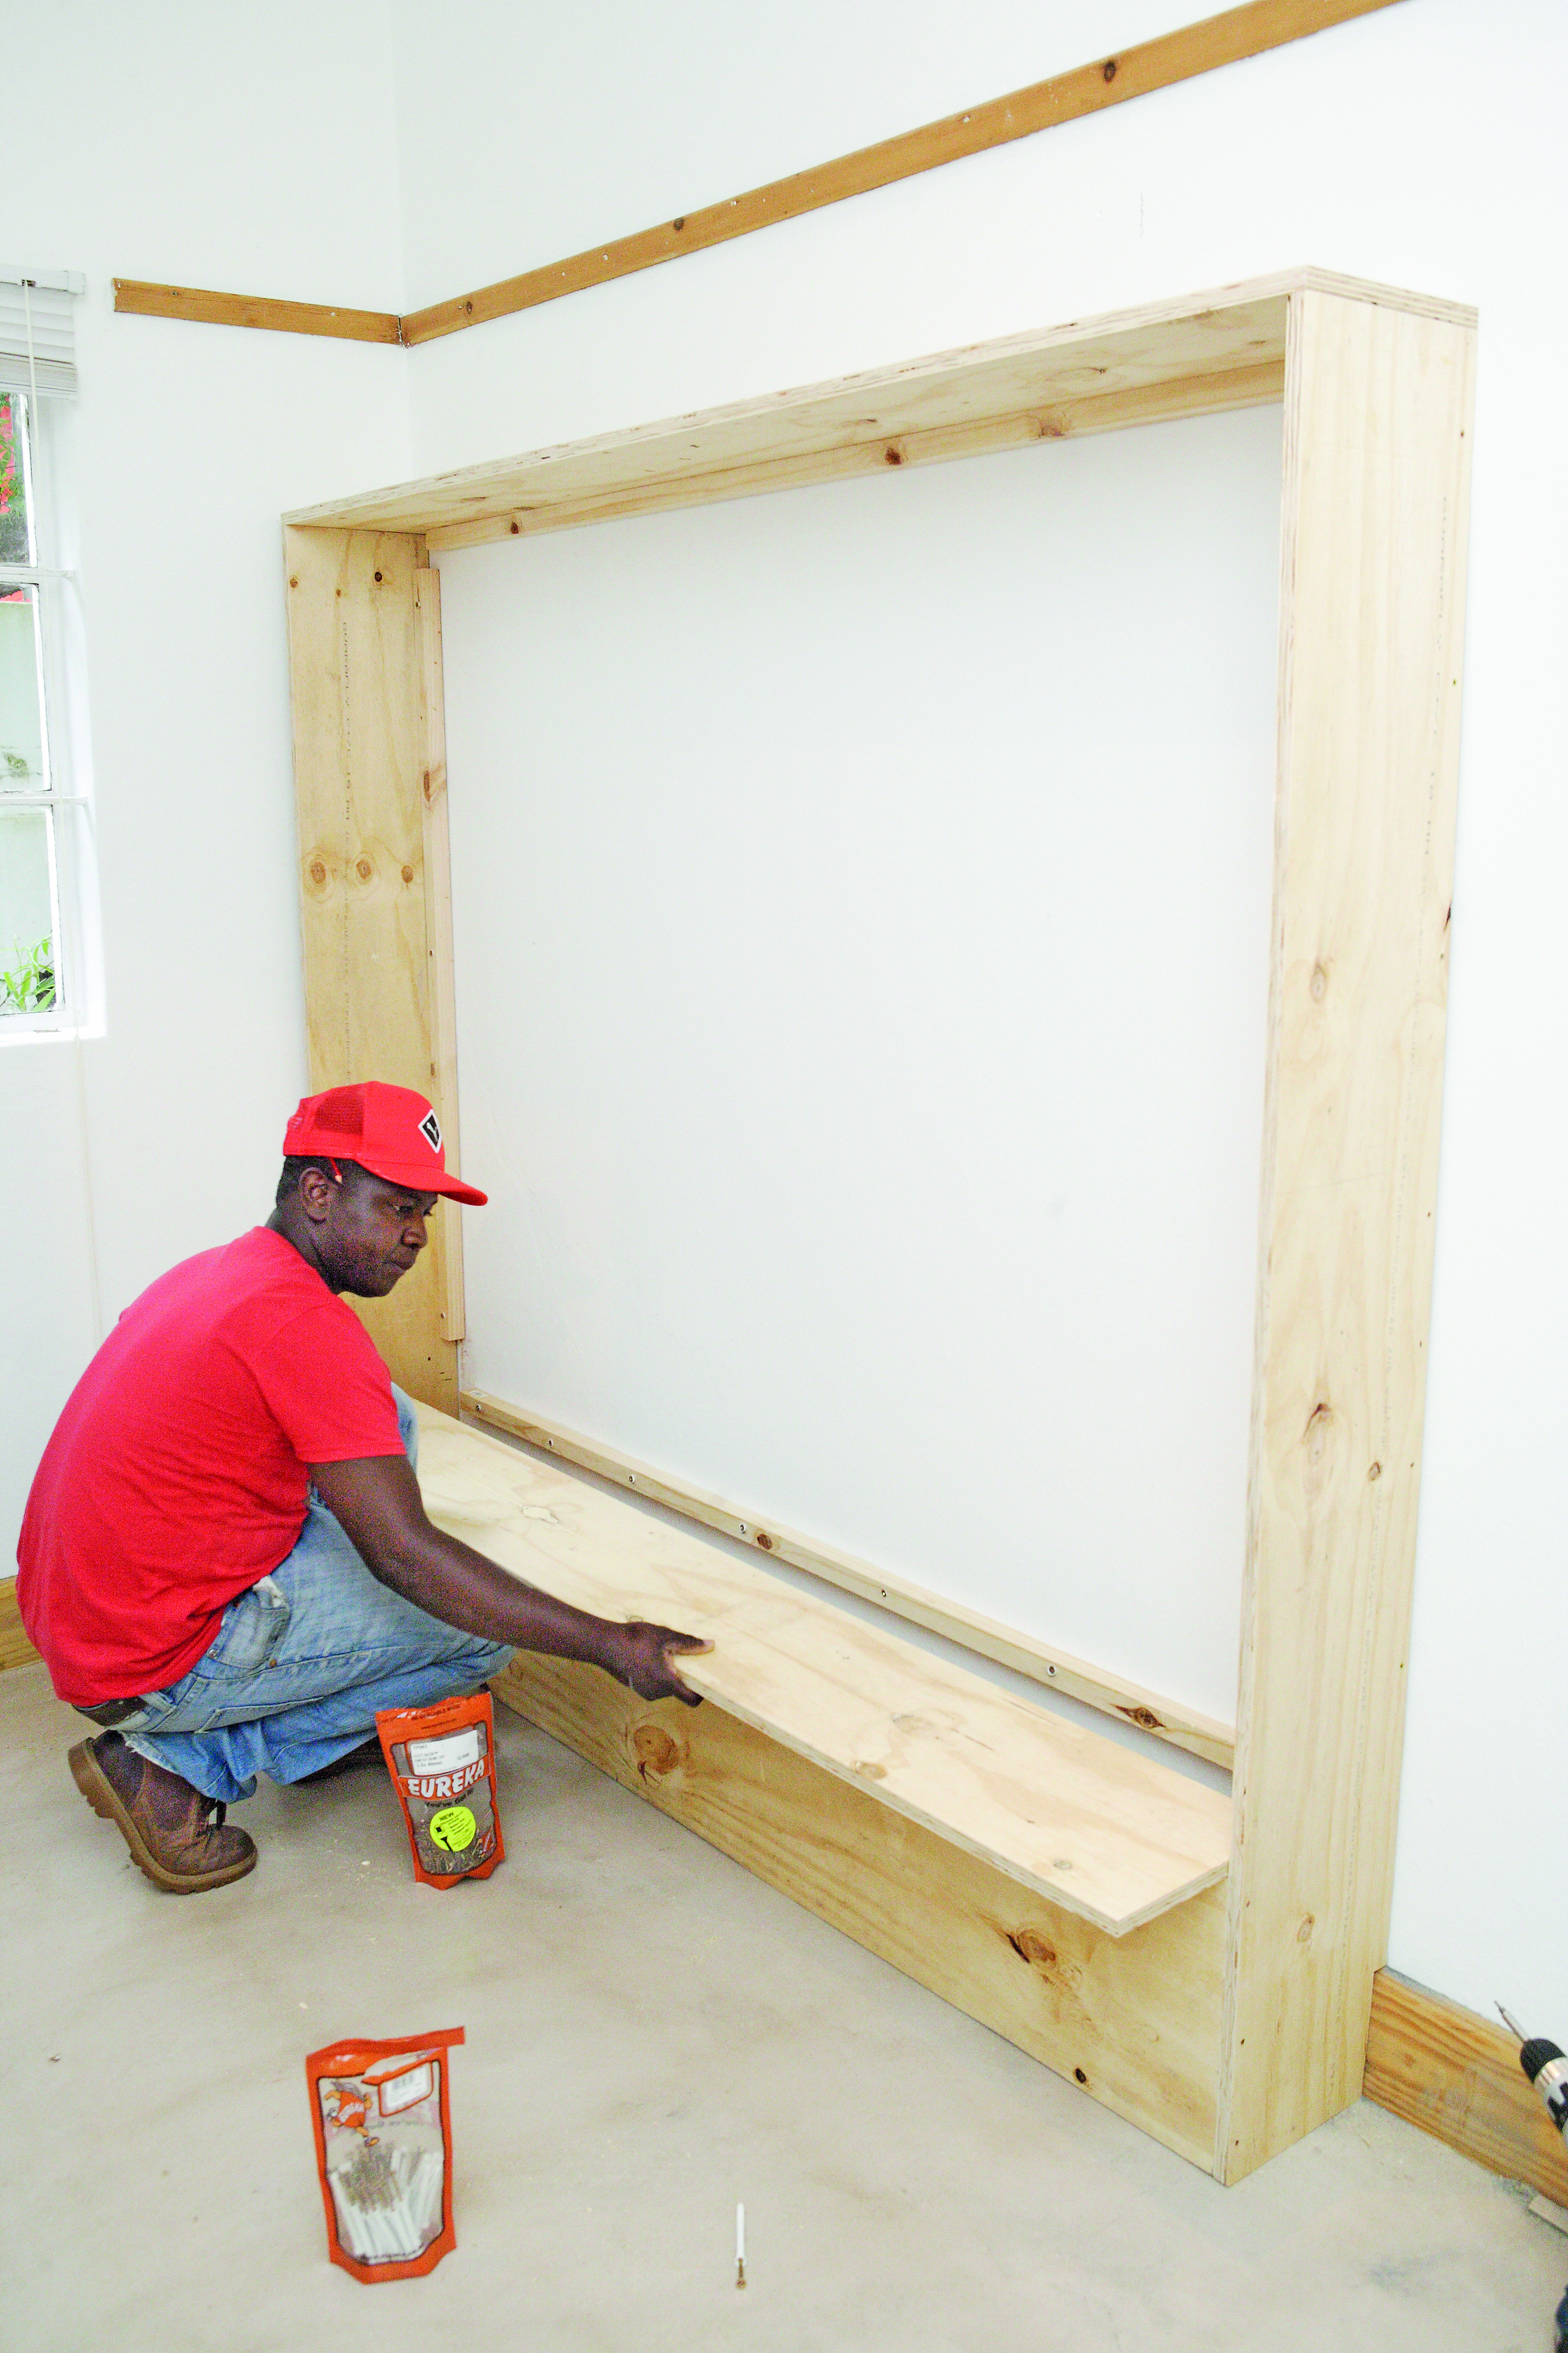
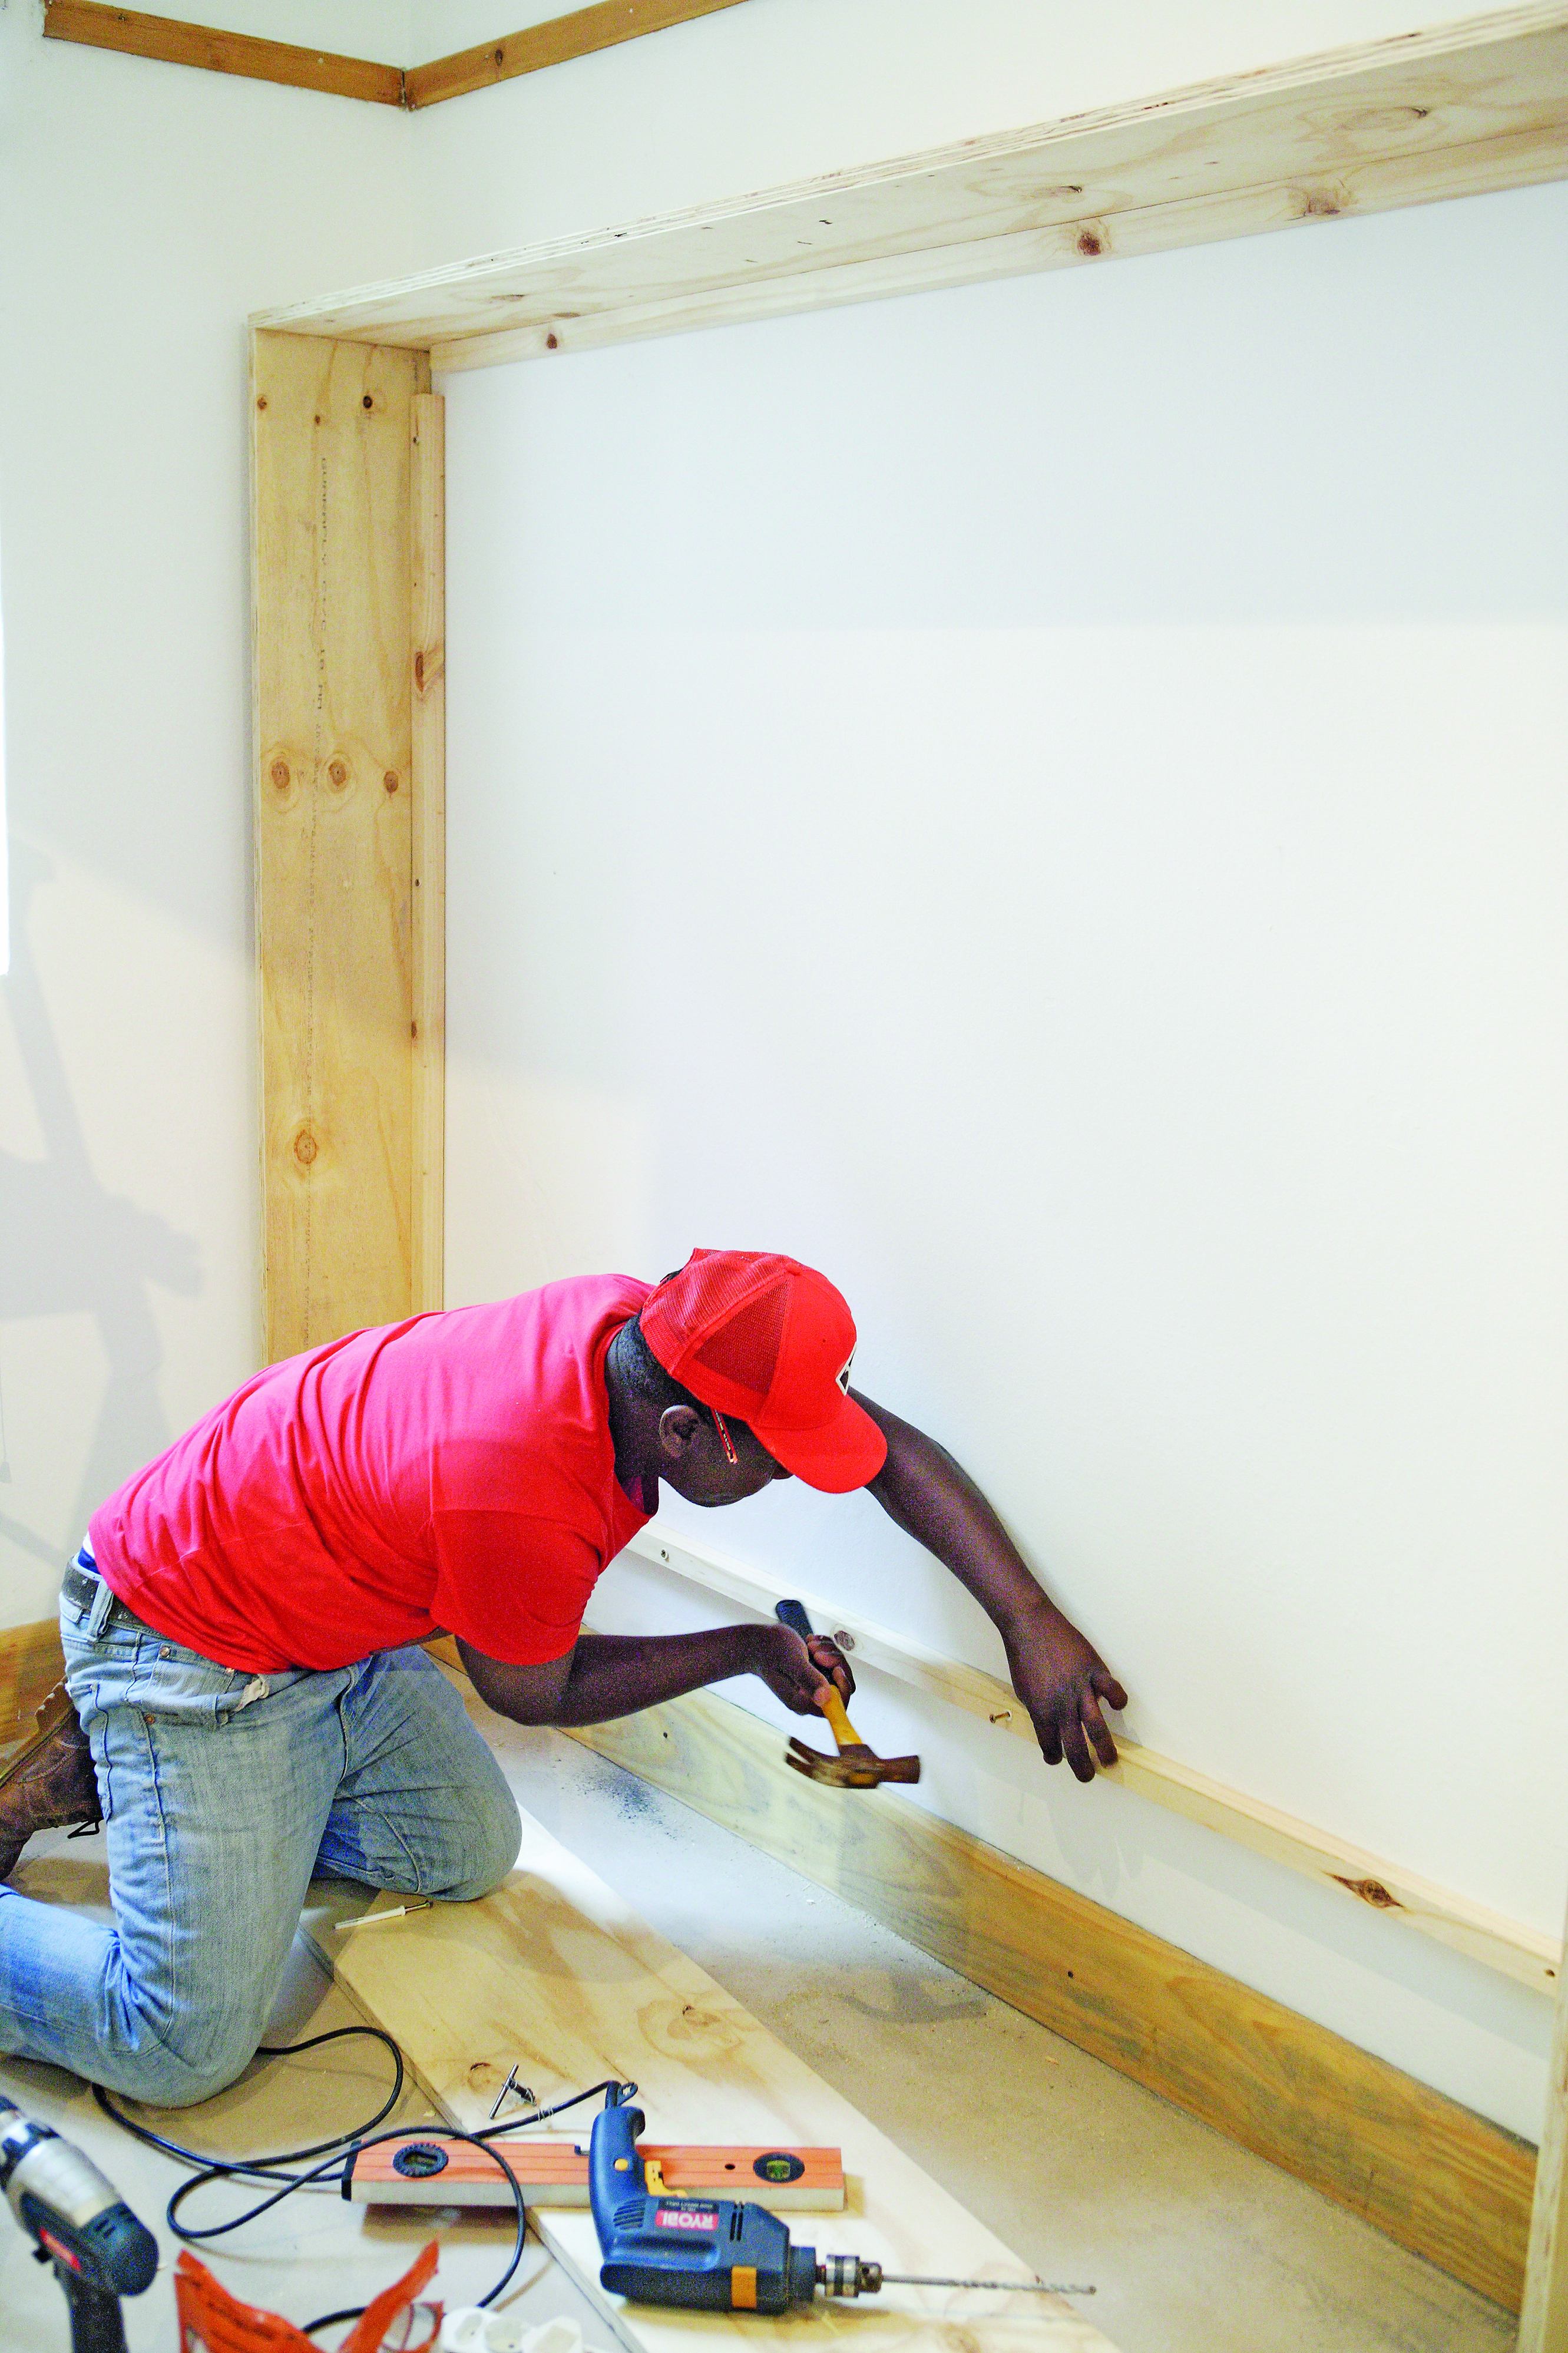
Step 8
Place the P5 on top of P4 and P8 and secure in place with screws.
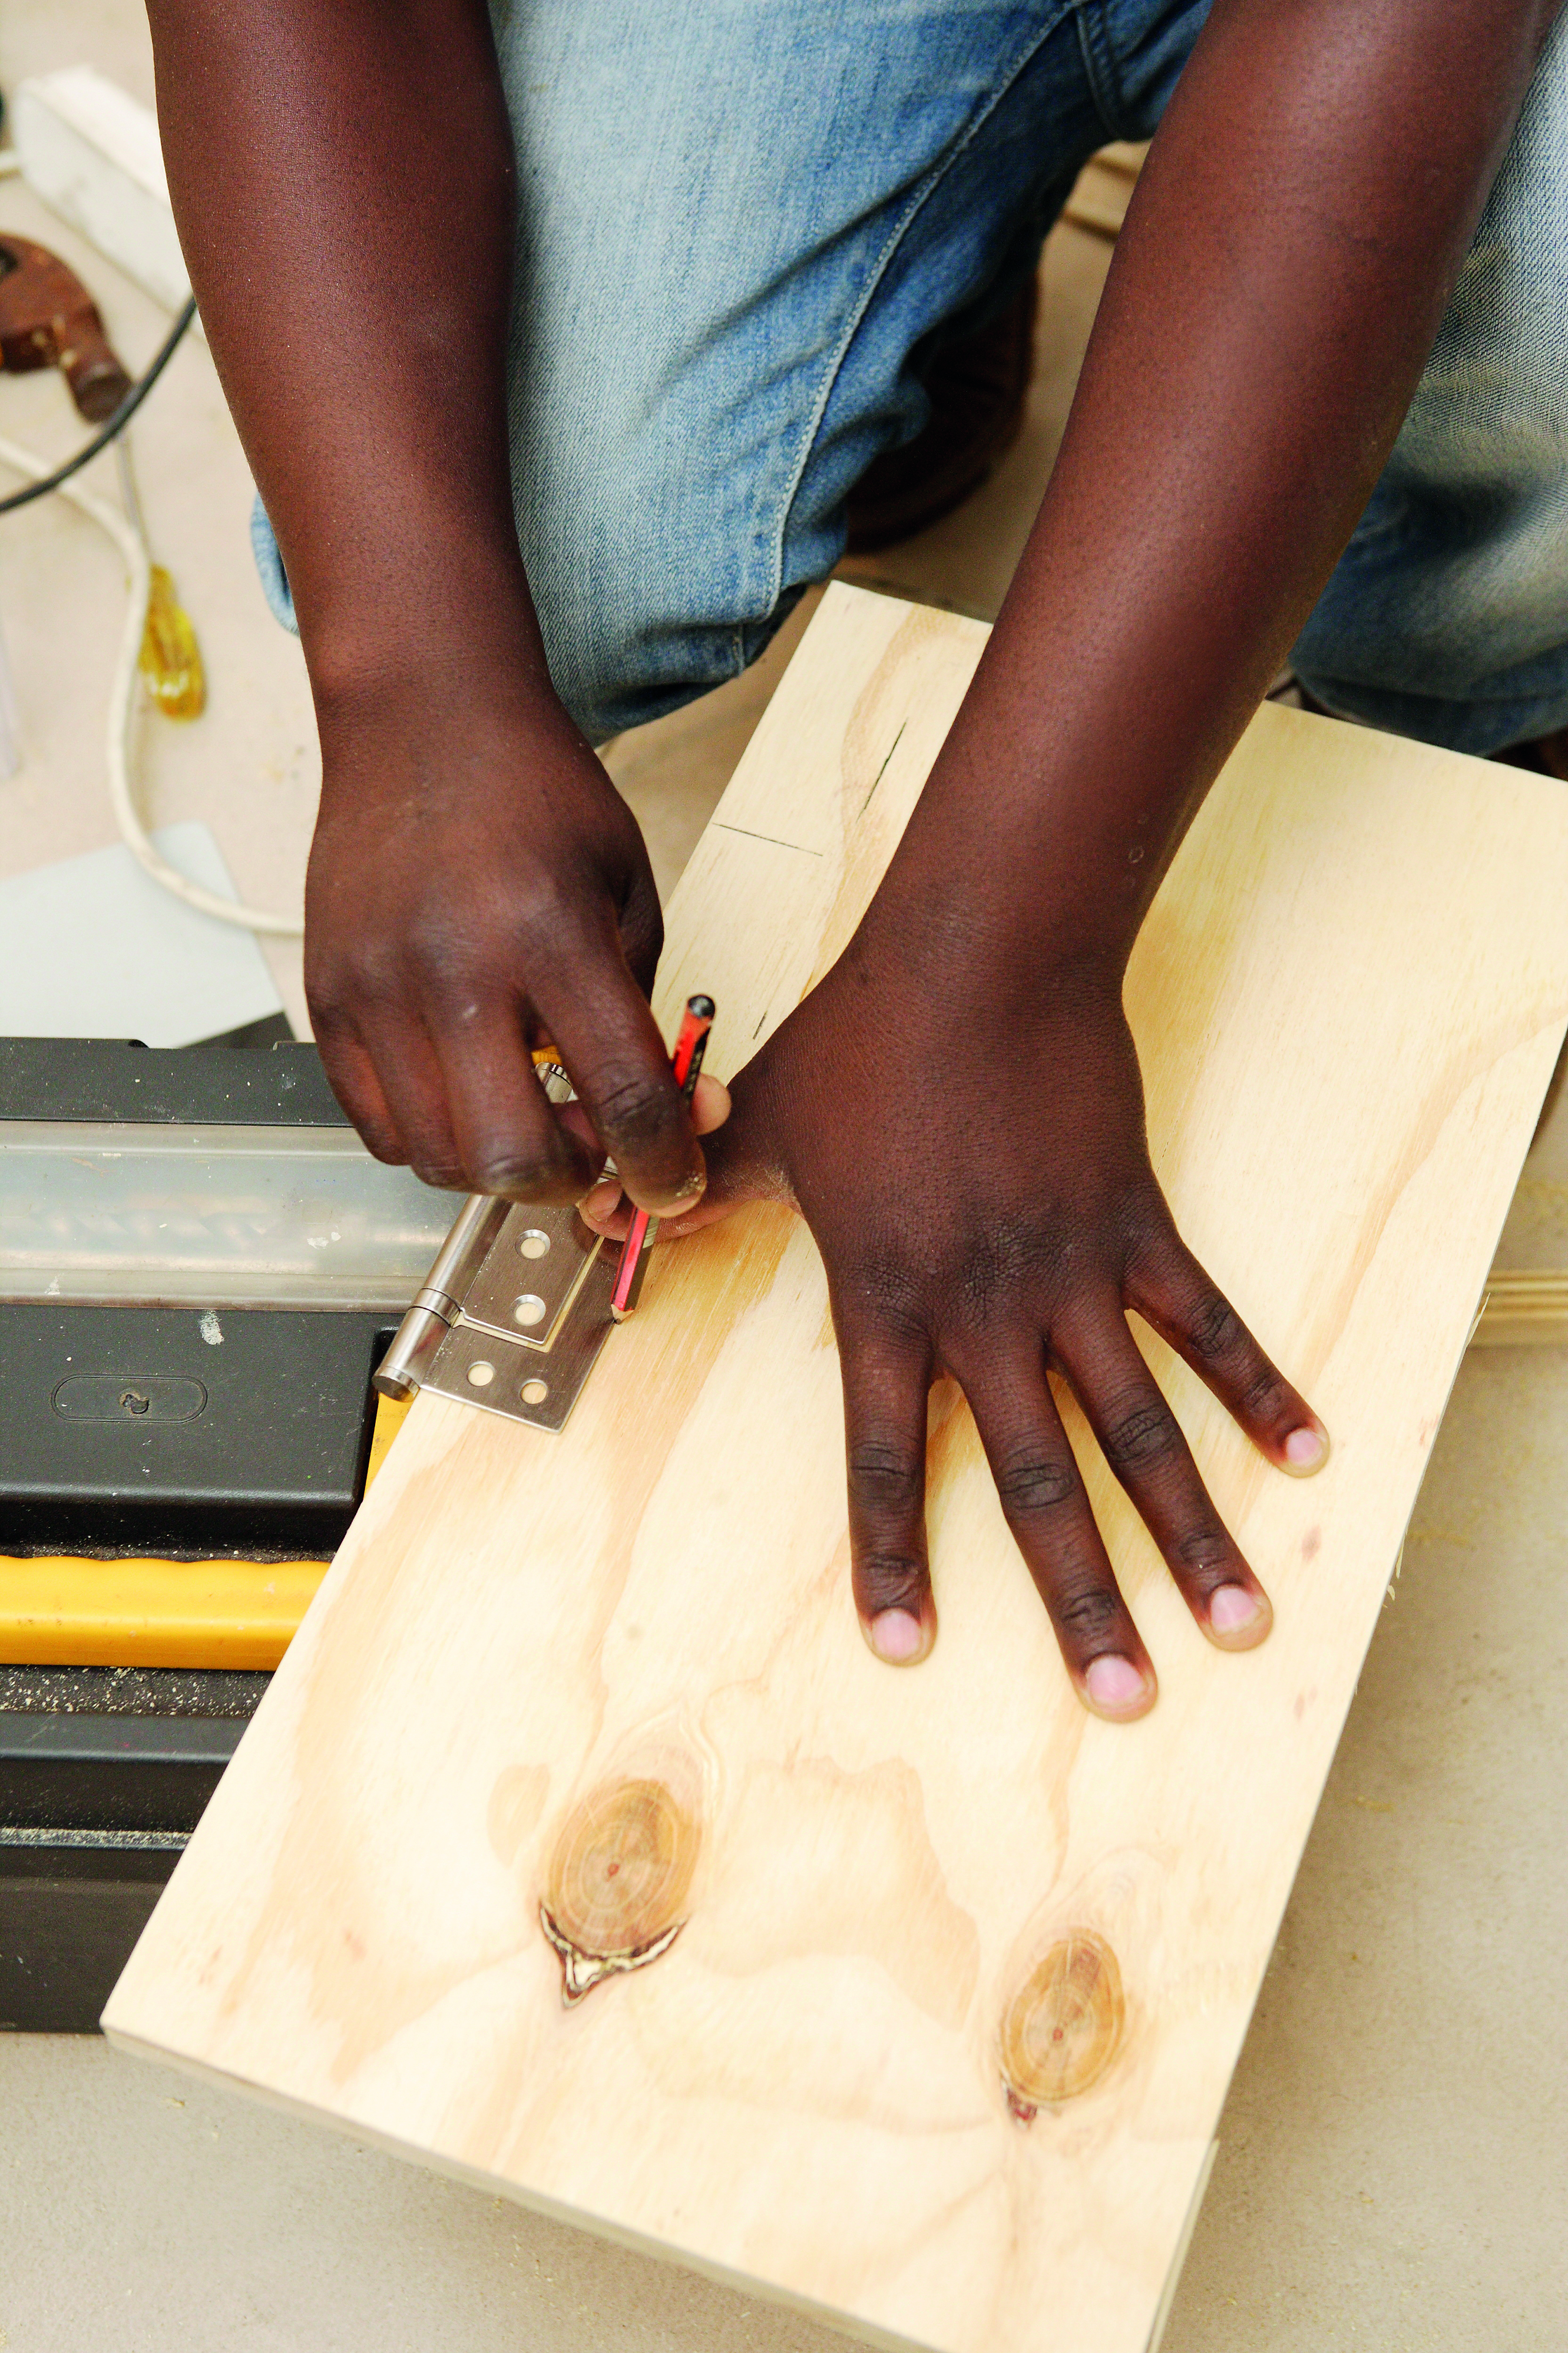
Step 9
Cut four rectangles of 100 x 76 mm (the size of the sinkless hinges) from the Shutterply offcuts.
Step 10
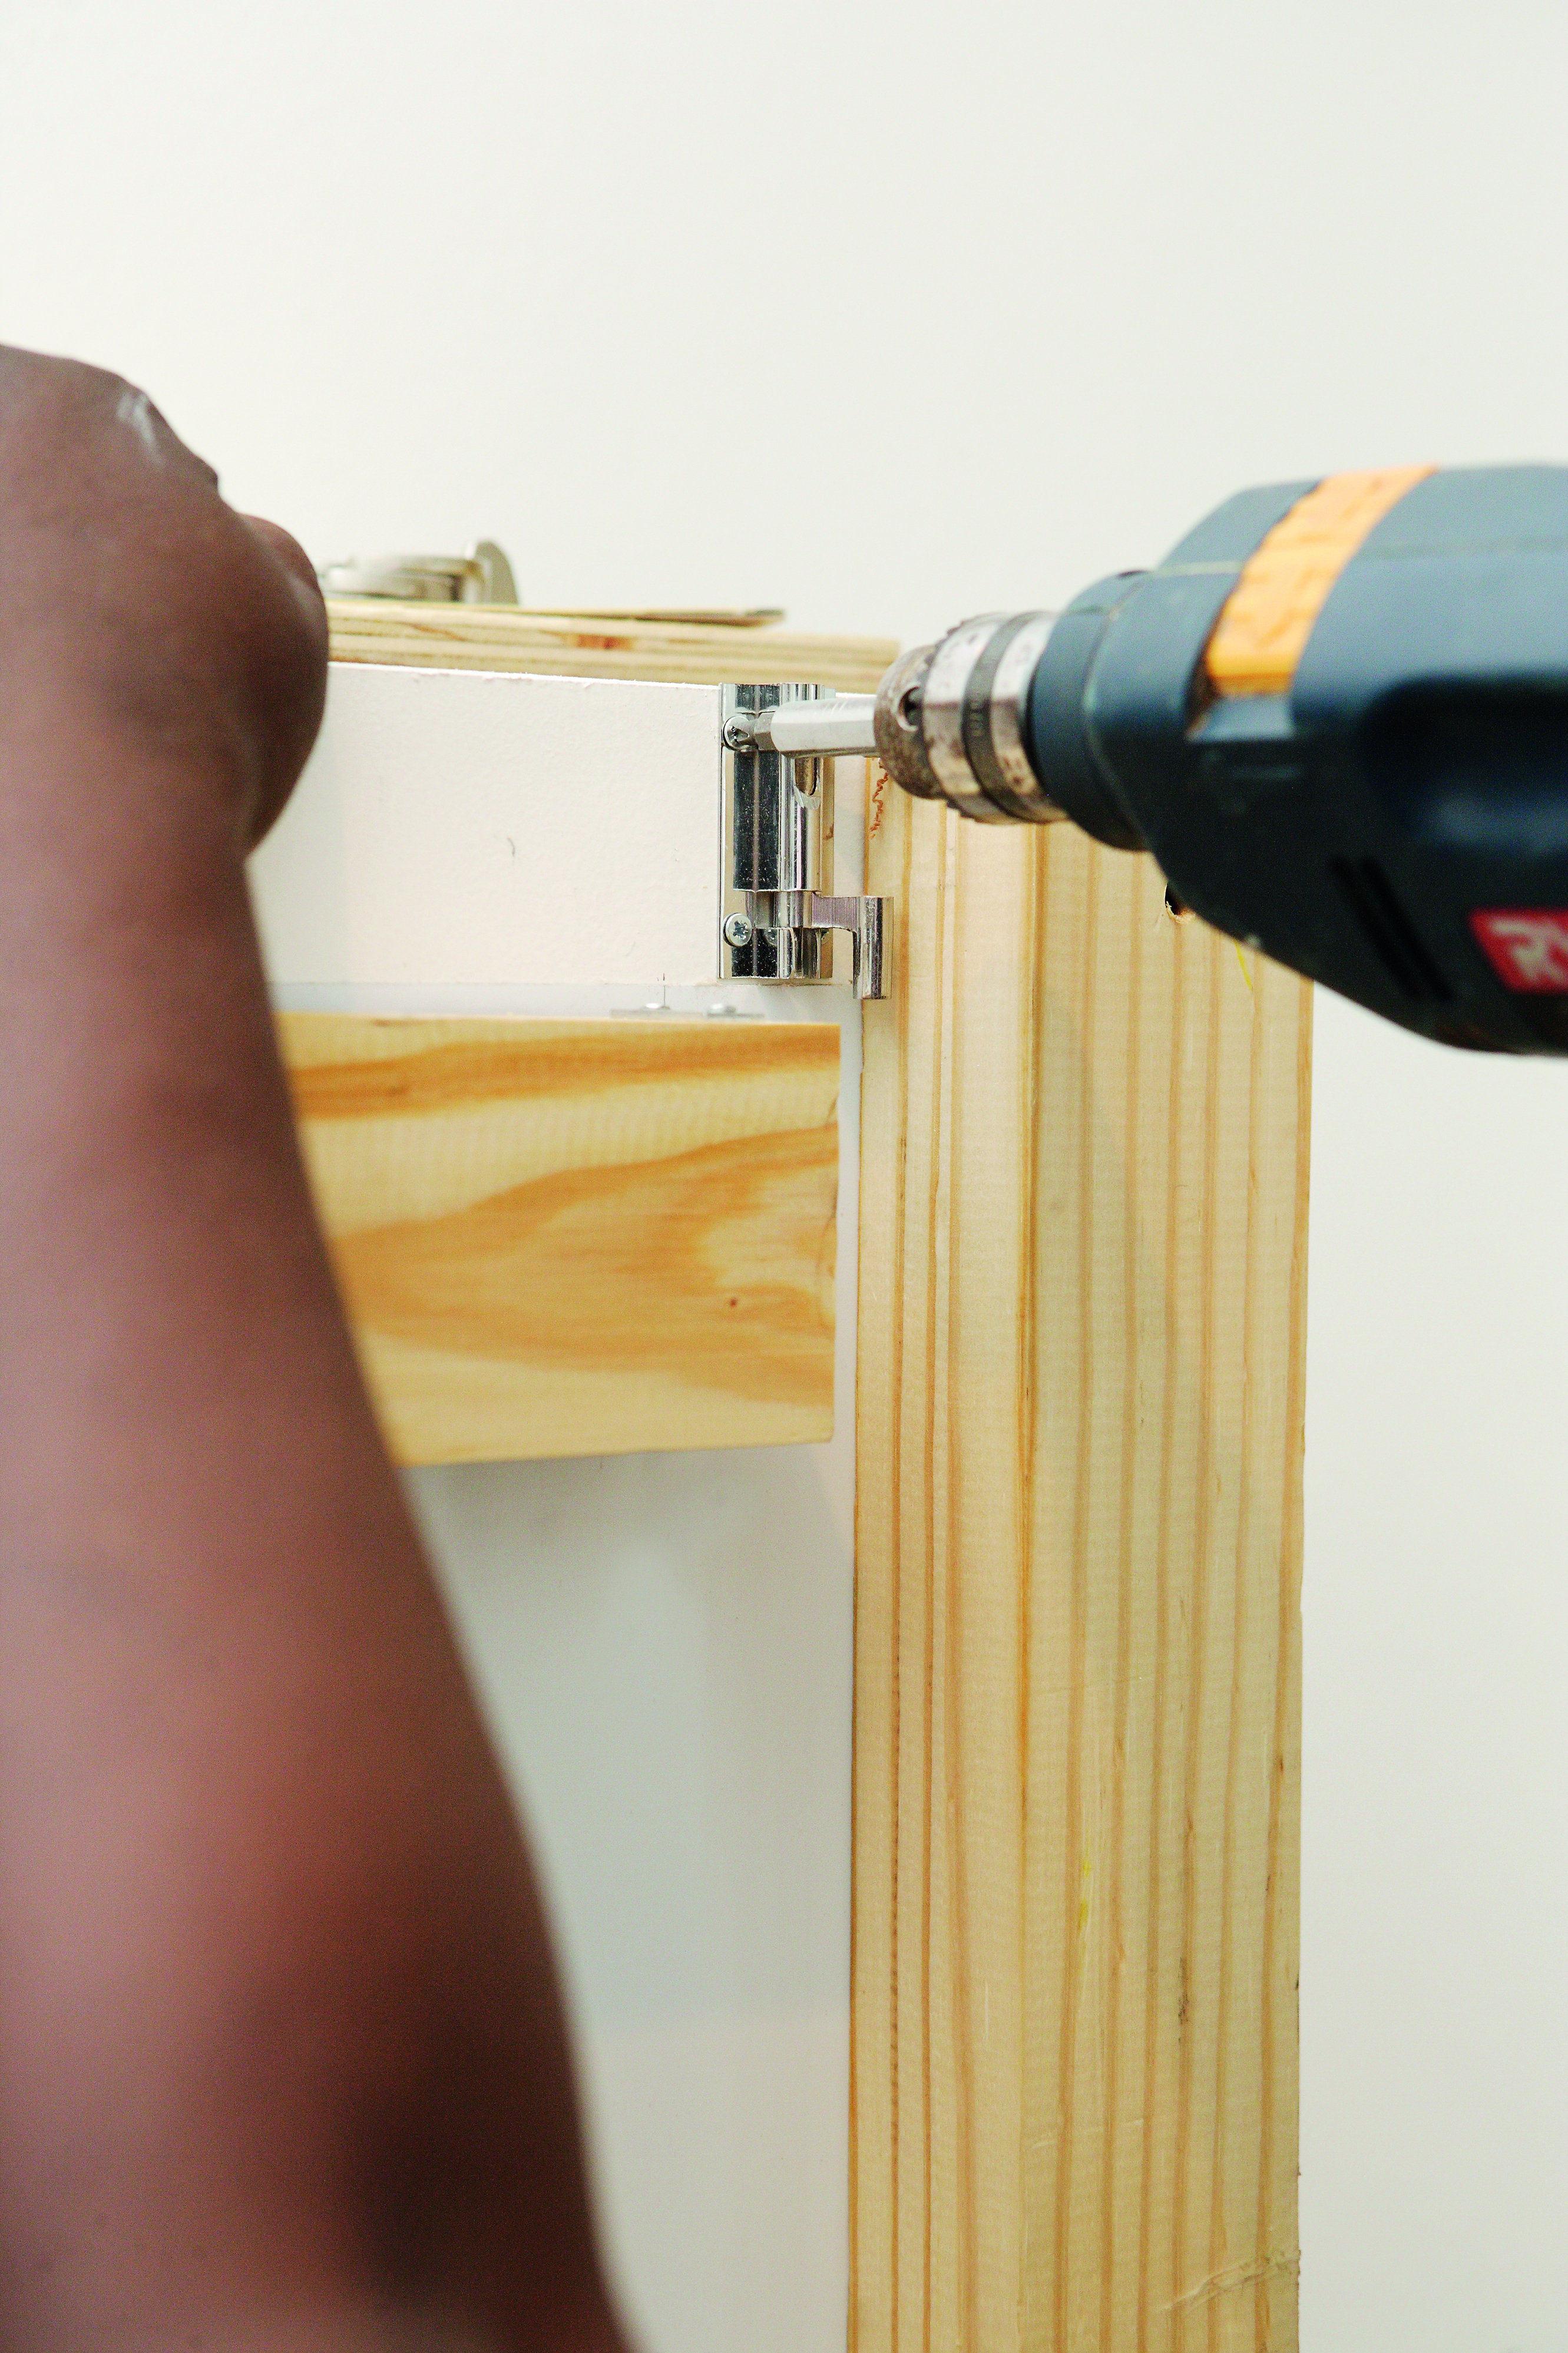
Measure and mark where the four sinkless hinges will go on the long side of P1 so that they’re evenly spaced. Glue the blocks you cut in step 10 at the back of where each hinge will go and screw the hinges in place.
Step 11
Put the P1 in place against P5 and screw the other side of the hinges in place.
Step 12
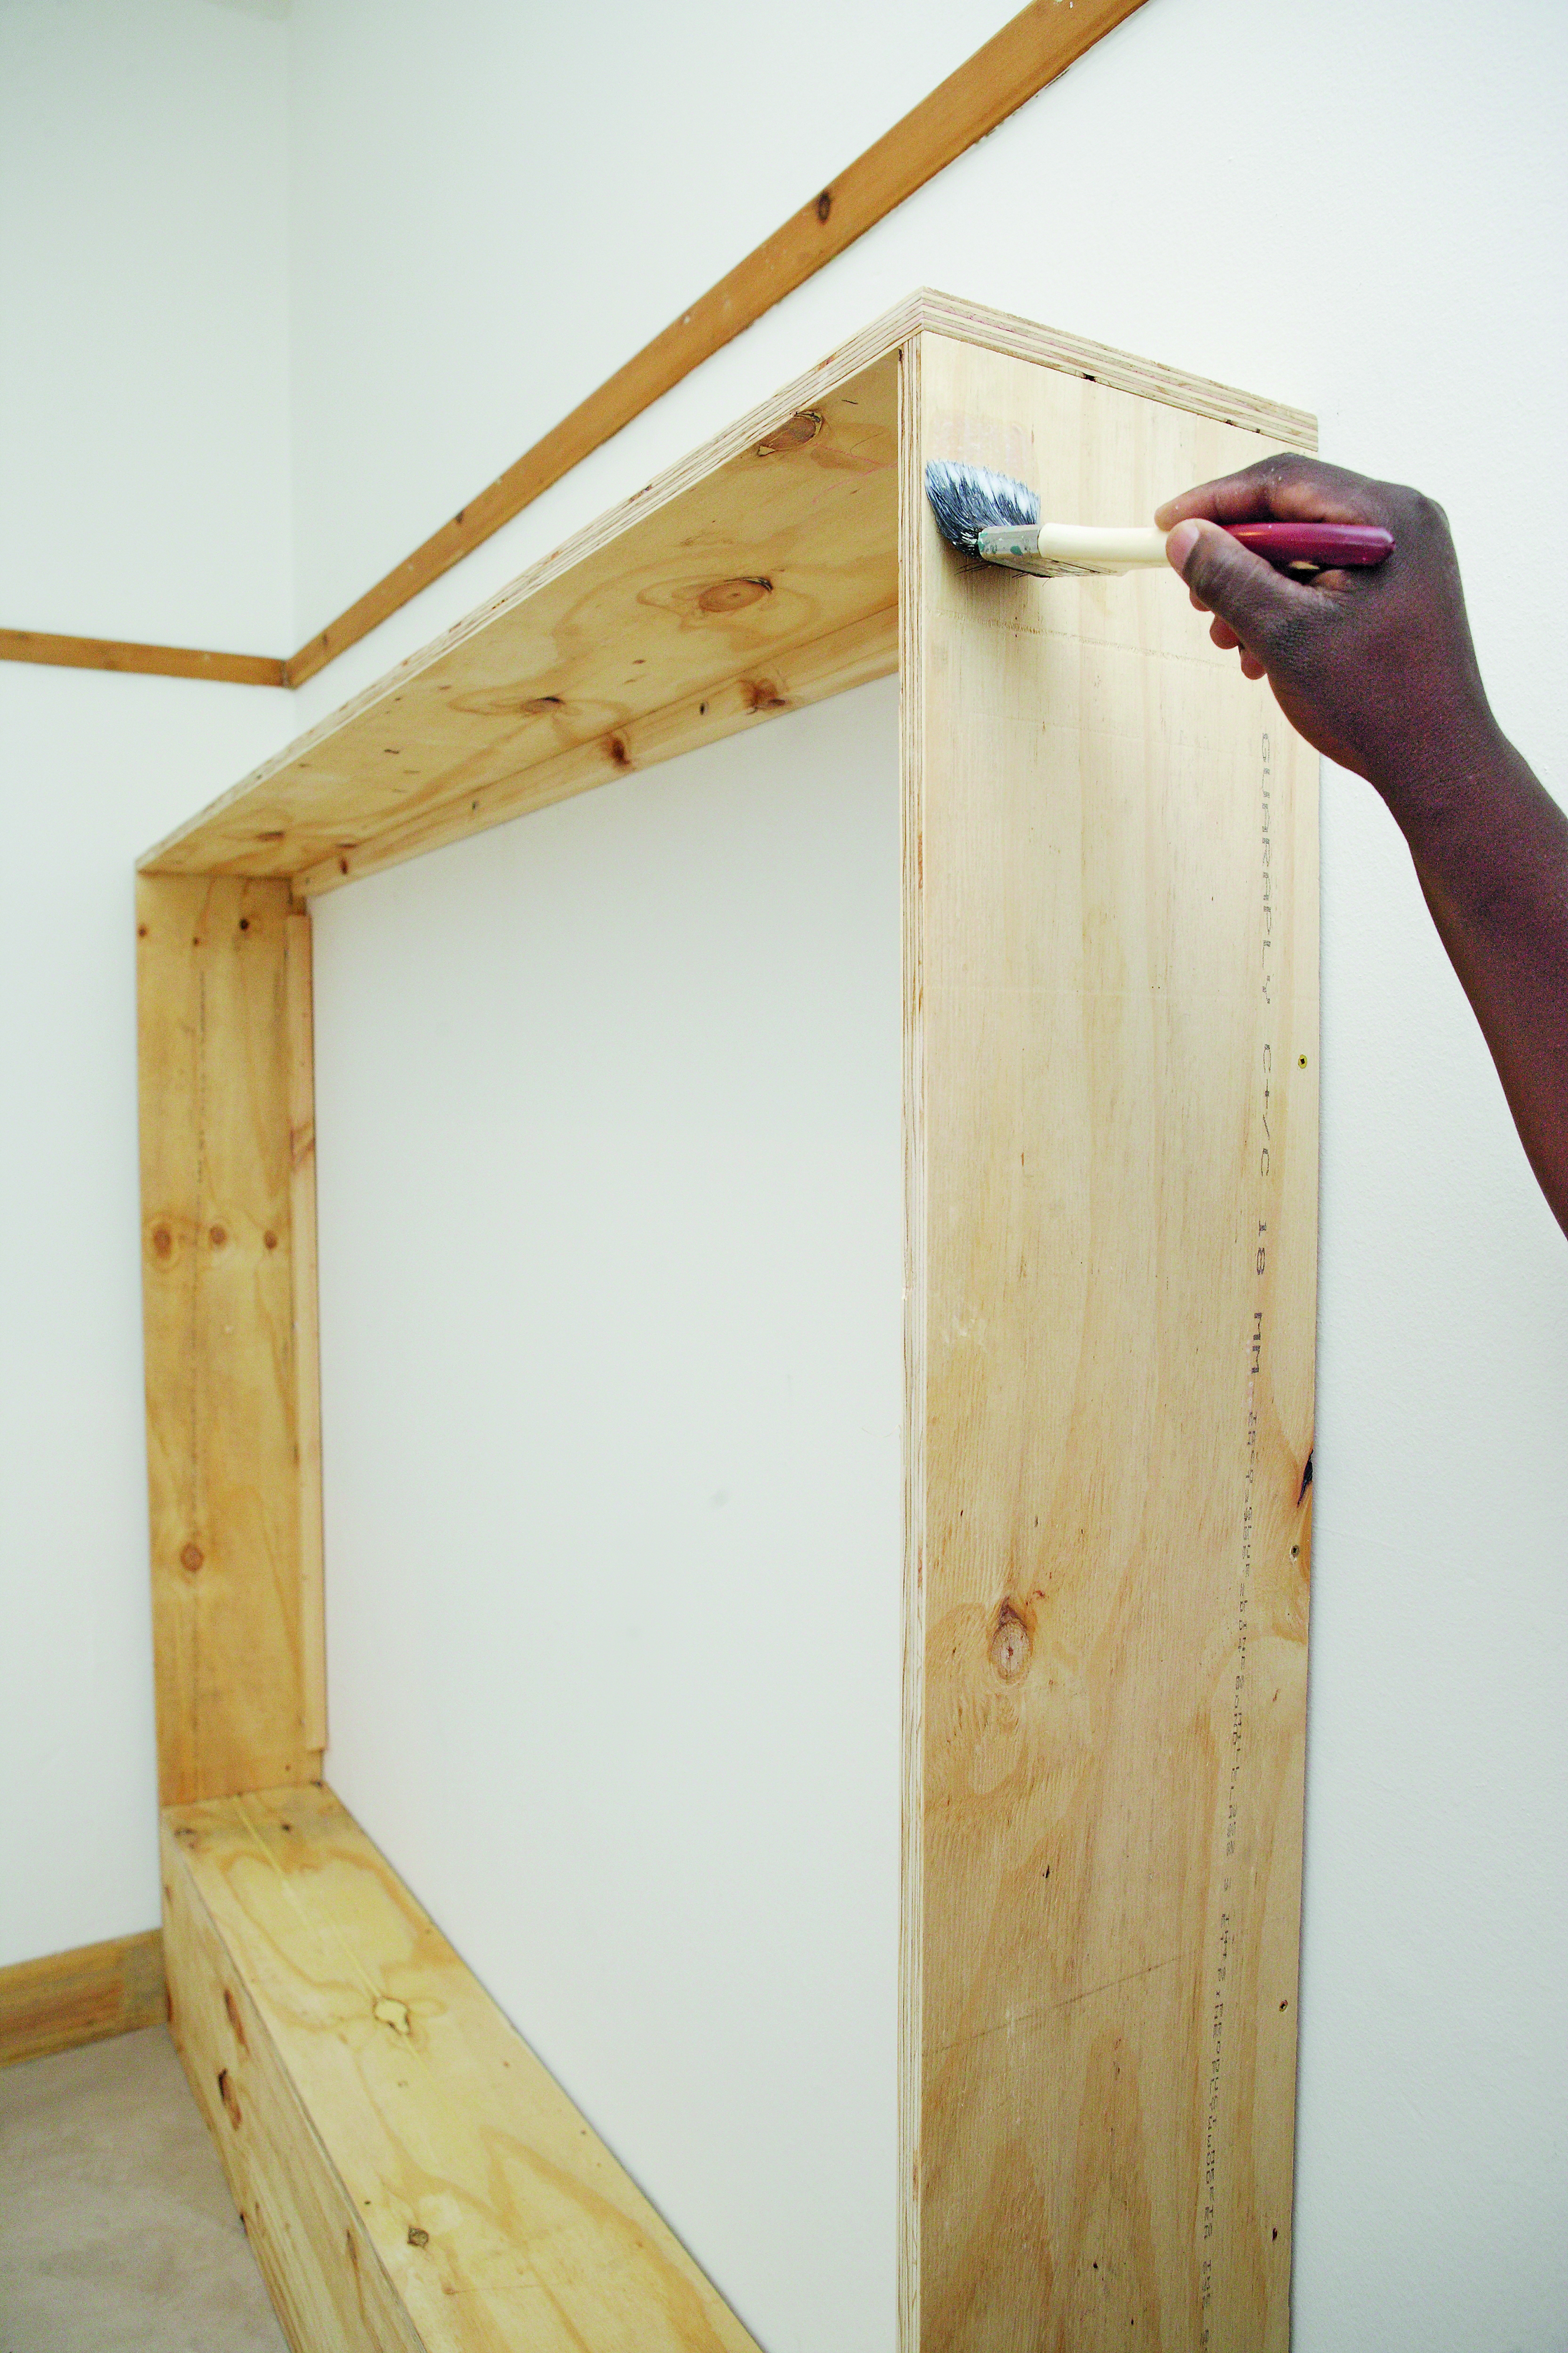
Measure 10 cm from the top and sides and 50 cm from the bottom on the outside of P1 and paint the area outside with primer then two coats of white enamel. Also paint the edges and a 15-cm frame on the inside of P1.
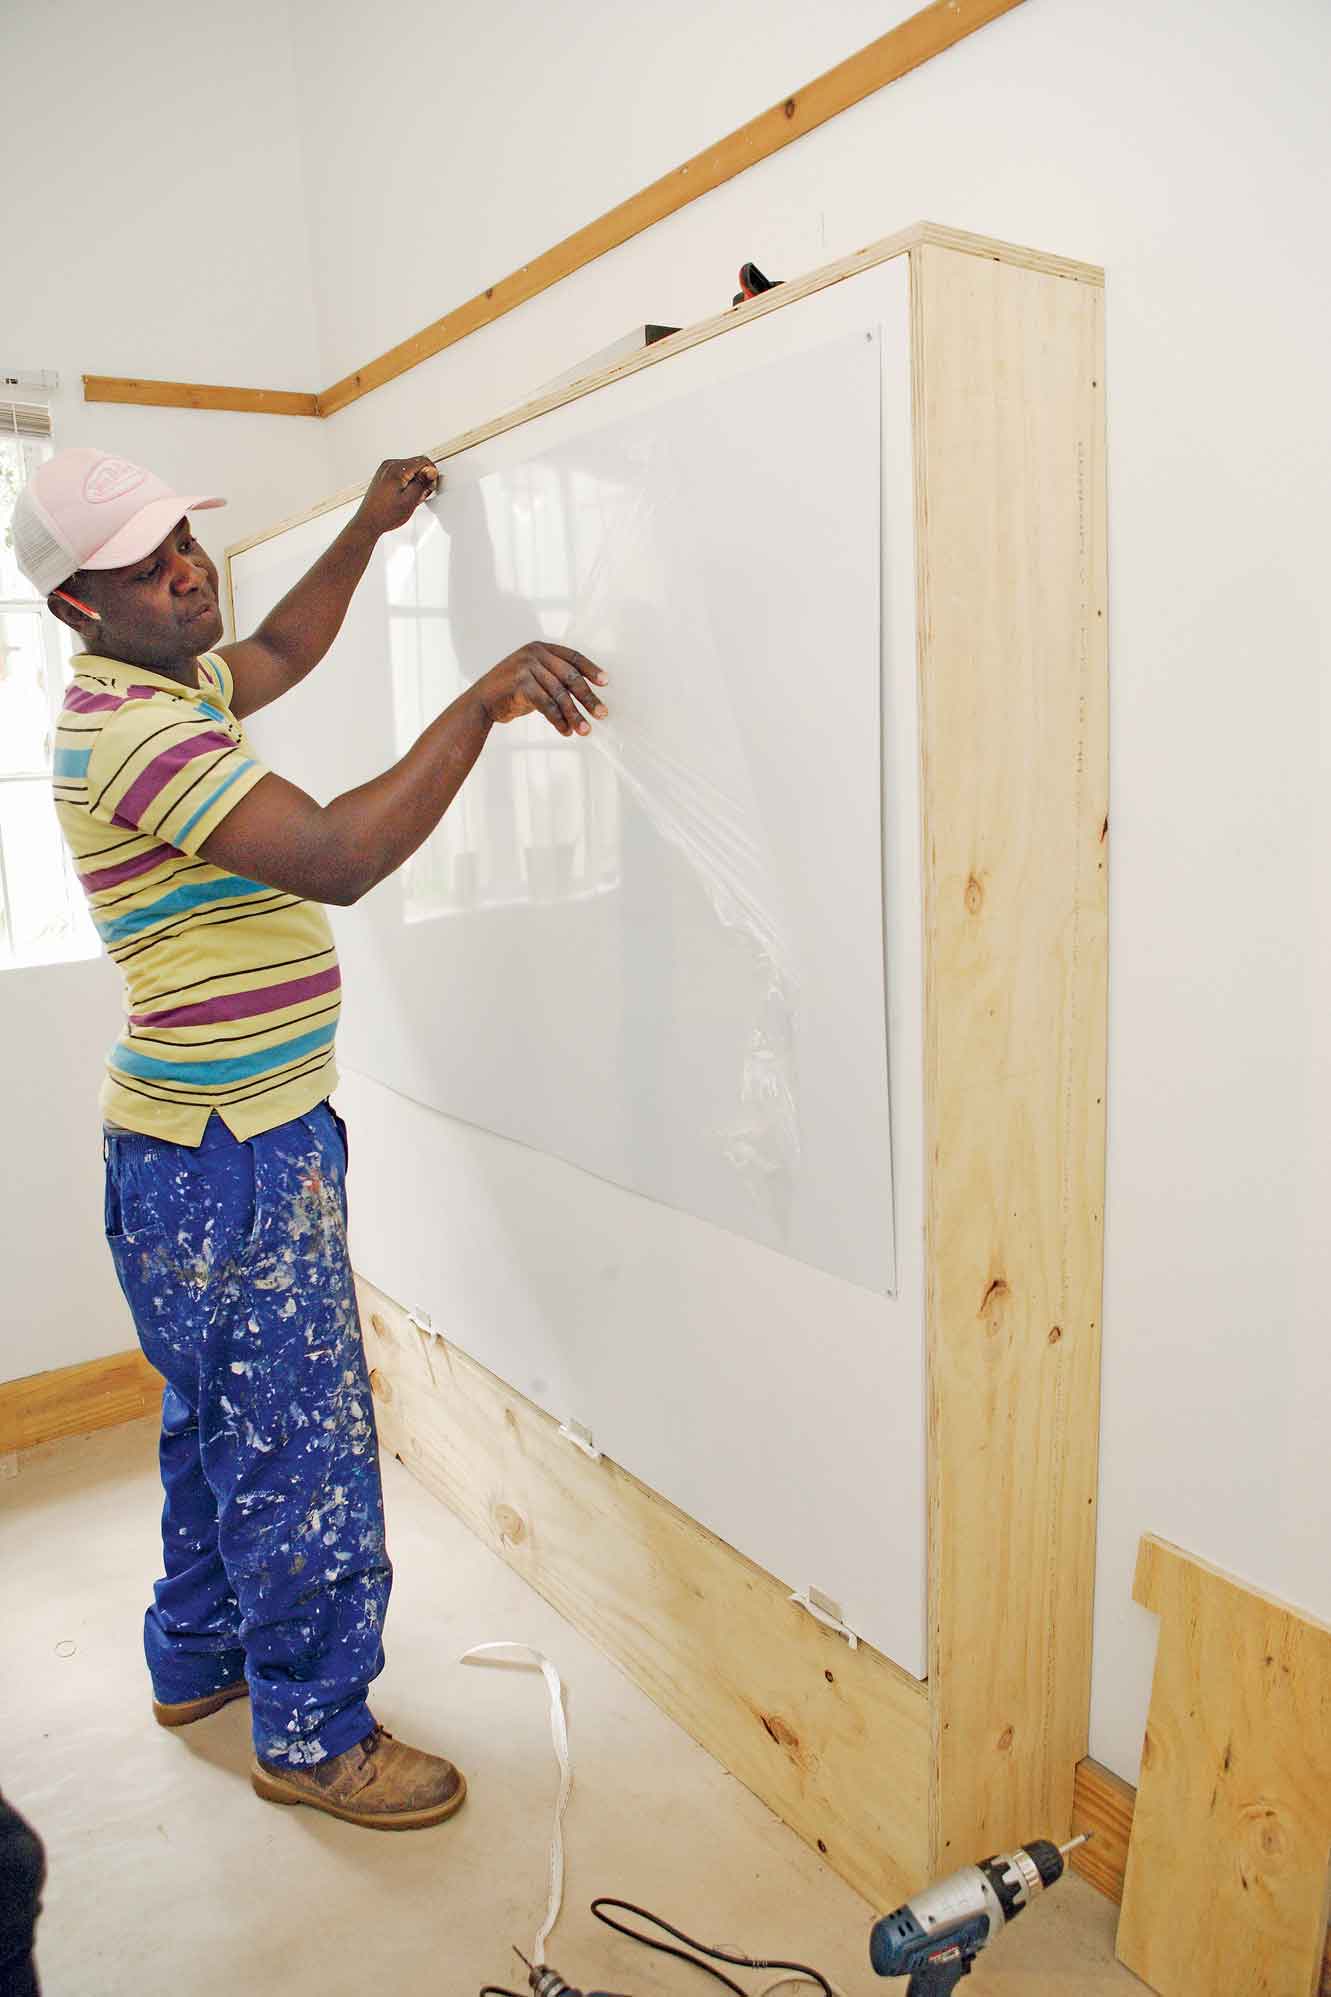
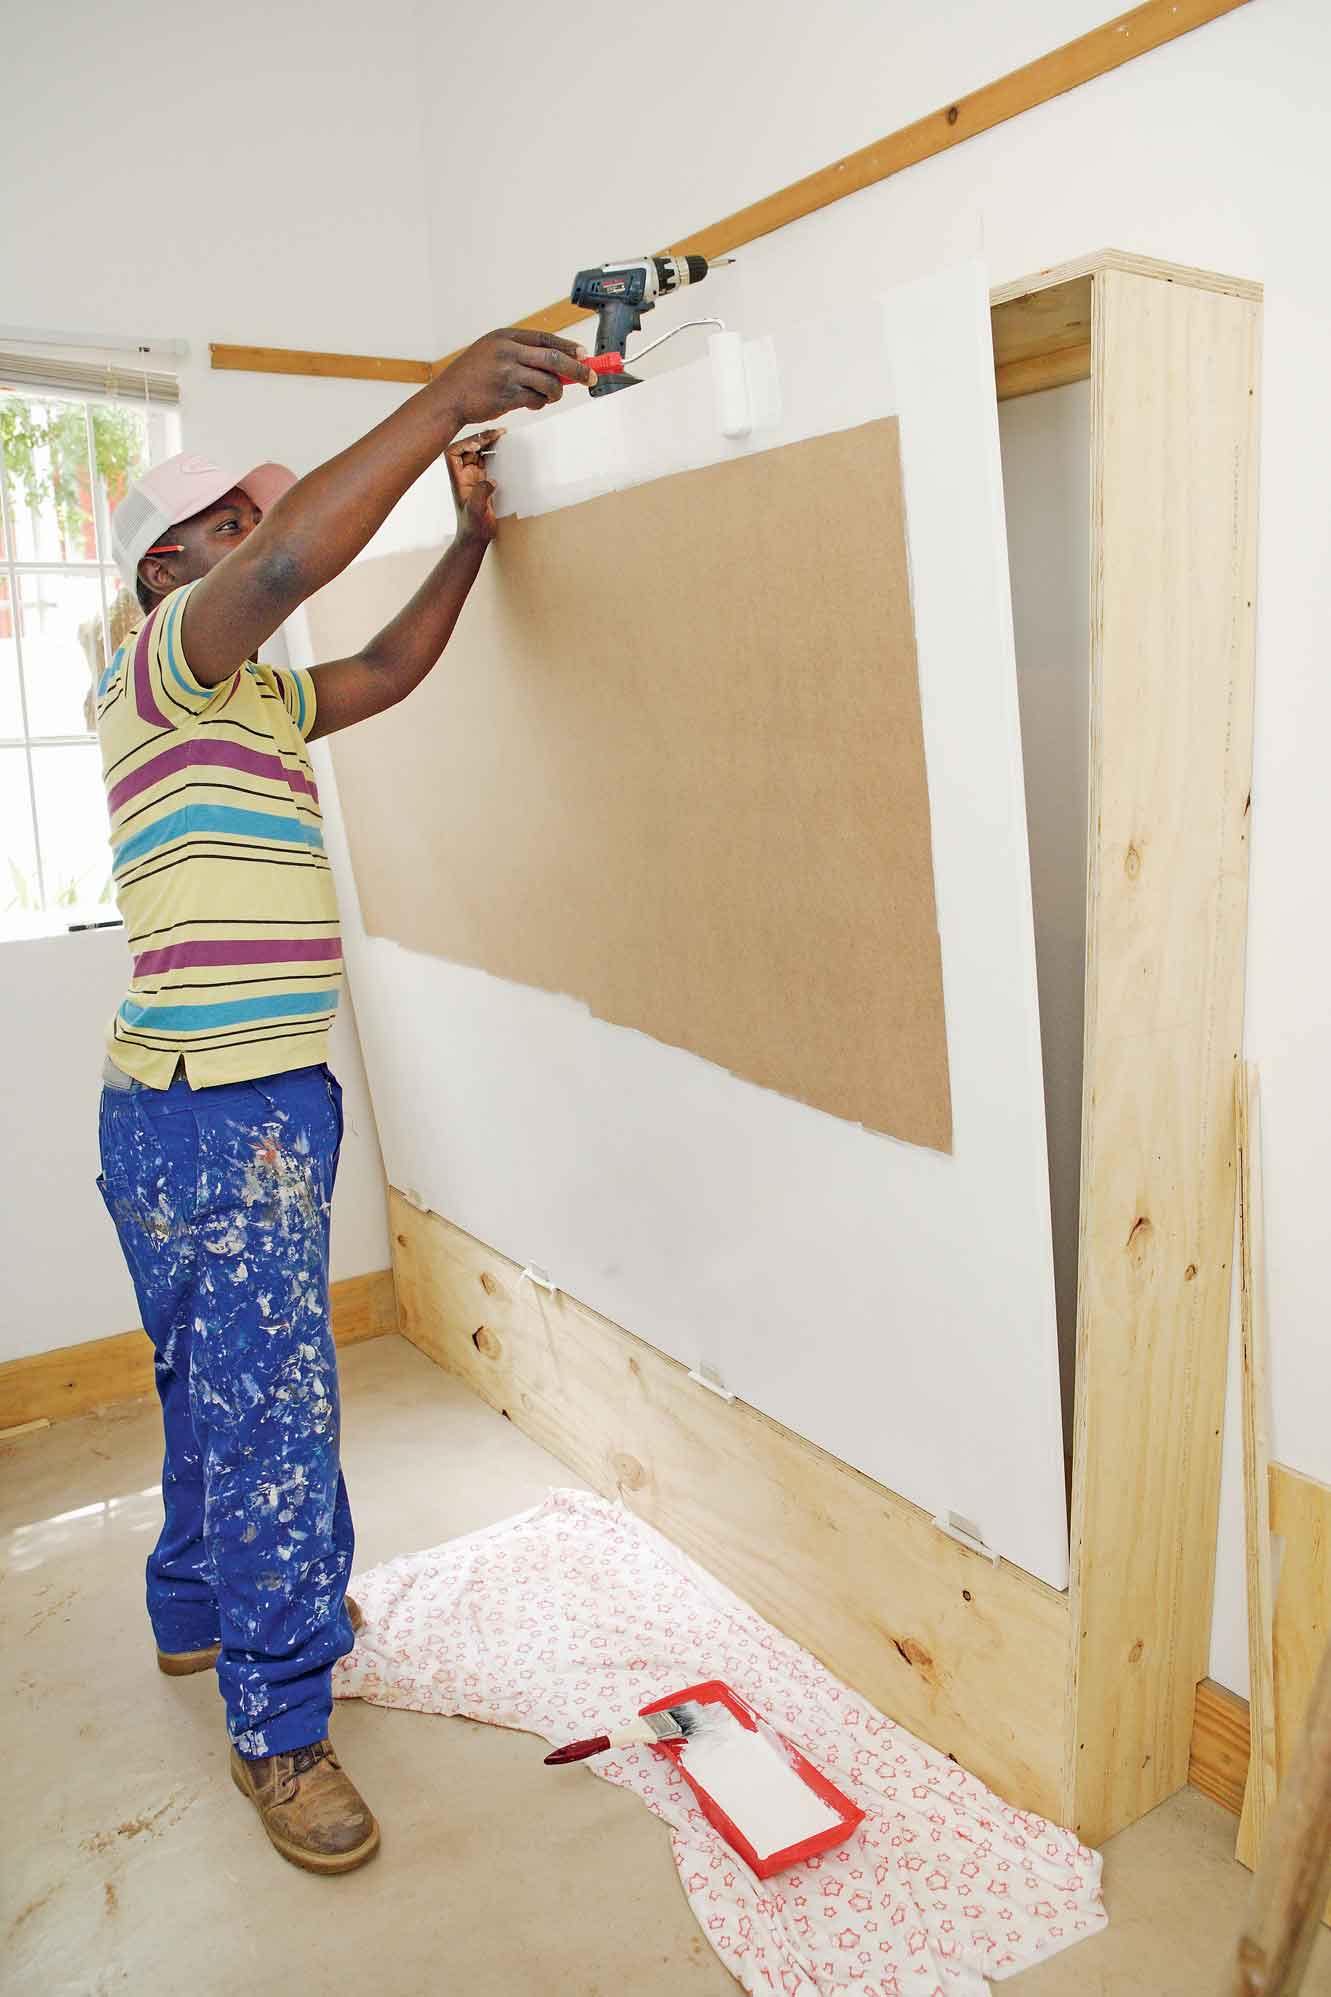
Step 13
Attach the whiteboard 5 cm from the top and sides to the outside of P1 with screws.
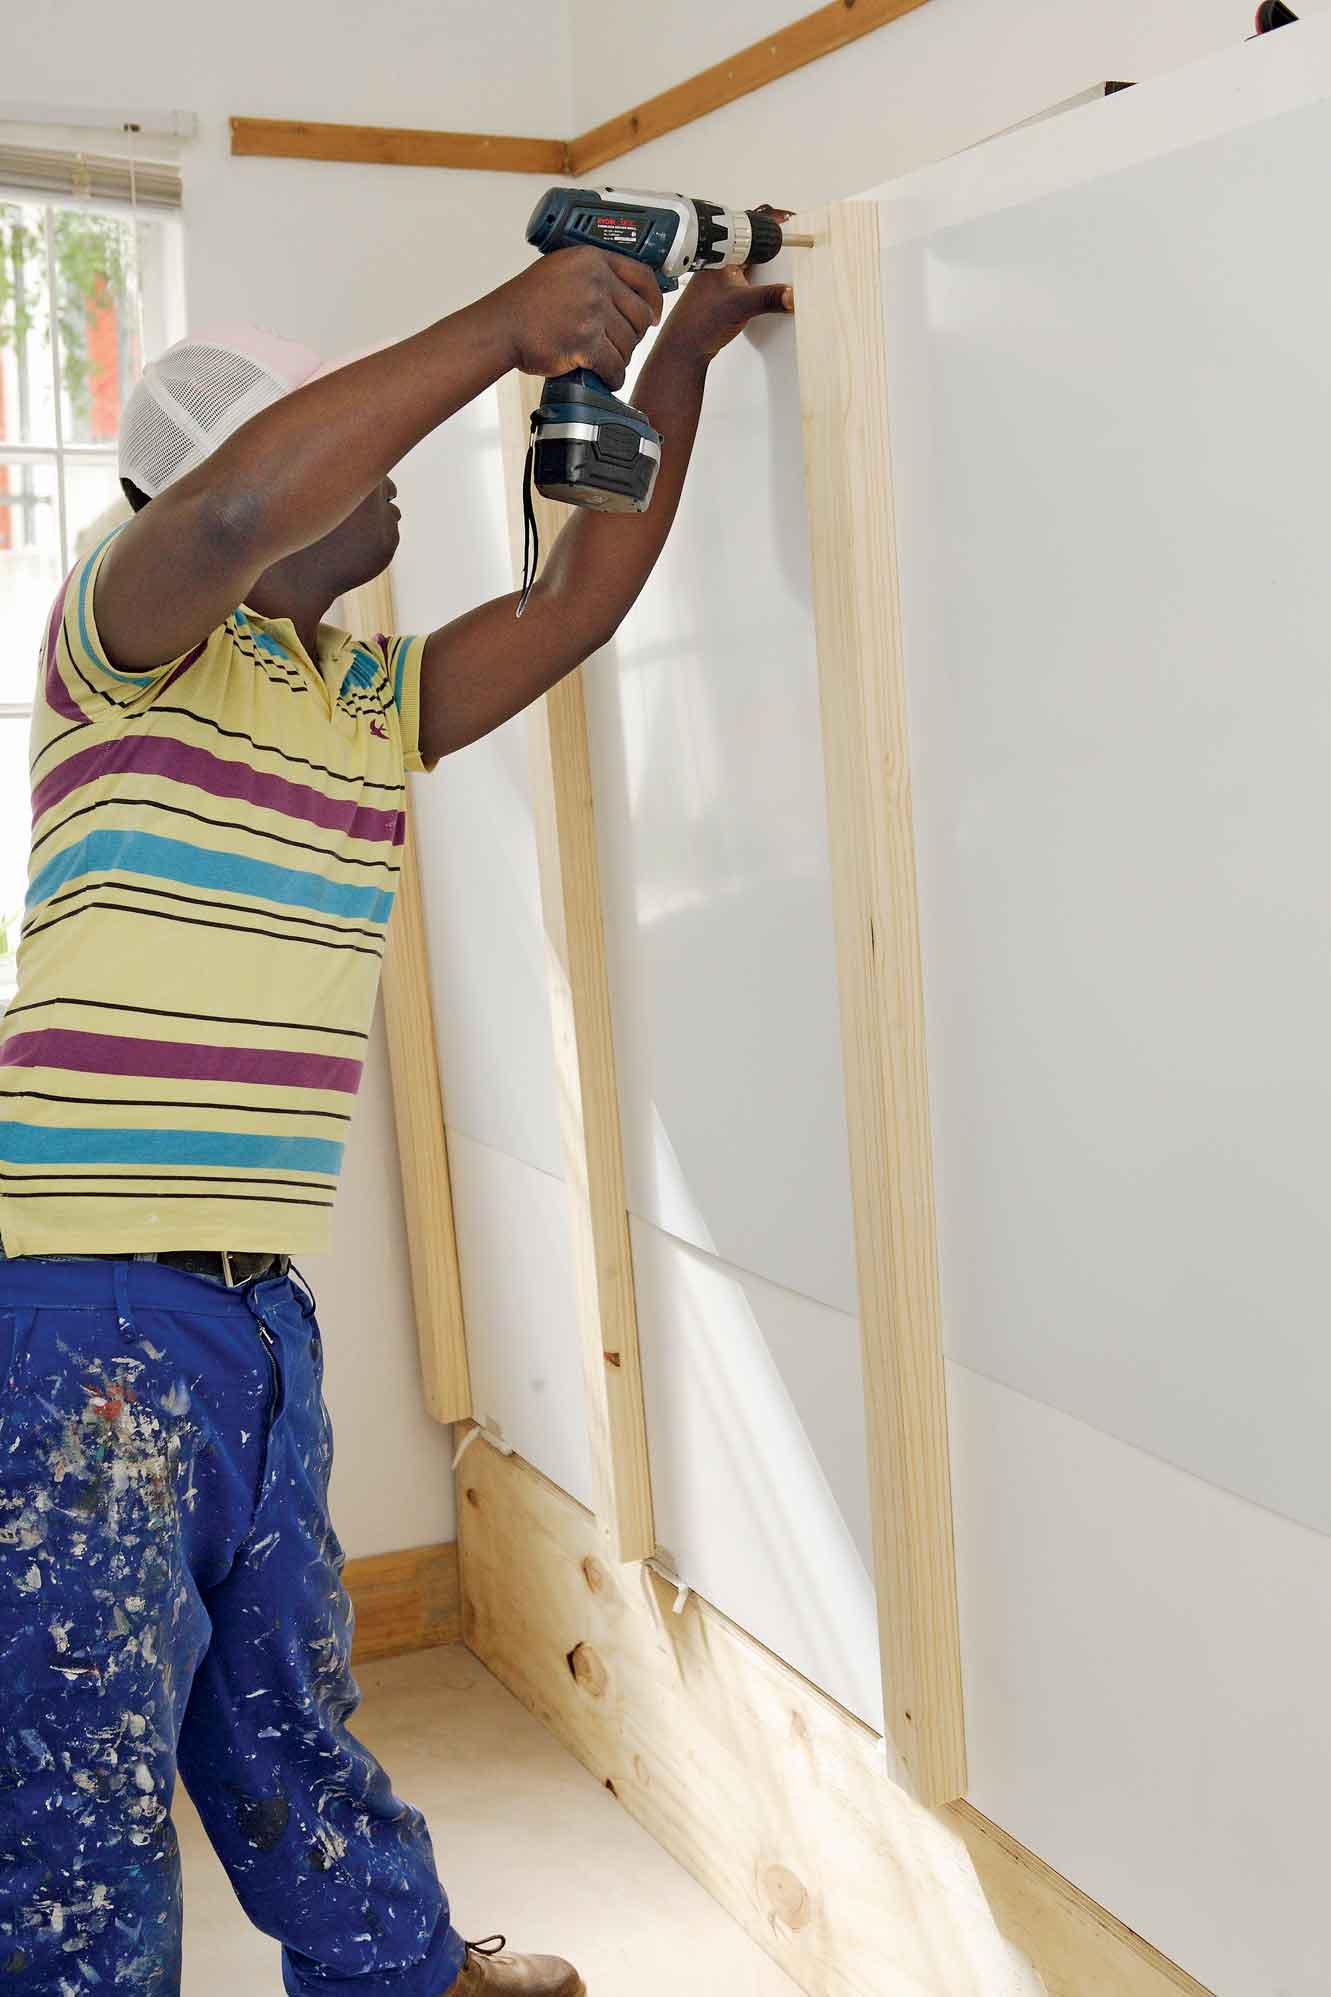
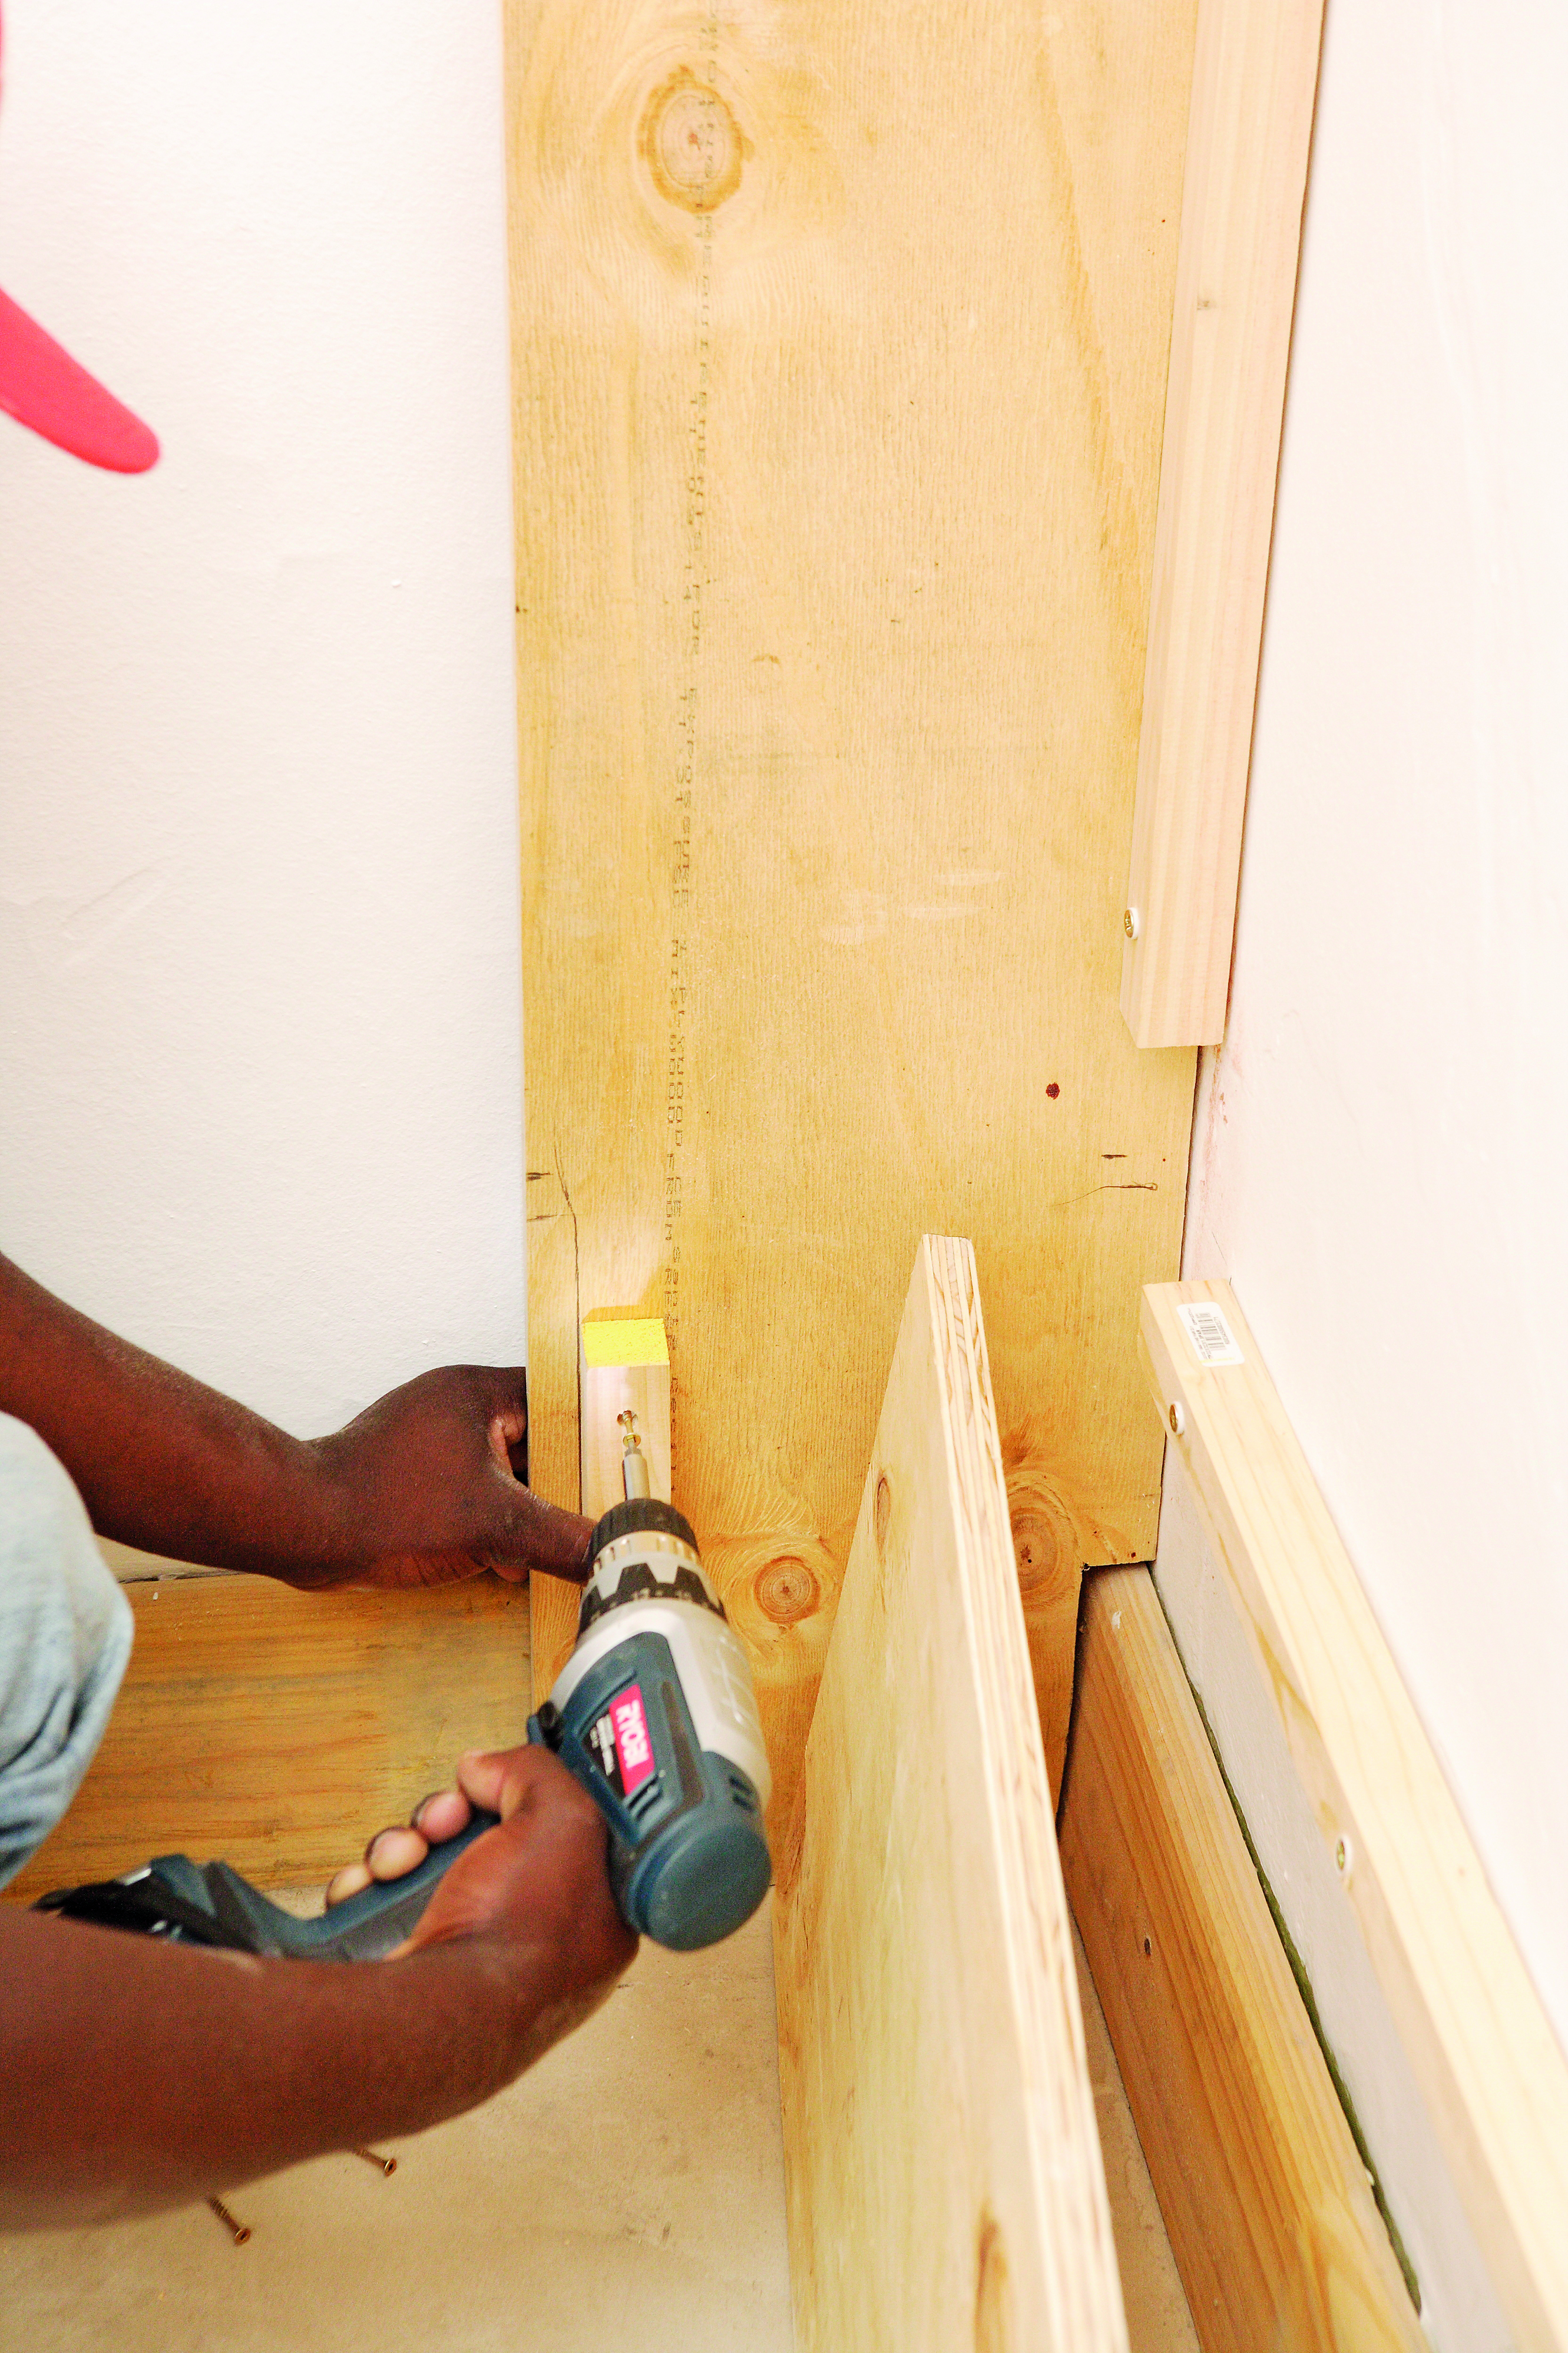
Step 14
Drill countersink holes about 3 cm from the short sides at both ends of all the P9s, evenly spaced and with the two P9s on the outside flush with the edges of P1. Secure the P9s to P1 from the outside as well in inside with screws.
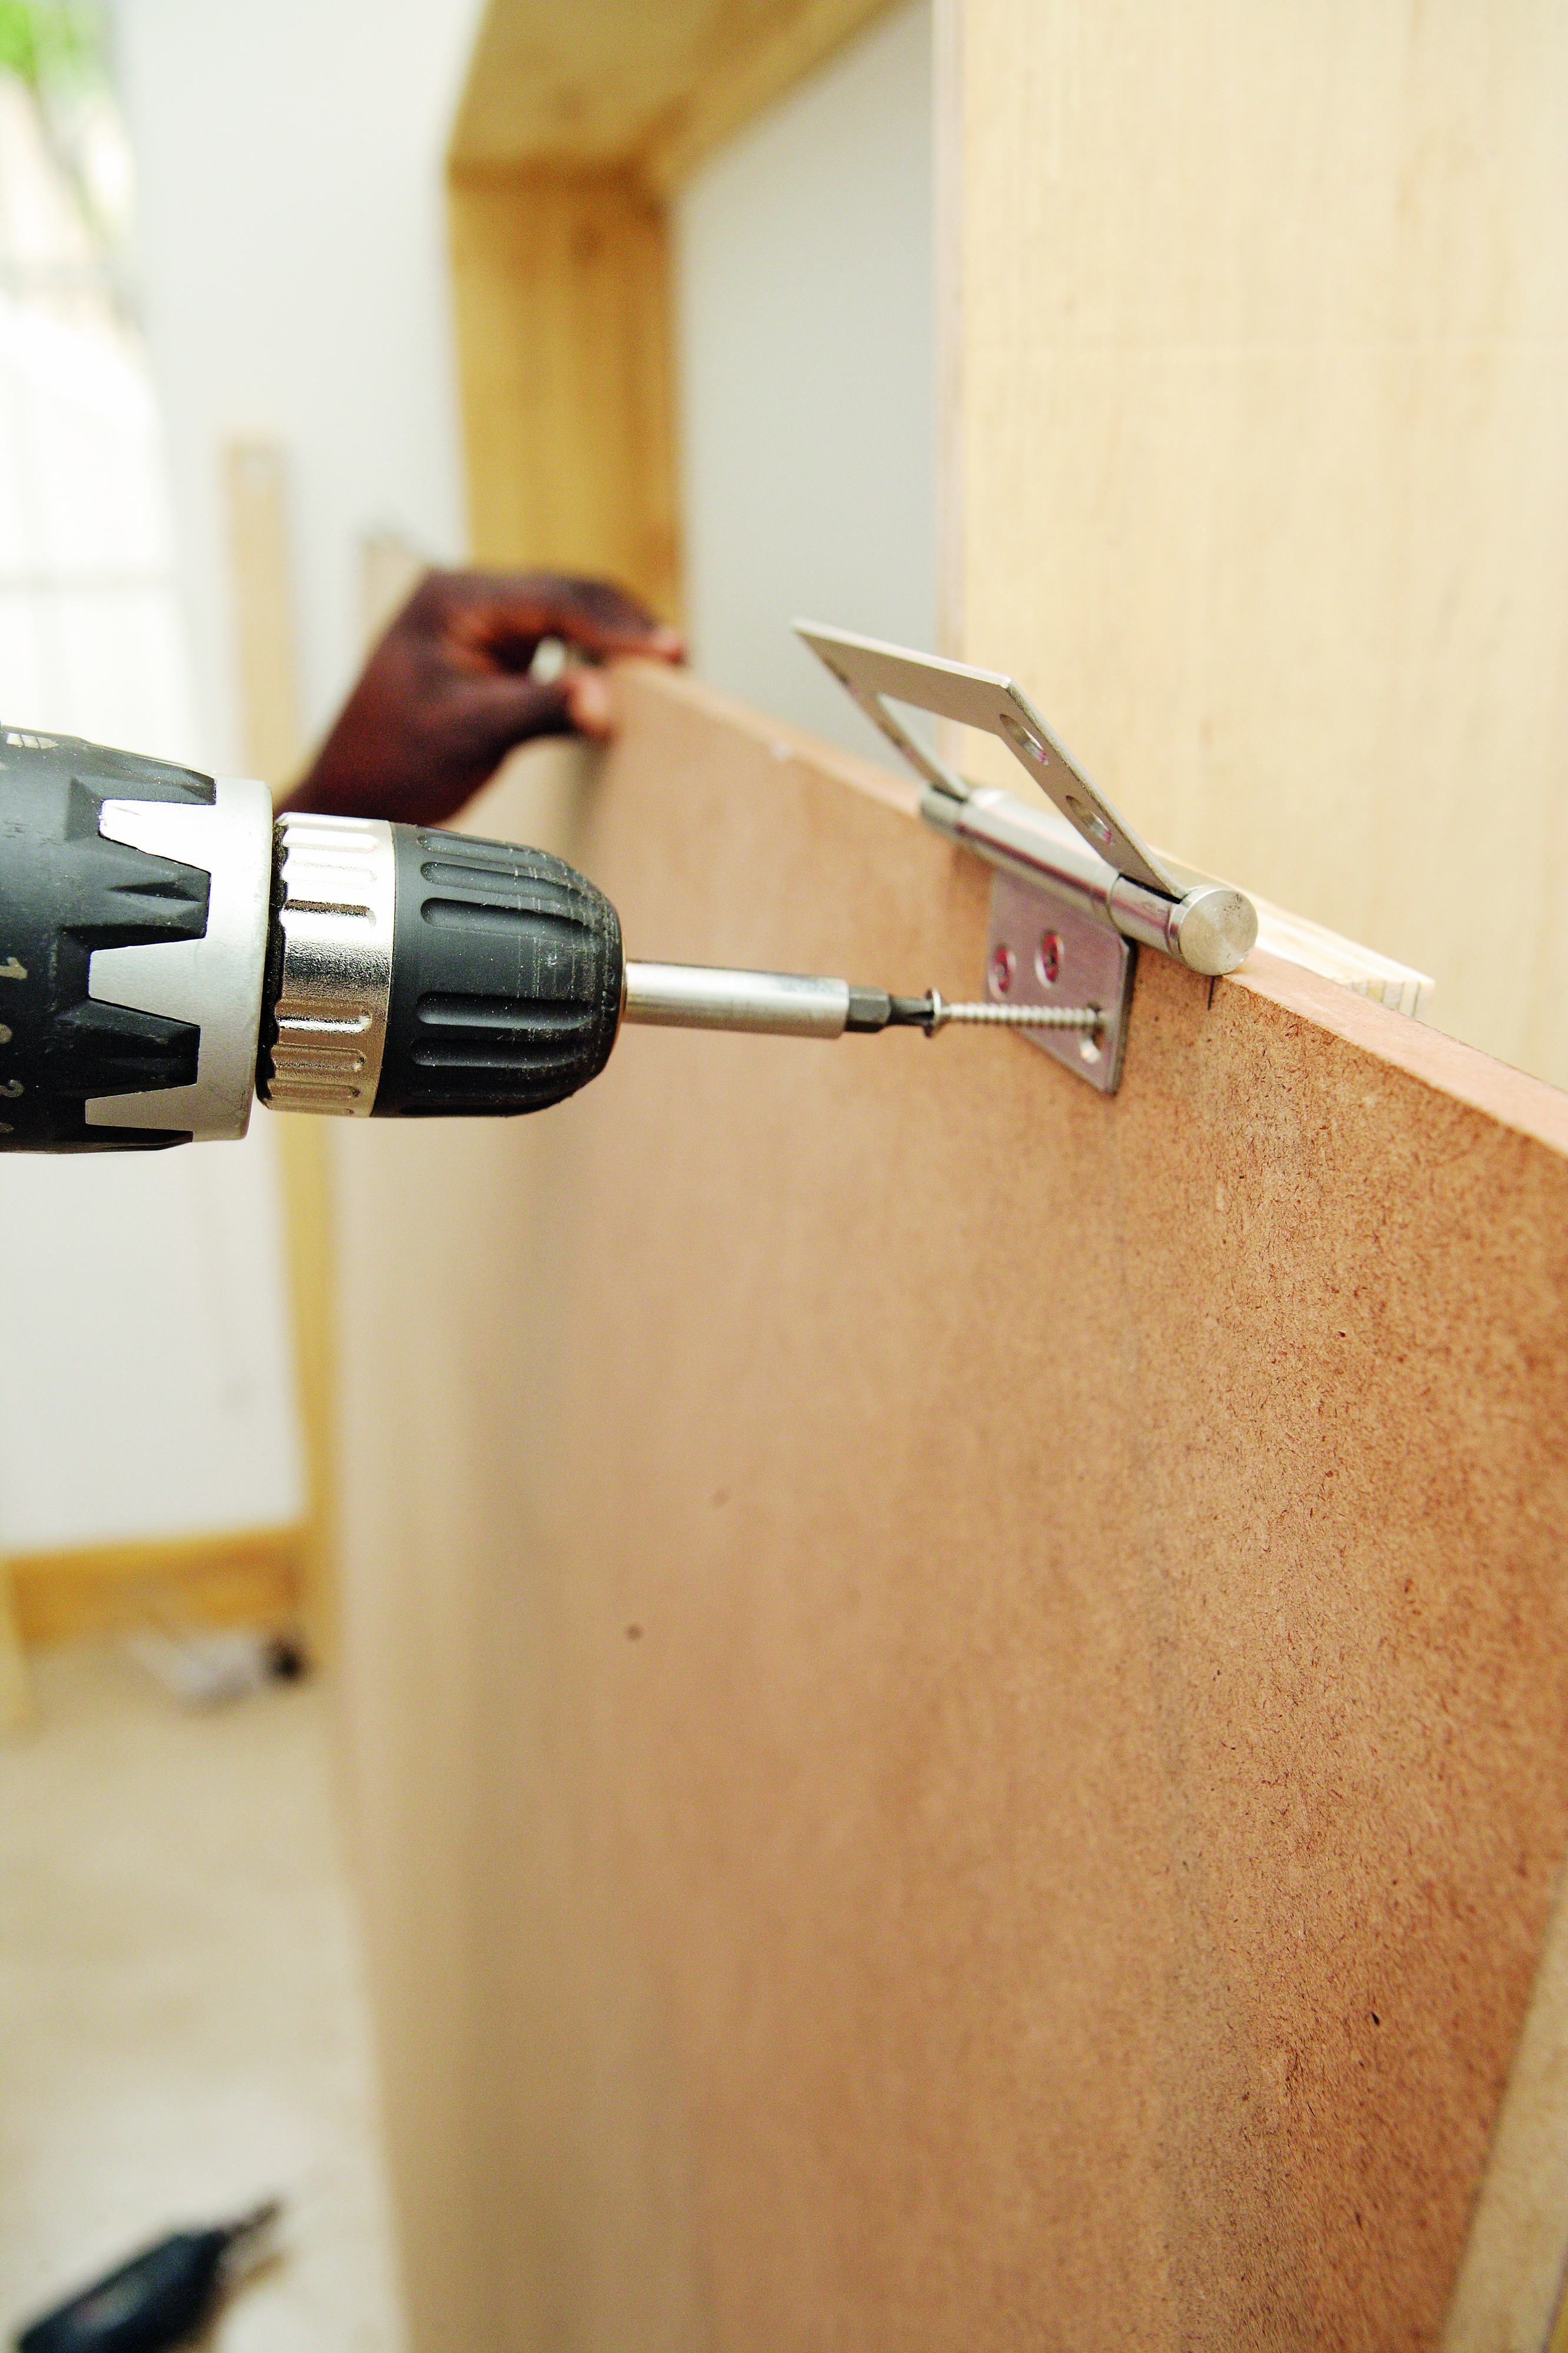
Step 15
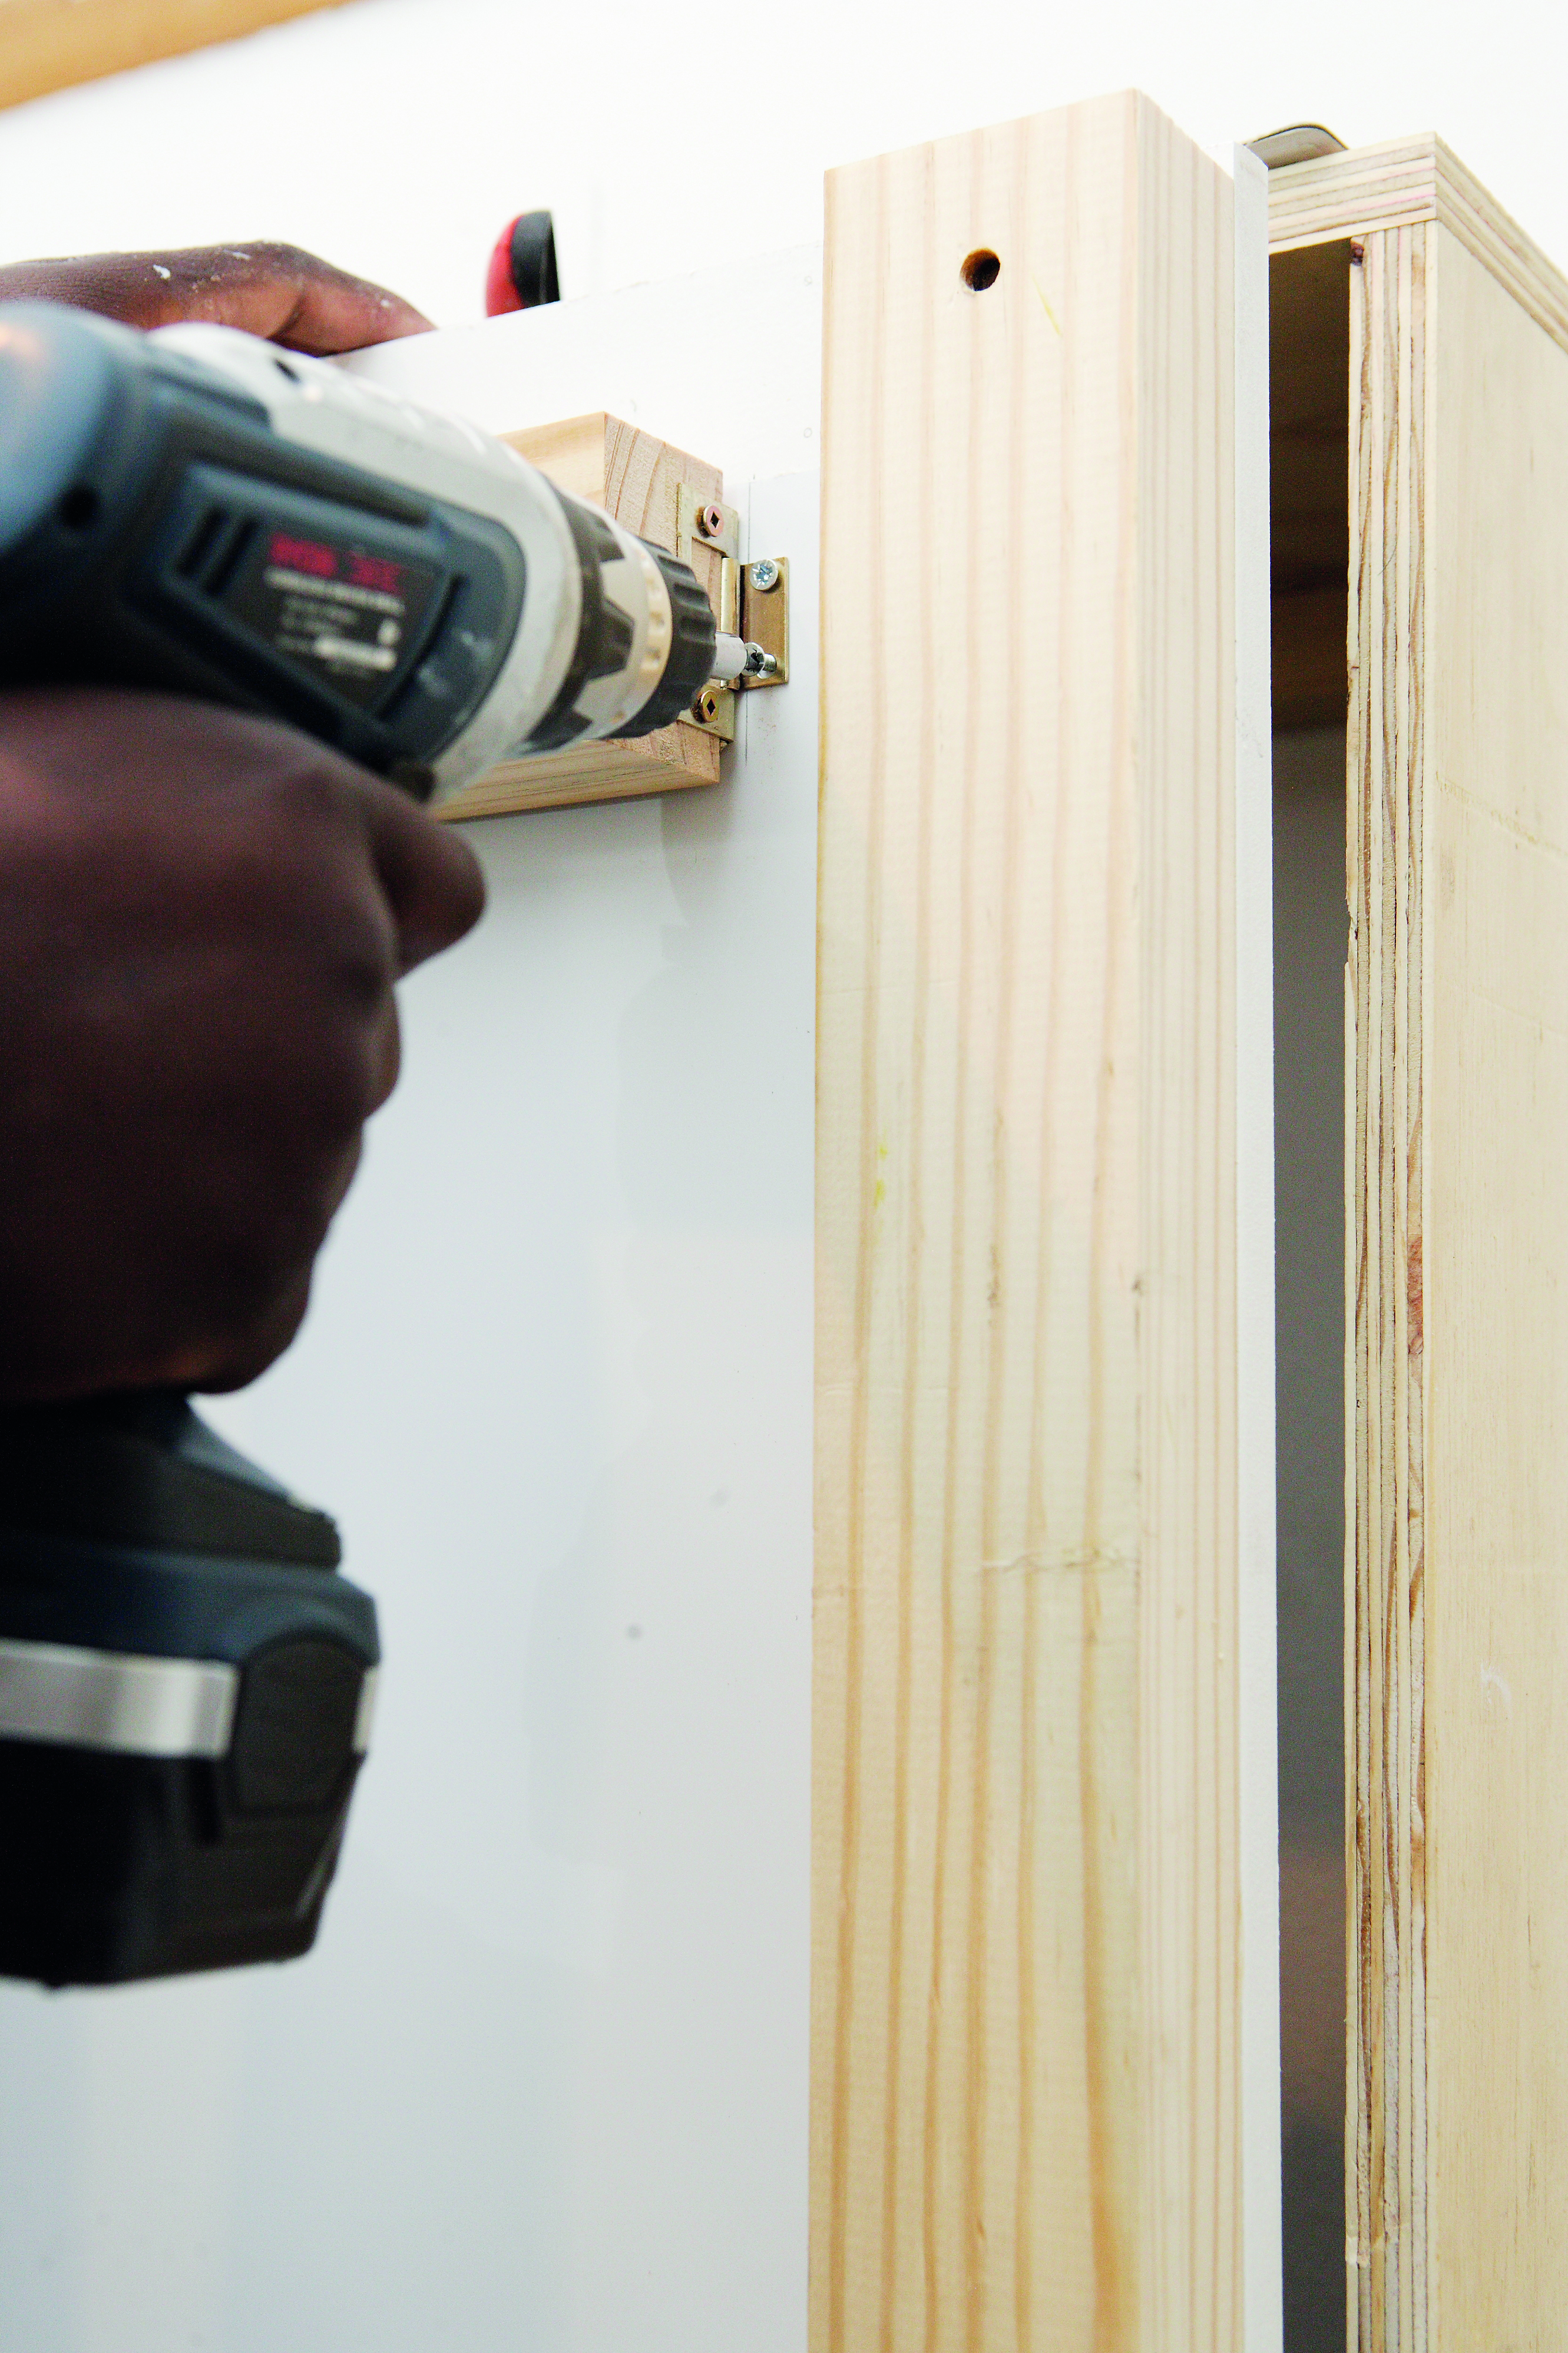
Attach a flash hinge (50 mm) to the ends of each P10 (the legs).
Step 16
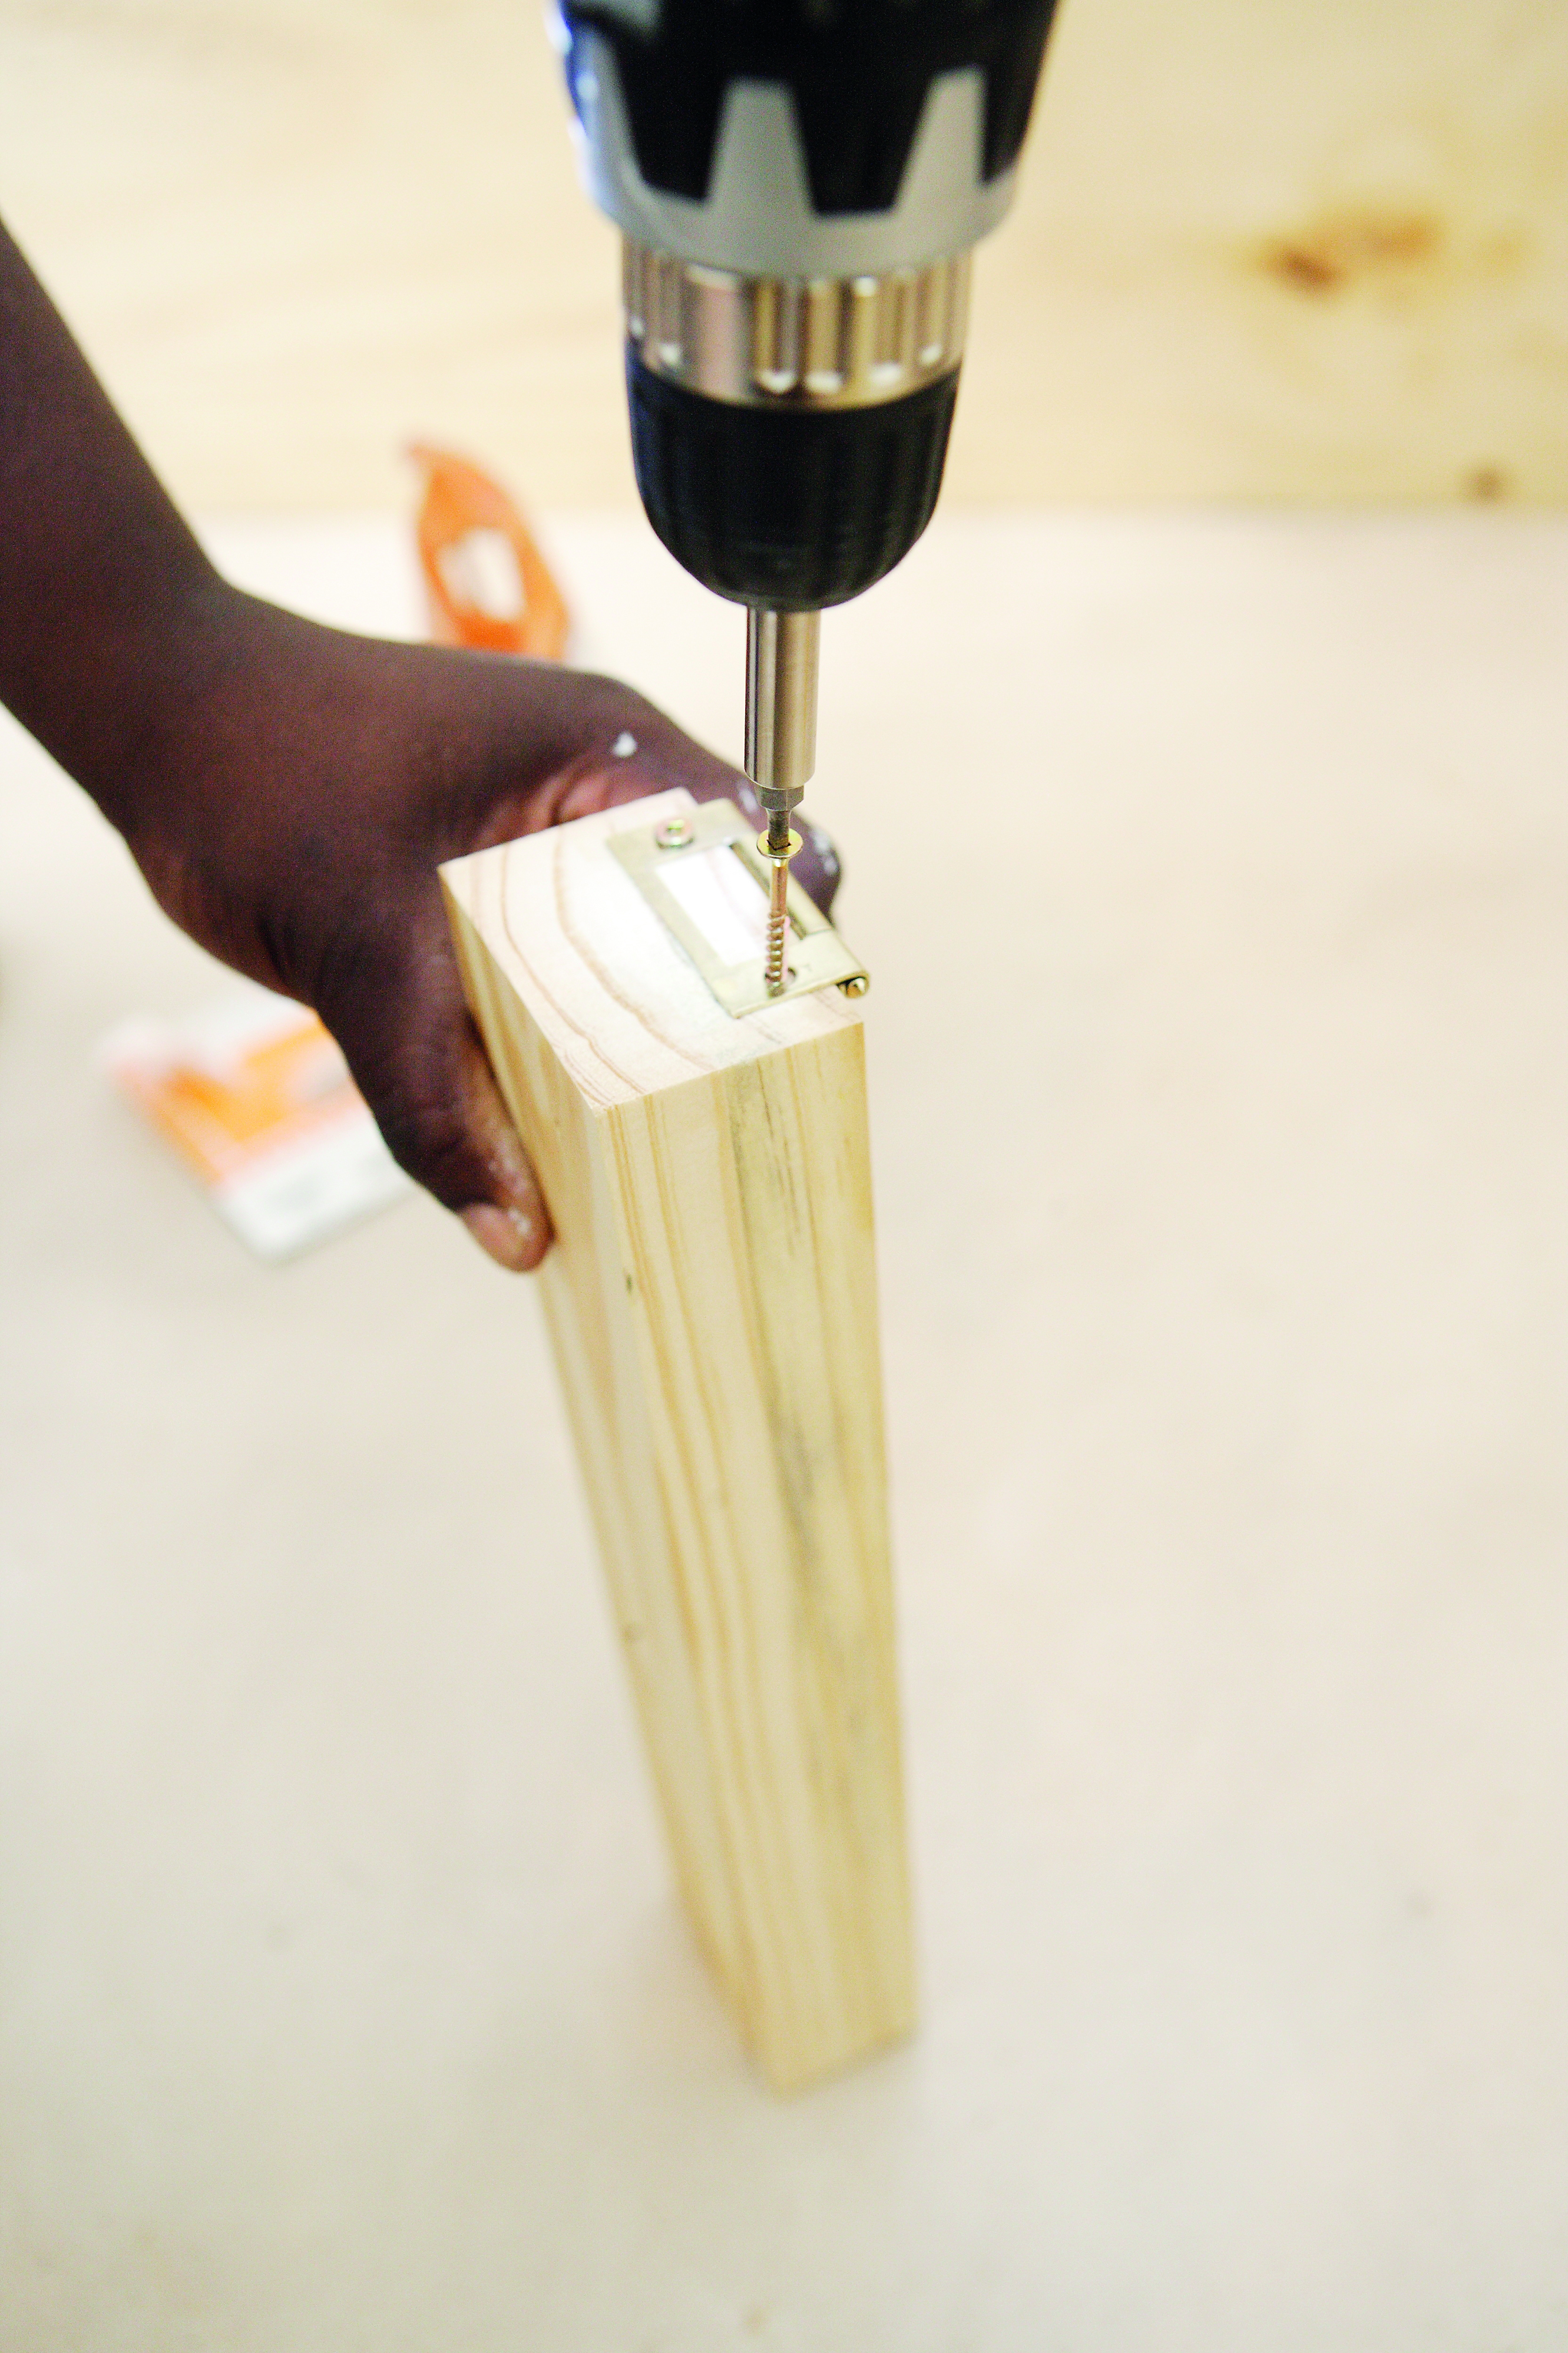
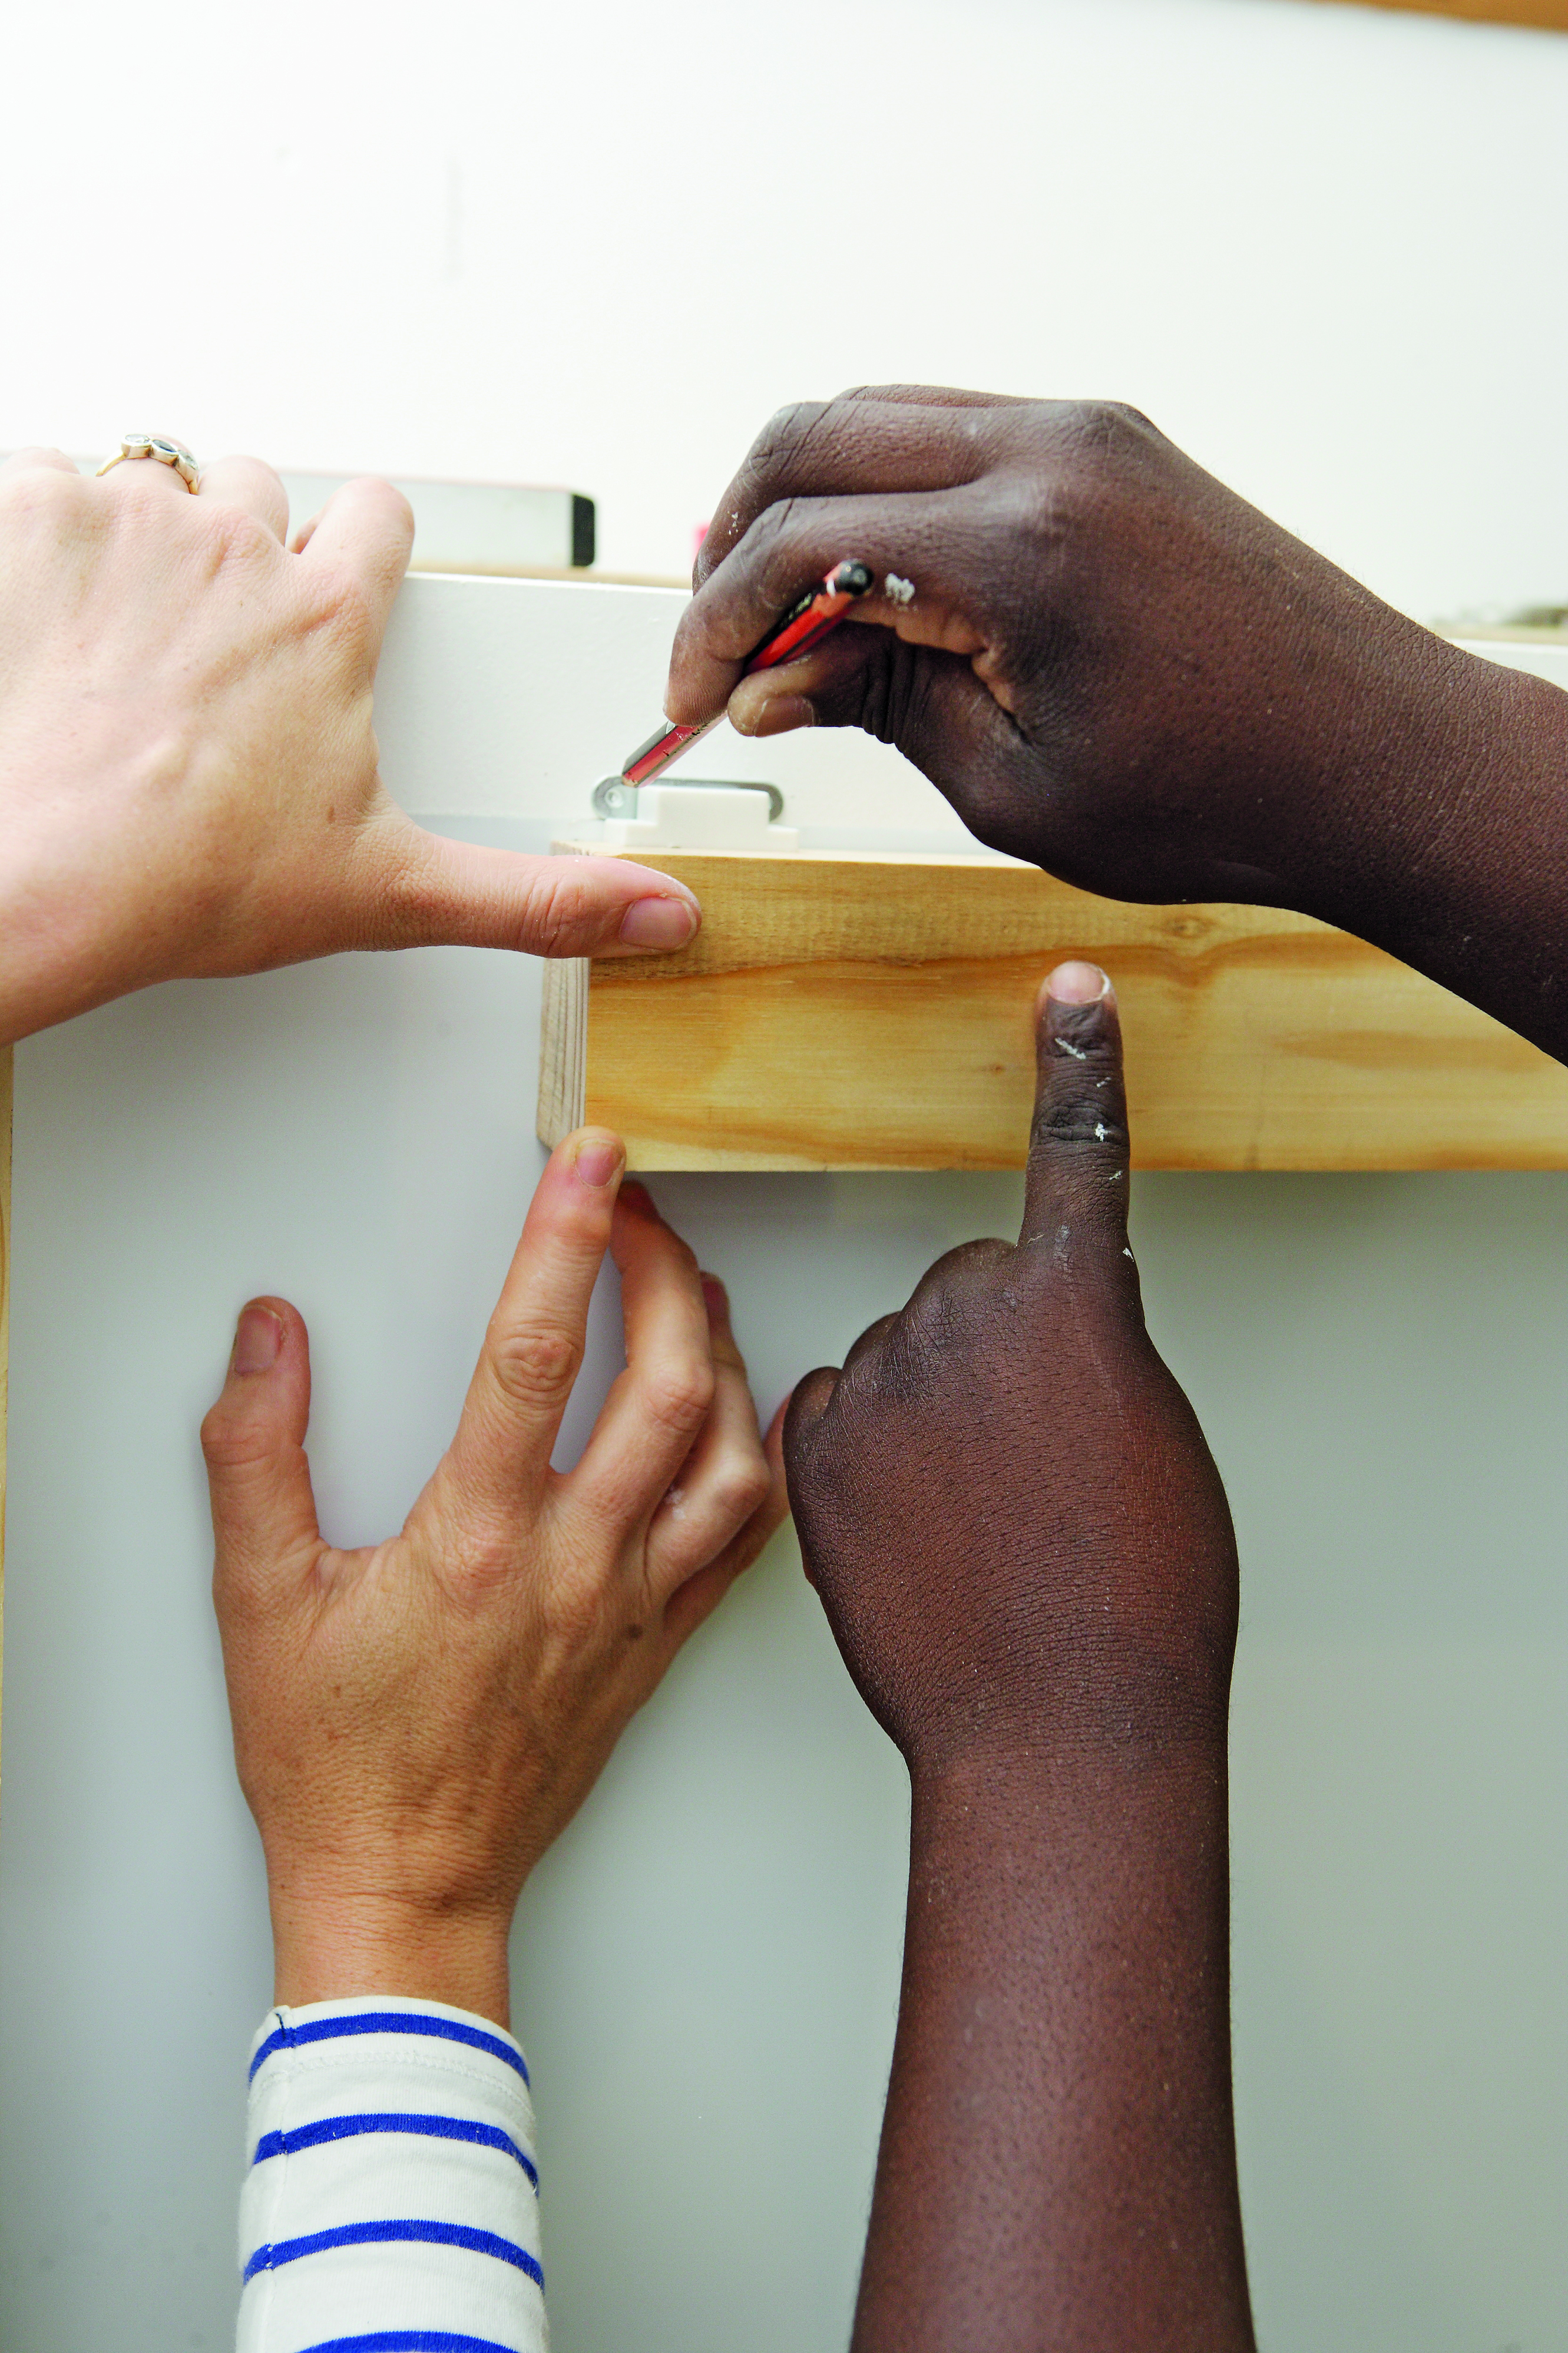
Position a leg (P10) in place as well as a barrel bolt, and mark where the barrel bolt will go into the leg in an upright position. Use the 10 mm drill bit to drill a hole for the barrel bolt, and attach the cover plate over the hole.
Step 17
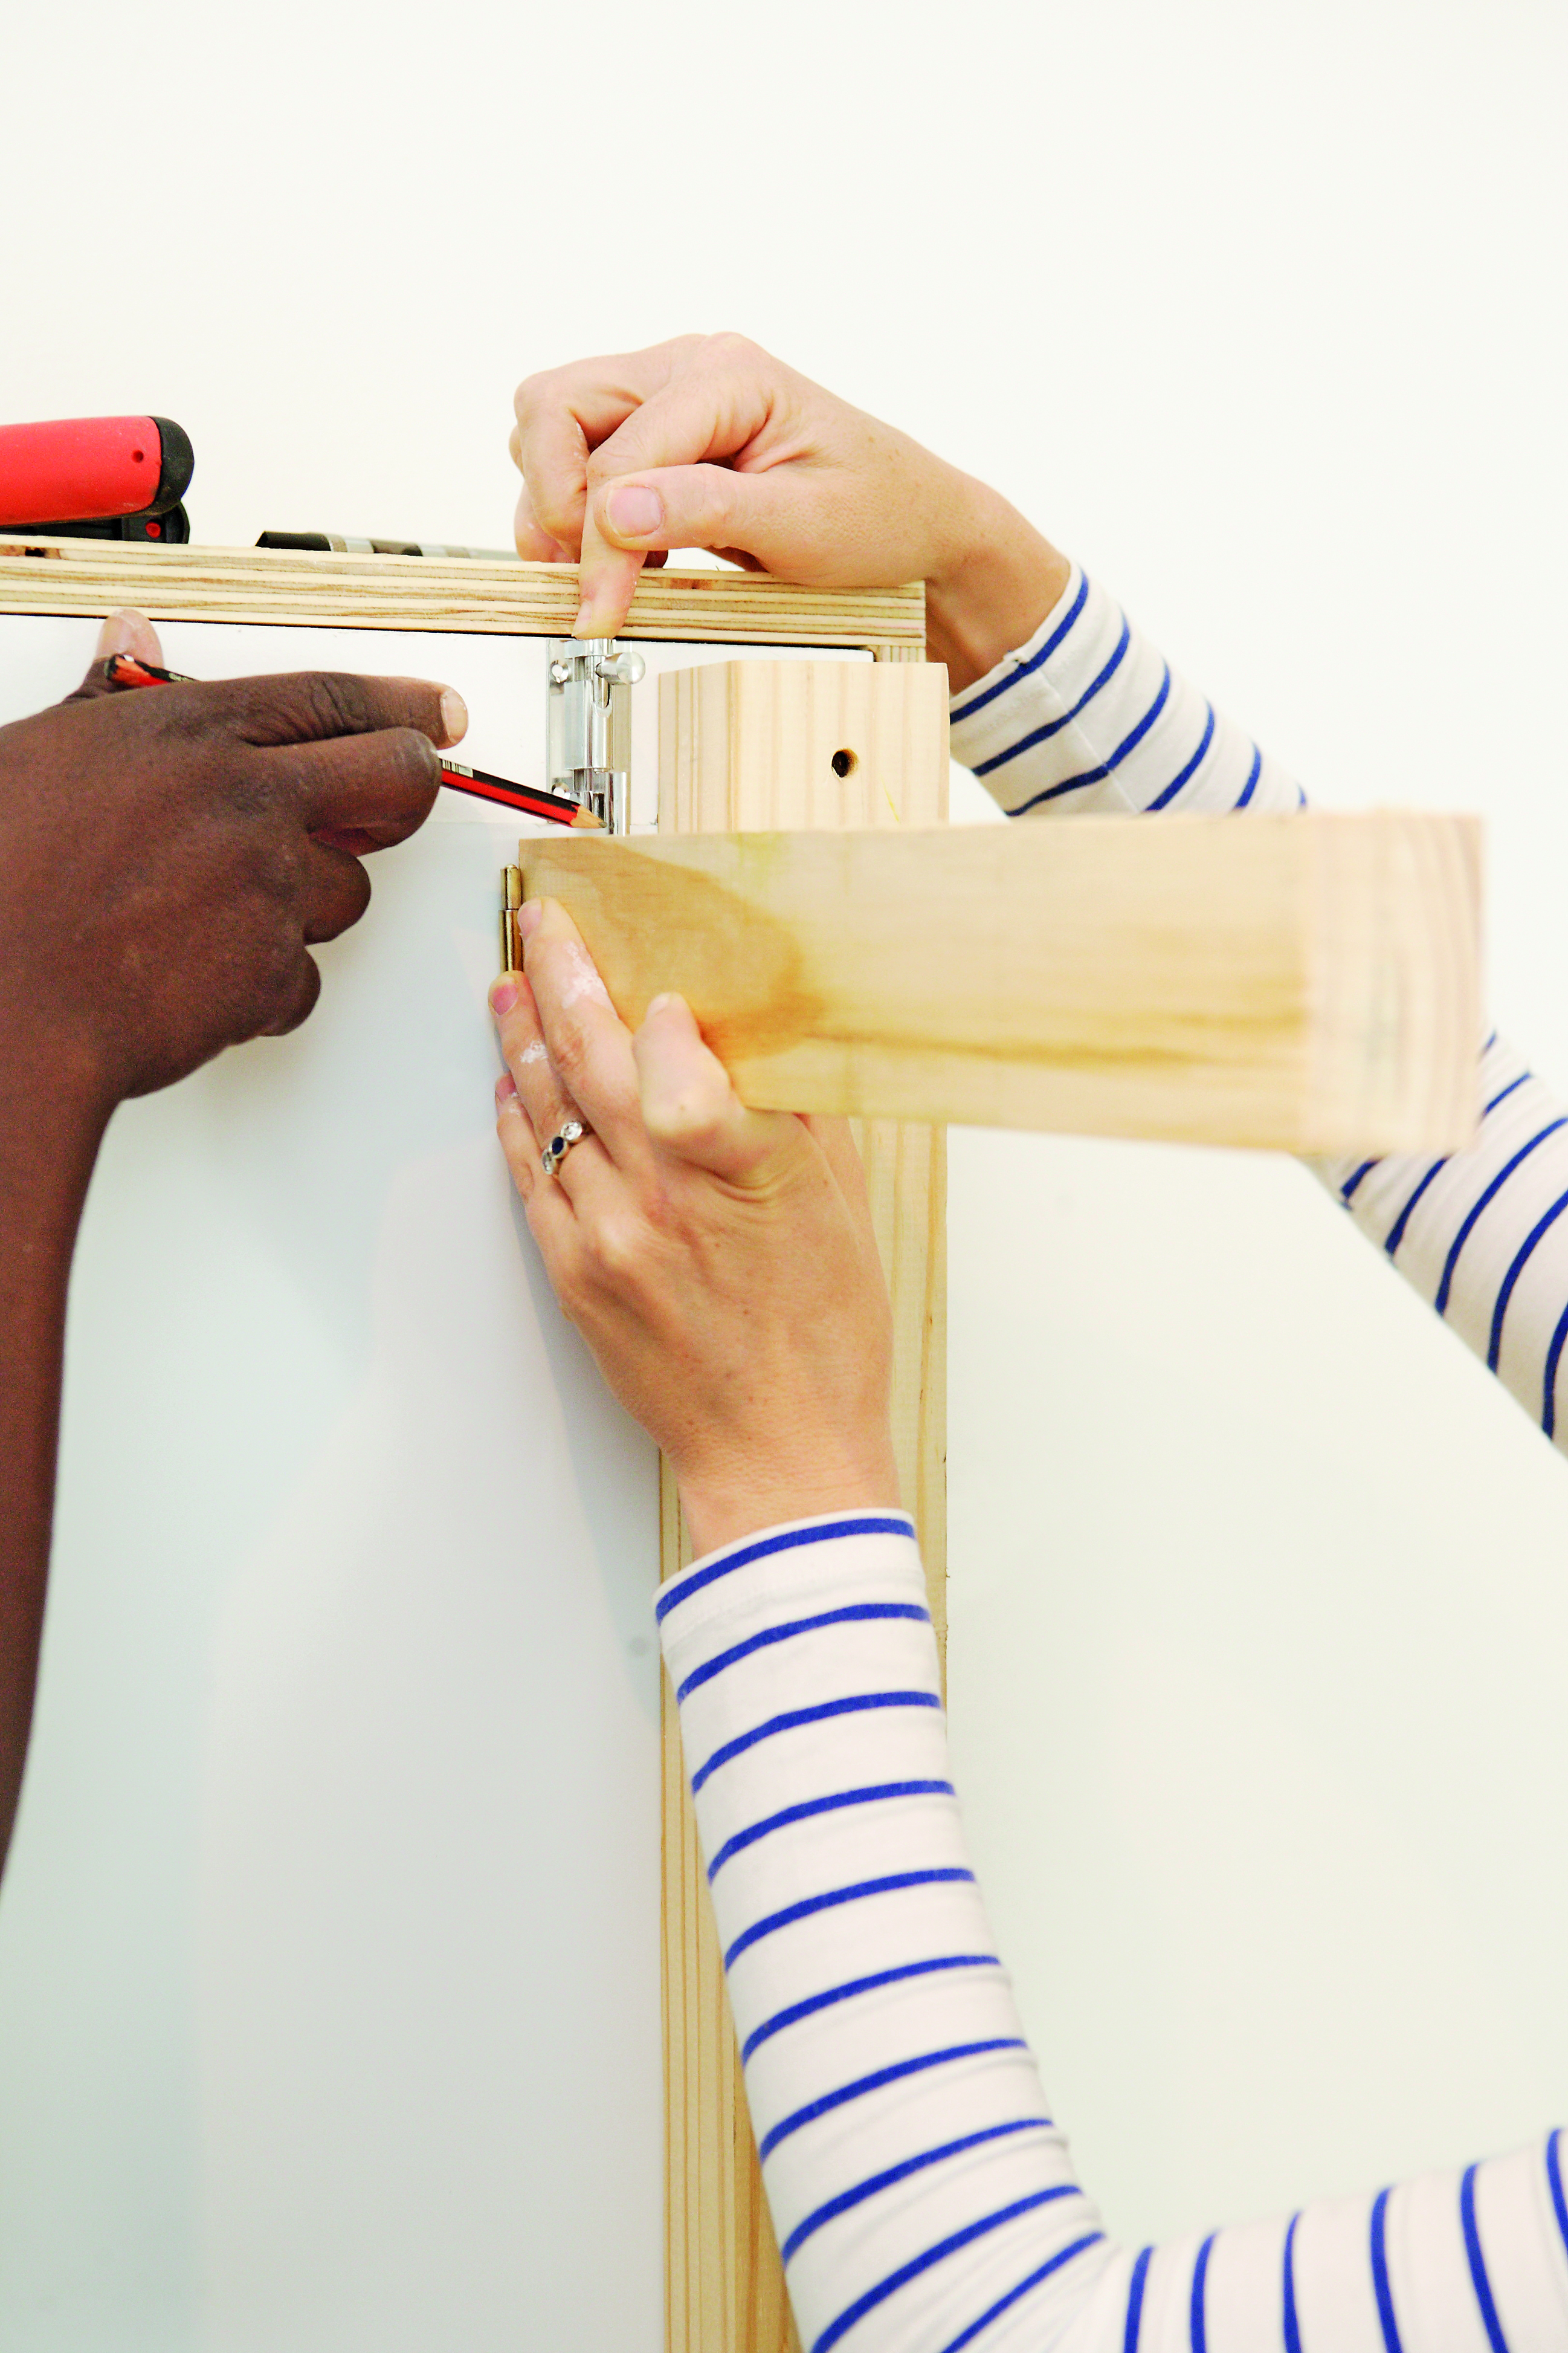
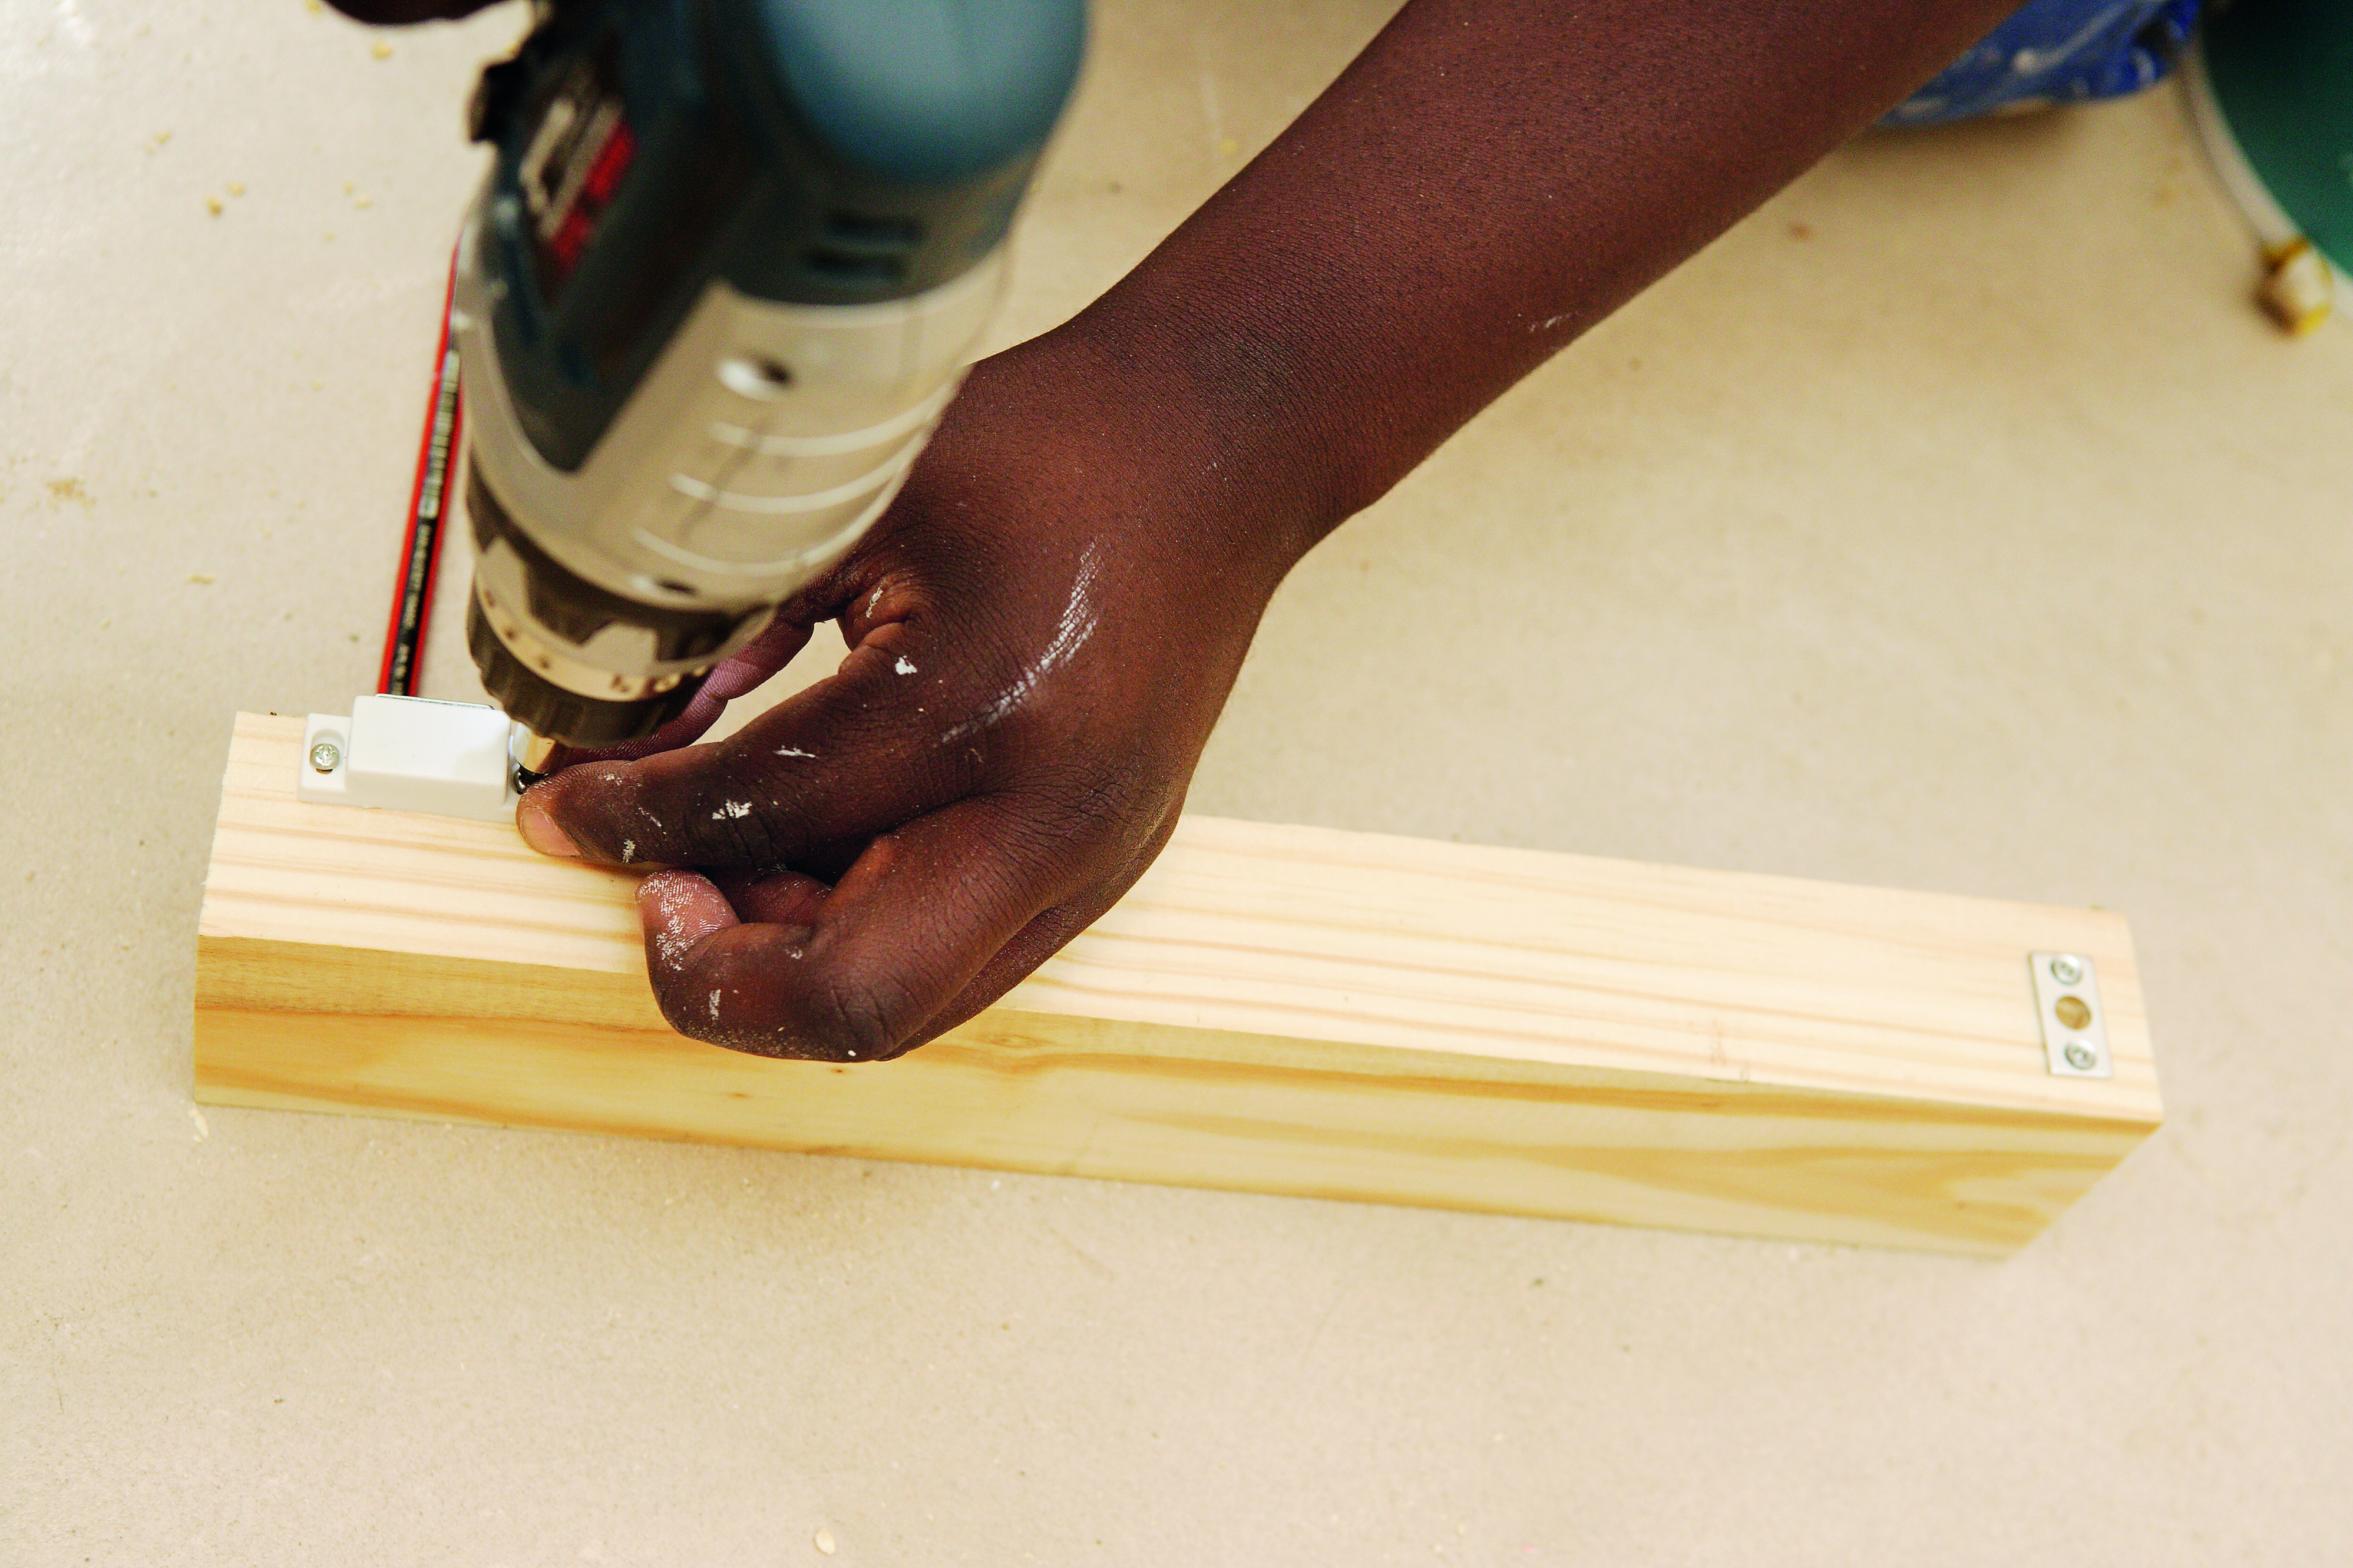
Attach the magnetic catch about 1 cm from the base of the leg on the edge that will be flush with the bed base.
Step 18
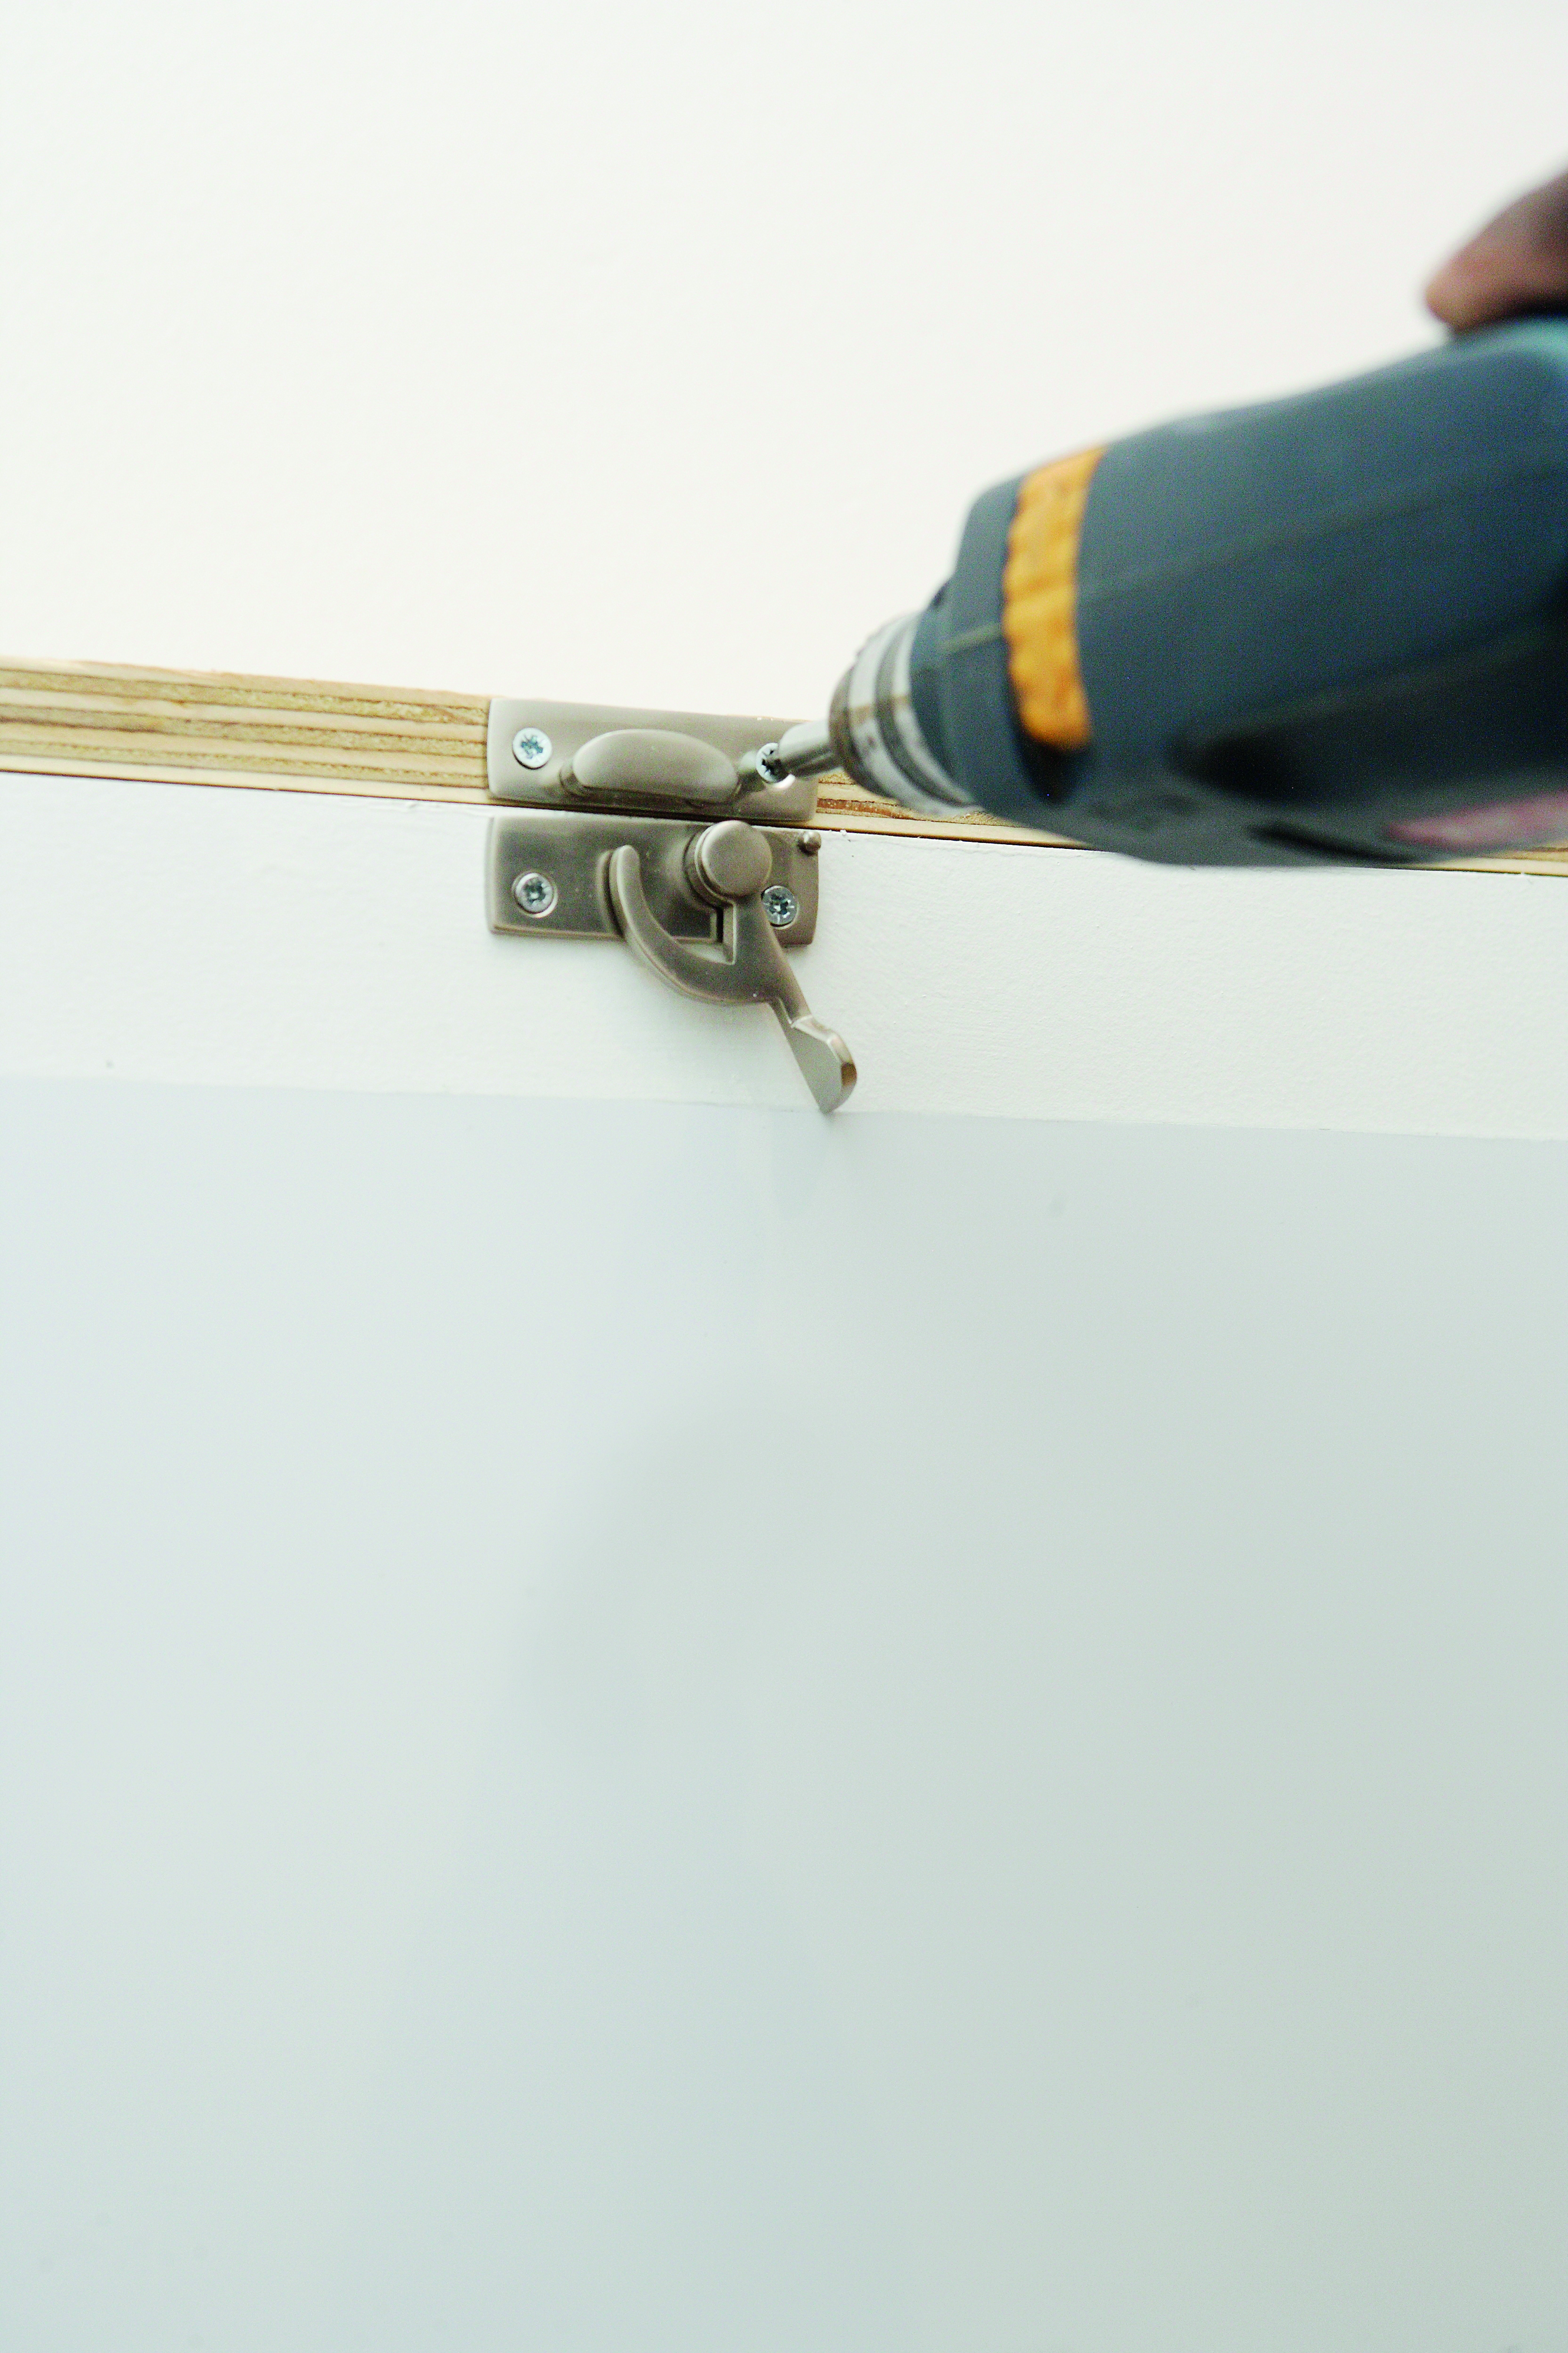
Position the leg in a flat position and mark the holes in the hinge. Drill pilot holes with the metal bit and attach the hinges with screws.
Step 19
Place the barrel bolt in position and secure with screws. (You will use the barrel bolts to secure the legs in an upright position when the bed is down.)
Step 20
Position the metal plate of the magnetic catch in place and secure with screws. (The magnetic catches will keep the legs in a folded-up position when the bed is folded away.) Repeat steps 17 to 21 with the remaining three legs.
Step 21
In the centre of the long edge of P1 and P3 attach the sash fastener. Varnish the woodwork on the bed base.
Step 22
Paint the woodwork with two coats of varnish, letting it dry between coats.
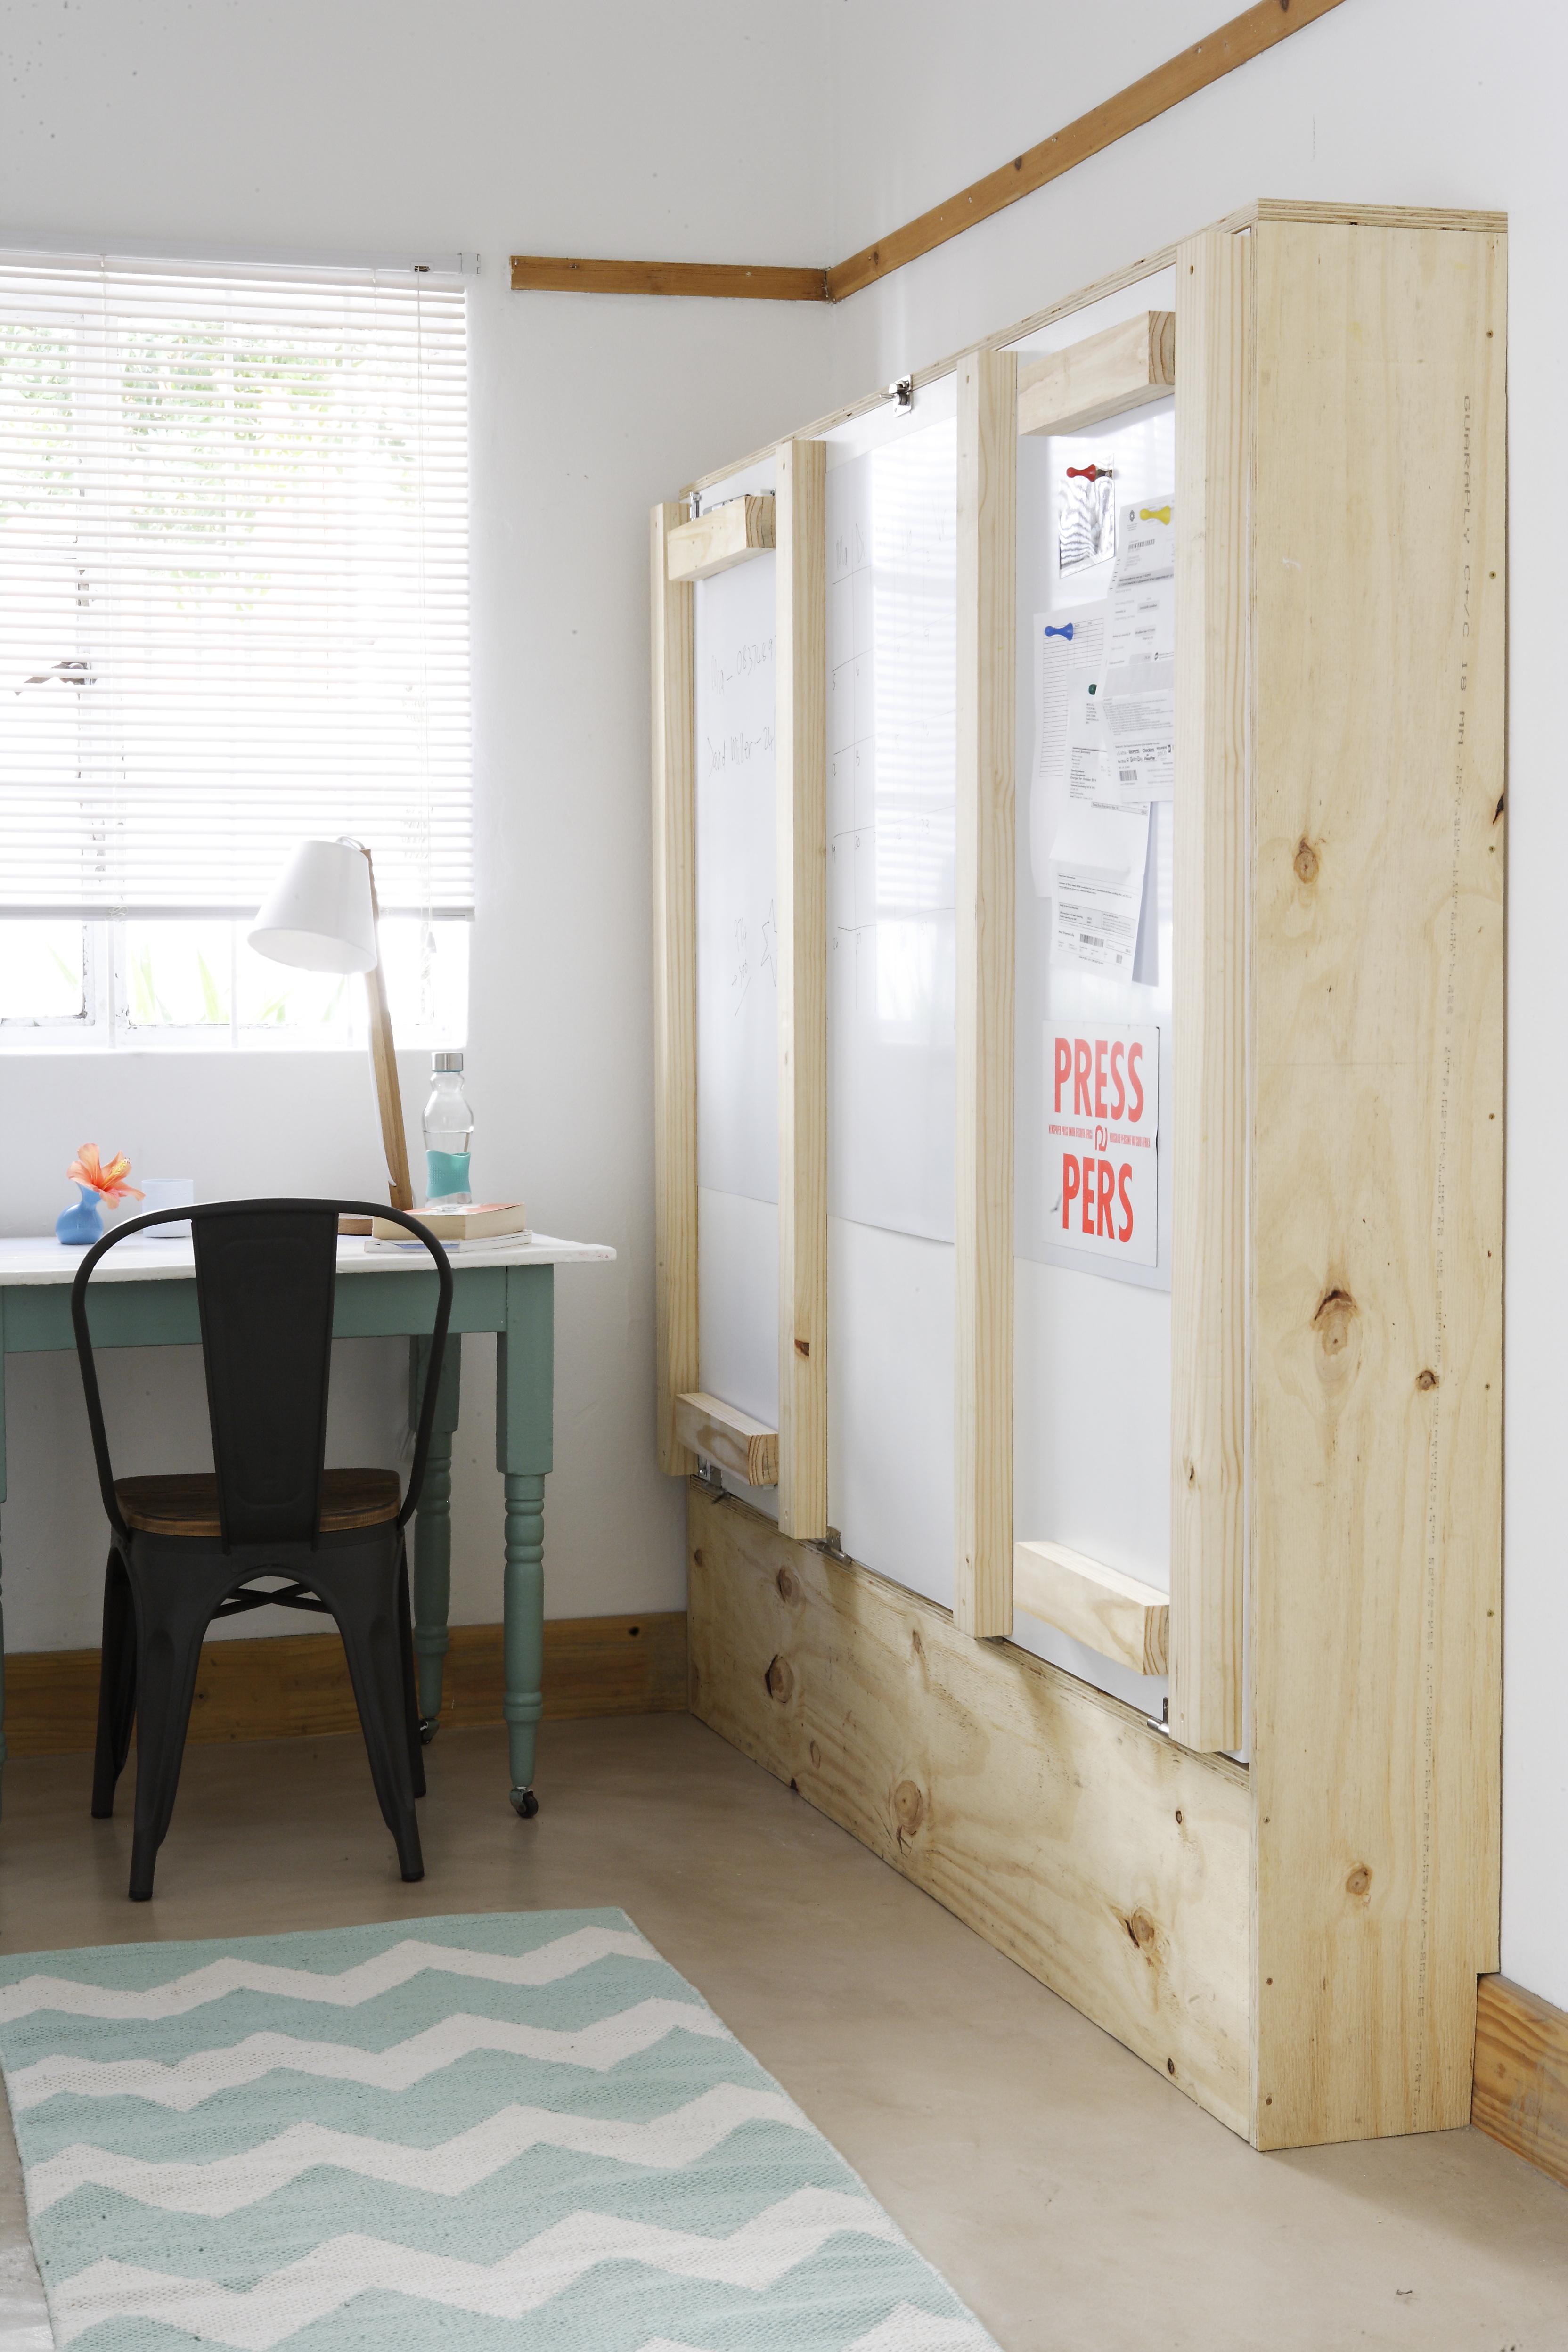
Multi-Use Room
Fold up the bed and use the room as a home office. Move in a desk and make notes on the whiteboard.
Credits
Referenced from Gallo images / YOU Magazine
Browse 1000’s of products available to you. Select your country to Shop Online.


