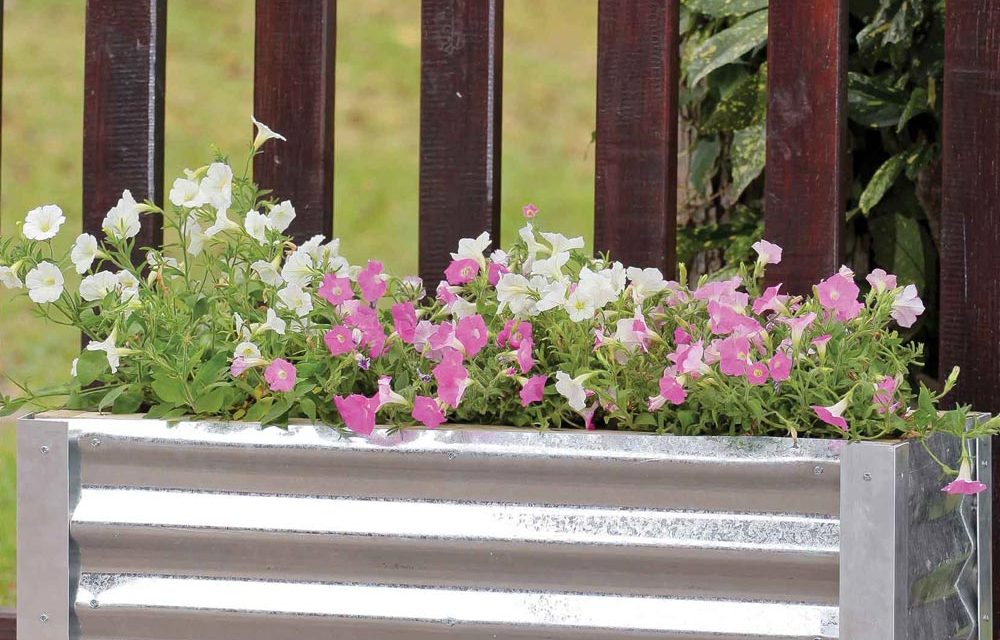
In this DIY, we show you how to make this easy garden planter with a few leftover roofing materials. It’s so simple!
- 20 x cut screws (75 mm x 6 mm)
- 54 x self-tapping screws (3.5 mm x 20 mm)
- 8 x cut screws (50 mm x 4 mm)
- Carpenter’s saw or jigsaw
- tape measure
- pencil
- combination square
- cordless drill and drill bits (3 mm steel drill bit and 5 mm steel drill bit).
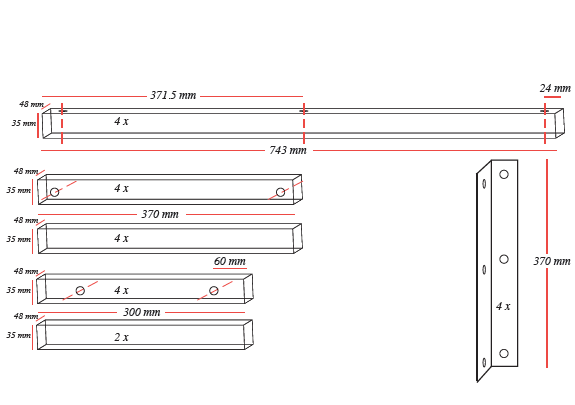
Cutting list
- 4 x 370 mm x 48 mm x 35 mm CCA-treated pine
- 4 x 245 mm x 48 mm x 35 mm CCA-treated pine
- 4 x 743 mm x 48 mm x 35 mm CCA-treated pine
- 6 x 300 mm x 48 mm x 35 mm CCA-treated pine
- 2 x 800 mm x 370 mm corrugated iron
- 2 x 345 mm x 370 mm corrugated iron
- 4 x 370 mm x 50 mm x 50 mm aluminium angle
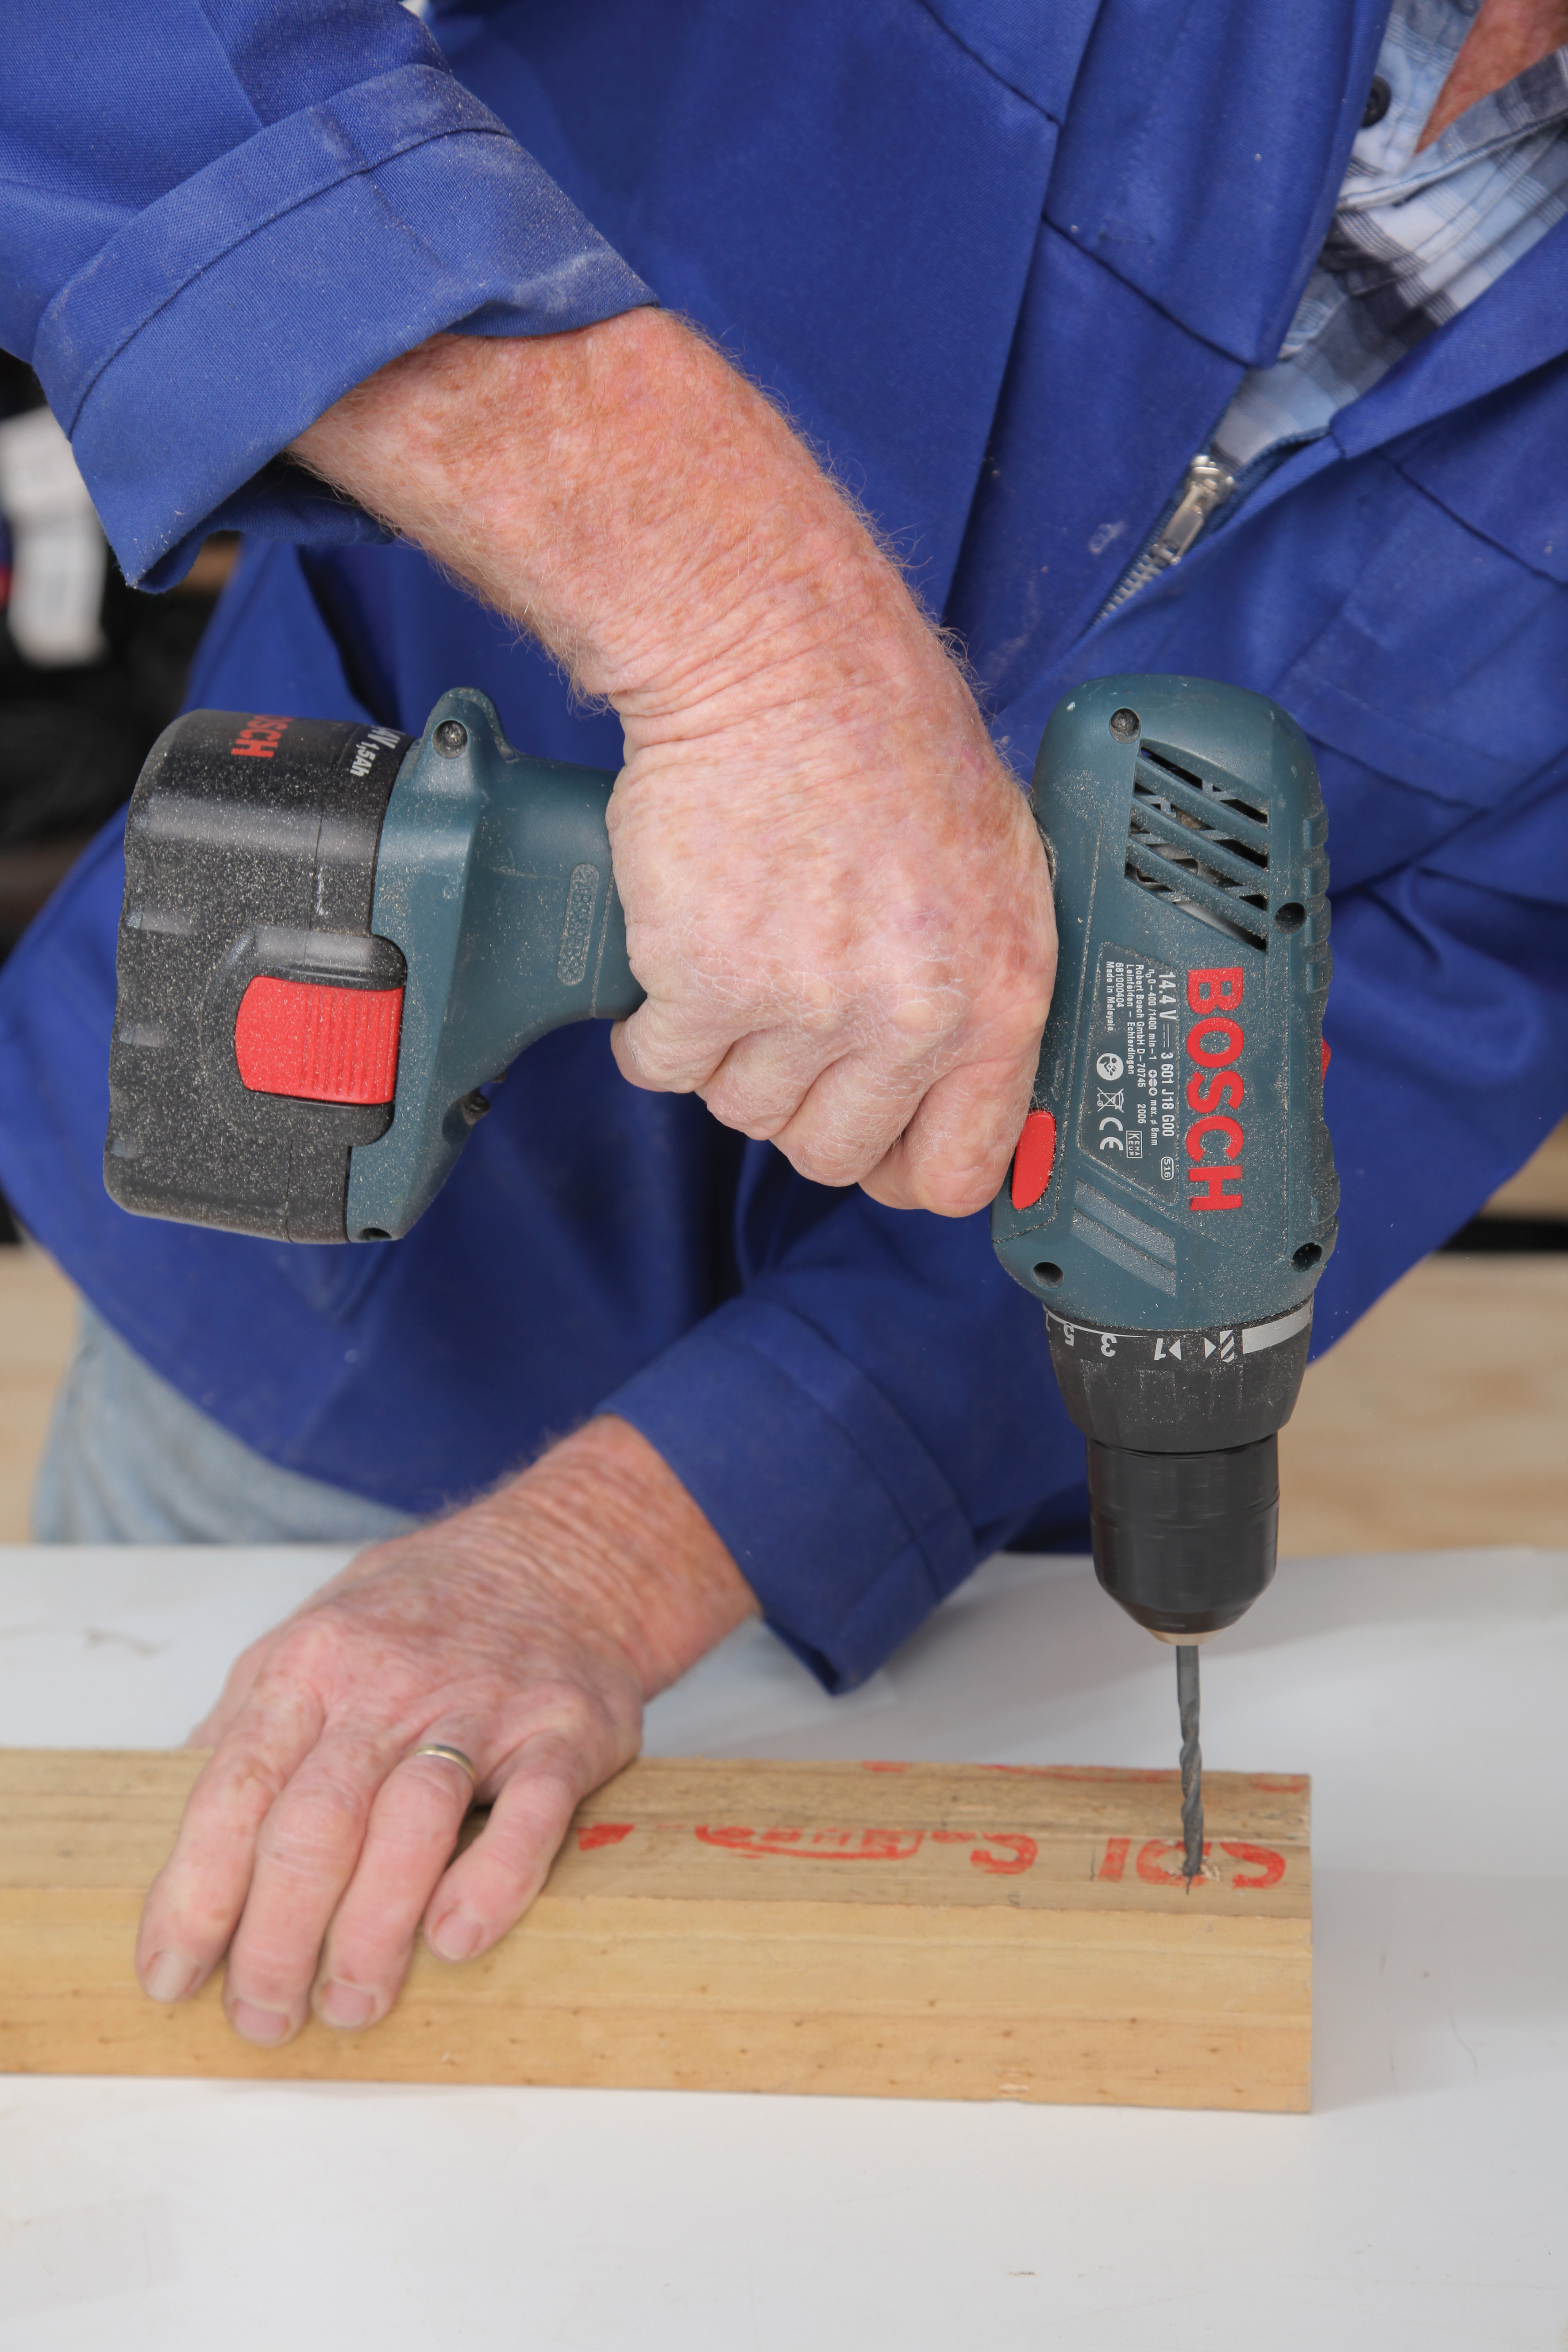
Step 1
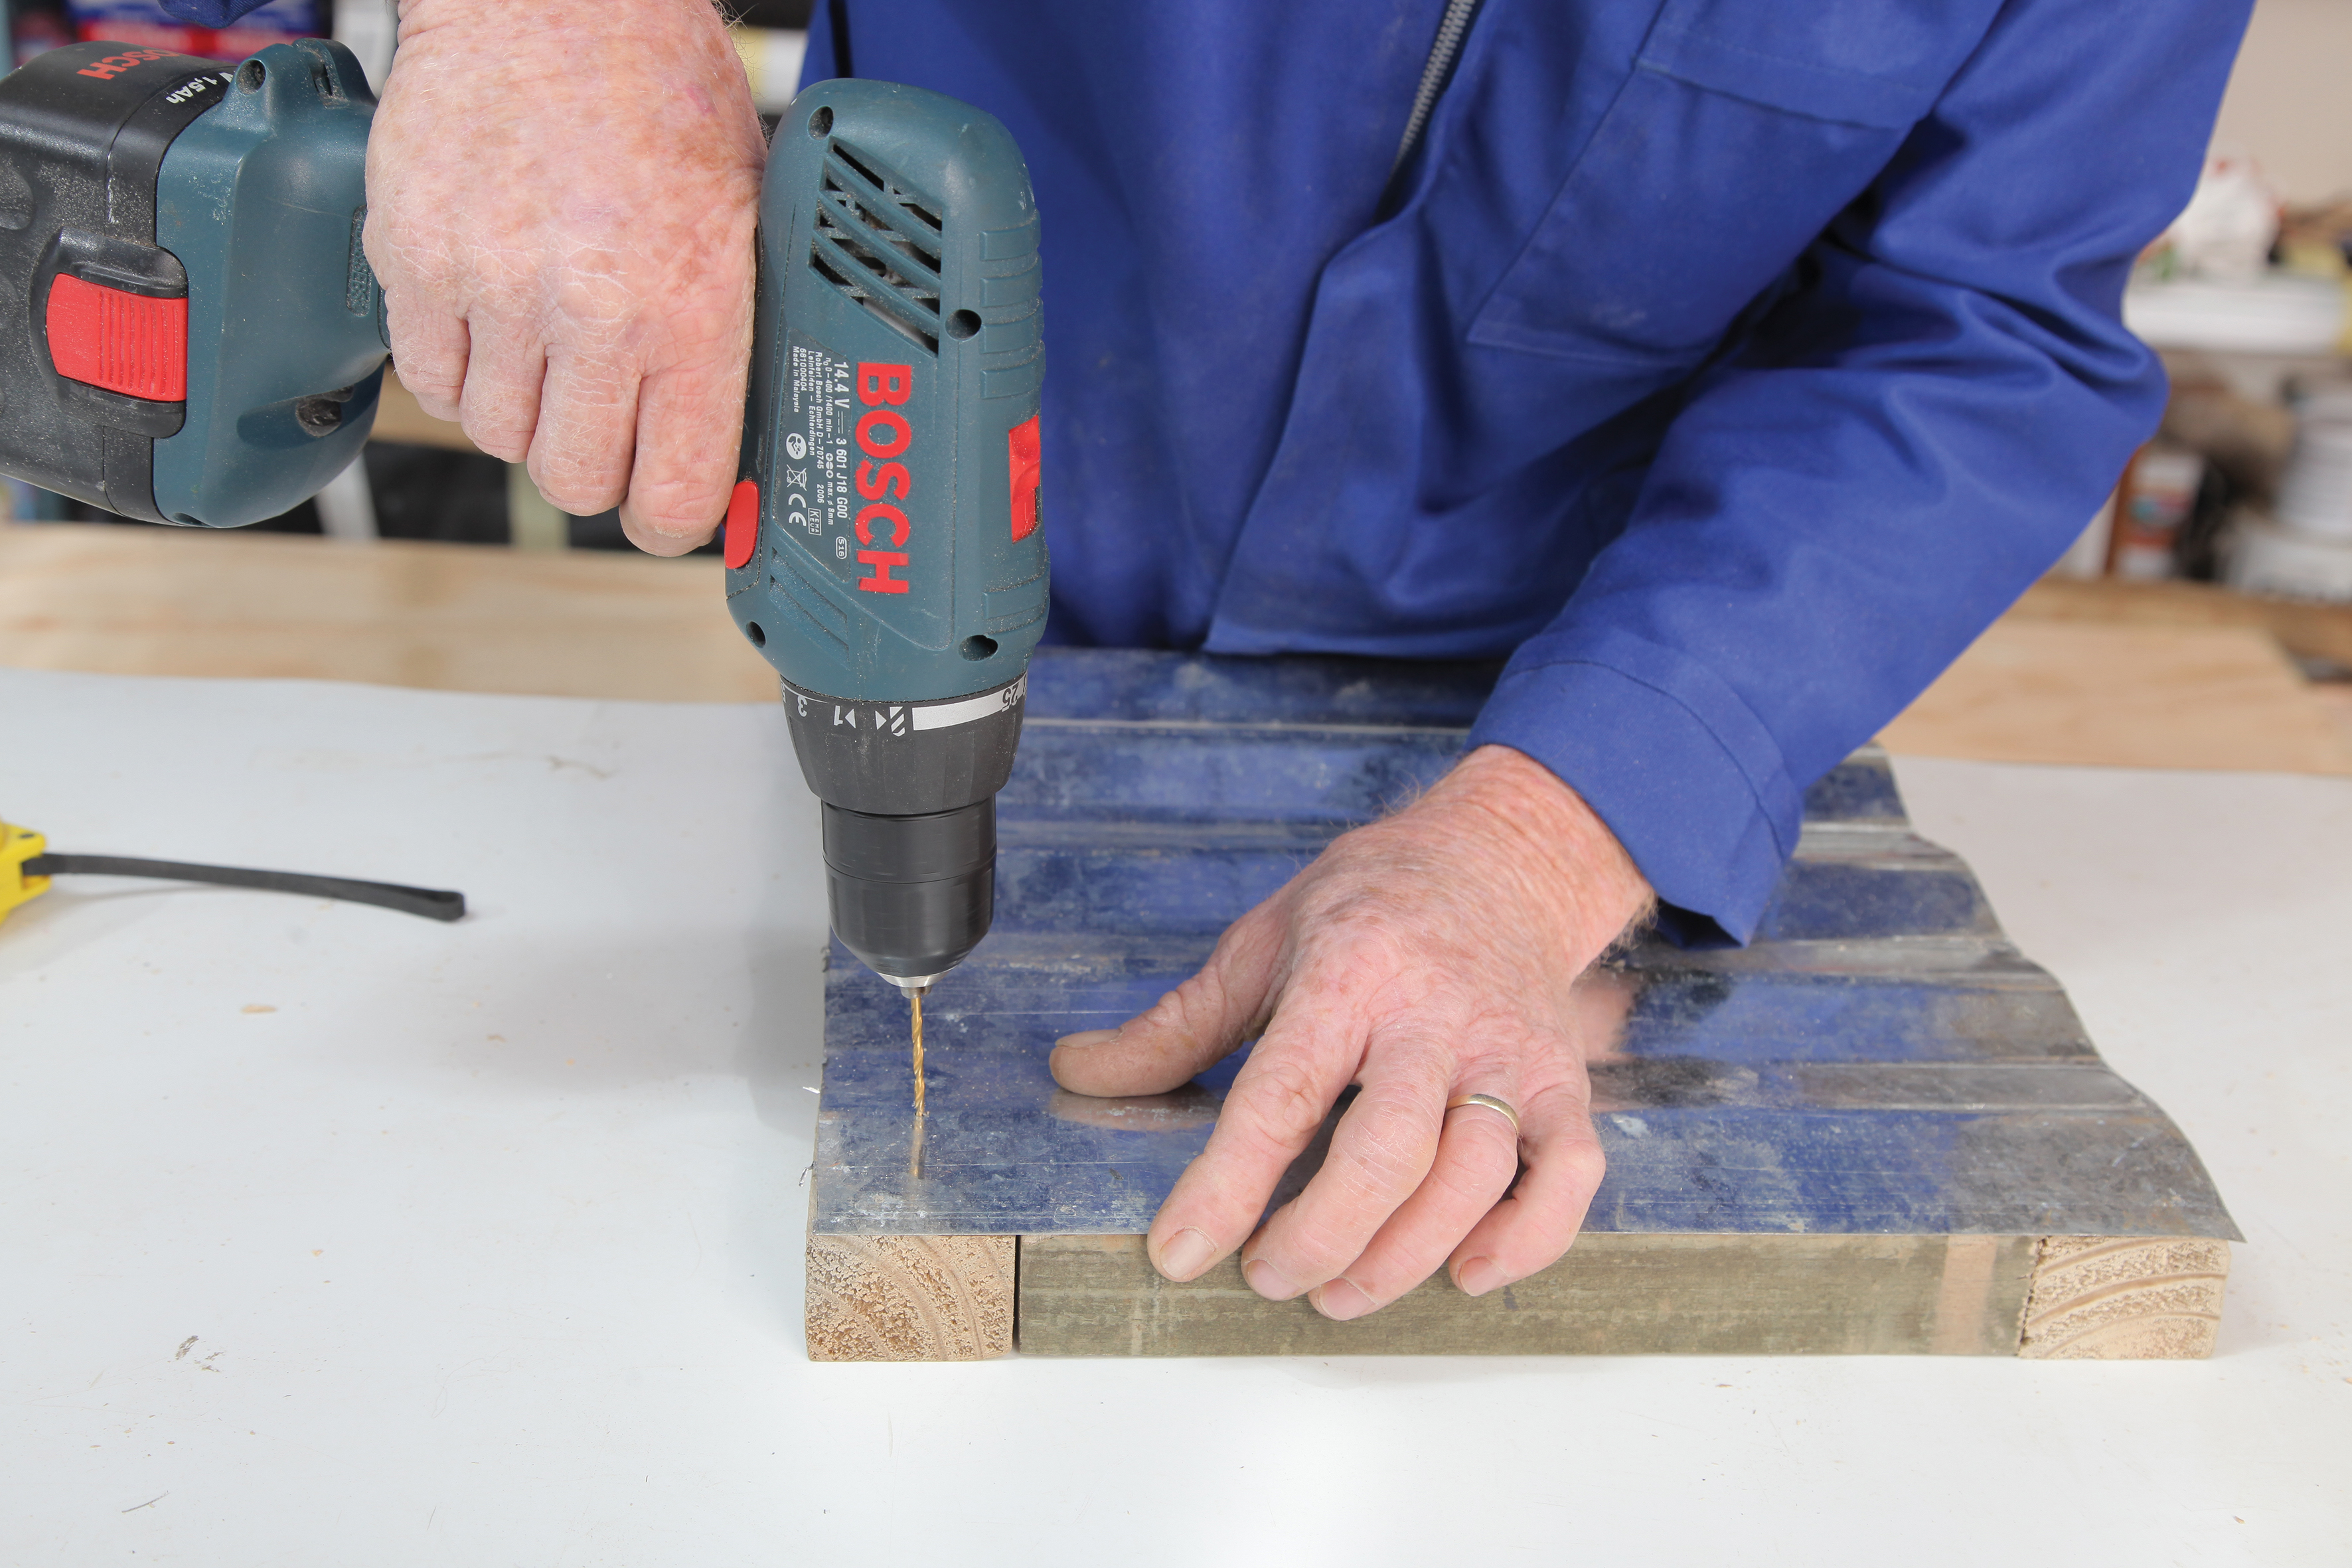
Prepare the pieces of pine, corrugated iron and aluminium angle for assembly by drilling all the holes as per the diagram.
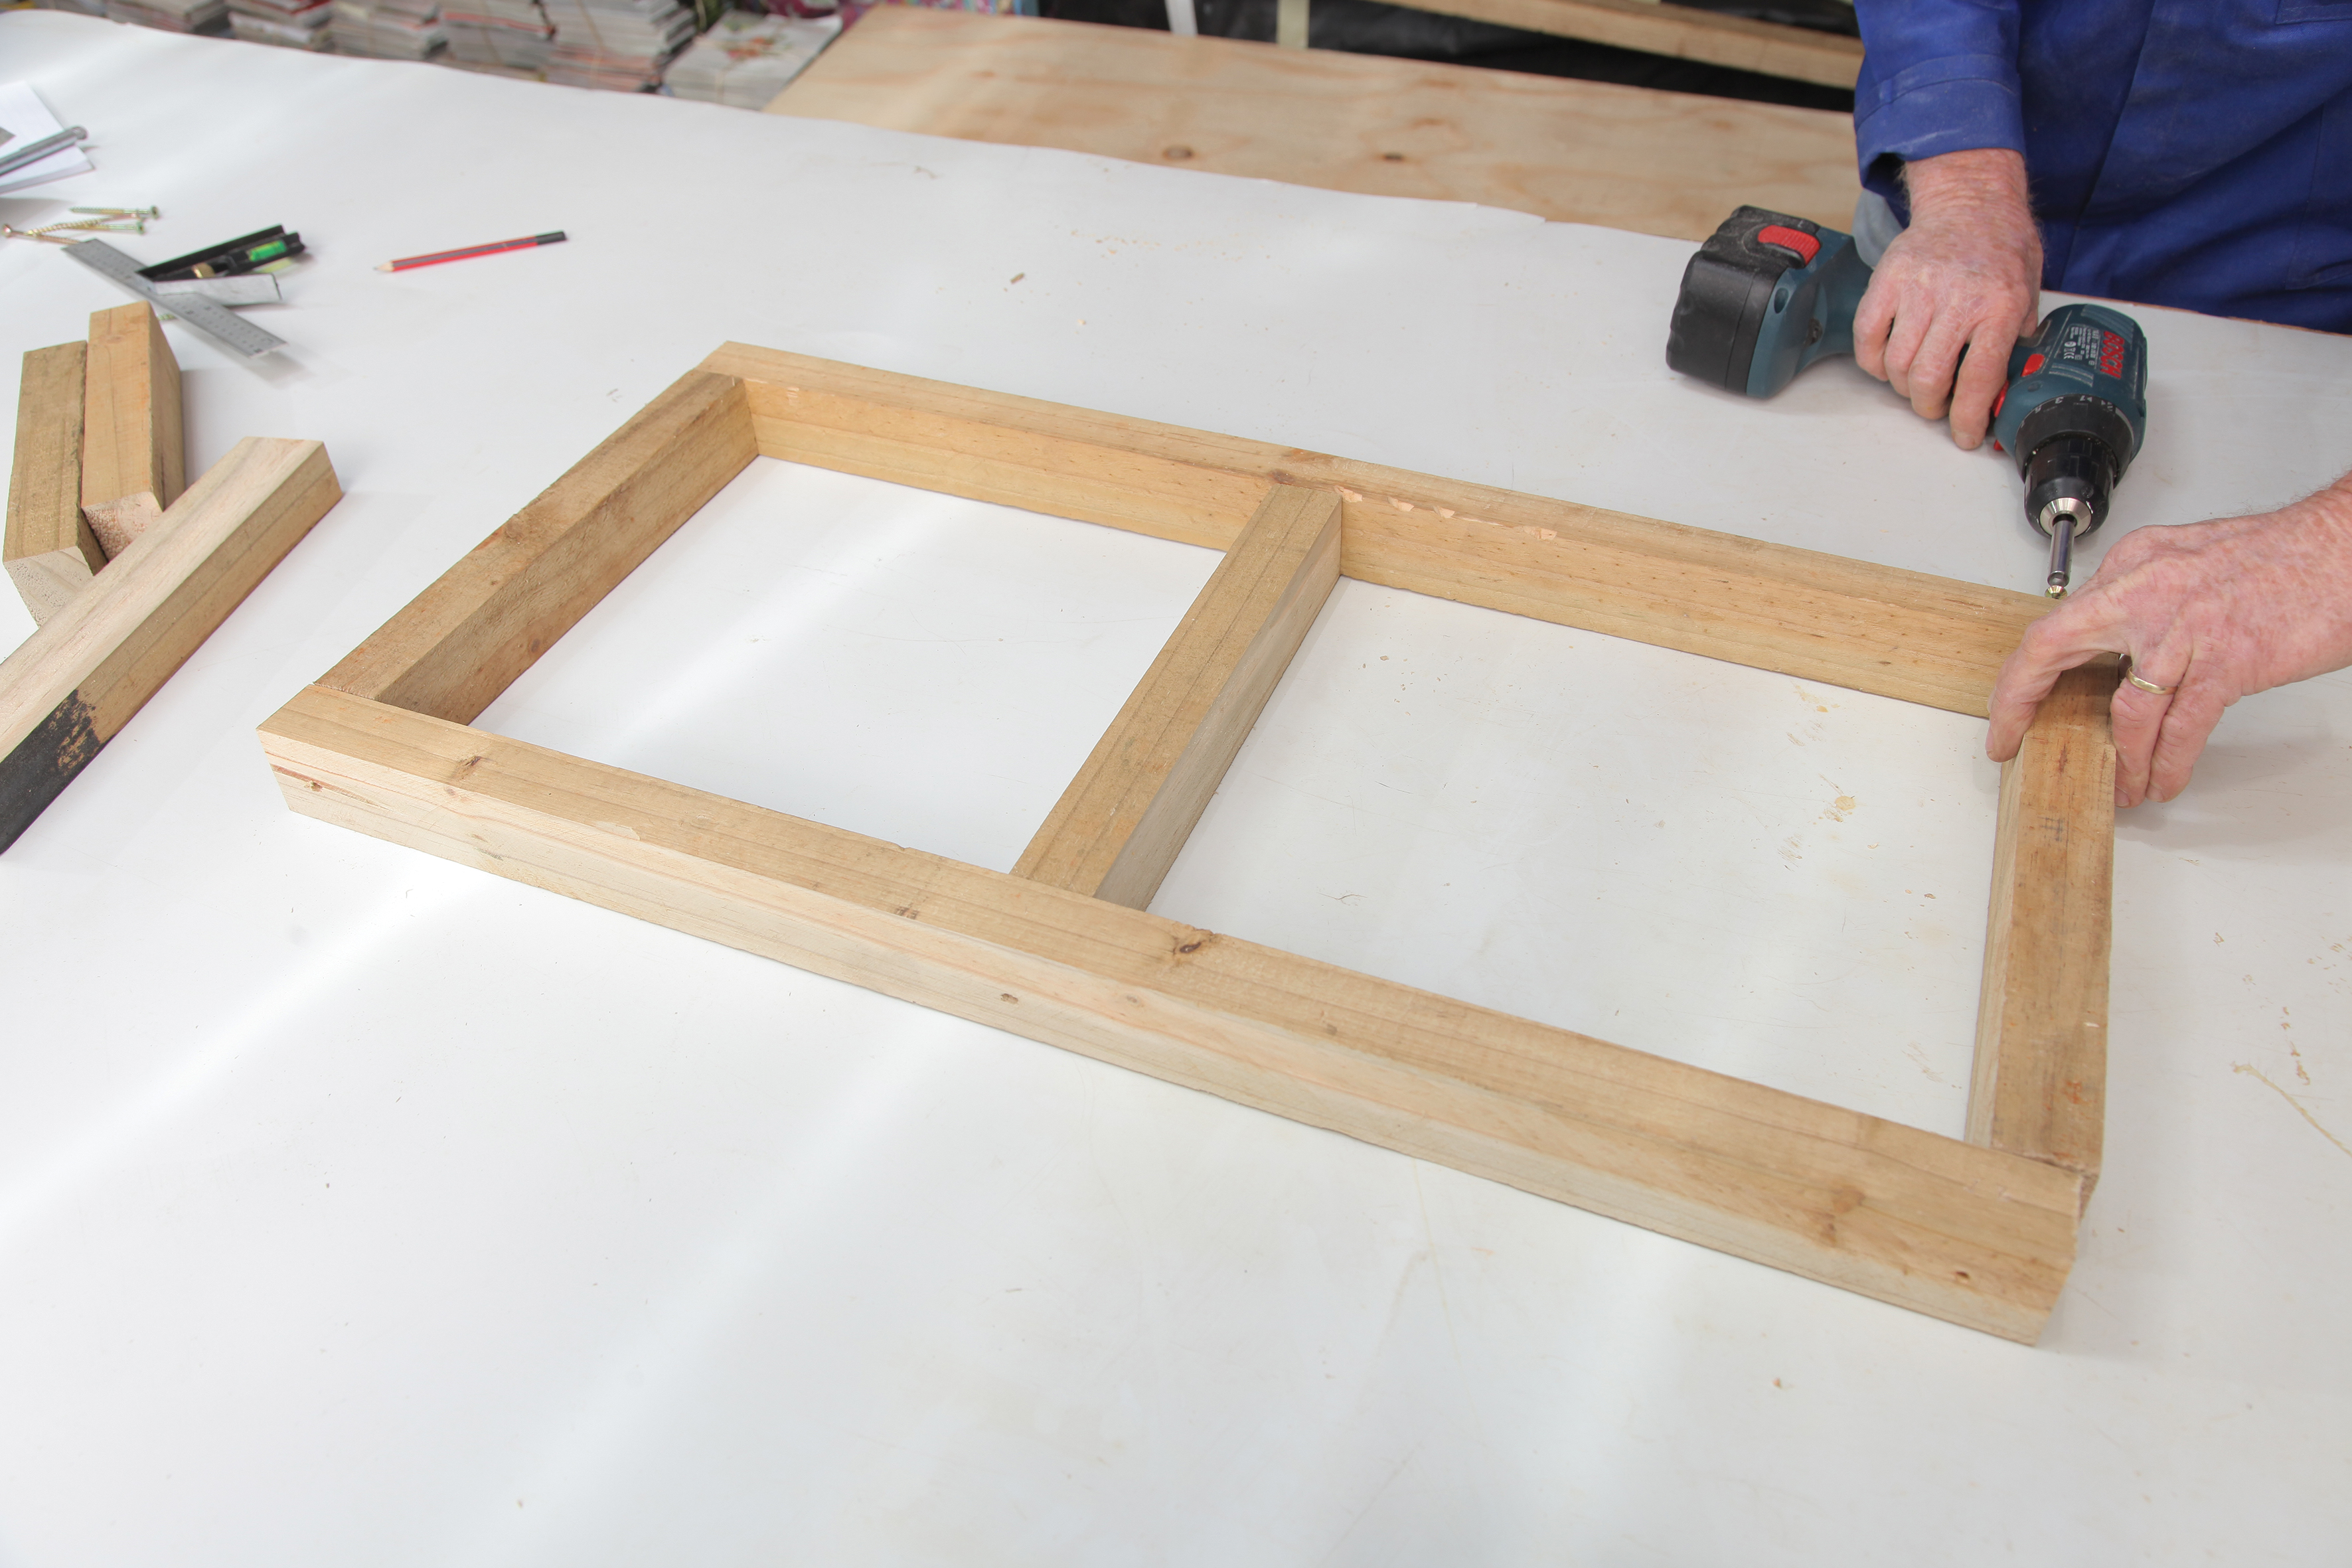
Step 2
Use 2 x 743 mm pine lengths and 3 x 300 mm pine lengths to create a frame (with a supporting centre strut) for the front of the planter, fixing them together with 75 mm cut screws. Repeat for the back of the planter.
Step 3
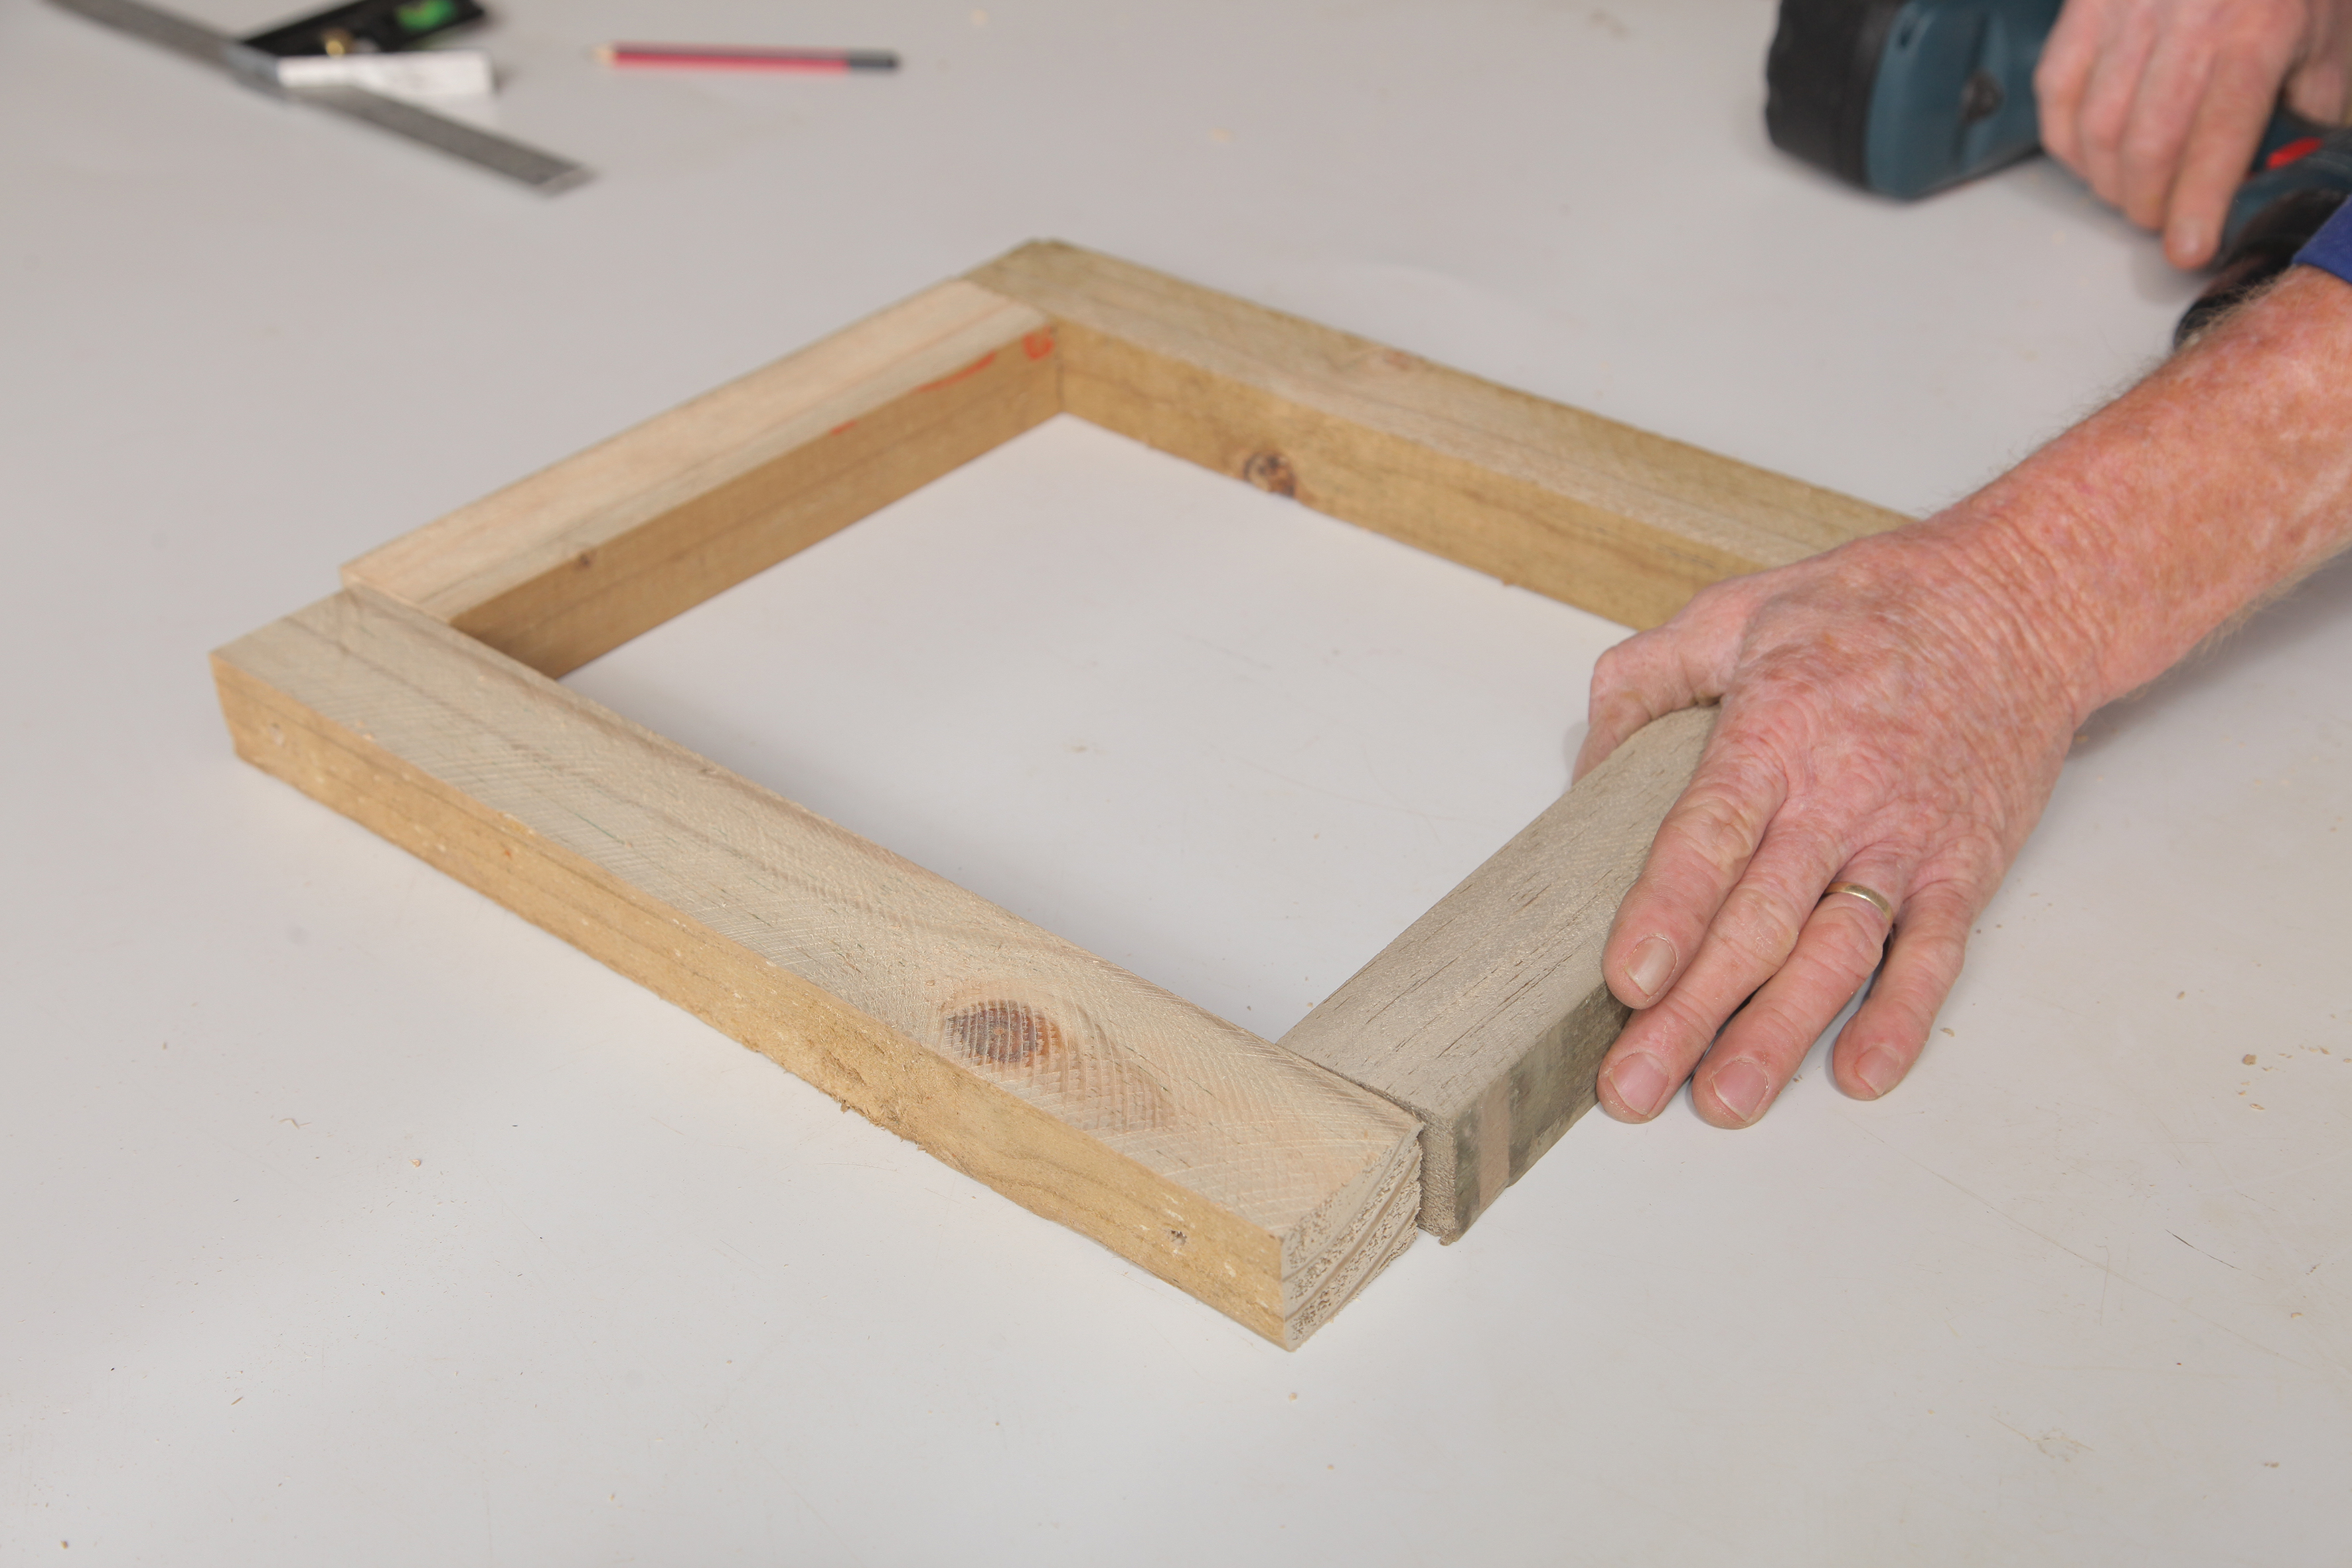
Use the 2 x 370 mm pine lengths and 2 x 245 mm pine lengths to create a frame for the short side of the planter, screwing them together with 75 mm cut screws. Repeat for the other side.
Step 4
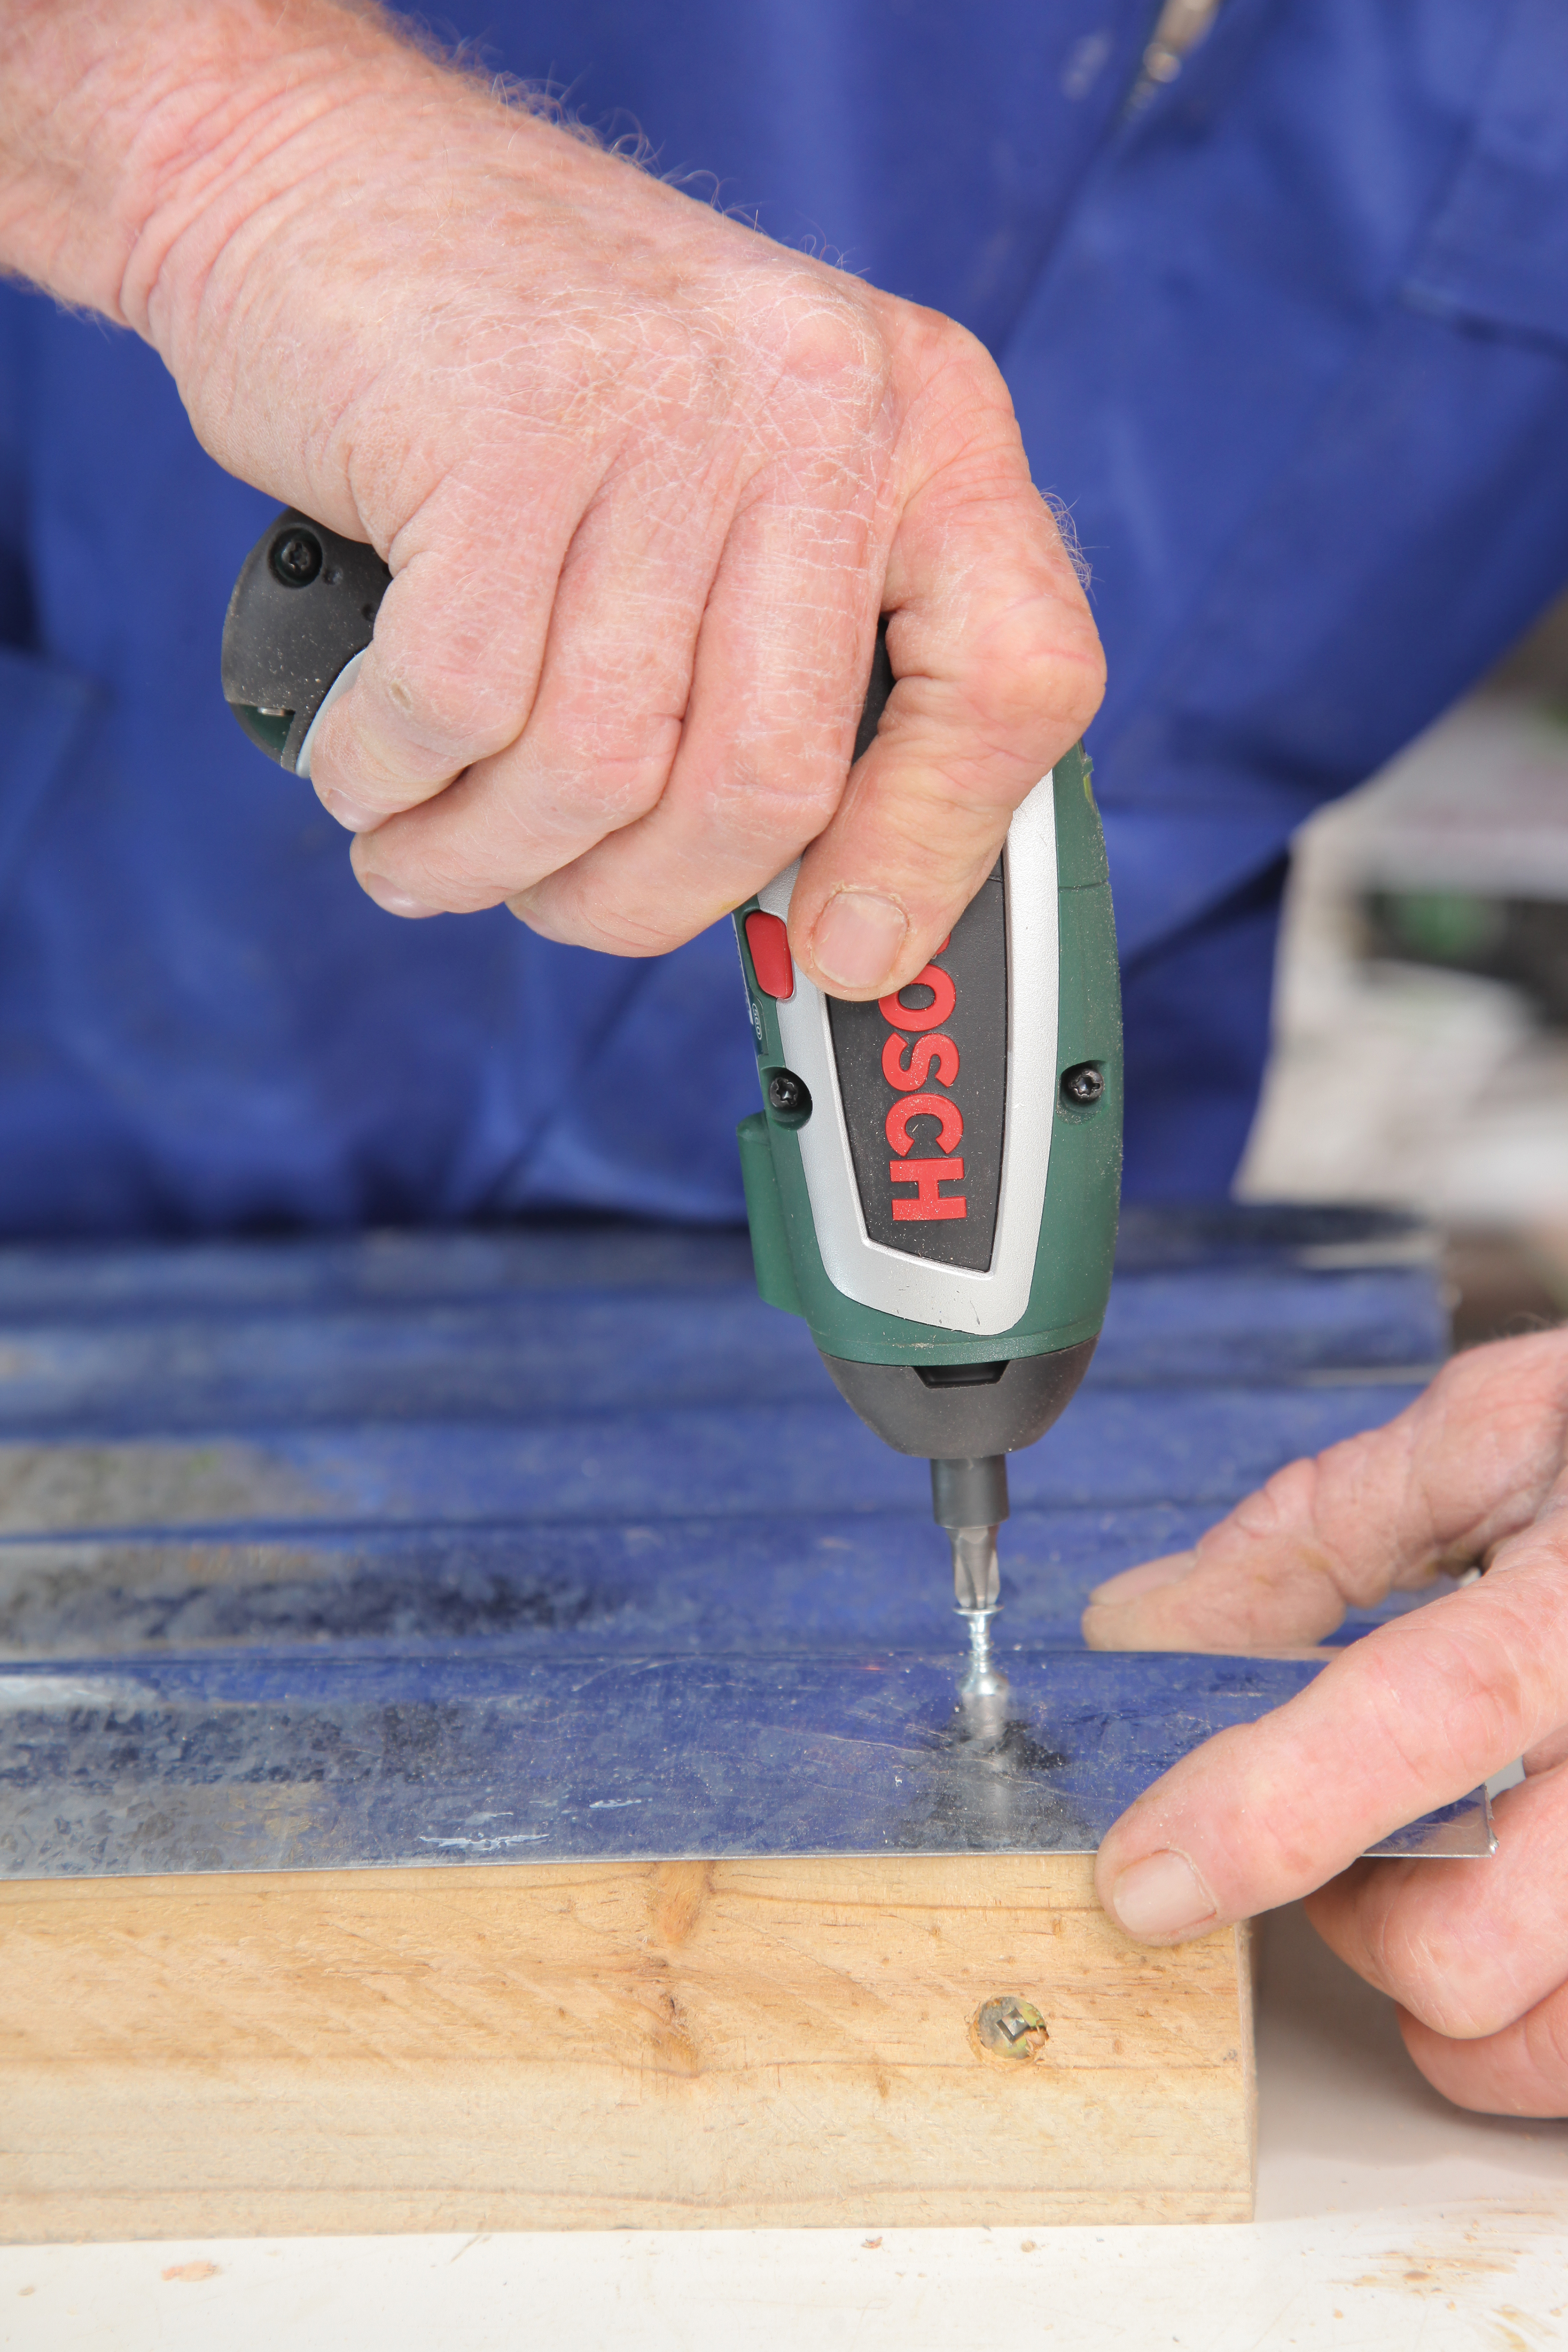
For the sides of the planter, place the 345 mm piece of corrugated iron on the side frame. No overhang is needed here. Drill three holes through the metal into each vertical piece of the frame and screw the corrugated iron in place using self-tapping screws.
Step 5
Position the 800 mm piece of corrugated iron on the front frame, allowing a 28.5 mm overhang on either end (this will cover the edge of the side frames). With the corrugated iron in place, drill three holes through the metal and into each vertical piece (nine holes in total) and screw the iron in place using self-tapping screws. Repeat for the back of the planter.
Step 6
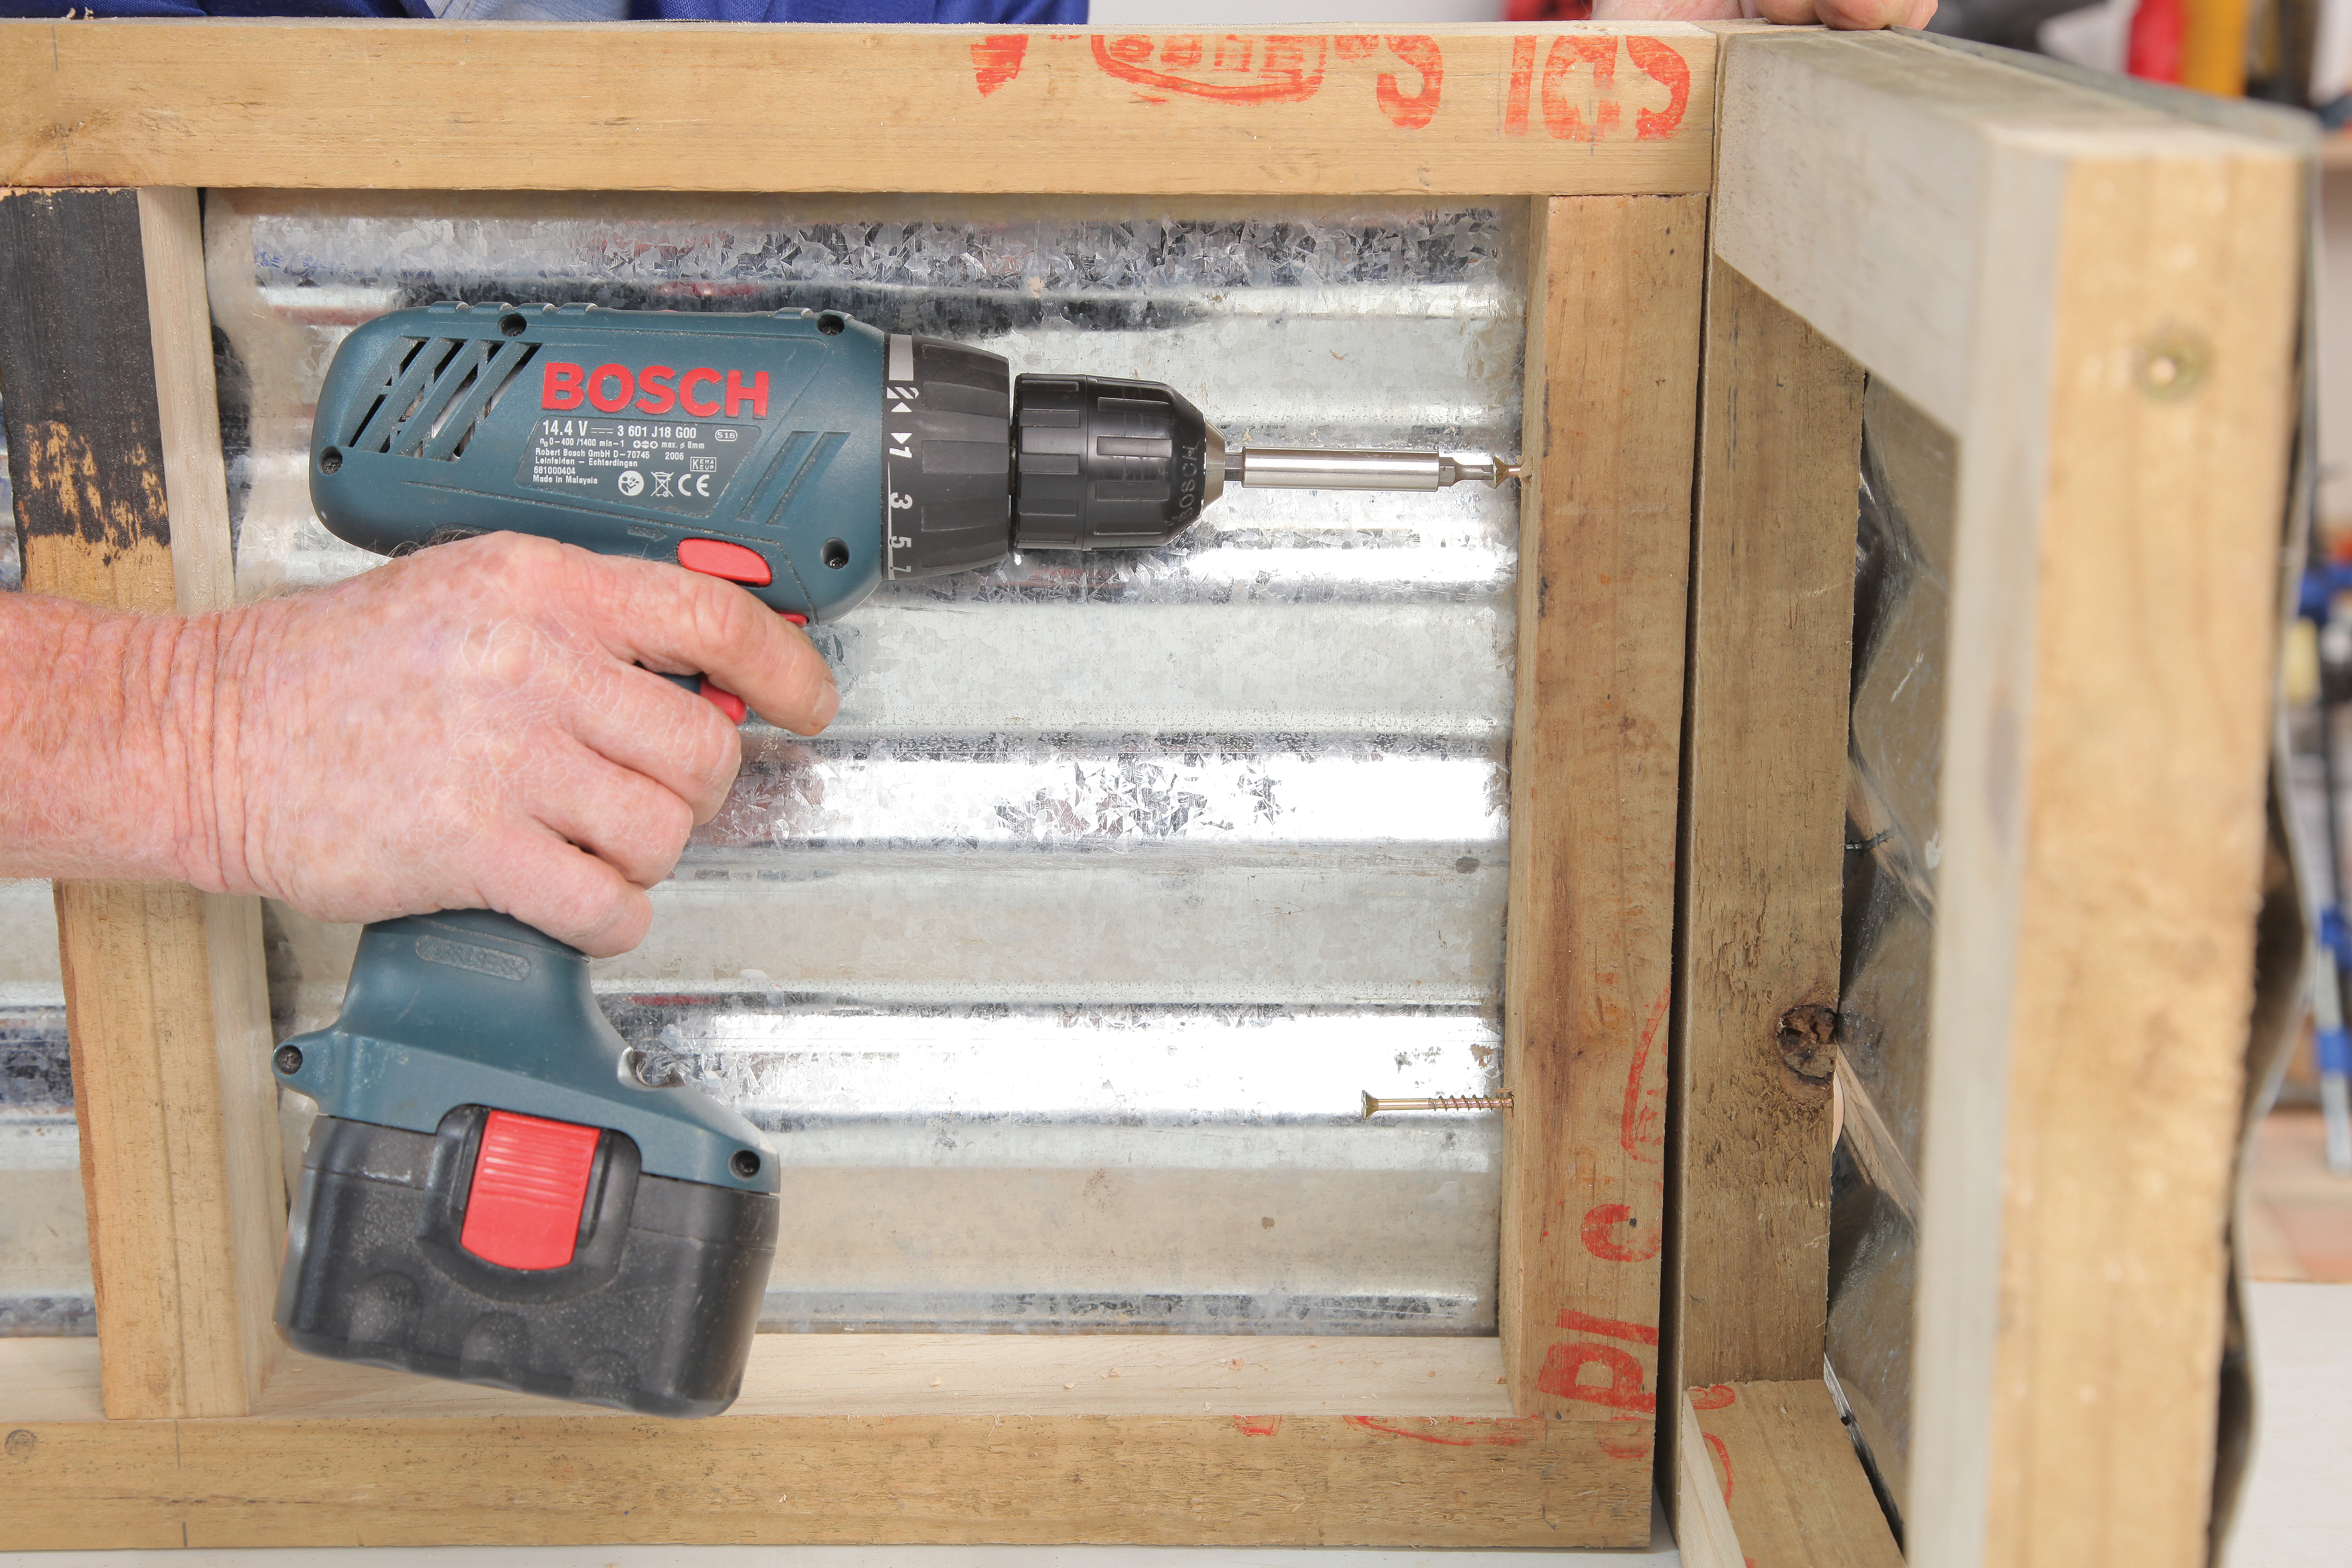
Position the four frames to make a box and screw them together using 50 mm cut screws.
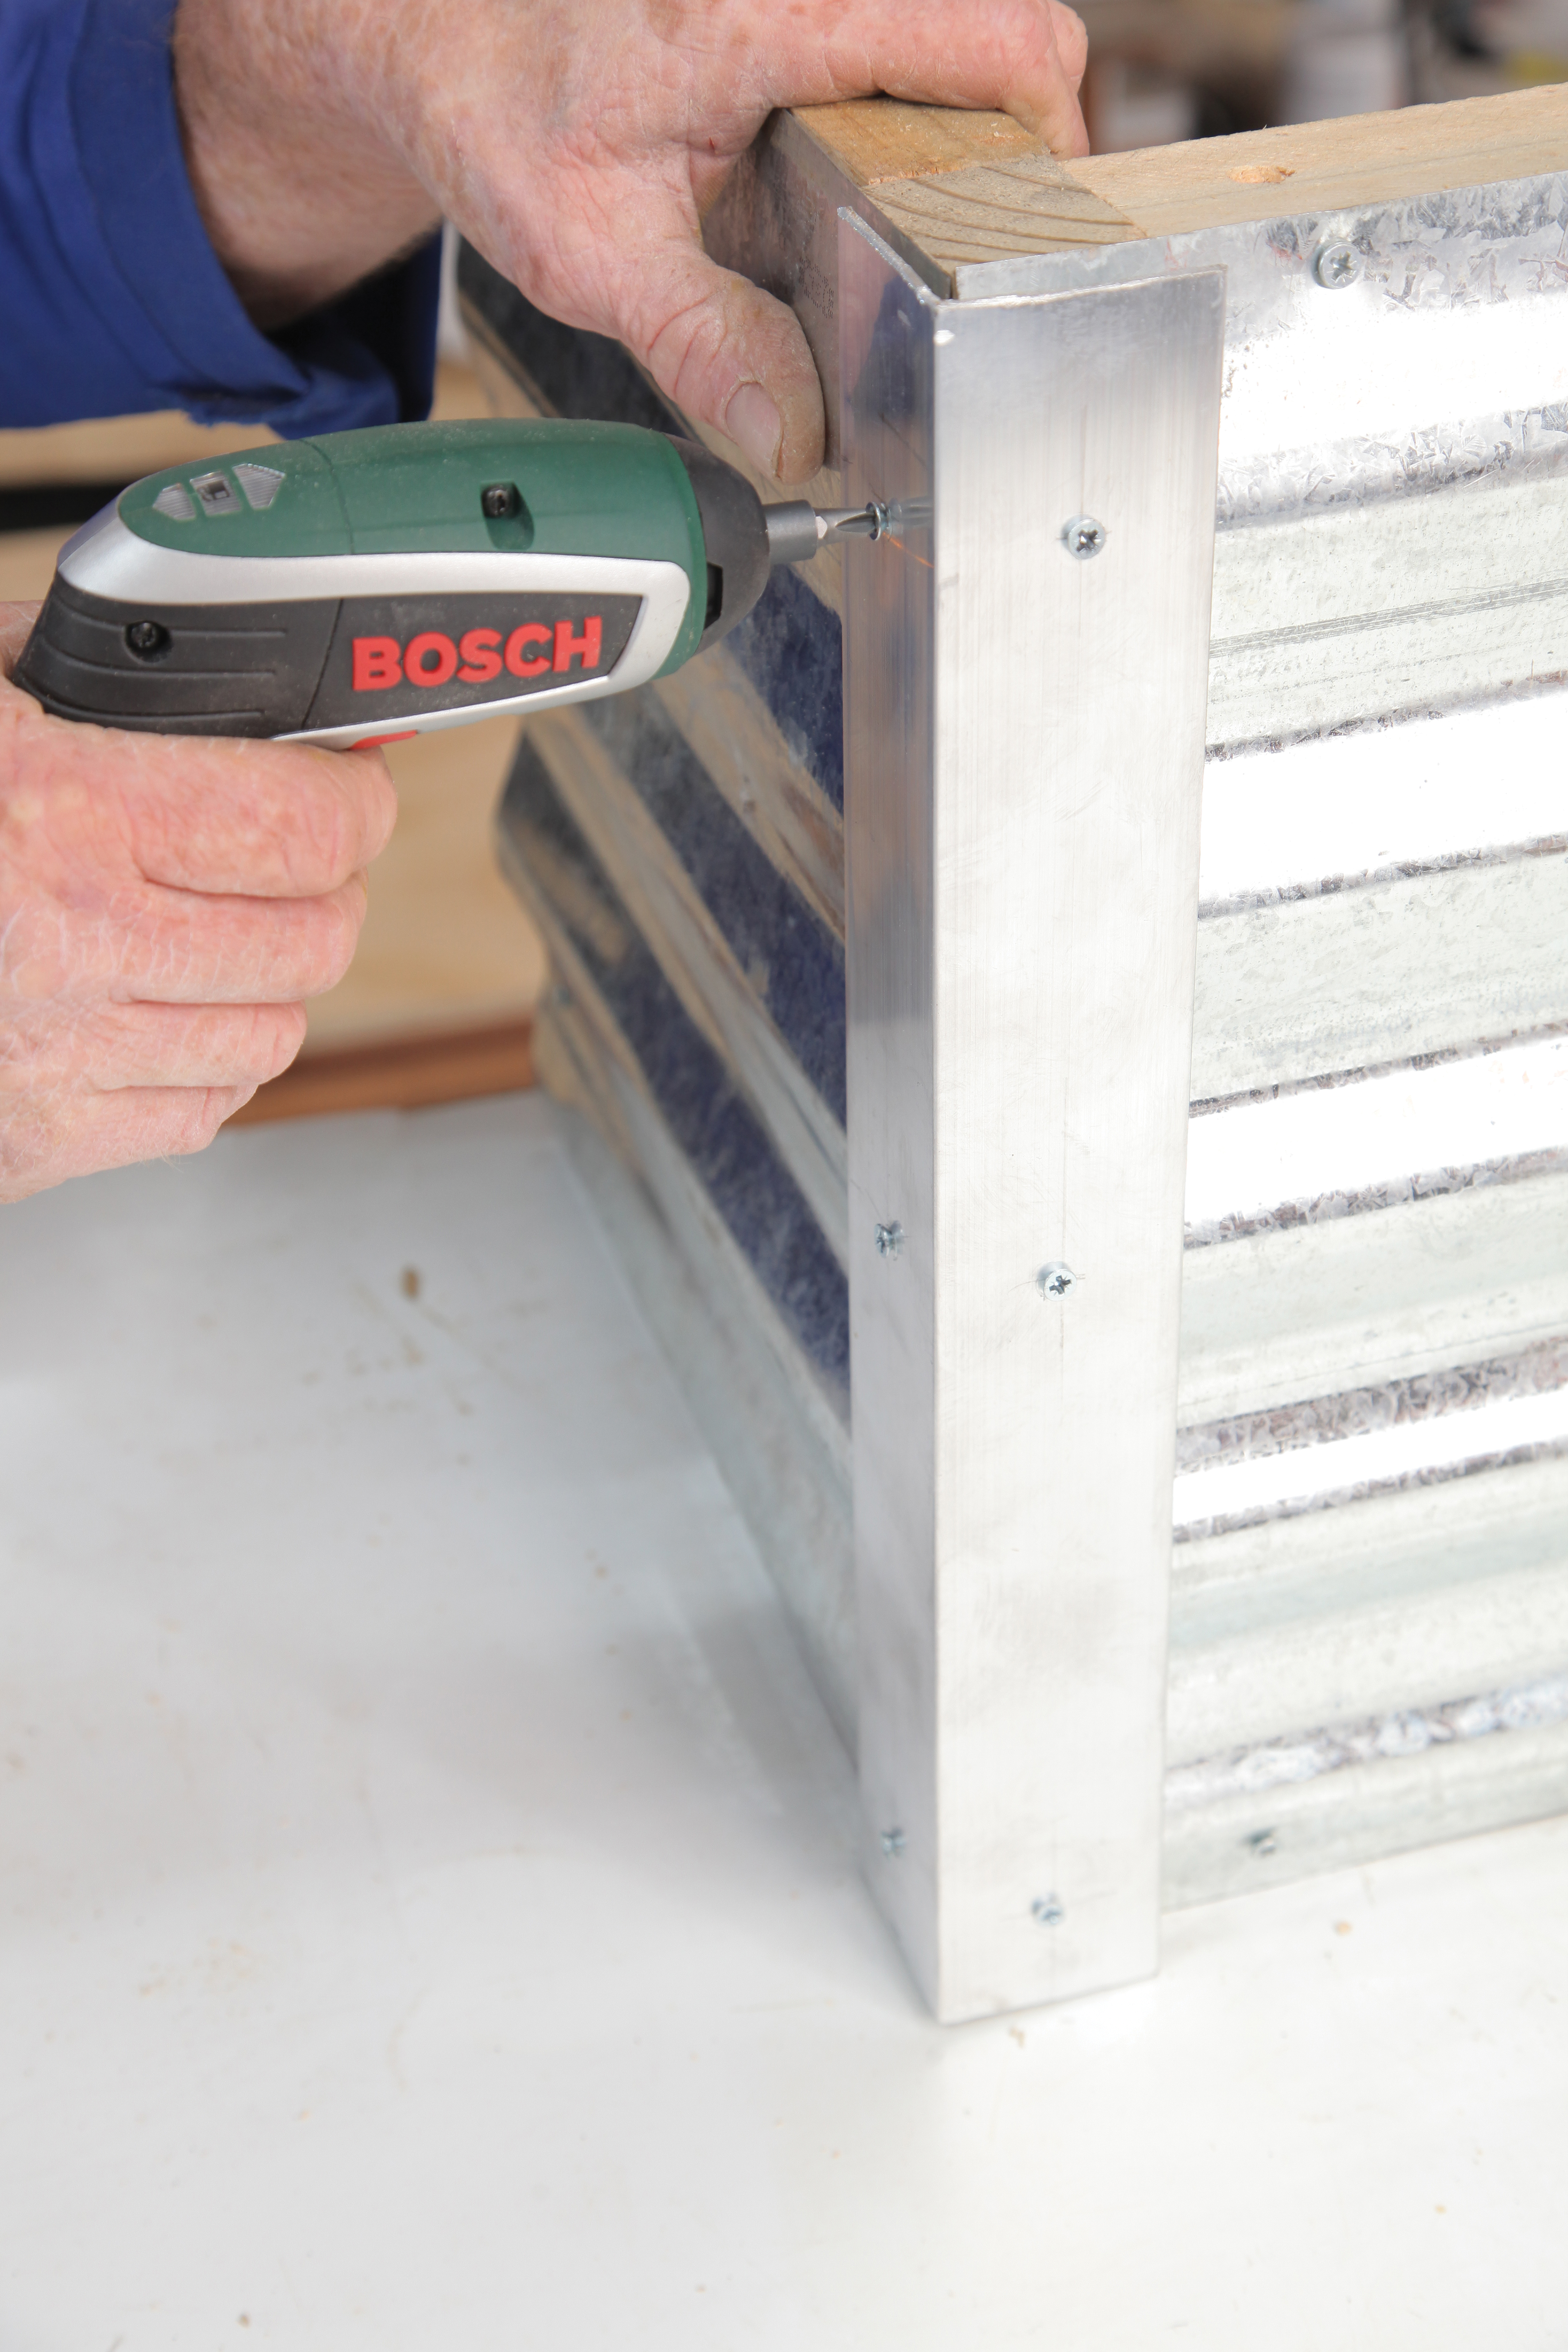
Step 7
Position the aluminium angle over the corners, drill holes through the corrugated iron and screw it in place using the self-tapping screws.Place your new planter in your garden, fill it with potting medium and plant it up with some of your favourite plants.
Credits
Referenced from Gallo images / www.thegardener.co.za
Browse 1000’s of products available to you. Select your country to Shop Online.


