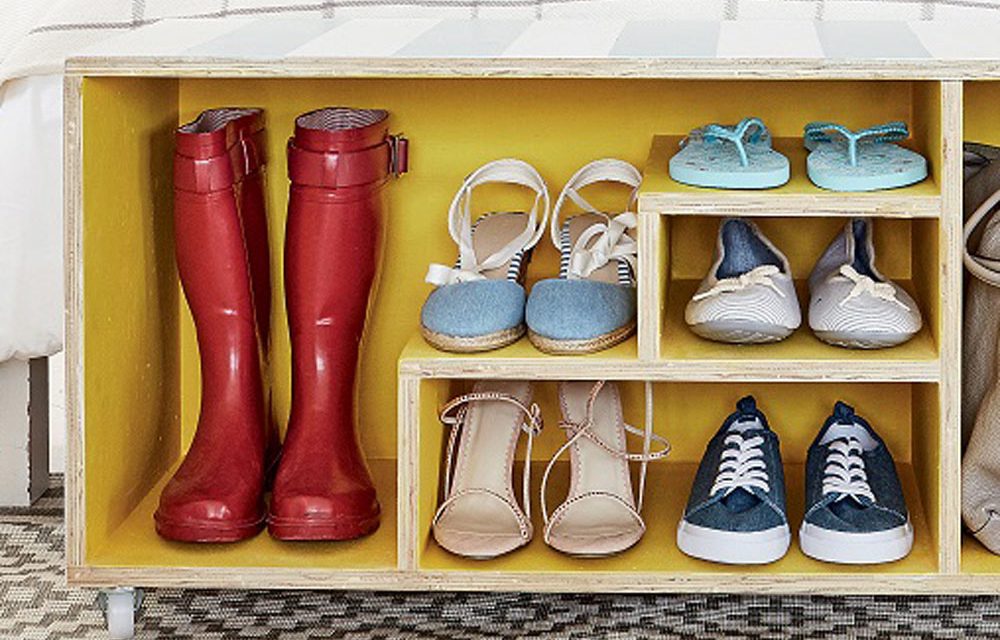
Keep your footwear neatly in pairs in a storage unit that doubles as a bed-end bench.
- Cordless drill and 3mm drill bit
- Pencil
- Tape measure
- Tri-square
- Sander
- Brush
- Scraper
- Wood filler
- 150-grit sandpaper
- Varnish or paint
- Four 50mm castors with joint plate
- One packet of 6mm x 40mm chipboard screws
- One packet of 8mm x 16mm chipboard screws
- One sheet of 18mm plywood, cut to:
- two pieces of 1 000 x 350mm (base and top)
- two pieces of 410 x 350mm (sides)
- one piece of 964 x 410mm (rear)
- one piece of 450 x 330mm (shelf)
- one piece of 250 x 330mm (shelf)
- one piece of 160 x 330mm (strut)
- one piece of 120 x 330mm (strut)
- one piece of 410 x 330mm (centre strut)

Step 1
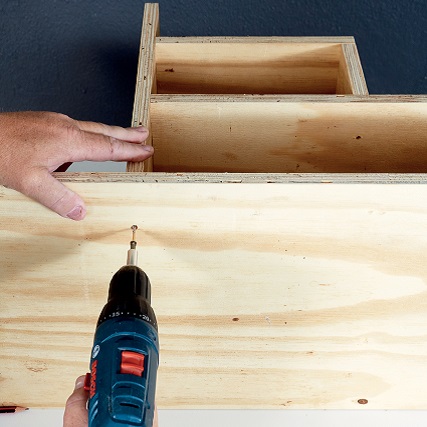
Using the 6mm x 40mm chipboard screws, attach the 160 x 330mm strut perpendicular to the short side of the 450 x 330mm shelf piece. Screw the 120 x 330mm strut perpendicular to the underside of the long side of the 250mm x 330mm shelf piece. Screw the strut of the small shelf piece perpendicular to the bigger piece (to form a step structure) – the open ends must be flush.
Step 2
Screw this step structure to the 410 x 330mm centre strut, ensuring that the bottom edges are flush. Measure and mark a line 250mm from one end of a 1 000 x 350mm piece (base) along the width of the plank. Position the short strut of the step on this line, flush with the front of the base, and screw the step to the base at the two struts.
Step 3
Screw the two 410 x 350mm sides perpendicular to the ends of the base. Complete the frame with the remaining 1 000 x 350mm plank as above.
Step 4
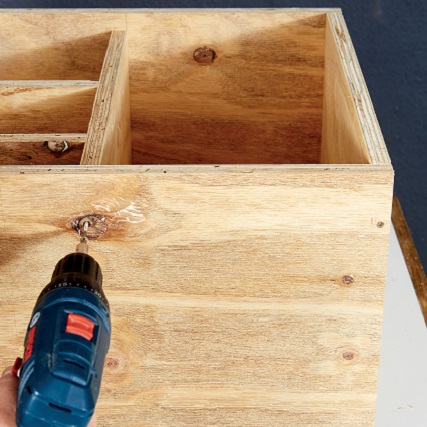
Insert the 964 x 410mm rear piece into the opening at the back of the frame and screw together.

Step 5
Turn the shoe rack upside down and attach a castor at each corner with the 8mm x 16mm screws.
Step 6
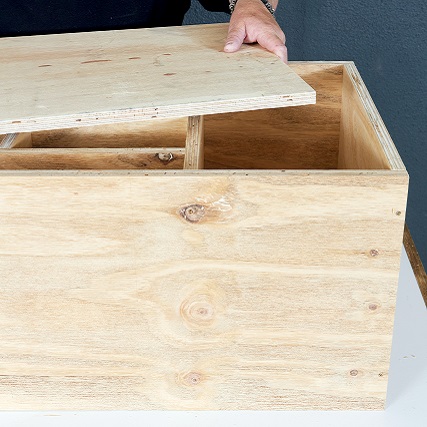
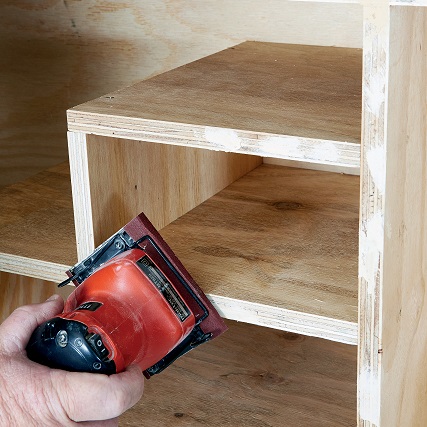
Fill in all the screw holes and gaps with wood filler and allow to dry completely. Sand the entire shelf thoroughly and varnish orpaint as desired.
Project notes
- Remember to drill pilot holes.
- Ask your timber merchant to cut the wood to size – it will make your task so much easier.
- We painted the unit in waterbased Plascon Velvaglo in the colours Crazy Daisy, Ocean Crystal and White.
Credits
Referenced from Gallo images / Home Magazine
Browse 1000’s of products available to you. Select your country to Shop Online.


