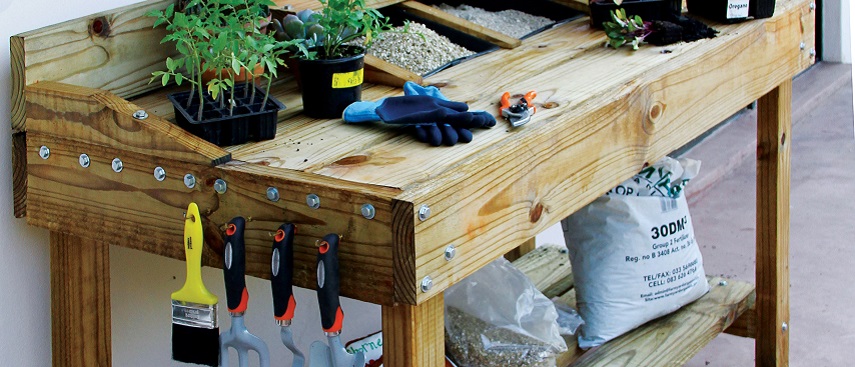
Builders have everything you need to make this special potting bench, allowing you to plant up your pots and seedlings in organised comfort this season.

- 6 CCA-treated timber roof trusses (3000 x 152 x 38 mm)
- 1 CCA-treated timber roof truss (3000 x 76 x 38 mm)
- 1 CCA-treated timber roof truss (4200 x 76 x 50 mm)
- 100 coach screws (8 x 75 mm)
- 100 flat washers (8 mm)
- 3 Hamilton Paint Mate paint trays (5 l)
- 1 bag of compost
- 1 large bag of bonemeal
- 1 bag of vermiculite
- Box frame (152 x 38 mm):
- 2 x 1550 mm lengths and 2 x 715 mm lengths
- Table top surface (152 x 38 mm):
- 2 x 1430 mm lengths
- 2 x 465 mm lengths
- 1 x 465 mm length (centre strut)
- Tapered fingers (76 x 38 mm):
- Top shelf (152 x 38 mm):
- 1 x 1030 mm length
- Back board (152 x 38 mm):
- 1 x 1550 mm length
- Legs (76 x 50 mm):
- 2 x 615 mm lengths (for cross-braces)
- 4 x 850 mm lengths
- Bottom shelf (152 x 38 mm):
- 3 x 1420 mm lengths
- Paint mate stopper (76 x 38 mm):
- 3 x 100 mm lengths
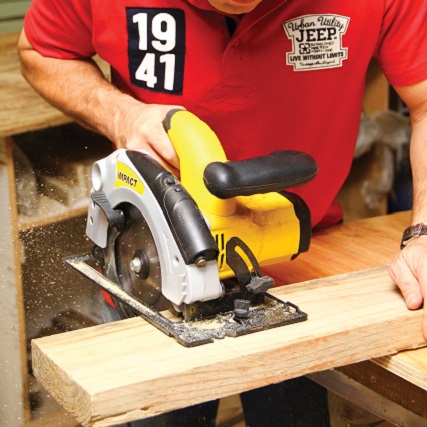
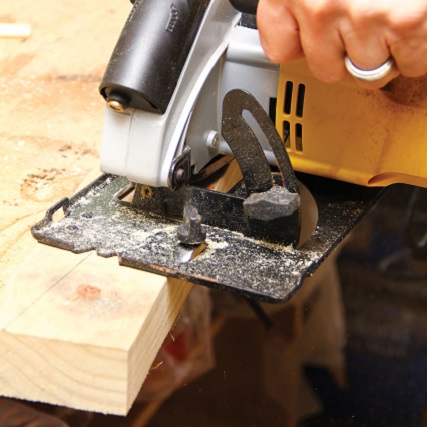
Step 1
Cut the timber as per the cutting list above, using a skill saw.
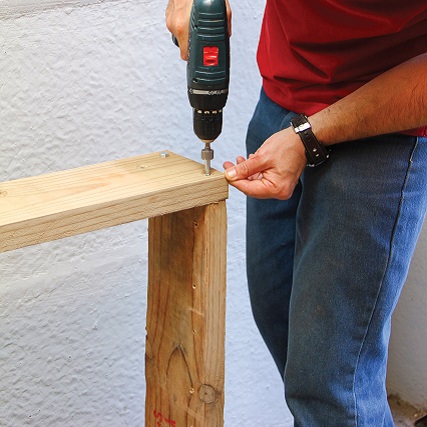
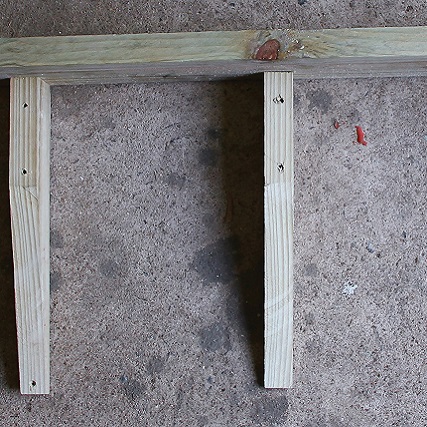
Step 2
Assemble the box frame and fasten, using the coach screws. Ensure that a 6 mm pilot hole is drilled first.
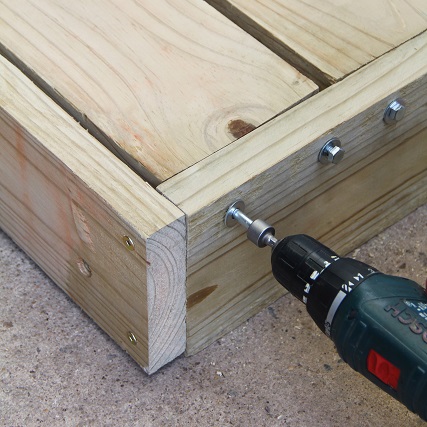
Step 3
At one end of the box frame, fasten in the two 1430 mm table-top planks, flush with the top of the frame.
Step 4
To cut the tapered fingers, mark out the corner section to be cut off – 15 mm step from the one end and 150 mm step from the opposite end. Trim off the tapered edge using a skill saw.

Step 5
At the right end of the back board, evenly space four of the tapered fingers to allow the three painter troughs to fit in-between. The fifth finger must be positioned at the left end of the back board.
Step 6
Drill and fasten the fingers to the back board.
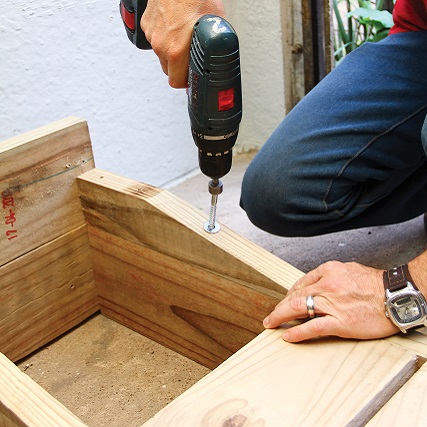
Step 7
Place the back board and finger assembly on top of the box frame and fasten, using the coach screws.

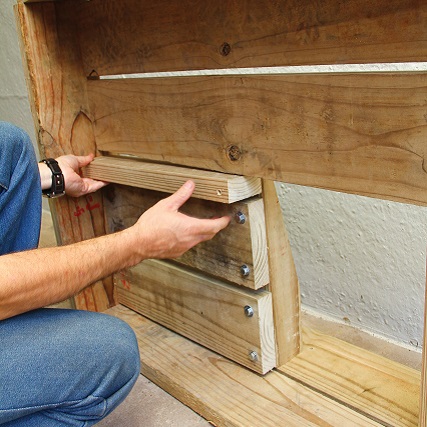
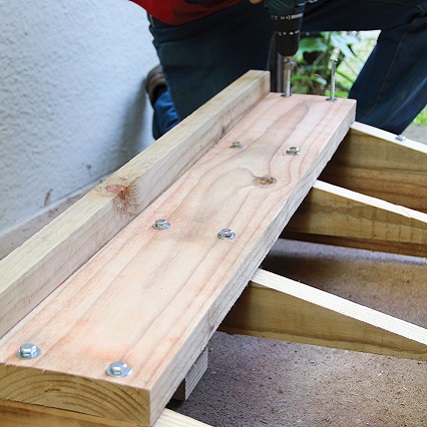
Step 8
Flip the box frame over and fasten the two 465 mm box frame top panels from the underside to the tapered fingers.
Step 9
Mount the centre strut to fill in the spacing required.
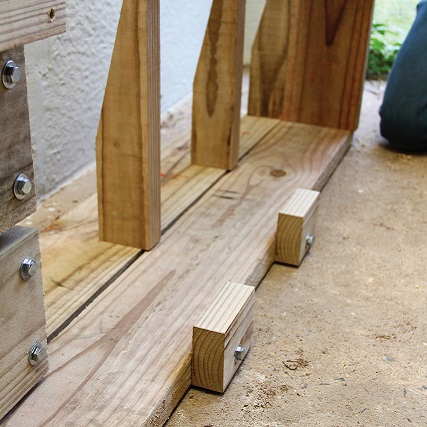
Step 10
Fasten the paint mate container stoppers.
Step 11
Mount the top shelf on top of the tapered fingers.

Step 12
Assemble the legs and crossbraces and fasten to the table box frame.
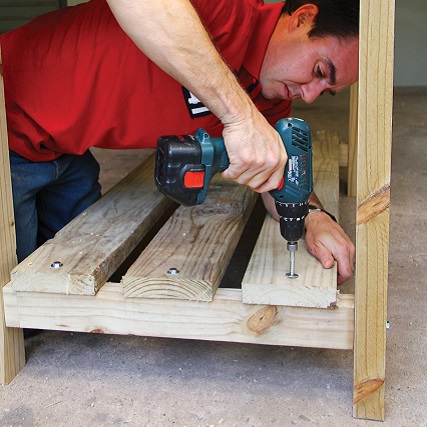
Step 13
Position the bottom shelf planks, drill and fasten. Place the Hamilton Painter’s trays in-between the tapered fingers ensuring the bottom rests on the stoppers.
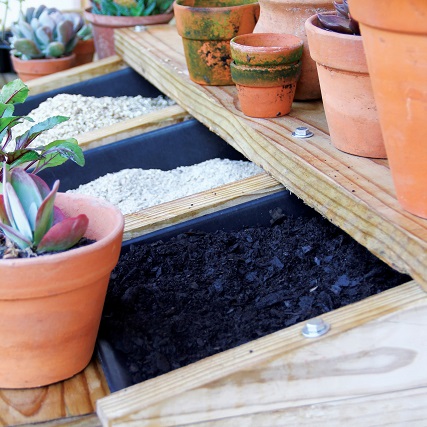
Step 14
Seal the potting bench using Woodoc 50 wood sealer. Fill the trays with compost, vermiculite and bonemeal or fertiliser of your choice.
Get potting
Now your DIY is complete and you can get working in your garden.
Credits
Referenced from Gallo Images / www.thegardener.co.za
Browse 1000’s of products available to you. Select your country to Shop Online.


