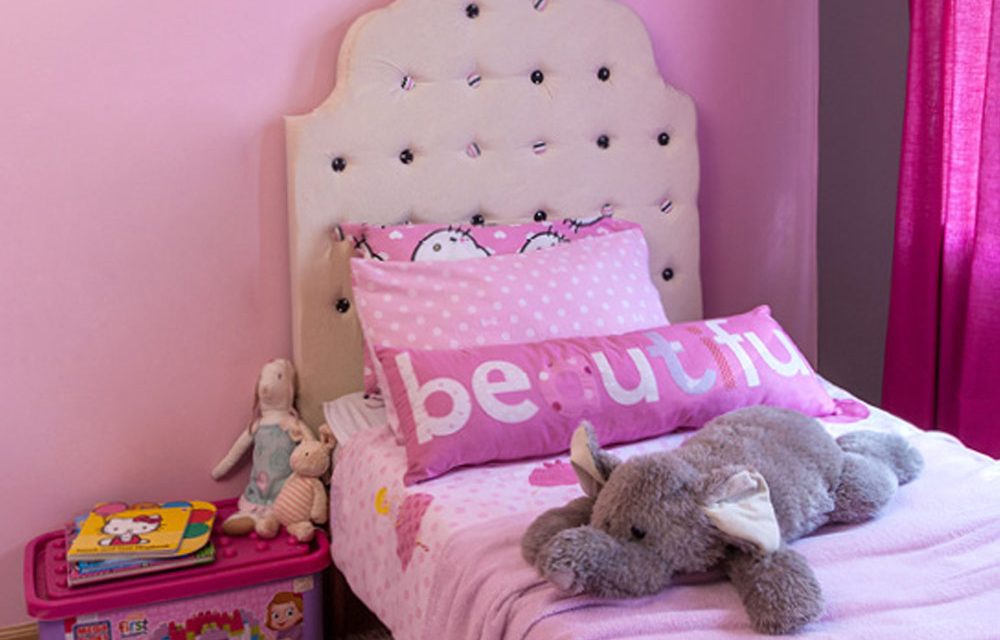
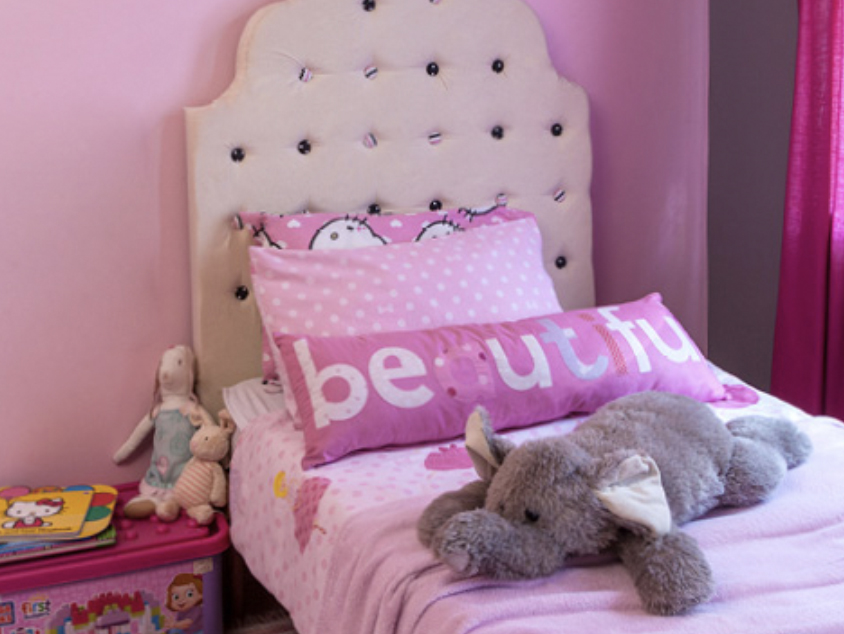
Follow these easy steps to make a princess headboard for a single bed. All you need is a jigsaw, drill and staple gun
- 15mm supawood cut 1m x 1m for a single bed
- 20mm laminated pine plank
- 35mm medium density foam cut to size (this should be the same size as your board to cover the entire surface)
- 3m fabric
- 26 buttons that can be covered with fabric and clipped back together
- Fun patterned fabric off-cuts
- Jigsaw
- Staple gun
- Drill
- Sharp knife
- Pen or pencil
- Spray adhesive
- String
- Long needle
- Thin dowel cut to 50mm lengths
- Cardboard
- Safety glasses
- Mask
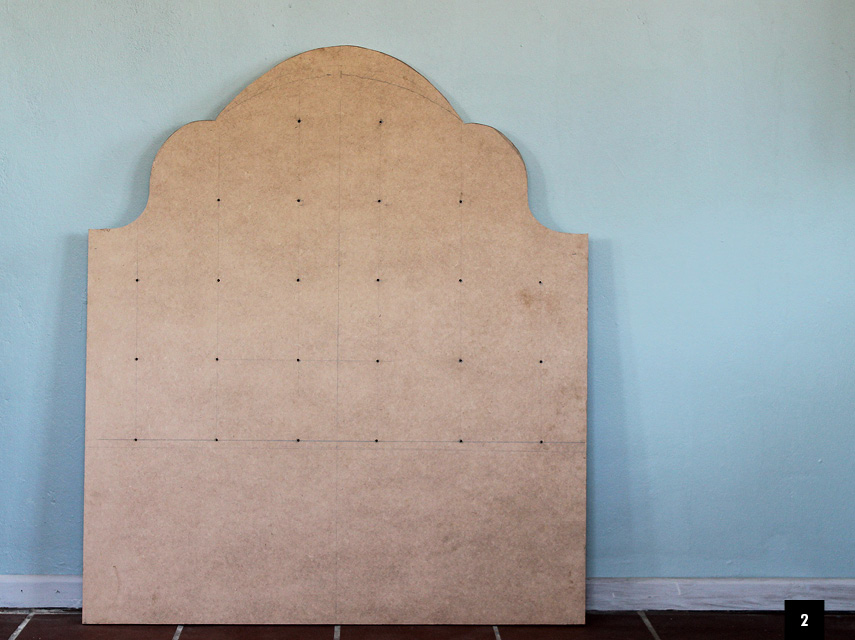
Step 1 & 2
Cut the supawood to 1m x 1m – there are skilled staff at Builders who can do this heavy work for you in a matter of seconds.
Draw half of the gable-like shape of the headboard top on a piece of cardboard. You might have to play around with it a little to get the desired look and then draw it onto your board. Flip it over and mark out the mirror image. Now you should have a perfectly symmetrical pattern. Using a jigsaw, cut the shape carefully following the outline. Remember to wear safety glasses.
Step 3
Measure out the grid pattern for your buttons. Do the measurements in equal parts from the edges and top and drill holes big enough for a long needle to go through.
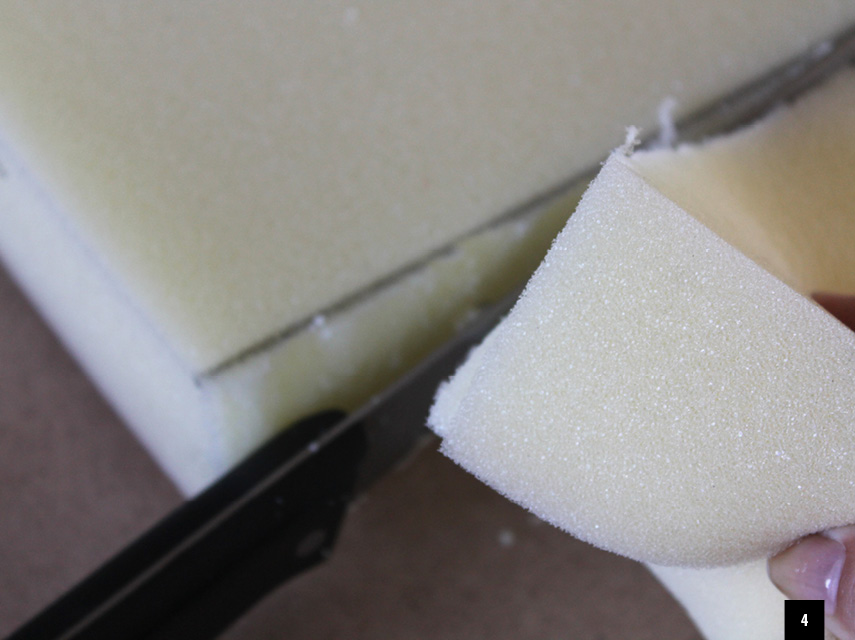
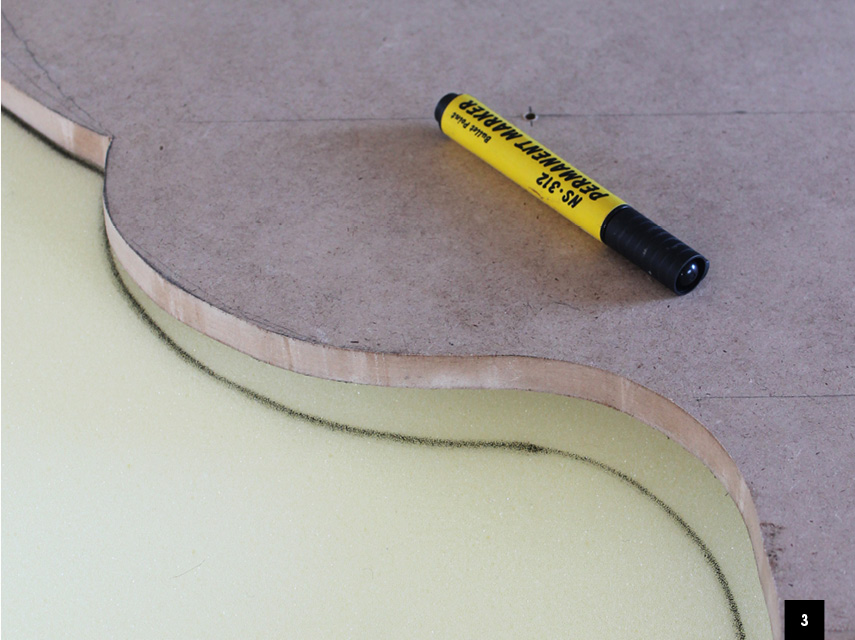
Step 4
Mark the headboard pattern onto the foam, then cut it to size with a sharp kitchen knife. Try to keep the edges of the foam smooth.
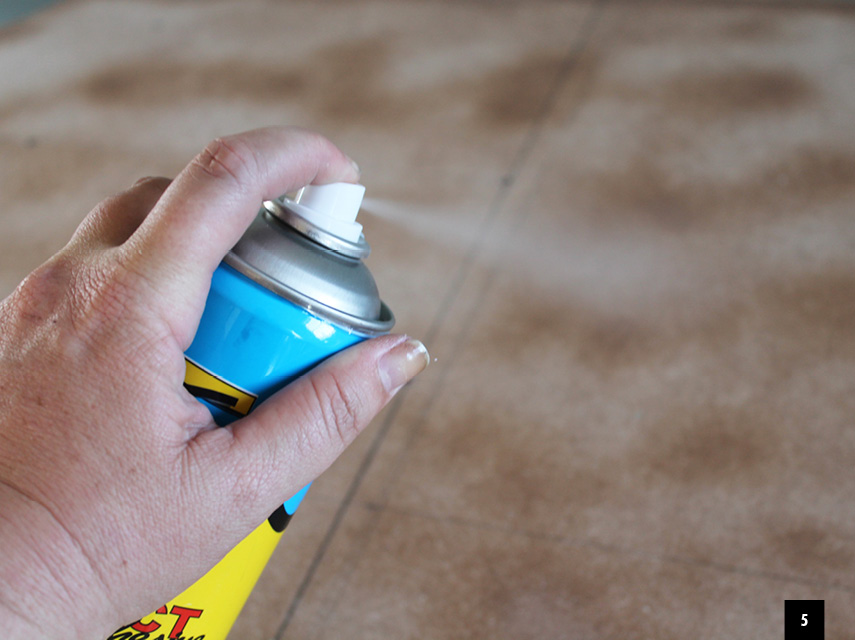
Step 5
To fix the foam to the headboard, spray both the headboard and the foam with spray contact adhesive. Wait till both surfaces are dry to the touch to ensure a solid bond, then place the foam on the supawood. Make sure you wear a mask and work in a well-ventilated area.
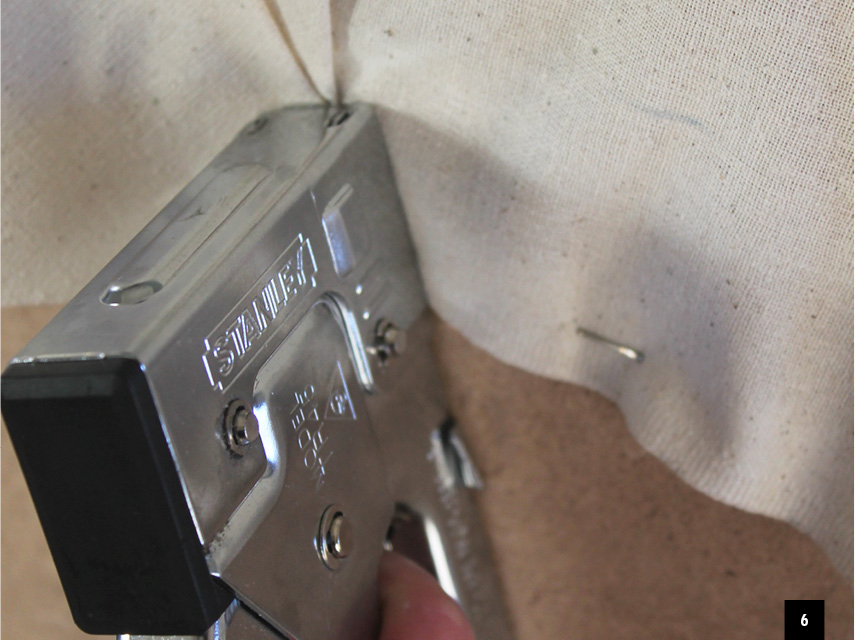
Step 6
Cover the headboard with fabric and staple it neatly to the back. Make sure you don’t cover any button holes. Trim off any excess fabric.

Step 7
Draw the shape of your button cover as a guide, allowing a few millimetres extra for the fold-over. These upholstery buttons come in two halves, cover the top part with the fabric, then secure it by pressing the bottom part into place. This is a little fiddly so if you’re struggling to do this with your hands give each button a tap with a lightweight hammer. The two pieces clip together to keep the fabric in place.
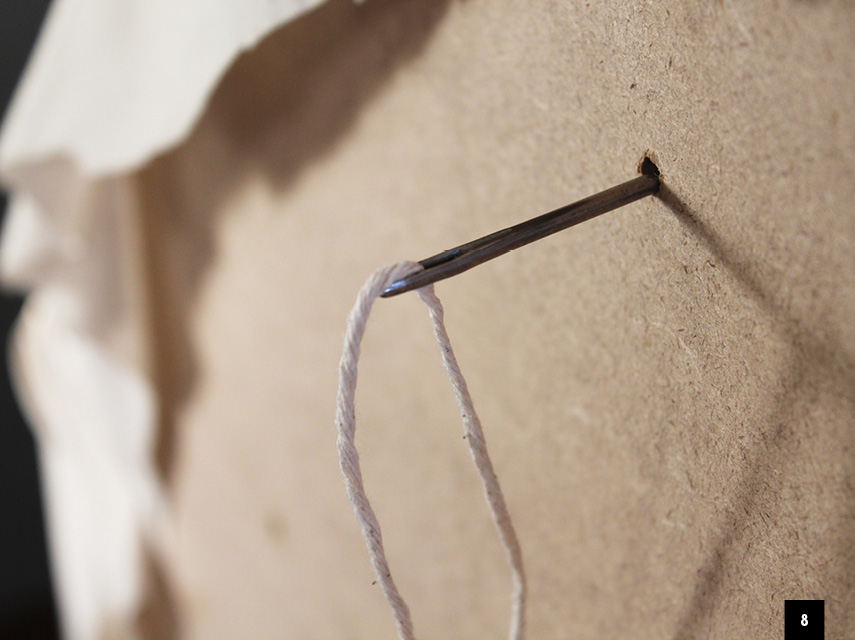
Step 8
Thread your long needle with string or nylon cotton and run it through the holes in the back. Secure it with a knot. Now thread through your button and pull it back to give a deepbuttoned effect. Make another knot to keep it in place and put a dowel through it.
Step 9
Use the dowel as a way to pull the buttons even deeper into the headboard by winding it tight. This clever trick allows you to adjust the buttons afterwards to get them even.
Measure the height you want for your headboard and cut two equal lengths of the pine plank as legs. Secure the legs to the back of the headboard with 40mm screws. The latest trend in children’s rooms is to have furniture that can grow with your child. This is not only cost effective but practical. As your princess grows older, simply change the fabric.
Browse 1000’s of products available to you. Select your country to Shop Online.


