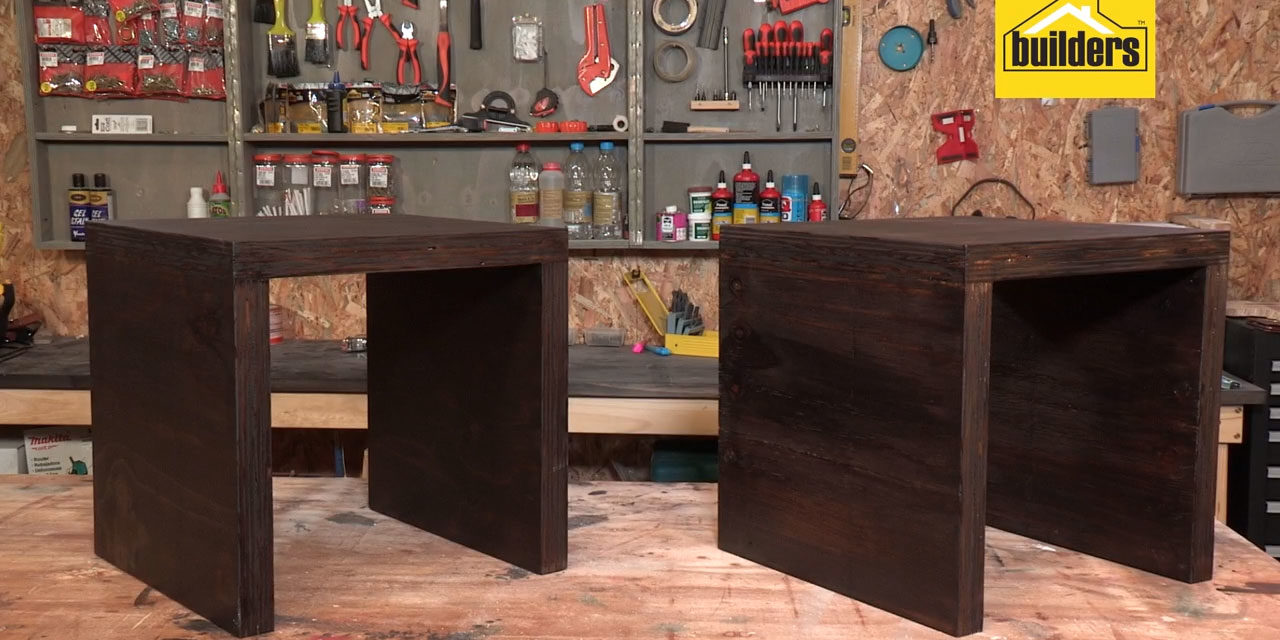
This DIY can be completed as a standalone or as a companion piece to the DIY headboard. We decided to create a set and so matched the tables to the headboard.
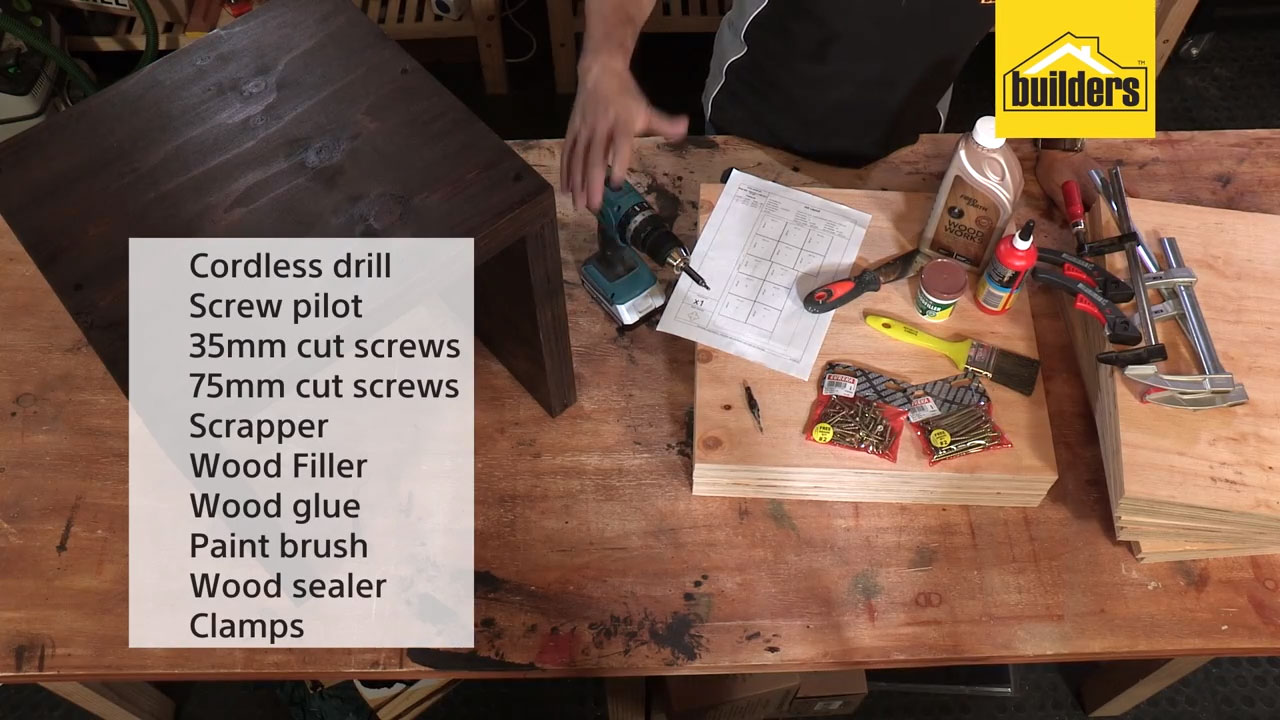
- Wood filler
- Wood glue
- Paintbrush
- Wood sealer
- 35mm and 75mm screws
- Scraper
- Clamps
- Cordless drill
- Speed pilot
- 12mm plywood
Cutting List
- (8) 400 x 450mm
- (4) 450 x 450mm
Step 1
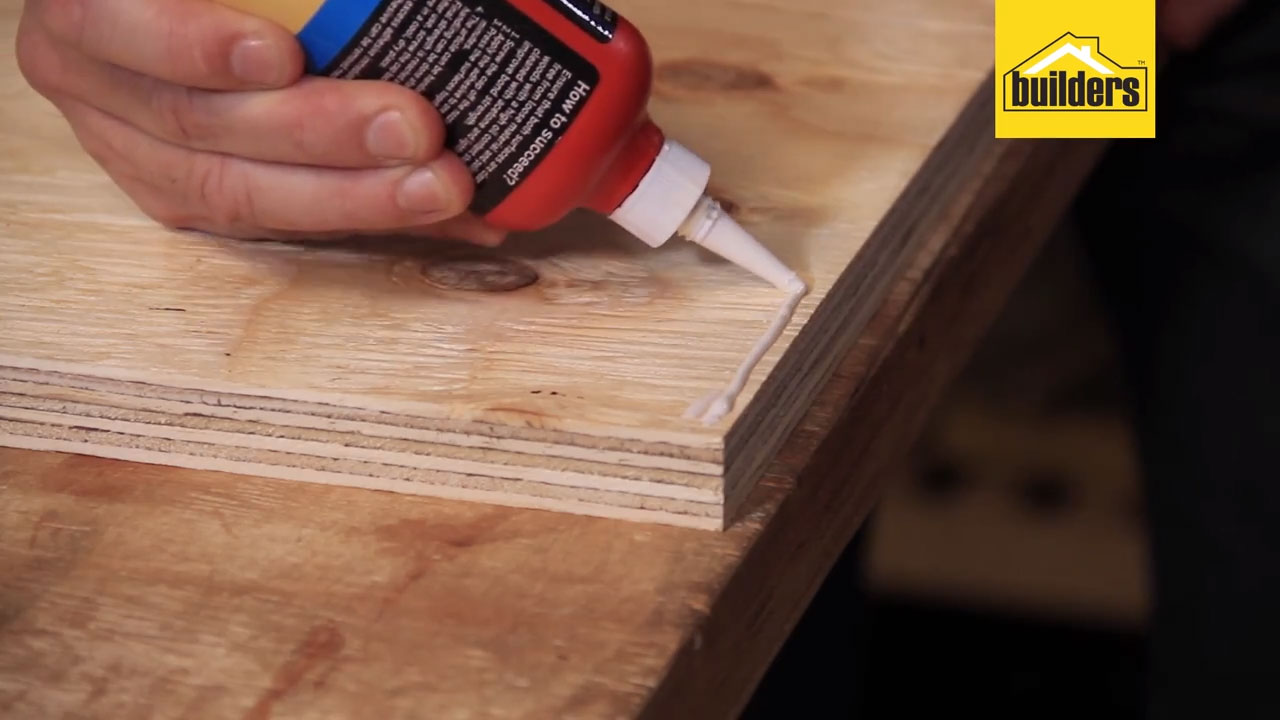
Start by doubling up the plywood to create a chunky, solid look. Clamp the wood to a work surface. Use wood glue to join the planks – remember to smooth the wood glue all the way to the edges of the wood for a secure bond.
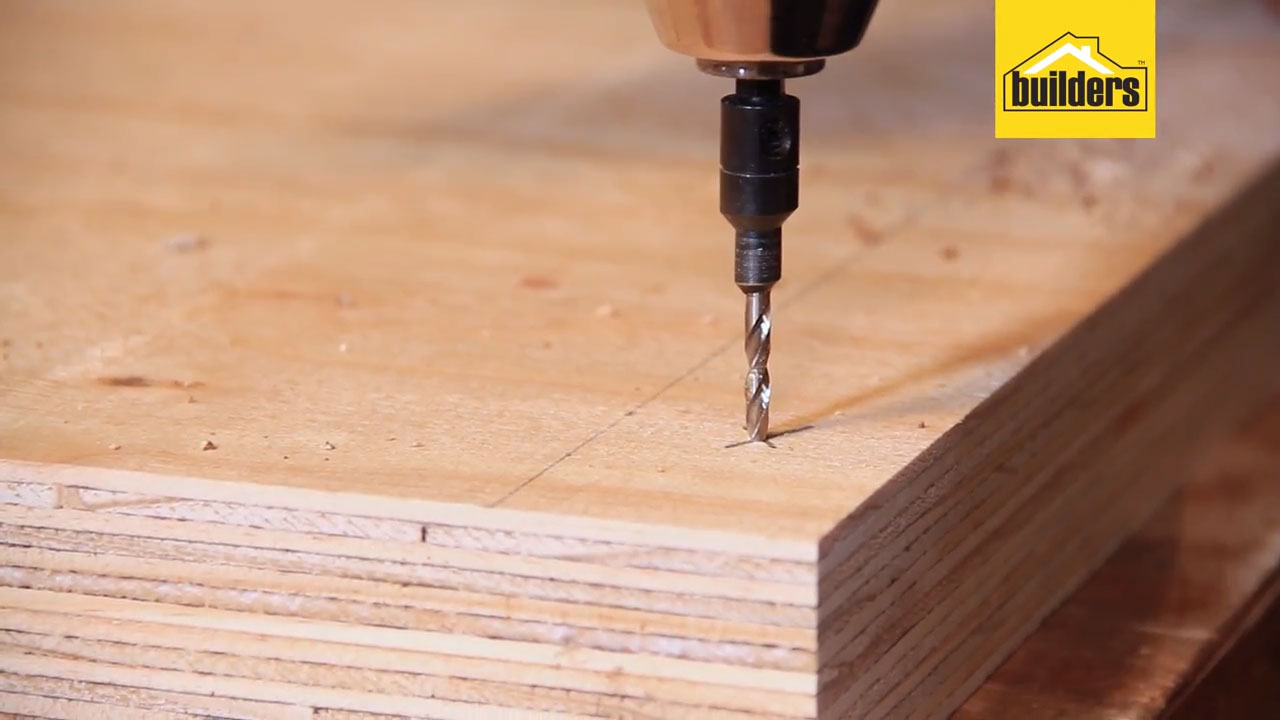
Step 2
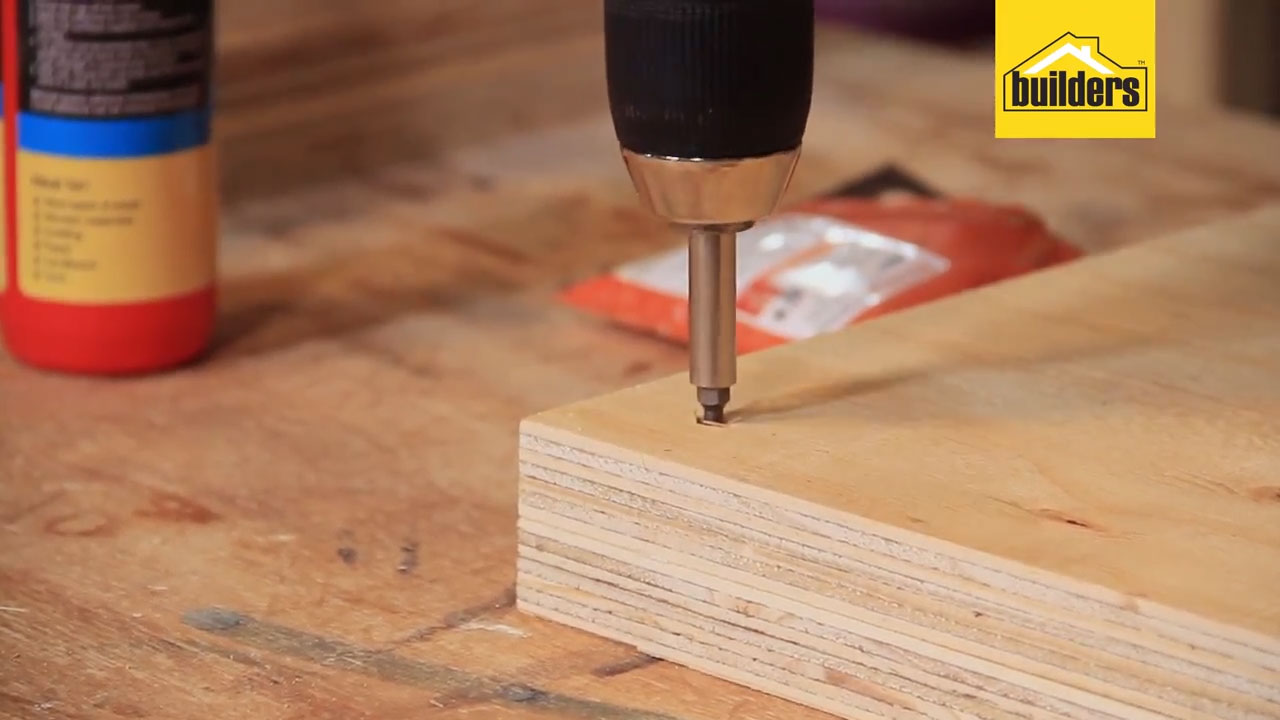
Fuse the wood planks together using the 35mm screws – tap the screws into place before drilling to get an idea of where they need to go (around the edges and in the middle of the planks.) Repeat the process until you have two legs (400mm x 450mm) and a table-top (450mm x 450mm) for each side table.
Step 3
Screw the table-tops to the legs to create the tables. Use a speed pilot to countersink the hole for each screw, for a neater finish.
Step 4
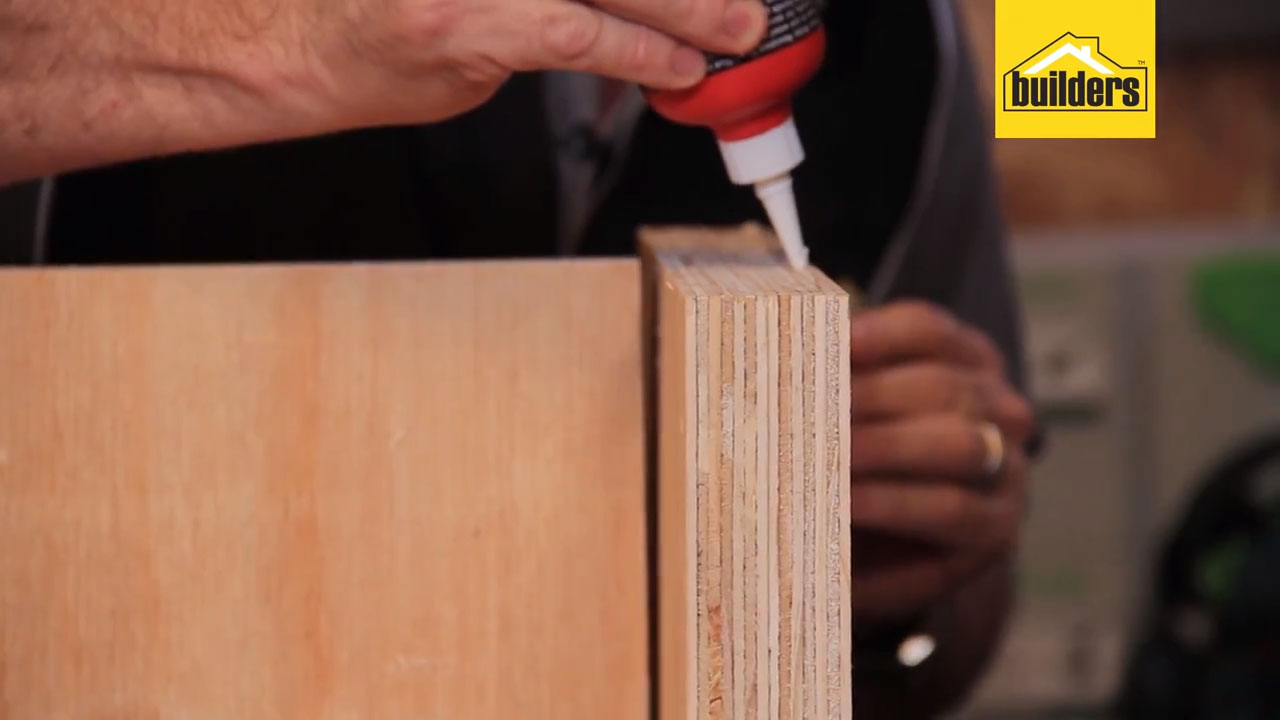
Place some wood glue on the edge of the leg that will be joined to the table-top to ensure a secure bond.
Step 5
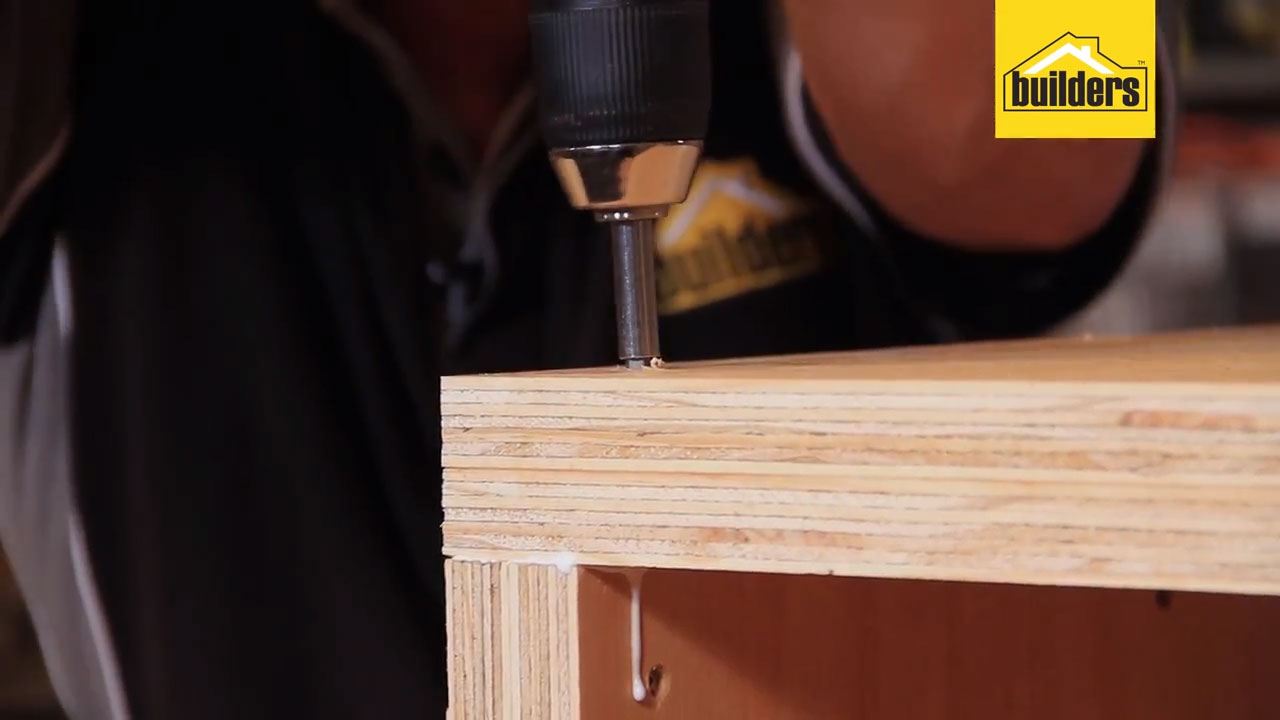
Screw 75mm screws into the pilot holes and attach the pieces tightly. Repeat the process for the second leg of the table.
Step 6
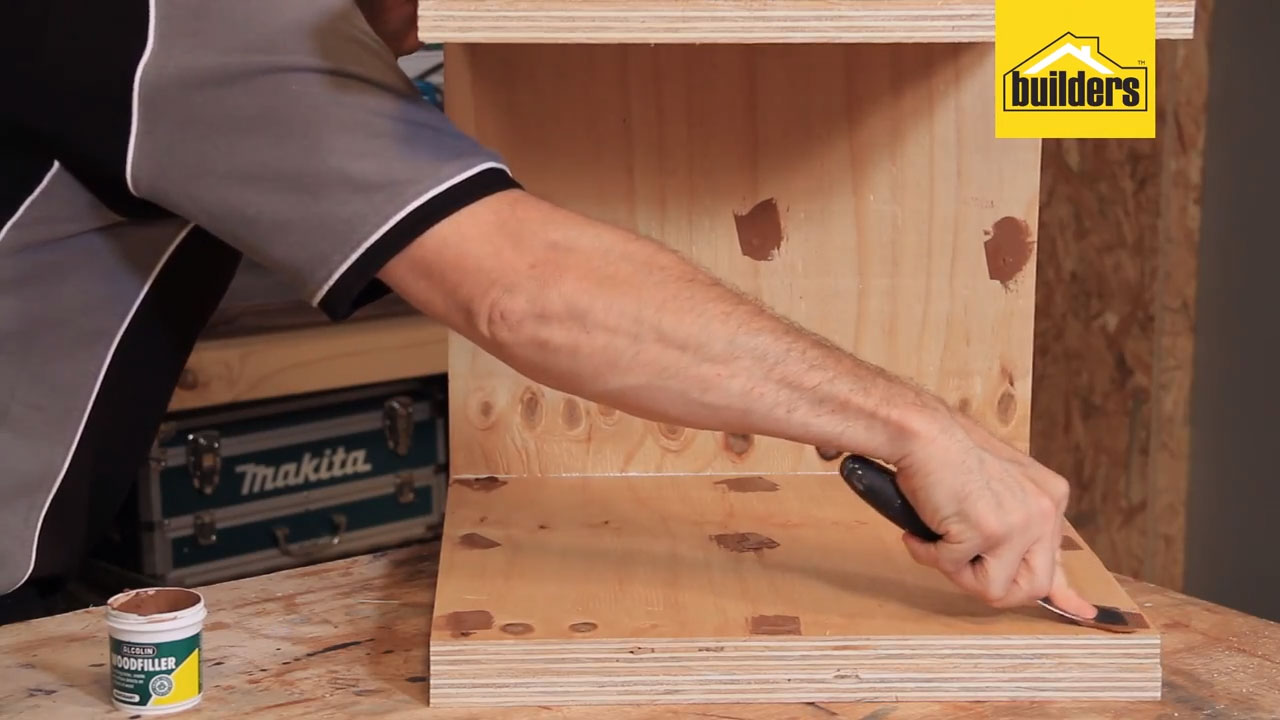
Once the structure is complete, fill the holes with wood filler and allow to dry.
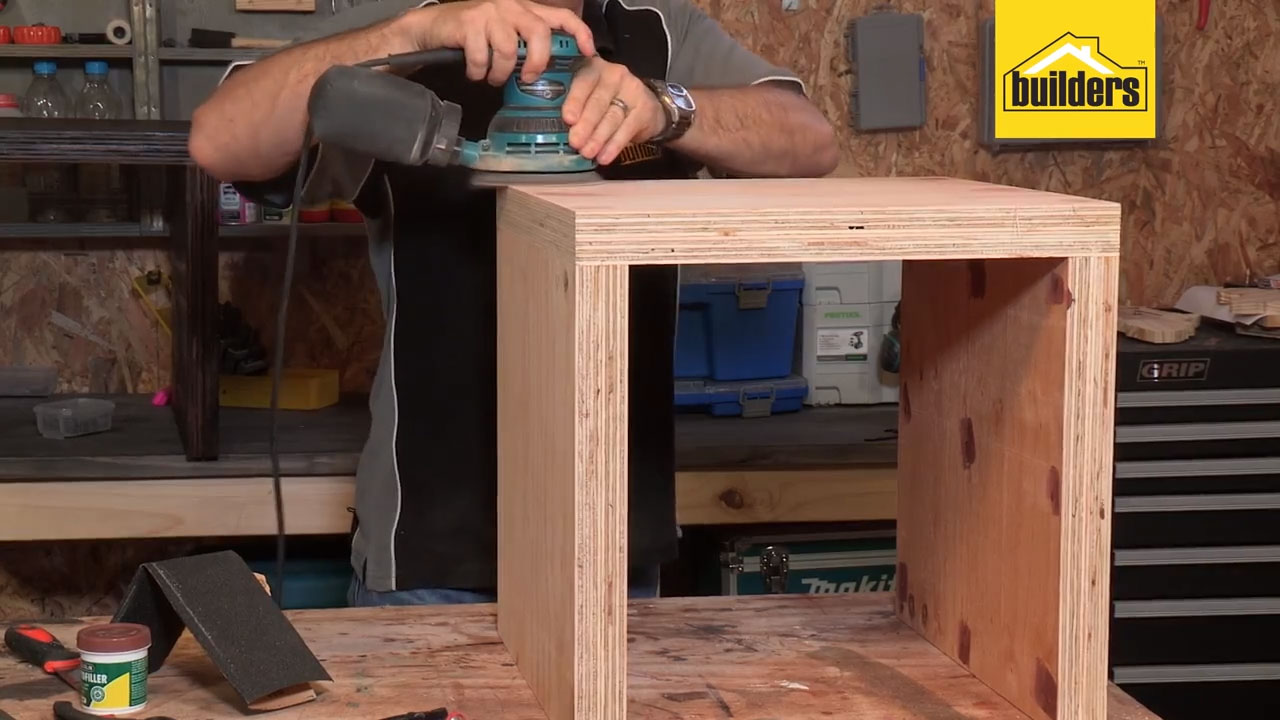
Step 7
Once the wood filler is dry, sand the table for a smooth surface and to soften sharp edges.
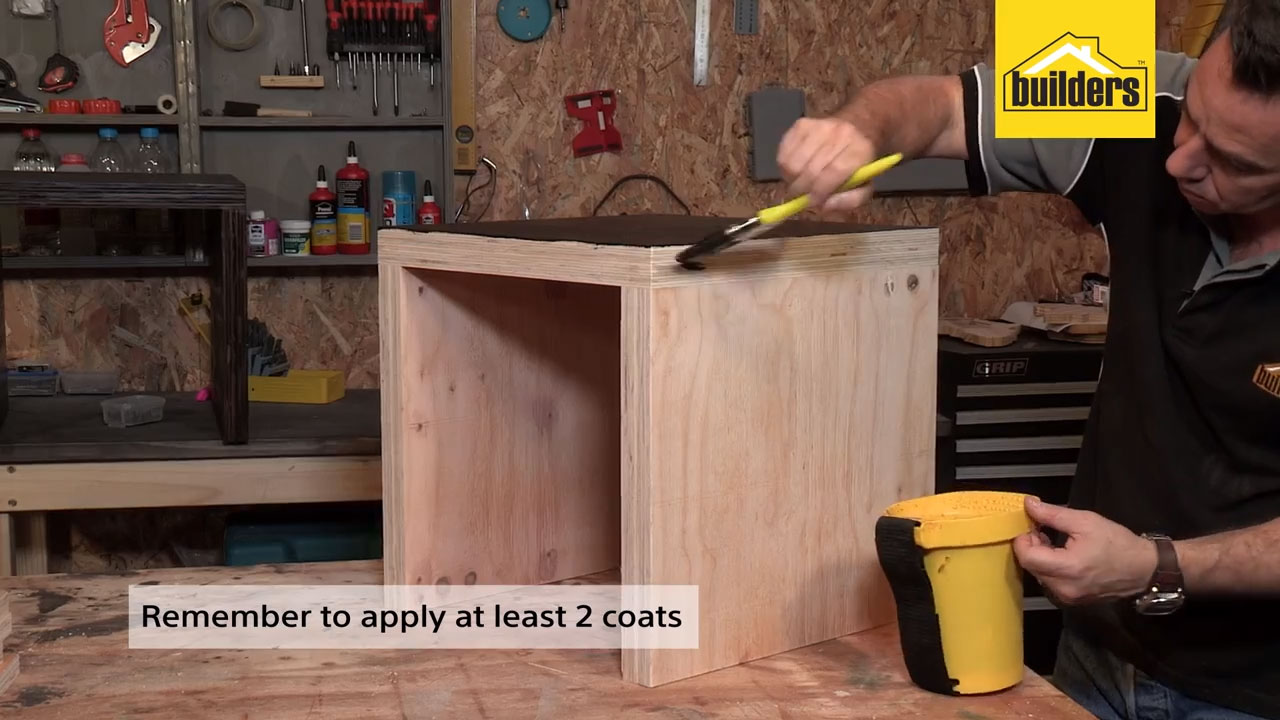
Step 8
Stain the tables to the desired colour (matching the headboard if you are creating a set). Be sure to add a second coat and allow it to dry.
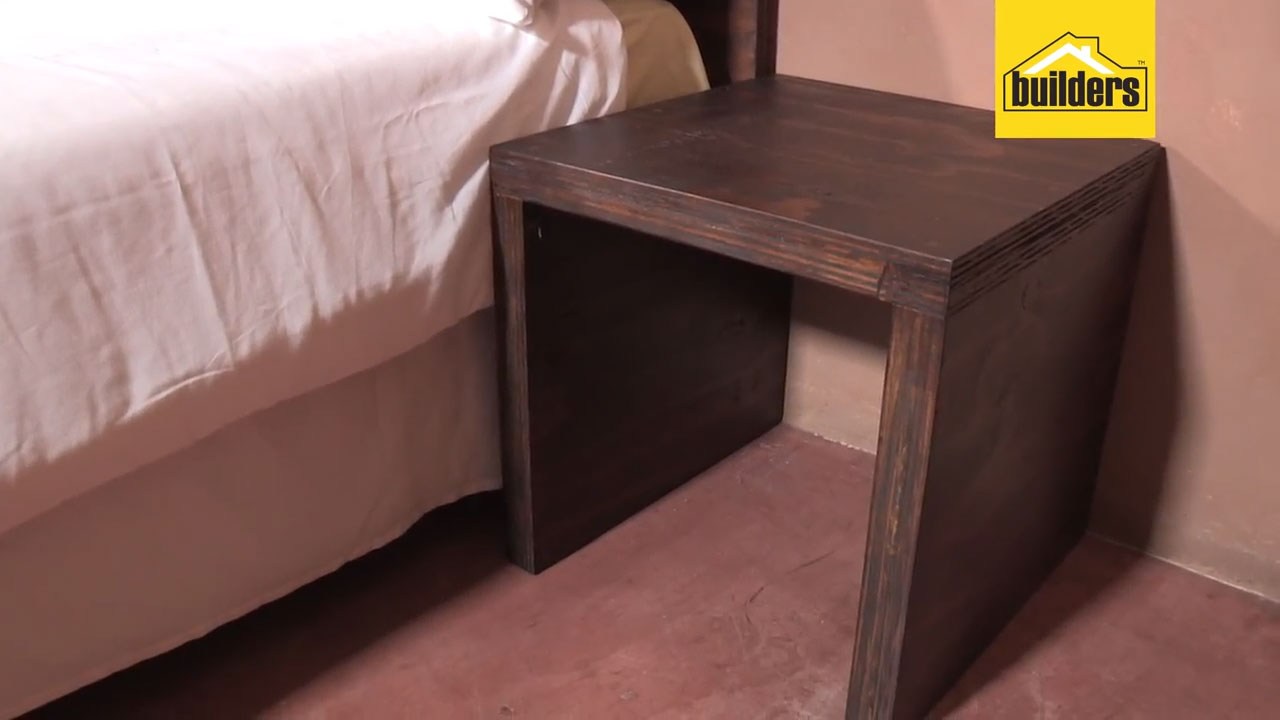
Step 9
Seal the wood to protect it from damage. Once dry, your tables are ready to enjoy!
Browse 1000’s of products available to you. Select your country to Shop Online.


