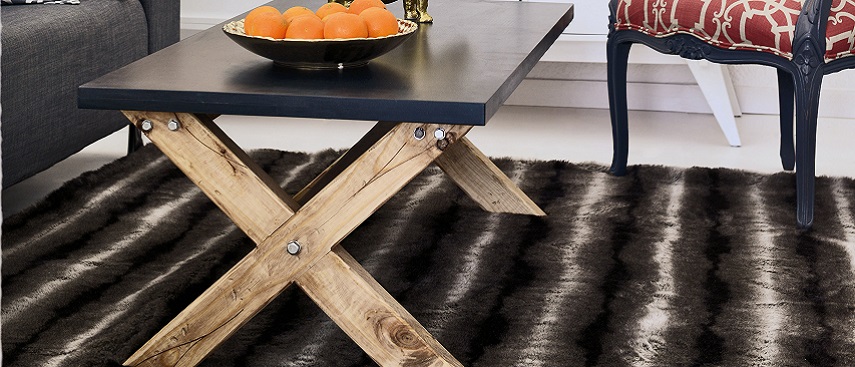
Try your hand at a nifty ageing technique and create a coffee table that marries a rustic and modern look – beautifully!
- 16mm Supawood cut to two 600mm x 1200mm pieces
- 6600mm length of 76mm x 50mm planed all round (PAR) pine cut to:
- 3 x 1000mm lengths (cross supports)
- 4 x 700mm lengths (legs)
- wood glue
- ten 8mm x 100mm coach screws with washers
- 120- and 240-grit sandpaper
- wood filler
- 8mm x 30mm screws
- sanding sealer
- stain
- top coat
- PVA (for top)
- hand saw or circular saw
- drill and pilot drill
- pencil
- measuring tape
- 13mm spanner for coach screws
- large square
- chisel
- angle grinder and chain (for ageing the wood)
Step 1
Laminate the two Supawood boards together using wood glue and fix on the underside using screws.
Top Tip
Use two pieces of 16mm Supawood instead of one piece of 32mm – it’s cheaper!
Step 2
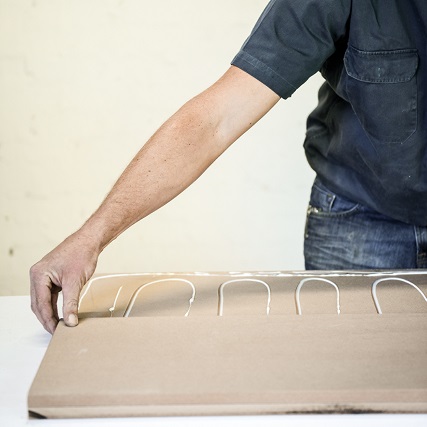
Rub wood glue onto the edges liberally, and sand once dry to seal it and prevent the paint from being drawn into the softer edge of the Supawood.
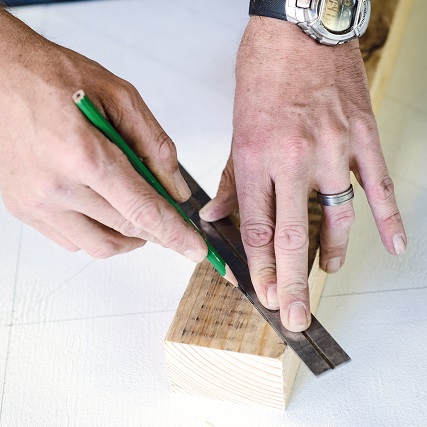
Step 3
Draw a rectangle 550mm wide by 400mm high on an offcut or on your workbench using a square. Then lay the pine across the corners diagonally and mark the angles that need to be cut using a hand saw.
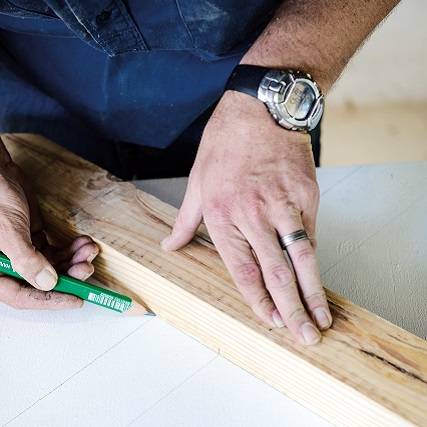
Step 4
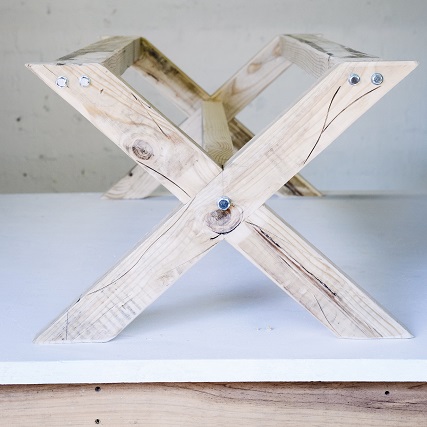
Place the legs back on your drawing and mark where they intersect. Now turn them over and join those marks.
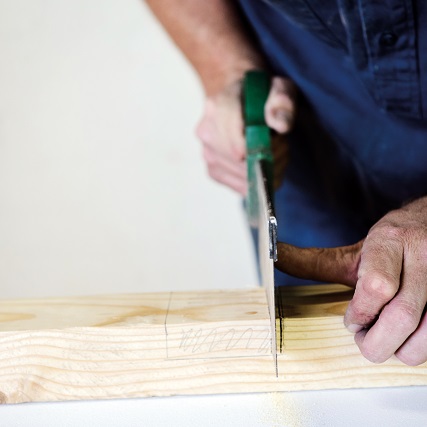
Step 5
Mark the depth that you will be cutting (half the thickness of the plank). Make cuts every 3 or 4mm; you will clean the join with a chisel afterwards.
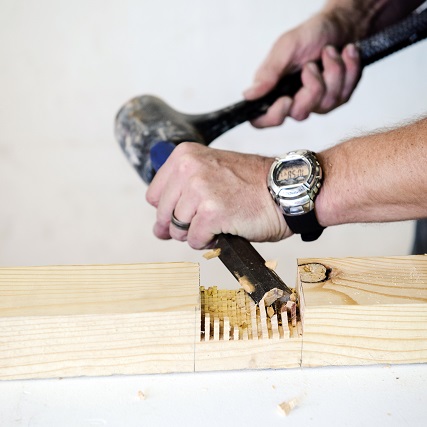
Step 6
Tap the leftover cuts with a hammer to break them out, then clean it up with a sharp chisel and hammer.
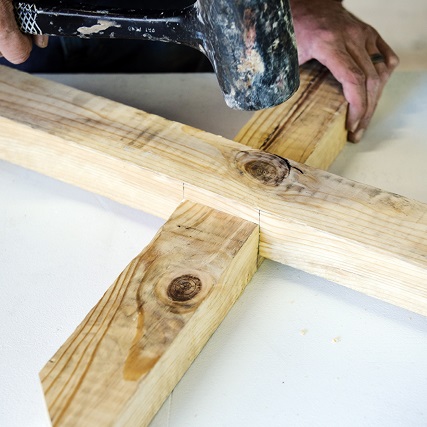
Step 7
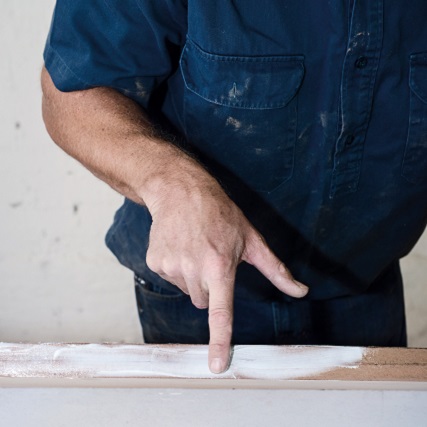
Apply glue to all the joins and fit the legs together; use screws if you don’t want to wait for the glue to dry (roughly four hours).
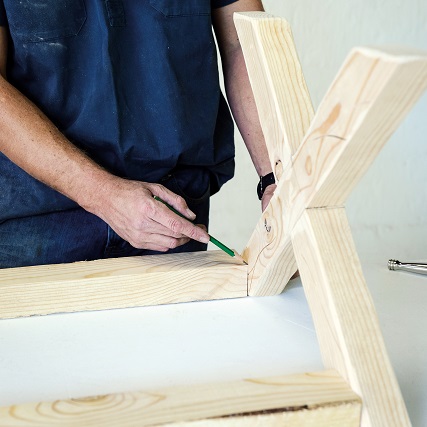
Step 8
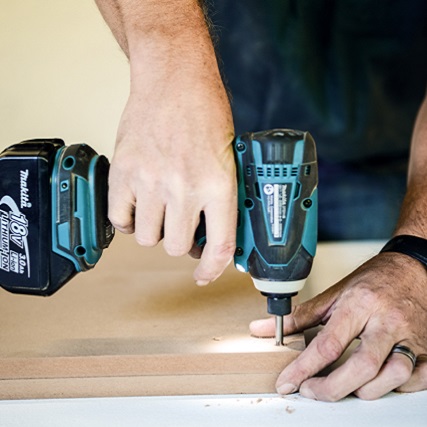
With the leg standing up, mark where the two cross supports will be positioned, then mark and drill two pilot holes (5mm) through each side of the leg.
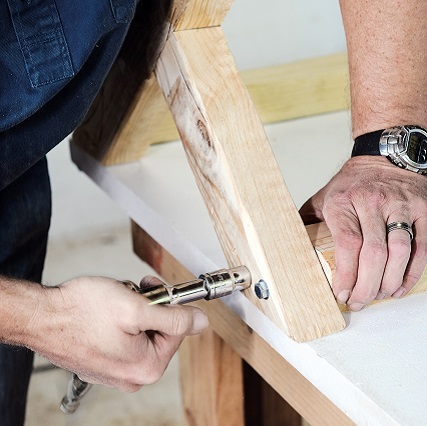
Step 9
Stand the leg up again and drill through the holes into the cross supports. Now make the holes bigger with an 8mm drill bit on the outside edge of the legs. Apply glue and fix together using the coach screws.
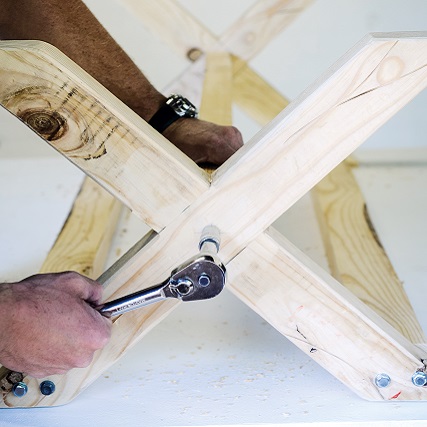
Step 10
Mark the centre of each cross support and attach the third support between these two pieces. Apply glue and fix in position.
Step 11
After painting and staining the legs, fix the top on by drilling from below the cross support beam into the top
Credits
Referenced from Gallo images / Home Magazine
Browse 1000’s of products available to you. Select your country to Shop Online.


