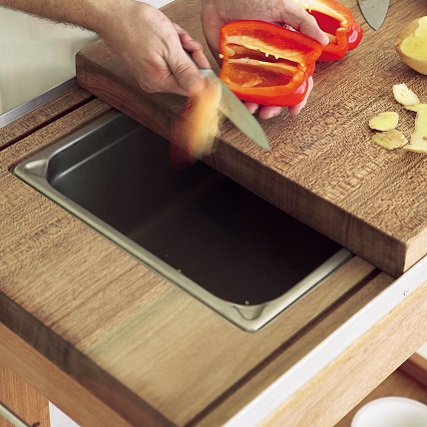
In this DIY, we show you how to make a wooden butcher’s block for the kitchen – it’s so simple!
- wood glue
- 40mm chipboard screws
- four castors (two with brakes)
- two 750 x 31 x 3mm aluminium fl at bars
- 16mm chipboard screws
- two 8mm coach screws
- stainless steel basin: ours measured 530 x 325 x 150mm (a plastic one can be used – adjust the measurements accordingly)
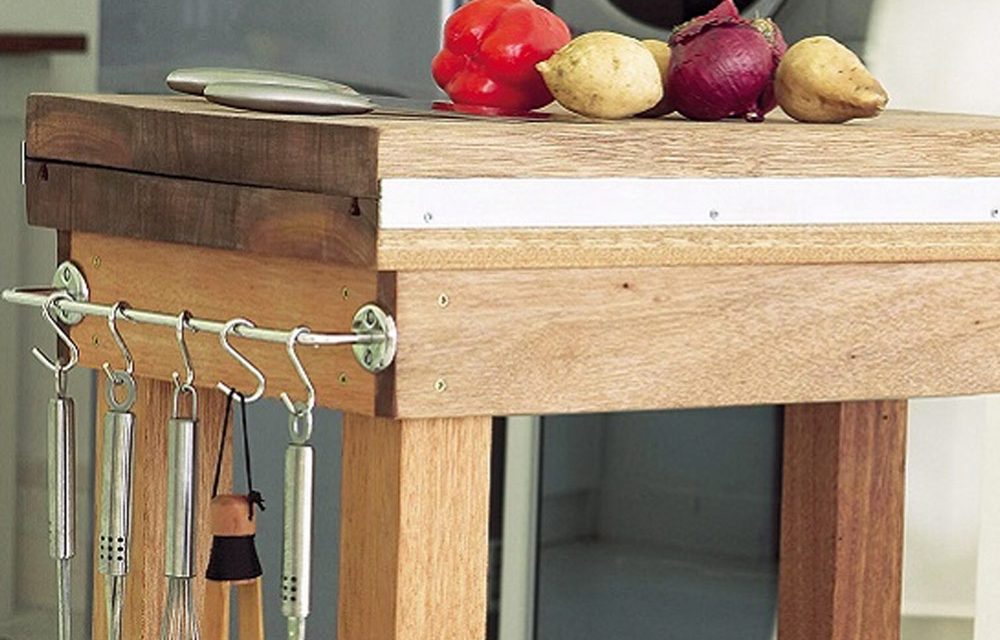
- stainless steel rails with hanging hooks
- 19mm stainless steel screws
- cordless drill (with 3mm drill bit and 25mm speedbit)
- orbital sander
- belt sander
- router (with square and dovetail bits)
- jigsaw
- steel rule
- clamps
- tape measure
- pencil
Cutting list
- four 750 x 69 x 69mm meranti/pine pieces cut from : two 1 500 x 69 x 69mm lengths (for the legs)
- four 710 x 94 x 22mm meranti/pine pieces cut from two 1 500 x 94 x 22mm lengths (for the rails)
- four 370 x 94 x 22mm meranti/pine pieces cut from one 1 500 x 94 x 22mm length (for the sides)
- six 750 x 144 x 44mm meranti/pine pieces cut from two 2 400 x 144 x 44mm lengths laminated to make two 750 x 432 x 44mm lengths (for the top and cutting board)
- three 670 x 144 x 44mm meranti/pine cut from one 2 400 x 144 x 44mm length laminated to make one 670 x 432 x 44mm length (for the bottom shelf)
Before you begin
Be sure to consider the price difference between pine and meranti. Meranti looks great but is more expensive.
Step 1
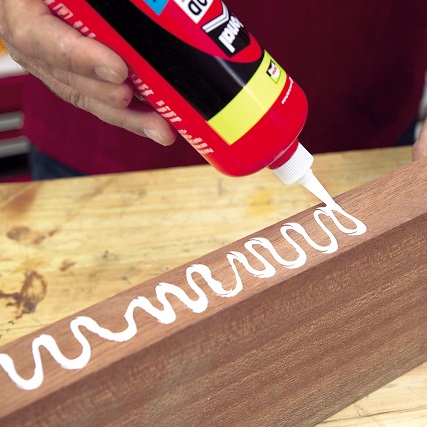
Spread glue along the sides of the six 750 x 144 x 44mm pieces and the three 670 x 144 x 44mm sections in order to laminate two boards of 750 x 432 x 44mm for the top and the cutting board and one piece sized 670 x 432 x 44mm for the bottom shelf.
Step 2
Clamp these sections individually and leave enough drying time before you proceed to step 3. Trim the size of the length for the bottom shelf to 670 x 370 x 44mm.
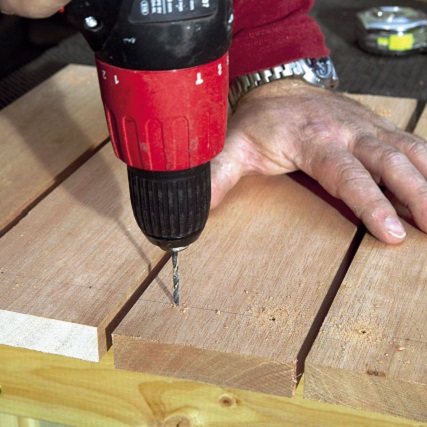
Step 3
Drill two 3mm pilot holes (35mm from the sides) on either end of each of the rails and sides, as shown.
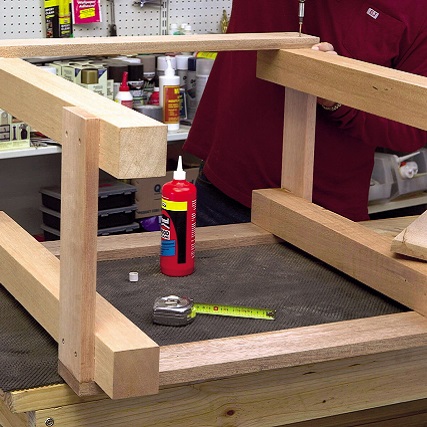
Step 4
Use the 40mm chipboard screws to construct the framework as shown. The top rails and sides should be fl ush with the tops of the legs and the bottom rails and sides should measure 75mm from the bottom.
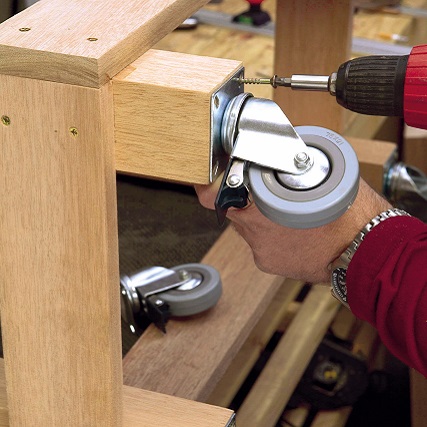
Step 5
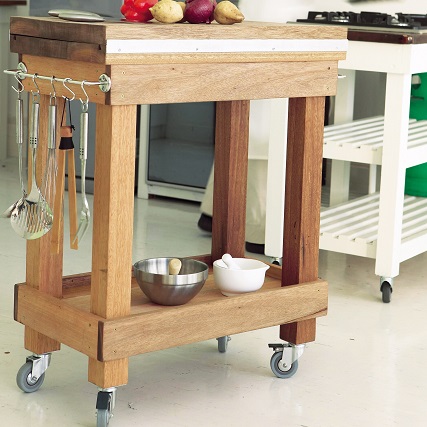
Screw the castors to the bottom of each leg using 40mm chipboard screws. Place the two castors with brakes along the same length.
Step 6
Use the jigsaw to cut 96 x 96mm sections from each corner of the 670 x 370 x 44mm bottom shelf.
Step 7
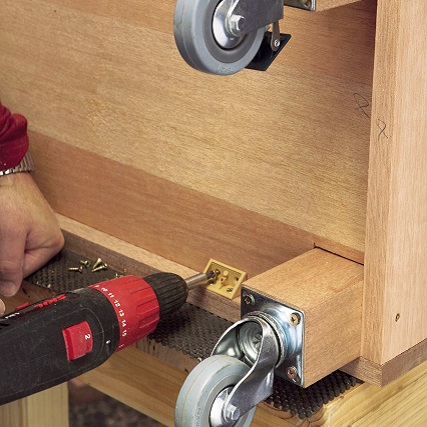
Place the bottom shelf in position 20mm from the top of the rails and screw it in place with the corner blocks, as shown.
Step 8
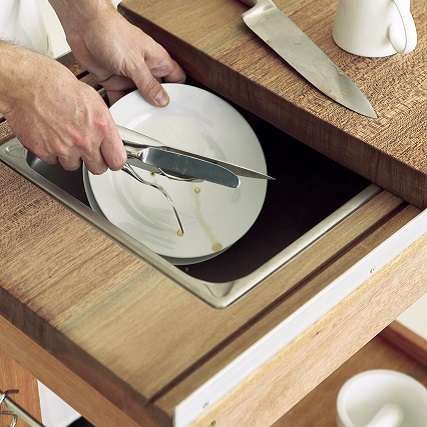
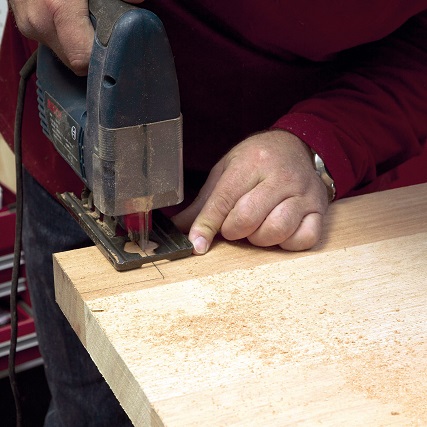
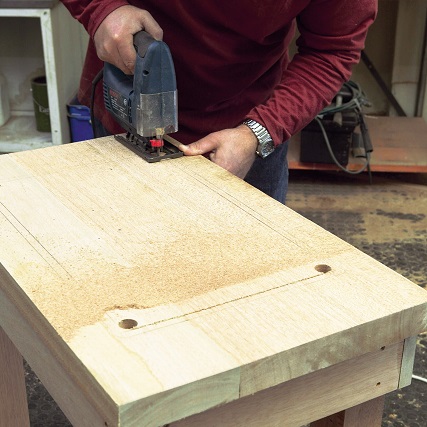
Place the top in position and screw it in place with the corner blocks from underneath. Place the basin unto the top and draw an outline. Use the 25mm speedbit to drill holes in each corner to facilitate the cutting process. Use the jigsaw and cut out the piece for the basin, as shown.
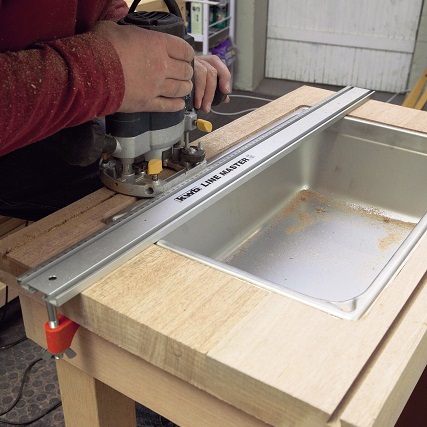
Step 9
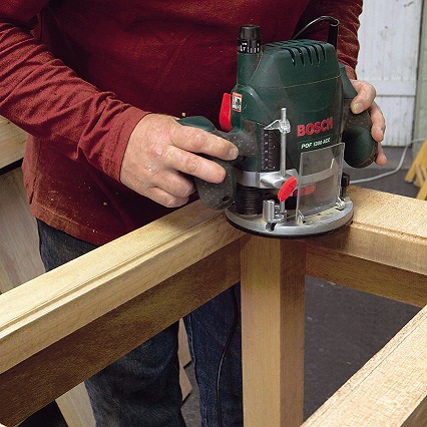
Use the router and square bit to create a recess along the edge so that the basin will settle flush with the top.
Step 10
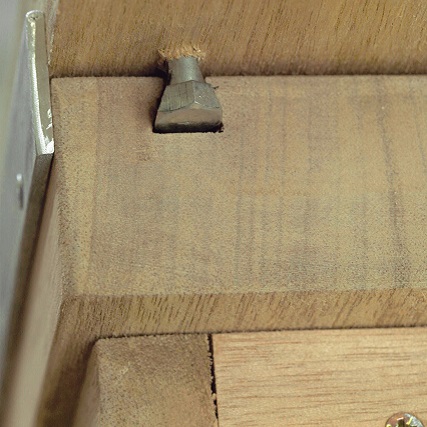
Use the router and dovetail bit to create two channels from one side to the midpoint, 25mm from the edge. These channels will hold the two modified coach screws to form the butcher’s block’s sliding mechanism.

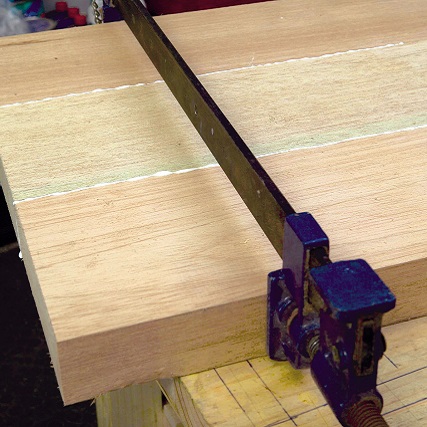
Step 11
Screw the two 750 x 31 x 3mm aluminum flat bar sections along the edges, overlapping a third, as shown.
Step 12
Modify the heads of the two coach screws with a grinding wheel so that they will run smoothly inside the dovetail grooves, as shown. These should be fixed in place, 50mm from the edge, on the bottom of the 750 x 432 x 44mm cutting board.
To finish off
Use the belt sander and orbital sander to give the structure a smooth finish. Use a quality wood oil, wood stain or varnish for the structure and use olive oil or linseed oil for the cutting board.
Credits
Referenced from Gallo images / Home Magazine
Browse 1000’s of products available to you. Select your country to Shop Online.


