Even the humble coffee table can say loads about your style and personality – so make your own statement with any one of our three conversation pieces.
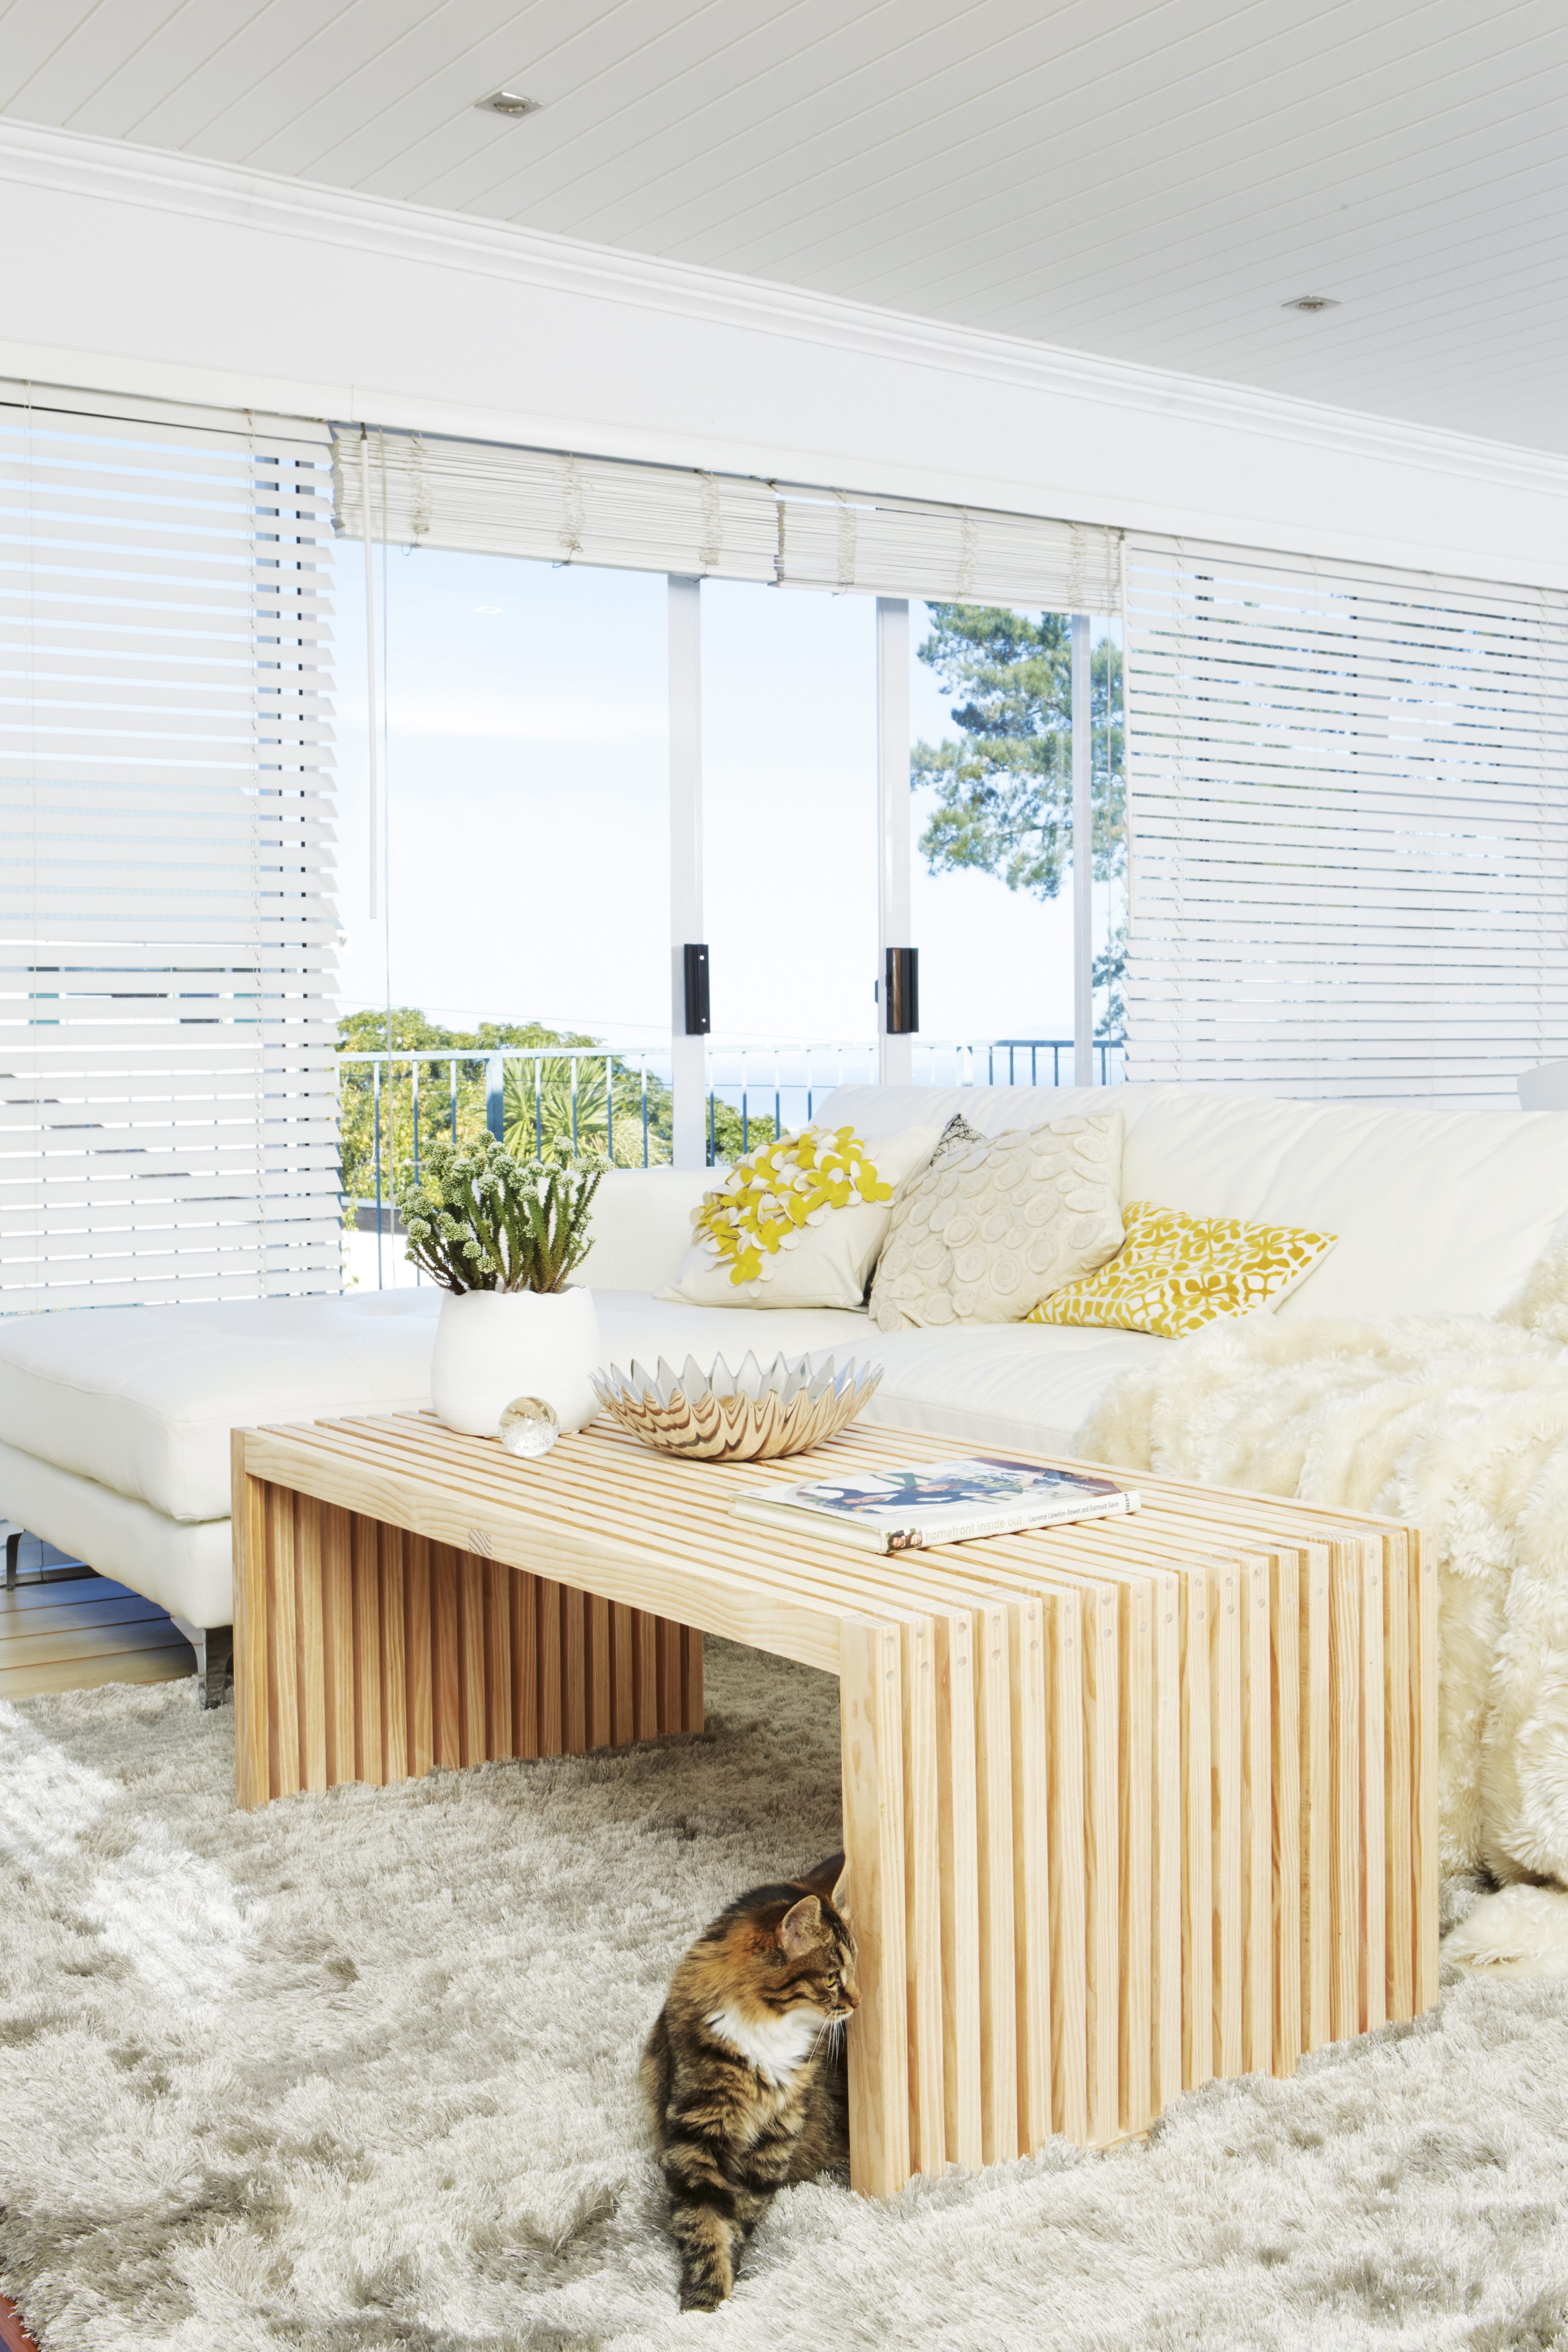
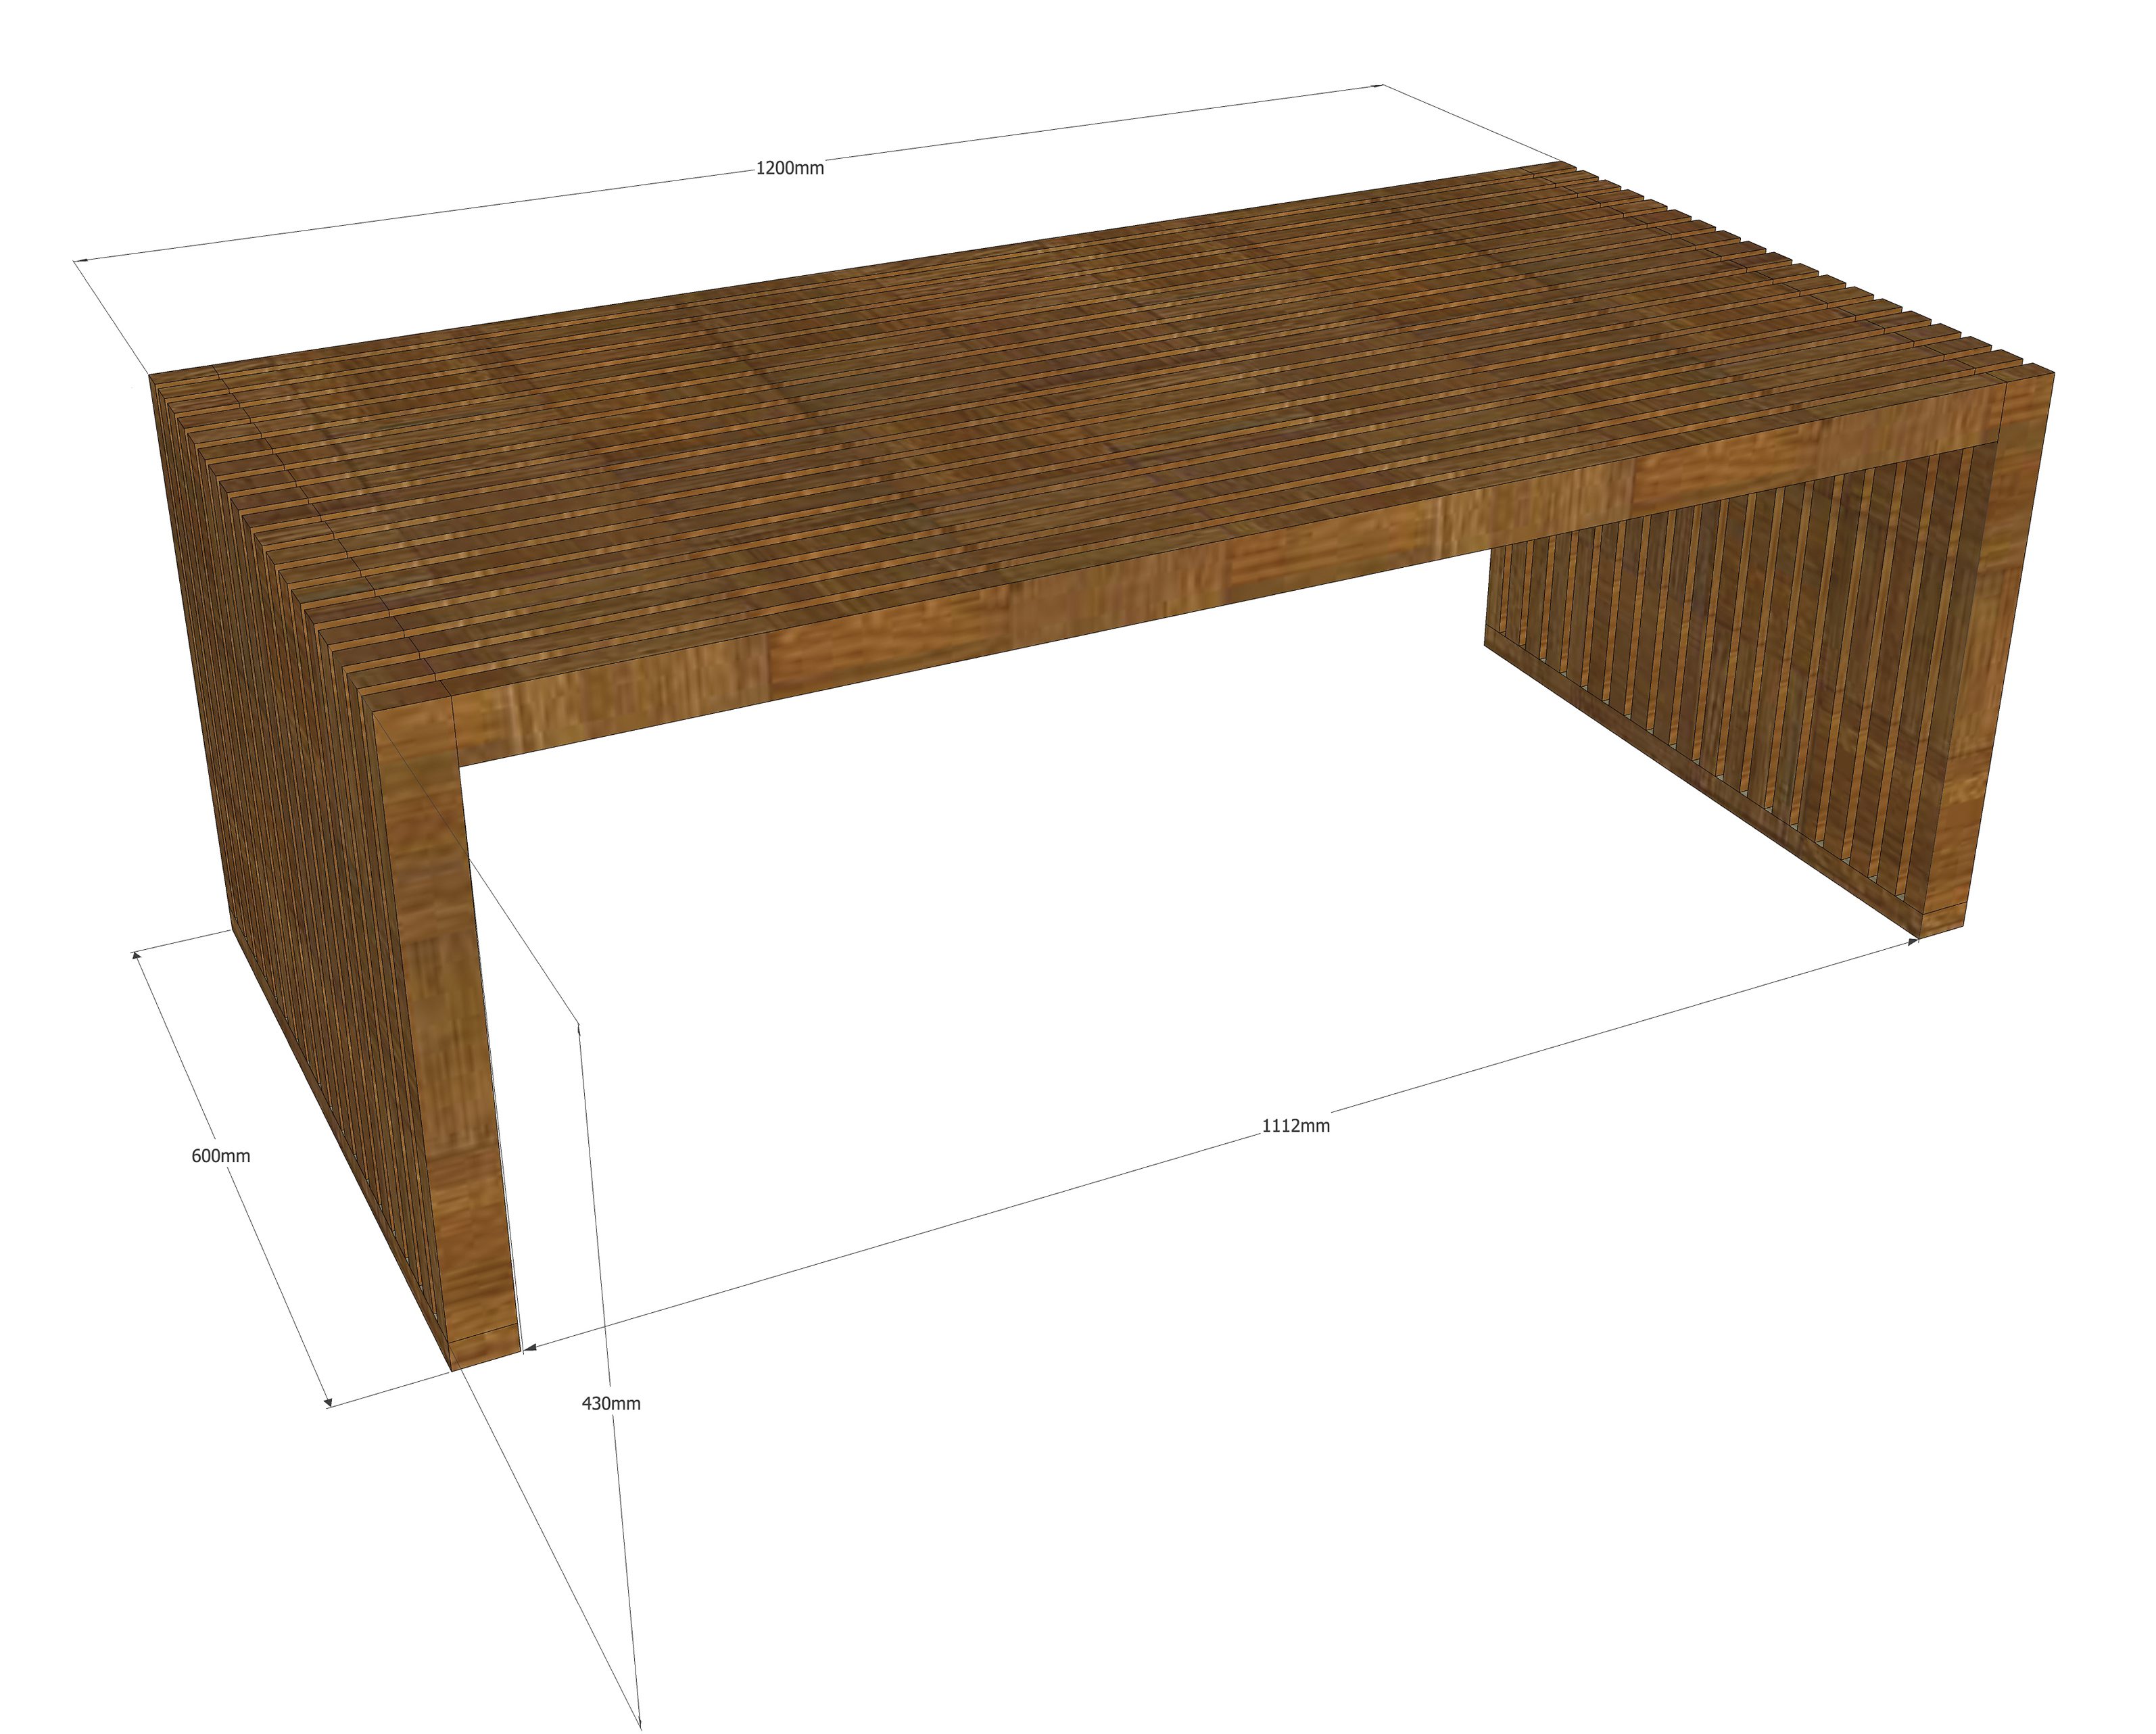
Modern Mover
Contemporary cool just got warmer: nineteen timber U-shapes add a sense of luxury to any space.
- cold glue
- 75mm cut screws
- 50mm cut screws
- 120 grit sandpaper
- wood sealer (or varnish)
- paintbrush
- cordless and corded drill, 3mm, 8mm drill bits
- tri-square
- jigsaw
- hacksaw blade
- mitre clamp(s)
- pencil
- measuring tape
- sander
Cutting List
- twenty 2400 x 44 x 22mm pine cut to:
- nineteen 1112mm (table top slats)
- thirty-eight 430mm (side slats)
- three 600mm (side and top supports)
- 8mm wooden dowel
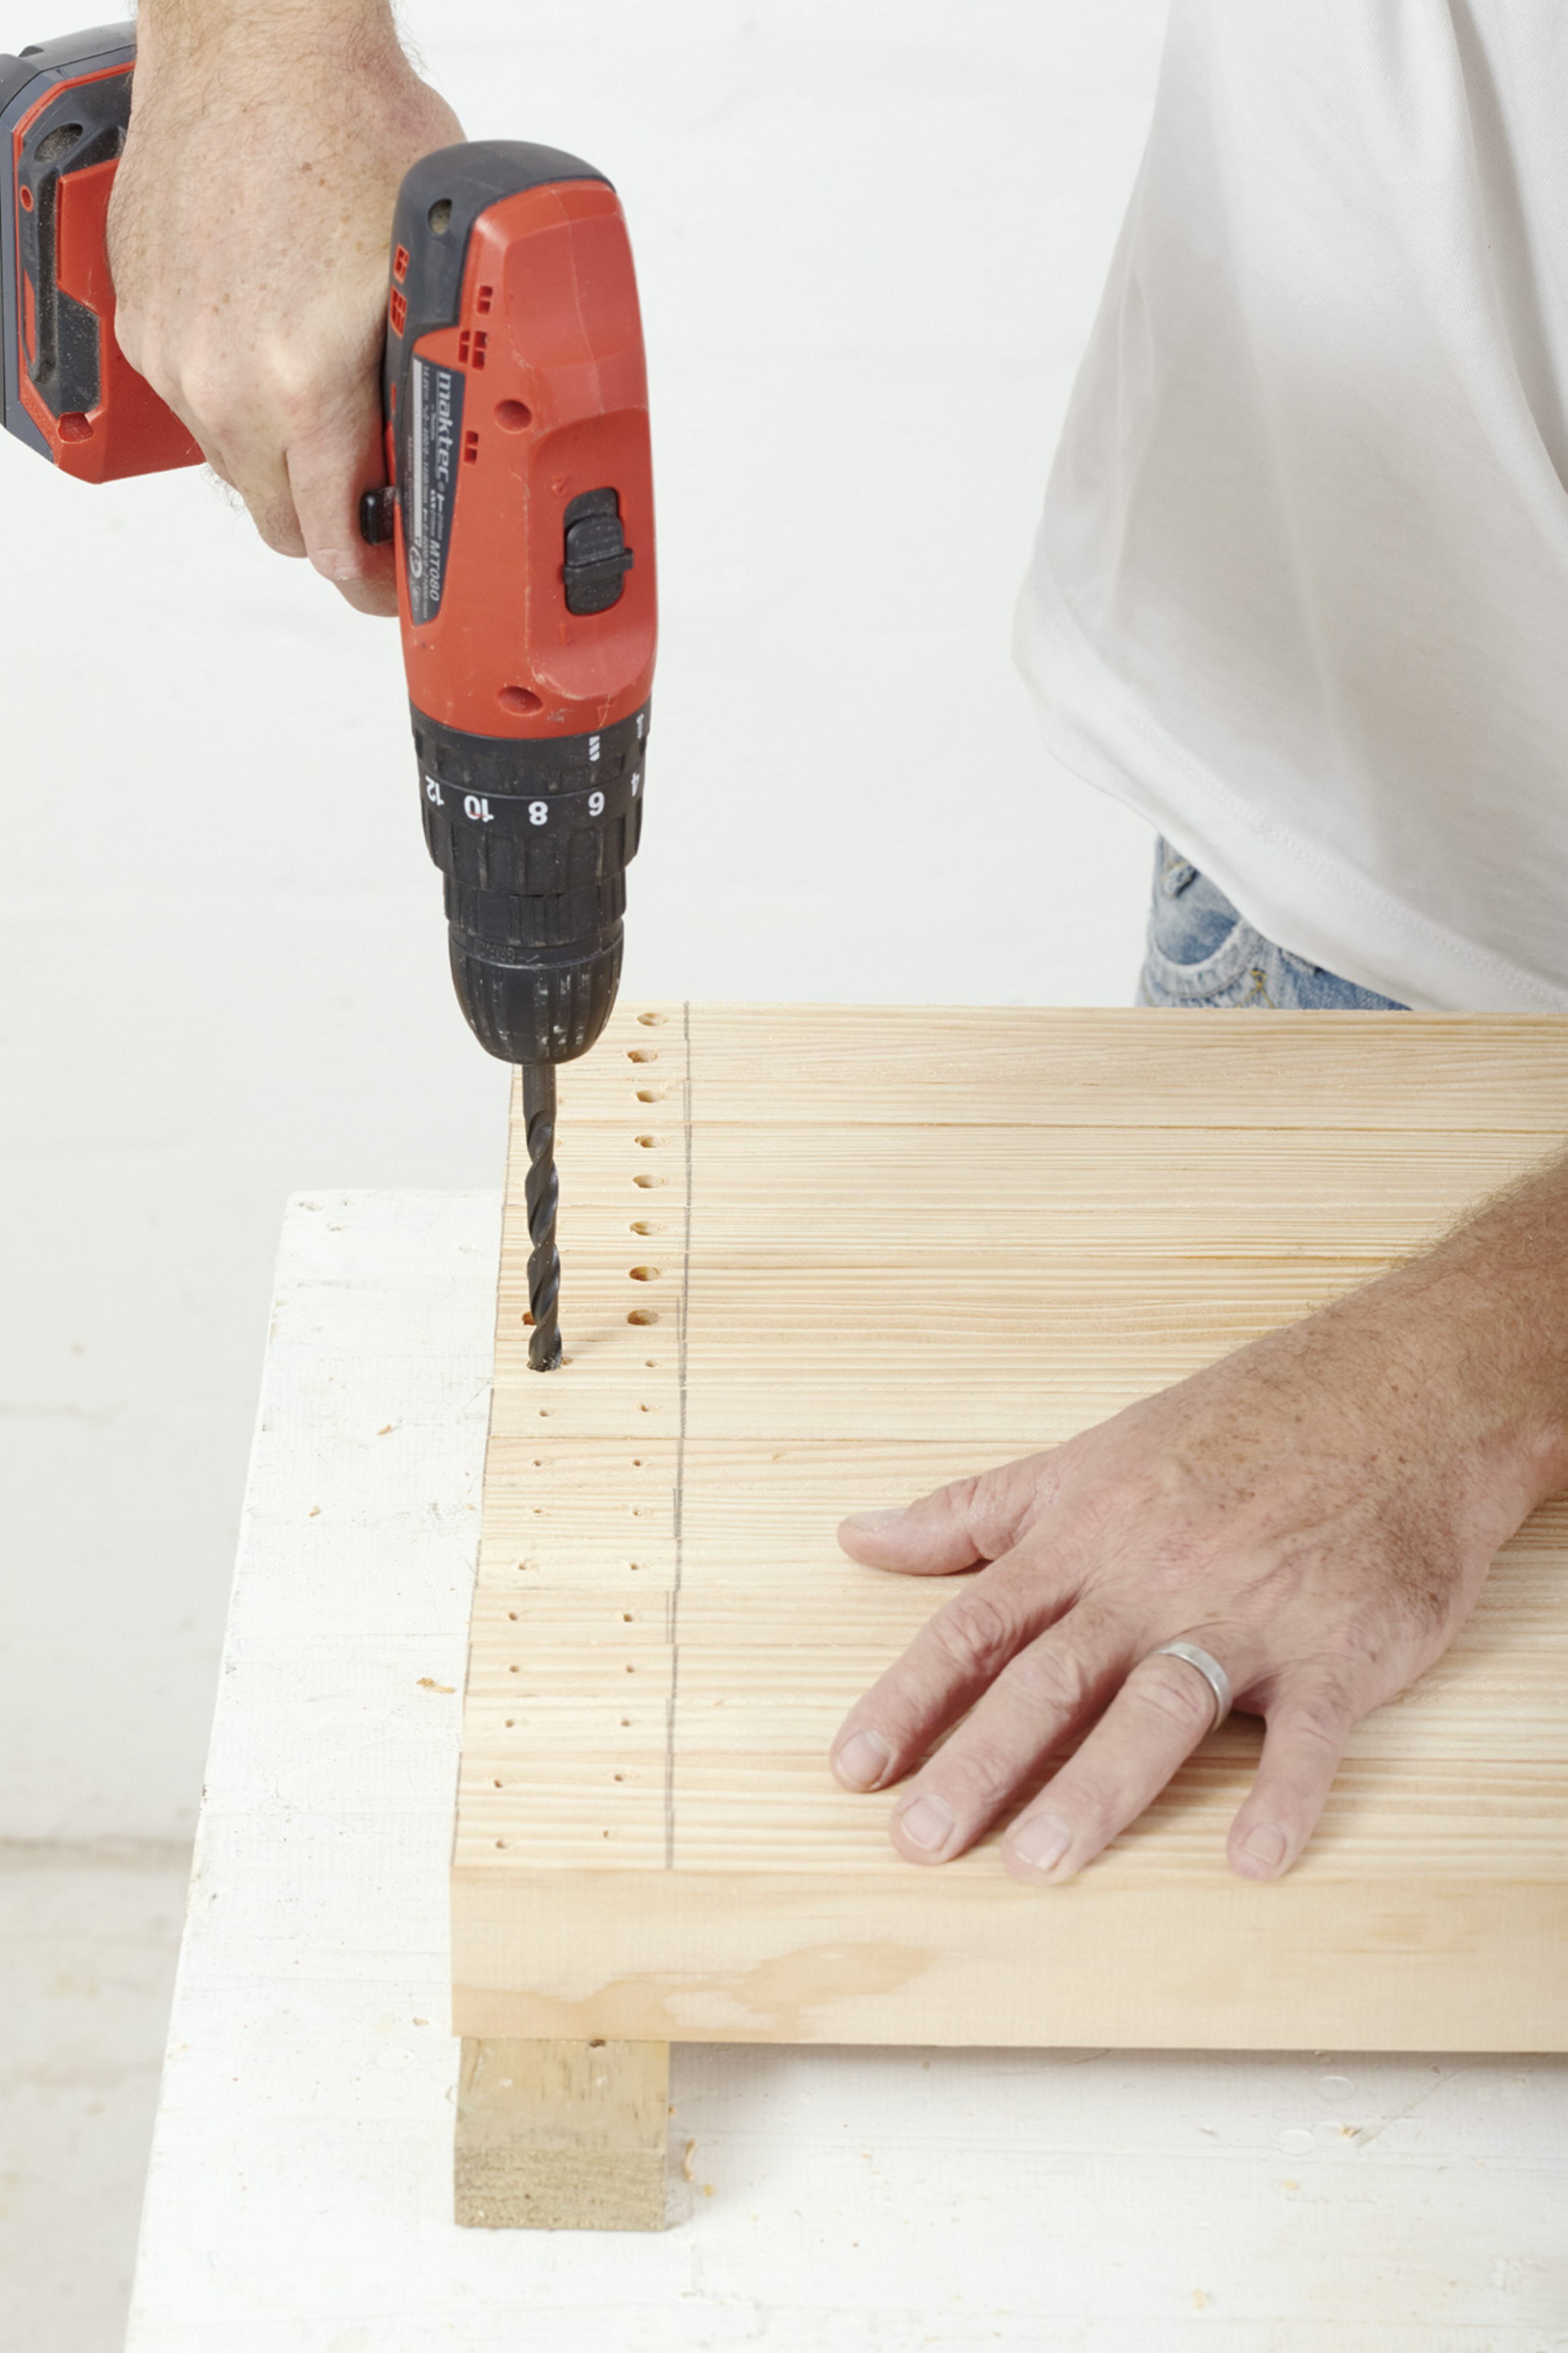
Step 1
Cut the 2400mm lengths to size, then mark 44mm-wide bands across one end of all thirty-eight 430mm lengths (side slats). Then drill a pair of 3mm pilot holes in each plank and countersink the holes to a depth of about 5mm using the 8mm bit, as shown.
Step 2
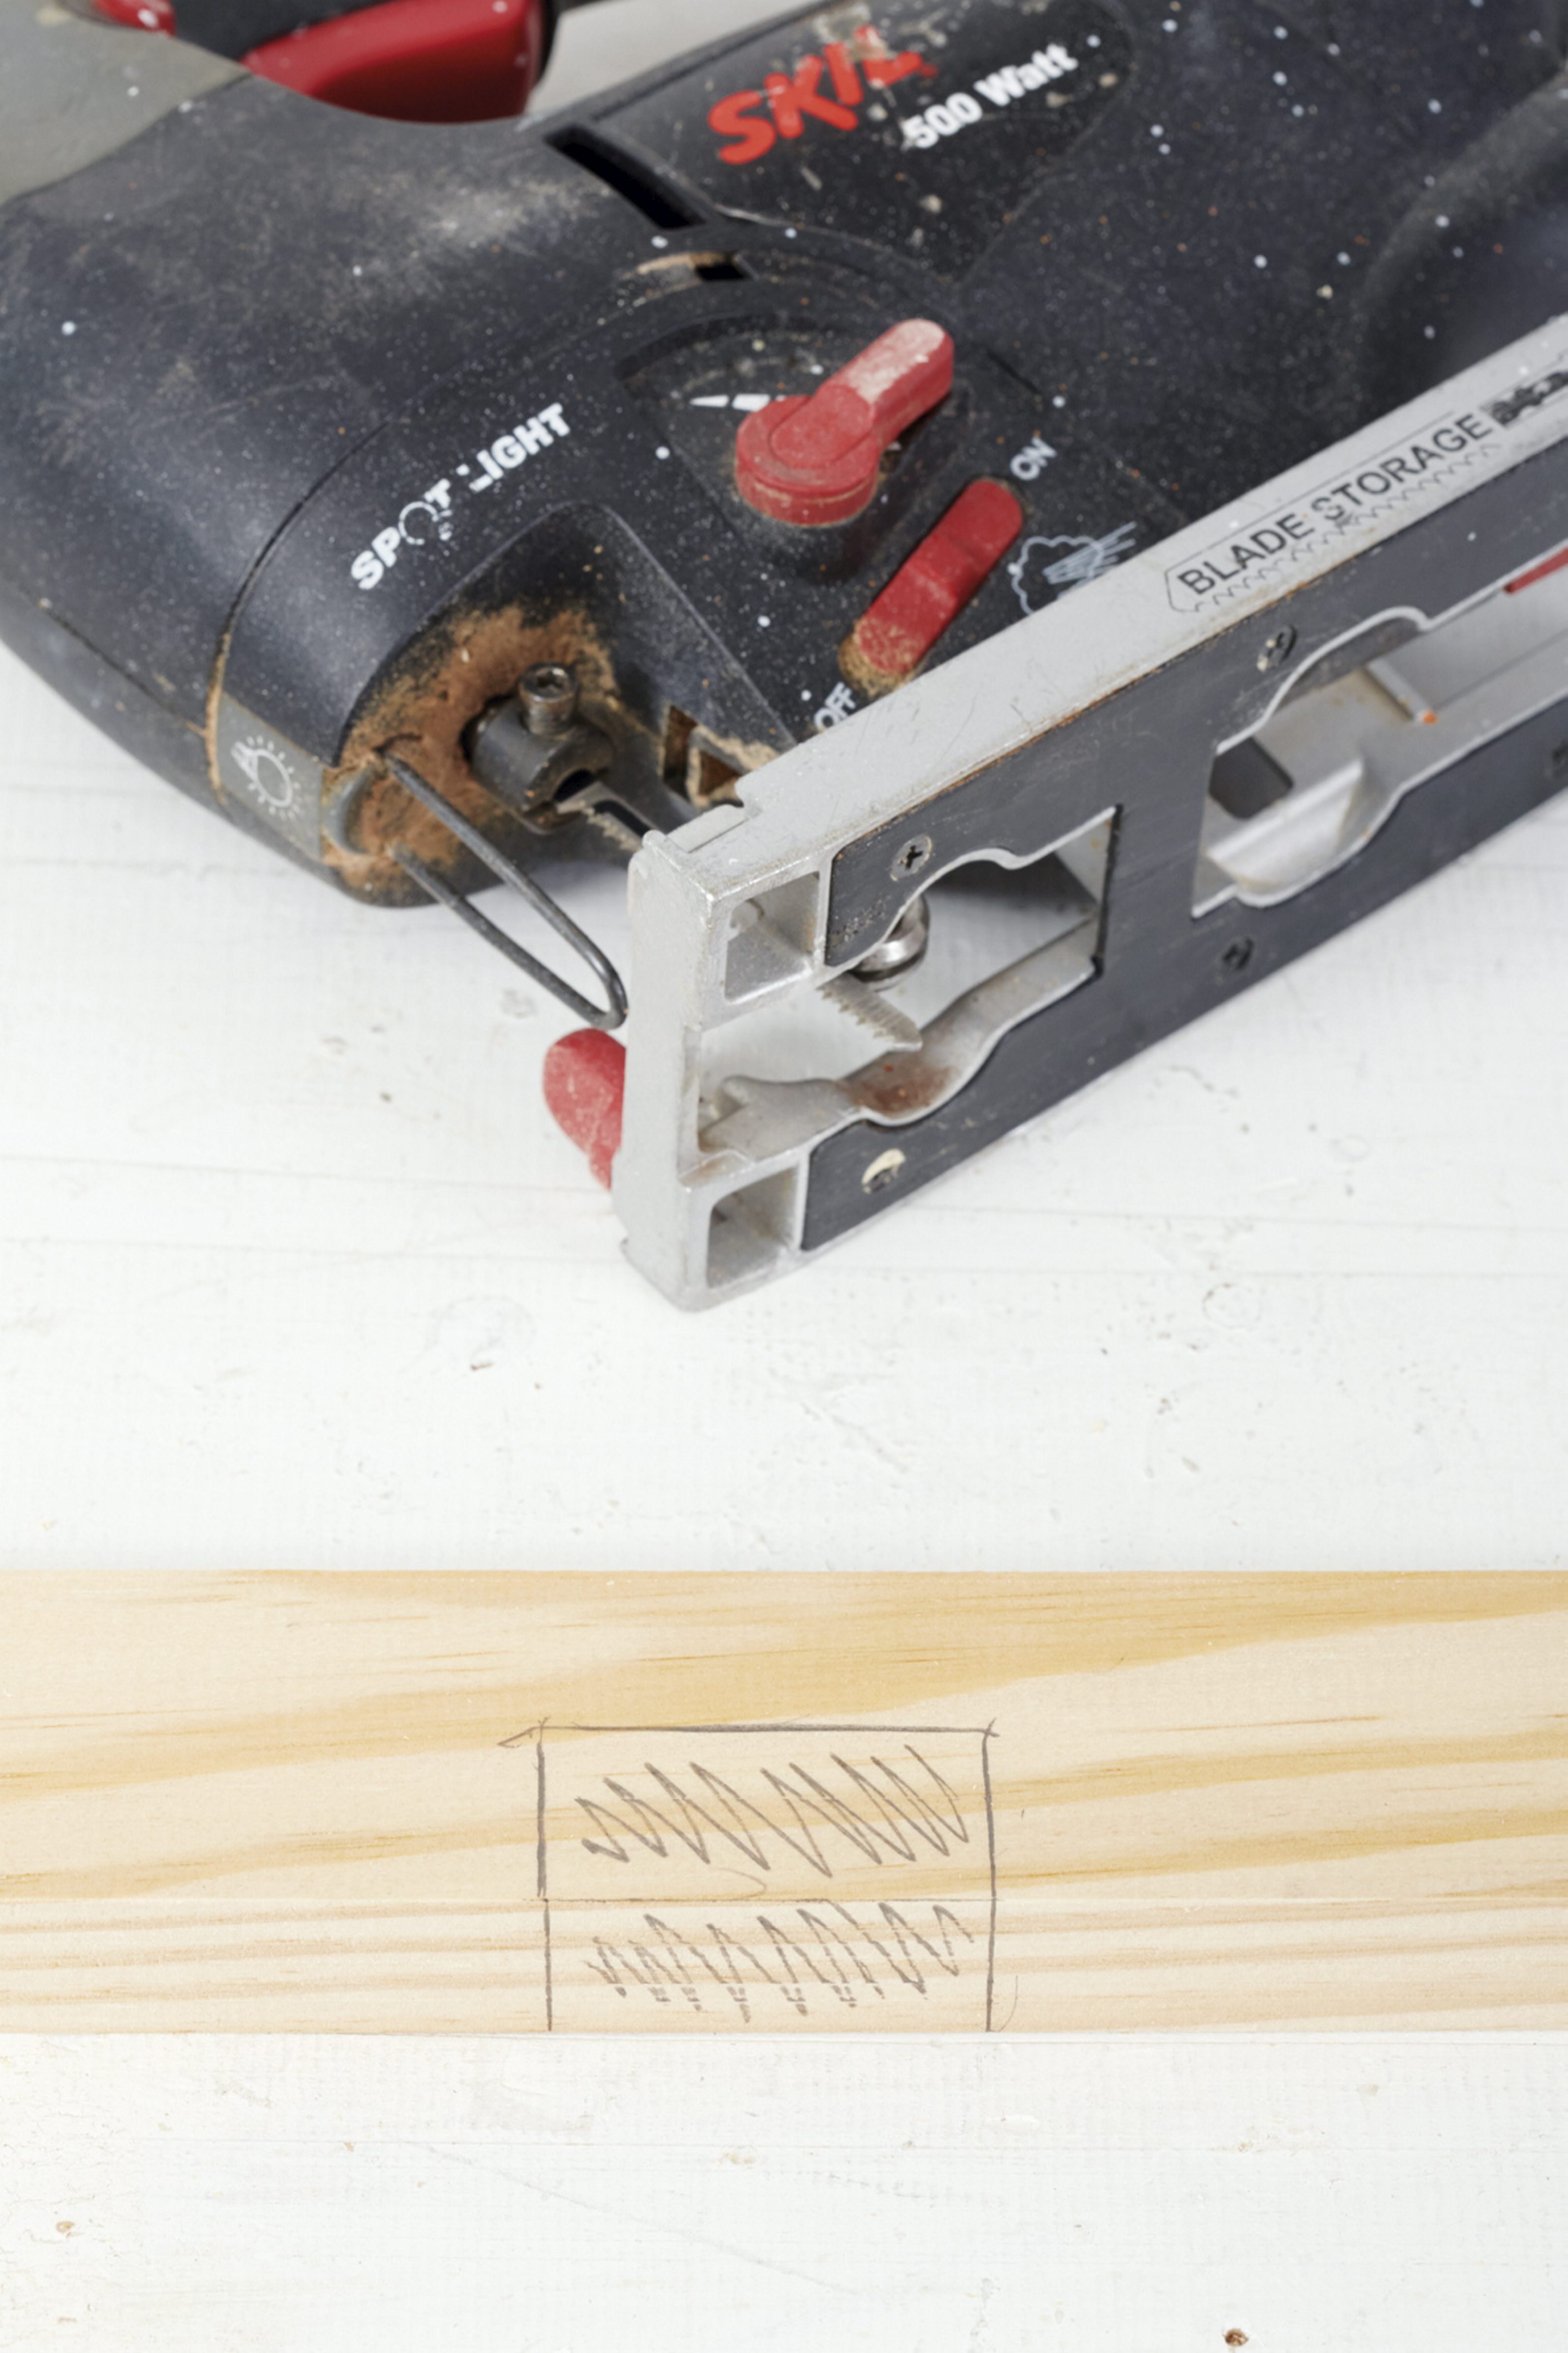
Now mark a 44x22mm ‘cutout’ midway along the length of one of the 1112mm pieces, and use the jigsaw to make a neat cut. Then use this as a template to mark and saw each of the 18 other lengths that make up the tabletop.
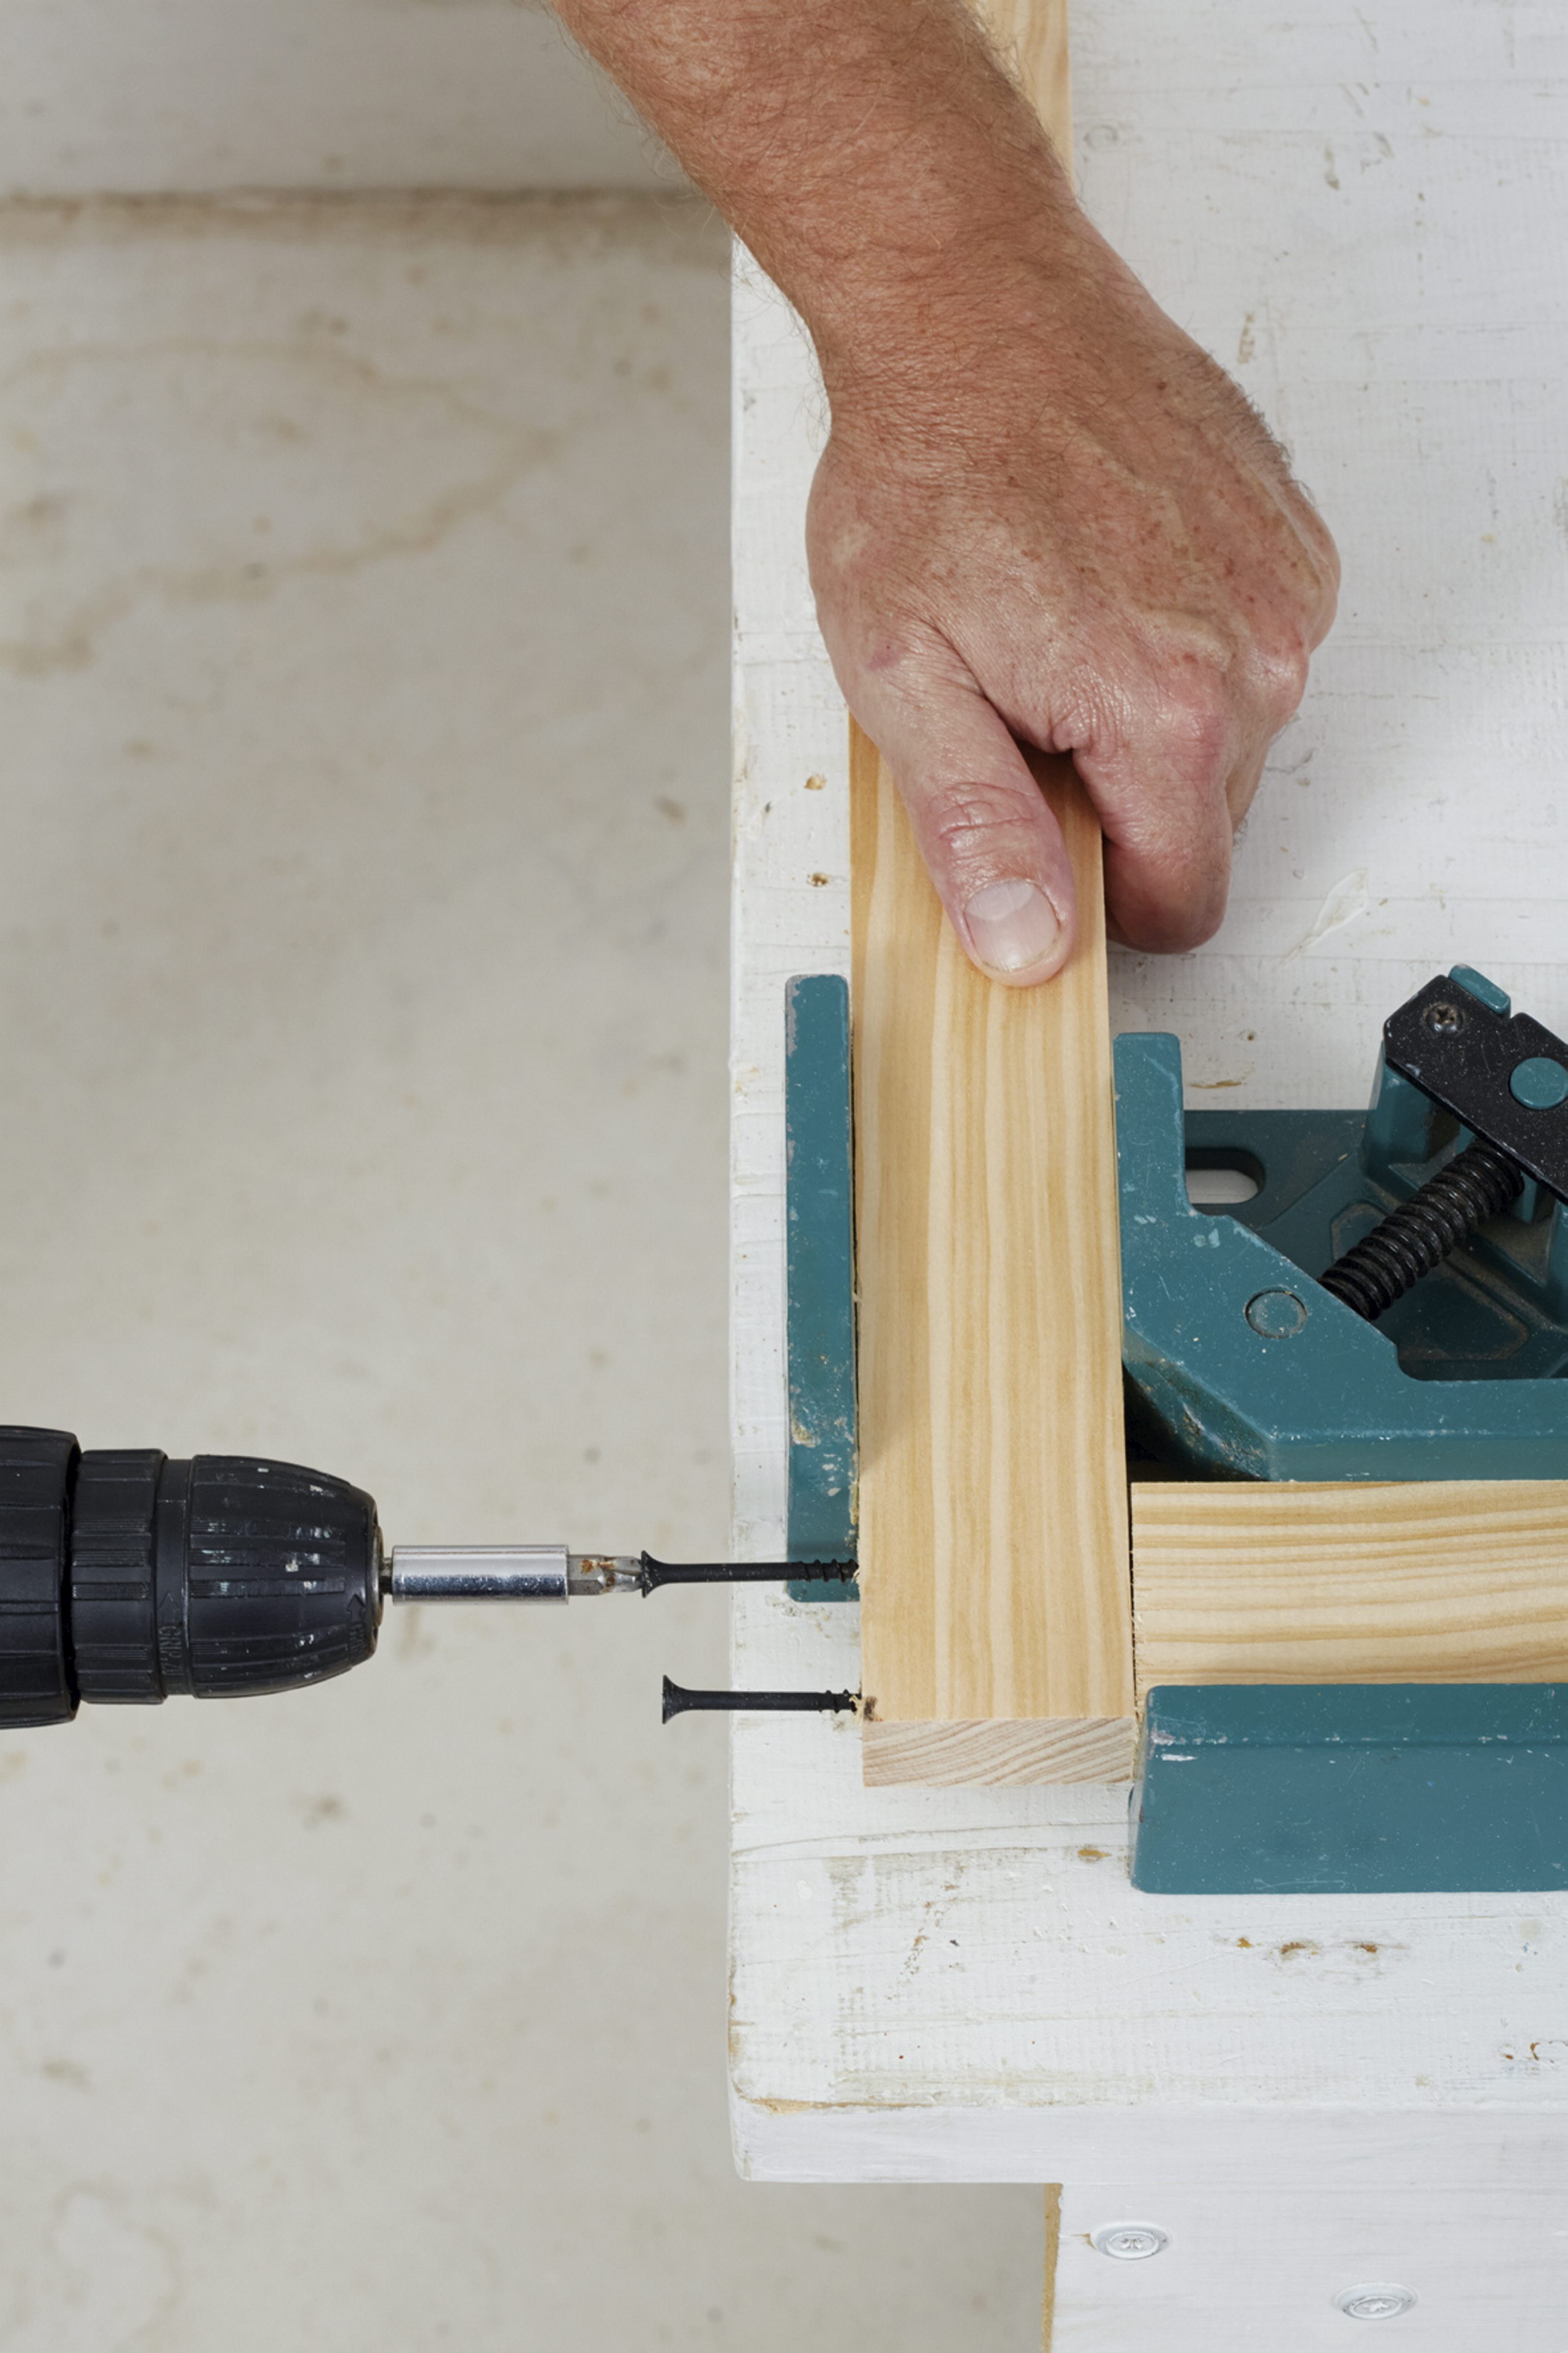
Step 3
Make nineteen U-shapes by adding a dab of cold glue and using the 75mm screws to join the shorter 430mm lengths over each end of the 19 table top (1112mm) lengths, as shown.
Top Tip: Use a mitre clamp to ensure that all your joins are fixed at 90º.
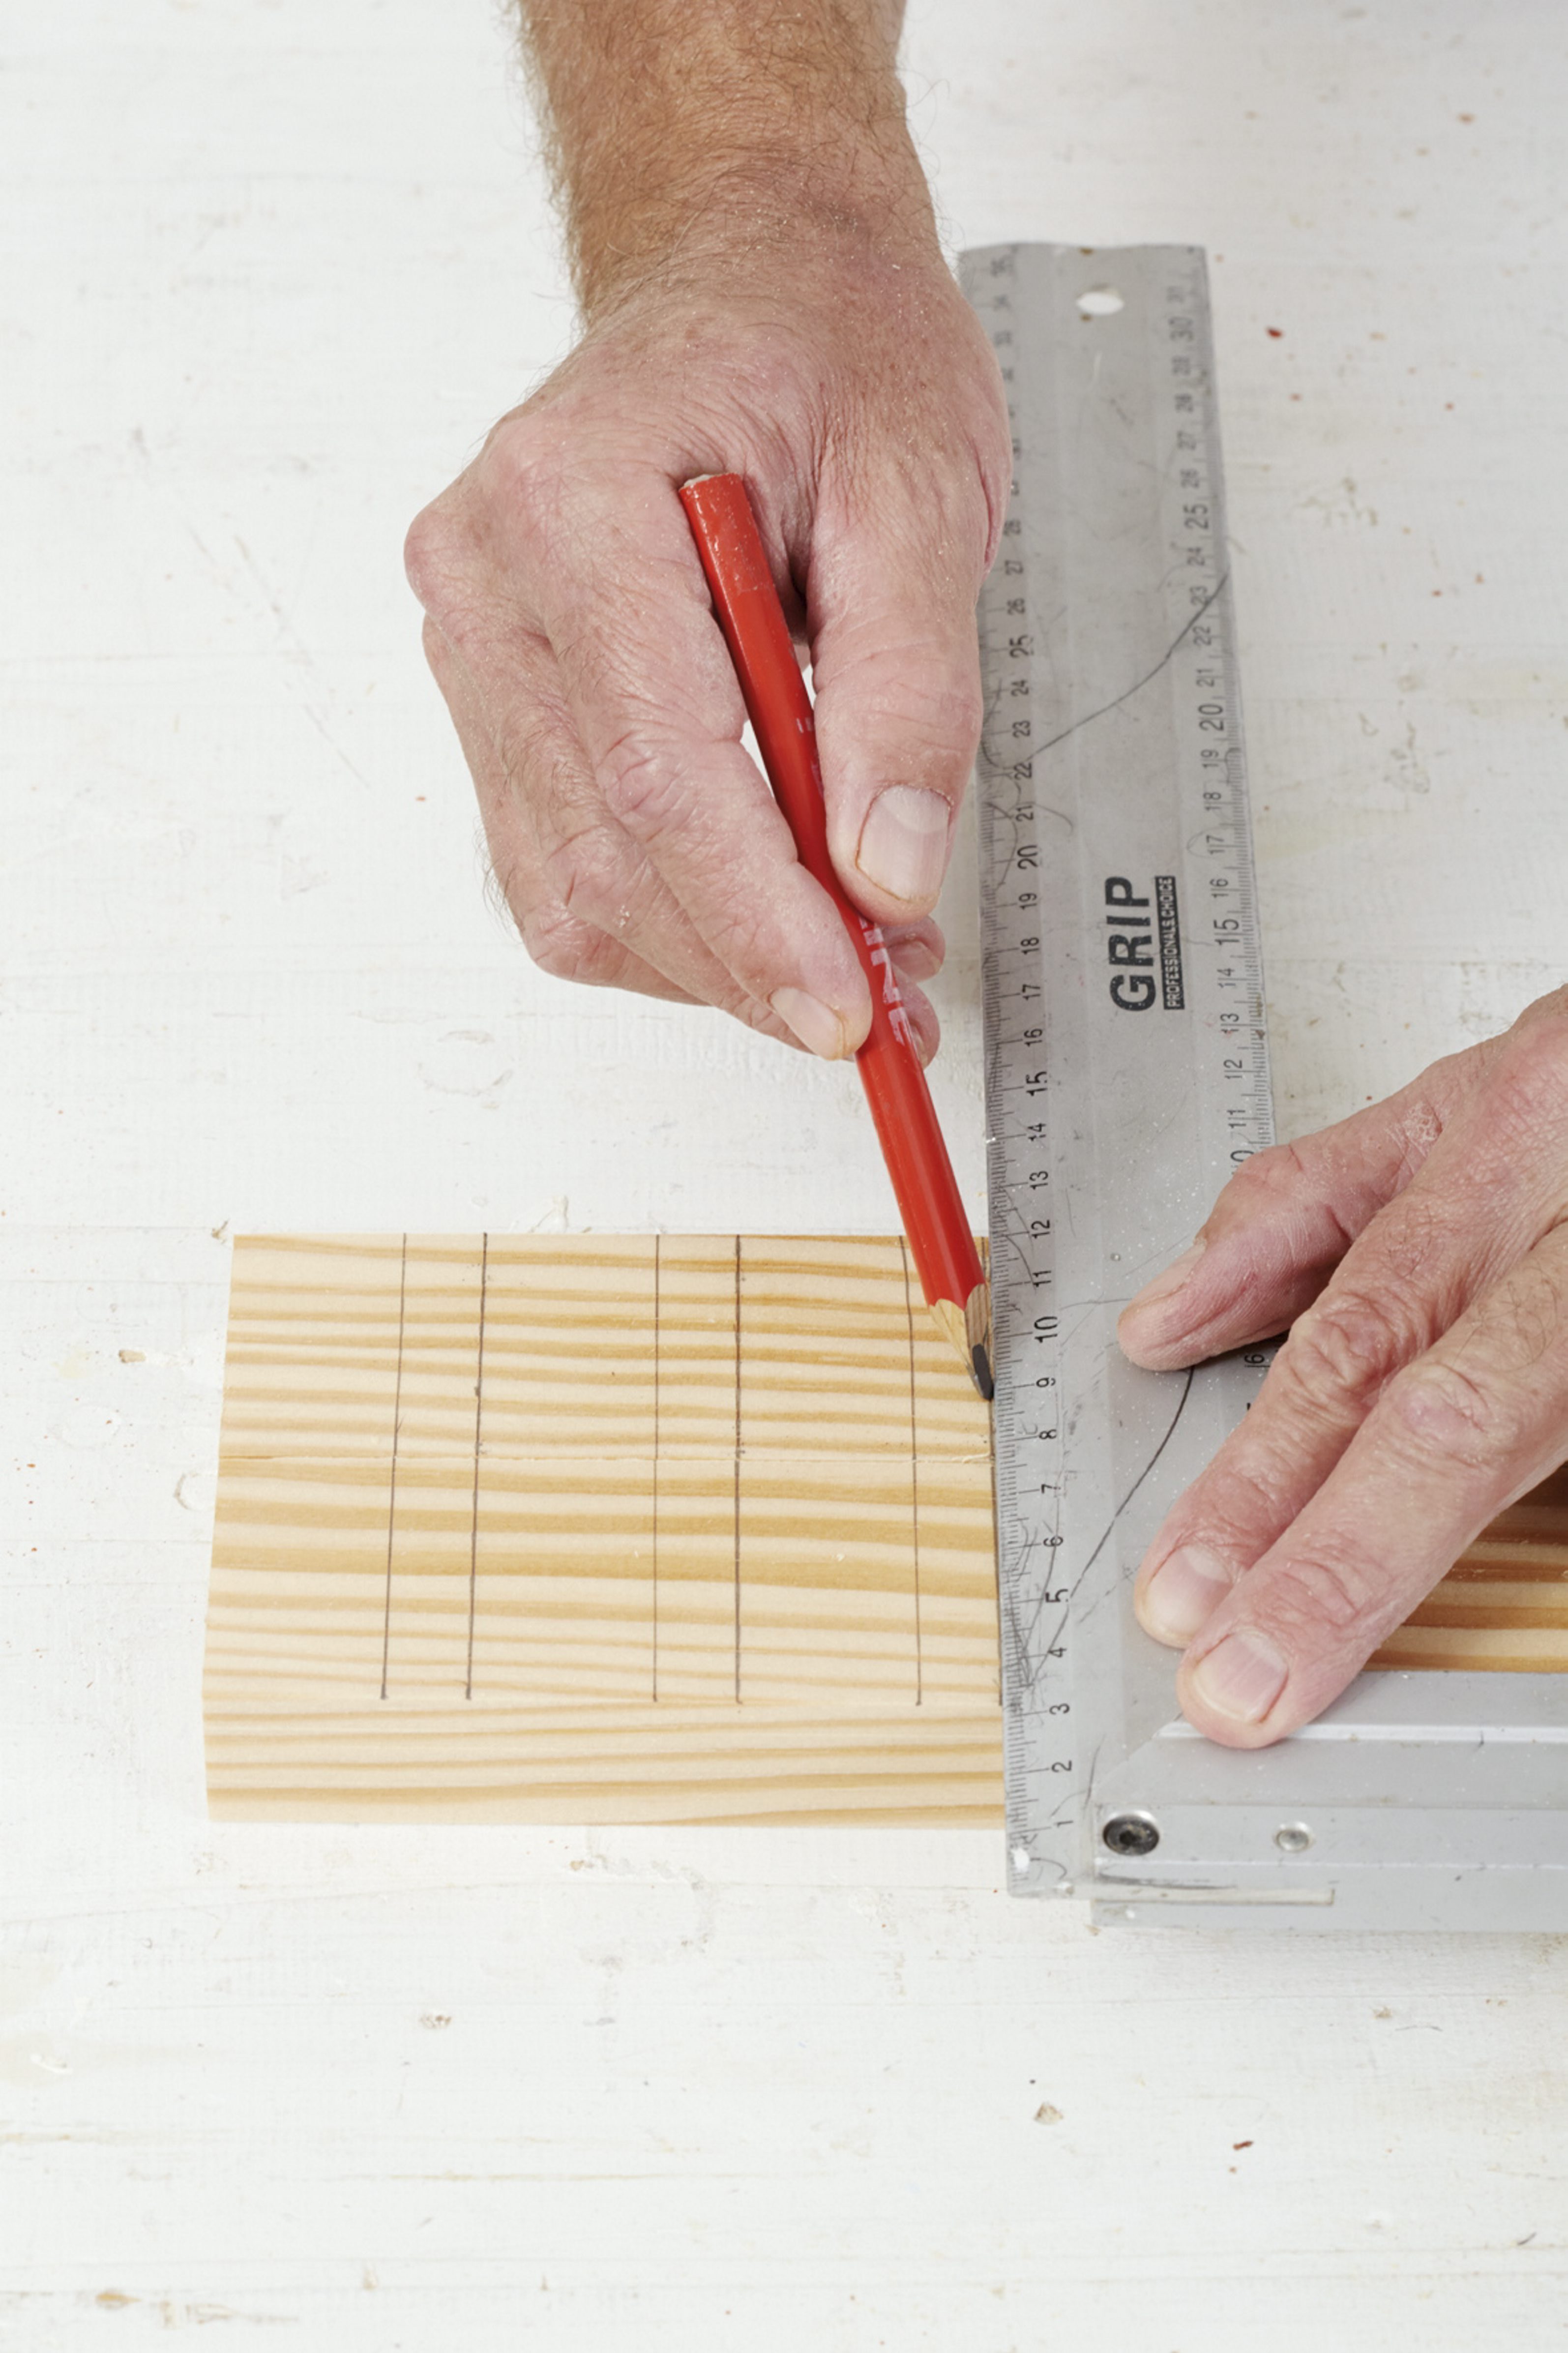
Step 4
Place the three 600mm lengths side by side, flat side down, and start from one side,measuring and marking 22mm bands 10mm apart to indicate where the side slates attach to the top and legs of each U-shape. Then drill and countersink pilot holes.
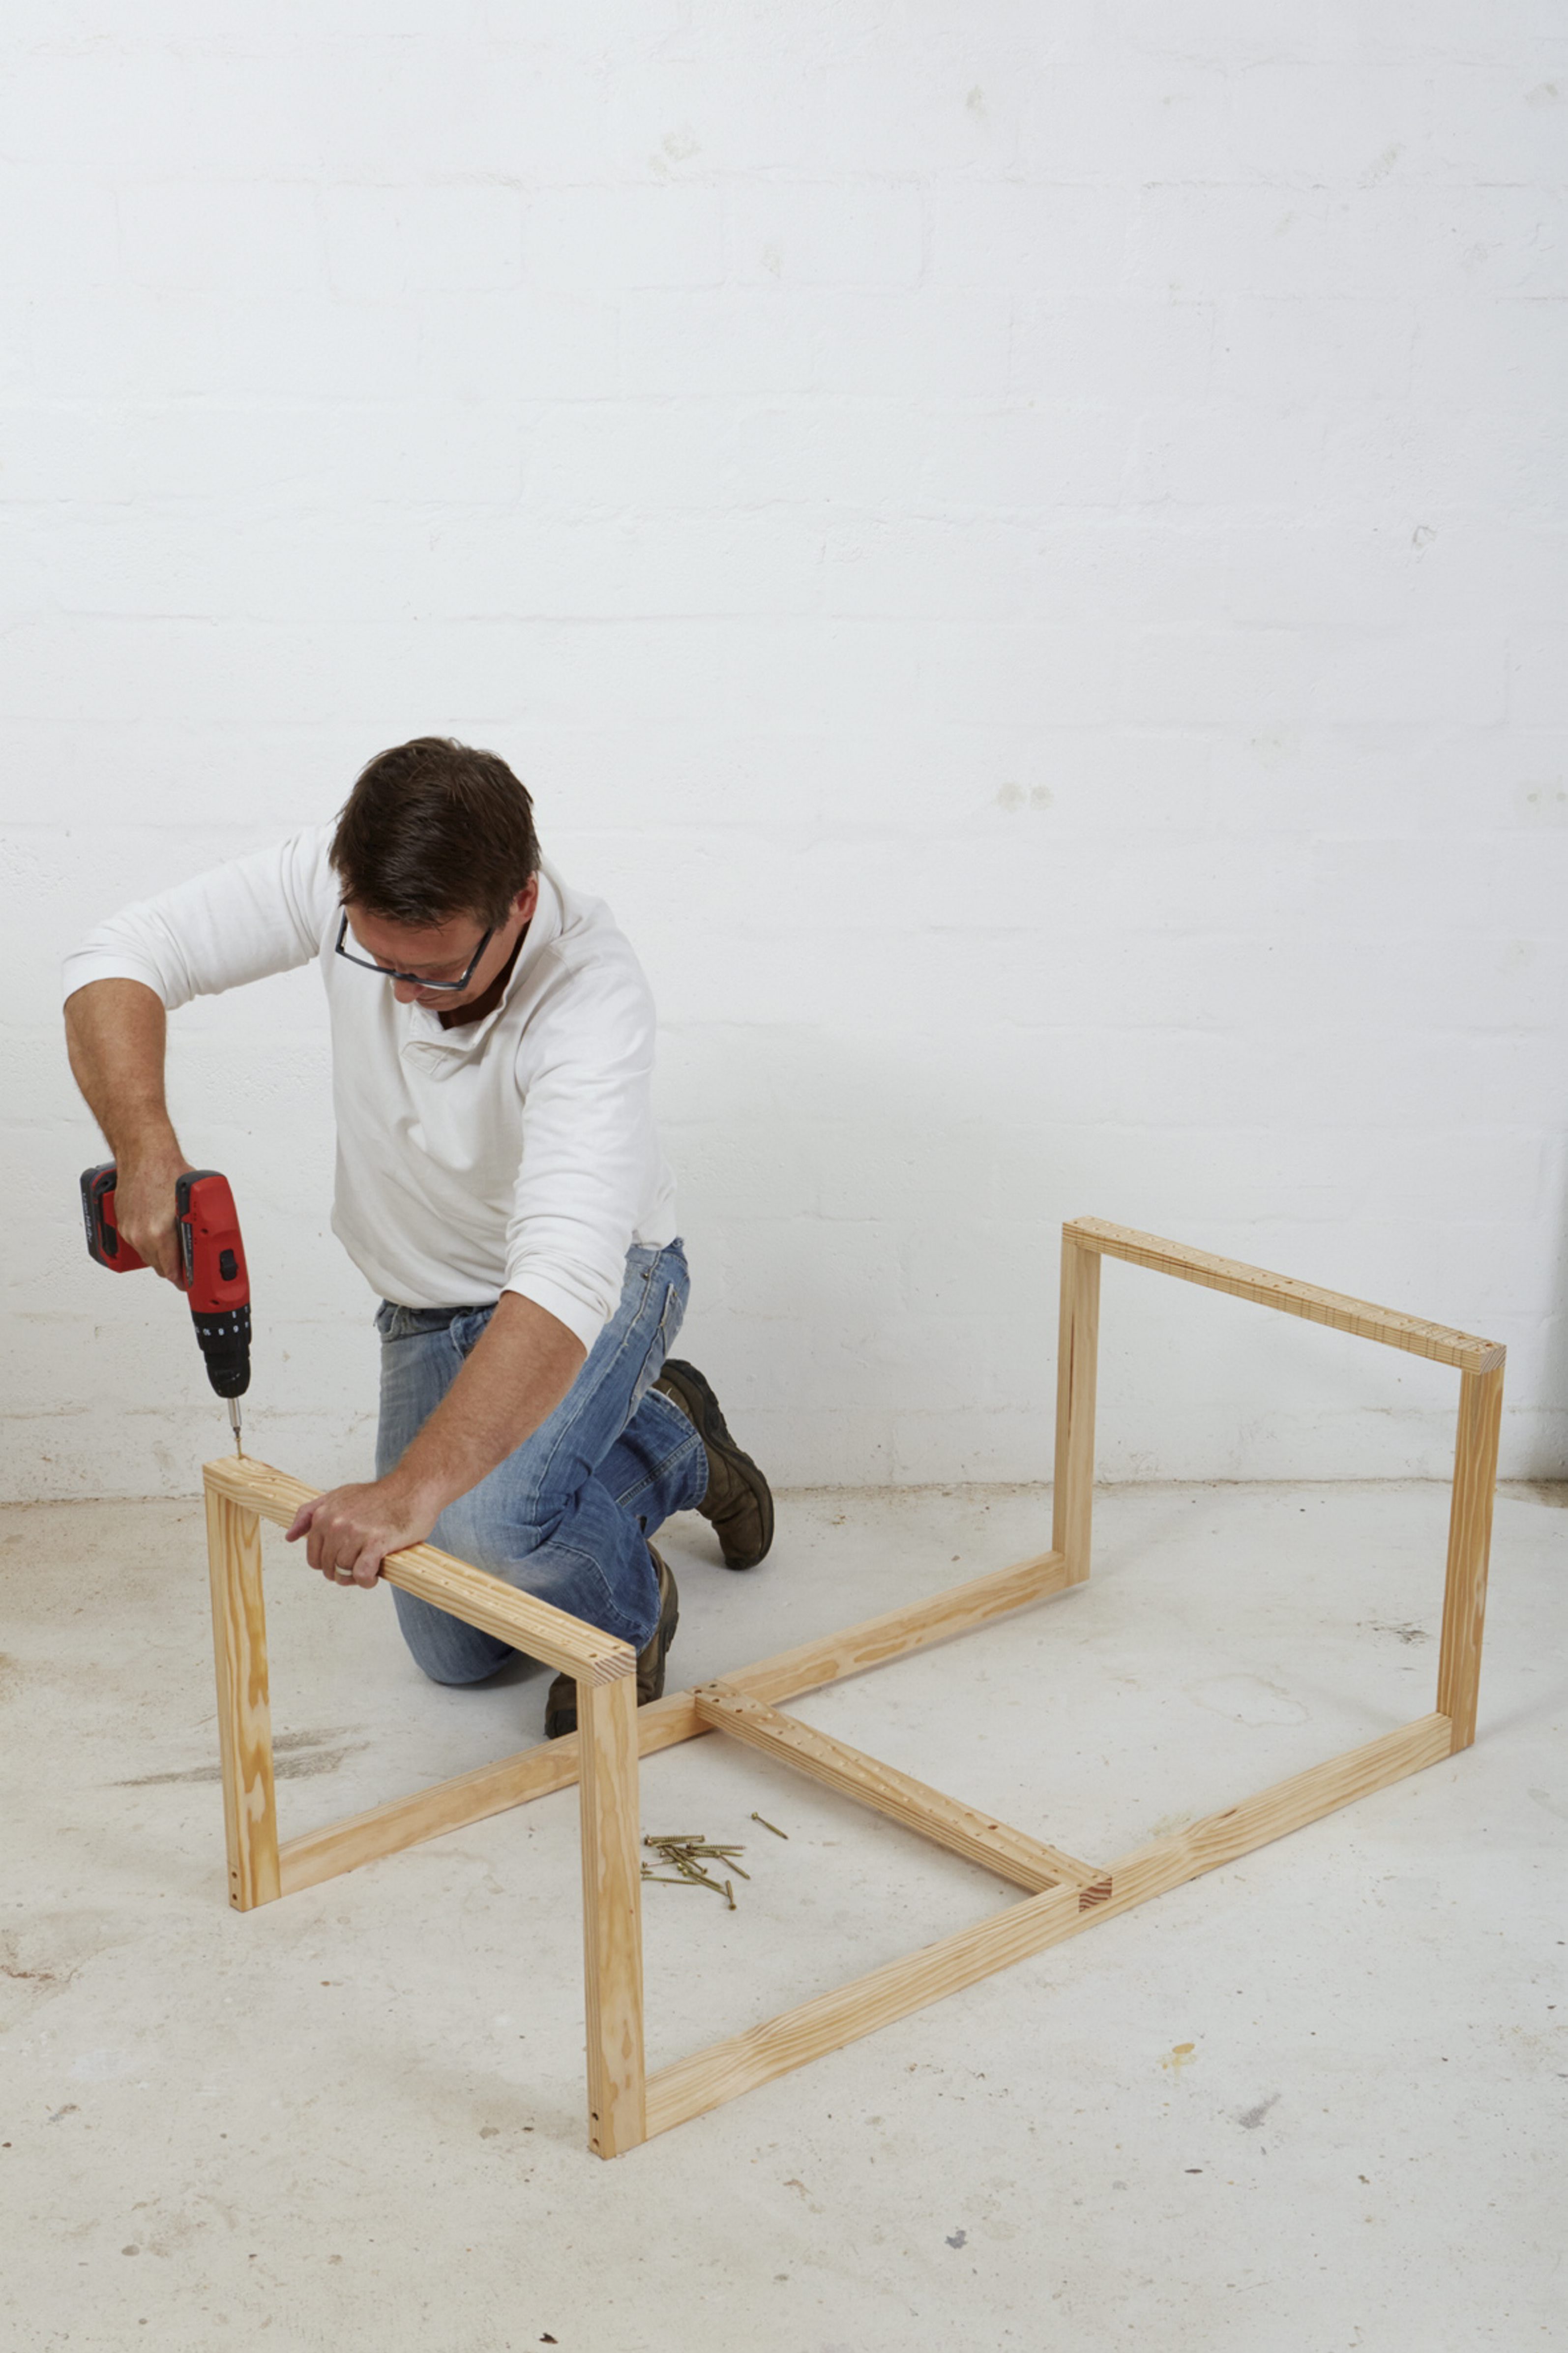
Step 5
Use two U-shapes to and the 50mm screws to make up the outer frame. Fix the middle support within the cutouts (step 2) in place first, then repeat with the other two slats under the legs.
Step 6
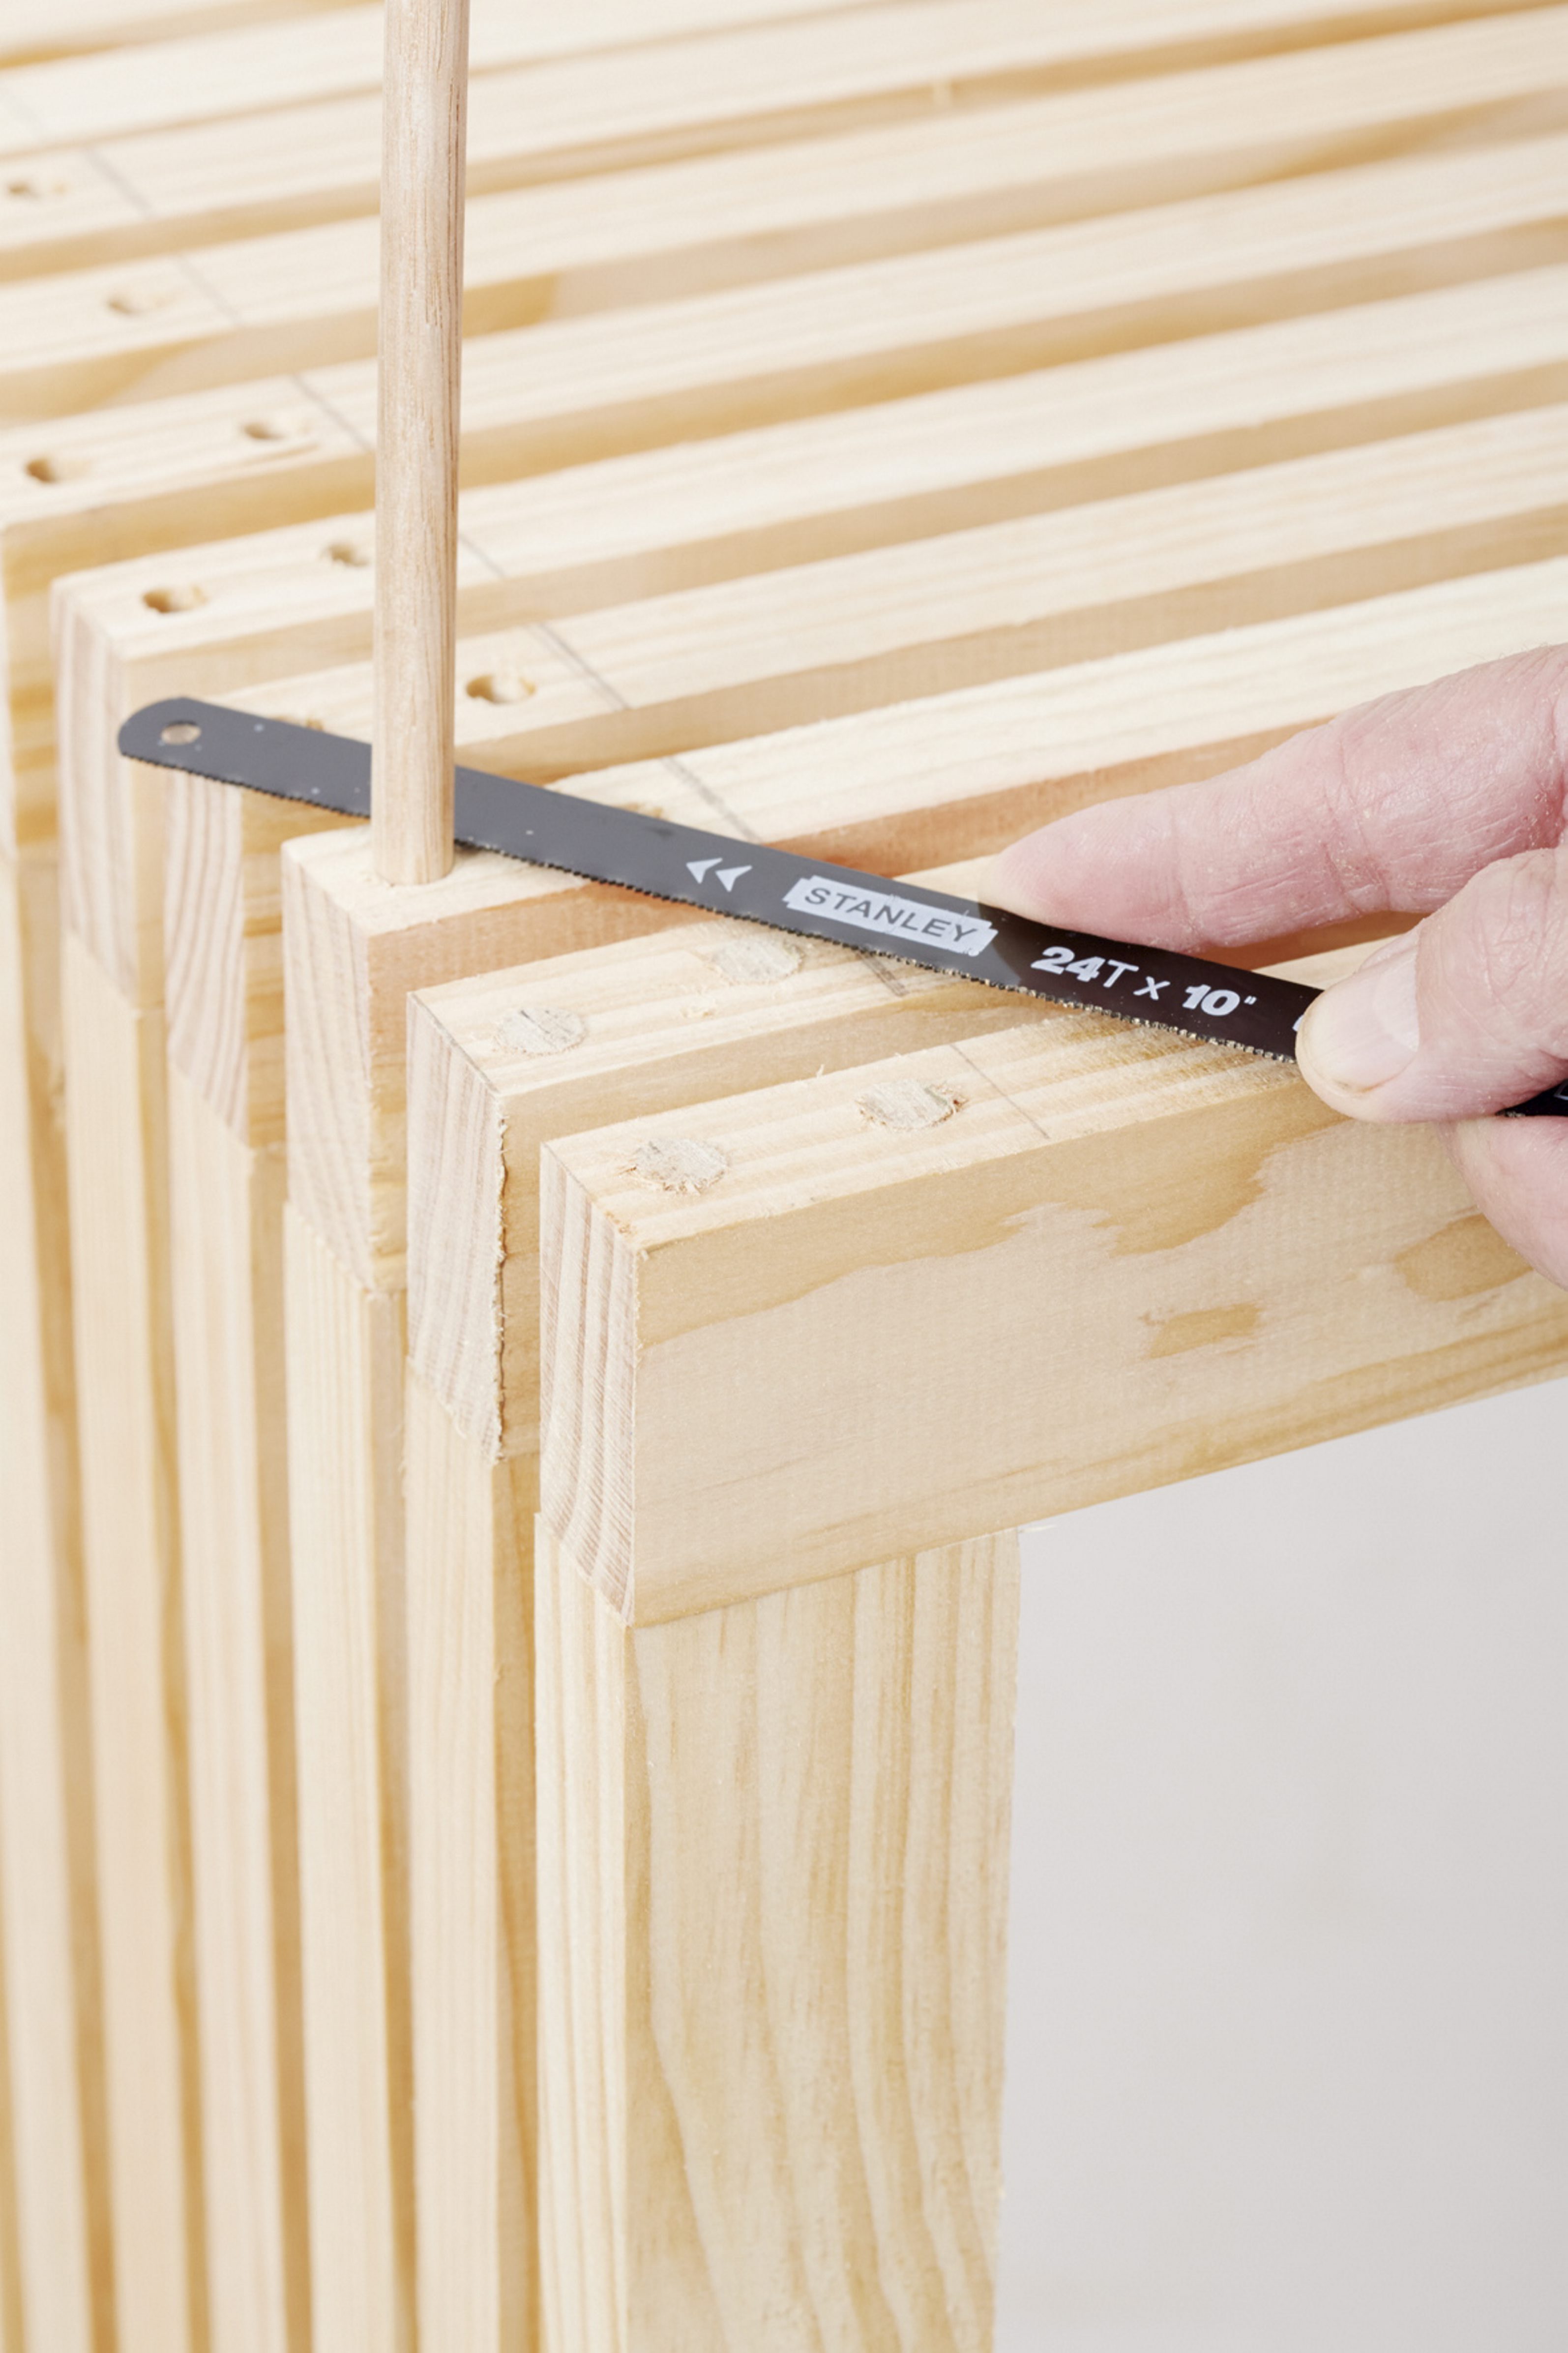
Screw all the U-shapes into the three supports in the outer frame first, tap the dowel into the holes and use the hacksaw blade to cut it flush with the surface.
To finish: Sand all sharp corners and over the dowels, then apply a primer or varnish to all the surfaces. Once dry, apply one or two topcoats in the colour(s) of your choice.
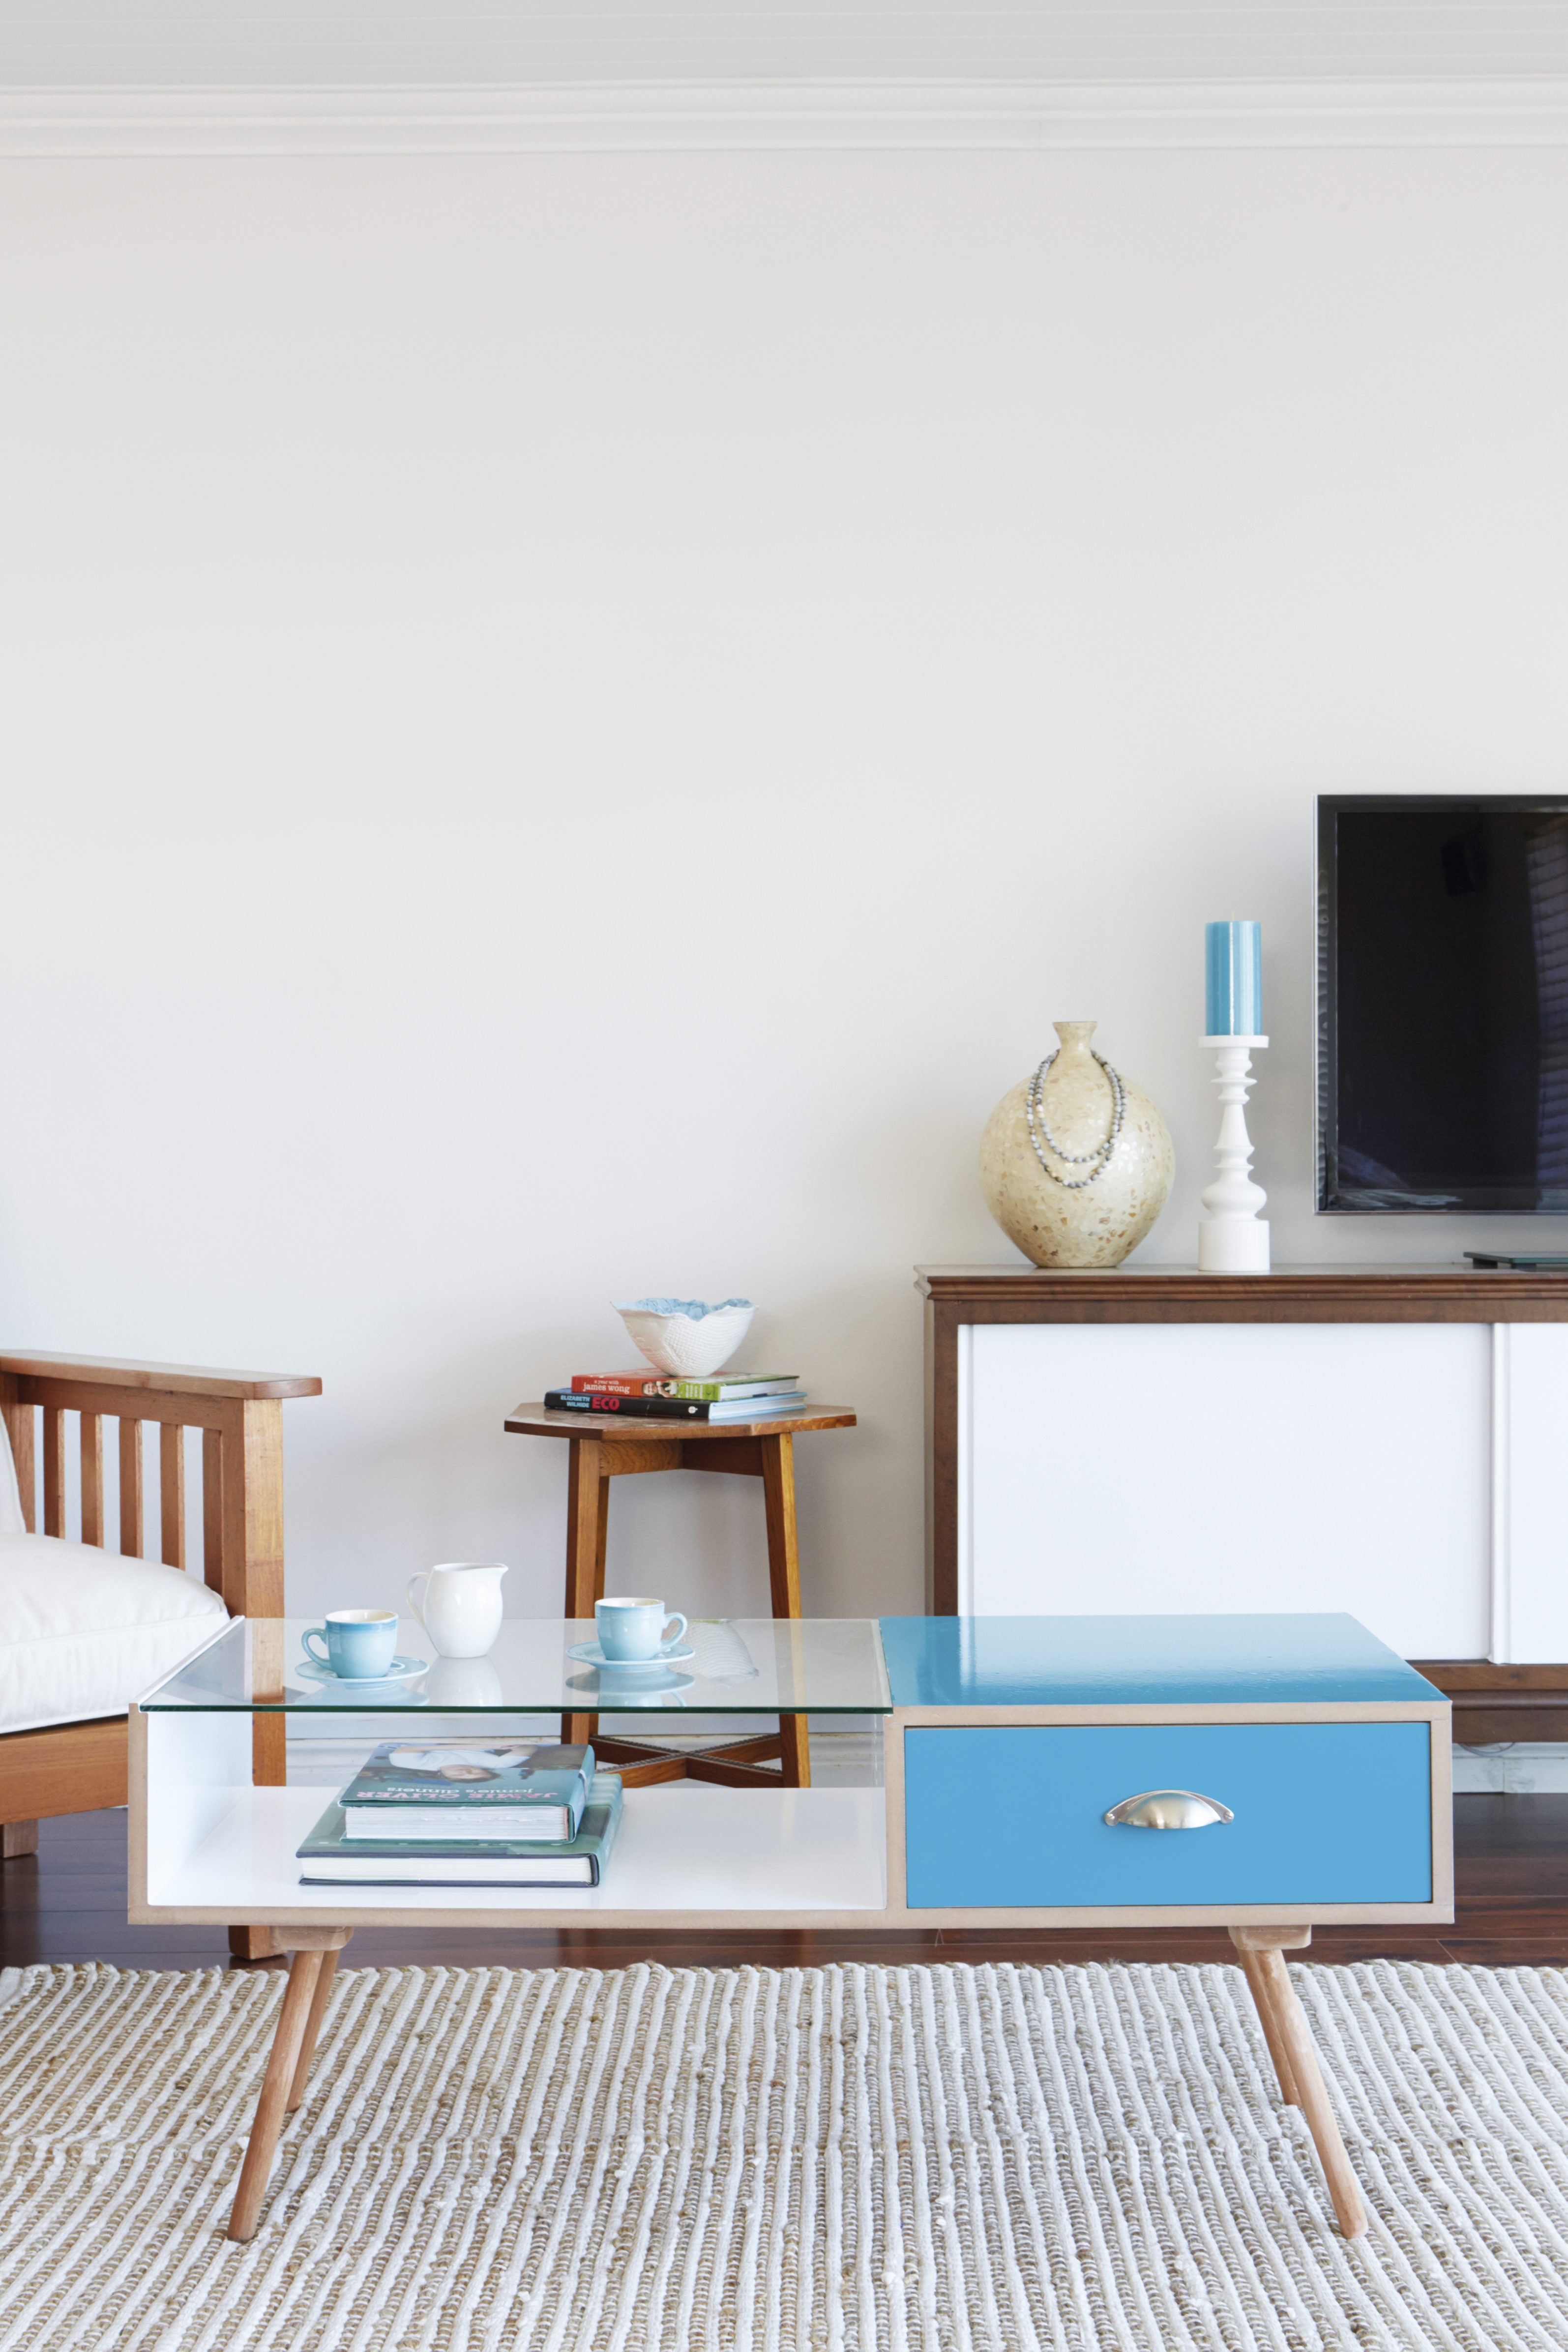
Relish the retro
You can easily create an eye-catching focal point in the centre of a room by simply adding some colour to your table.
- cordless and corded drill; 3mm, 5mm, 10mm drill bit
- router and straight bit
- screwdriver
- G-clamp
- 25mm Forstner bit or 25mm spade bit
- pencil
- measuring tape
- sander
- cold glue
- 32mm drywall screws
- 50mm chipboard screws
- 120 grit sandpaper
- wood filler
- paintbrush or foam roller
Cutting List
- 16mm MDF cut to:
- 1085 x 450mm (table base)
- two 450 x 146mm (drawer housing – sides)
- one 450 x 166mm (upright)
- one 466 x 450mm (top)
- two 430 x 130mm (drawer – front and back)
- two 418 x 130mm (drawer – sides)
- one 418 x 398mm (drawer bottom)
- 25mm-diameter meranti rake handle cut to:
- four 300mm lengths
- 6mm glass cut to: 618 x 450mm
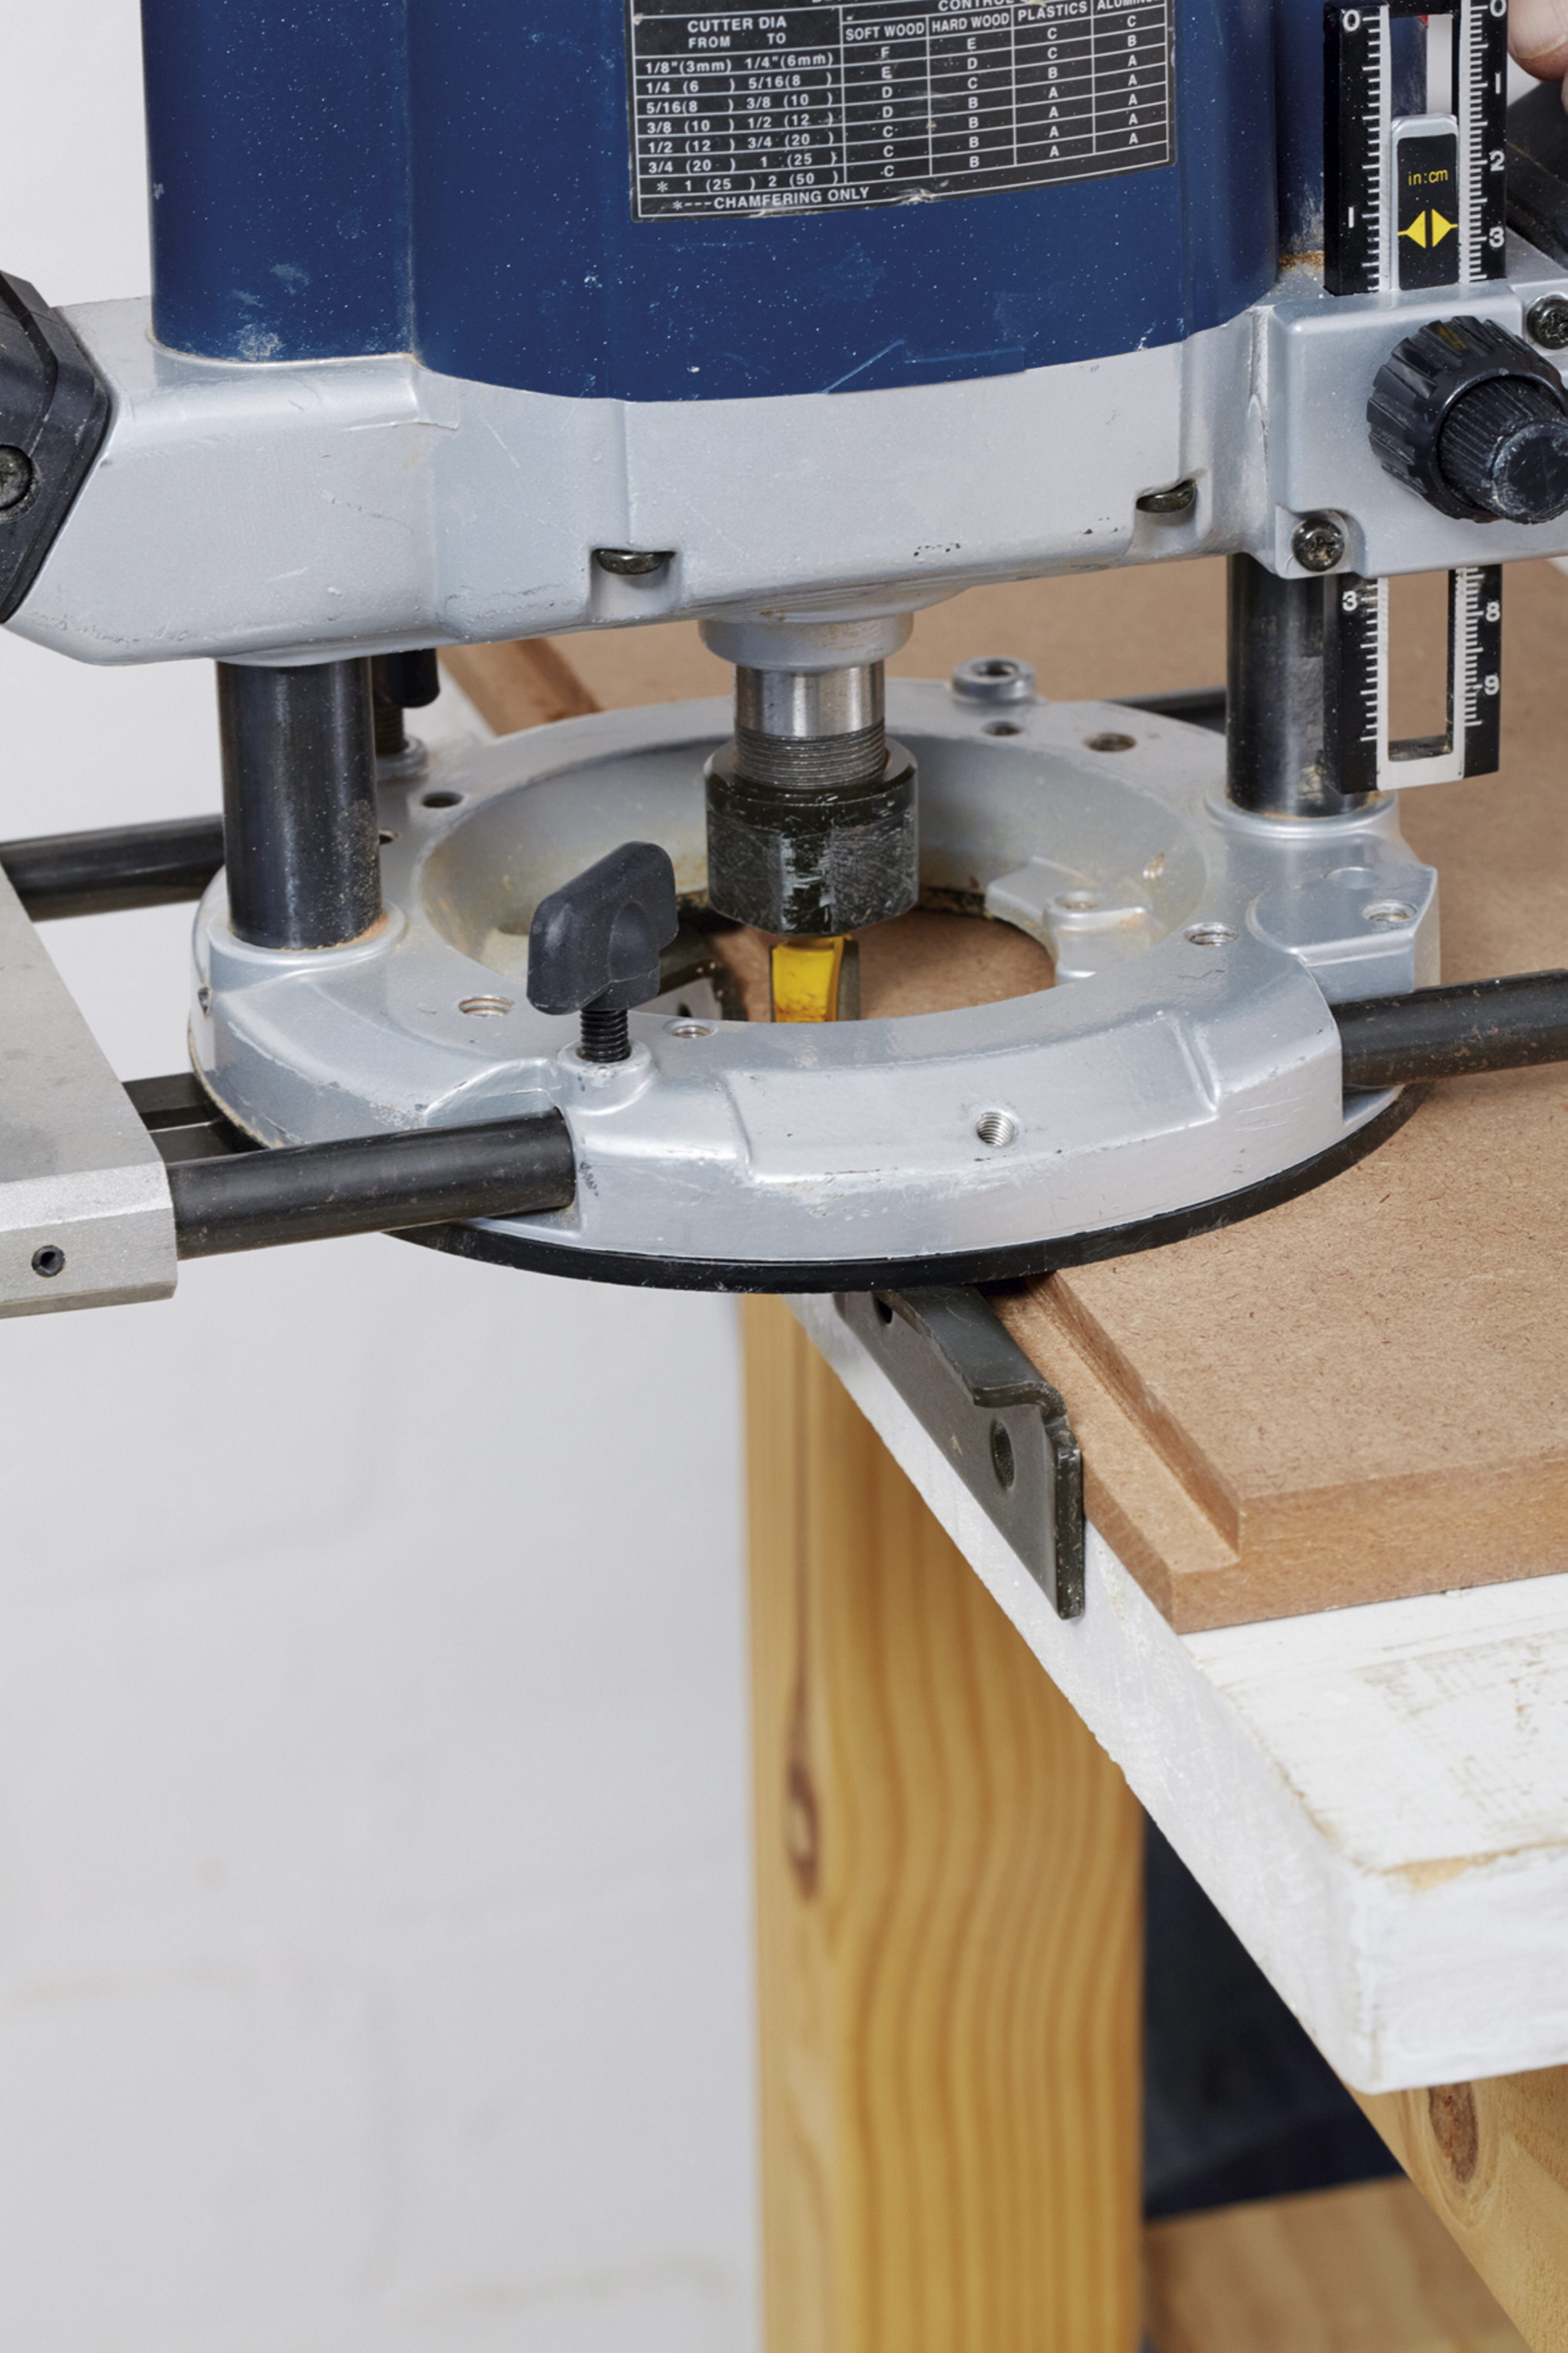
Step 1
Adjust the guide on your router (with straight bit fitted) to create a 6 x 6mm recess along the long edge of the 450 x 166mm upright, as well as along one edge of the 466 x 450mm piece (top), as shown.
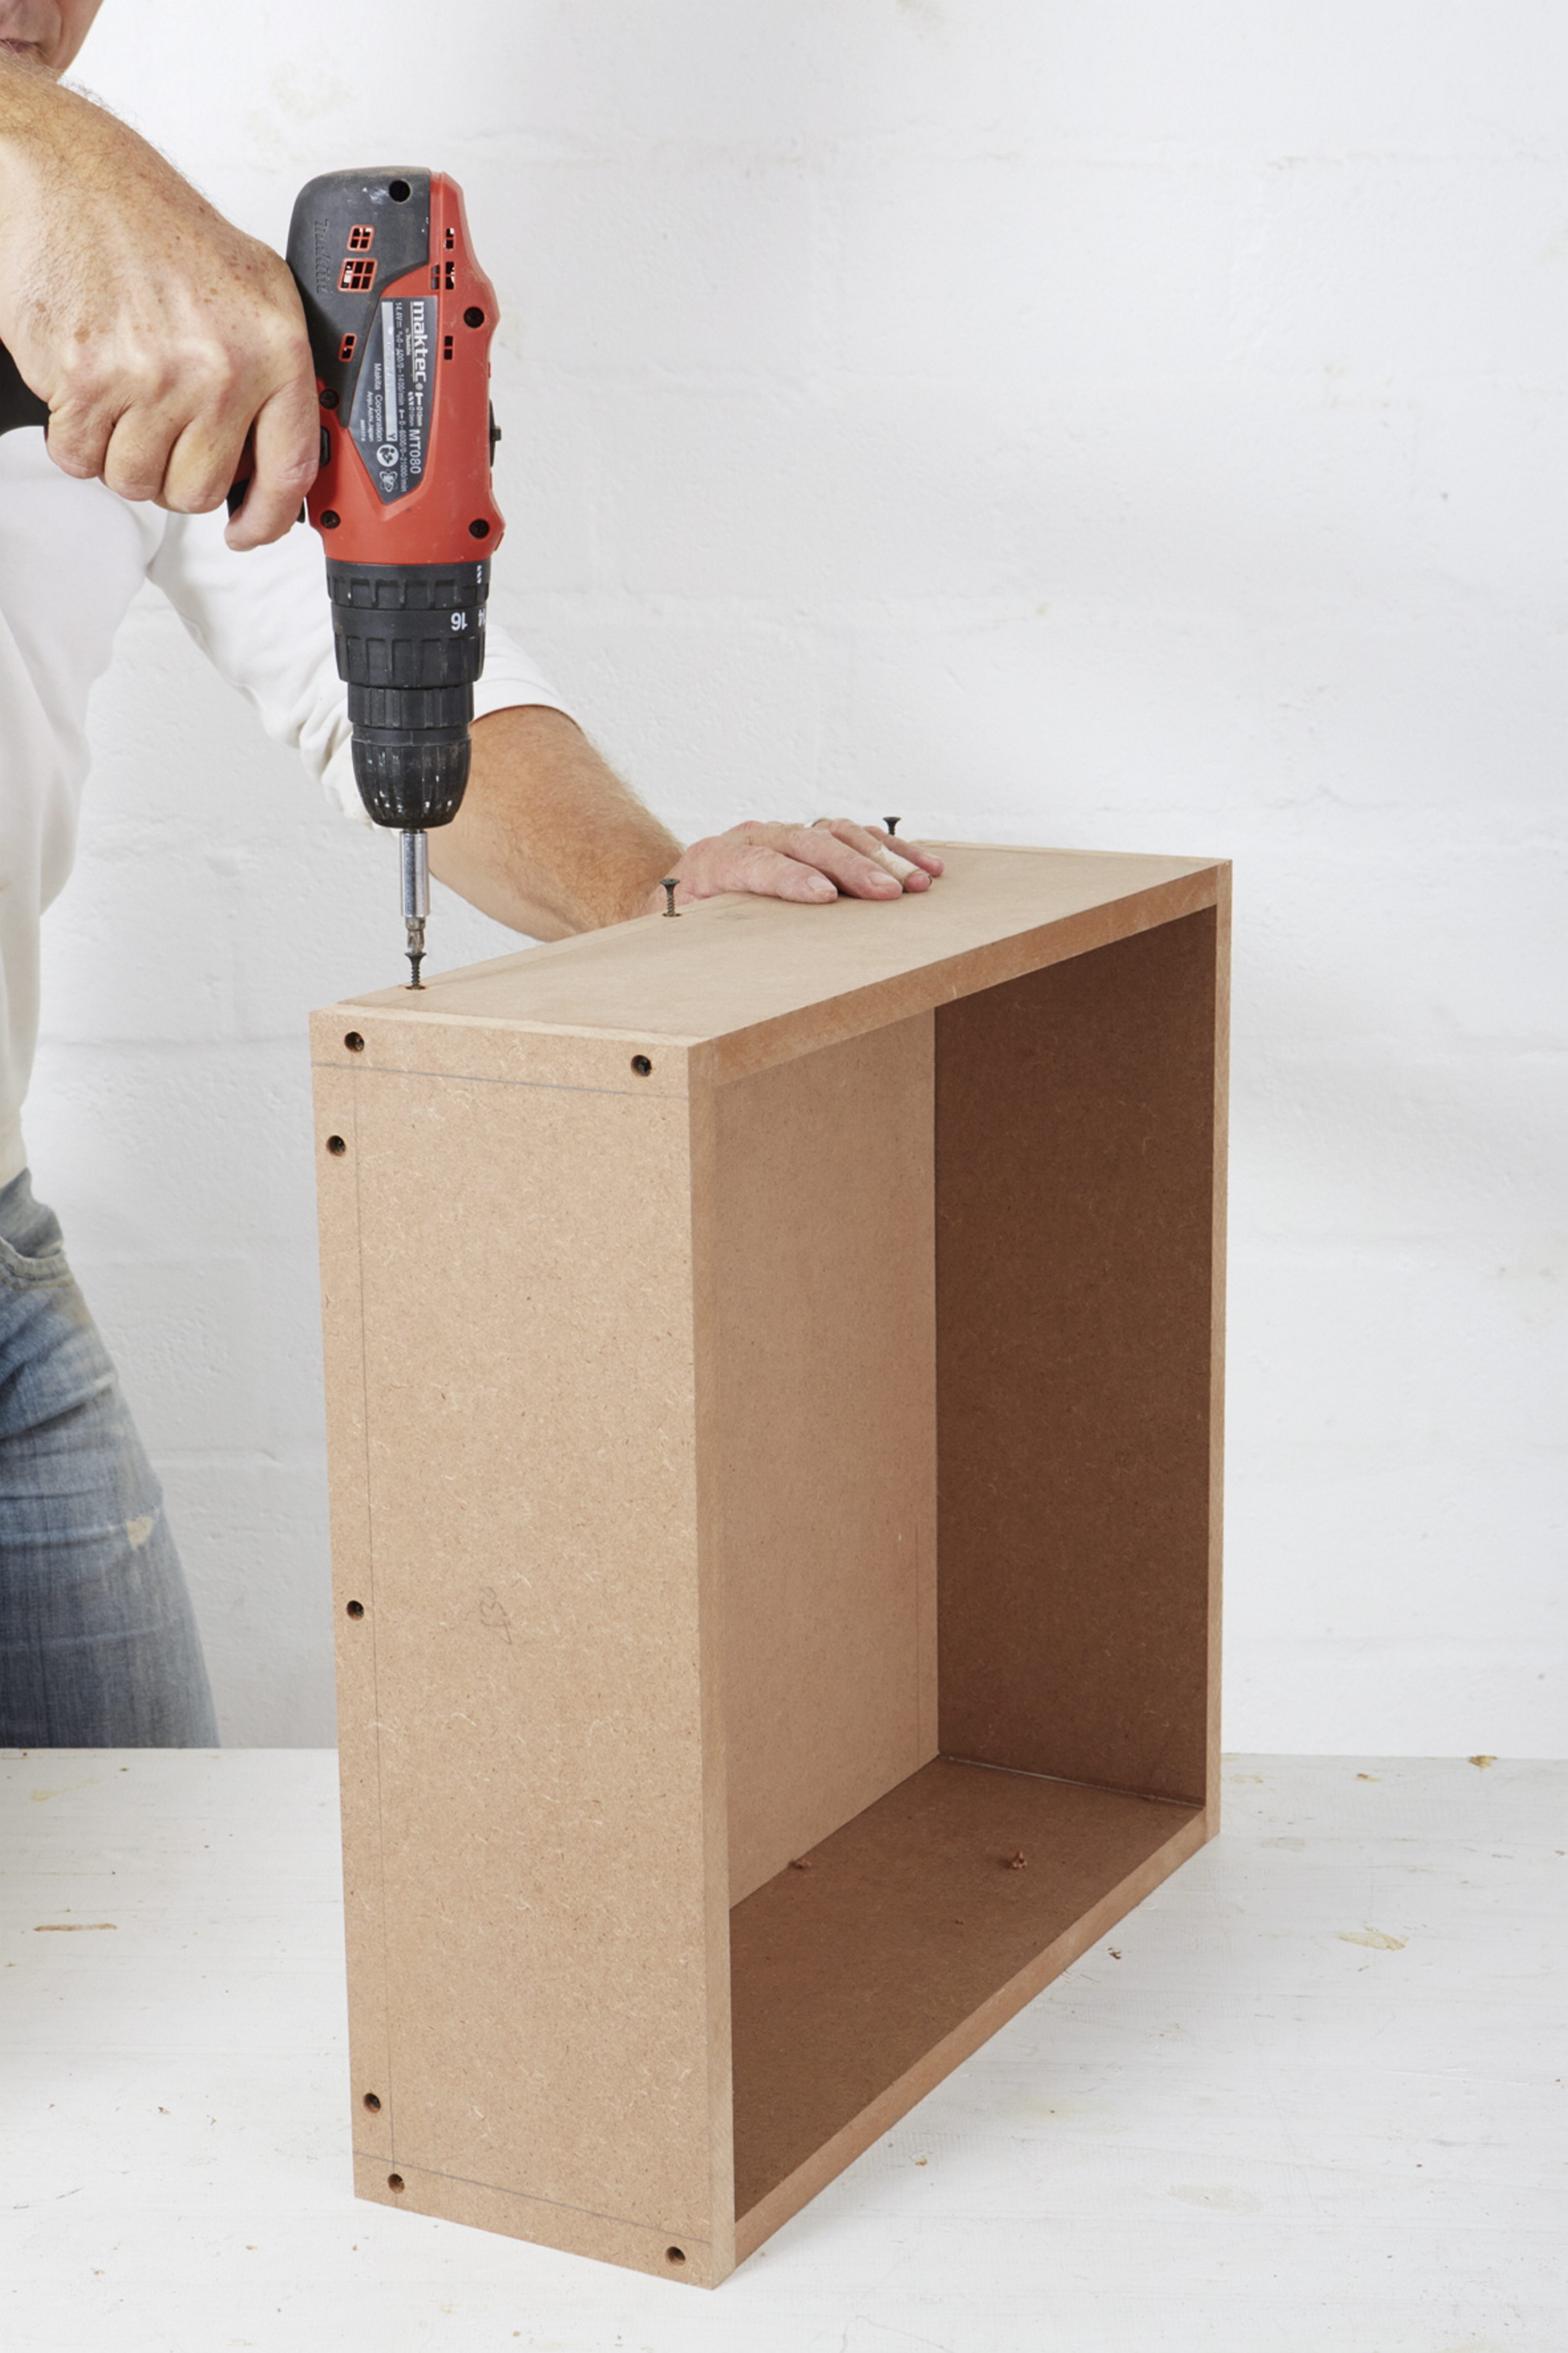
Step 2
Measure 16mm-wide bands across the 1085 x 450mm table base. Mark 16mm from either side, measure and mark a line 434mm from one line, then mark another 16mm apart. Drill pilot holes (using the 3mm drill bit) between these lines then fix the 450 x 146mm (drawer housing – sides) along the edge and middle, then the 450 x 166mm upright at the end. Use the drywall screws to fix in place, then fill the holes with wood filler.
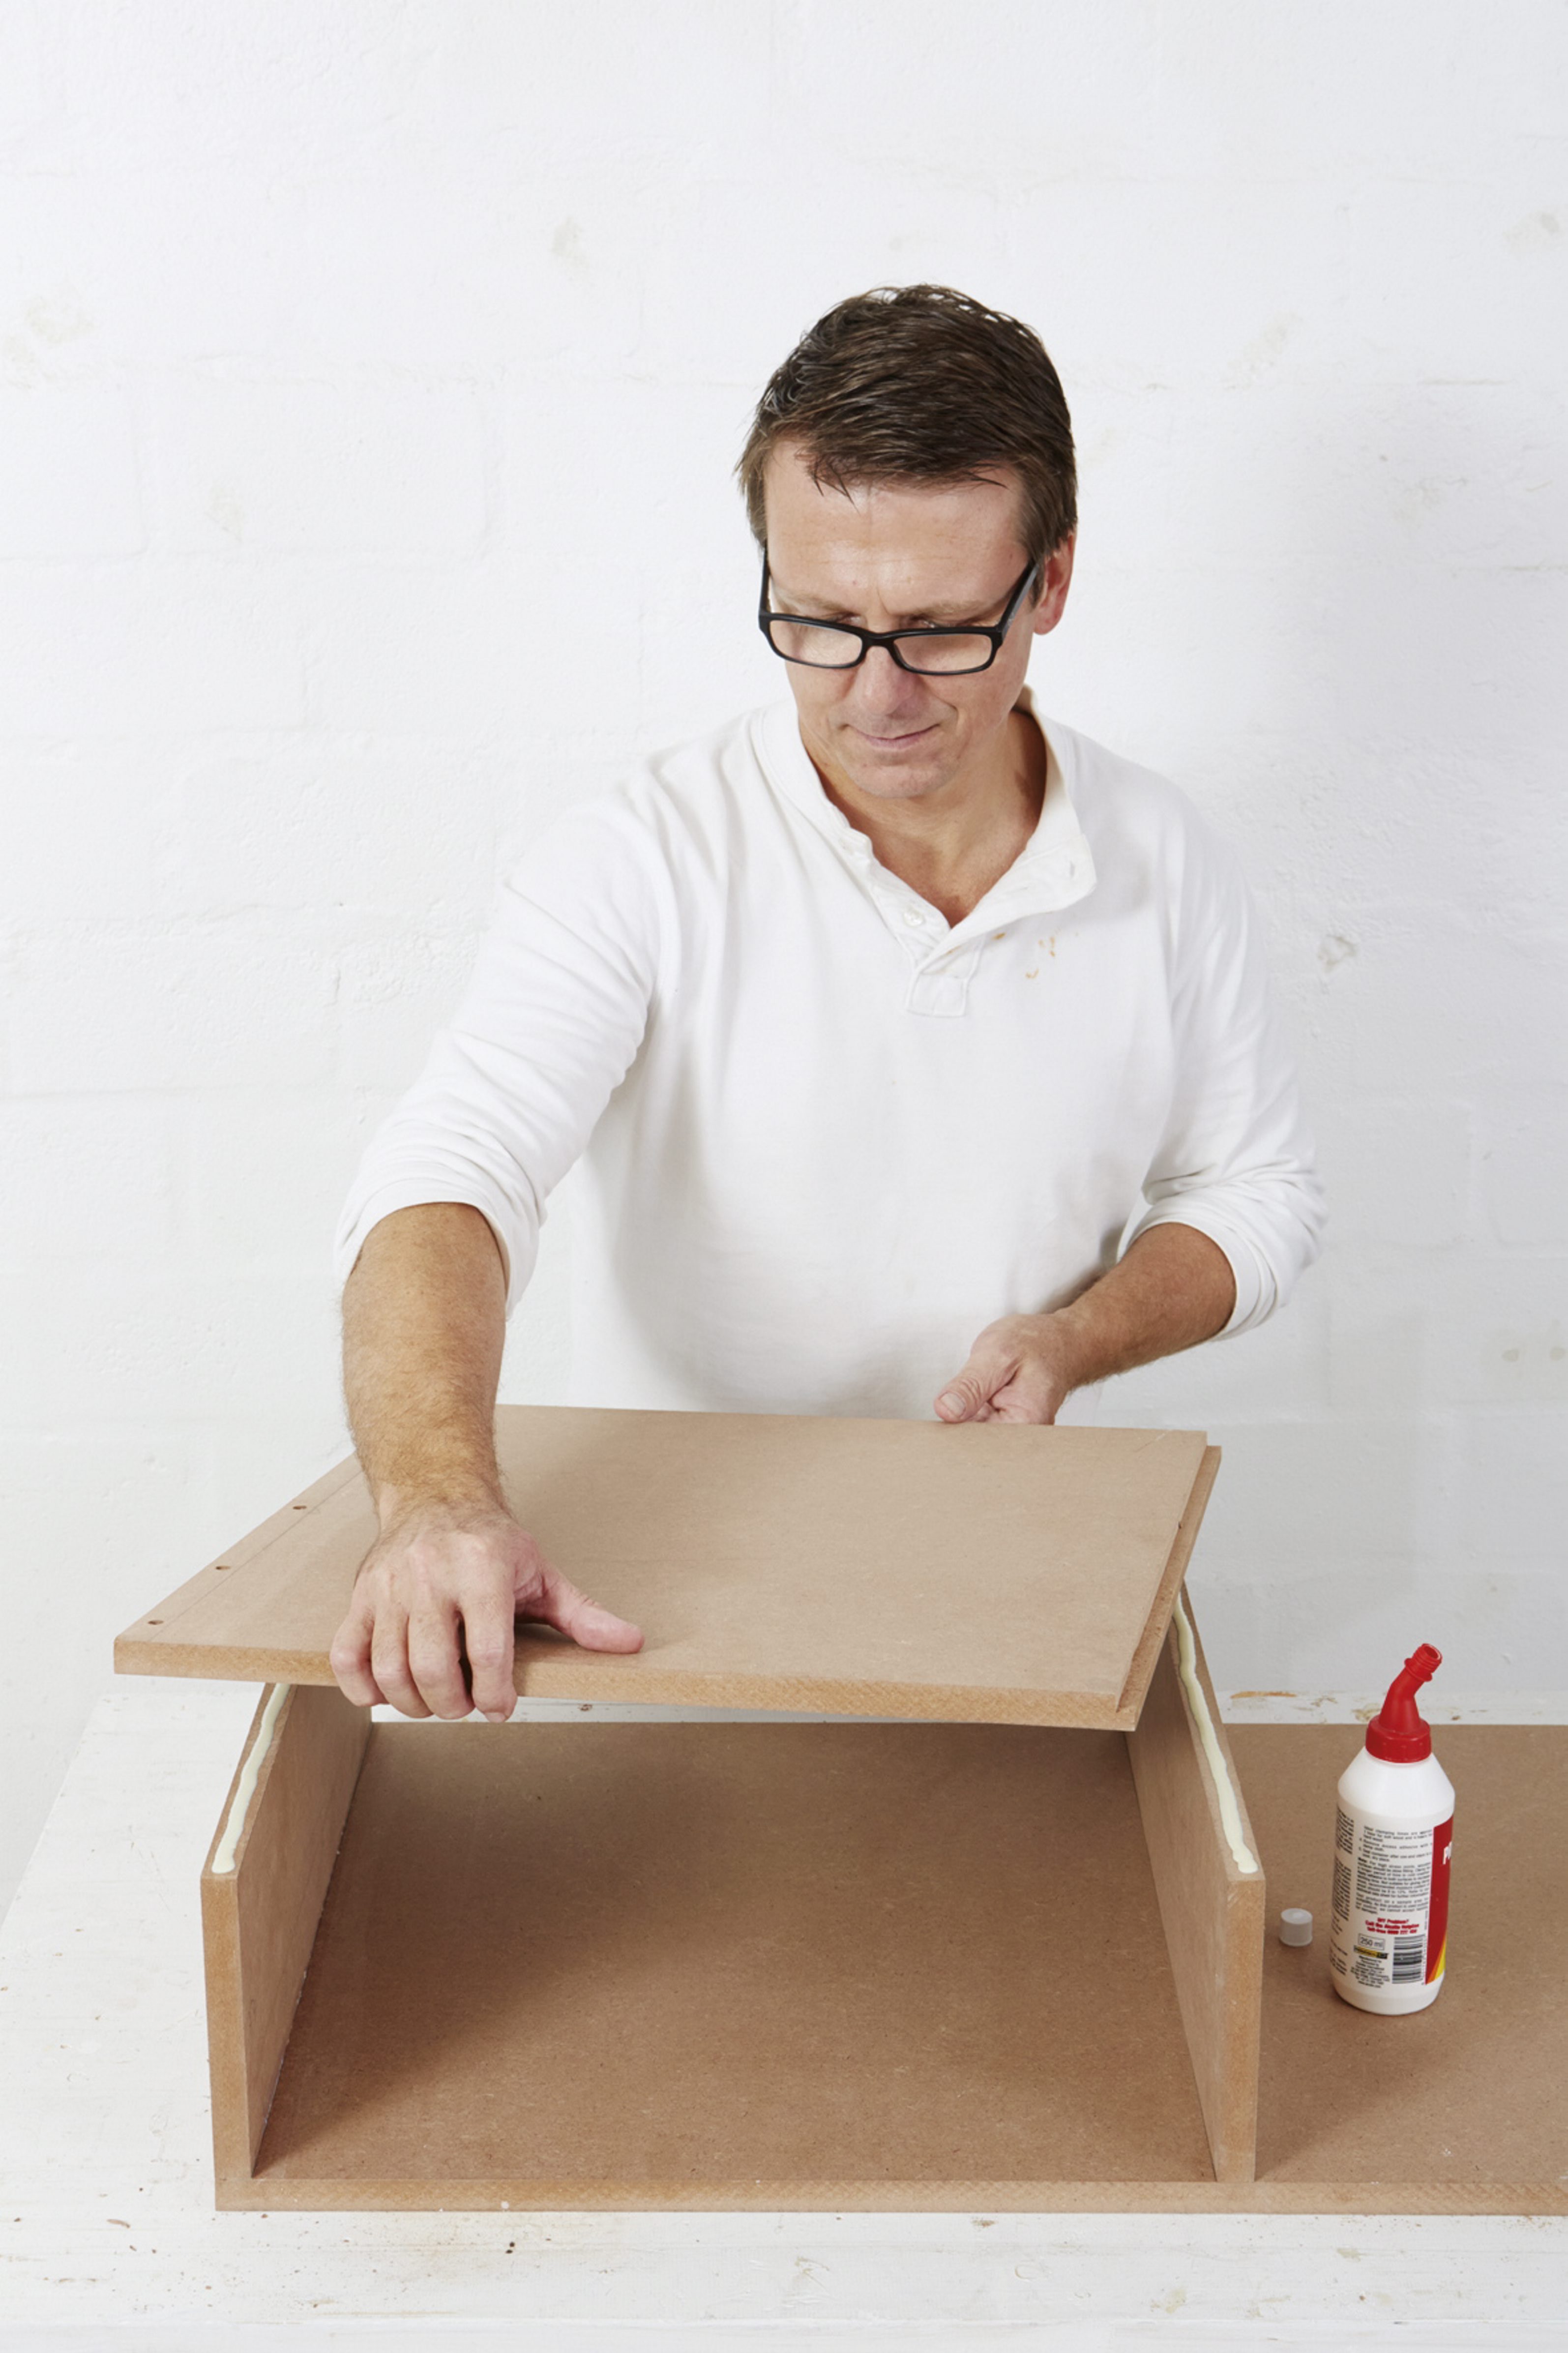
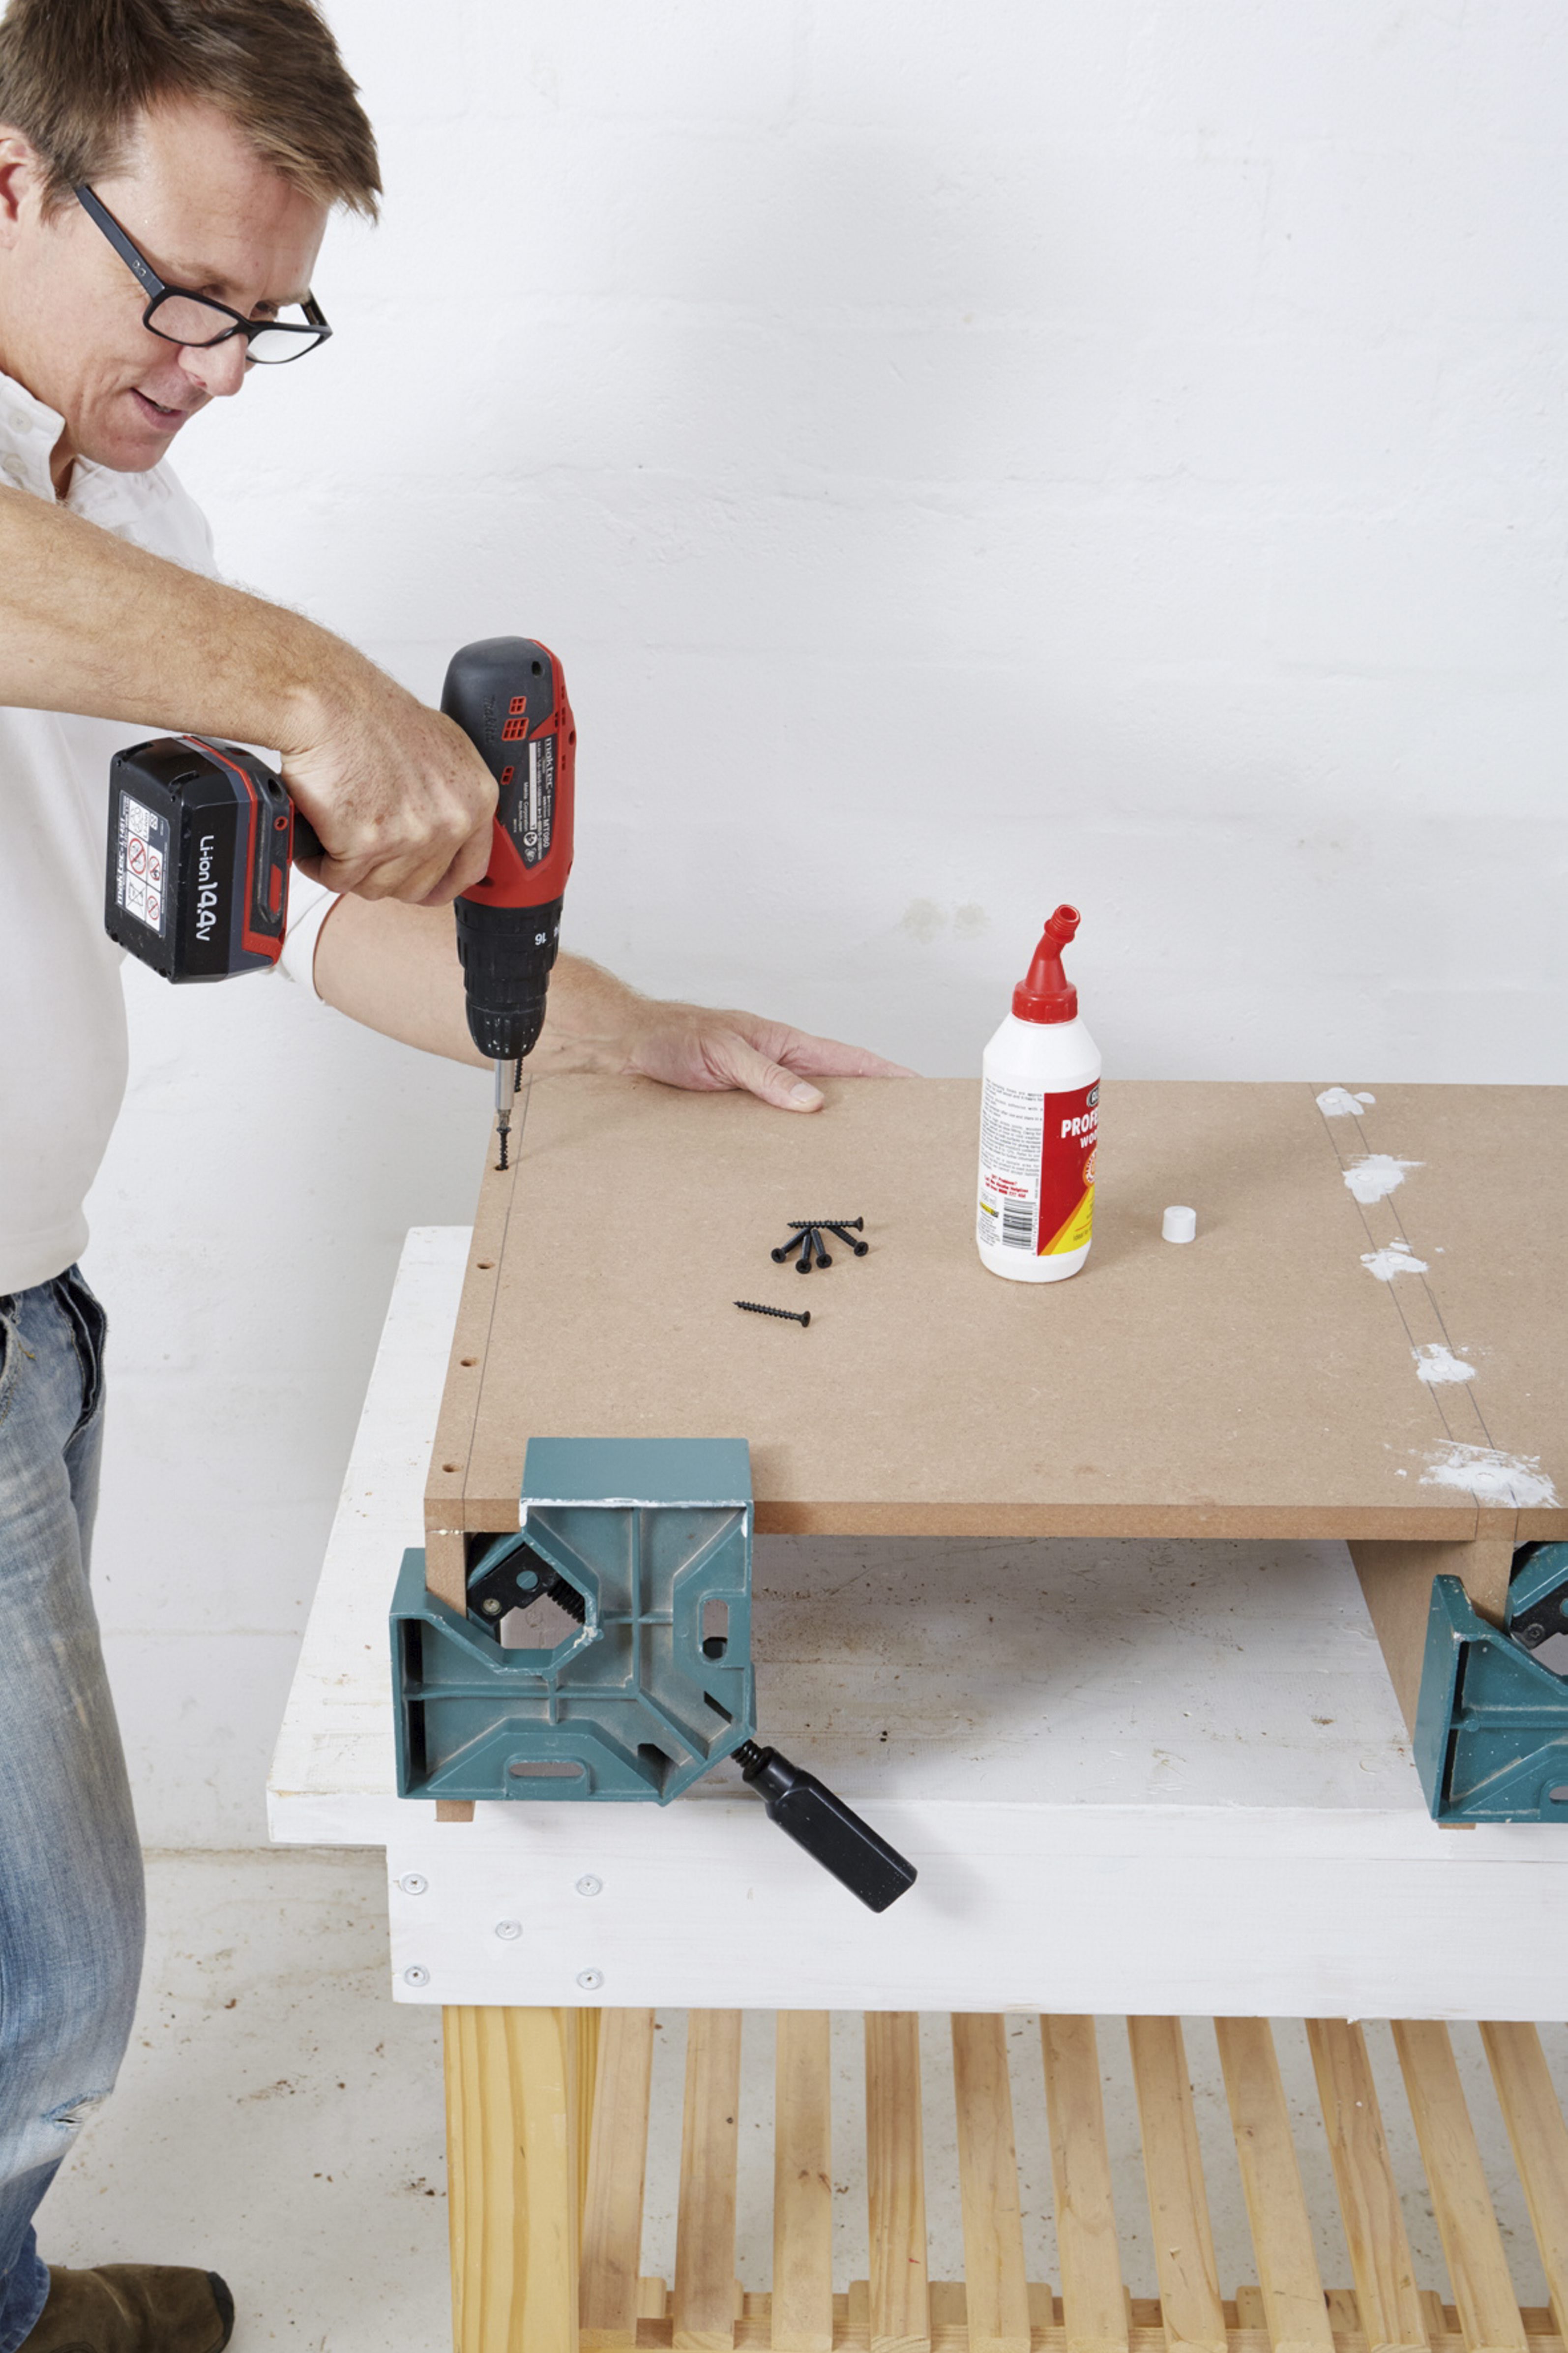
Step 3
Apply glue to the top edges of the 450 x 146mm (drawer housing – sides) and place the 466 x 450mm top onto these, as shown. Fix in place along the side. Simply place a weight onto the side (with the edge cut out) and leave to dry; it’s not necessary to fix this edge with screws, as the glue will provide a strong enough bond.
Step 4
Construct the drawer using simple overlap joins: overlap the 418 x 130mm lengths (sides) with the 430 x 130mm (front and back) lengths and then fix the 418 x 398mm (drawer bottom) inside this frame, as shown. Use the 32mm drywall screws to construct the drawer after drilling 3mm pilot holes and countersinking the holes with the 10mm drill bit.
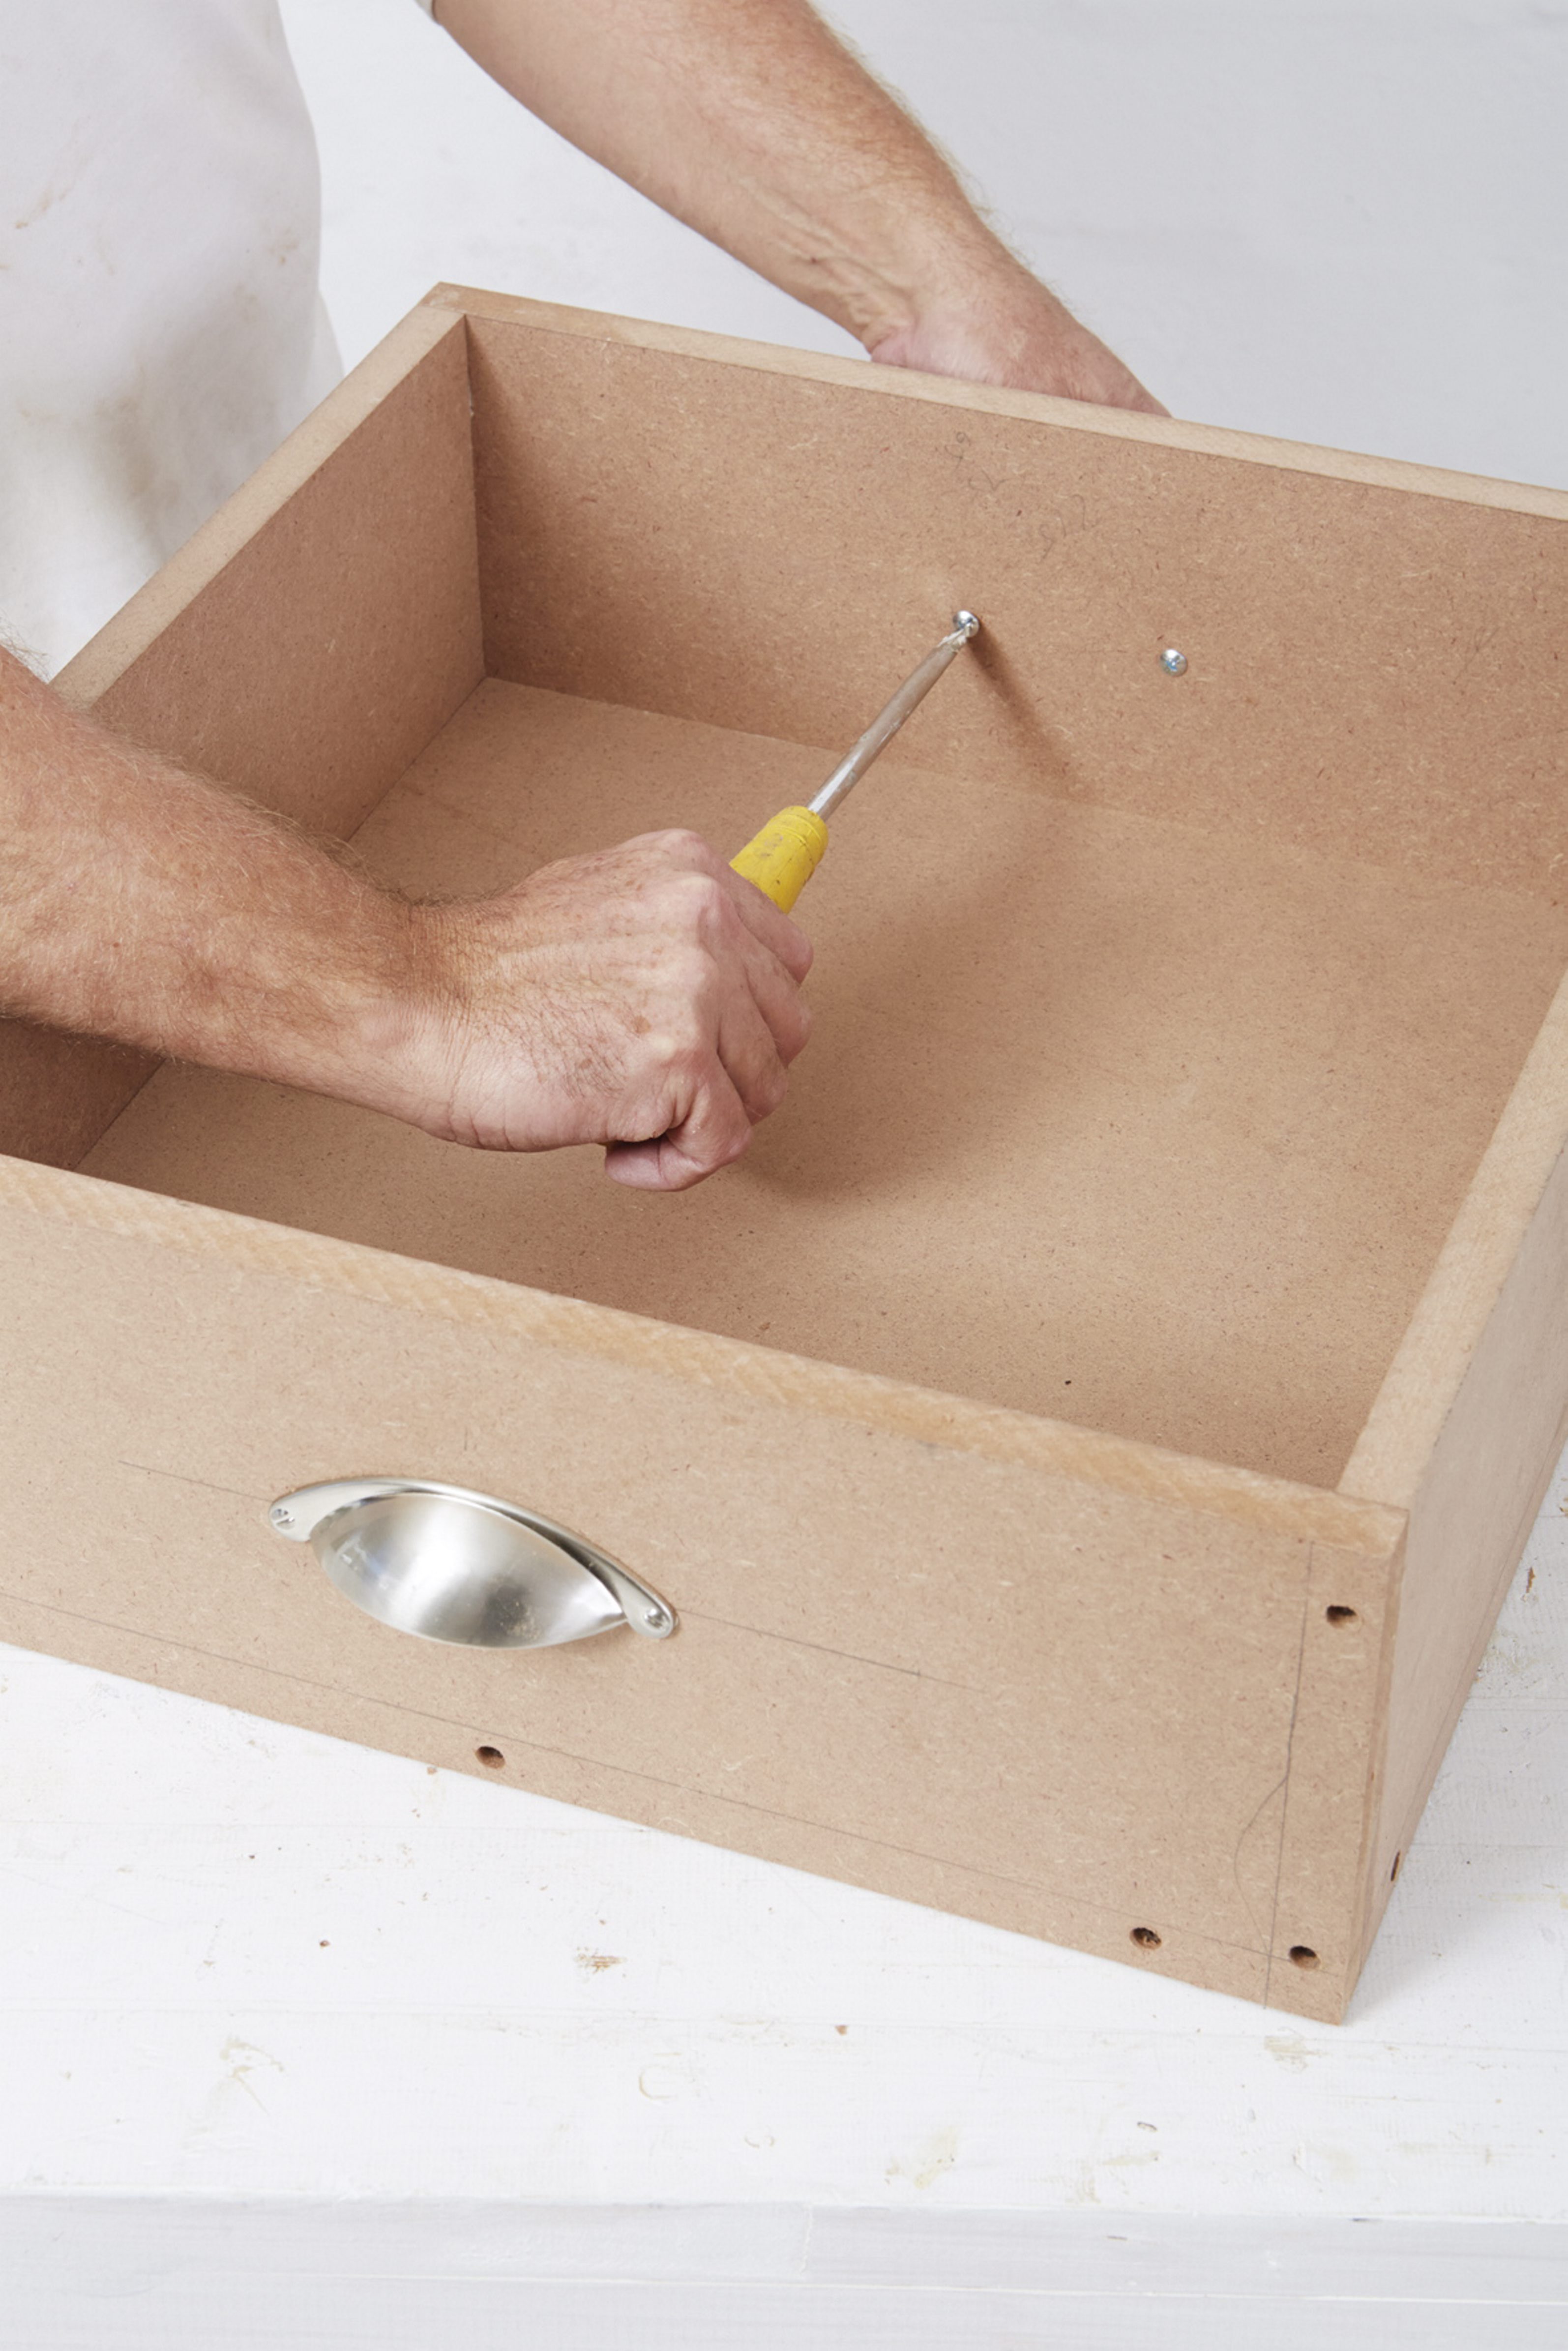
Step 5
Mark the centrepoint along the drawer fronts and mark the position of the handles. Use the 5mm drill to drill holes for the screws before using the screwdriver to fix in place.
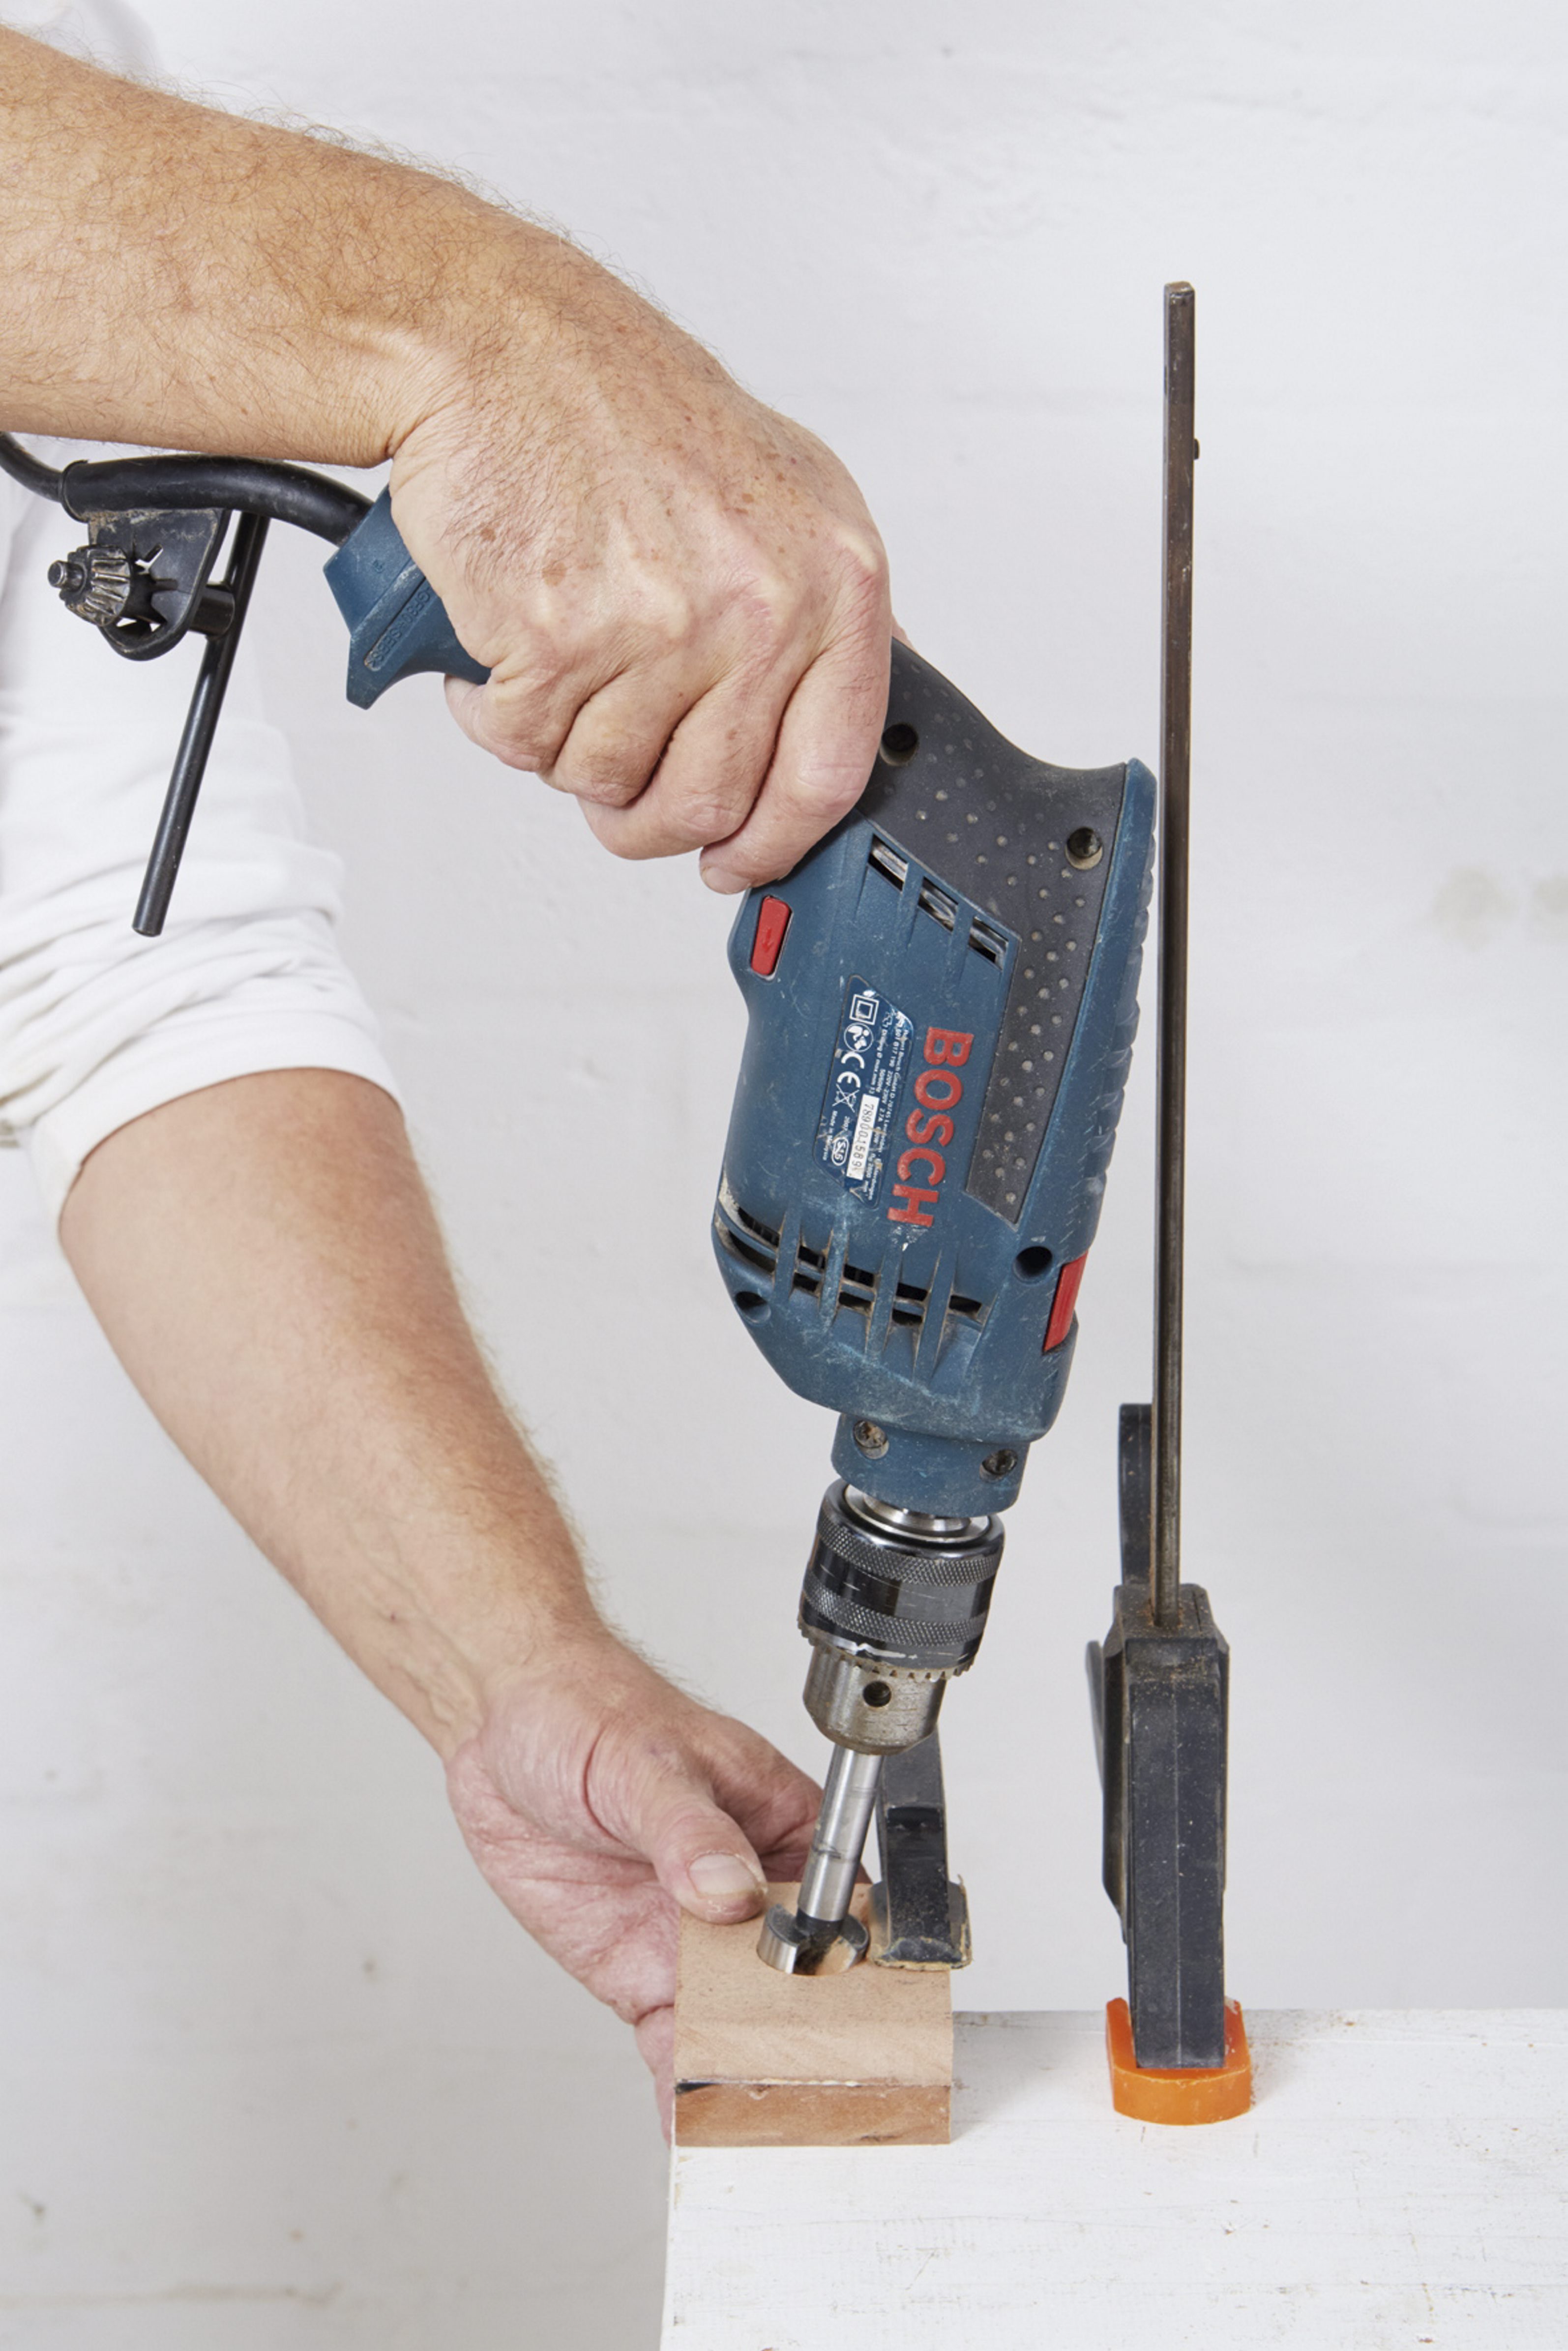
Step 6
We decided to create unique legs for this table using offcut pieces of MDF and short lengths cut from a meranti rake handle. Glue eight 80 x 80mm offcut pieces of MDF together in pairs. Once the glue has hardened, use the G-clamp to hold these firmly to the work surface while you drill holes for the legs using the 25mm Forstner or 25mm spade bit. Use a second clamp as a guide to ensure that you drill all four holes for the table legs at exactly the same angle.
Step 7
Fix the blocks in the corners on the underside of the table, roughly 50mm from the edges, using glue and the 50mm screws. Then cut the 25mm meranti rake handle into four 300mm lengths and glue these into the holes.
To Finish: Sand all the edges and then apply a primer or sealer to all the surfaces. Once dry, apply one or two topcoats in the colour(s) of your choice; we applied two coats of Plascon Velvaglo.
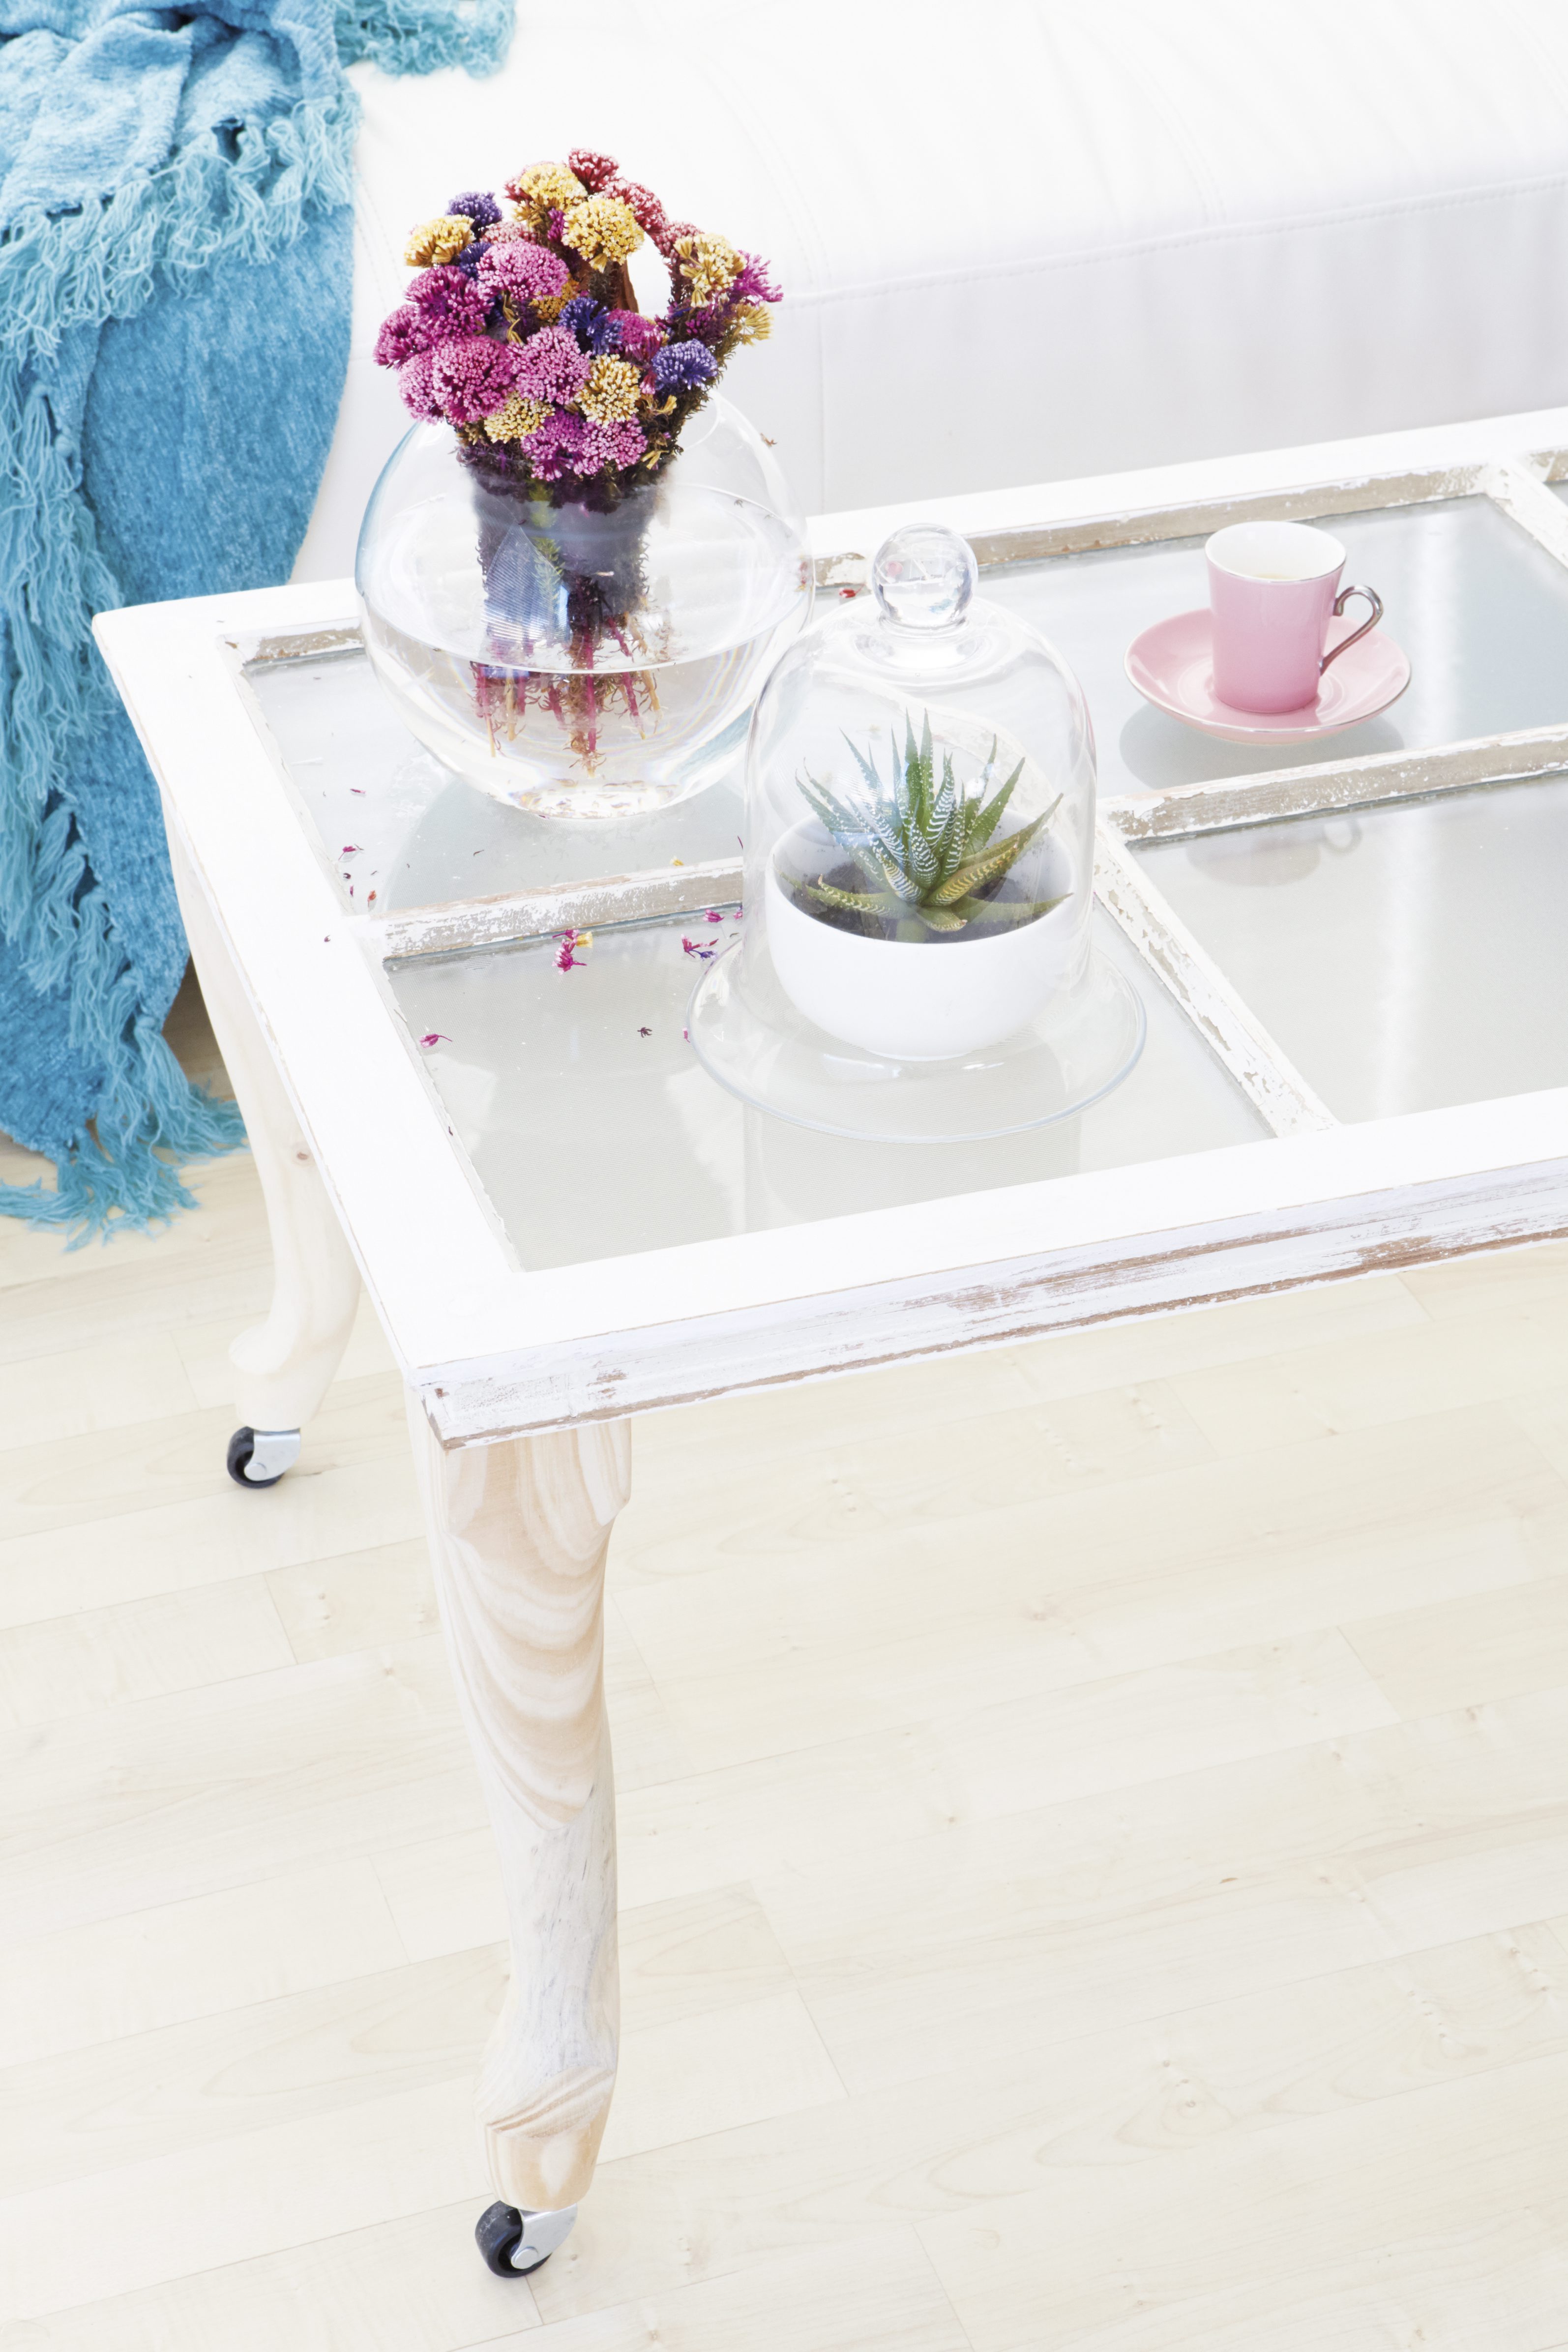
The past revisited
Simply add some wheels to off-the-shelf timber legs, fix them to an old window frame et voila! Contemporary, re-visited furniture that’s also a conversation piece.
- cordless and corded drill; 3mm, 10mm drill bit
- pencil
- hammer
- tri-square
- measuring tape
- sander
- cold glue
- 75mm cut screws
- 120 grit sandpaper
- wood filler
- paintbrush
- old window
- four 450mm Queen Anne-style legs (available at joinery wholesalers)
- four small castors
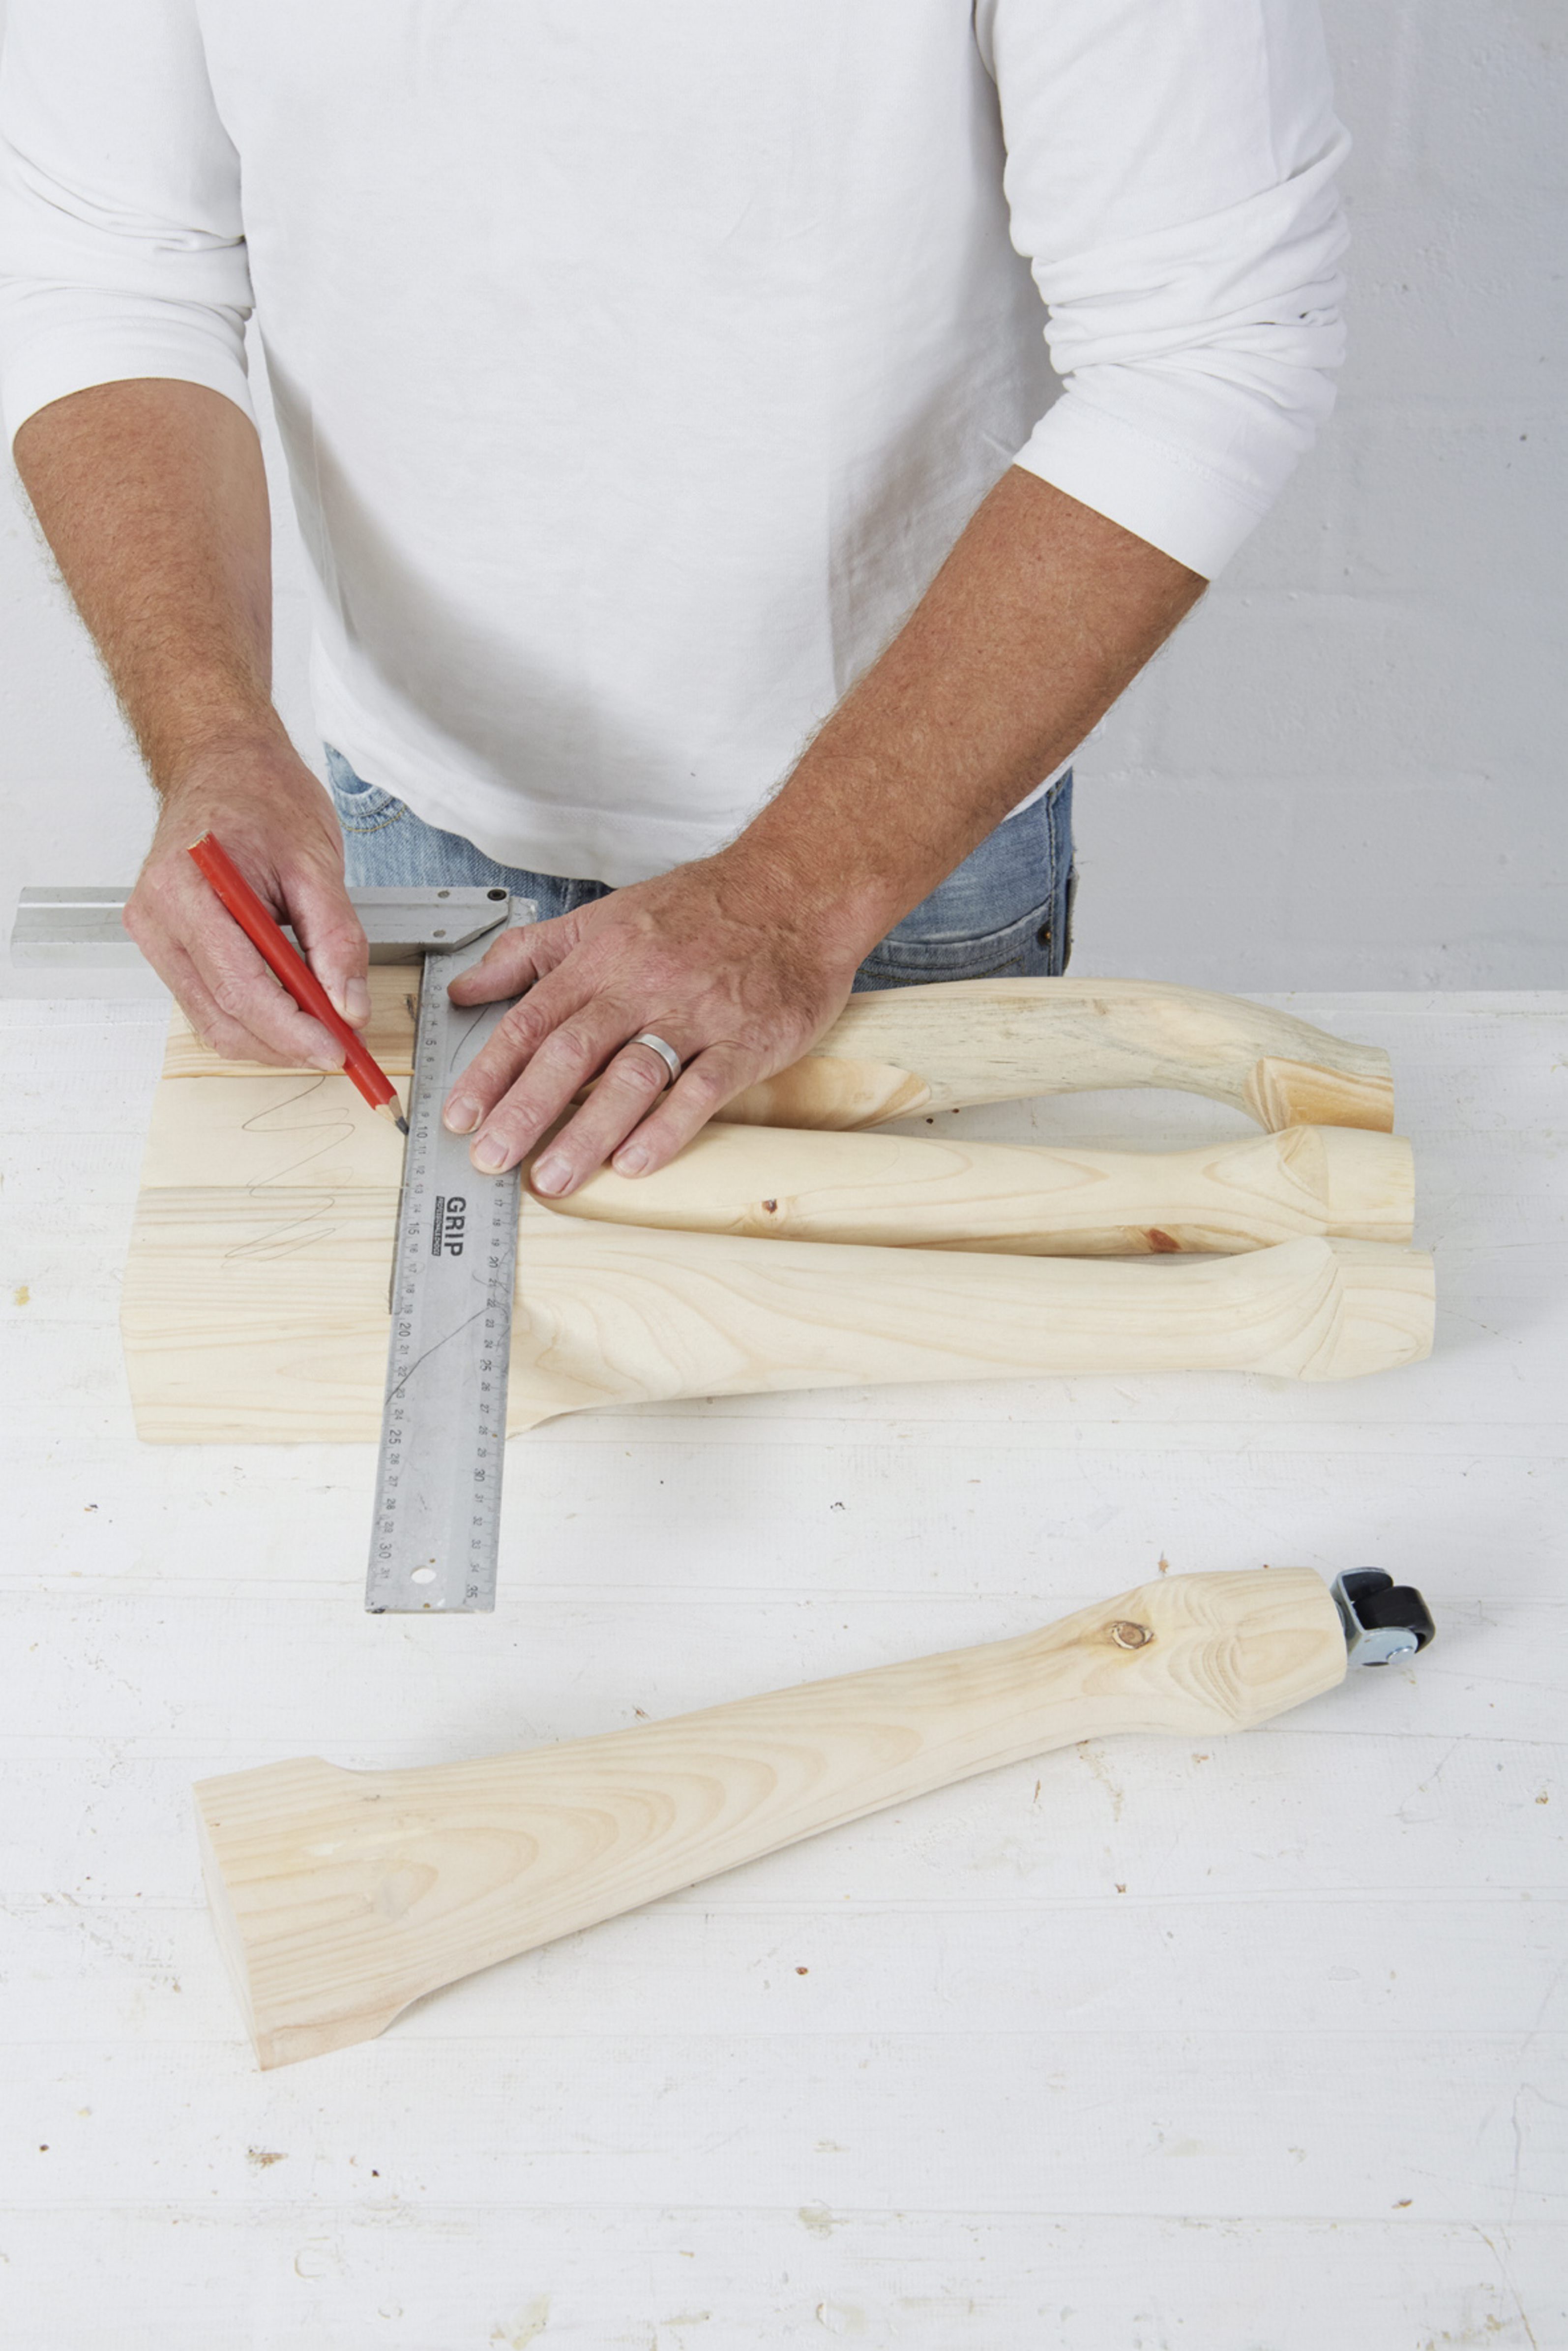
Step 1
Cut the legs to the required length. Window frames vary in size, so we added a castor to one of the legs then trimmed the length until we were happy with both the functional height as well as the overall proportions the table would have. Now mark and cut the other legs to the same length.
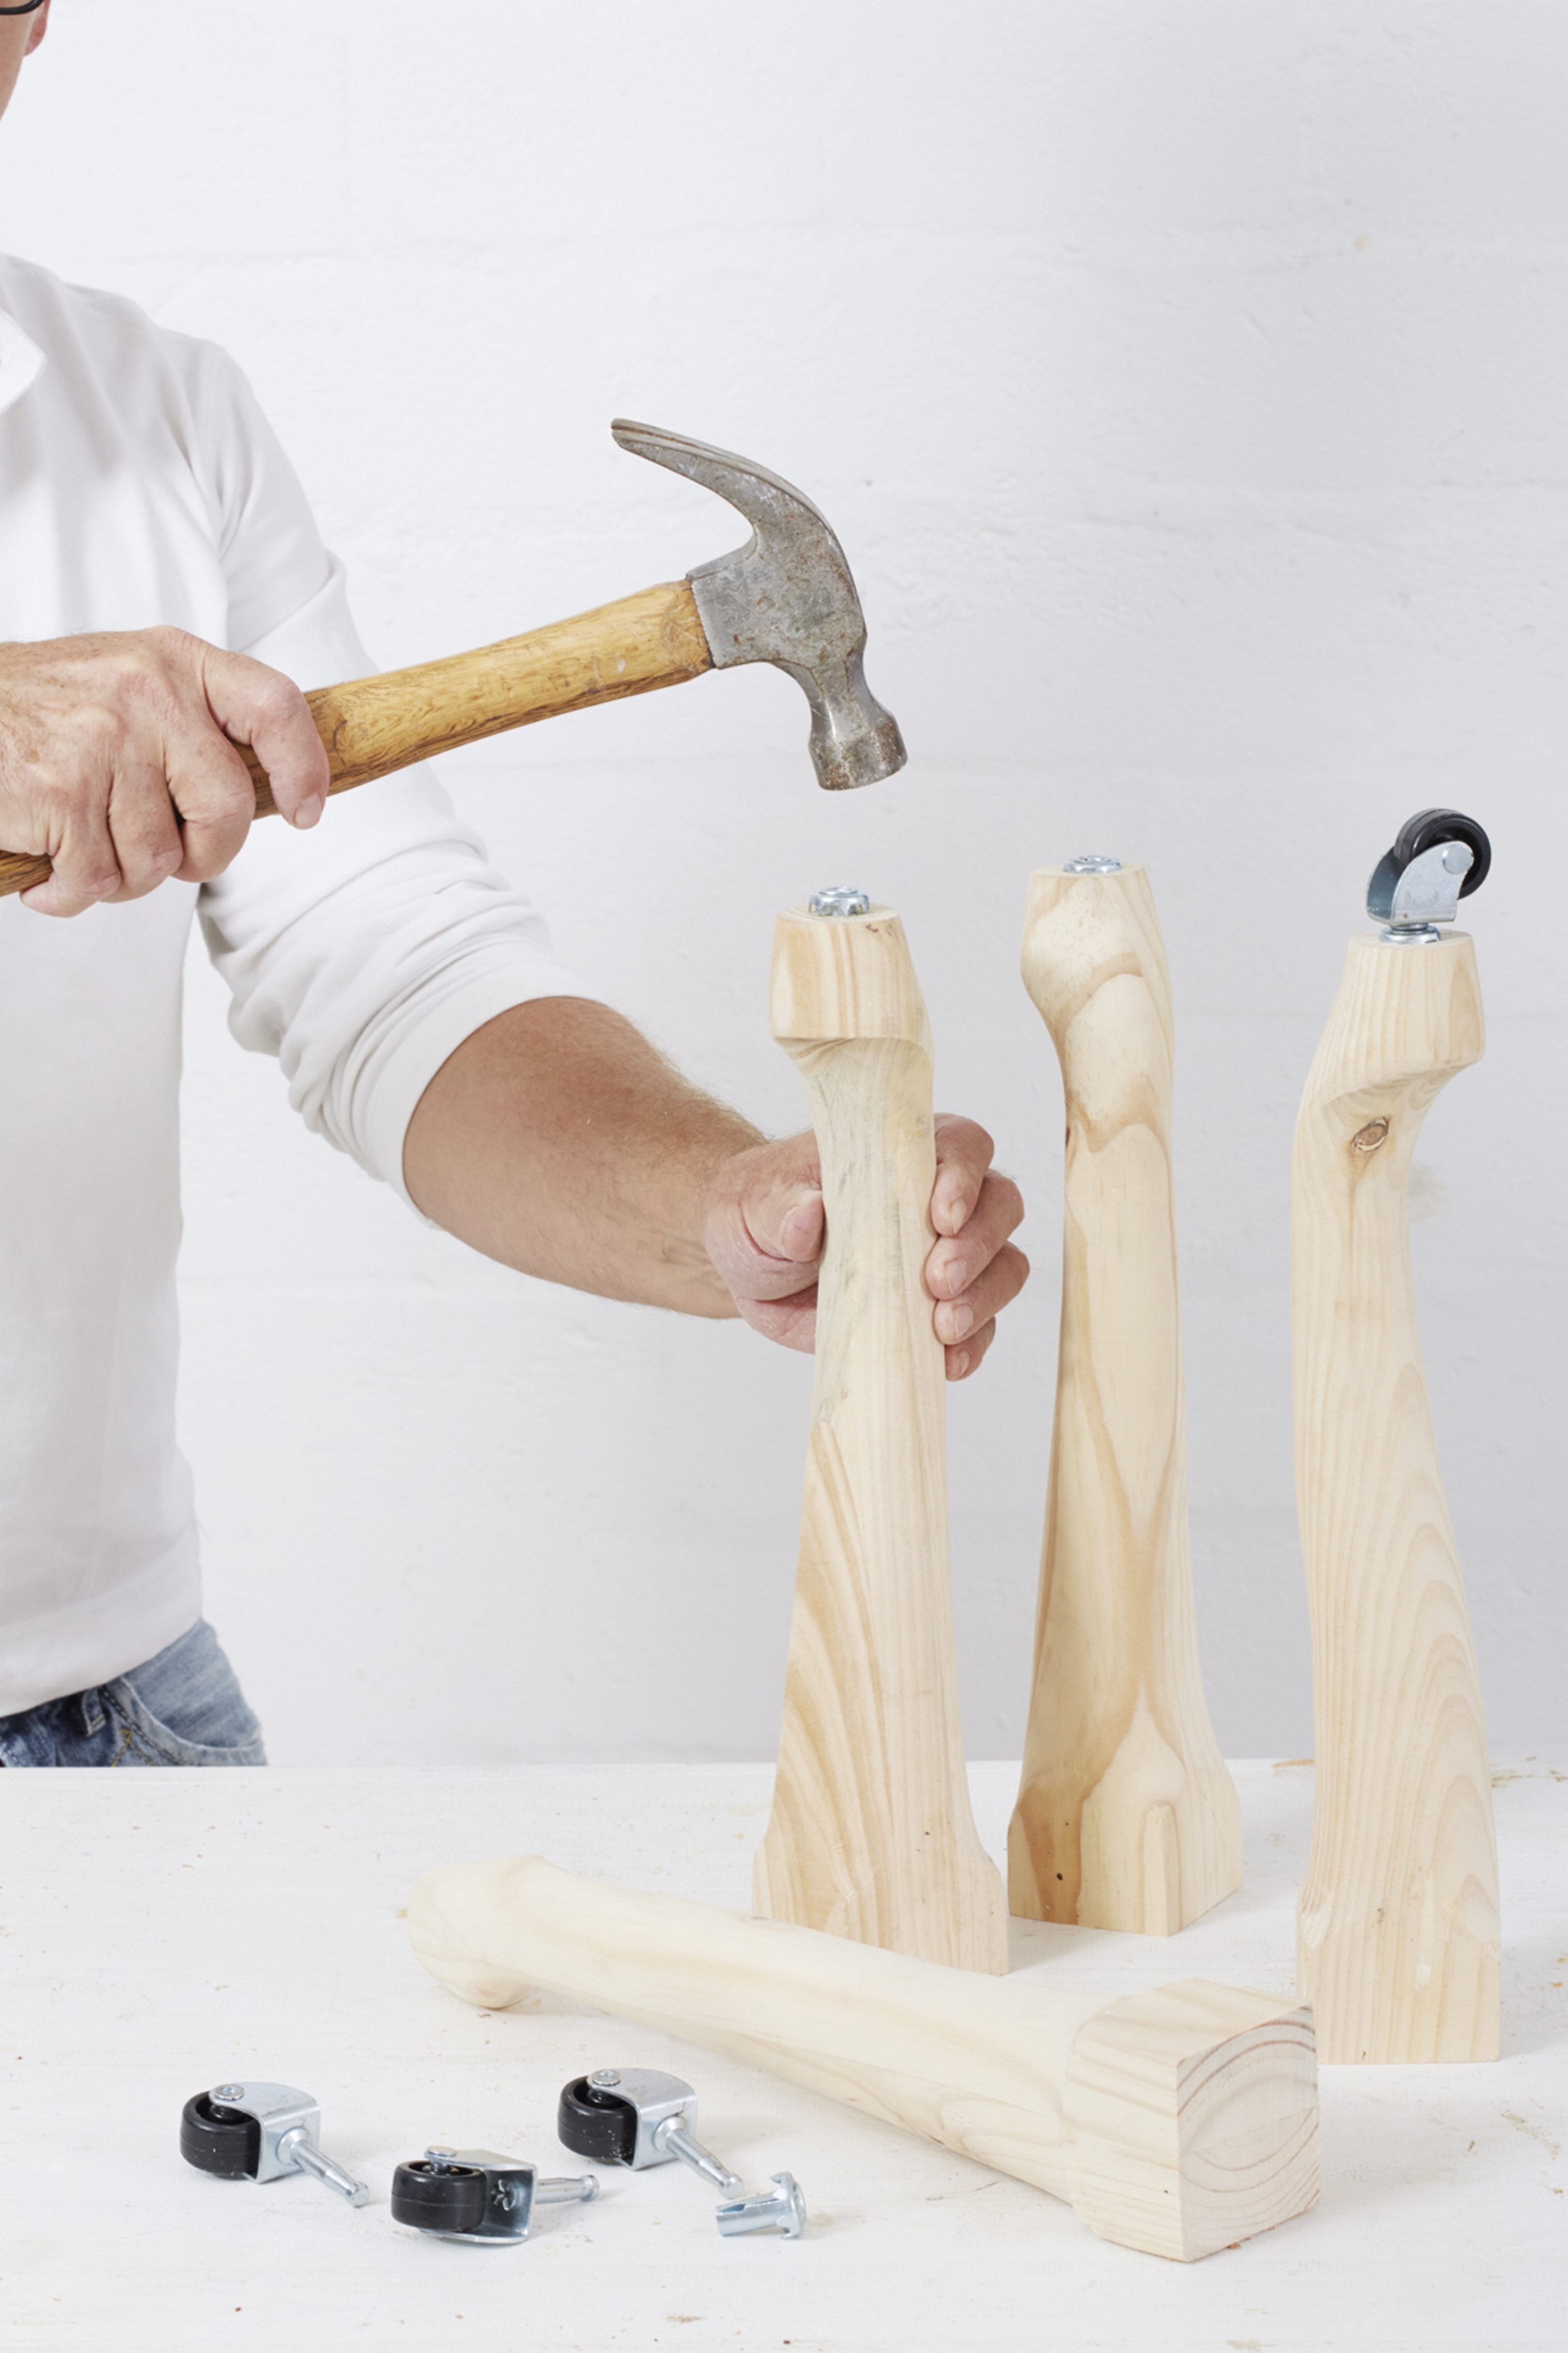
Step 2
Drill 10mm holes in the base of the legs for the fitting. Use a hammer to tap these firmly in place. Then fit the castors.
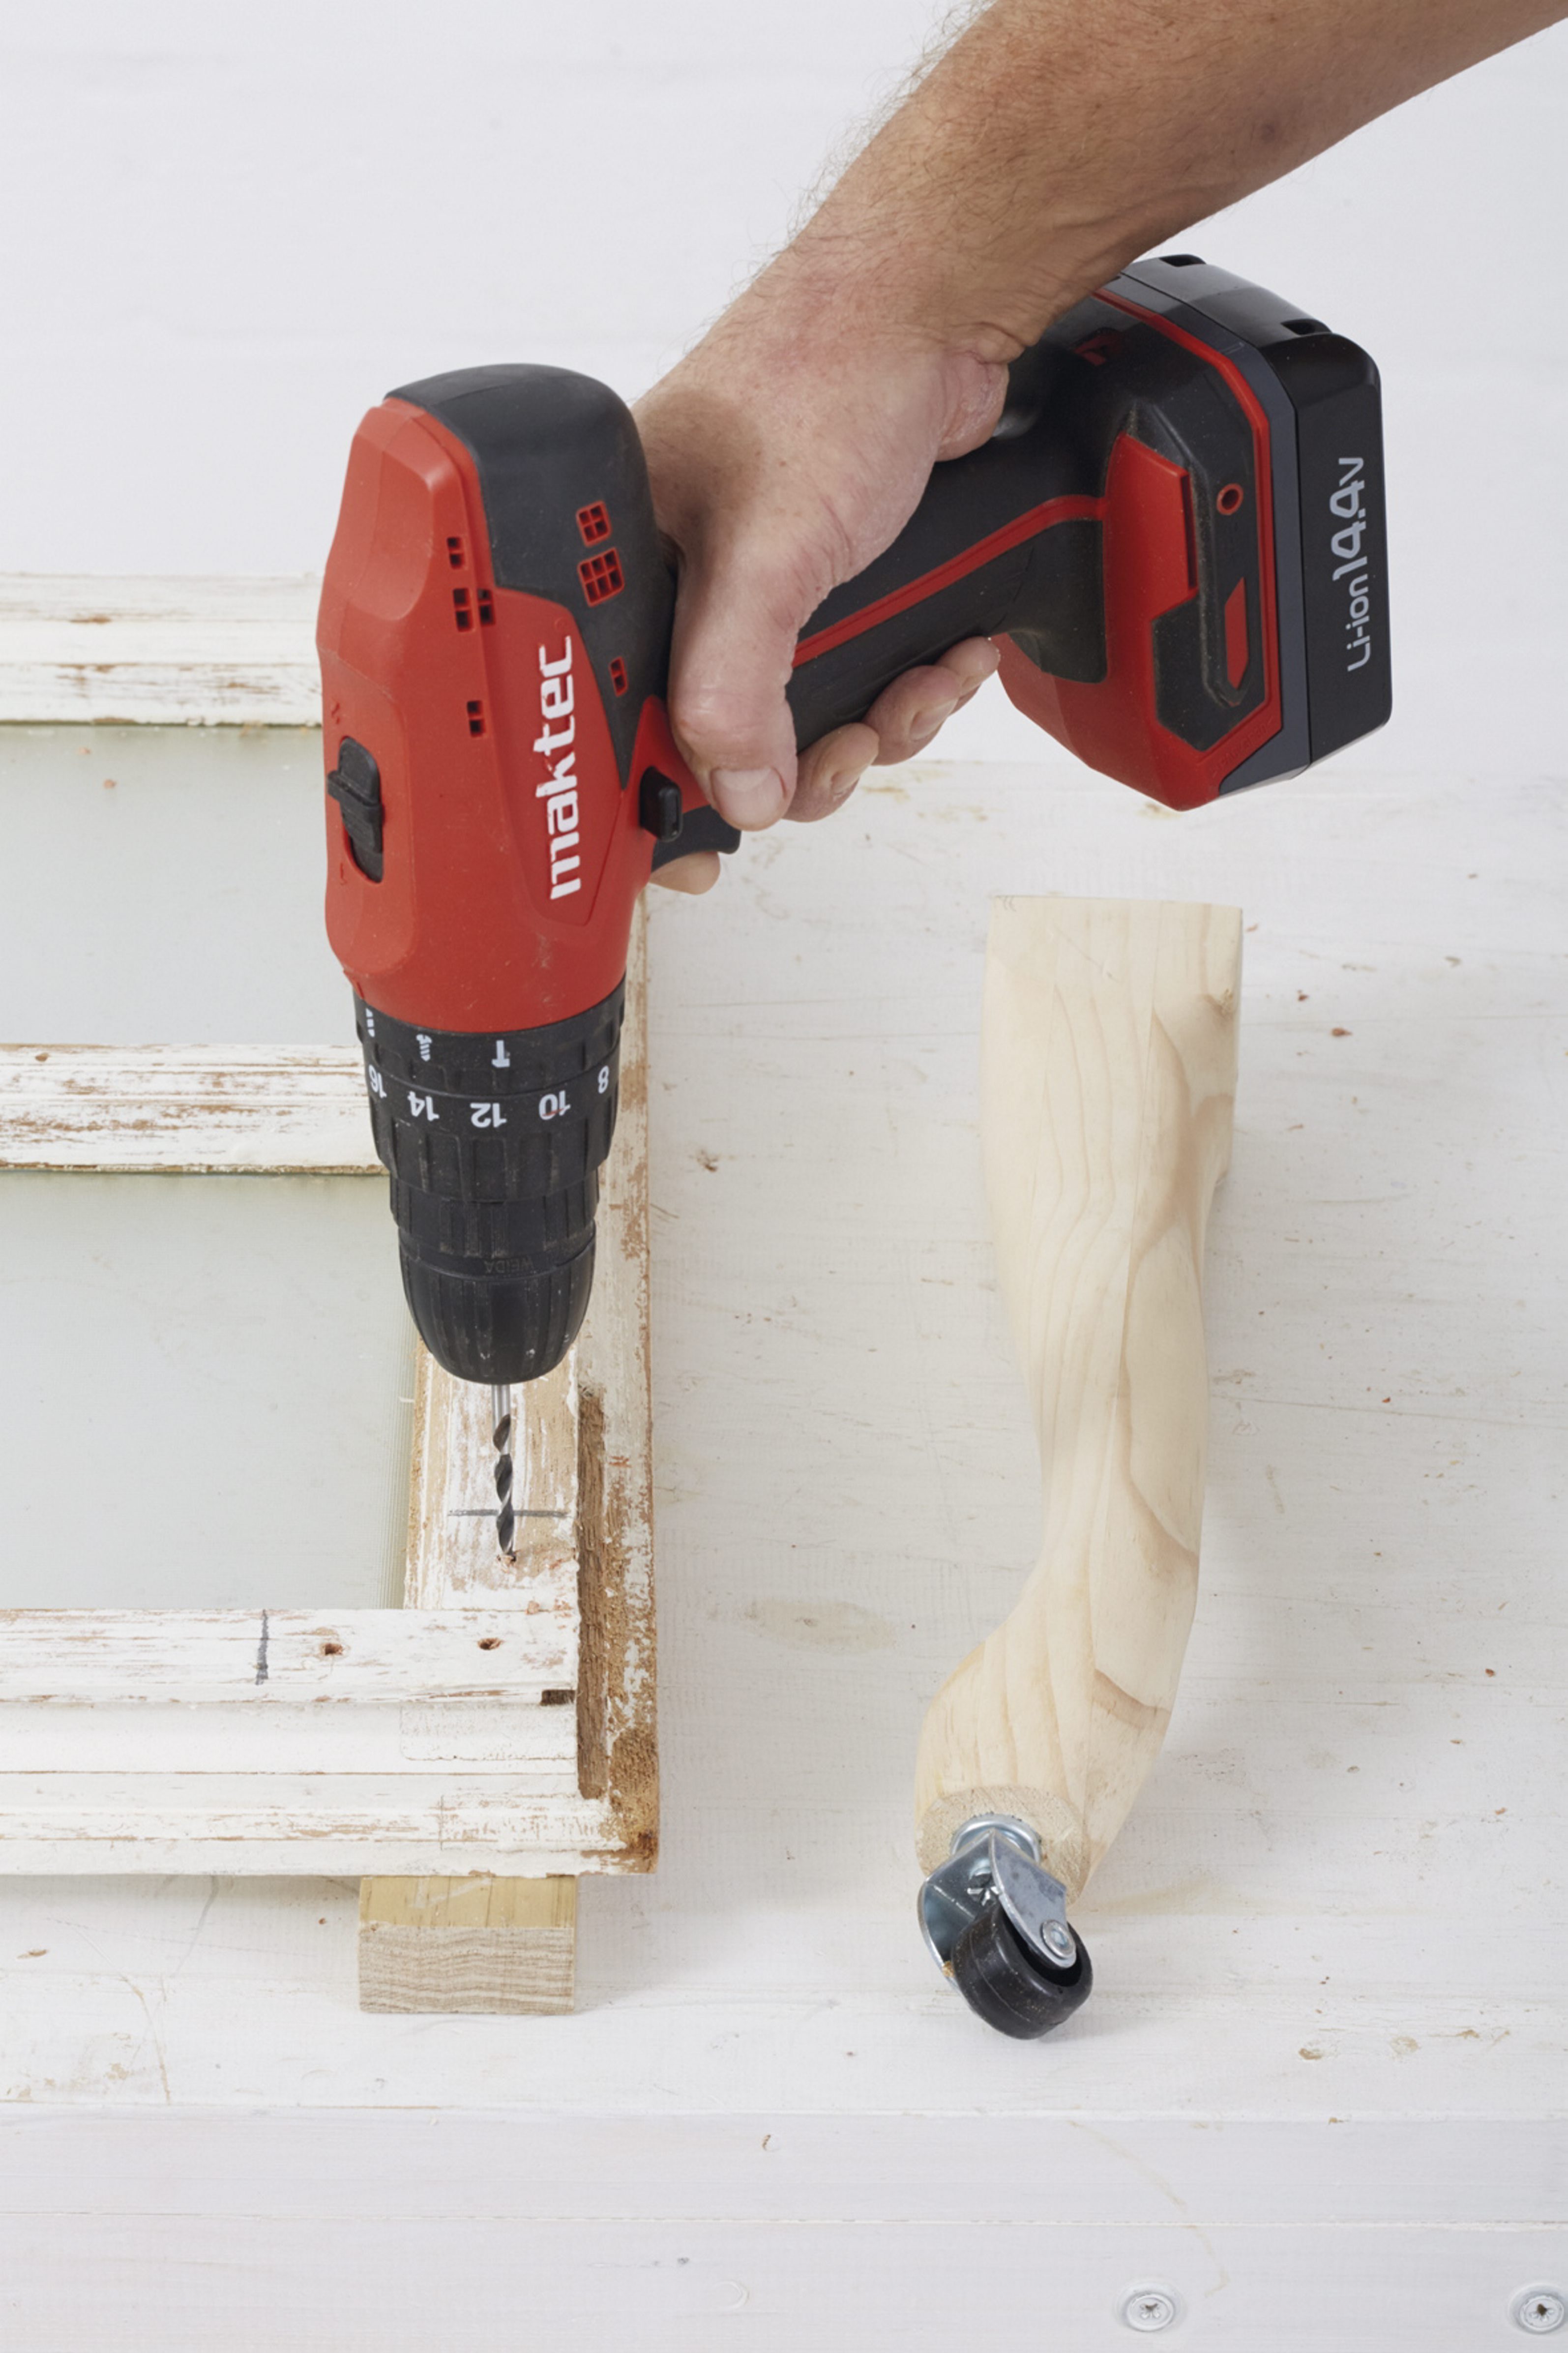
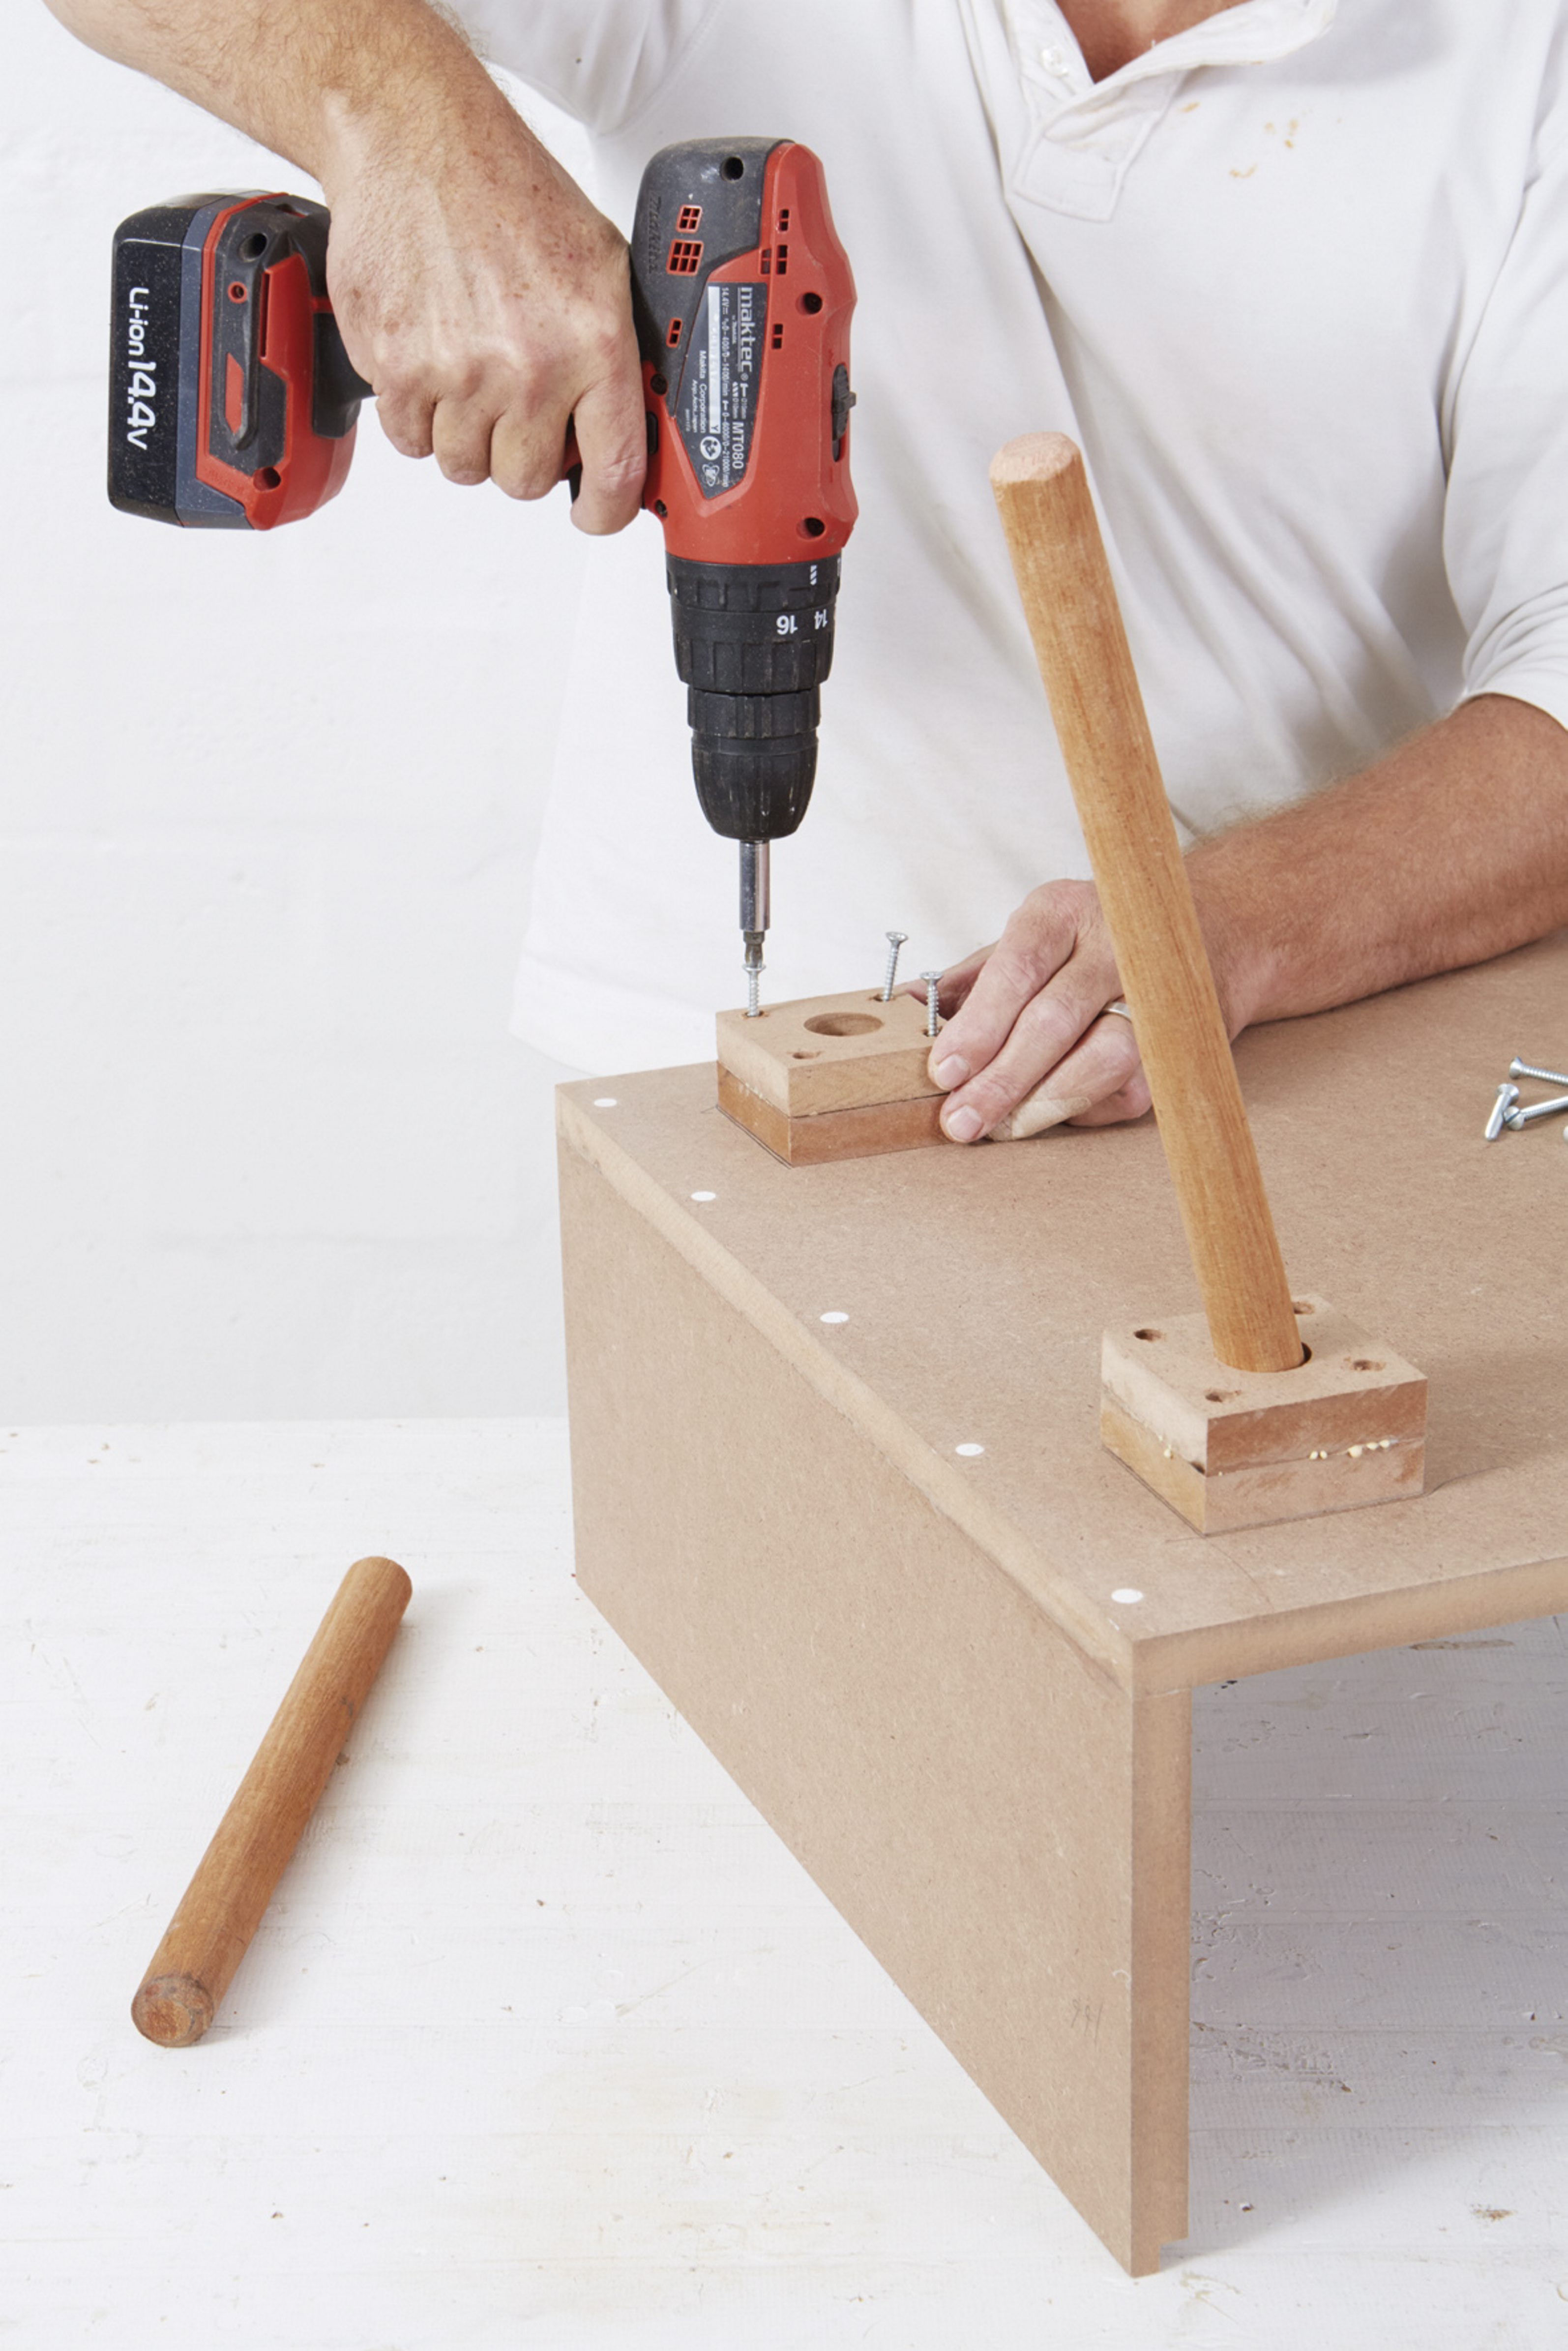
Step 3
Mark out the position of the leg base where it will sit on the frame, then use the 3mm drill bit to drill pilot holes all the way through. Turn the window over and countersink these holes to about 5mm in depth.
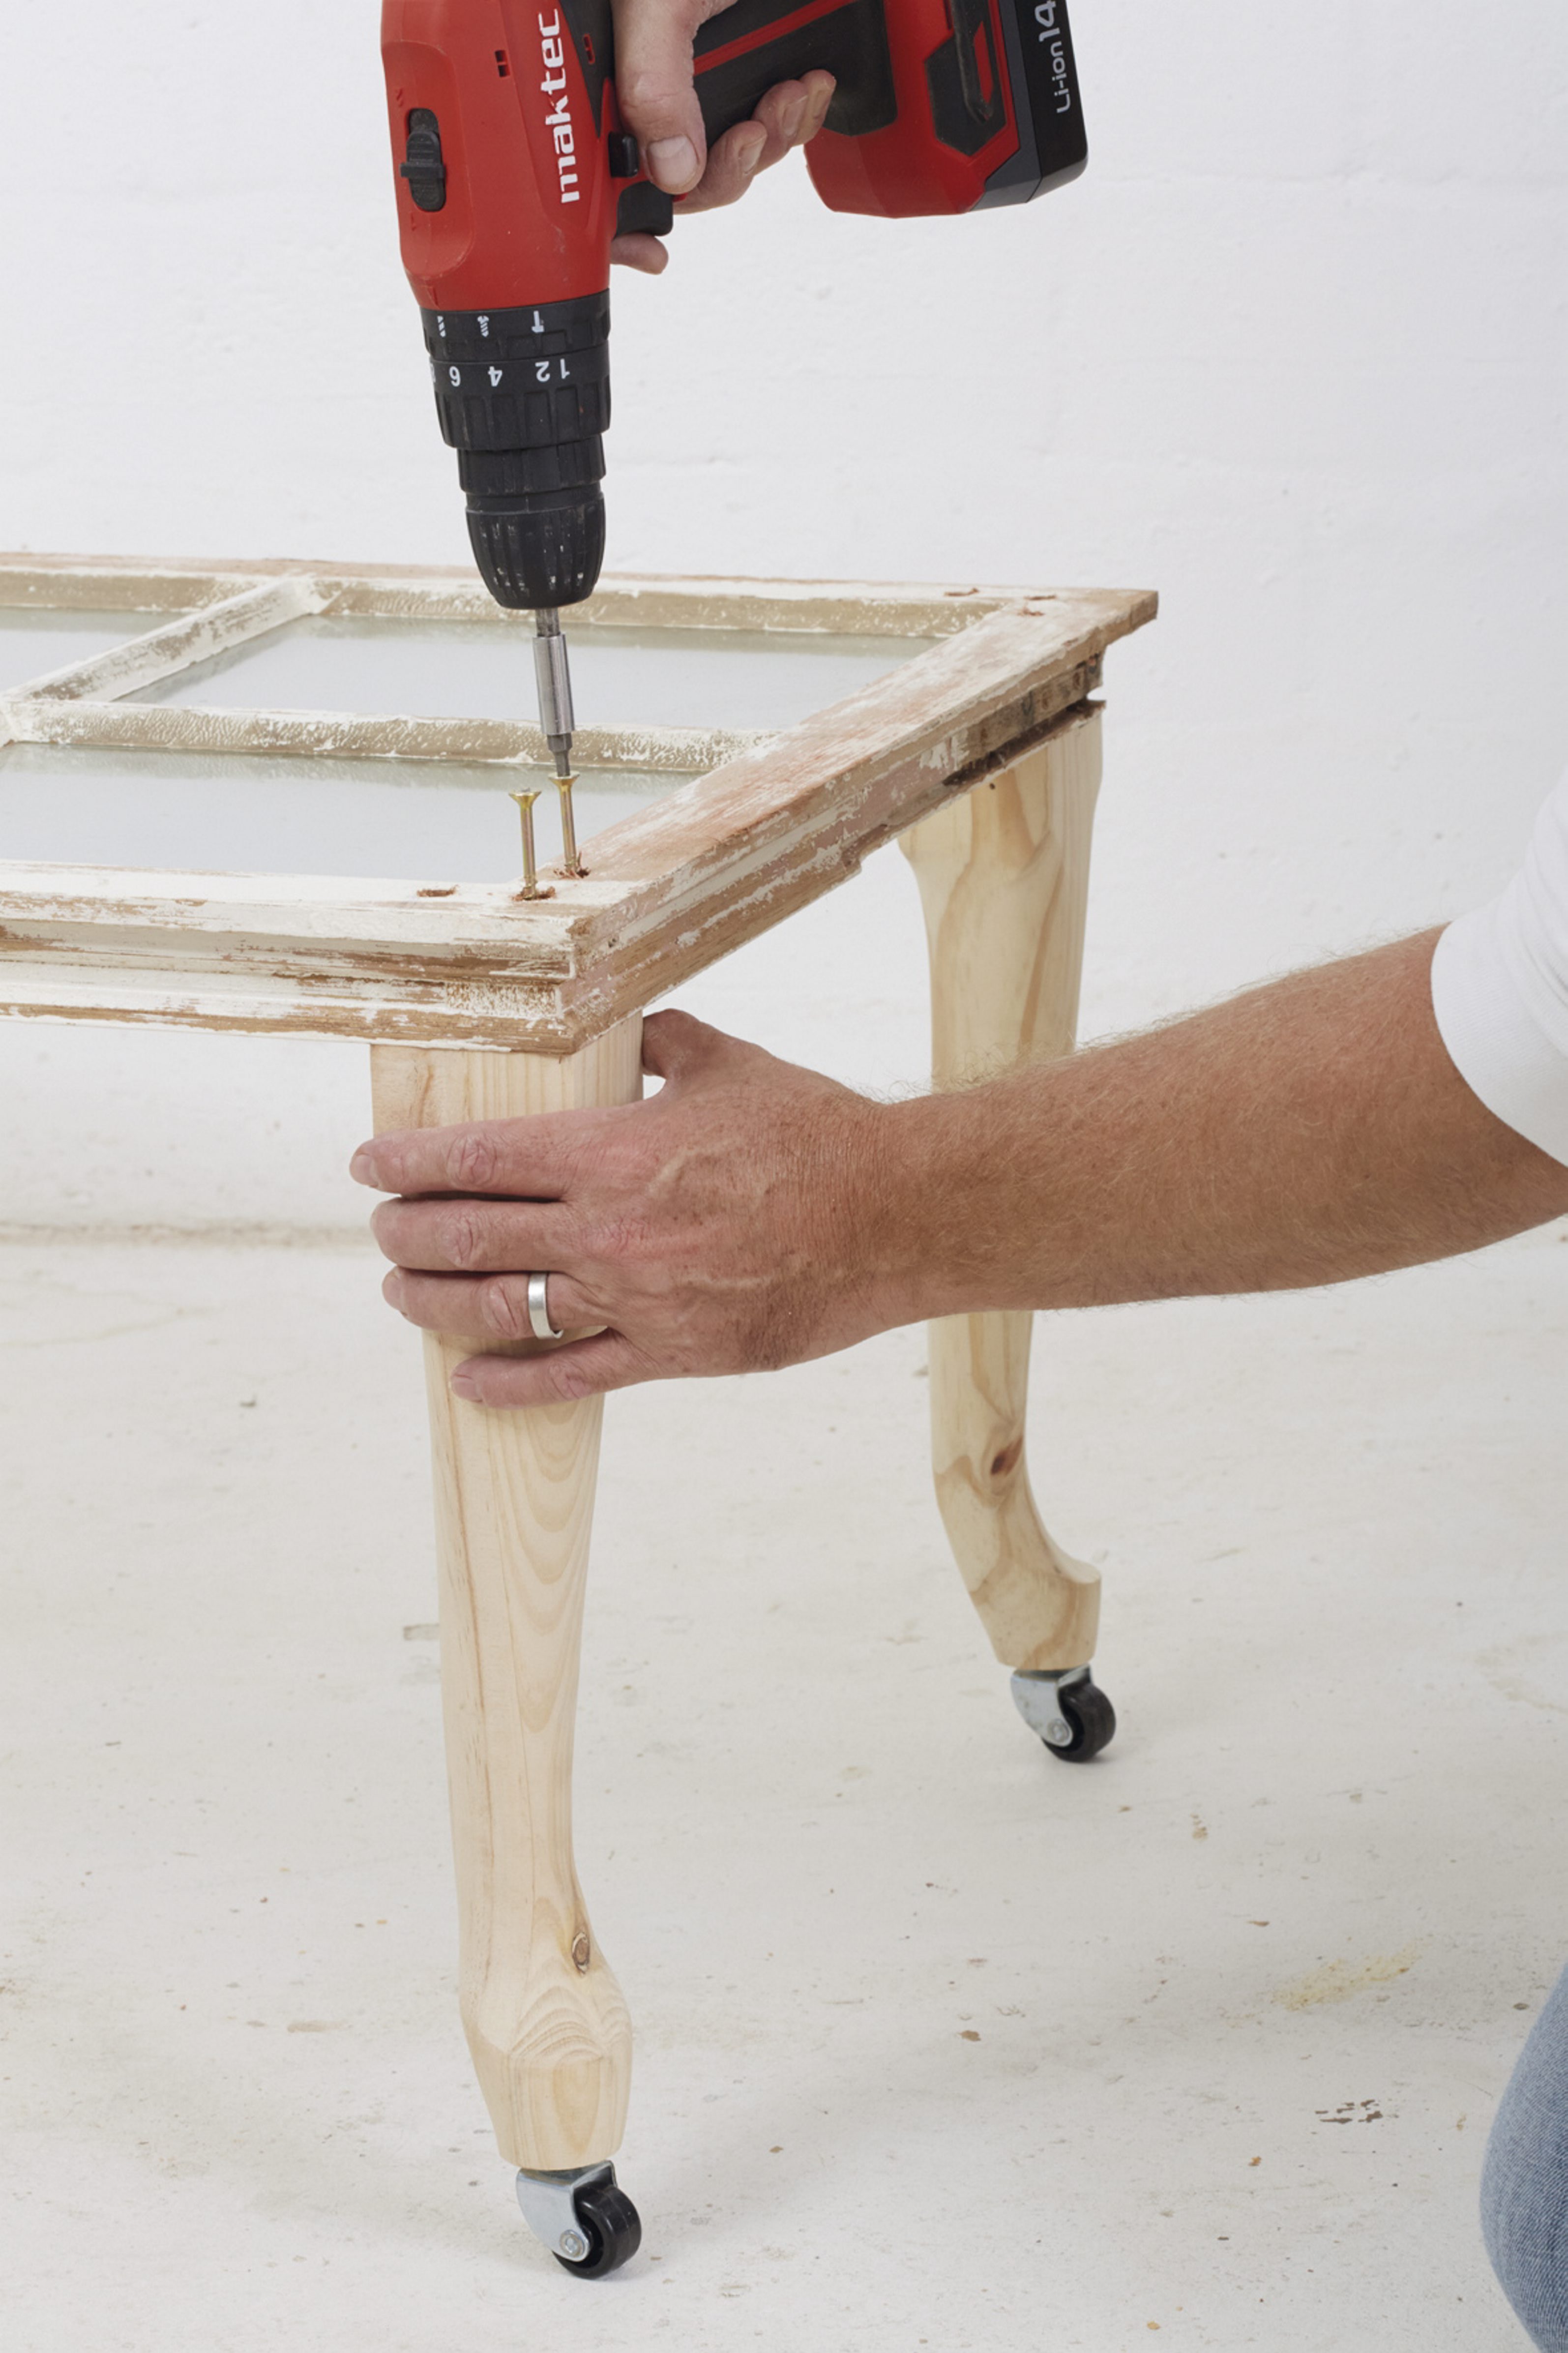
Step 4
Use the 75mm cut screws to fix the legs to the underside of the window frame, as shown. Fill all the holes with wood filler and when dry, sand to a smooth finish.
Credits
Referenced from Gallo images / Home Magazine
Browse 1000’s of products available to you. Select your country to Shop Online.


