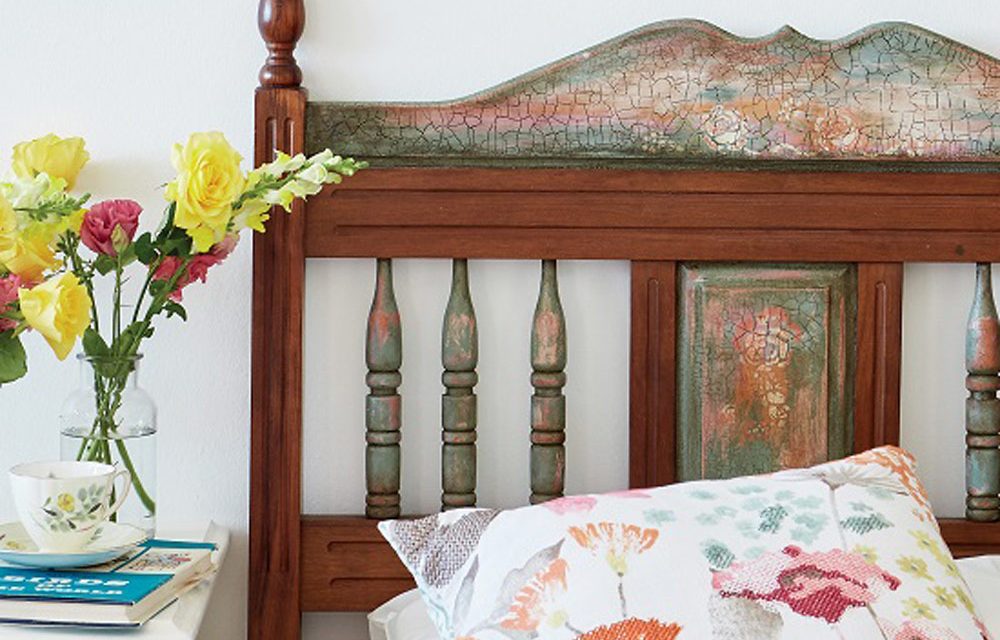
Want to create a unique decorative piece for your bedroom? Unleash your creativity with three different techniques on an old headboard!
- Paint in the colours of your choice
- Crackle glaze (we used annie sloan craqueleur)
- Annie sloan soft wax
- Sugar soap
- Blue painter’s tape (or masking tape)
- Paintbrushes
- 220-grit sandpaper
- Stencil
- Stencil brush
- Mutton cloth
Project notes
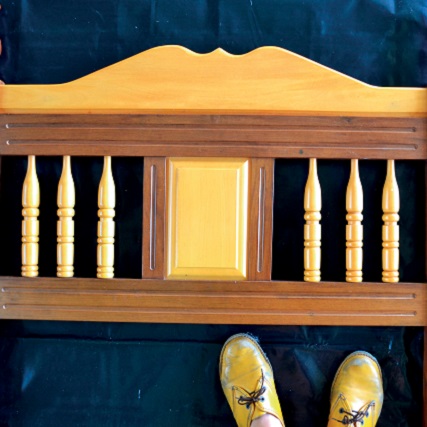
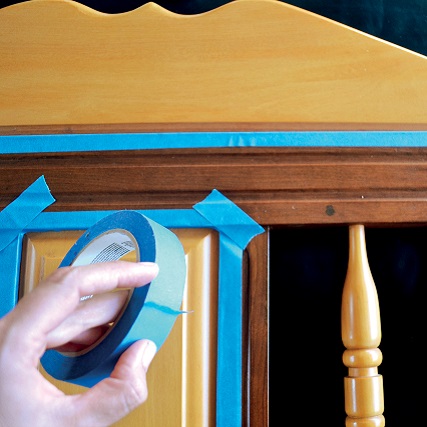
Make sure the headboard (or whatever you want to paint) is clean and dry; washing the item with sugar soap is always a good idea. Apply blue painter’s tape to mask off the areas you want to keep paint-free. For this headboard, we only wanted to paint the light wood sections and not the darker brown sections.

Step 1
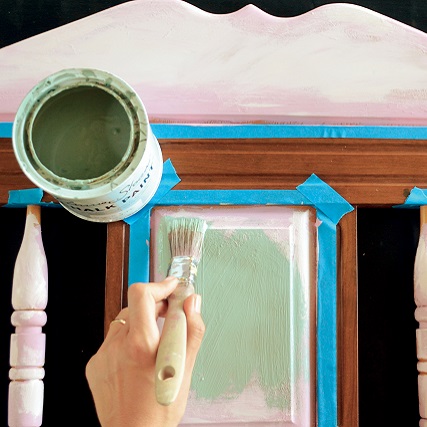
A distressed technique adds detail to the piece – for this you will need to first paint a base coat in one or more colours and then a top coat which covers the base layers completely. When you sand the top coat, the base colours will show through. The first step is to paint the colours you want showing through; we used Annie Sloan paint in the colours Henrietta and Antoinette.
Step 2
After the base coats of paint are dry, apply a solid layer of the top coat colour of your choice; we used Annie Sloan Duck Egg Blue. Paint all the sections and allow to dry completely.
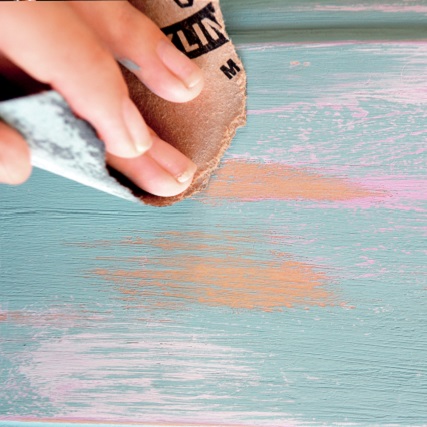
Step 3
Using 220-grit sandpaper, sand those bits of the furniture that would tend to weather naturally. You can choose to sand only a little or all the way down to the wood as we did.
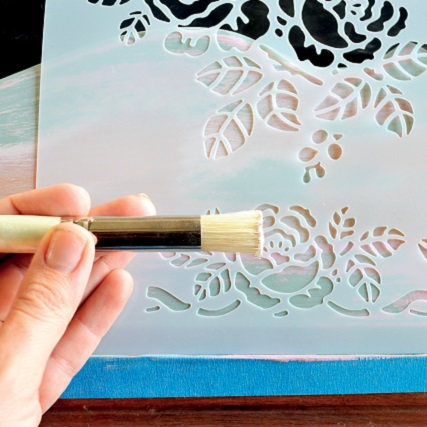
Step 4
Make sure the entire piece of furniture is clean and dry before doing the stencilling; we used a rose stencil. Keep the stencil in place with painter’s tape. Using a stencil brush, dab the paint over the stencil; have fun playing with different colours for the stencilling.
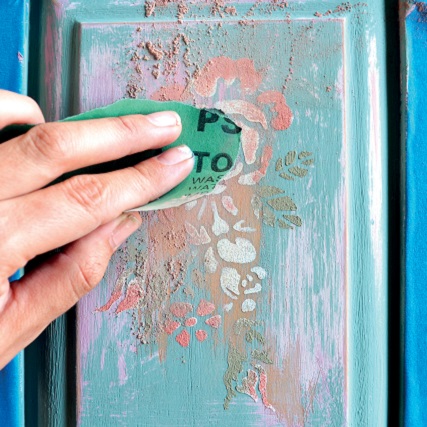
Step 5
Allow to dry completely. At this point, you can sand it down again – this works well to achieve the antique effect we want to create.
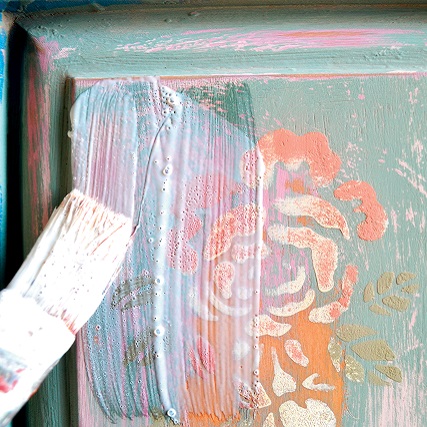
Step 6
Annie Sloan Craqueleur is a two-part product. Apply the crackle glaze or Craqueleur base coat first. The thicker you apply the product, the deeper the cracks tend to be. Leave to dry.

Step 7
Once the crackle base coat is dry, apply the crackle top coat and allow to dry. Once again, the thicker the layer, the deeper the cracks will be. The cracks only start appearing after this top coat is completely dry; this could take a few hours. You can use a hairdryer to speed up the process but the direct heat could make wrinkles in the product – rather let it dry naturally.
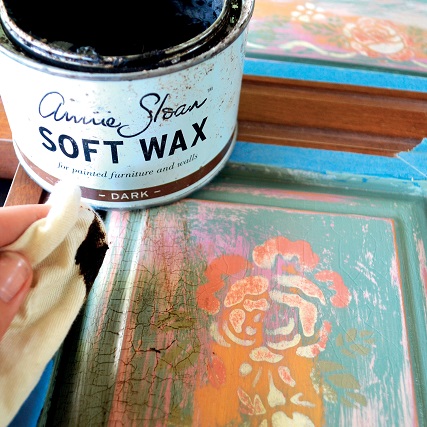
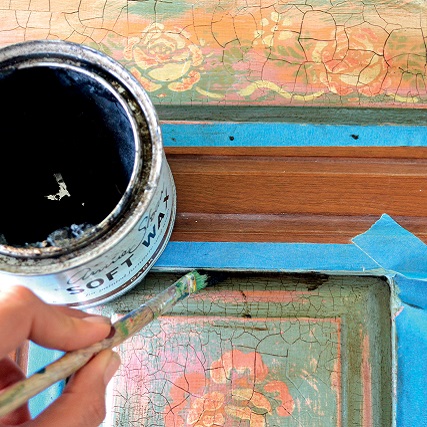
Step 8
Enhance the cracks by applying Annie Sloan Soft Wax (in the colour Brown or Black) with a mutton cloth, making sure to rub it into all the cracks.
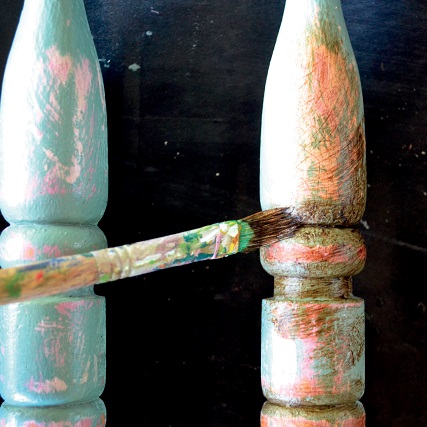
Step 9
You could use a narrow paintbrush to really work the dark wax into all the nooks and crannies you’d like to highlight.
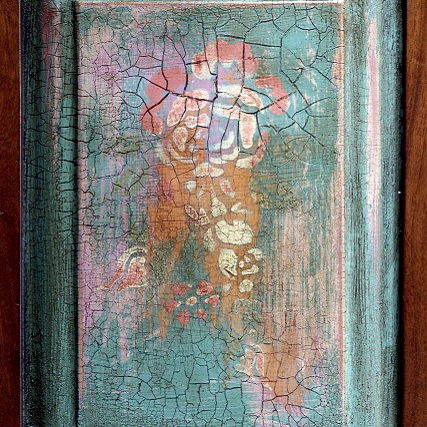
Step 10
If the cracks are too dark for your liking, apply a thin coat of Annie Sloan Wax in the colour Clear to clean the surface.
All Done
Remove all the painter’s tape and you’re good to go!
Credits
Referenced from Gallo images / Home Magazine
Browse 1000’s of products available to you. Select your country to Shop Online.


