Mosaic tiles look great as a shower floor, a splashguard in the kitchen or as detail in a tile pattern.
- Scissors
- Mosaic tiles
- Spacers
- Grout
- Tile adhesive
- Serrated spreader
- Putty knife
- TFC grout sealer
- Rubber grout spreader
- Rubber mallet
- Wooden block
- Tile nippers
- Level
- Safety gear
- Safety glasses
- Rubber gloves
- Dust mask for mixing the adhesive and grout
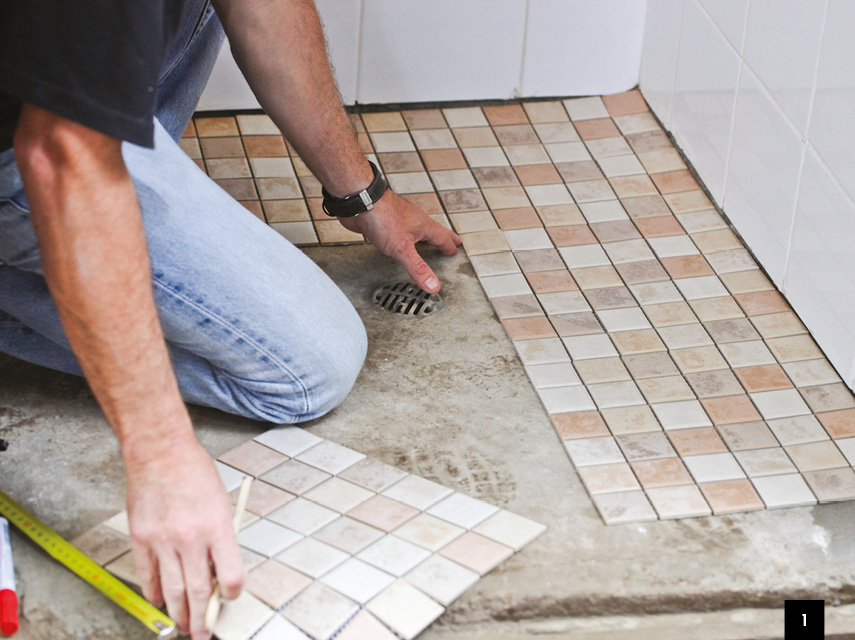
Step 1
Find the centre point of your room, or decide which part of it attracts the most attention and is the most visible. Start tiling here so this area looks the best. (People do not focus on the bottoms of walls or the edges of a room.)
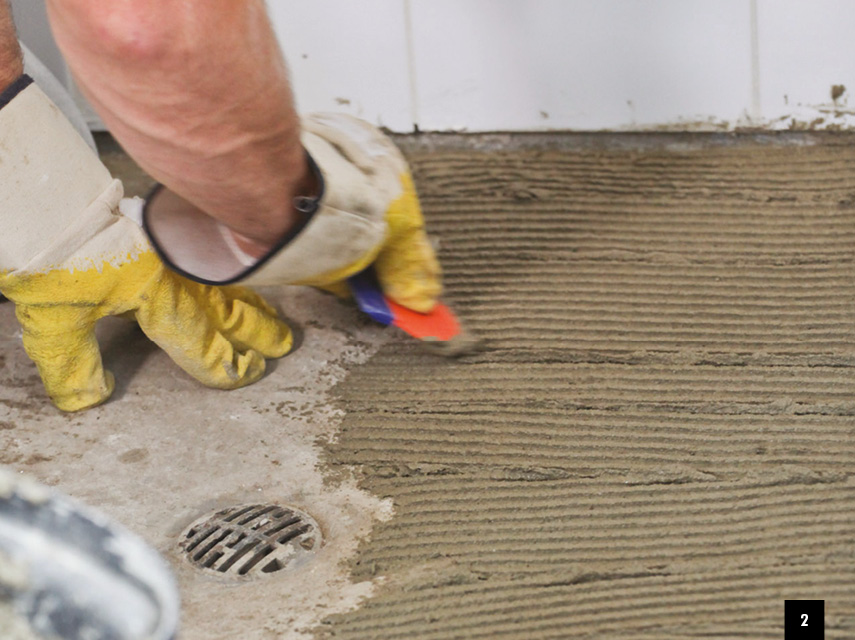
Step 2
Mix tile adhesive and spread it over an area that will take two or three sheets of mosaic tiles. Use a small serrated spreader to create an even bed of adhesive.
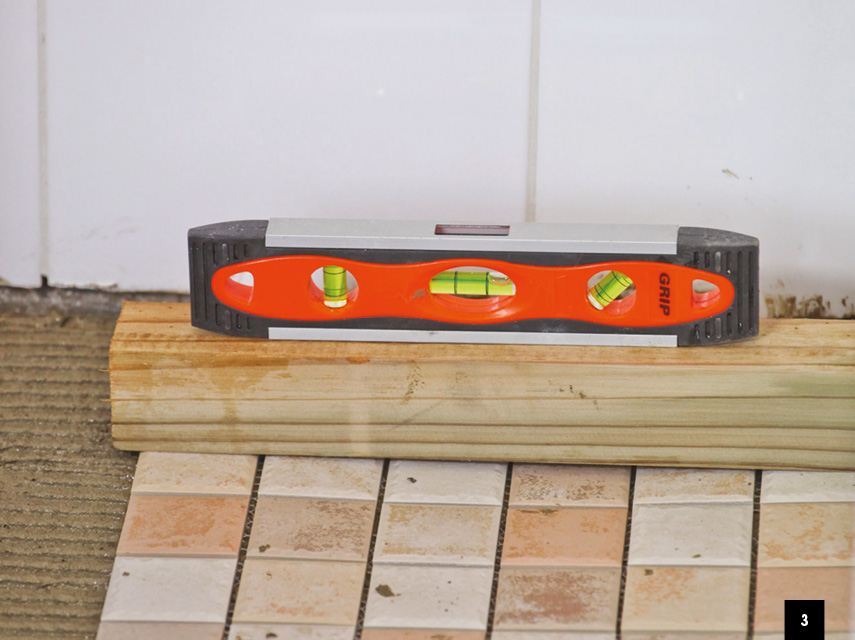
Step 3
Lay the first sheet of tiles down, place a wooden block on it and tap the block with a rubber mallet to tamp the tiles into the adhesive and level them. Check that they are level with a spirit level.
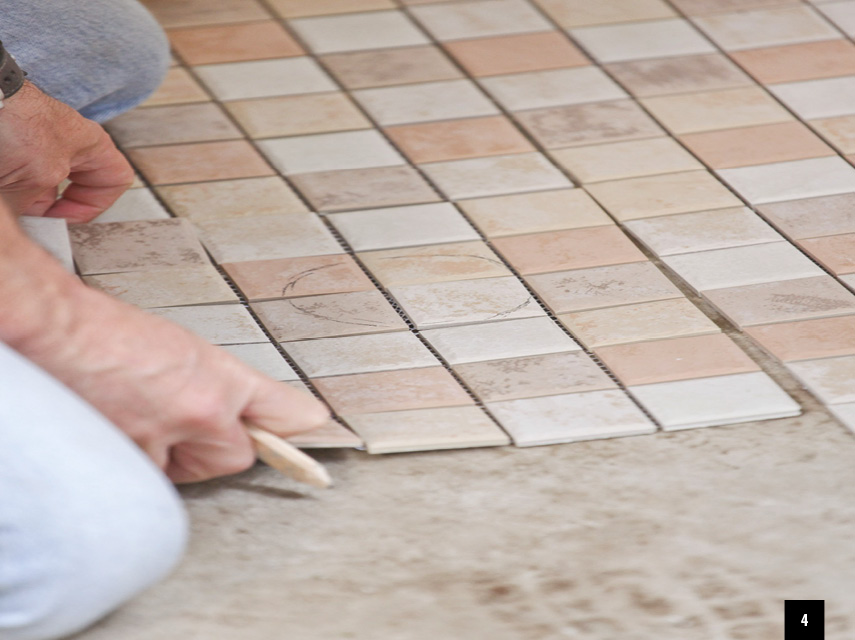
Step 4
Place spacers between the sheets of tiles, making sure the spacing is the same as that between the tiles themselves so you won’t be able to tell where one sheet ends and the next begins.

Step 5
Continue laying the sheets towards the edge of the room. When faced with objects or spaces smaller than a sheet, cut the mesh as necessary to get the size or shape required. Always tap the tiles down and check that they are level.
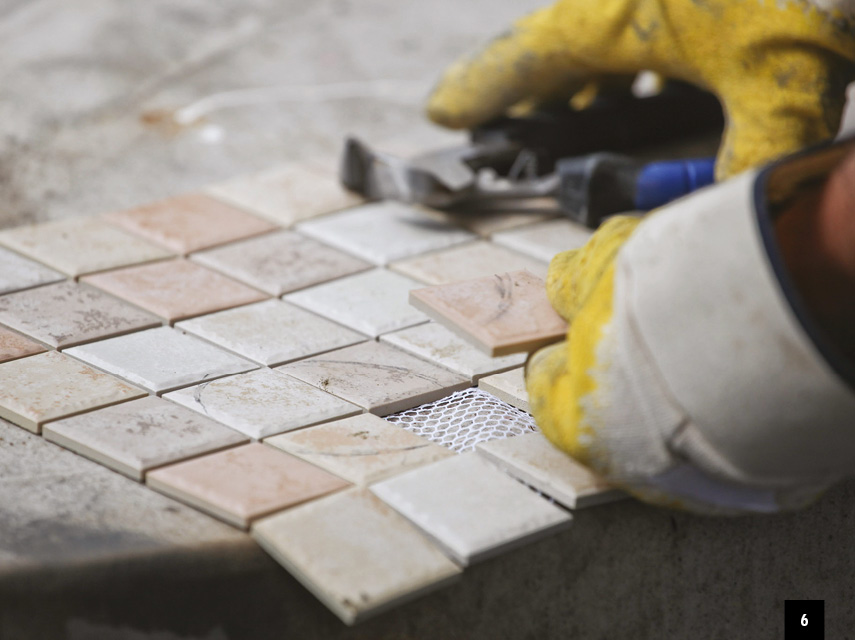
Step 6
For exact fits you will have to lay a few individual tiles, using a nipper to cut them in half or to the shape needed.
Step 7
Allow the adhesive to dry for at least 24 hours before grouting.
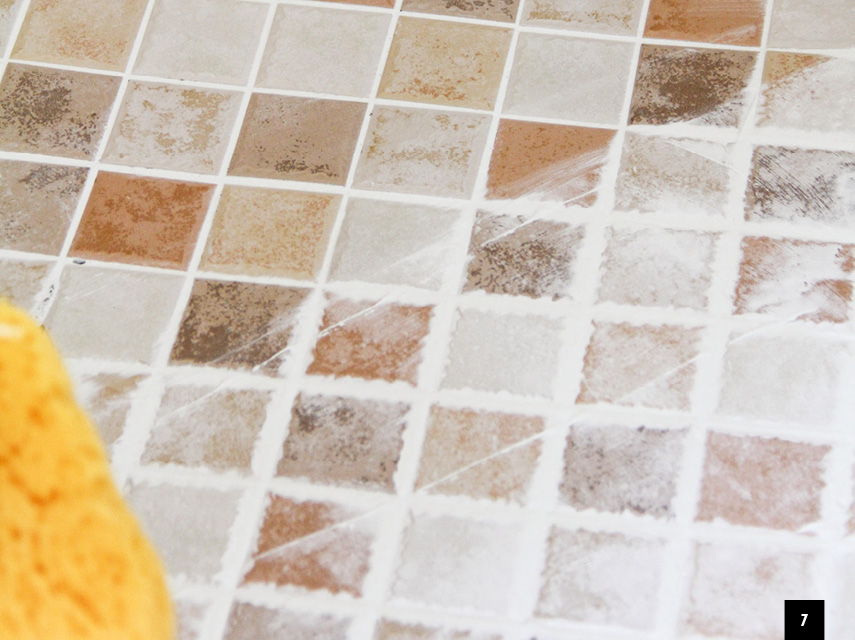
Step 8
Mix grout as per the manufacturer’s instructions and apply it with a rubber spreader, working it into the spaces between the tiles with a number of sweeps. Use a waterproof grout in showers.
Step 9
Grout small areas at a time, so you don’t get ahead of yourself and find that the grout dries too quickly.

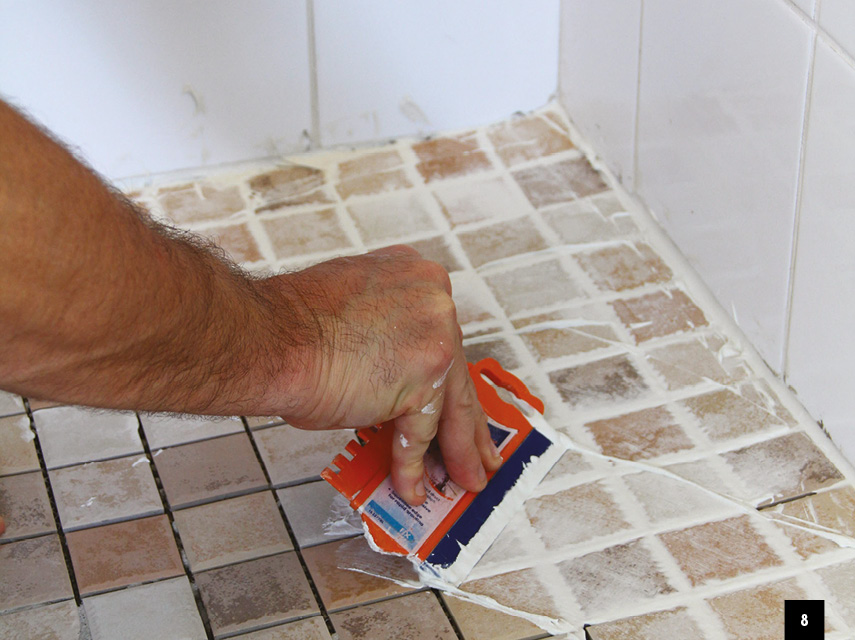
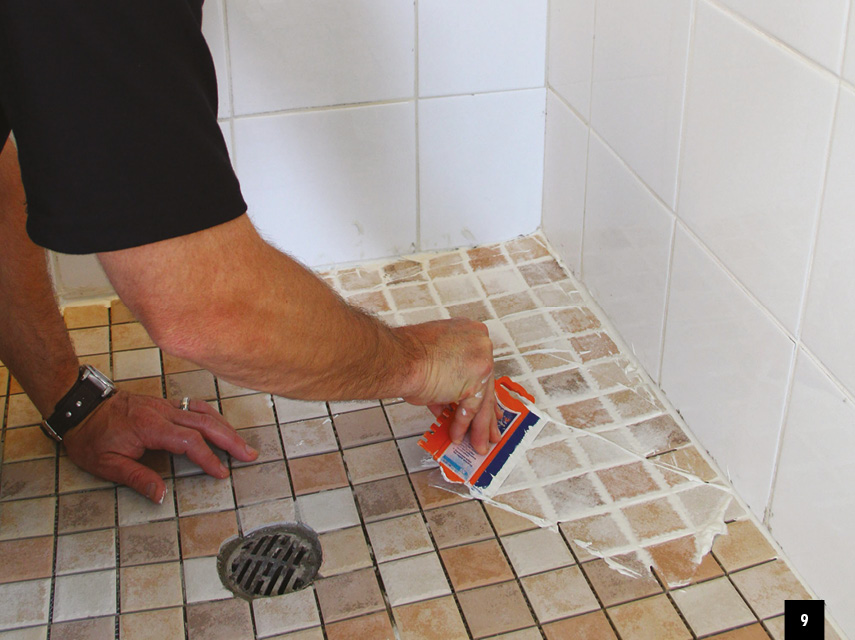
Step 10
Before leaving the grout to harden, use a damp sponge to clean any grout from the tile surfaces and run a damp finger or a piece of dowelling along the joints to create a smooth finish.
Step 11
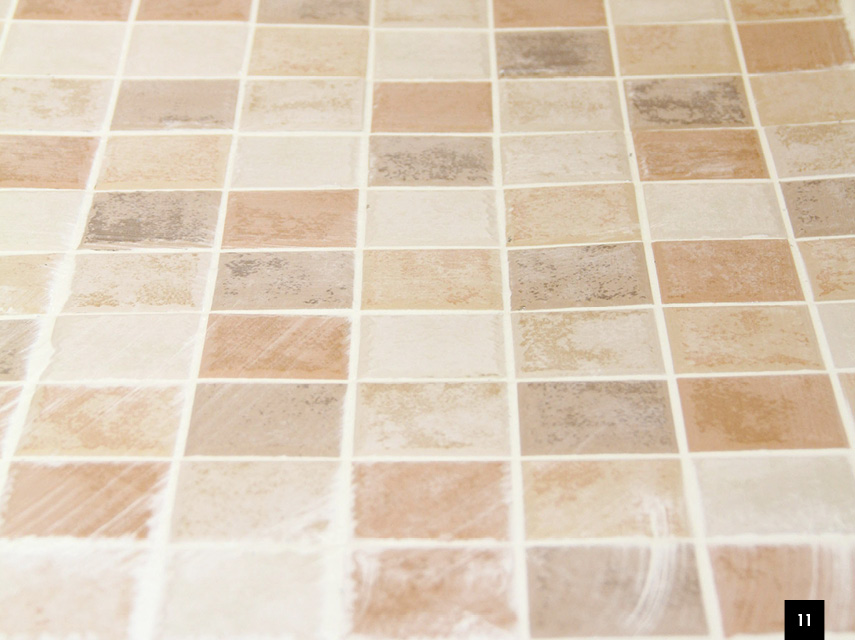
Leave the grout for 15 to 20 minutes, then wipe the tile surfaces again.
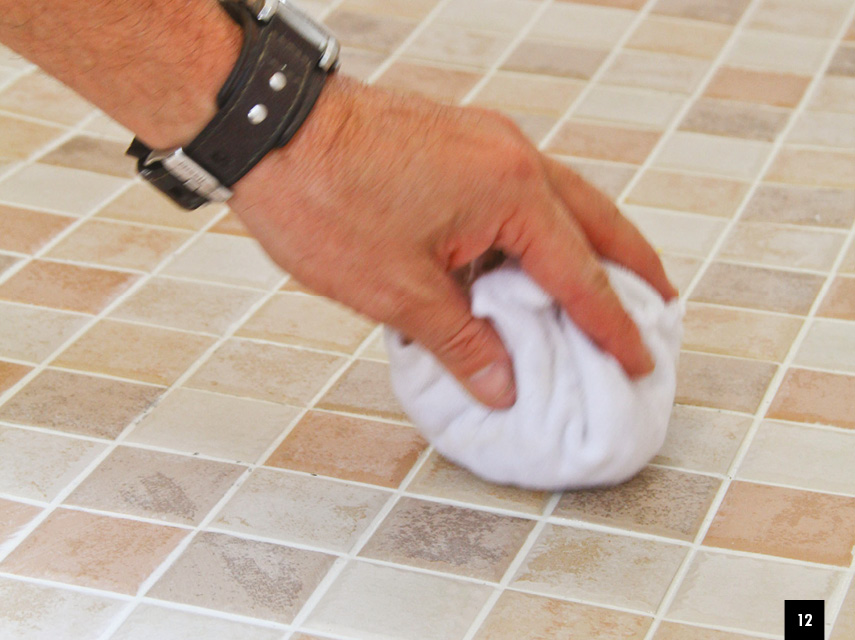
Step 12
Once the grout is dry, polish the tile surfaces with a soft dry cloth.
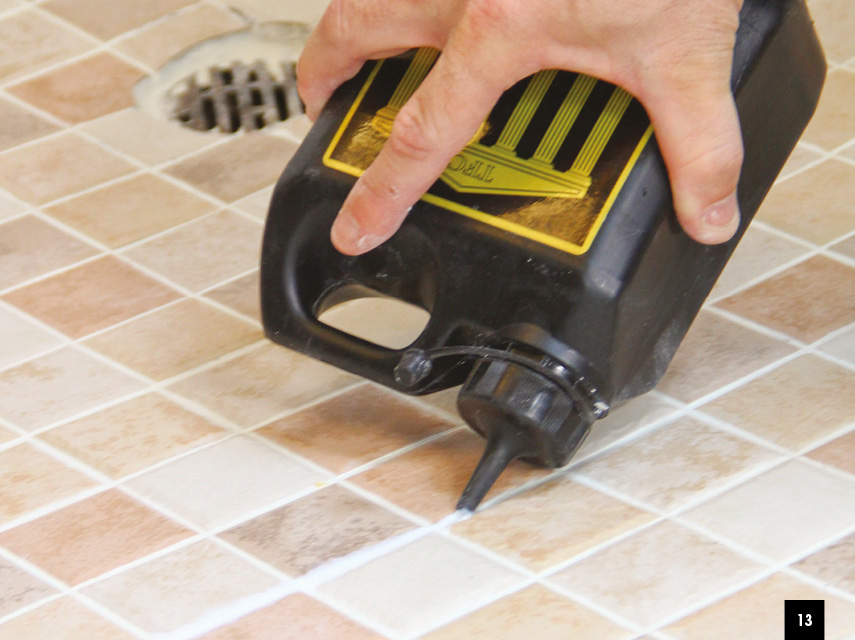
Step 13
After a few days apply a grout sealer. TFC grout sealer comes ready mixed in a bottle with a nozzle for easy application. Apply the sealer only to the grout and leave it to dry for 24 hours before using the area.
Top Tip: To test when it’s safe to clean off grout residue, press your thumbnail into a filled joint. If it doesn’t leave an impression, then it’s safe to go ahead. Wipe a damp sponge across the tiles to remove the residue. Polish tiles with a soft dry cloth to remove any haze left by the grout.
Handy Hint: You can use a tile cutter or nippers to cut mosaic tiles. If you need to cut a whole line of them in half, then keep them on the mesh and use a tile cutter. The mesh will help hold the tiles in place.
Browse 1000’s of products available to you. Select your country to Shop Online.


