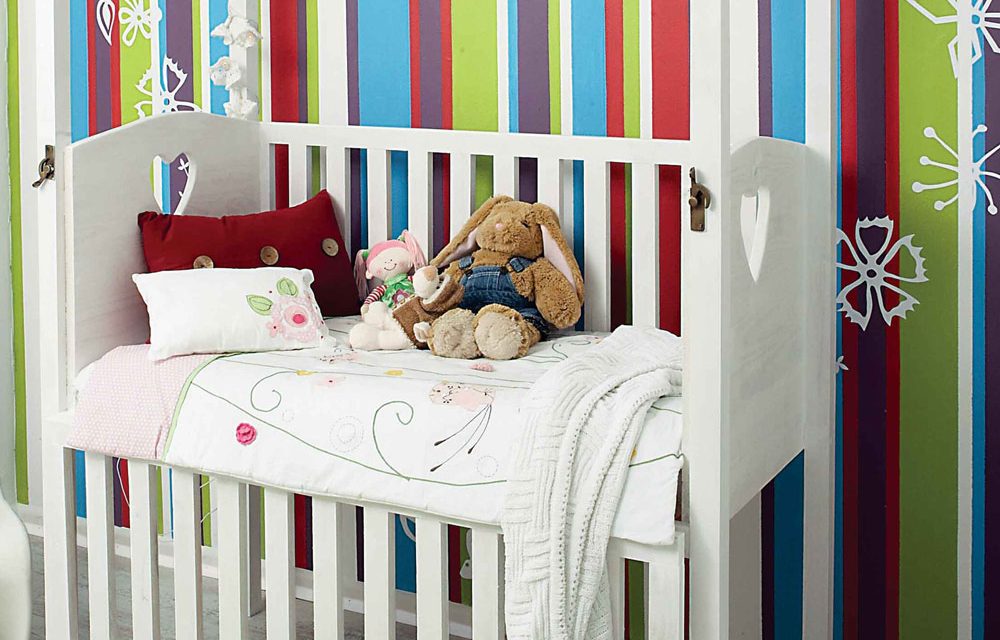
Break from tradition – play with stripes and graphics to add a fresh perspective to a wall.
- Dulux Luxurious Silk (recommended for kids’ rooms as it’s washable) or any other Dulux paint in the colour of your choice
- ground sheet
- vinyl sheets or stickers
- spirit level
- pencil
- masking tape
- paintbrushes or a set of sponge rollers in various widths

Step 1
Using a laser spirit level makes masking out the stripes for the focal wall much easier, but you can also use an ordinary spirit level.
Step 2
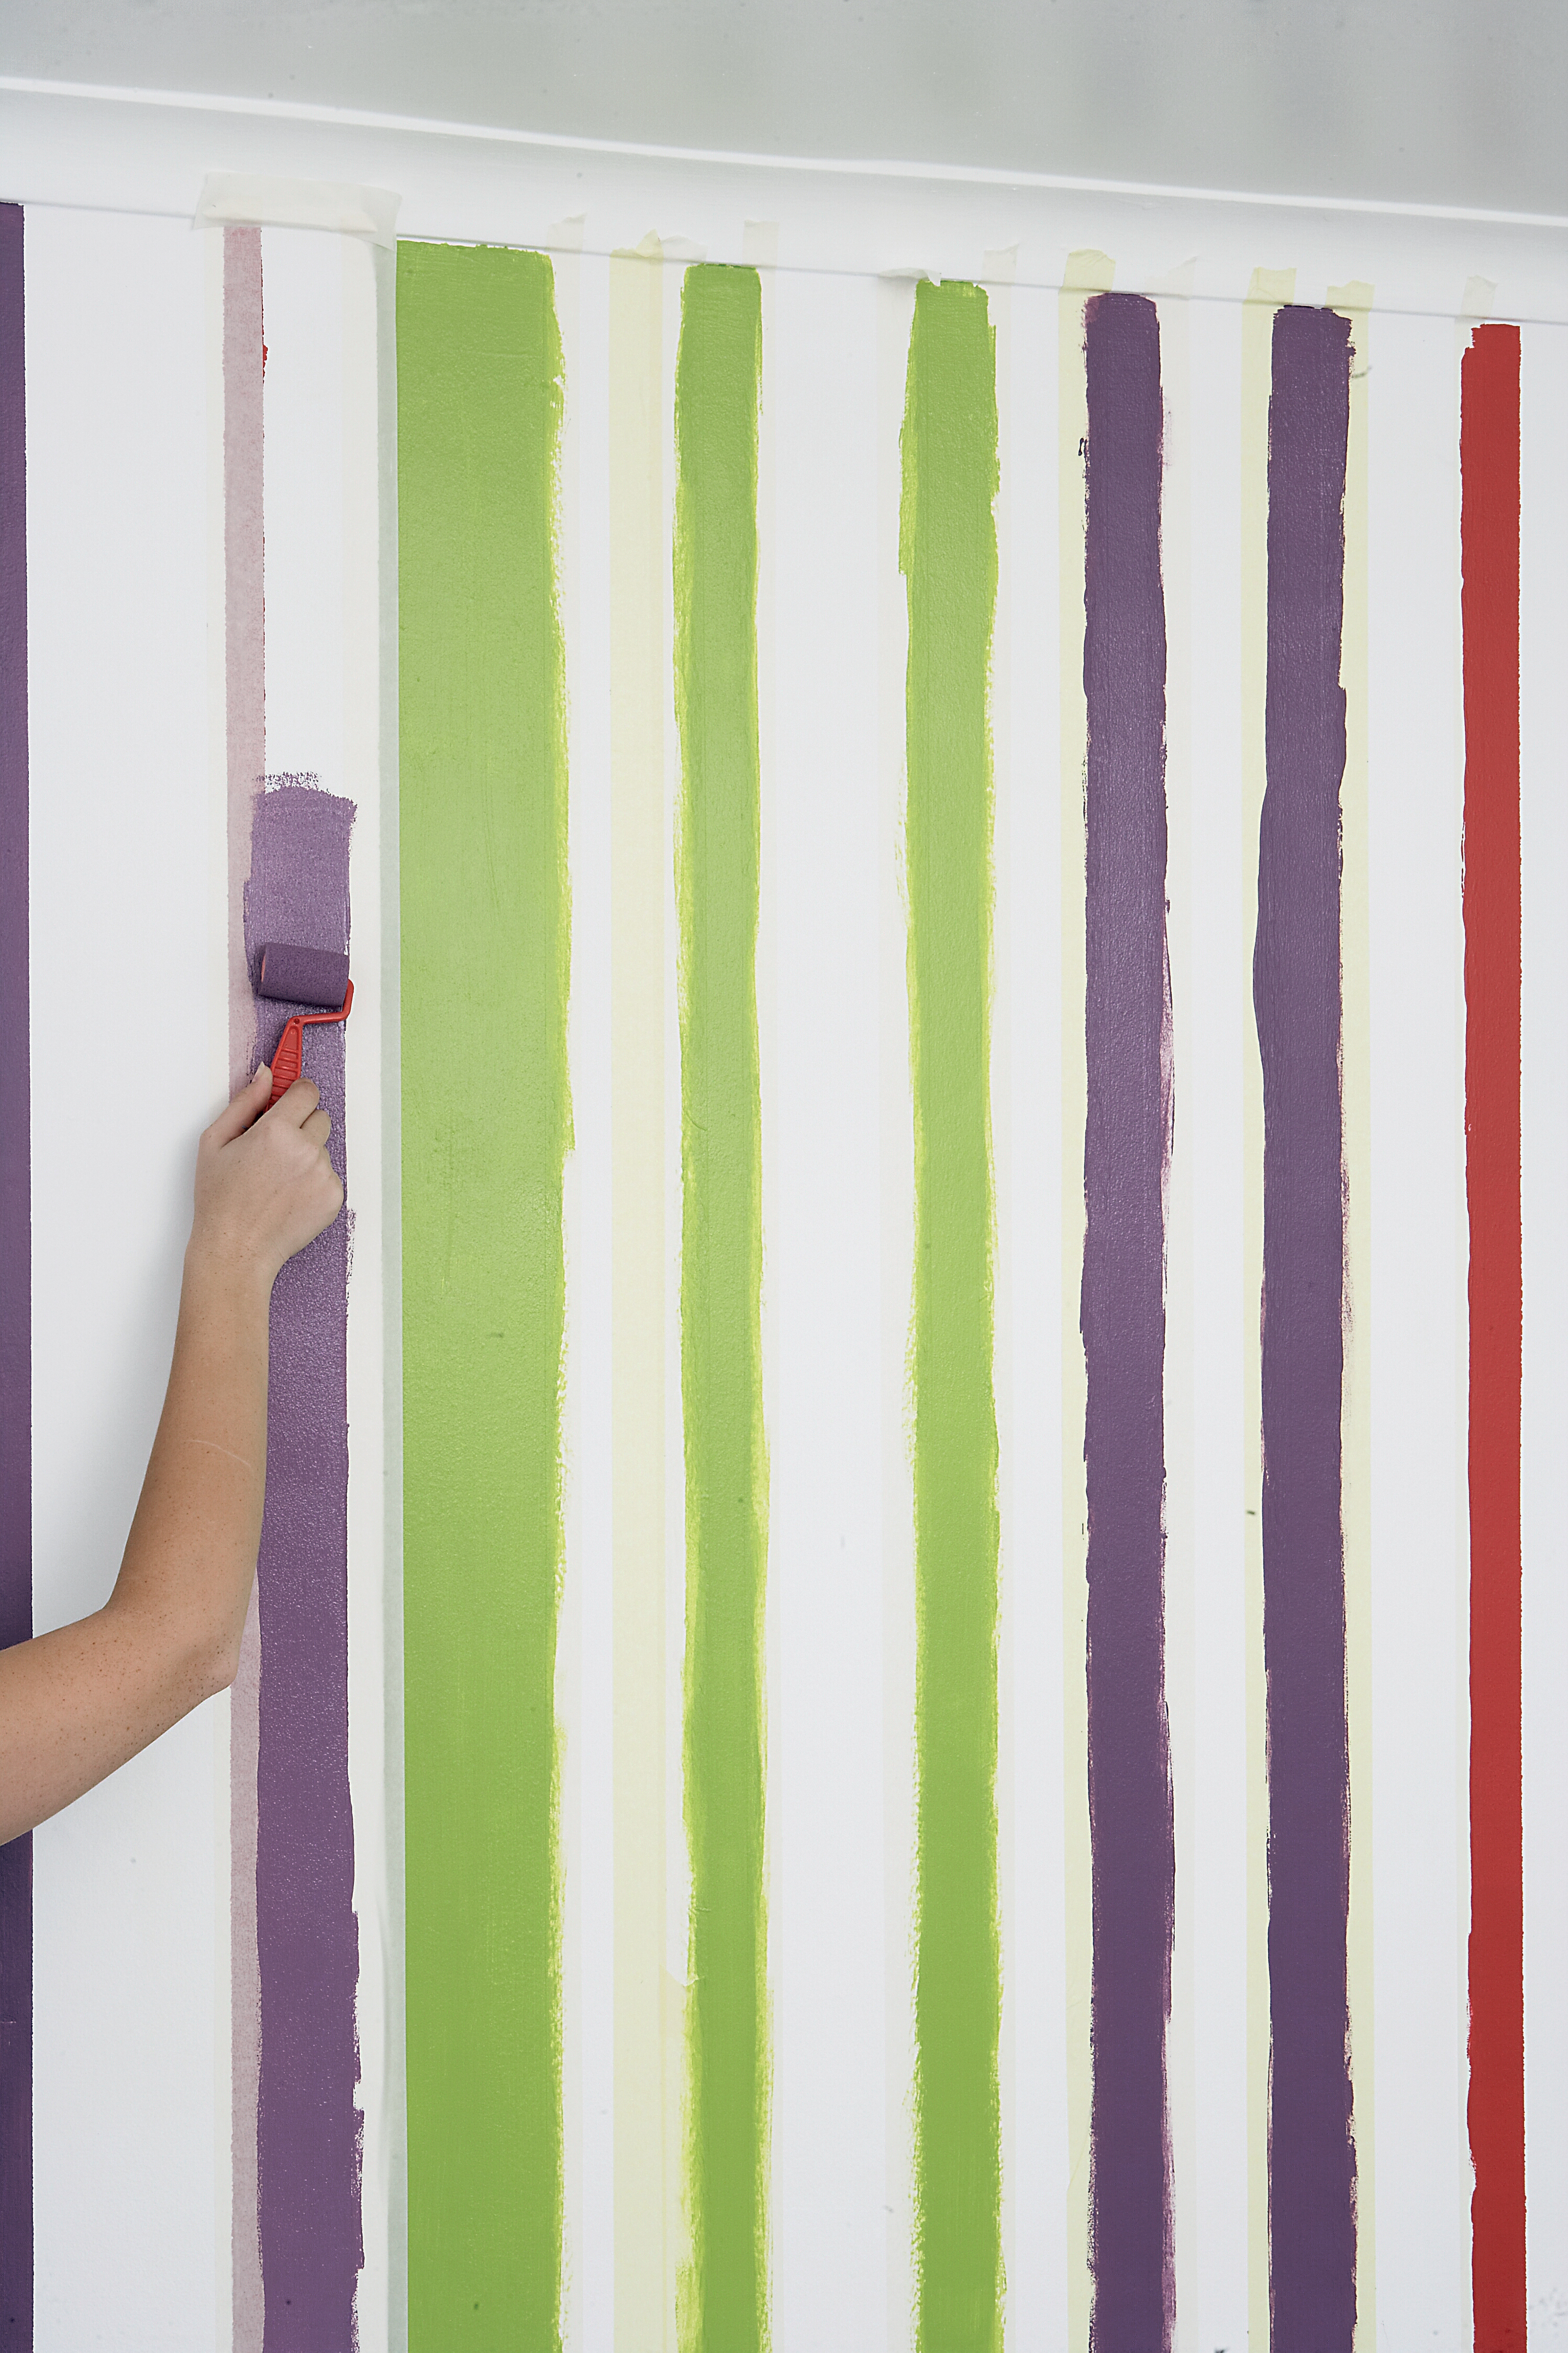
You will need to mask out and paint alternate stripes first. Once the first series of stripes is dry, remove the masking tape and mask out the in-between stripes.
Step 3
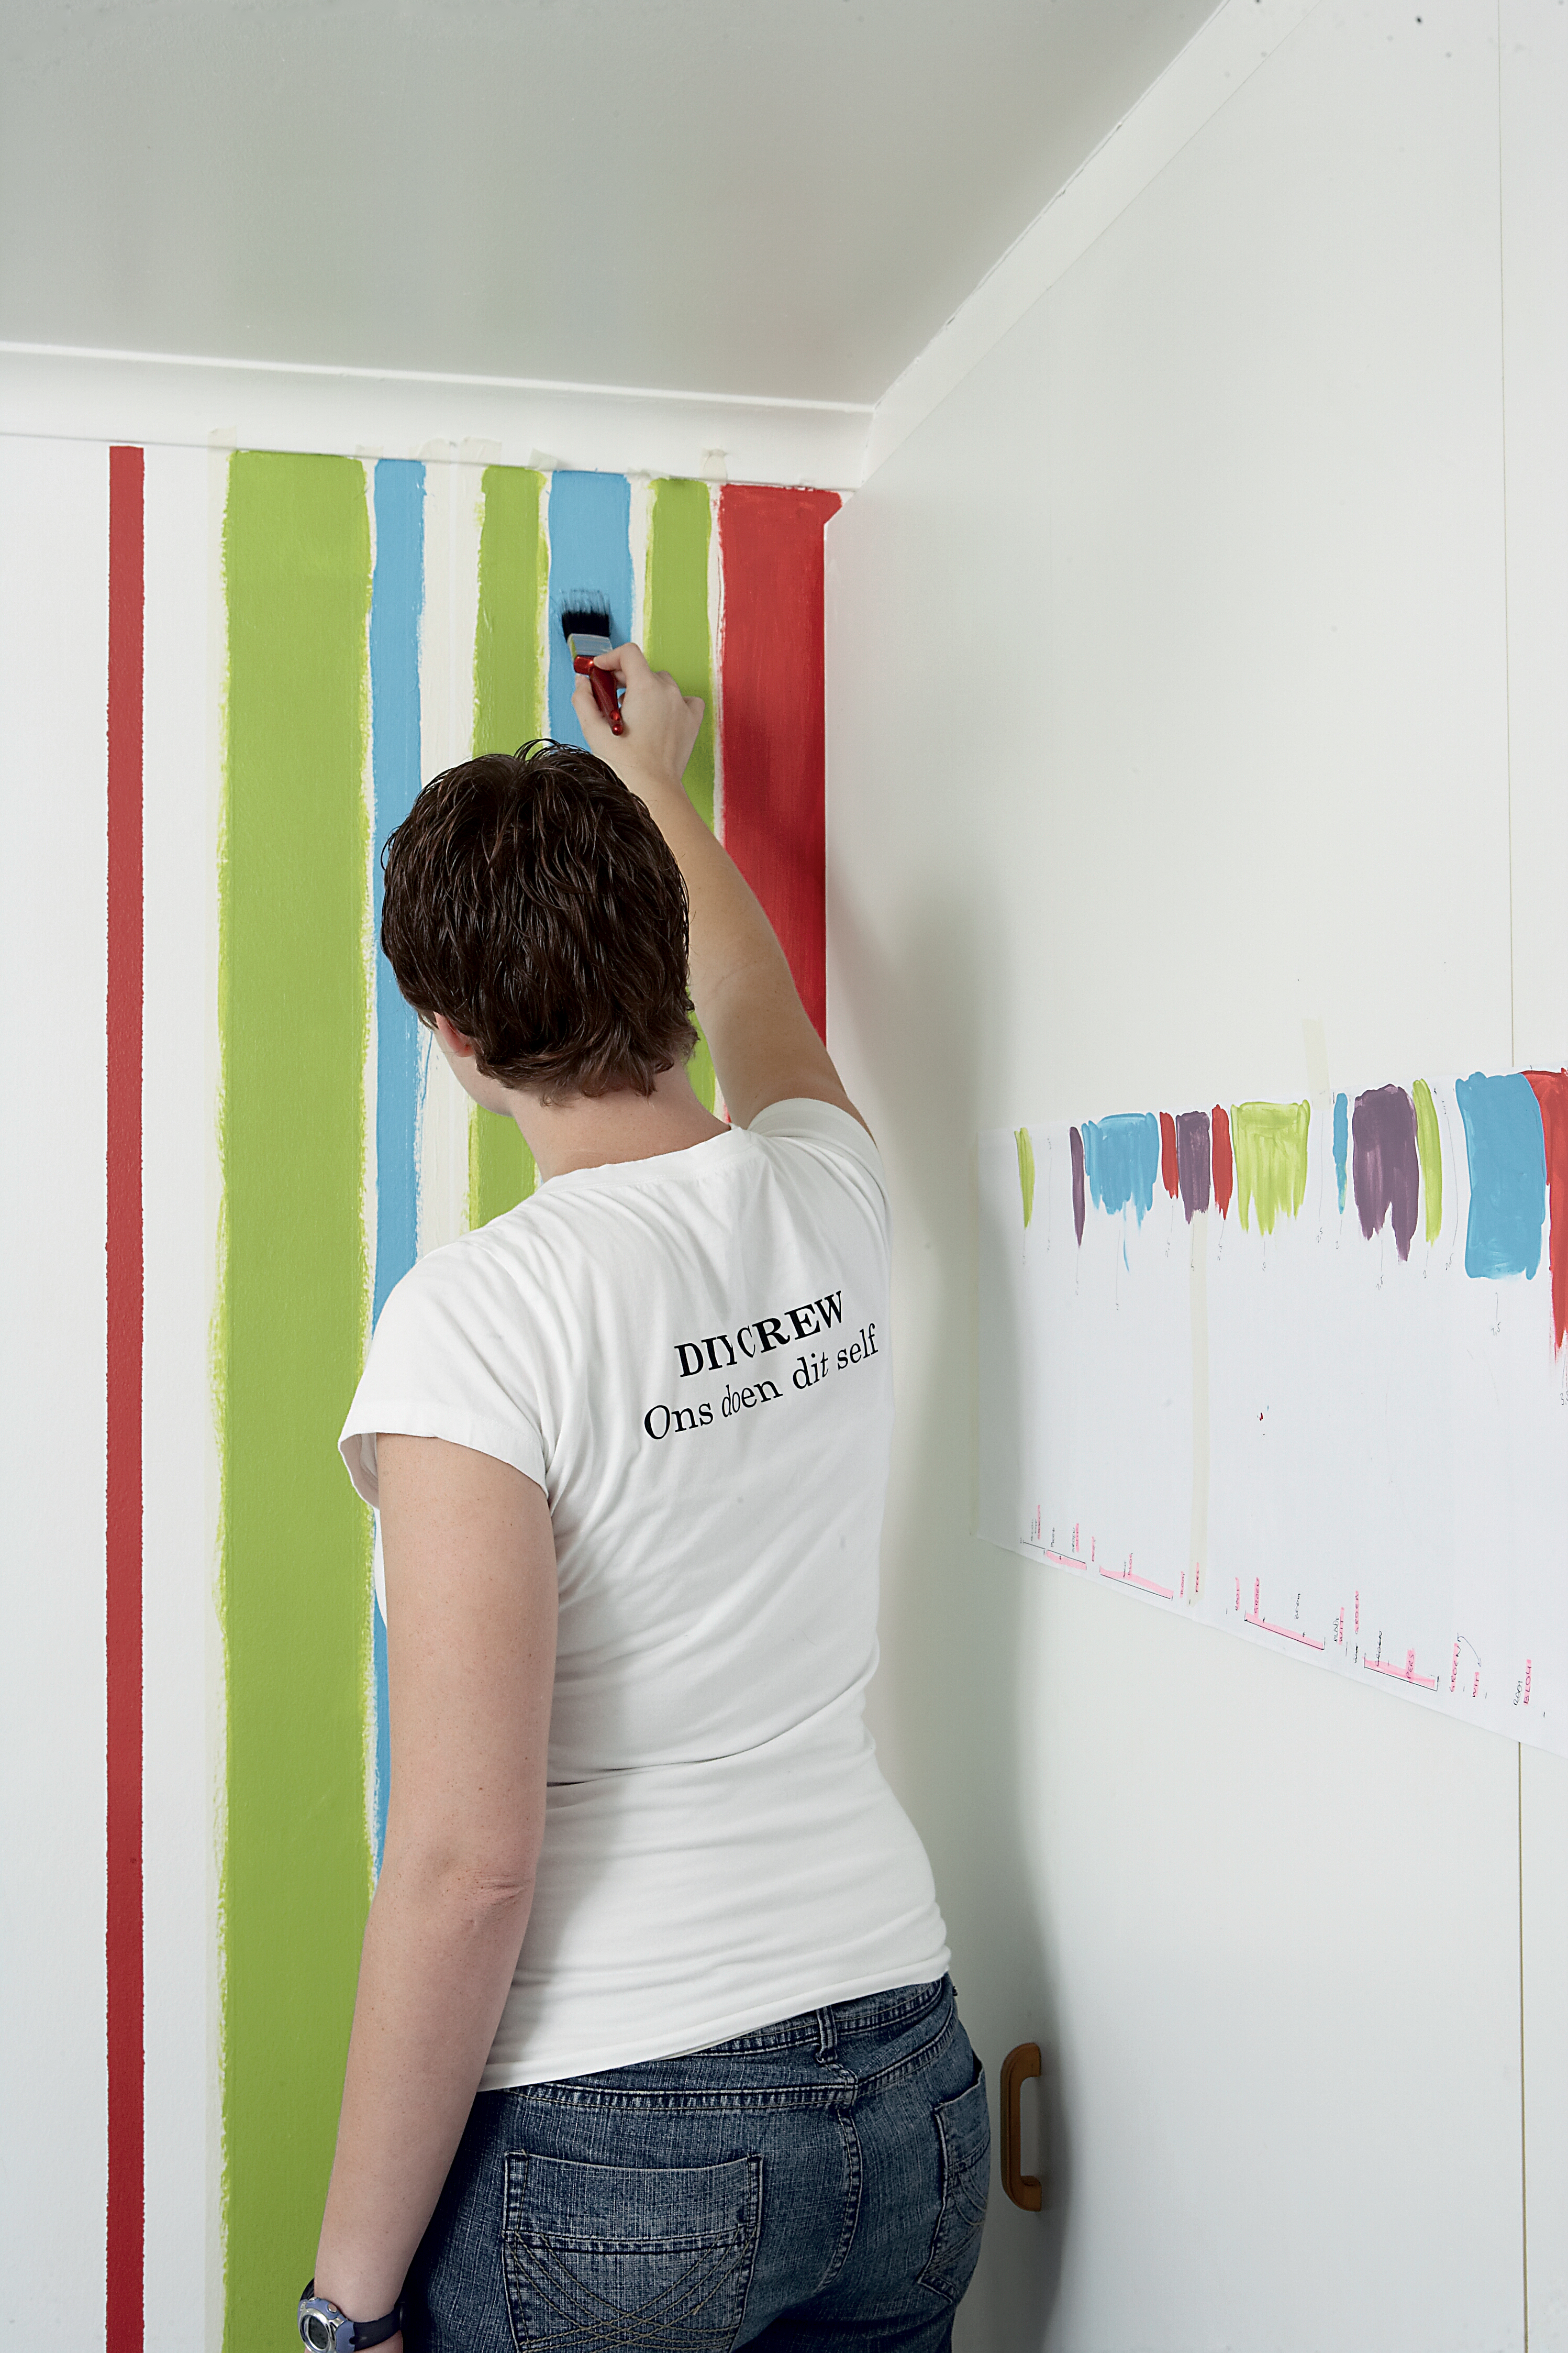
It helps to have a plan and stick to it; ours can be seen pasted to the side of the cupboard. Work out the widths and allocate colours before you start to paint. Remove the masking tape carefully – it helps to create a scissors-like action by pulling the tape at a slight angle.
Step 4
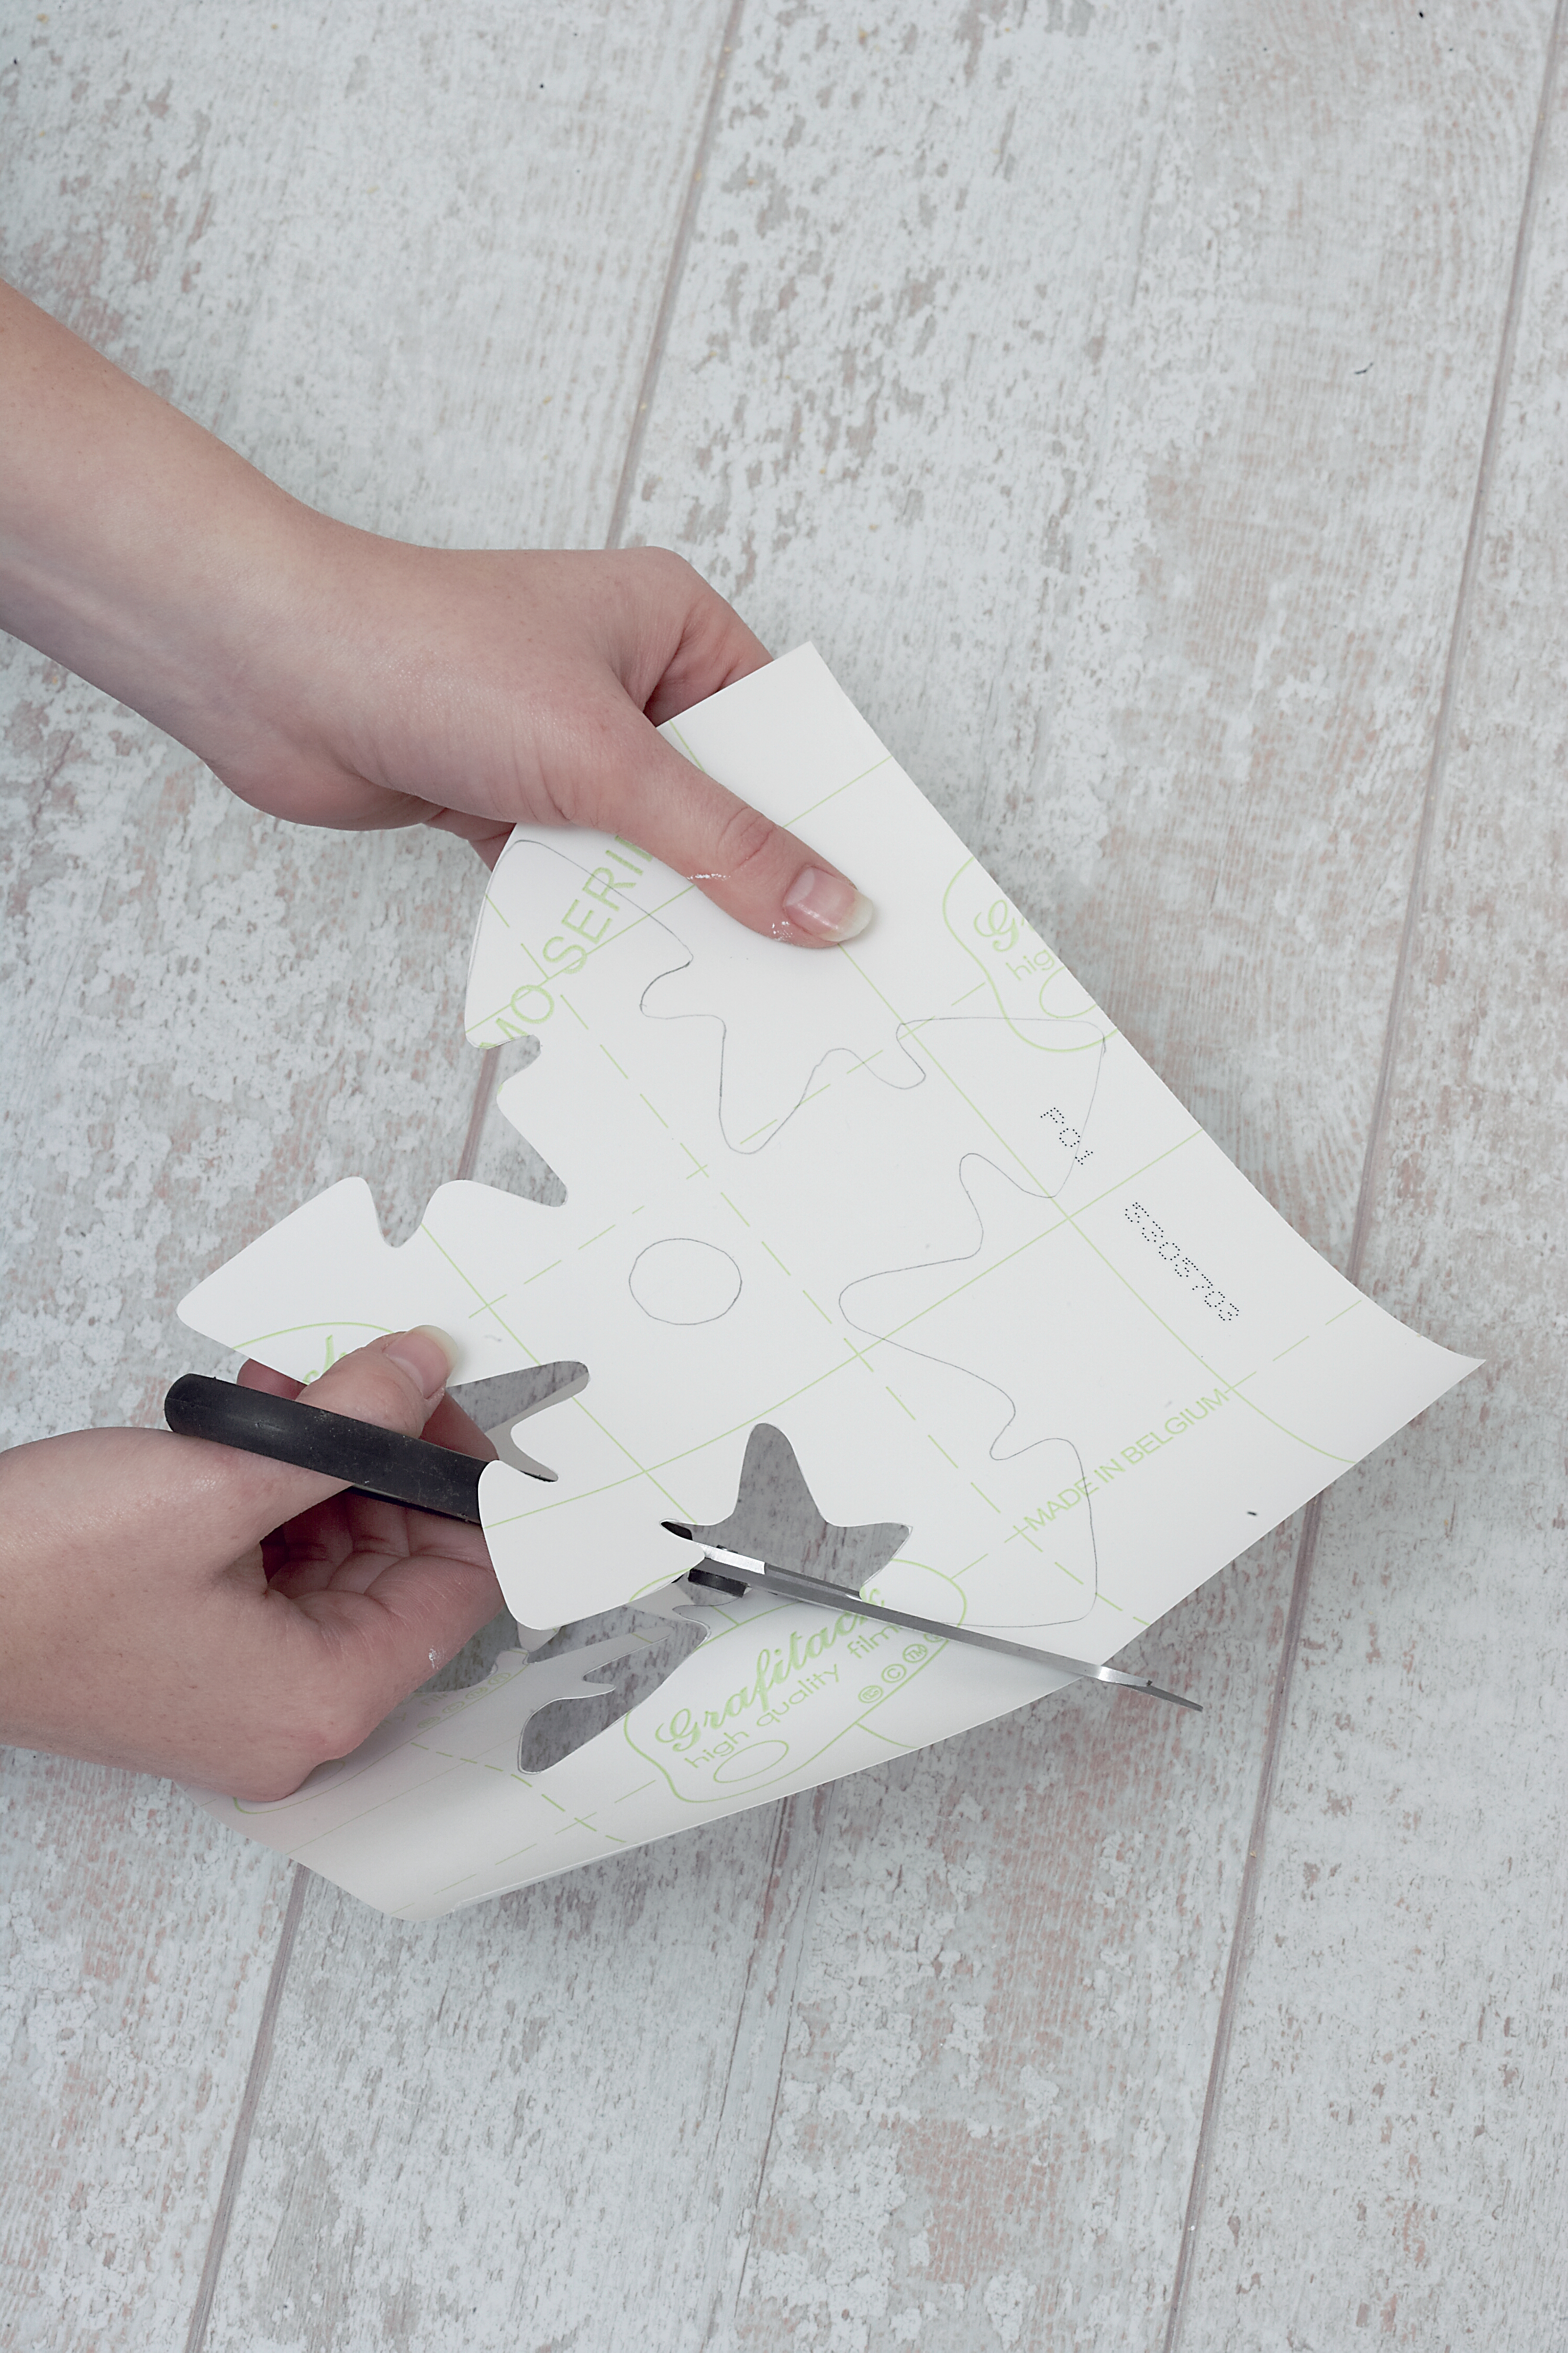
Make your own vinyl stickers: trace your designs onto the vinyl sheet using carbon paper. Then use a pair of scissors to cut out the graphic shapes. First, position the individual shapes onto the wall using Prestik.
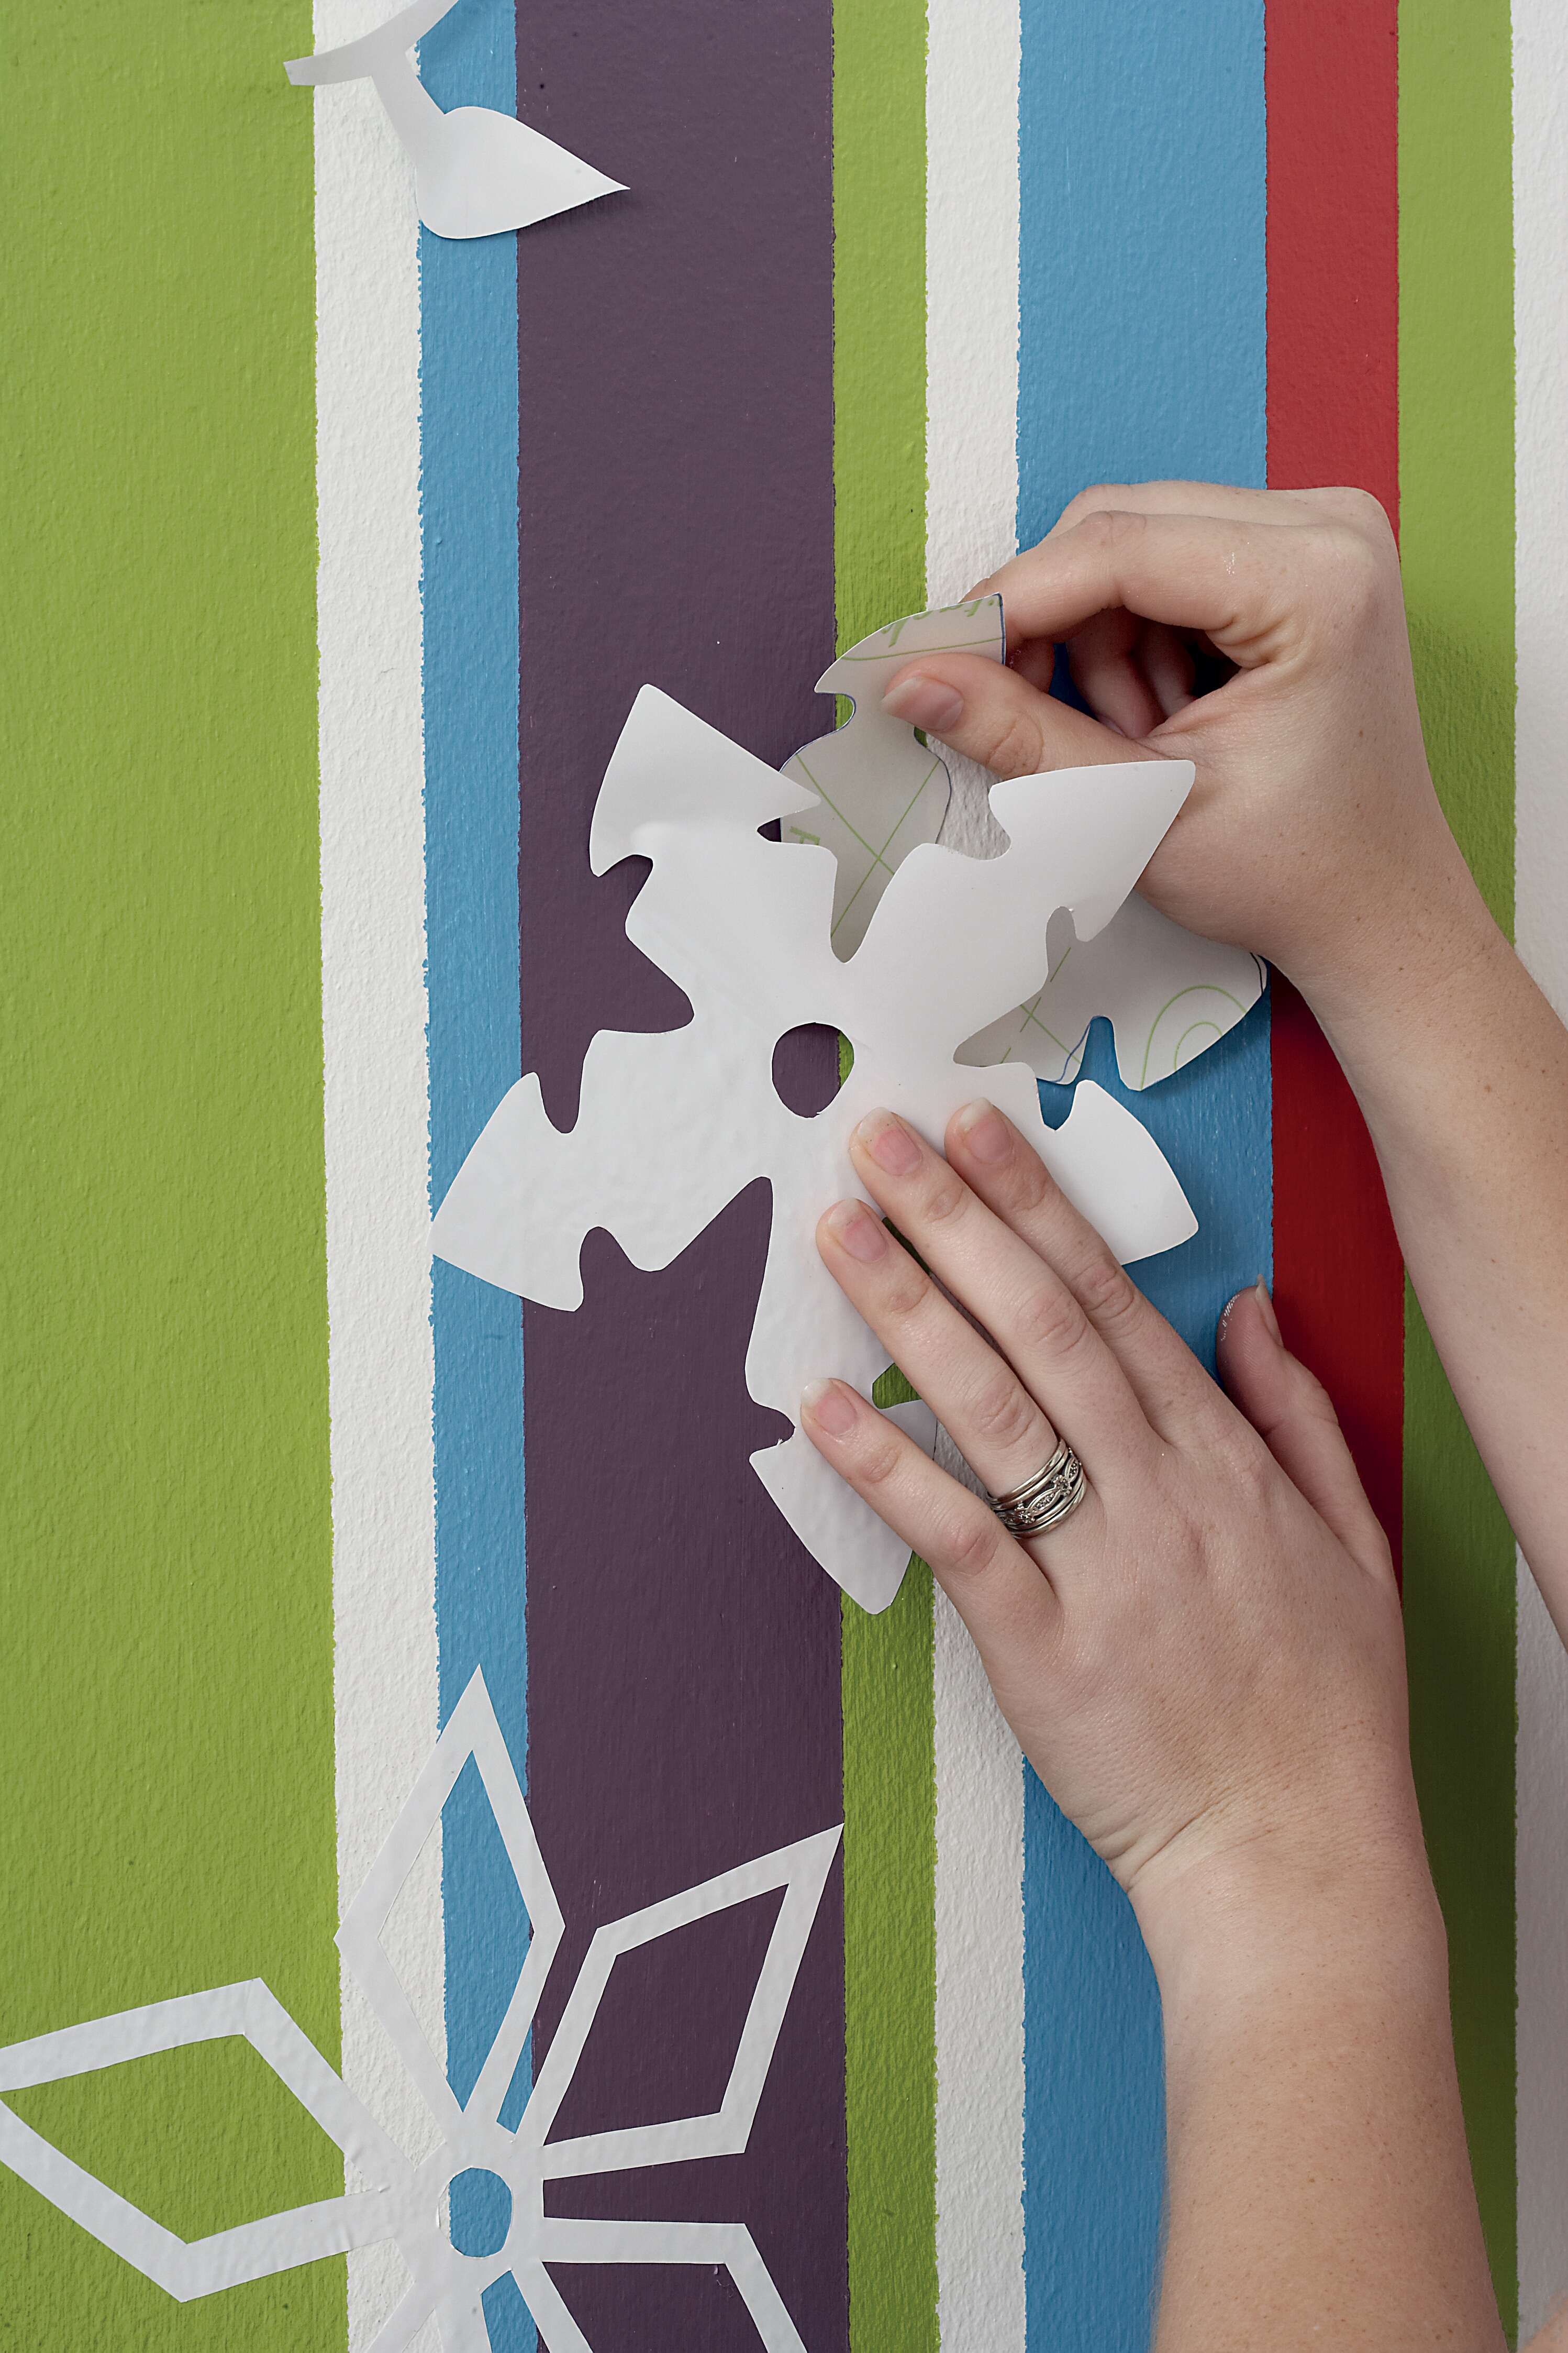
Step 5
Once you’re happy with the positioning of your graphics, remove the backing and adhere the graphic to the wall.
Credits
Referenced from Gallo images / Home Magazine
Browse 1000’s of products available to you. Select your country to Shop Online.


