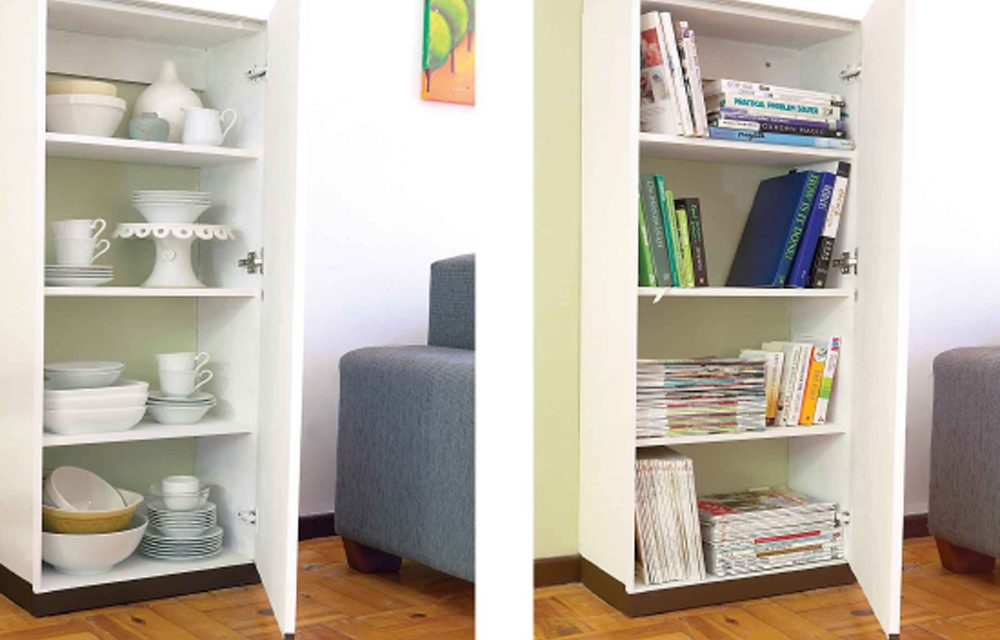
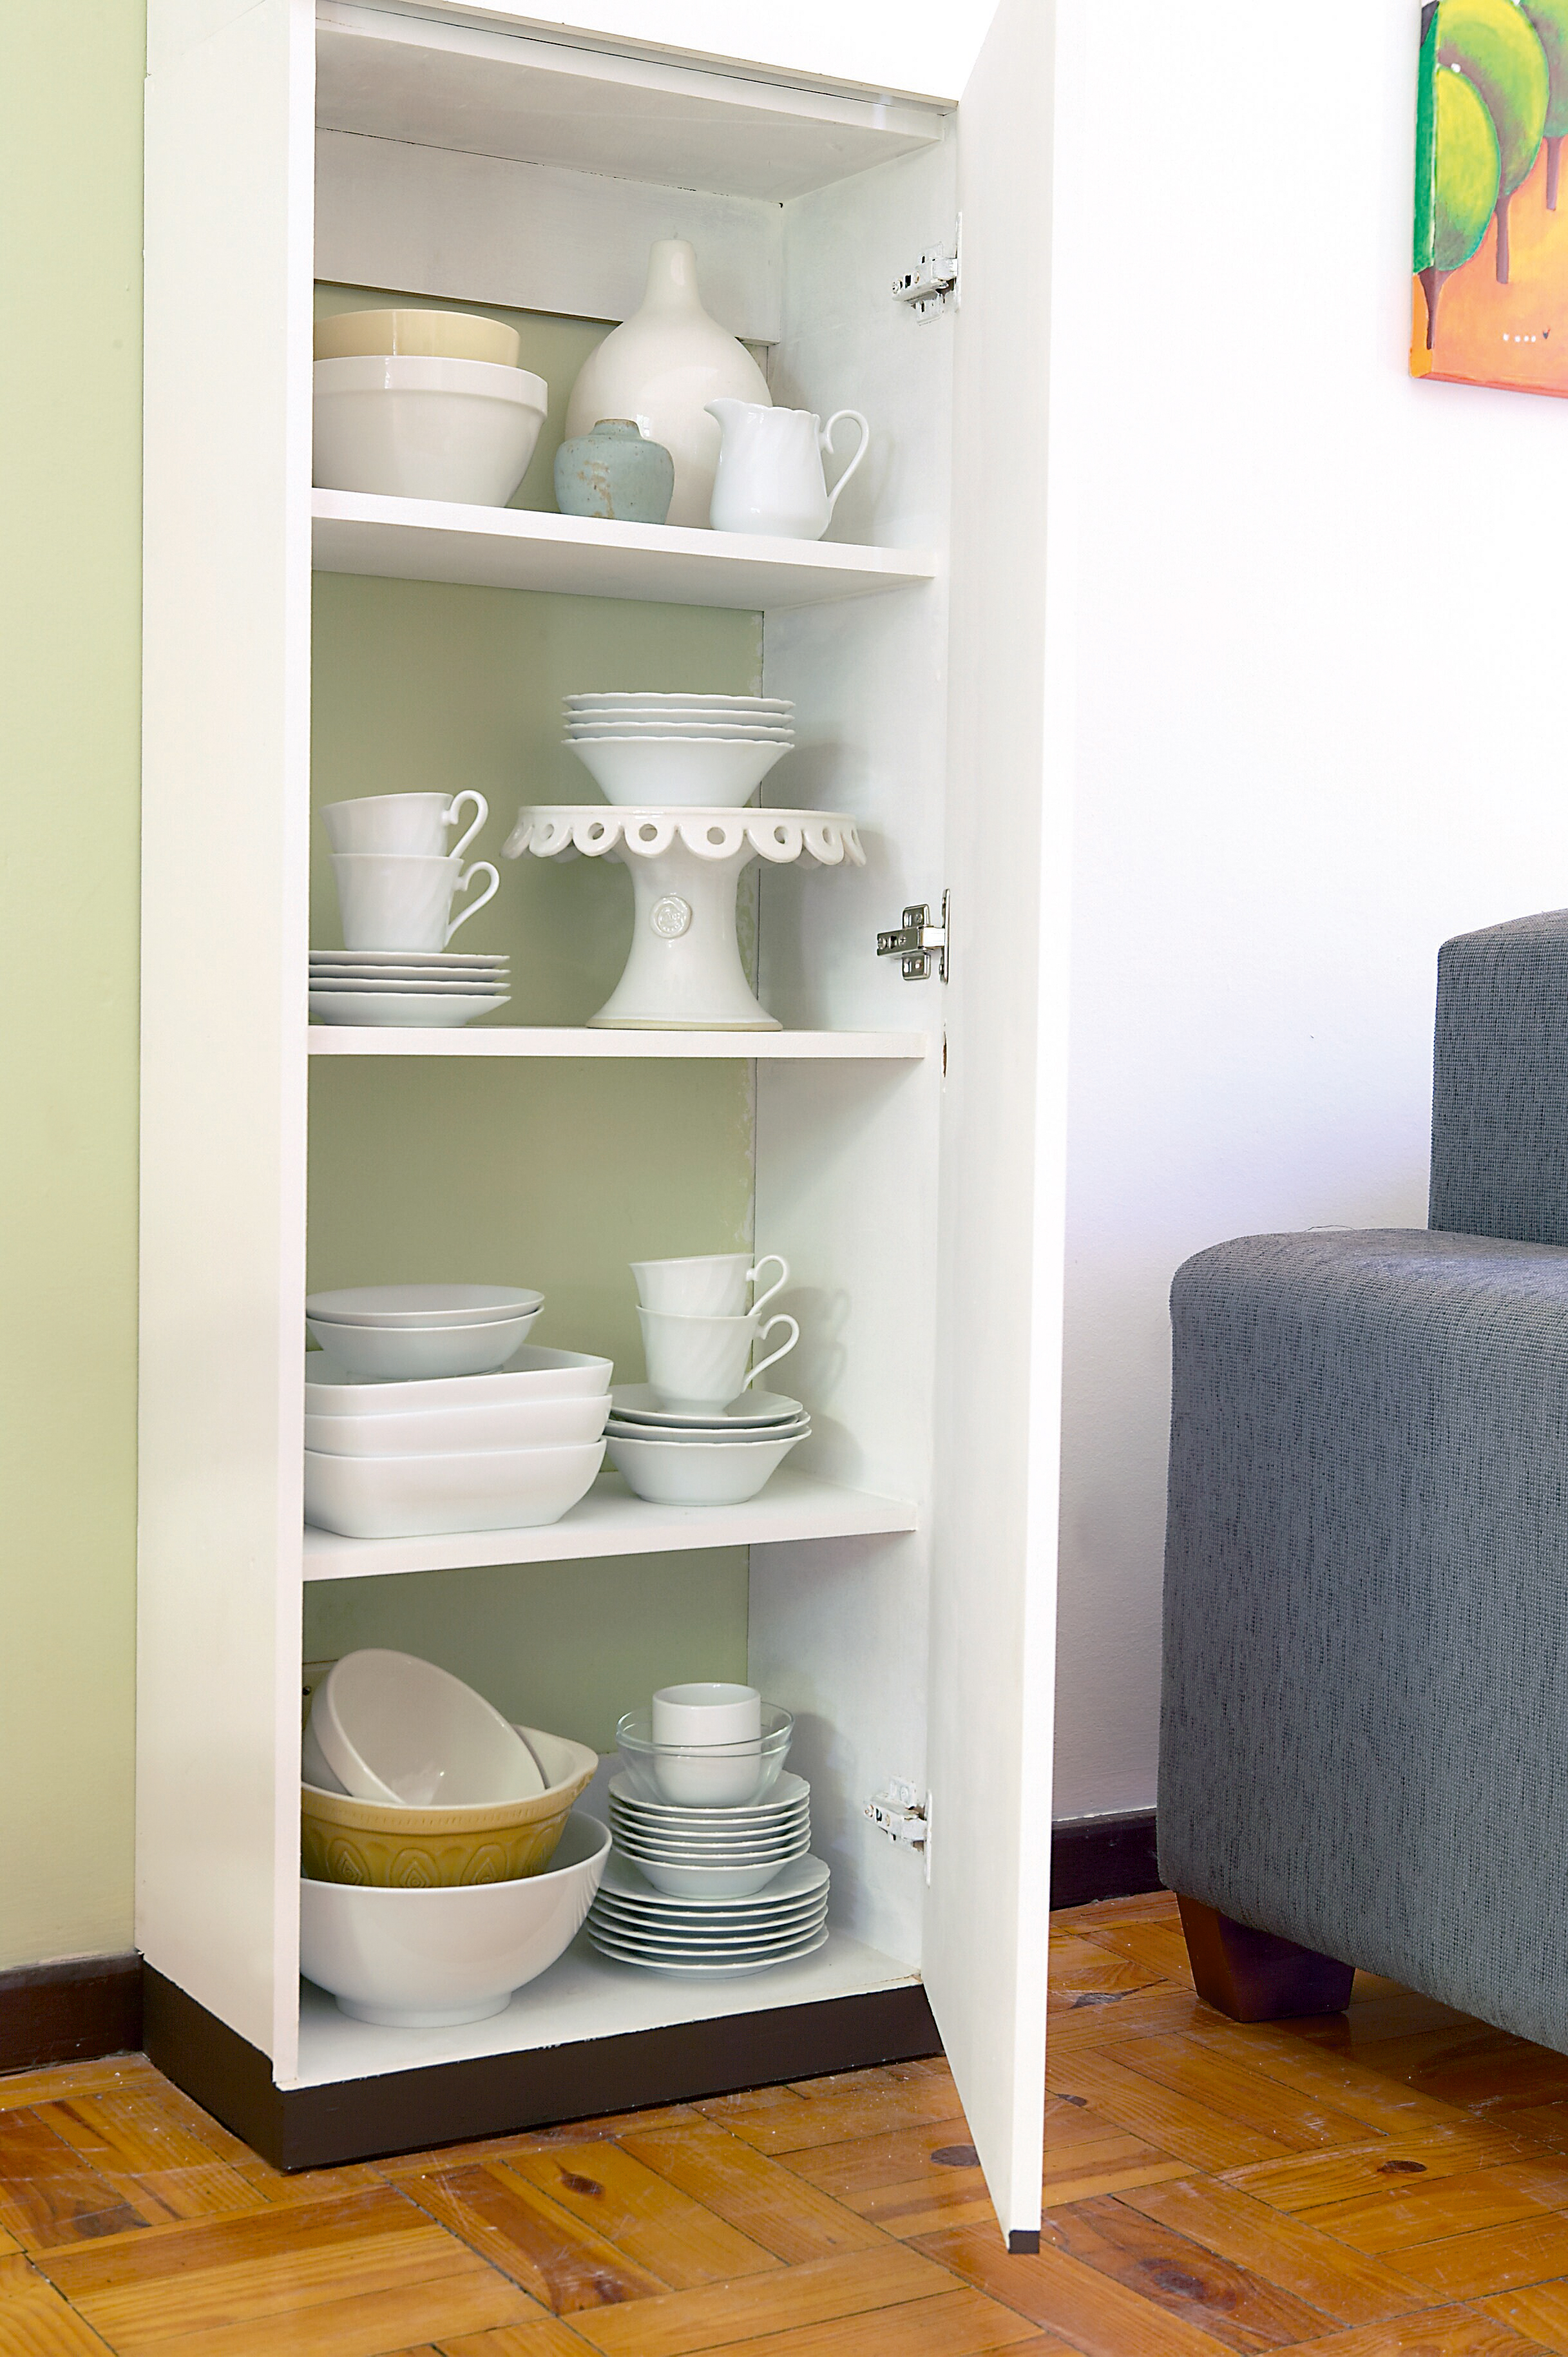
In this DIY we show you how to create storage and subtly partition your open plan space with our column-like cupboard.
- pencil
- measuring tape
- combination Square
- hammer
- jigsaw
- electric drill and masonry drill bit
- cordless drill and 2mm, 5mm and combination countersinking drill bits
- paint brush or foam roller
Materials you will need
- eight 75mm x 5mm Hilti wall anchors or screws and wall plugs
- six offset cabinet hinges
- ±sixty 40mm cut screws
- two 25mm cut screws
- 16mm chipboard screws (usually supplied with hinges)
- wood glue
- wood filler
- one sheet of 16mm MDF (Supawood) cut to:
- four 1 330mm x 250mm lengths (sides – size dependent on floor to ceiling measurement, divided by two)
- eight 468mm x 230mm (shelves)
- four 468mm x 100mm (braces)
- one 500mm x 85mm (plinth front)
- one door of 1 330 x 500mm (top) and one of 1 245 x 500mm (bottom), each predrilled with three holes for the cabinet hinges
Step 1
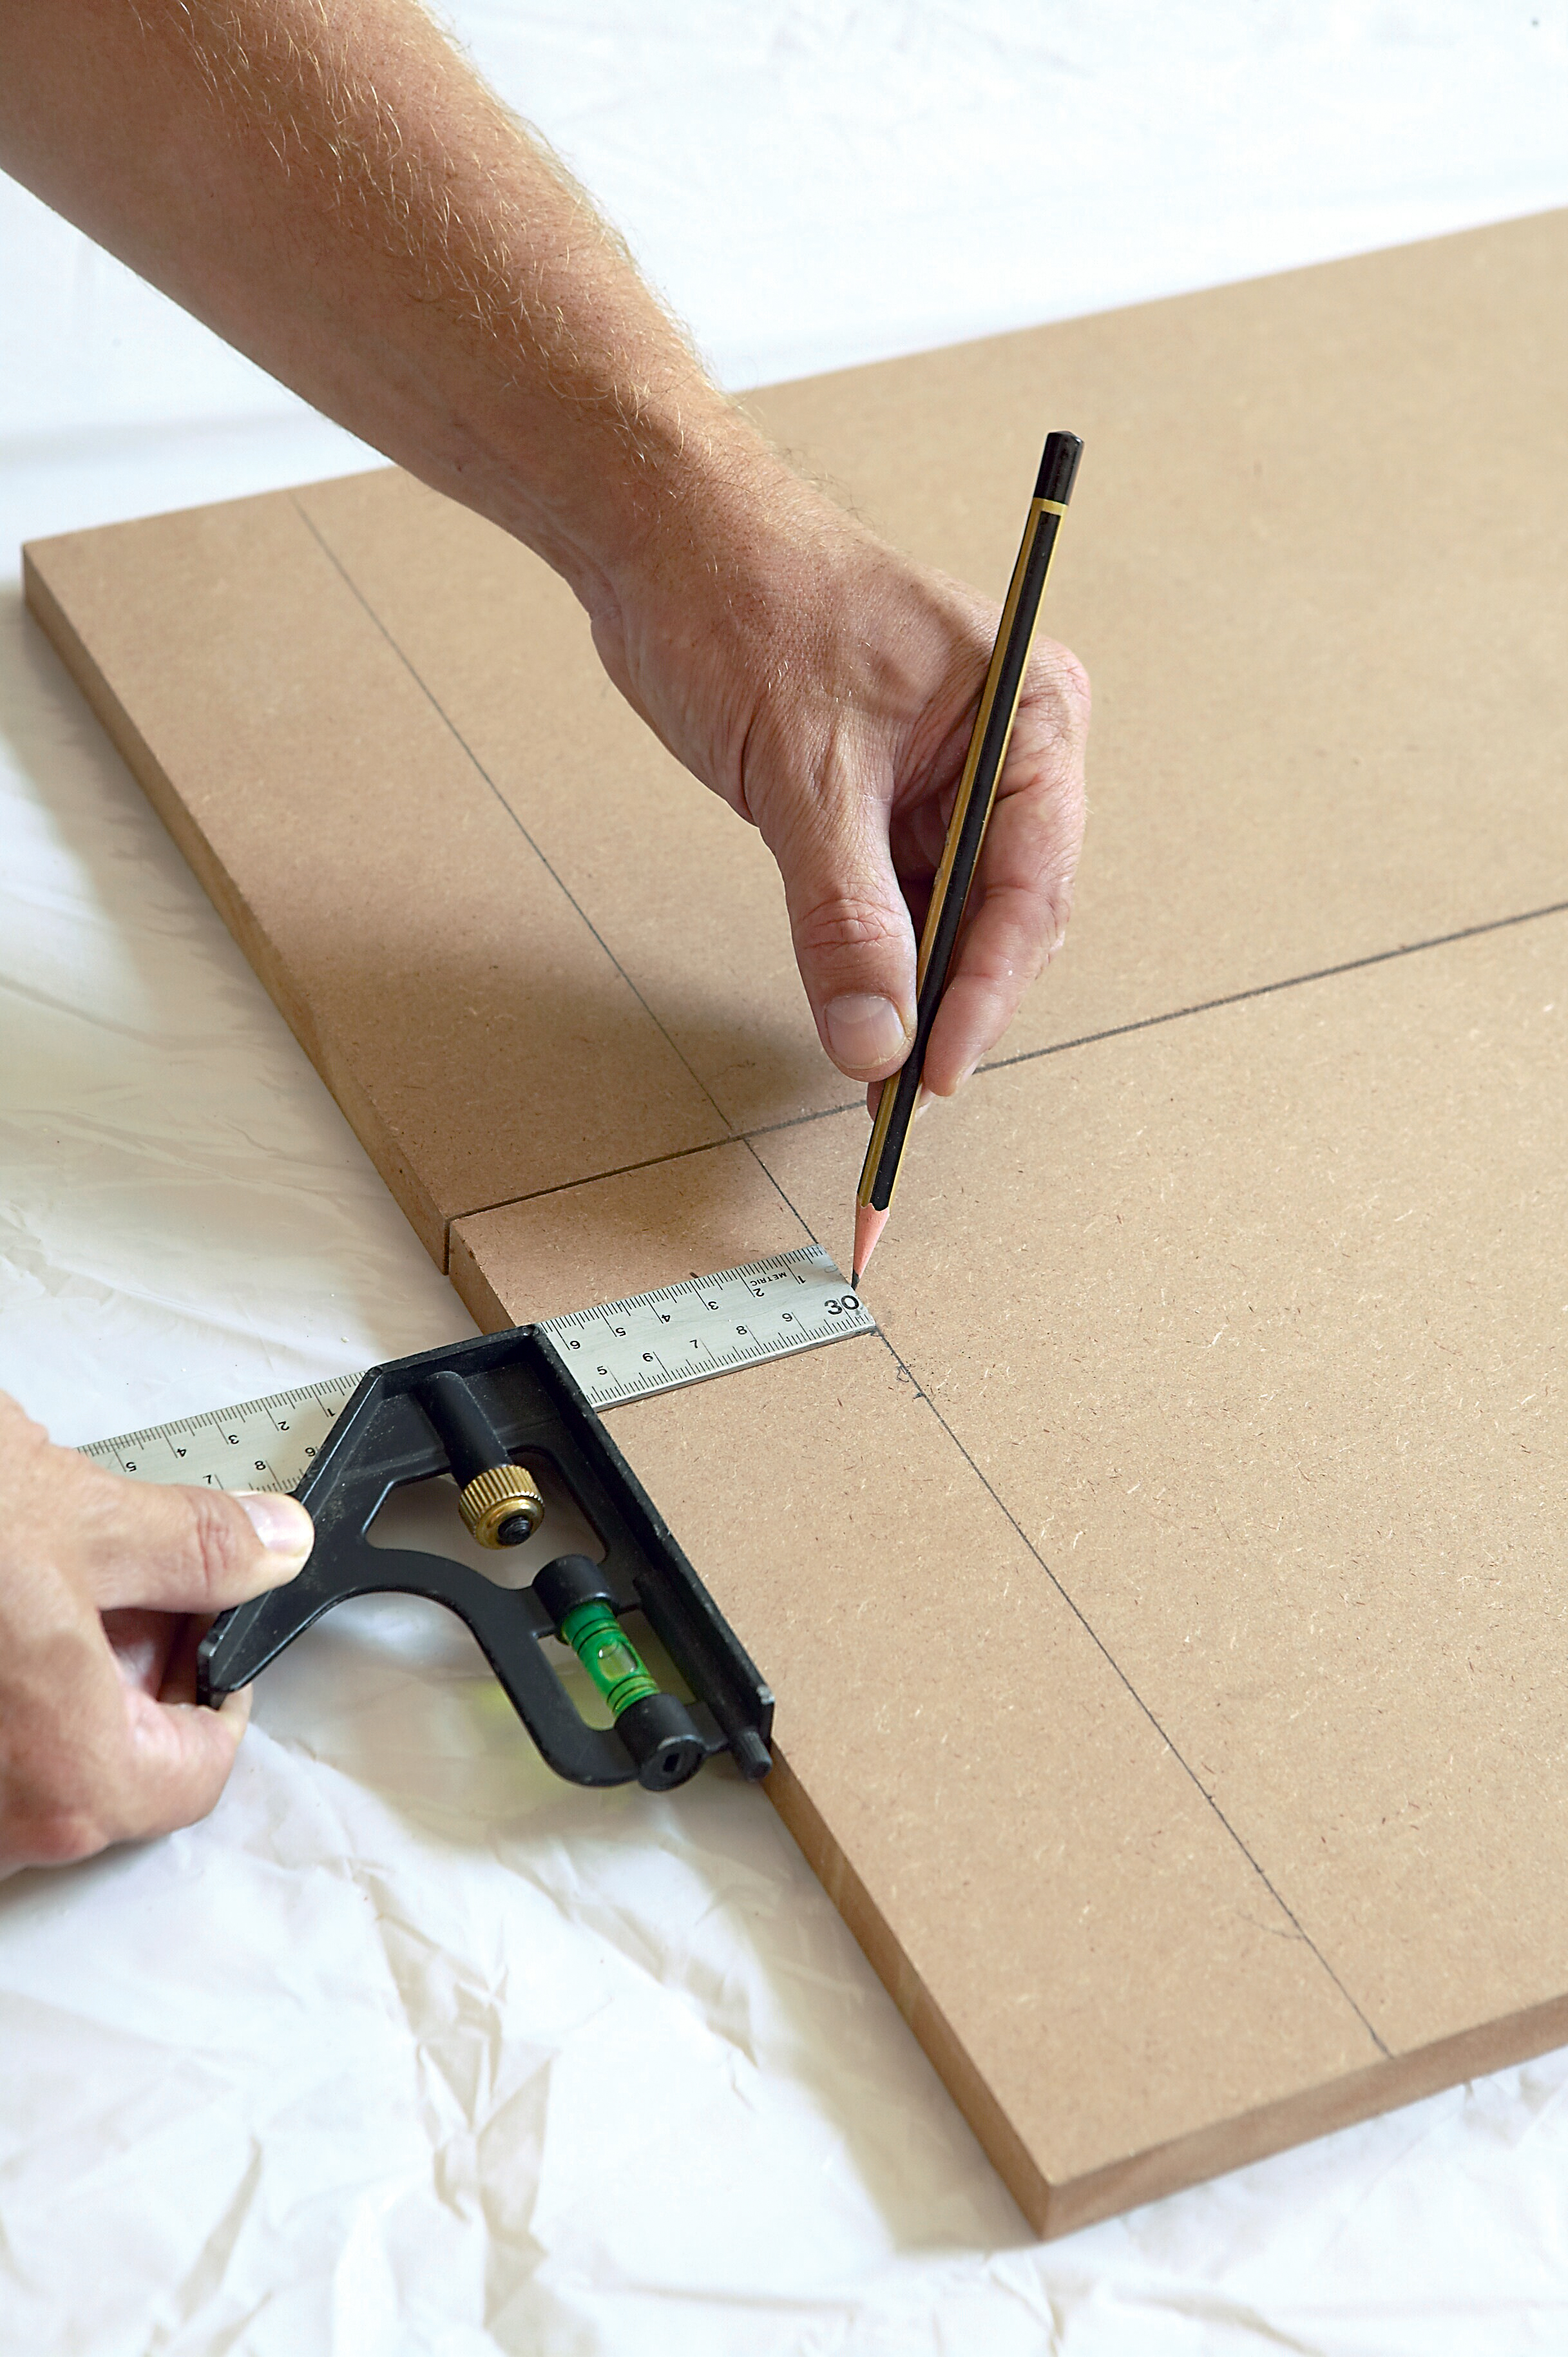
Place two of the side panels side by side and use the combination square to draw a line 65mm from the (bottom) ends. Now use one of the braces as a measure and draw a line 16mm ‘above’ this line. The underside of the bottom shelf will rest on top of the 65mm skirting once the cutout is made to accommodate it (see step 7).
Step 2
Use the tape measure to mark 16mm-wide spaces across the two sets of side panels spaced at regular intervals. RemembeR the spacing of the shelves should take into account the positions of the hinges. If necessary, adjust the positions of the shelves to accommodate the hinges.
Step 3
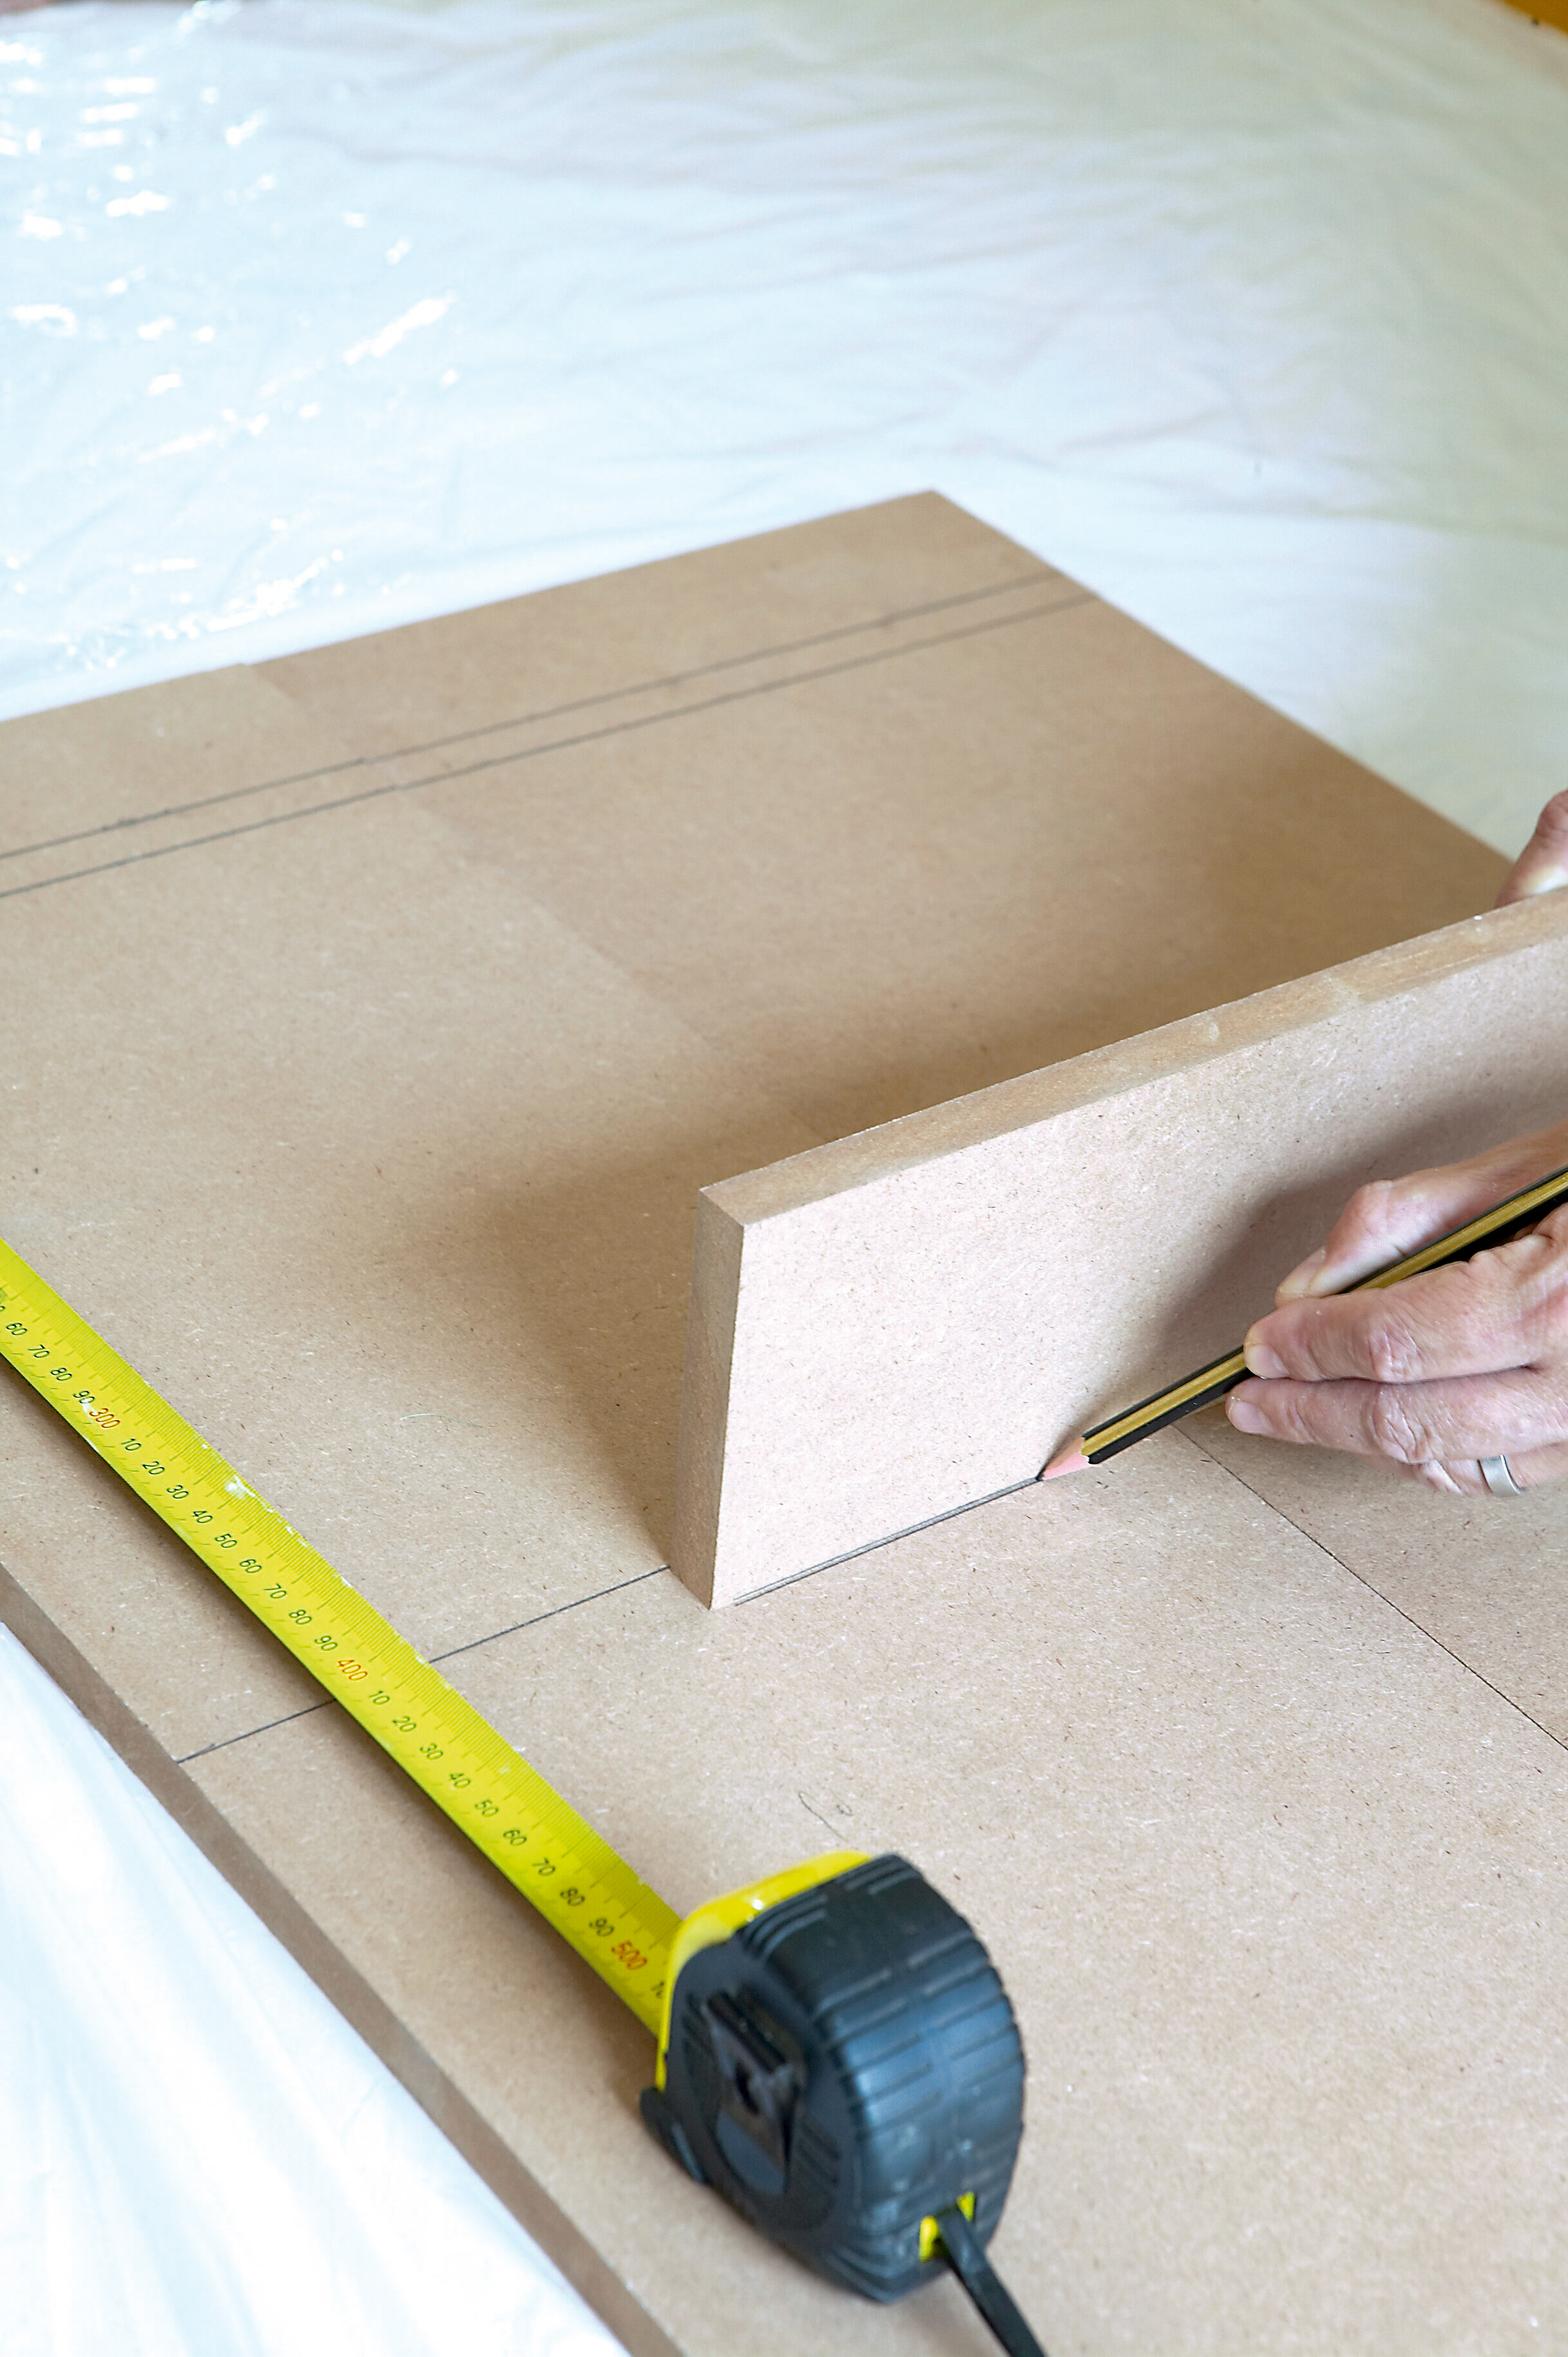
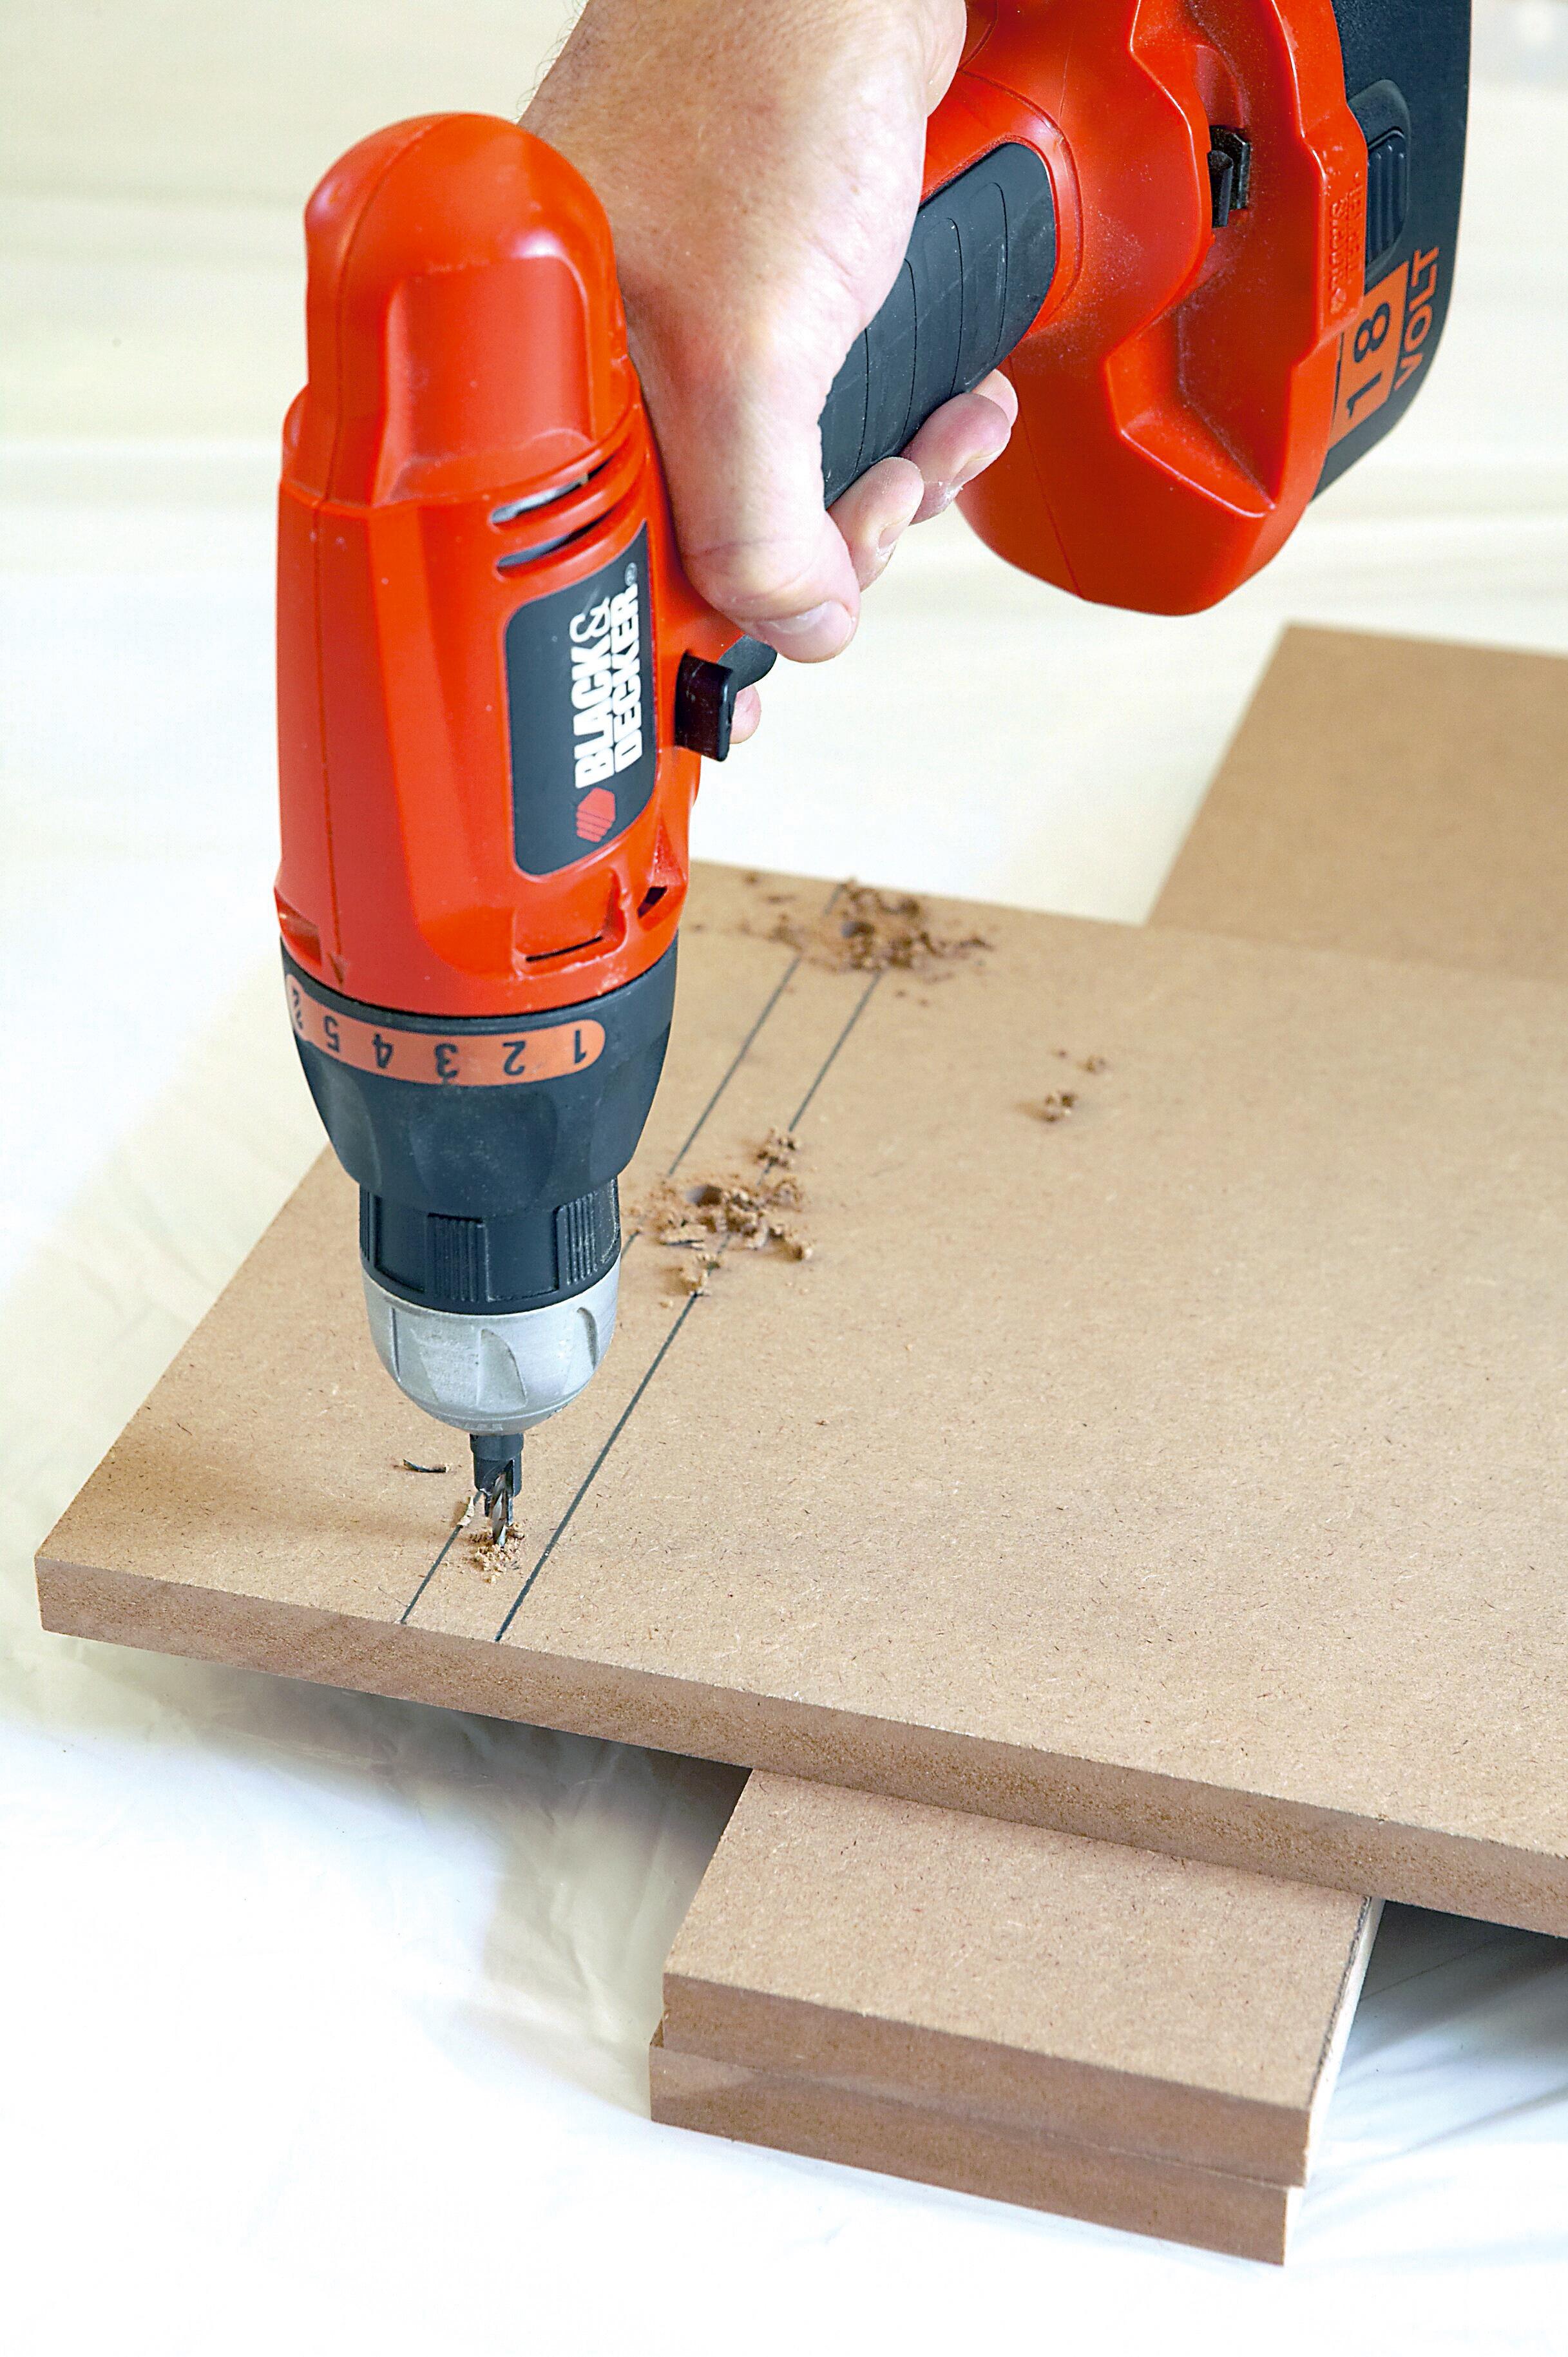
The 230mm-wide shelves will be positioned toward the back of the cupboard leaving a 20mm wide gap between shelves and the door(s). Therefore you will need to measure and mark lines 20mm from the (front) long edge of the side panels. Now drill three equally spaced pilot holes and countersunk holes (use a combination countersinking drill bit) between the lines indicating the positions of the shelves, as shown.
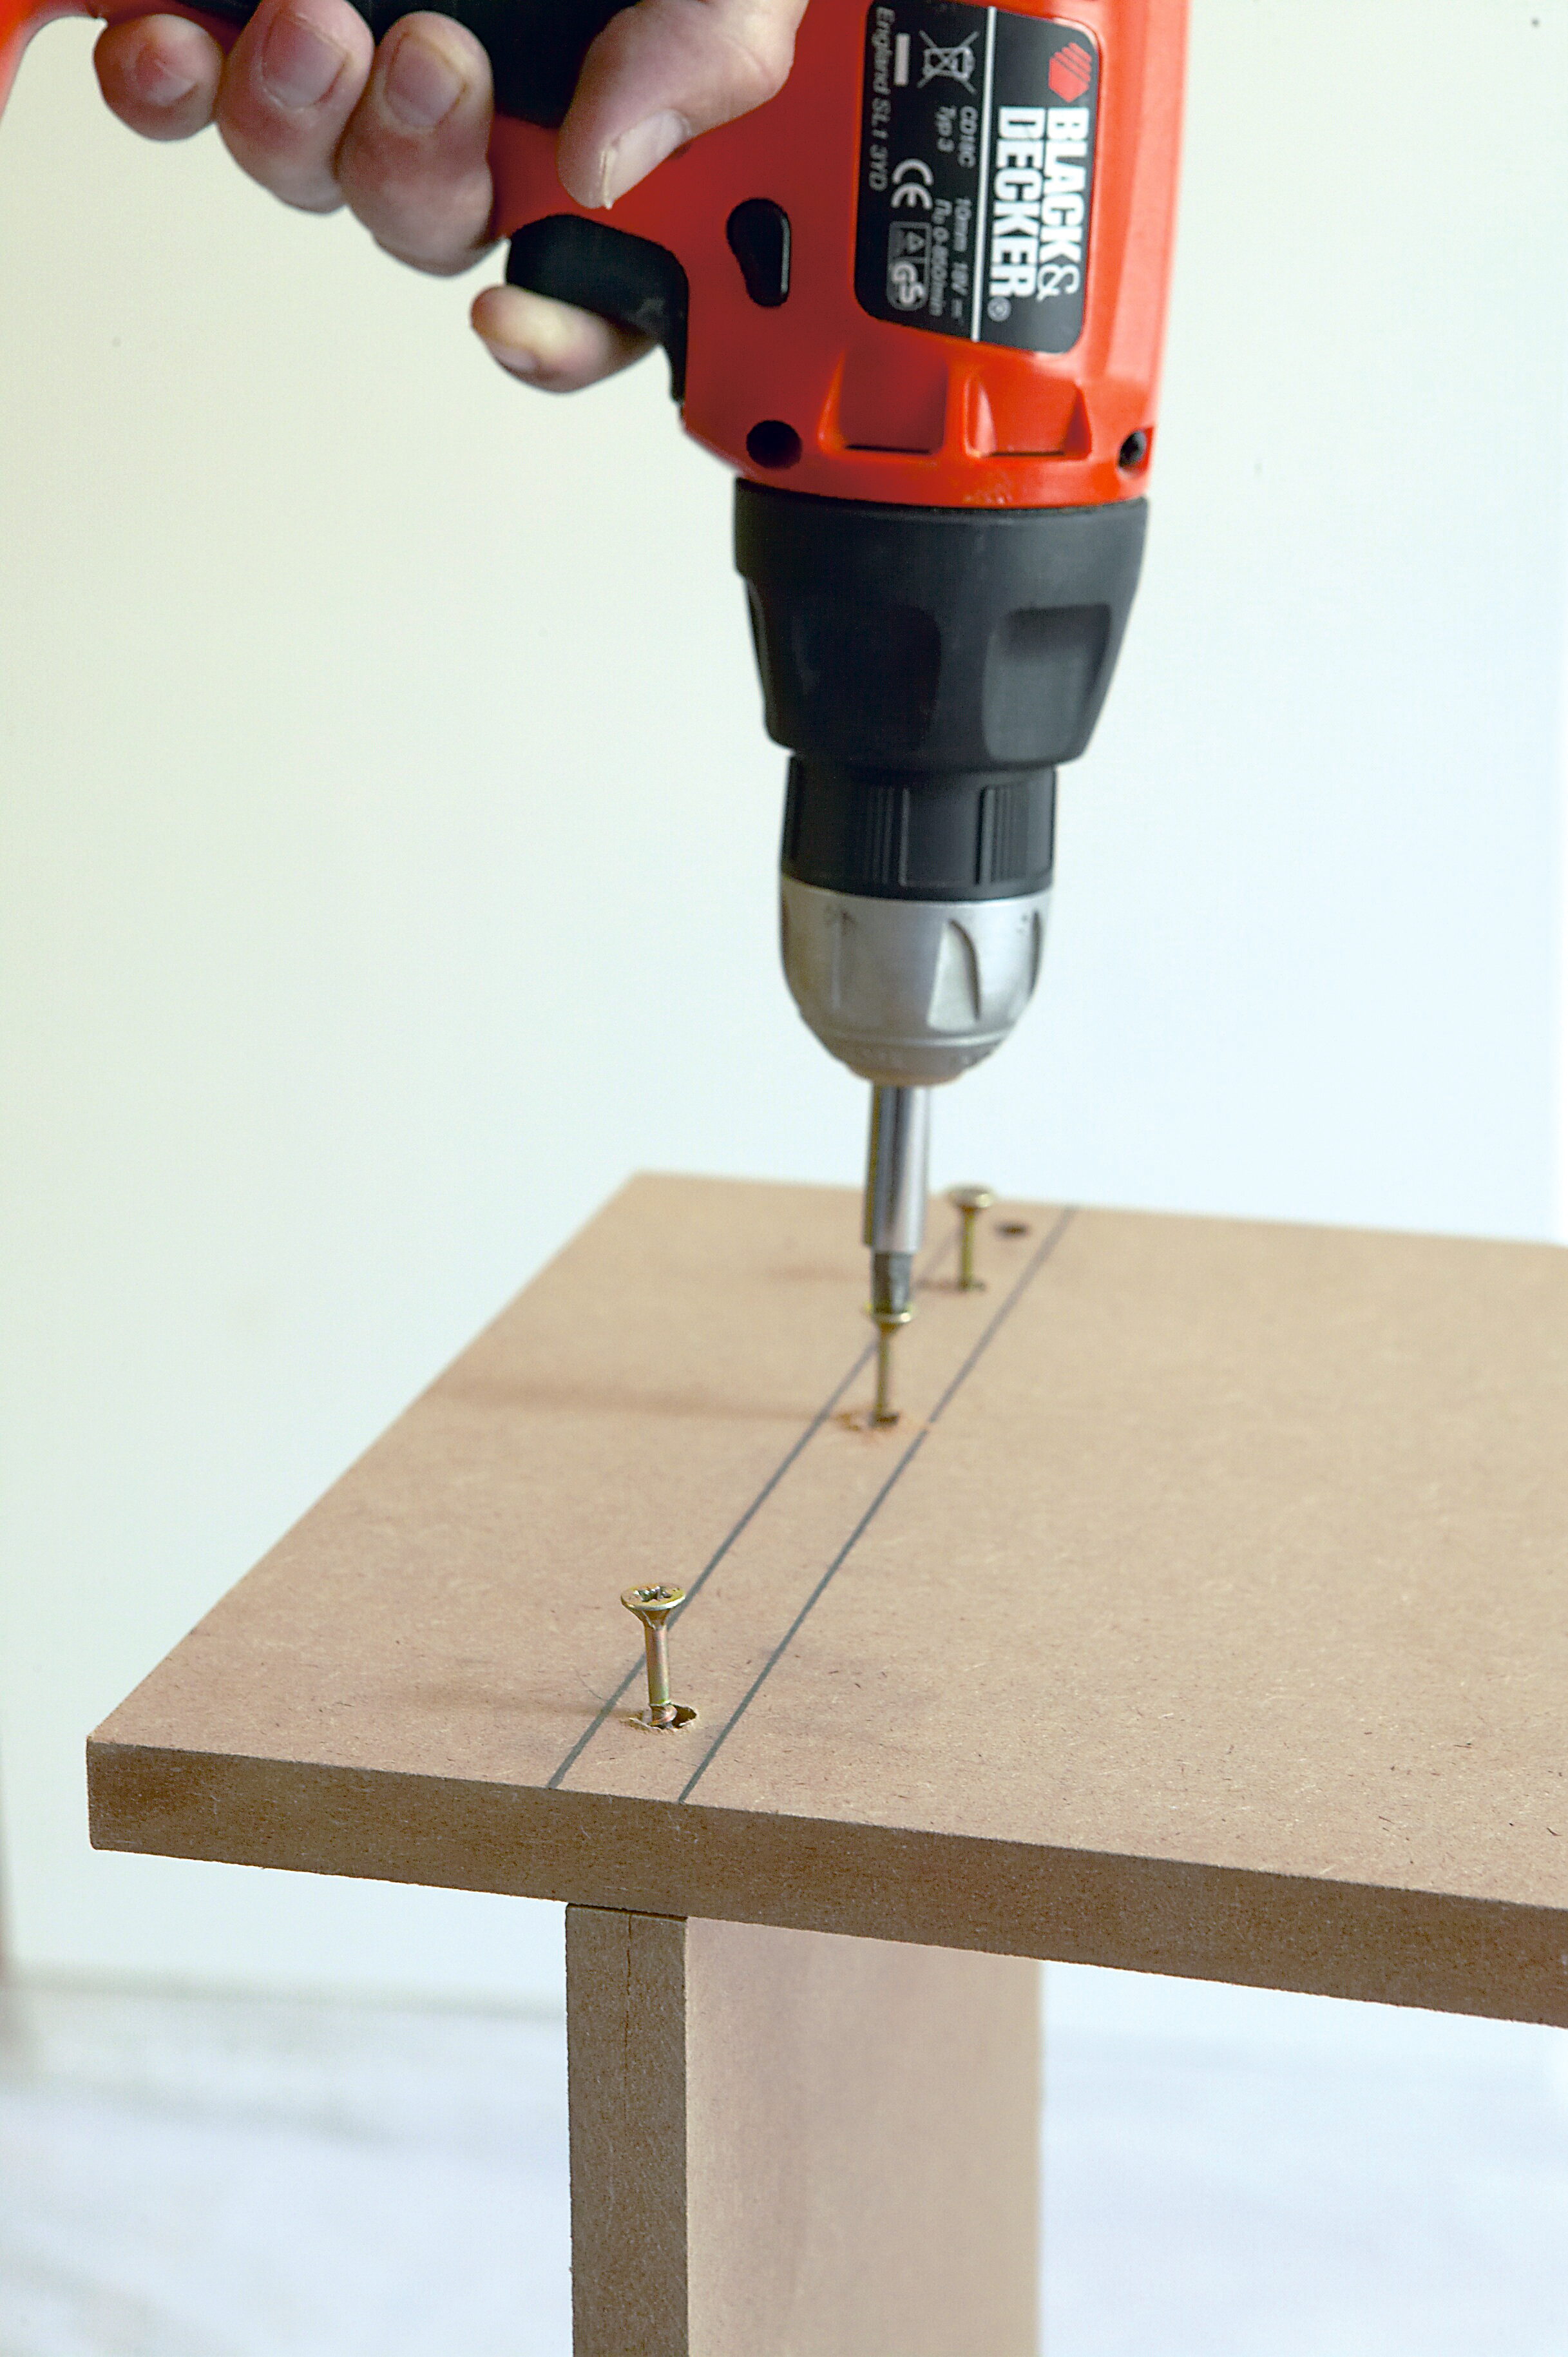
Step 4
Now hold the shelves in position and extend the 2mm pilot holes drilled in step three into the shelves as well. Then glue and screw these in place using the wood glue and cut screws.
Repeat this until you have completed the construction of both cupboards.
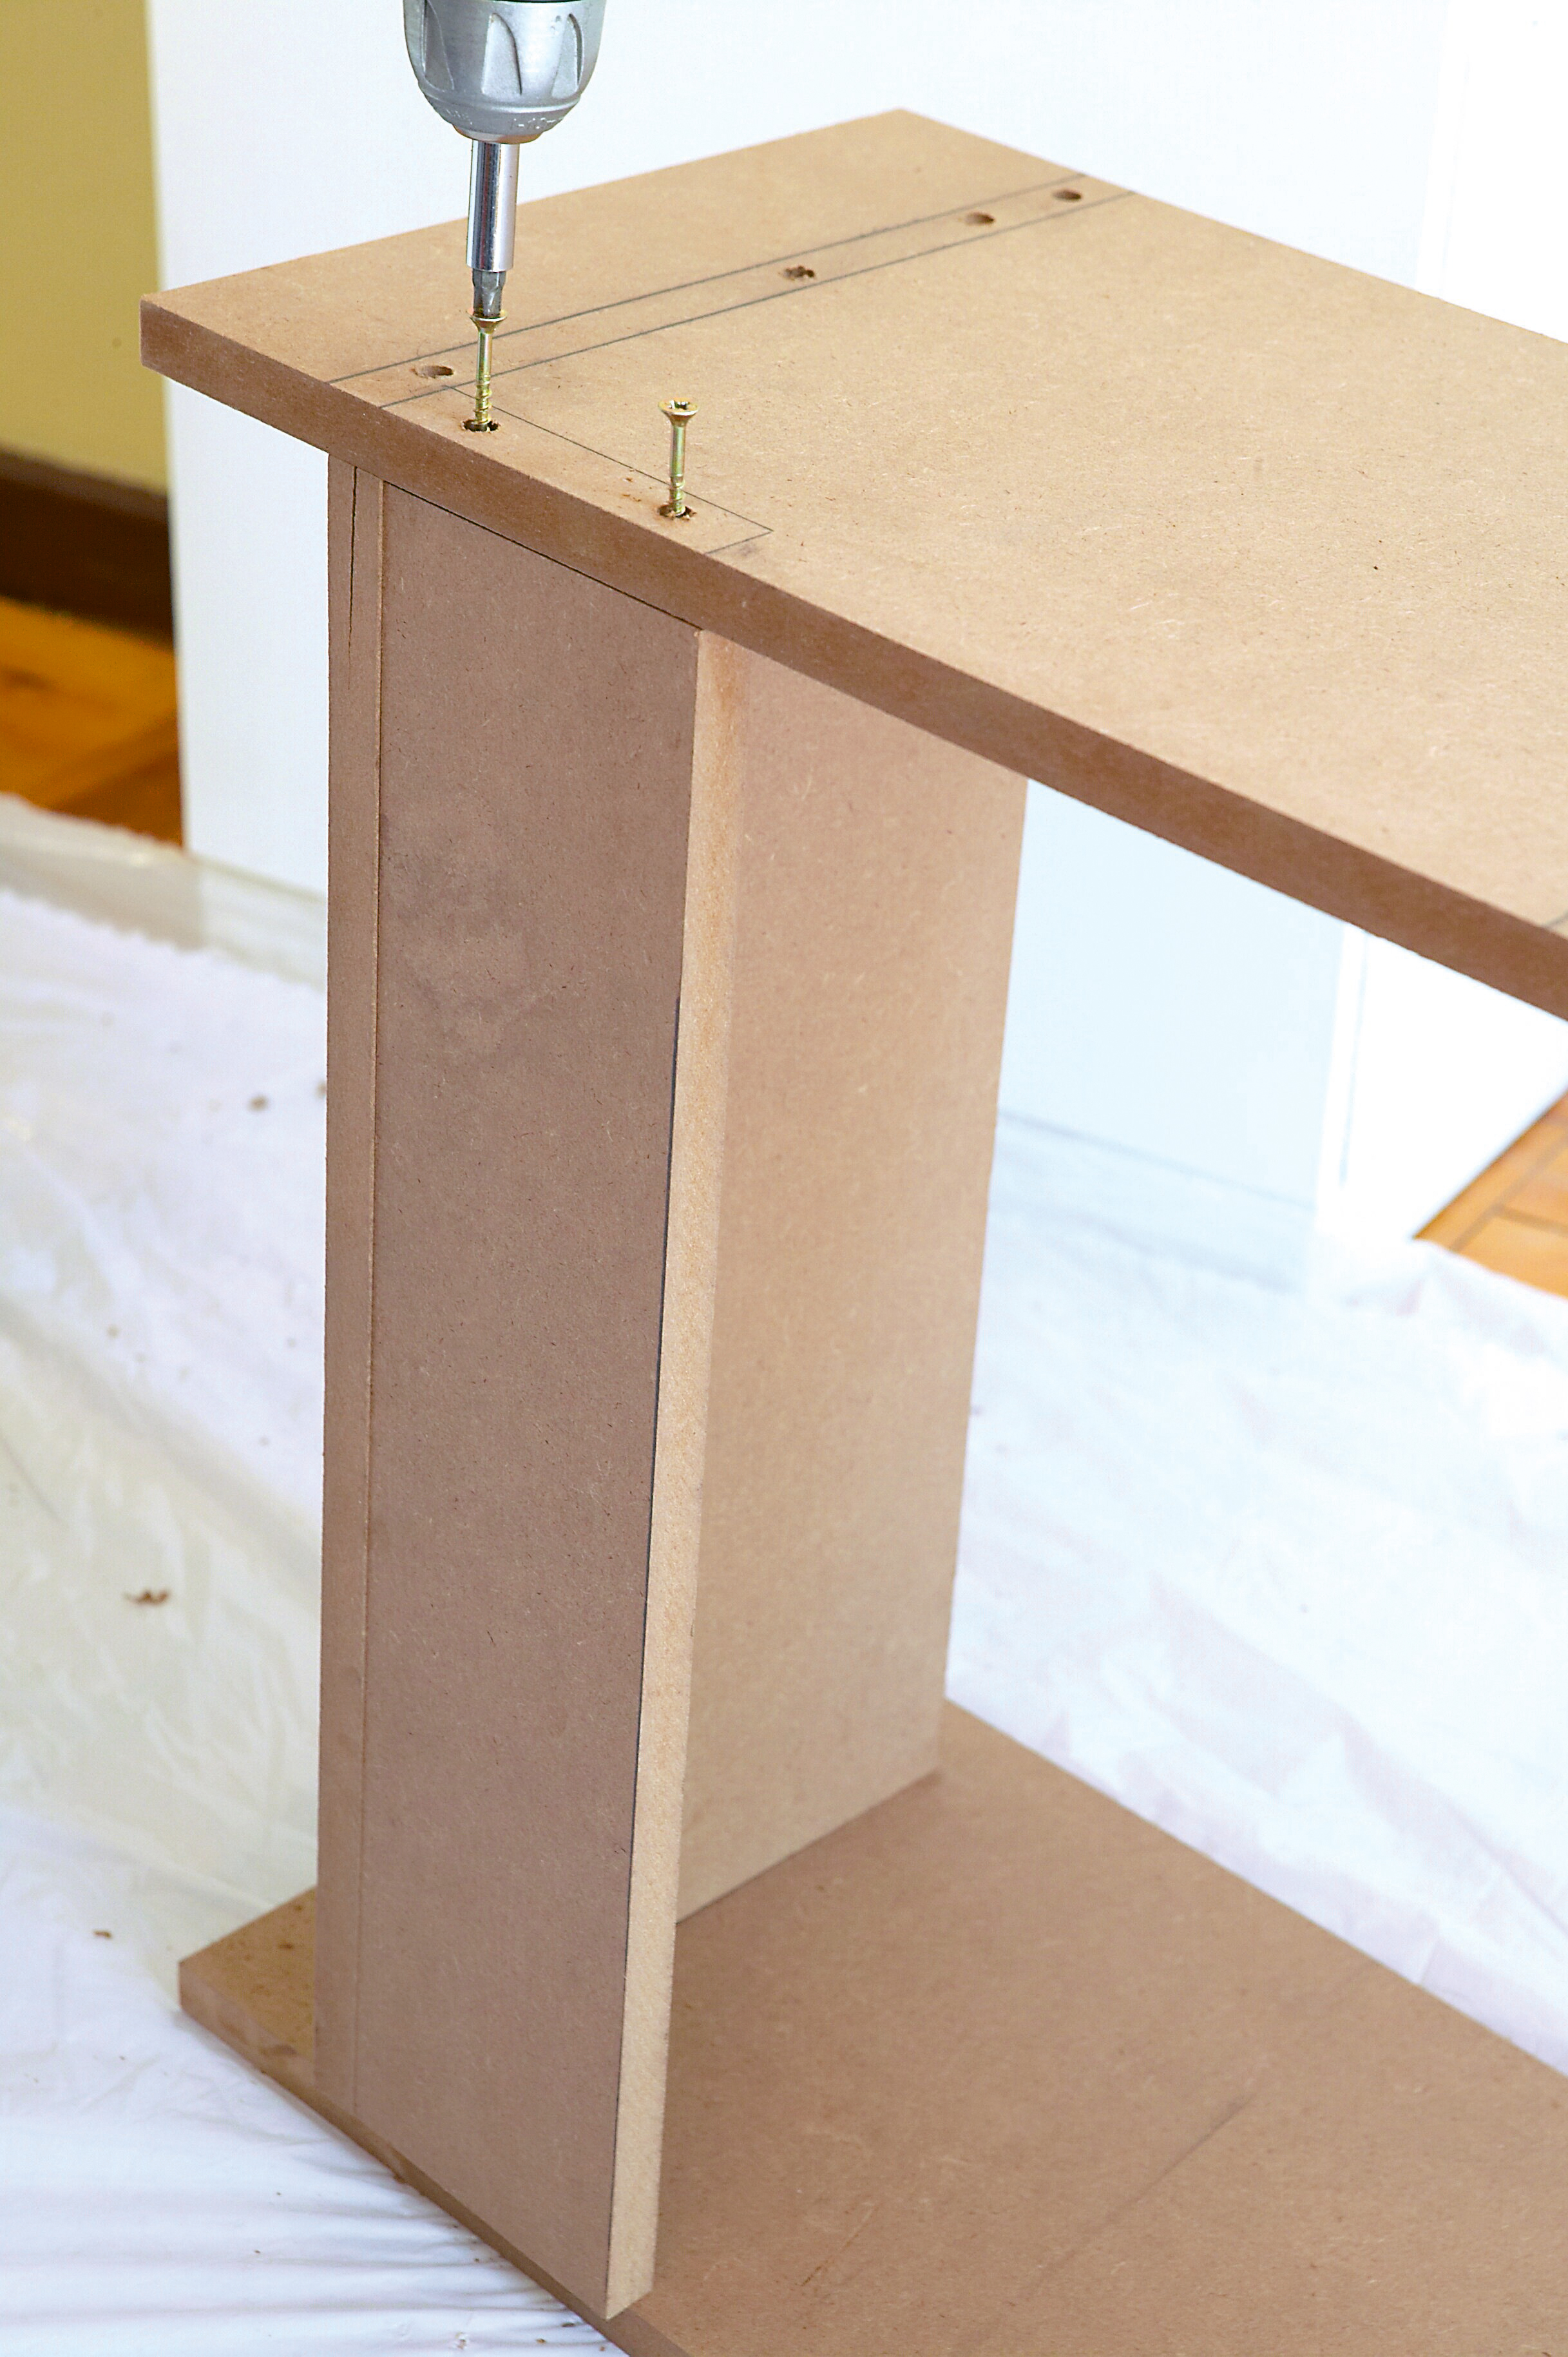
Step 5
Add the four brace sections to the back of the cupboard(s) in the same manner. These will be used to fix the cupboard(s) to the wall.
Step 6
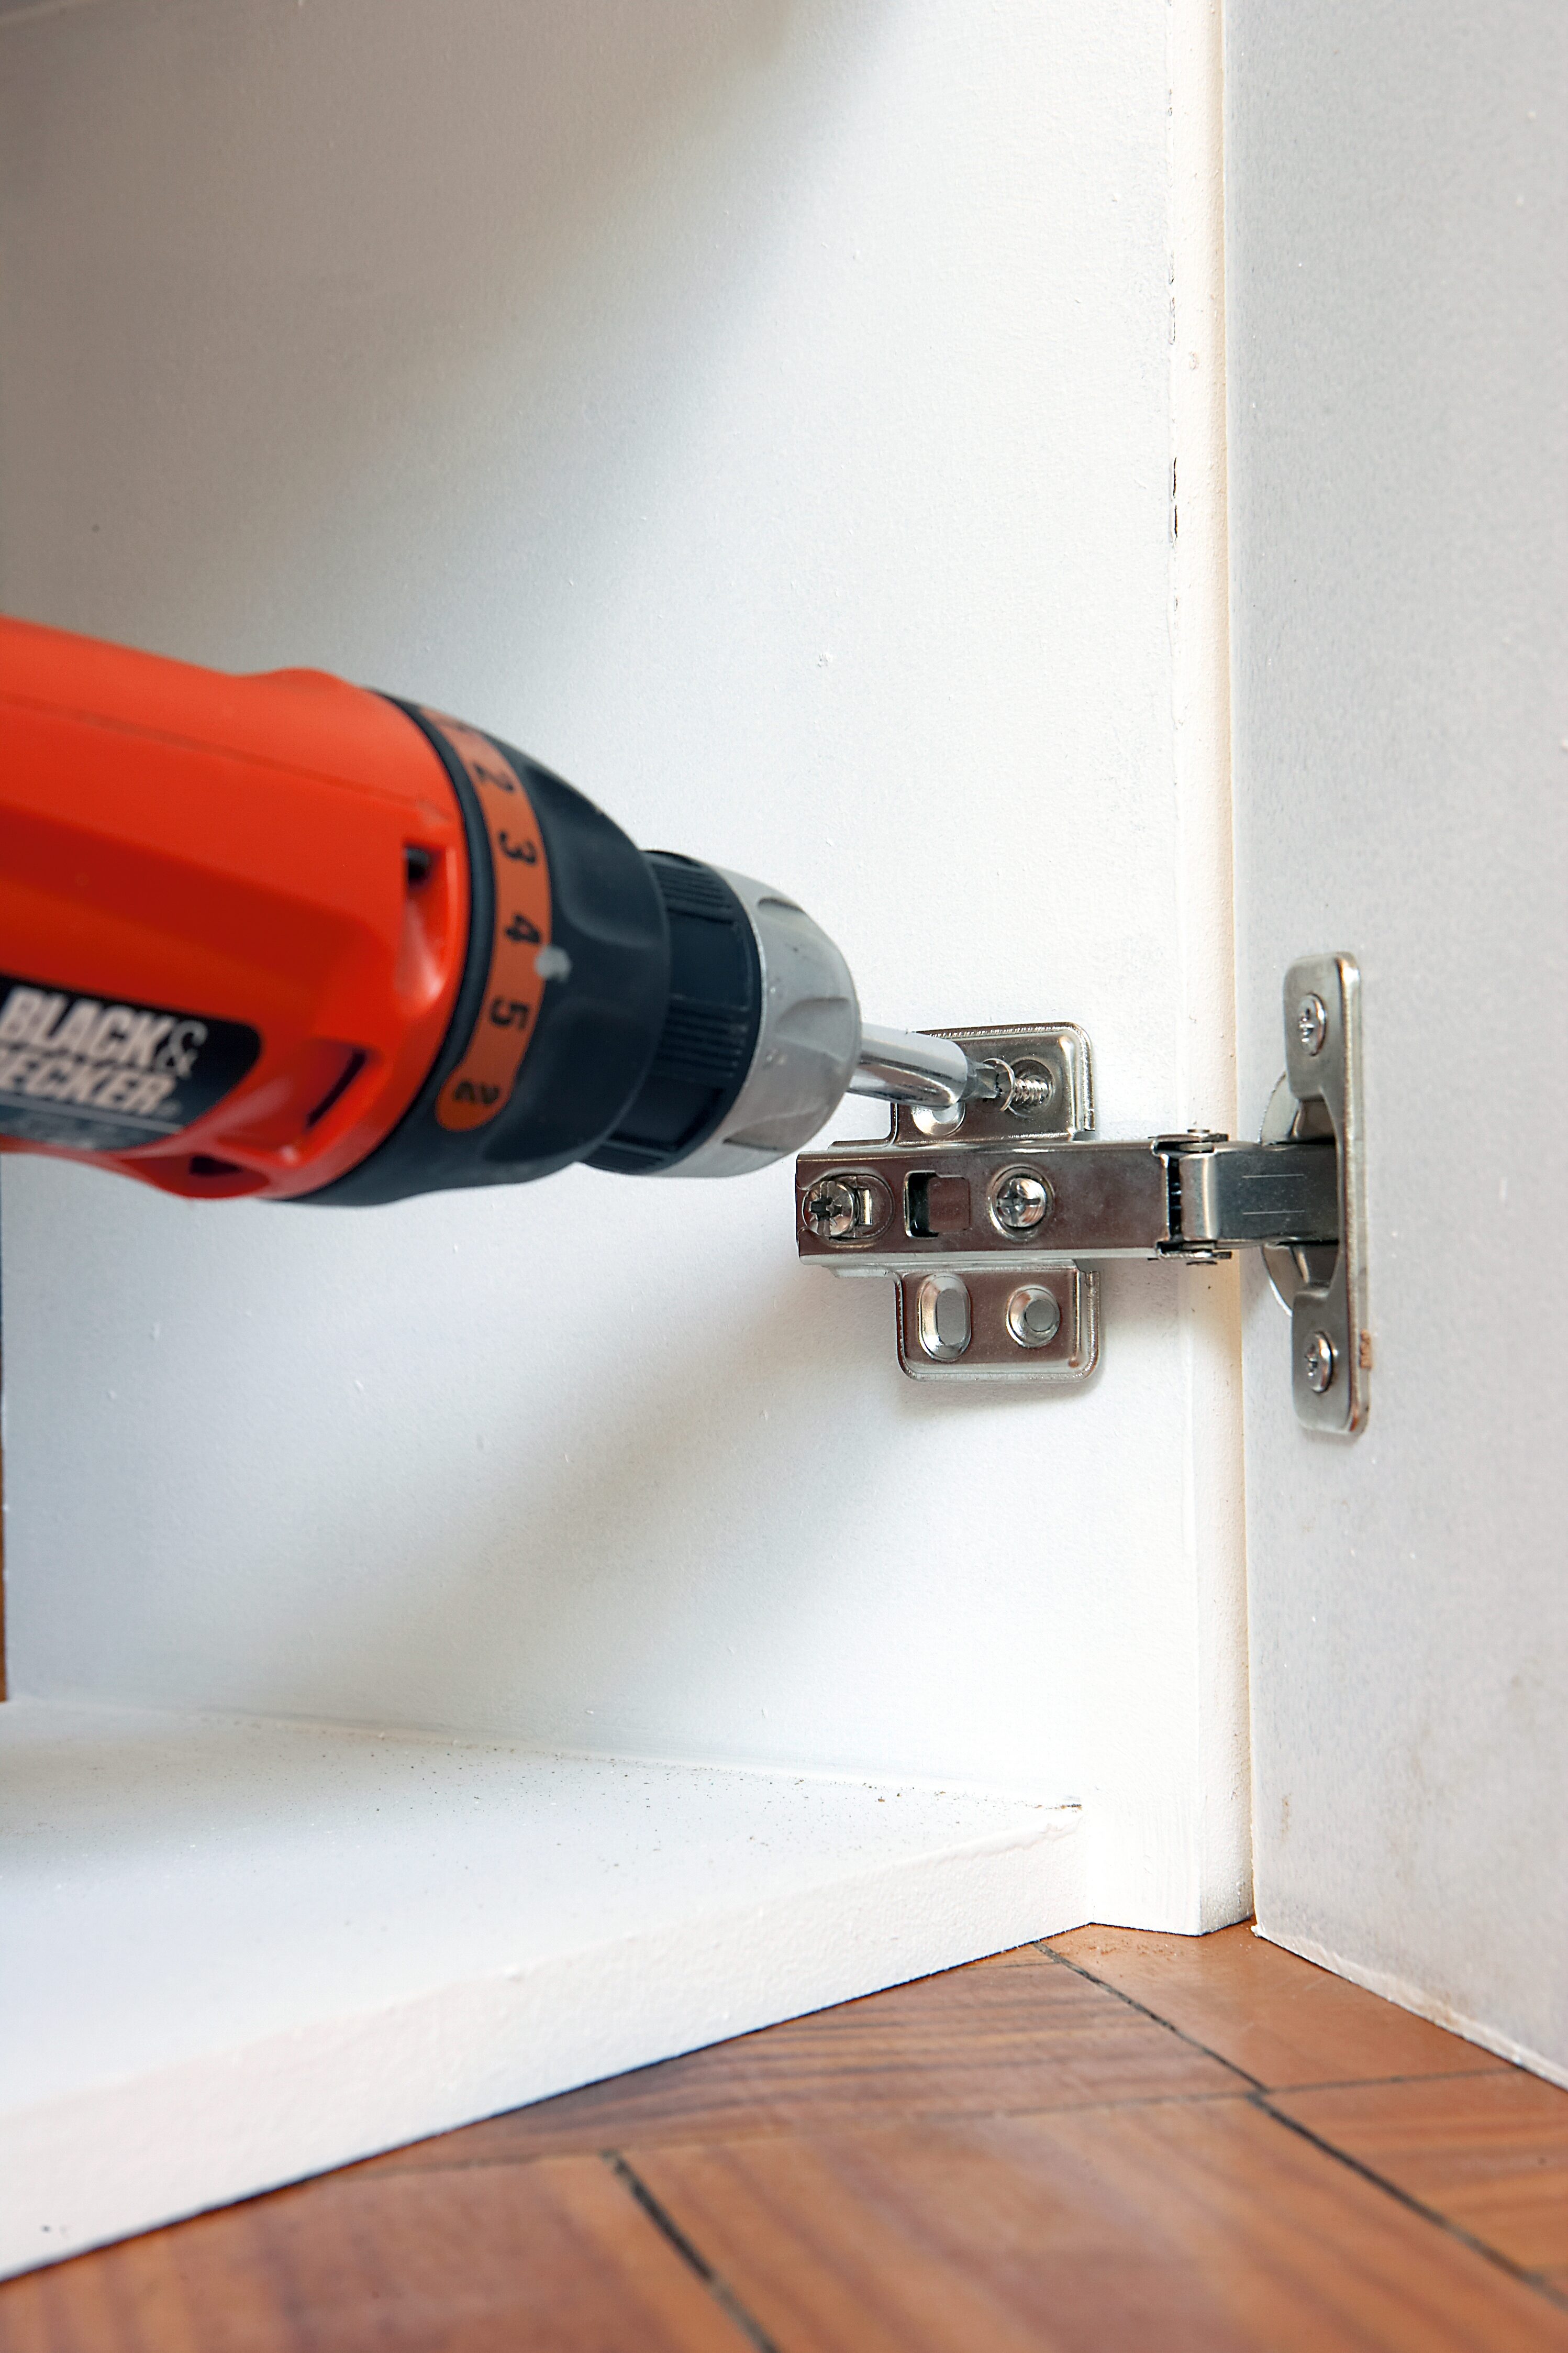
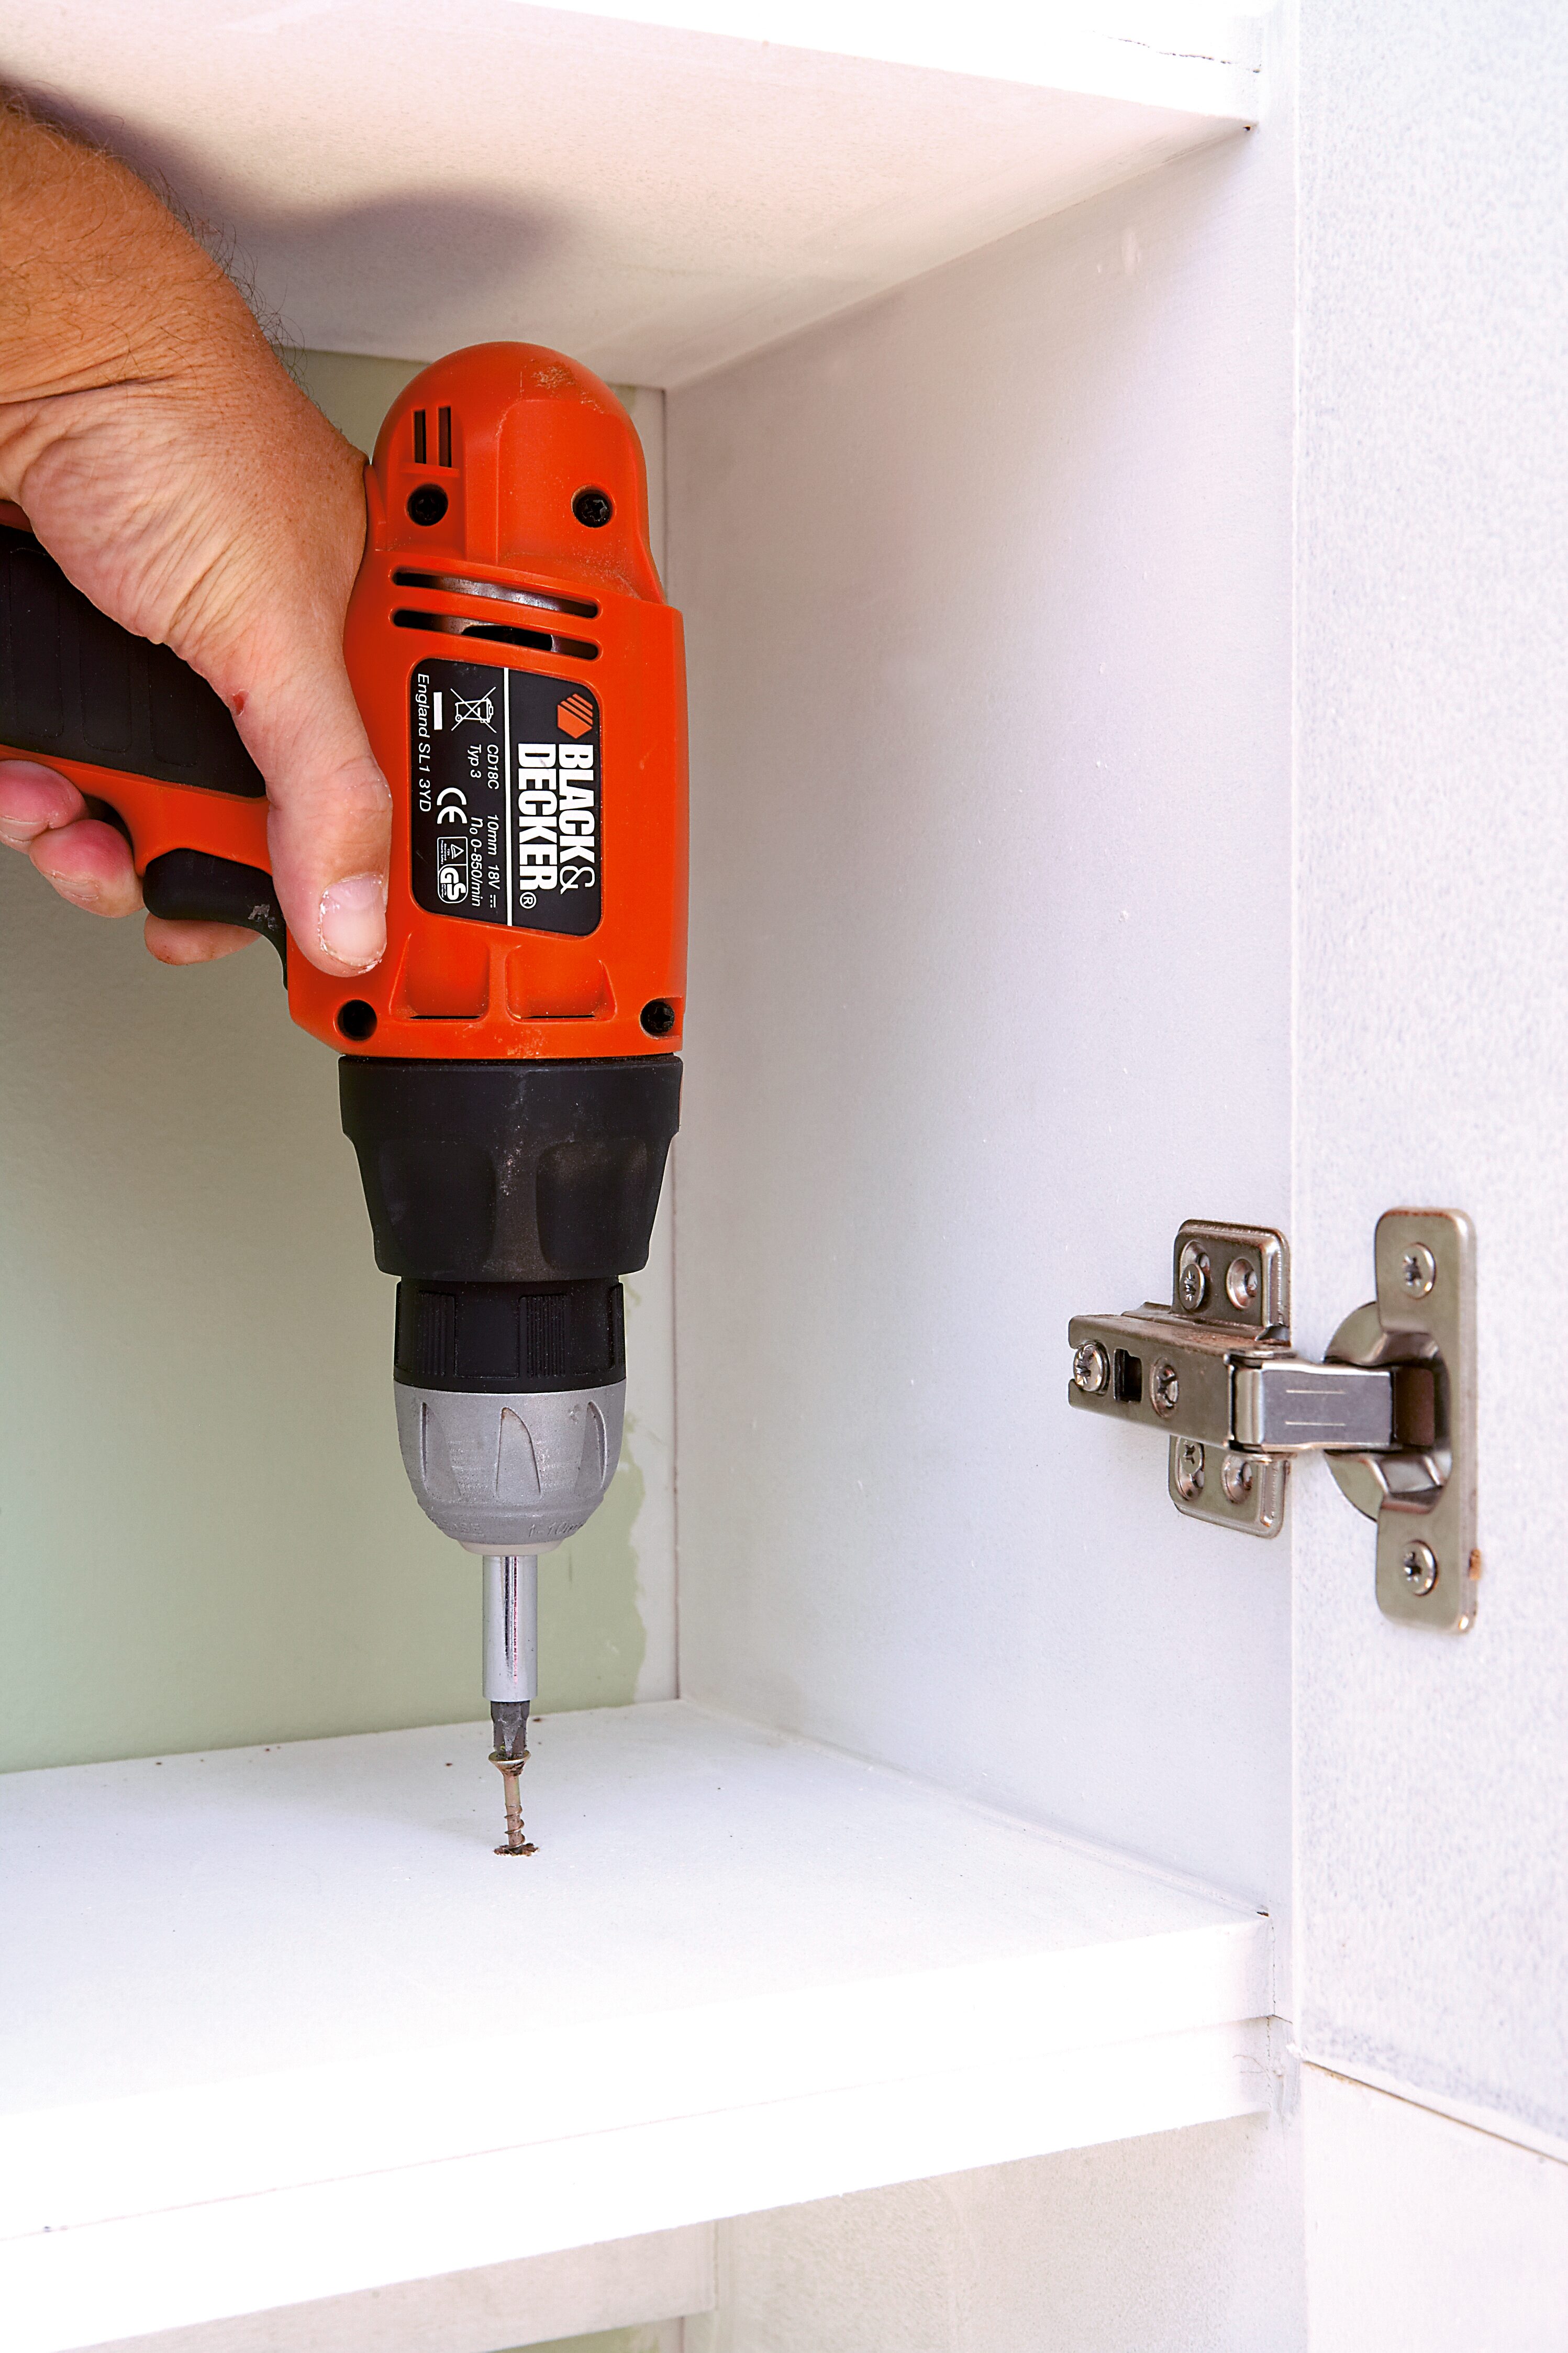
Fix the hinges to the doors. Ensure that these are positioned at right angles; use the combination square to accurately check this. Now fix the door(s) to the cupboard(s) using the 16mm chipboard screws.
Step 7
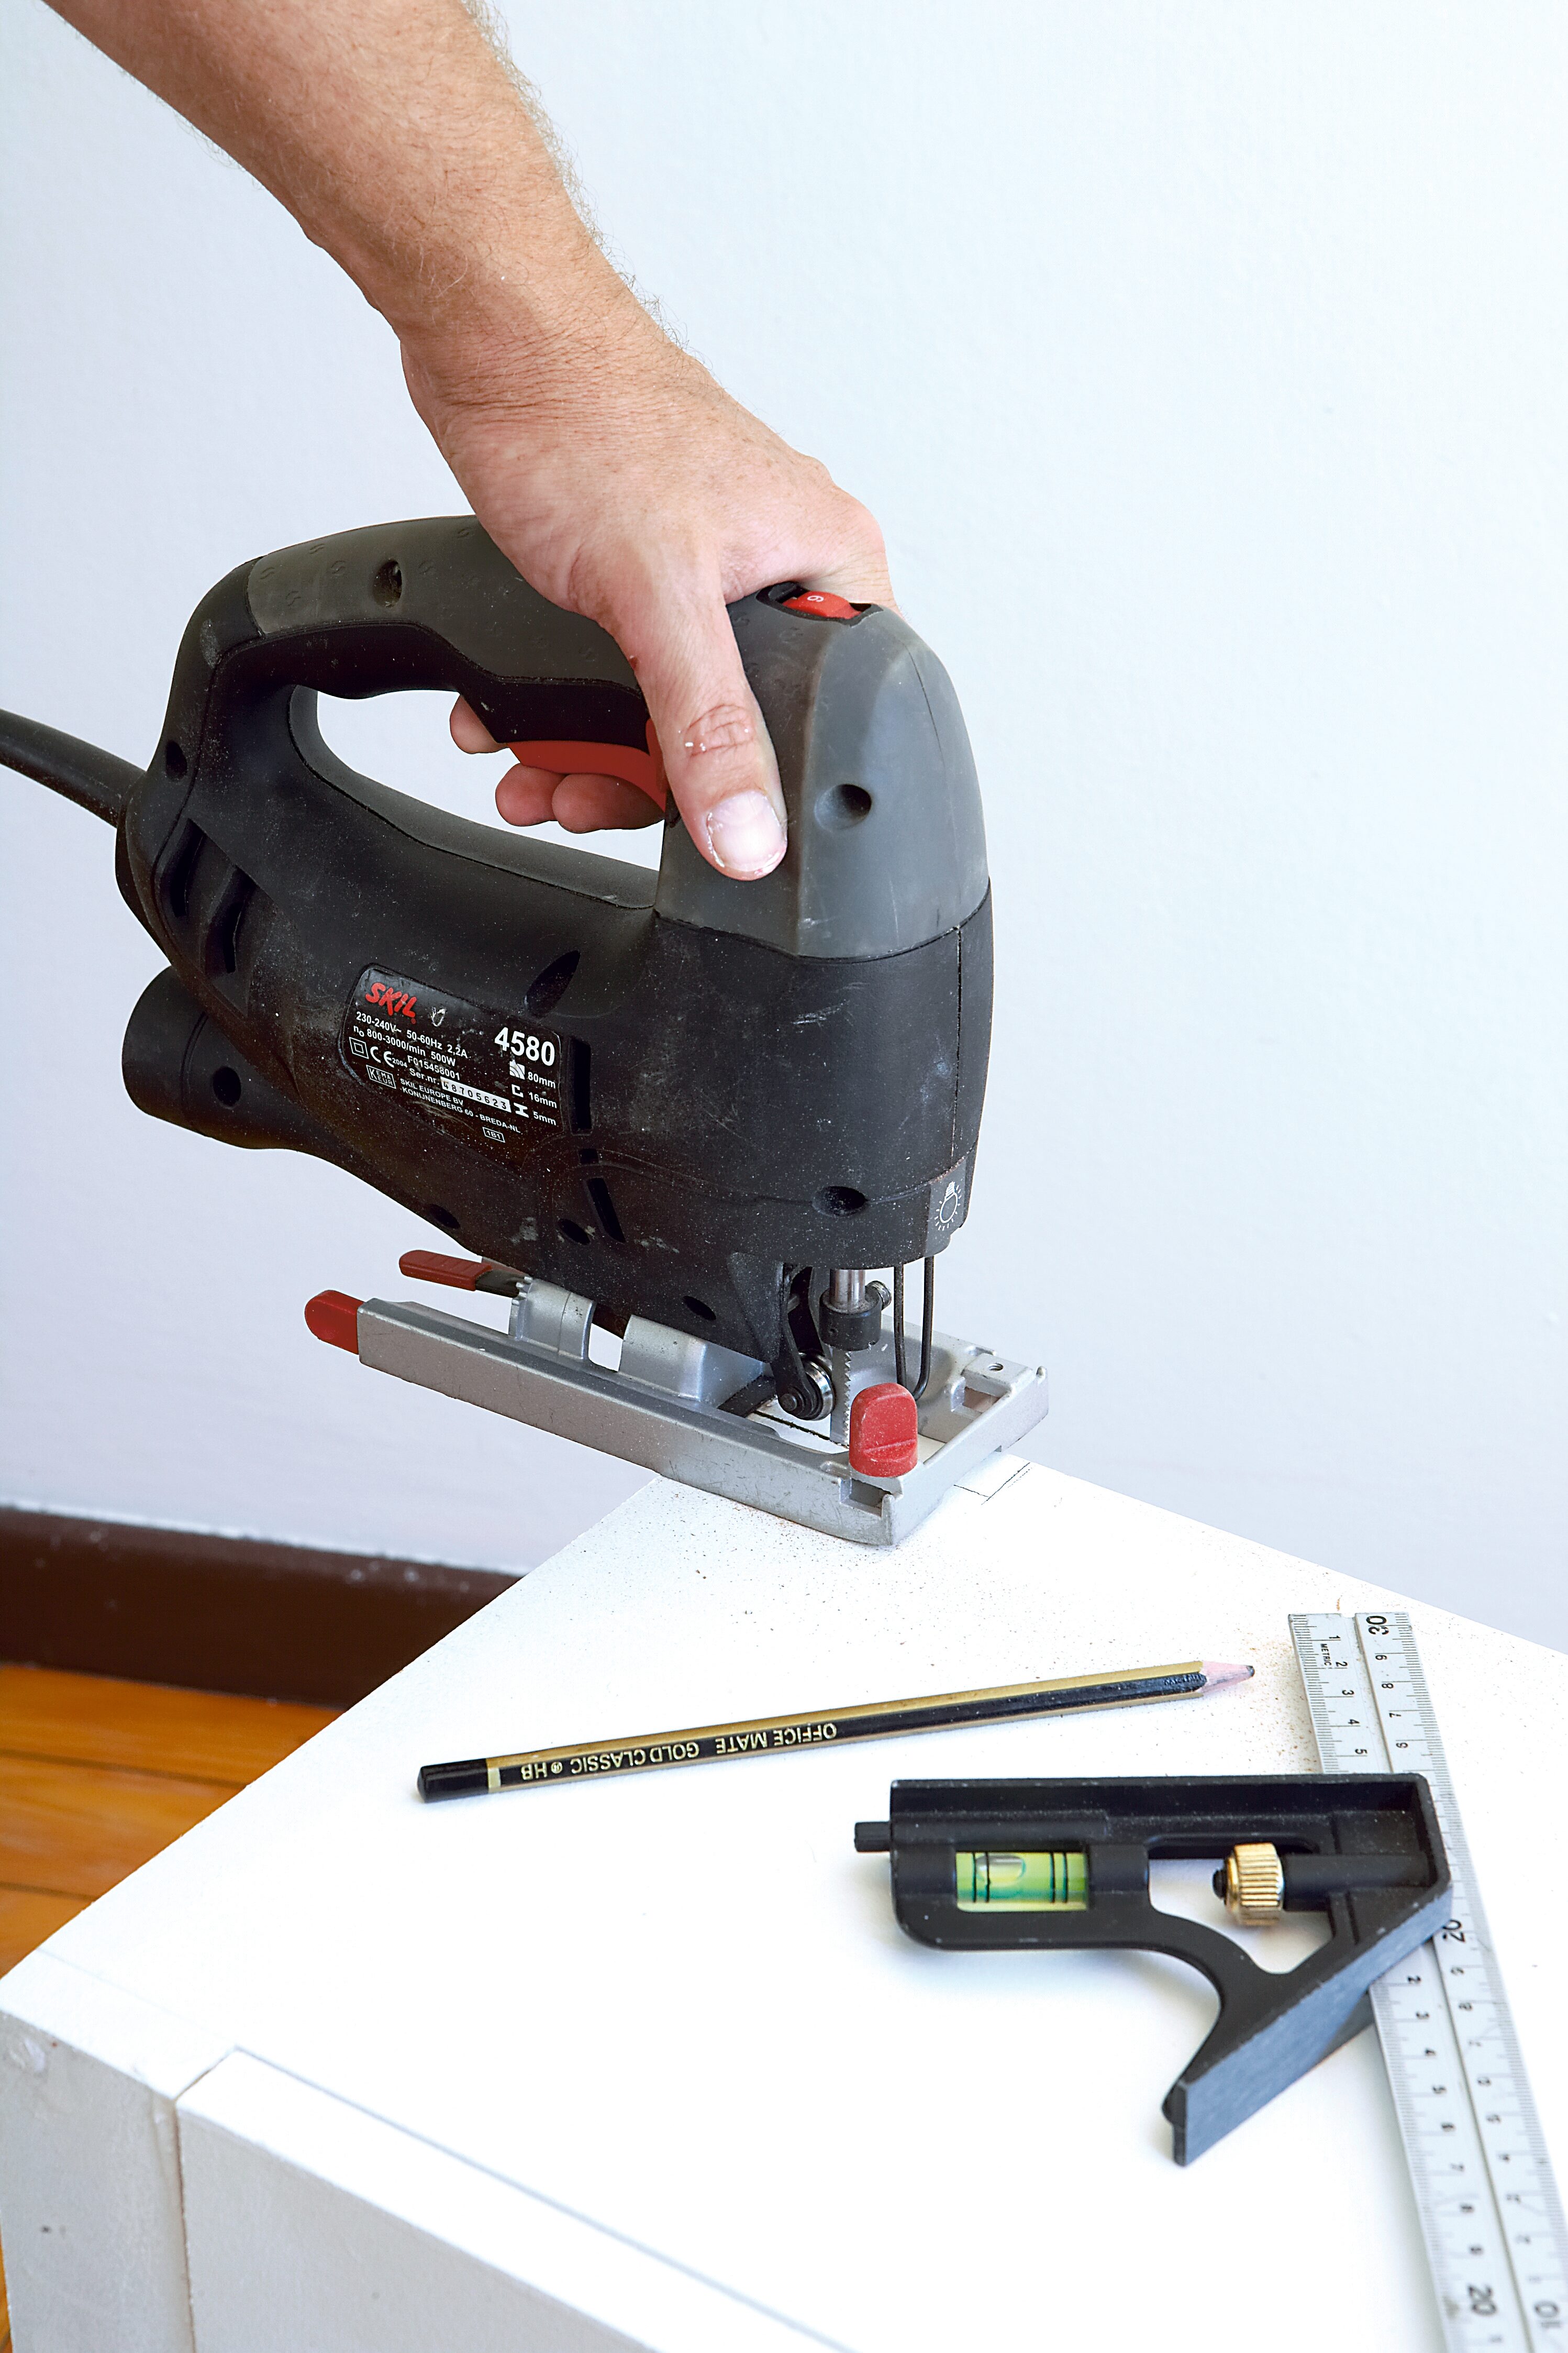
Measure the height (65mm) and depth (12mm) of the skirting board. Use a jigsaw to cut out these 65mm x 12mm sections from the back of the cupboard (bottom) so that the cupboard will fit over the skirting board and flush with the wall.
Step 8
Place the second cupboard on top of the first and fix the two together using two 25mm cut screws.
Step 9
Drill two 5mm holes in each of the four braces and then drill holes into the wall using the electric drill and masonry drill bit. Now fix the cupboards to the wall using the 75mm x 5mm Hilti wall anchors.
Step 10
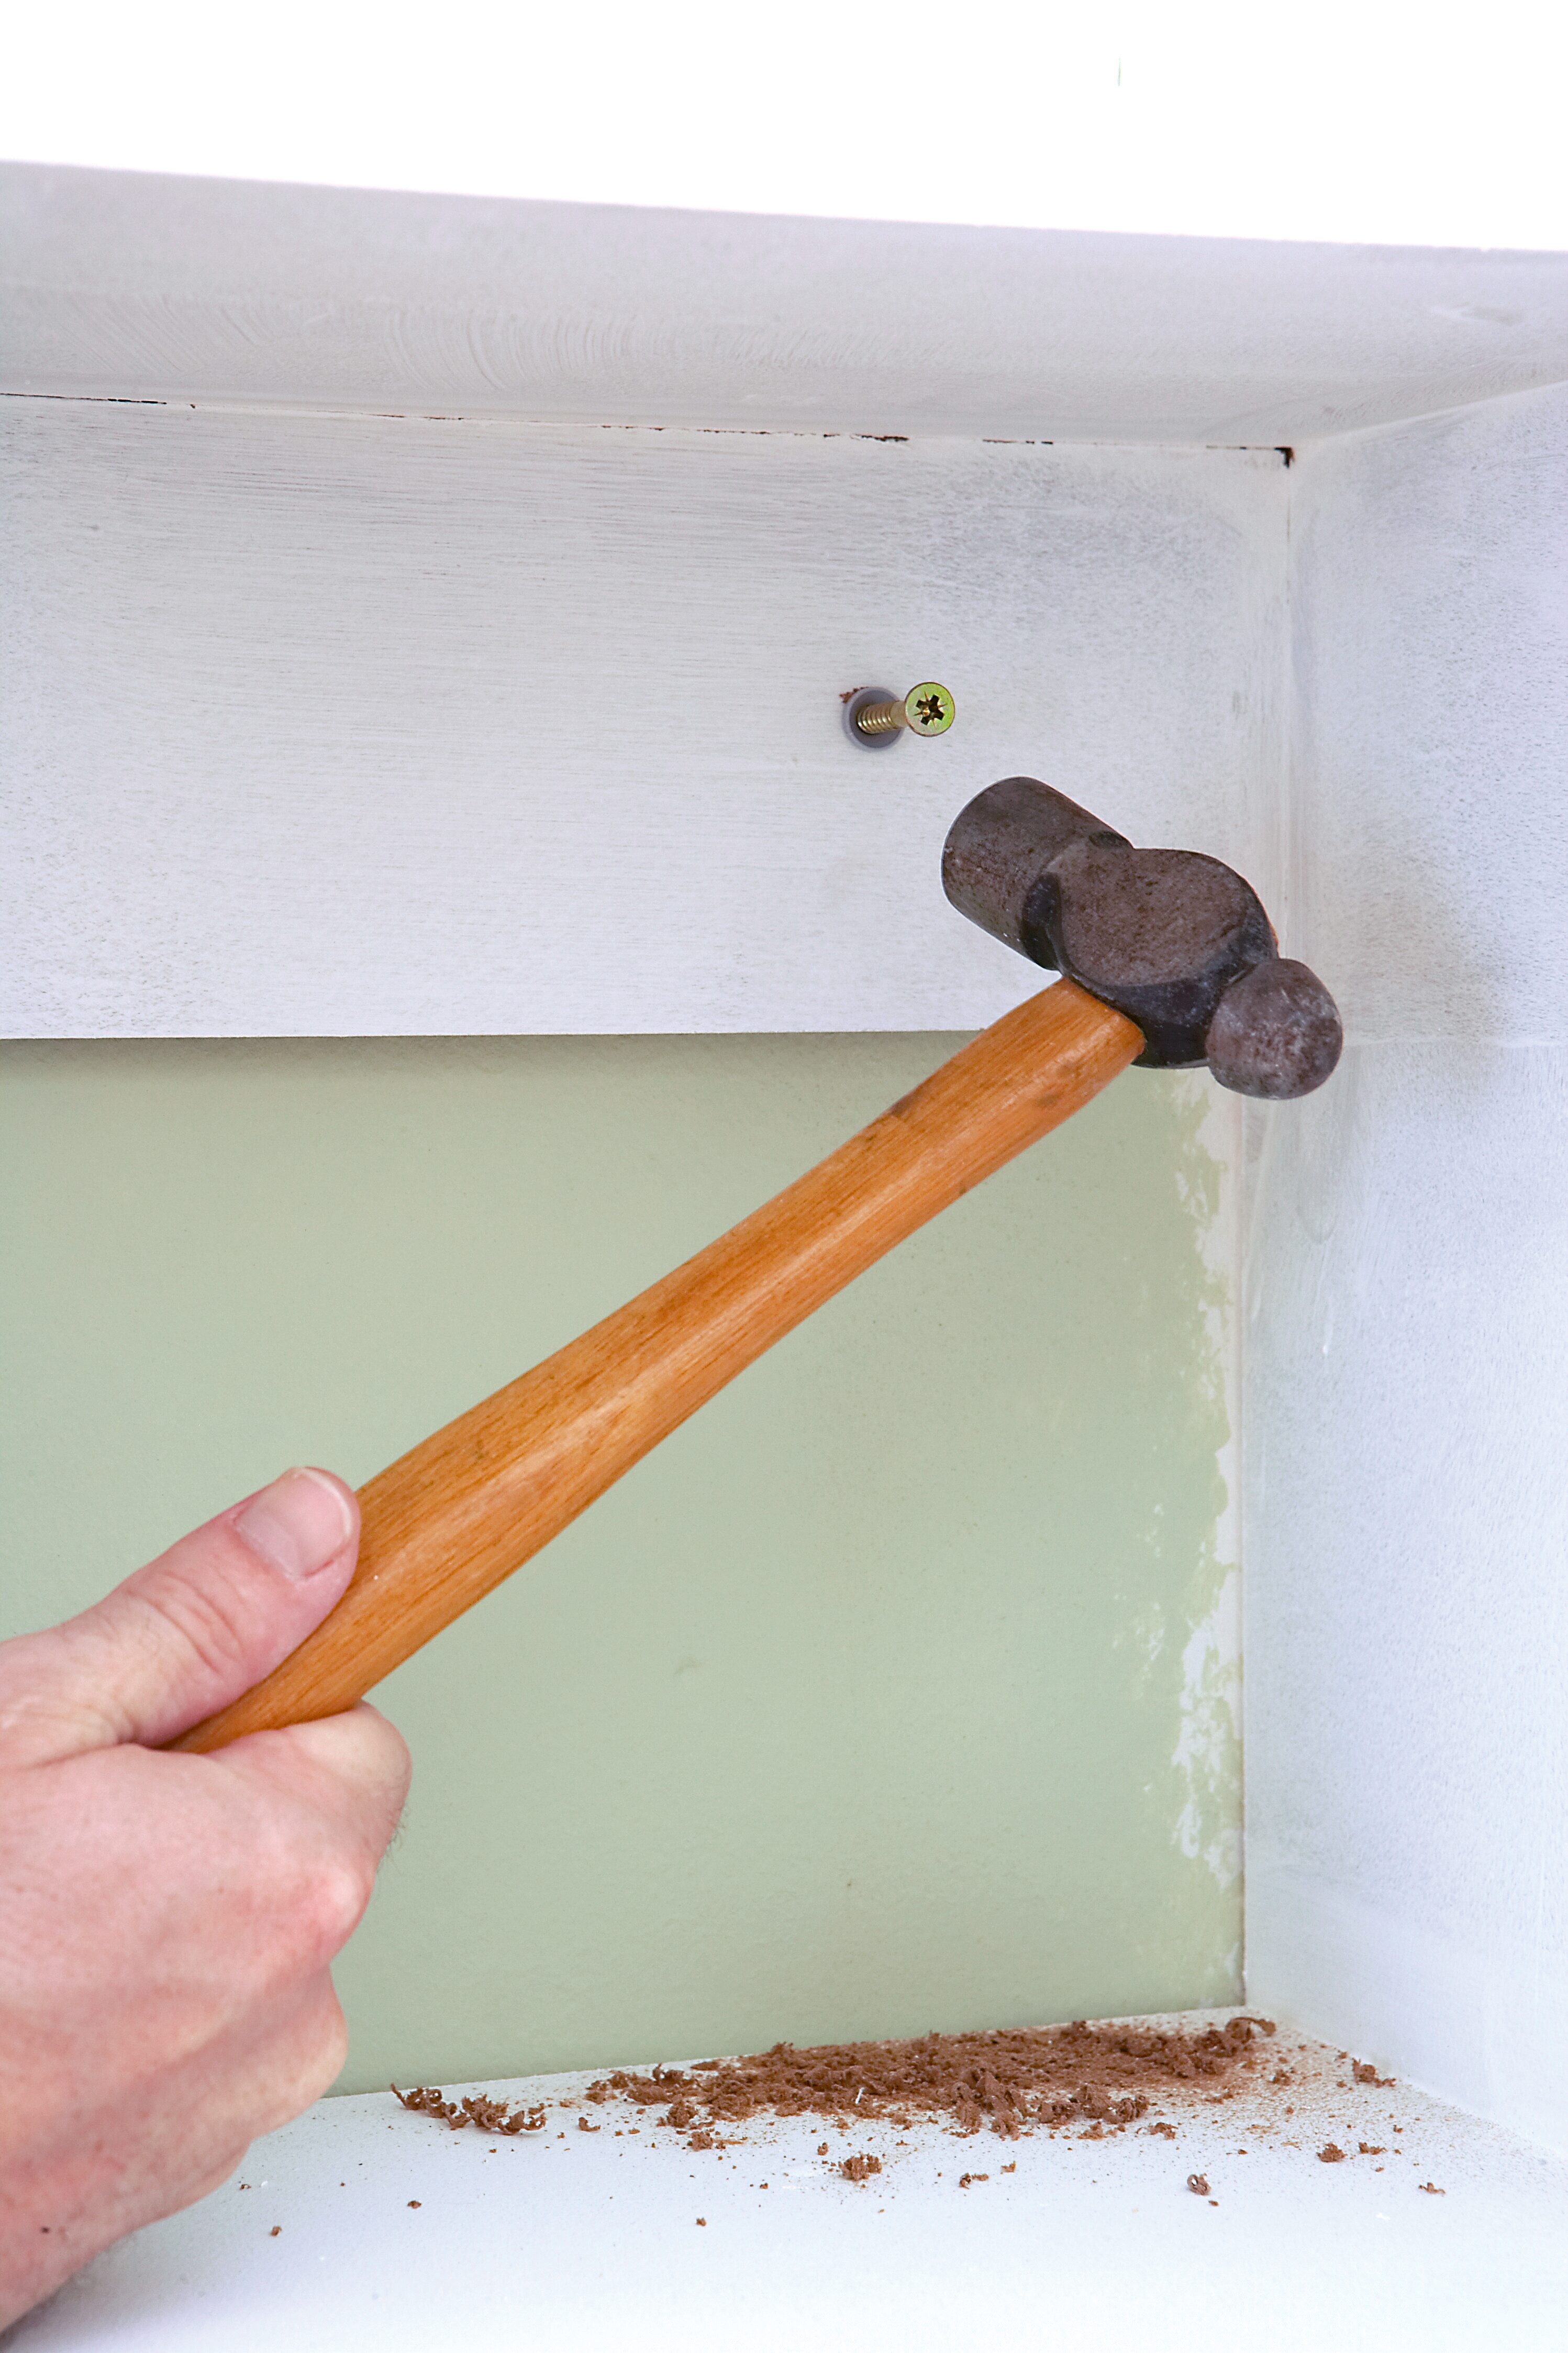
Fill all the holes and finish the cupboard with a multisurface primer followed by the colour of your choice. We added a 65mm skirting to the bottom of the cupboard and cornice detail around the top to match the existing trim of the room.
Credits
Referenced from Gallo images / Home Magazine
Browse 1000’s of products available to you. Select your country to Shop Online.


