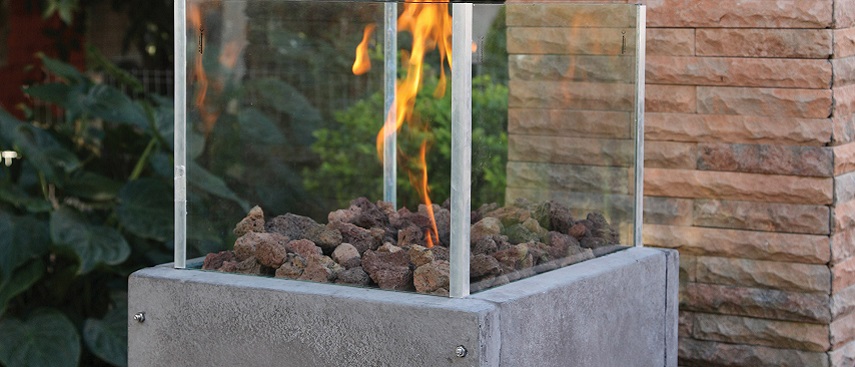
A portable fire pit is the perfect addition to your deck or patio, especially on chilly nights. You can build this durable, affordable fire pit over a weekend.
- Tape measure
- Permanent marker
- Hammer drill and 6 mm masonry drill bit
- 10 mm spanner
- 450 mm bolt cutter
- Epoxy
- Biofuel (not for cooking)
- 8 x 6 mm nuts
- Silicone sealant and caulking gun
- 4 inch corner clamps and a hacksaw
- 4 x 450 x 250 x 40 mm pavers
- 2 x 440 x 300 x 6 mm tempered glass
- 2 x 360 x 300 x 6 mm tempered glass
- 1 x 445 x 360 x 3 mm expanded mesh
- 8 x 80 x 6 mm threaded bar (Note: threaded bar comes in 900 mm lengths, you will have to cut it to this size with a hacksaw)
- 2 x 364 mm aluminium equal angle strips
- 2 x 417 mm aluminium equal angle strips
- 4 x 300 mm aluminium equal angle strips for glass edging
- Circular tin (ours is an empty milo tin 160 x 100 mm)
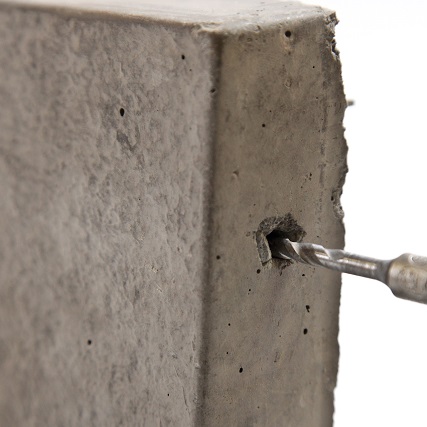
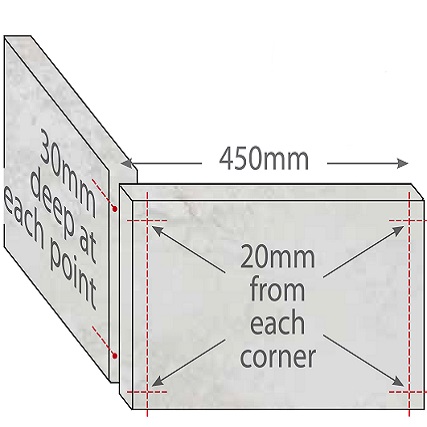
Step 1
Mark to drill holes 20 mm from each corner on the front of two pavers where the threaded bar will be inserted. Drill the holes all the way through. Match up these holes with the side edge of the unmarked pavers. Into these second two pavers, drill 30 mm deep at each of these matched points.
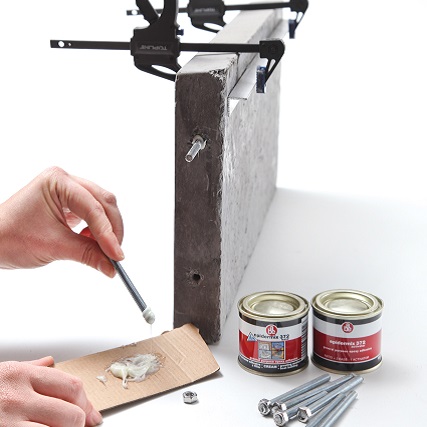
Step 2
Place a little epoxy on the threaded bar s and insert into the side edges of the two unmarked pavers. Leave to set.
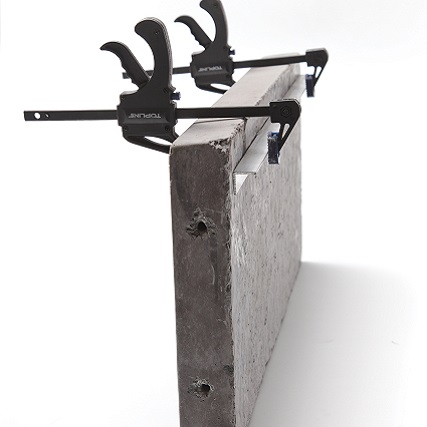
Step 3
Using epoxy, attach the 364 mm aluminium equal angle strips 20 mm from the lip of the marked pavers of what will become the inside of you paver frame and clamp them in place. Repeat with the 417 mm aluminium equal angle strips on the unmarked pavers.
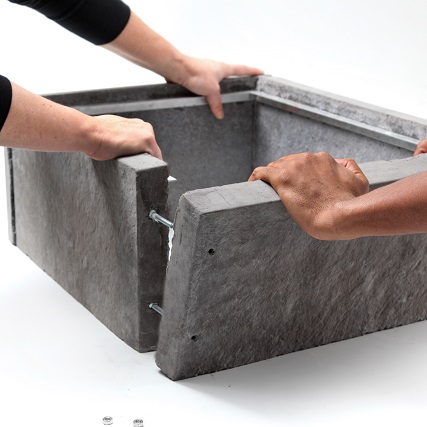
Step 4
Once dry, assemble the paving to form a box-shaped frame by carefully inserting the embedded threaded bars through the matching holes in the two marked pavers.
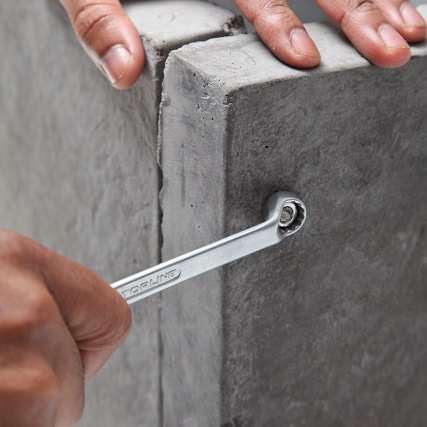
Step 5
Secure with a nut at each point using the no. 10 spanner.
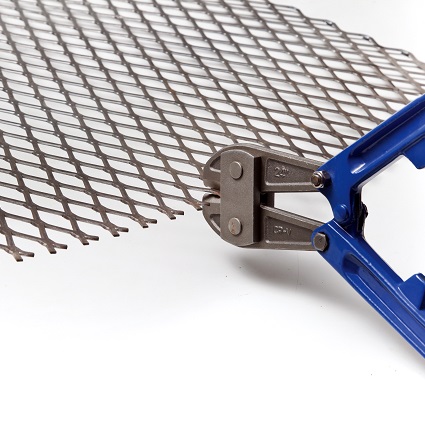
Step 6
Cut the mesh with a bolt cutter to fit on top of the aluminium strips of your paver frame. Leave a 6 mm gap between the mesh and the paver edge all the way around the inside of the frame for the glass to fit between the mesh and the paver.
Step 7
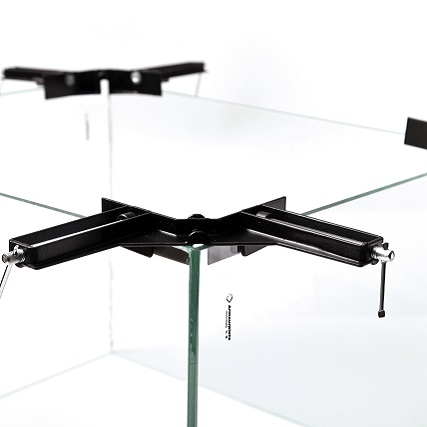
Apply a strip of silicone to the outside edges of the two smaller pieces of glass using the caulking gun. Line up with the larger pieces of glass and secure with the corner clamps to dry. Apply silicone to the inside edges of the 300 mm aluminium strips. Attach these to the outer corners of your glass frame for a neat finish that hides the exposed glue edges.
Step 8
Once dry, place the glass frame on the aluminium strips inside the paver frame.
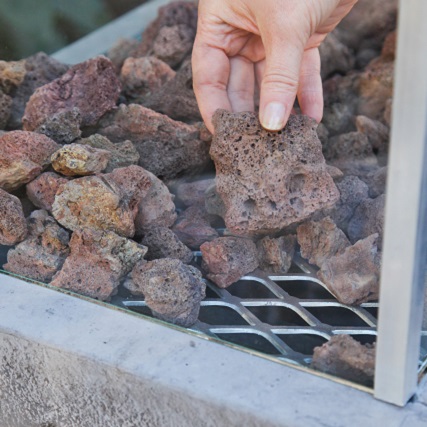
Step 9
Place your biofuel-filled tin inside the paver frame and place the grid over it. Cover the grid with stones, lava rocks or ceramic briquettes. Note: The depth of the tin determines the length of time you will have a heating flame. If you want the fire to last a shorter time we suggest using an empty tuna tin on top of your larger tin.
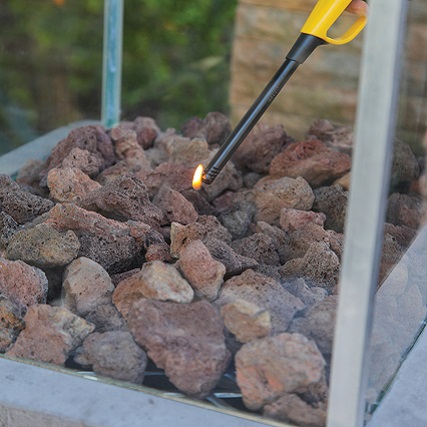
Step 10
To light the fire, move aside a few stones and use a long match or fire lighter.
H.D. caulking gun
Ruth found that the caulking gun is suitable for most 380-425 ml cartridges and was easy to use. It dispenses the silicone evenly along the glass when the handle is gripped with consistent pressure.
4-inch corner clamp
The 4-inch corner clamps are lightweight and are manufactured from an aluminium alloy. These clamps held the glass pieces together at 900 until the glue dried.
Credits
Referenced from Gallo images / www.thegardener.co.za
Browse 1000’s of products available to you. Select your country to Shop Online.


