This is a great feature to add to your kitchen. It’s easy and convenient for all types and sizes of kitchens
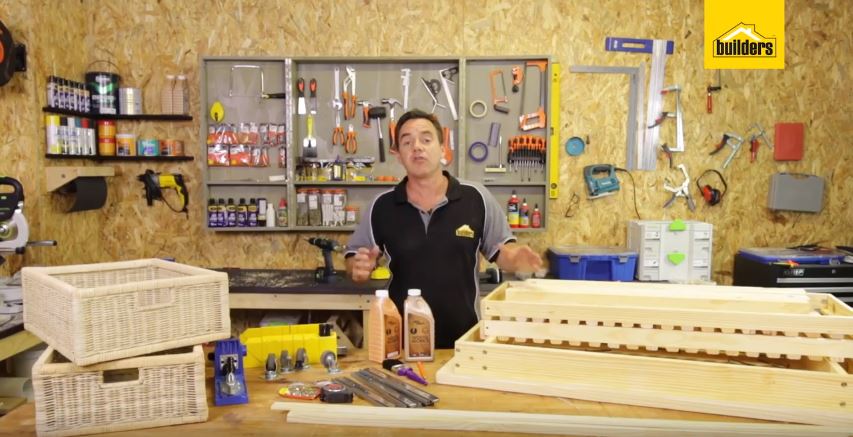
- Builders 1.2m workbench
- Drawer slide rails – 350mm
- 1.8m x 22mm x 69mm Pine PAR Timber
- 1.8m x 8mm x 32mm Cover strip PAR Timber
- 2 Wicker baskets
- Fired earth, white and imbuia wood sealer
- Paintbrush
- Screws
- Tape measure
- 4 Castor wheels – 2 with brakes and 2 without (to carry 35kg each)
- Kreg K4 Jig
- Mitre Saw
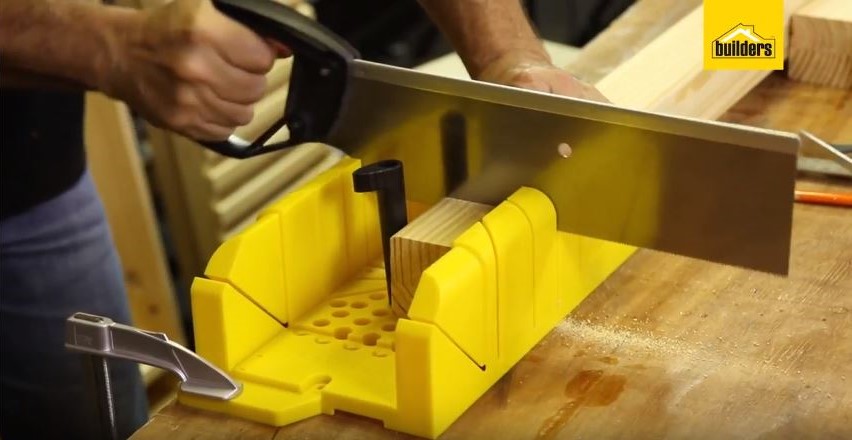
Step 1
Trim your workbench legs as the same height of the castor wheels (70mm) to accommodate the height that the castor legs will add to the project. You can use the electric mitre saw or a mitre box.
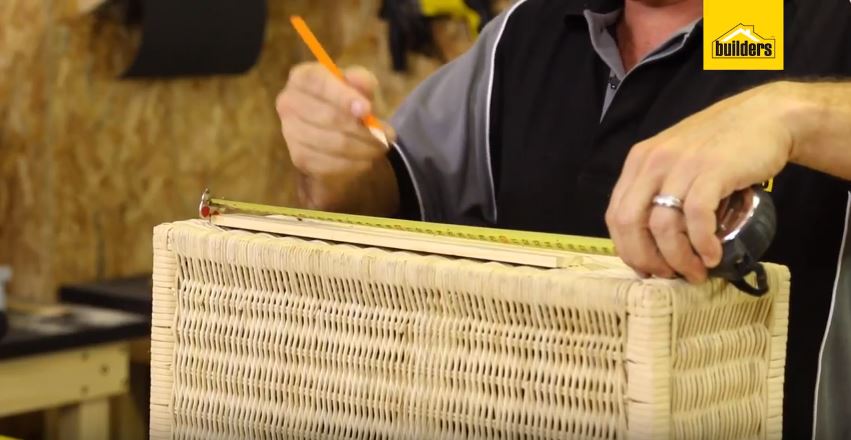
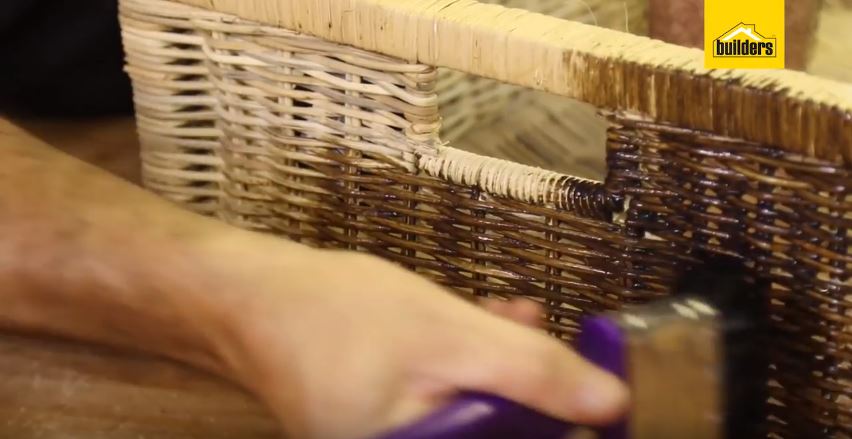
Step 2
Get your bottom shelf and 2 wicker baskets ready. You will have 4 cover strips and 4 rails, one for each side of the 2 baskets. Use the 1.8m x 8mm x 32mm cover strip PAR timber and trim accordingly to sit in the middle of the baskets. Mount the cover strips on the side of the wicker baskets for a smooth and clean finish then attach the inner part of the rails to the cover strips to it.
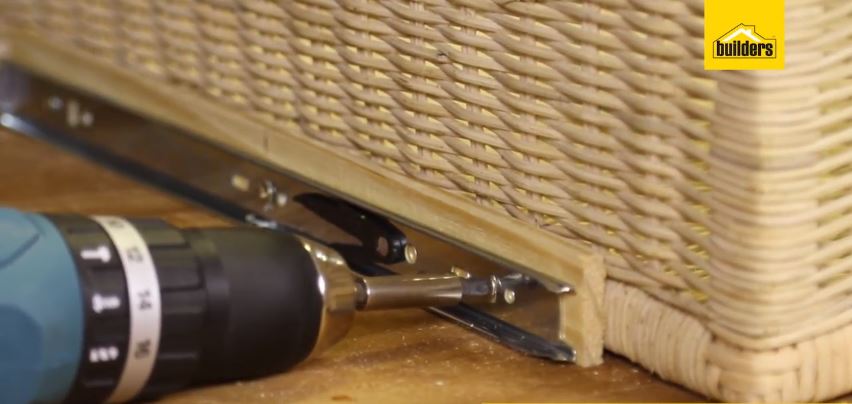
Step 3
Use the 1.8m x 22mm x 69mm pine PAR timber as your vertical that you will attach to the bottom shelf. First attach the outer part of the drawer slide rails to the timber. One will sit in the middle and two on the outer sides of the shelf. Spacing between the basket rails and the outer rails on the vertical timber are 12.7mm per side.
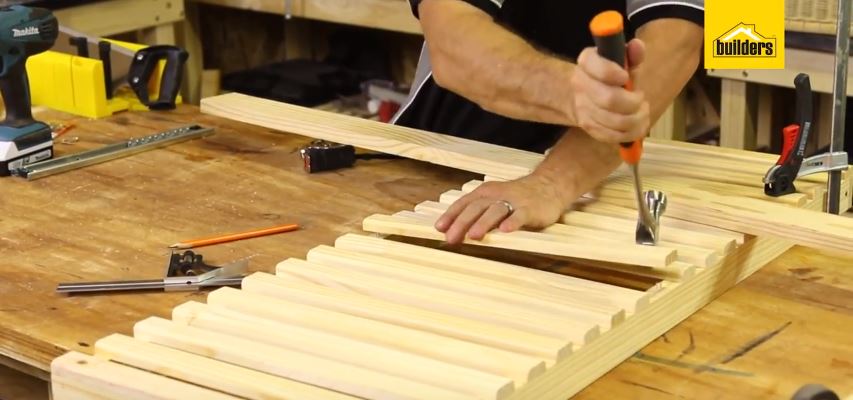
Step 4
Find the center of the shelf and cut 3 rails to the width of the shelf. Use a hammer to remove any slats that are in the way of you mounting your timber. Screw your center piece through the shelf. Now using your measurements of the baskets, with the cover strips and rails attached, measure the distance to the outer rails and attach the other pieces to the shelf. Use the leftover slats to fill the gaps in the shelf.
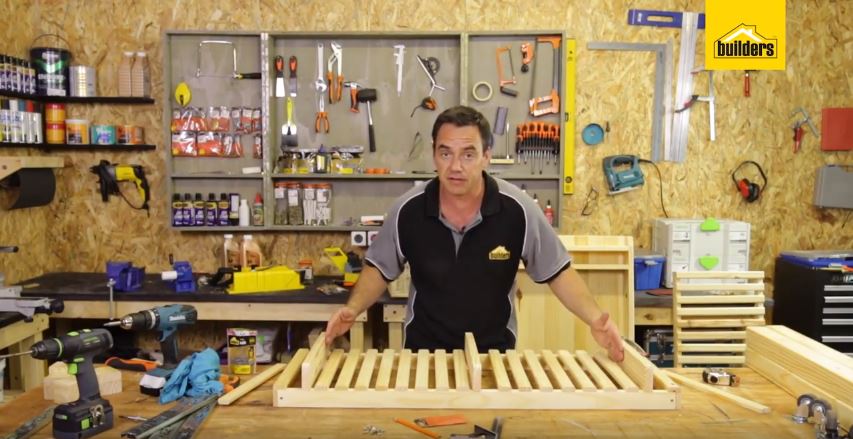
Step 5
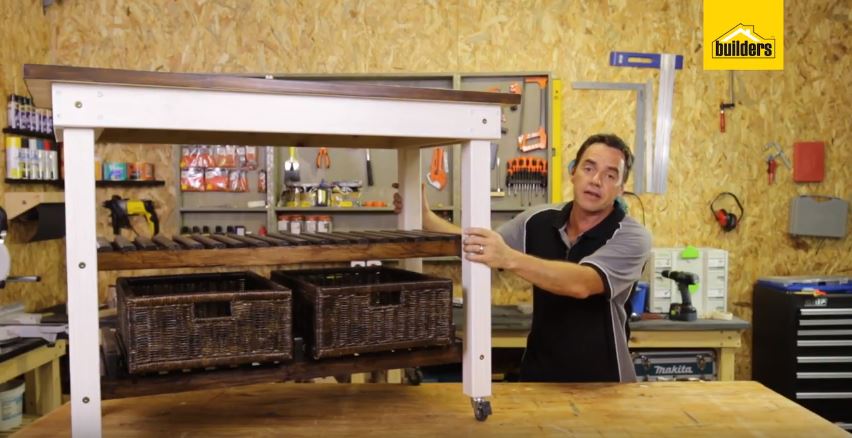
Now you have your uprights in position. Attach the outer part of the drawer slide rails on either side, keeping in mind which way it will slide. Attach your baskets to the rails.
Step 6
Remove the baskets from the shelf then sand and stain the island stand. Stain the timber with the wood sealer. You can use the imbuia wood sealer for the shelves and the baskets and the white wood sealer for the legs and sides and make sure to apply 2 coats.
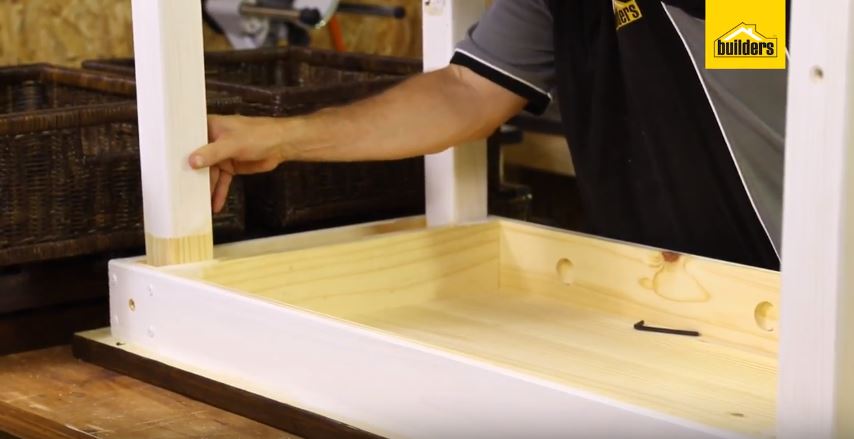
Step 7
Now that everything is painted. Slot in the legs and screw the shelves and lock it into position. Lastly, screw on the castor wheels and your DIY is done!
Recap
You used a standard workbench which you assembled and changed by adding the shelves and baskets on draw slides. You also added the castor wheels which allows the island to move and lock. You then painted the project and sealed the wood and put all the components back together.
You now have a portable kitchen island!
Browse 1000’s of products available to you. Select your country to Shop Online.


