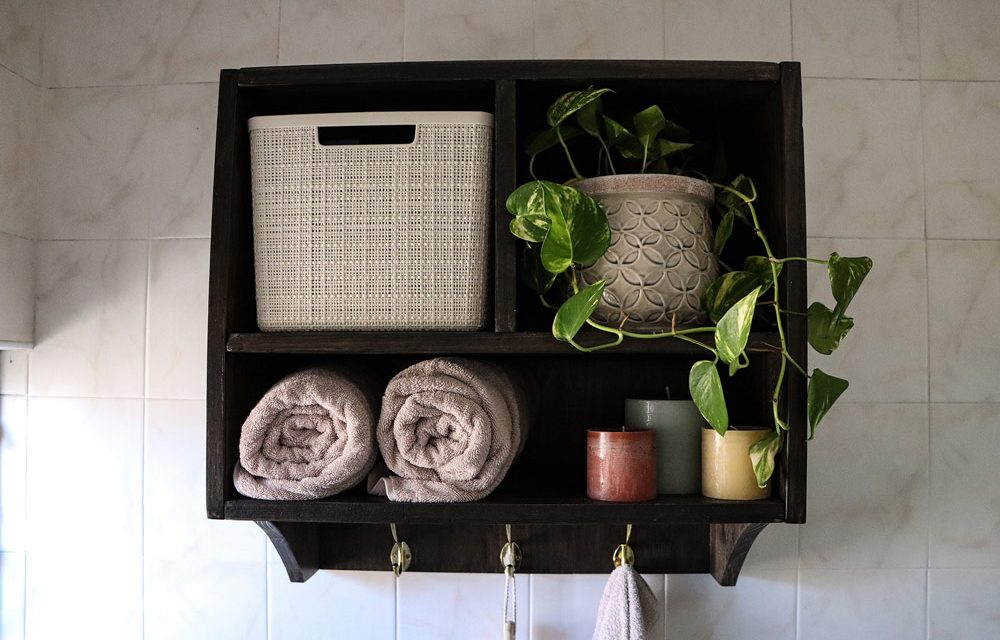
You can never have too much storage in your bathroom and this DIY adds more, easily and with style.
Transforming under-utilised wall space into a stylish and functional storage area. This DIY bathroom storage cabinet project is straightforward and can be completed with a few basic tools, with a little creativity.
You’ll need:
- 2 x 1.8 m x 610 mm x 21 mm pine boards, cut to:
- 1 x 610 mm x 565 mm (backboard)
- 2 x 610 mm x 391 mm (sides)
- 3 x 568 mm x 370 mm (top, middle and lower shelves)
- 1 x 260 mm x 370 mm (central vertical divider)
- 4mm x 35mm woodscrews
- Speed pilot and screwdriver bit
- Wood glue
- Fired Earth Woodworks stain/sealer in Dark Ebony
- Old school towel hooks
- Wood filler (Ebony)
Tools:
- Circular saw
- Drill driver
- 6mm wood bit
- 8mm ceramic bit
- Sander
- Jigsaw
- Measuring tape, ruler and pencil

Step 1
Start by measuring and cutting the pine boards accurately according to the cutting list, using a circular saw. A handy trick for straight cuts is to clamp a straight edge as a guide.
Pine is relatively soft, making it easy to work with. Make sure your measurements are precise for a perfect fit.

Step 2
Measure 473mm from the top of one side panel and make a mark. Starting at the mark, draw a freehand curve for the bottom edge and cut it out with a jigsaw. Use this first piece as a template for marking and cutting the second side so they are identical.
Step 3
Sand all pieces with 180-grit sandpaper to smooth edges and surfaces.

Step 4
Before assembly, stain and seal all timber pieces to protect them from moisture. Fired Earth Woodworks is a stain and sealer in one – one application with two benefits. Apply with a paintbrush, working from the inside out to avoid run marks. Ensure even coverage and paint with the wood grain for a professional finish. Apply a second coat after the first has dried.

Step 5
Now, assemble your cabinet by screwing the panels together, starting by attaching the shelves to the two sides. First drill pilot holes and remember to use wood glue on joints for extra strength. The top shelf should be flush with the top of the side pieces and the backing board. For the middle shelf, measure 300 mm from the top shelf and mark where it will go. The bottom shelf will line up with the start of the curve cut in step two. Ensure all pieces are aligned correctly before securing them.

Step 6
Measure and mark the centre of the top and middle shelves. This is where you will be putting the vertical divider. Drill pilot holes and then glue and screw the divider in place.
Step 7
Turn the cabinet over and attach the backing board, securing it with glue and screws. Remember to drill pilot holes before screwing.

Step 8
Make this storage cabinet even more functional by adding towel hooks on the lower part of the cabinet. Drill pilot holes and secure the hooks in place. Fill any screw holes with ebony-coloured wood filler, and apply a thin coat of the Fired Earth Woodworks stain once that is dry.

Step 9
To mount the cabinet in your bathroom, ideally drill into grout lines to avoid cracking tiles. Use masking tape to mark drill positions on both the wall and the cabinet. Drill the holes in the cabinet using a wood bit in the drill. Switch to a ceramic bit (without hammer function) if you need to drill though tiles, and then back to hammer mode for brickwork. If you’re not drilling through tiles, a masonry bit is the answer. Secure the cabinet with 8 mm nail-in anchors for a sturdy mount.
And that’s that – the DIY storage cabinet is complete and ready to be admired and used. Remember, Builders stocks everything you need for your next DIY project, including a full range of Fired Earth products as well as timber and tools.
Browse 1000’s of products available to you. Select your country to Shop Online.


